Search the Community
Showing results for tags 'deployable'.
Found 10 results
-
Version 1.4.1
1,805 downloads
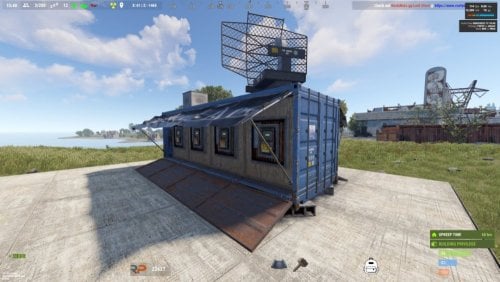
Let your players shop from the safety of their own bases. Give them the ability to place & pickup their own drone Marketplaces, plus they look cool! With all the necessary configurable options, players will love this on any type of server, PvP or PvE. To add Marketplaces to server shops, I recommend adding the item rather than the command. You can do this with the following: Shortname: box.wooden.large SkinID: 2859284352 Features. Support for Friends, Clans, Teams Works with rewards shops like Server Rewards, Economics etc. Force on foundation (optional) Pickup by hitting a terminal with a hammer or chat command Allow multiple marketplaces (optional) Allow players to craft (optional) Configurable crafting cost More control with optional permissions Drop item if building underneath destroyed (optional) Lose condition on pickup (optional) Checks for space before placing (prevents clipping through structures) Config option to add vending machines to Marketplaces Option to block damage to attached vending machines Important Note: Rotate attached vending machines by hitting with a hammer. In-Game Commands (Remove / Prefix in F1 Console). /marketplace.give (give to self) /marketplace.give <PlayerName> or <SteamID> (give to player) /marketplace.craft /marketplace.pickup (Or hit a terminal with hammer) /marketplace.clear (Clear ALL stored marketplace data) /marketplace.clear <SteamID> (Remove marketplace data for player) /marketplace.balance (Check owner commission balance) /marketplace.withdraw [amount] (Withdraw commission) (Use console command in reward shops or give custom skinned item) Permissions (Optional). personalmarketplace.admin (Required for give & clear commands) personalmarketplace.deploy personalmarketplace.pickup personalmarketplace.craft API: Plugin devs can prevent conflict with this plugin by utilizing the following: Interface.CallHook("MarketplaceCheck", skinID) (where skinID = the skinID of the entity you are checking e.g. entity.skinID) Returns true if the given entity's skinID matches an item used by this plugin (deployable wooden box item, or Marketplace entity) or null if it is not. Plugin devs can use this to prevent conflict with their plugins if dealing with large wooden boxes or other items which maybe be Marketplace related, now or in the future. How to Place. As there is no deployable marketplace item in Rust, the plugin uses the large wooden box planner to help guide and align the Marketplace where you want to place it. Keep in mind the marketplace is a very large item, so it is only a guide to help align it. Make sure to place it far away from where you stand and from buildings, if there is not enough room you will not be able to place and you will get a chat message to tell you this. If you don’t get the position right first time, no worries, just pick it up and try again until happy with the placement. Use caution if marketplace condition is enabled, picking up the marketplace too many times will cause it to break and it is NOT repairable! Marketplaces are better placed in the middle of a 3x4 or larger foundation for best placement (see below image), but can be placed on open terrain or floors if allowed as such in the config: Inventory item: Custom Icon (to use in reward shops etc): https://rustynuts.gg/pmicon.png$9.99- 73 comments
- 5 reviews
-
- 3
-

-

-
- #rust
- #marketplace
- (and 8 more)
-
Version 1.0.5
35 downloads
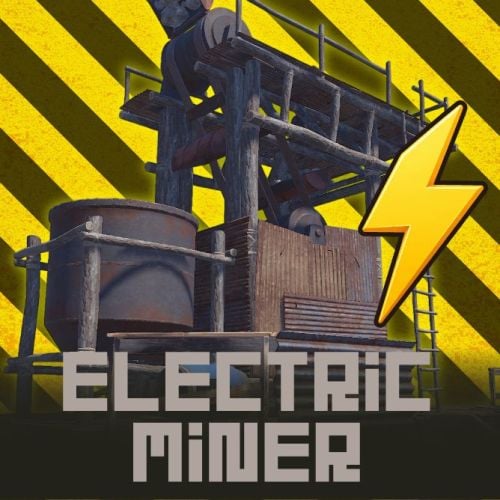
Electric Miner Why not convert your excess electricity into a resource? Electric Miner brings the Mining Quarry and the Pump Jack to life as fully automated, electricity-powered machines that players can build wherever they want. There's no need to fight over a monument quarry anymore. Just place a machine on your own base, run a wire to it, choose what you want it to produce, and let it work. Each machine has a clean animated interface, an engine you can upgrade for bigger yields, and a liquid system on the Pump Jack for pumping water where you need it. Two placeable machines: the Electric Miner (a mining quarry) and the Electric Pump Jack (an oil and liquid pump). Both are handed to players as a deployable item. A live placement guide draws the machine's footprint with marker spheres as you aim, so you always know exactly where it will land before you commit. Placement is checked against slope, water depth, roads, monuments, safe zones, no-build zones, nearby obstructions, and other players' building privilege. Machines run on real power. They only start once you've wired them to a power source and flipped the switch, and they draw from the upstream battery while they run. Players choose what each machine produces from an in-game menu, whether that's the ore the Miner digs or the liquid the Pump Jack outputs. An engine upgrade system lets players spend materials to push the machine through several tiers, each one raising the yield multiplier. Upgrading plays a sound and fills an animated progress gauge. The Pump Jack stores liquid internally and can feed it out through a hose to a water container or sprinkler, which is handy for irrigation and base setups. Machine lights turn on by themselves whenever there's power, giving you an instant visual cue that everything is connected. Only the owner, their team, and admins can flip the switch, open the menu, or pick a machine up. Nobody else can touch it. Pick a machine back up with a hammer and it returns to your inventory as an item, as long as it's healthy enough, and any stored contents drop to the ground. The selected resource, engine tier, stored liquids, chosen output liquid, and durability are all saved and survive server restarts. The interface animates open and closed, uses a clean card layout for selections, and supports your own custom background image. Built-in translations for English, Japanese, Simplified Chinese, Traditional Chinese, Russian, Ukrainian, and French. English (en), Japanese (ja), Simplified Chinese (zh-CN), Traditional Chinese (zh-TW), Russian (ru), Ukrainian (uk), and French (fr). Every message and menu label can be edited in the oxide/lang files. 1. Get the item. An admin gives out the machines (see Commands below), or you can sell them through a shop or hand them out in a kit using the skin IDs. 2. Place it. Hold the item and look at flat ground. The footprint guide appears, and a left-click drops the machine in. The item is used up and the full quarry or pump jack spawns in its place. 3. Power it. Take out the in-game Wire Tool, click an output on your power source (a battery, generator, and so on), then click the machine's power switch to join them. The default wire limit is 100 m. 4. Choose a resource. Press USE on the machine to open the menu and pick what it should mine or output. 5. Turn it on. Flip the power switch. As long as it has enough power and the output isn't full, the machine runs and produces on the interval you set. 6. Upgrade it (optional). Press USE on the engine to open the upgrade menu and spend materials to raise the yield. 7. Collect or pack up. Loot the output container as it fills, or hit the machine with a hammer to take it back as an item. A note on the Pump Jack The Pump Jack collects oil and water-type liquids into its own internal tank, which holds up to 500,000 ml by default. To move that water elsewhere, point the Wire Tool at the Pump Jack's fluid switch and run a hose to a water container or sprinkler. From there it pushes liquid out at the rate you set in the config (300 ml/s by default). { "Wire/hose max distance (m)": 100.0, "Durability": 2000.0, "Pickup minimum durability percent": 80.0, "Required power (consumed per minute)": 50, "Liquid storage capacity (ml)": 500000, "Fluid output per second (ml)": 300, "UI background image URL": "https://i.imgur.com/WMefGKk.jpg", "Electric Mining": { "Item display name": "Electric Miner", "Mineable resources": [ { "Item shortname": "metal.ore", "Item skin ID": 0, "Display name": null, "Amount per cycle": 10, "Interval (seconds)": 15.0 }, { "Item shortname": "sulfur.ore", "Item skin ID": 0, "Display name": null, "Amount per cycle": 10, "Interval (seconds)": 20.0 }, { "Item shortname": "hq.metal.ore", "Item skin ID": 0, "Display name": null, "Amount per cycle": 1, "Interval (seconds)": 60.0 }, { "Item shortname": "stones", "Item skin ID": 0, "Display name": null, "Amount per cycle": 10, "Interval (seconds)": 10.0 } ], "Upgrade tiers": [ { "Yield multiplier": 1.1, "Upgrade costs": { "scrap": 300, "metal.refined": 50, "gears": 10, "metalblade": 20 } }, { "Yield multiplier": 1.2, "Upgrade costs": { "scrap": 500, "metal.refined": 100, "gears": 20, "metalblade": 40 } }, { "Yield multiplier": 1.5, "Upgrade costs": { "scrap": 800, "metal.refined": 200, "gears": 30, "metalblade": 50 } }, { "Yield multiplier": 2.0, "Upgrade costs": { "scrap": 1000, "metal.refined": 400, "gears": 50, "metalblade": 80 } } ] }, "Electric Pump Jack": { "Item display name": "Electric Pump Jack", "Mineable resources": [ { "Item shortname": "crude.oil", "Item skin ID": 0, "Display name": null, "Amount per cycle": 1, "Interval (seconds)": 20.0 }, { "Item shortname": "water", "Item skin ID": 0, "Display name": null, "Amount per cycle": 800, "Interval (seconds)": 10.0 }, { "Item shortname": "water.salt", "Item skin ID": 0, "Display name": null, "Amount per cycle": 1000, "Interval (seconds)": 10.0 }, { "Item shortname": "water.radioactive", "Item skin ID": 0, "Display name": null, "Amount per cycle": 500, "Interval (seconds)": 10.0 } ], "Upgrade tiers": [ { "Yield multiplier": 1.1, "Upgrade costs": { "scrap": 300, "metal.refined": 50, "gears": 10, "metalblade": 20 } }, { "Yield multiplier": 1.2, "Upgrade costs": { "scrap": 500, "metal.refined": 100, "gears": 20, "metalblade": 40 } }, { "Yield multiplier": 1.5, "Upgrade costs": { "scrap": 800, "metal.refined": 200, "gears": 30, "metalblade": 50 } }, { "Yield multiplier": 2.0, "Upgrade costs": { "scrap": 1000, "metal.refined": 400, "gears": 50, "metalblade": 80 } } ] } } DEFAULT PRODUCTION Electric Miner Metal Ore .......... 10 every 15s Sulfur Ore ......... 10 every 20s HQM Ore ............ 1 every 60s Stones ............. 10 every 10s Electric Pump Jack Crude Oil ......... 1 every 20s Water ............. 800 ml every 10s Salt Water ....... 1000 ml every 10s Radioactive Water . 500 ml every 10s Engine Upgrade Tiers (default, both machines) Tier 2 x1.1 300 Scrap, 50 HQM, 10 Gears, 20 Metal Blades Tier 3 x1.2 500 Scrap, 100 HQM, 20 Gears, 40 Metal Blades Tier 4 x1.5 800 Scrap, 200 HQM, 30 Gears, 50 Metal Blades Tier 5 x2.0 1000 Scrap, 400 HQM, 50 Gears, 80 Metal Blades All amounts, intervals, multipliers, costs, resources, and tier counts are fully editable in the config. Config field reference - Wire/hose max distance (m): How far a power wire or fluid hose is allowed to reach. - Durability: The machine's health. - Pickup minimum durability percent: How healthy the machine has to be before it can be picked up as an item. - Required power (consumed per minute): How much power the machine needs to run, and how much it draws each minute while running. - Liquid storage capacity (ml): The size of the Pump Jack's internal tank. - Fluid output per second (ml): How fast liquid is pushed through a connected hose. - UI background image URL: The background image shown behind the menu. Swap in your own to match your server. - Item display name: The name shown on the item and in the menu. - Mineable resources: Everything the machine can produce. Item skin ID and Display name are optional. - Upgrade tiers: Each tier sets a yield multiplier and its material cost. Add or remove tiers as you like; the number of tiers is the max level. The give commands are restricted to admins. To hand item to regular players, an admin uses the give command, or you distribute the items through a shop / kit plugin using the skin IDs below. Chat command (Admin Only) /ElectricMiner Gives the player one Electric Miner AND one Electric Pump Jack item Console command giveminer <mining | pumpjack> <SteamID> Gives the chosen machine to the specified player (must be online). Ex. Give the pumpjack to 76562442829013221 giveminer pumpjack 76562442829013221 Item details (for shops / kits) Electric Miner shortname: watchtower.wood skin: 3750459142 Electric Pump Jack shortname: watchtower.wood skin: 3750459320 Q: Do these have to go near a monument? A: Not at all, and that's the point. You can build them anywhere valid on the map, whether that's flat ground or shallow water up to 3 m deep, as long as you keep clear of monuments, roads, safe zones, and other players' building privilege. Q: How do players power a machine? A: With the in-game Wire Tool. Click an output on a power source such as a battery or generator, then click the machine's power switch. It needs enough power to run (50 by default) and draws from the battery the whole time it's working. Q: My machine won't start. What's wrong? A: A machine only runs when three things are true: the switch is on, it has enough power, and the output container isn't full. Check all three. The lights are a quick tell, since they only come on once the machine has power. Q: Can other players use or steal my machine? A: No. Only the owner, their team, and admins can flip the switch, open the menu, or pick it up. Q: How do I get my machine back? A: Hit it with a hammer. As long as it's above the durability threshold (80% by default), it returns to your inventory as an item and anything stored inside drops to the ground. Q: How does upgrading work? A: Press USE on the engine to open the upgrade menu, then spend the listed materials to move up a tier. Each tier raises the yield multiplier (x1.1 up to x2.0 by default), and your tier is saved per machine through restarts. Q: What can the Pump Jack do with liquids? A: It keeps the liquid it produces in its own tank and can push water out through a hose to a water container or sprinkler, which is great for irrigation. You pick the output liquid from the menu. Q: Can I change what each machine makes, how fast, and what upgrades cost? A: Yes. Resources, amounts, intervals, multipliers, tier counts, and costs are all set per machine in the config. Q: How do I give the items to regular players? A: Use the admin /ElectricMiner or giveminer command, or sell and gift them through your shop or kit plugin using the shortname watchtower.wood and the skin IDs above. Q: Do placed machines and their settings survive a restart or wipe? A: Your settings (selected resource, engine tier, stored liquids, output liquid, and durability) carry over through restarts. Like any deployable, the machines themselves are cleared on a map wipe. Q: Can I use my own background image in the menu? A: Yes. Just point the "UI background image URL" setting at your own image. VOID / NINJA WORKS DISCORD : https://discord.gg/U8uxePjSyA MADE IN JAPAN$20.00 -
Version 1.9.2
4,212 downloads
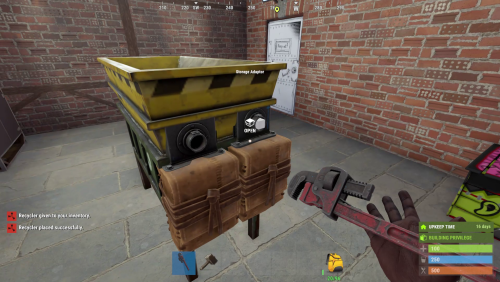
Industrial Recycler – The Ultimate Automated Recycling System for Rust! Supercharge your Rust server’s recycling experience with the Industrial Recycler plugin! Empower your players to automate, optimize, and control every aspect of item recycling, whether they want a plug-and-play setup or deep customization. Core Features Automated Industrial Recycling Fully automate resource processing! Industrial recyclers can be linked to input/output storage and adapters, allowing seamless recycling and transfer between containers. Standard Recycler Option Prefer a classic touch? Standard recyclers are also available—simple and reliable, with or without automation. Shop, Give, and Upgrade Commands /buyindustrialrecycler – Buy an industrial recycler (Permission: industrialrecycler.buyindustrial) /buyrecycler – Buy a standard recycler (Permission: industrialrecycler.buystandard) /giveindustrialrecycler & /givestandardrecycler – Instantly give recyclers to any player (Permission: industrialrecycler.give) /upgraderecycler – Instantly upgrade a standard recycler to industrial (Permission: industrialrecycler.give) /irec or /virtualrec – Open your personal virtual recycler from anywhere (Permission: industrialrecycler.virtual) VIP & Admin Benefits Tiered Ownership Limits Customizable limits for Standard, VIP1, VIP2, and Admins (Admins enjoy unlimited recyclers). Configurable Purchase Costs Set any item or currency as the price for purchasing recyclers in your shop. Advanced Access Control Permissions for Everything Decide who can buy, give, place, upgrade, or pick up recyclers with flexible permissions. Ownership Security Limit recycler usage to owner only, or expand to team/friends (via Friends plugin). NoEscape Integration Automatically restrict virtual recycling if players are raid-blocked or in combat (optional). Interactive & User-Friendly UI Intuitive Panels Jump between recycler, input, and output with a click—no more clunky menus! Layout Toggle Owners can switch between layout styles instantly, right from the UI (with permission). Shop & Purchase UI Players buy recyclers via an in-game panel with clear costs and confirmation. Virtual Recycler (Anywhere Recycling!) Personal Recycler Players with permission can access a virtual recycler from anywhere with commands like /irec—no need to place a recycler at their base! Placement & Pickup Place on Foundations, or Tugboats (Standard only) Pick Up Easily Use a hammer to pick up your recycler or its adapters (if permitted)—items inside will be safely returned. Customization & Flexibility Change the Base Item Make the recycler any deployable you want—match your server’s style! Custom Skins Industrial and Standard versions each use their own skin for clear identification. Hide Storage Containers For minimalistic servers, hide storage visuals for a cleaner look. Full Localization Support Available Languages: English, Portuguese, German, Spanish All chat and UI messages are ready for your global player base. Smart Quality-of-Life Dropped Item Protection If recyclers are destroyed or picked up, any leftover items are safely dropped for the owner. Recycler Speed Tiers Special permissions allow VIPs/Admins to recycle at faster speeds. Why Choose Industrial Recycler? Transform recycling into a powerful, automated experience. Perfect for PVE, PVP, RP, and creative servers. Easy to set up, ultra-configurable, and packed with features for admins and players alike. Embrace the future of recycling in Rust—install Industrial Recycler today! Configuration File:$25.00- 73 comments
- 11 reviews
-
- 8
-
-
-
- #recycler
- #industrial
- (and 2 more)
-
Version 1.0.2
30 downloads
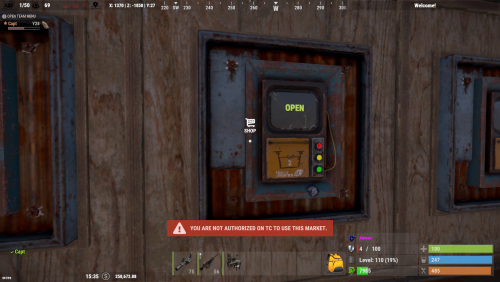
The Drone Market plugin allows players to conveniently place their own drone marketplace directly at their base, providing easy access to Rust's in-game marketplace without needing to travel. Each player can deploy a personal drone market, subject to optional permission and building rules. Configuration { "Sets Drone Market console command to give": "market", "Require permission dronemarket.pickup to pick up the Drone Market": false, "Require permission dronemarket.use to place": false, "Set Drone Market amount limit: 0 = Disabled": 2, "Log to file when a Drone Market is placed": false, "Force Build Requirement to be within a TC Radius": true, "Destroy when foundation is removed under it": true, "Require Building Auth to use/loot the Drone Market": true, "Only allow Team Members to use/loot the Drone Market": true, "Block all Damage to Drone Market": true, "Sets Drone Market Condition Level: HP": 100.0, "Nope Sound": "assets/prefabs/locks/keypad/effects/lock.code.denied.prefab", "Ok Sound": "assets/prefabs/locks/keypad/effects/lock.code.updated.prefab", "Breaking Sound": "assets/bundled/prefabs/fx/item_break.prefab" } Permissions dronemarket.pickup "Require permission dronemarket.pickup to pick up the Drone Market": true, dronemarket.use "Require permission dronemarket.use to place": true, Commands // Server Rcon Command: market Name-Or-SteamID amount ( amount is optional defaults to 1 ) //In Game F1 Command: market amount ( amount is optional defaults to 1 ) Click here for > Drone Market Skin$19.99 -
Version 1.0.4
32 downloads
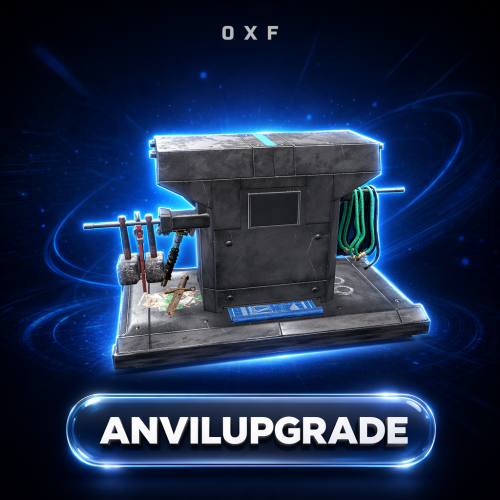
Add a working Anvil and a Metal Hammer to your server and let players reforge their gear. Drop an item onto the anvil, strike it with the hammer, and it transforms into an upgraded or reskinned version — with resource costs and chance-based outcomes you fully control. Key Features Adds a custom Anvil deployable and a Metal Hammer tool as real in-game items Reforge system — place an item in the anvil and strike it with the hammer to convert it Chance-based results: one input can roll into several possible outputs (the default recipe turns an AK into ice, jungle, medical, diver, or a skinned variant) Fully configurable recipes — define the input item (shortname, skin, name, amount), its resource cost, the number of hammer strokes required, and the weighted result table Optional Metal Hammer durability, measured in strikes, with a found-condition range and repair support (can be turned off entirely) Tunable anvil entity: health, per-damage-type protection, optional invulnerability, and a lootable toggle Anvil decay with delay, duration, indoor decay, heal rate, and tick controls Anvil repair and pickup rules — require the hammer, require building privilege, and carry condition over on pickup Per-item world-model transform overrides so each item sits correctly on the anvil In-world UI that shows the resources needed for the current upgrade Localized into 31 languages out of the box Permissions & Commands None — AnvilUpgrade has no permissions or chat/console commands. Everything happens in the world: whoever holds the Anvil and Metal Hammer items can use them. Control access by choosing who receives those items. Configuration A full config is generated on first load at oxide/config/AnvilUpgrade.json. Excerpt of the key sections (the per-damage-type protection table is generated automatically with sensible defaults): { "Config Version": 1, "Metal Hammer Item": { "Enable Condition": true, "Max Condition (durability / strikes)": 500.0, "Found Condition Fraction Min (0-1)": 0.1, "Found Condition Fraction Max (0-1)": 0.4, "Repairable": true, "Maintain Max Condition": true }, "Anvil Entity": { "Health": 1000.0, "Lootable": true, "Invulnerable": false, "Base Protection (per damage type, 0-1)": { "Generic": 0.98, "Bullet": 0.9999, "Explosion": 0.4998, "...": "remaining damage types generated automatically" }, "Decay": { "Enabled": true, "Decay Delay (hours)": 8.0, "Decay Duration (hours)": 8.0, "Decay Indoors": false, "Override Heal Rate": false, "Heal Rate": 1.0, "Decay Tick Override (seconds, 0 = default)": 0.0 }, "Repair": { "Enabled": true, "Resources": [ { "Short Name": "metal.refined", "Skin ID": 0, "Amount": 25 } ] } }, "Anvil Pickup": { "Enabled": true, "Require Hammer": true, "Require Building Privilege": true, "Item Count": 1, "Set Condition From Health": true, "Subtract Condition (0-1)": 0.25 }, "Configs": [ { "Requirements": { "Short Name": "rifle.ak", "Skin ID": 0, "Text": null, "Amount": 1, "Number of strokes (Min 1)": 10, "Resources": [ { "Short Name": "metal.refined", "Skin ID": 0, "Amount": 30 } ] }, "Collect resources on success only": false, "Result Items": [ { "Short Name": "rifle.ak.ice", "Skin ID": 0, "Chance (0-100)": 20.0 }, { "Short Name": "rifle.ak.jungle", "Skin ID": 0, "Chance (0-100)": 20.0 }, { "Short Name": "rifle.ak.med", "Skin ID": 0, "Chance (0-100)": 20.0 }, { "Short Name": "rifle.ak.diver", "Skin ID": 0, "Chance (0-100)": 20.0 }, { "Short Name": "rifle.ak", "Skin ID": 2436647042, "Chance (0-100)": 20.0 } ] } ], "World Item Transform Override": {} } Each result item also supports amount ranges and a condition range; add as many recipes to "Configs" as you like. Localization Ships with 31 languages, including English, Russian, German, French, Spanish, Portuguese, Italian, Polish, Turkish, Ukrainian, Chinese (Simplified & Traditional), Japanese, Korean, and more. Every message is editable under oxide/lang. Dependencies CustomItemDefinitions (required) — library that provides the custom Anvil and Metal Hammer items ServerPrefabs (required) — library that provides the custom anvil entity and hammer prefab Installation Install the required libraries CustomItemDefinitions and ServerPrefabs. Drop AnvilUpgrade.cs into your oxide/plugins/ folder. Edit the generated config to define your recipes, then reload the plugin. Distribute the custom items to players — the Anvil (anvil) and Metal Hammer (hammer.metal) — through your kits, shop, or give system. Credits Prefab created by m1t1ngg. Support Questions, ideas, or issues? Leave a comment or send me a DM here on Codefling.$15.00 -

Version 2.5.0
133 downloads
The most advanced and vanilla-friendly sentry turret plugin, allowing your players to place the Outpost NPC Turrets. With an extensive amount of configurable features, you can tune the plugin to best fit your server. Features (all toggleable in the config) - Vanilla friendly: Does not use a custom wheel UI, keeping interactions just how they are with vanilla turrets - Base Defenses: Allow players to place them in their base like a turret for stronger, more unique, and fun raids - SAM Site: Sentries can double as anti-air, so a compact base can still cover its sky - Powered Turrets: Wire sentries into base electricity with a configurable power draw - PvE Ready: One setting stops sentries ever firing players, only engaging NPCs - Remote Control: Allow players to control the turrets in a computer station, making for unique experiences on your server - Ammo Types: Incendiary, explosive, HV, each type has its own damage and effects, so what your players load actually matters - Compatibility: Compatible with plugins like Auto Auth, which lets authing stay effortless Commands scientistsentry.get <name/steam id> <amount> *both parameters are optional *console command in the F1 console Known Issues Authorize Friends does not work This option sadly will not work unless a special wheel UI is used, removing the vanilla UI and making experience worse for high-ping players This is due to a client-sided bug with Scientist Sentries that can not be fixed in the plugin itself Configuration { "Instant sentry switch (Sentries toggle instantly when switch toggled)": false, "Power required to switch": 0, "Force switch to be on when required power is given": false, "Where the switch to toggle the sentry is located (View website for options)": "front", "How far the switch is from the center of the sentry in meters": 0.8, "Sentry Item Name": "Scientist Sentry", "Sentry Skin ID": 3306396656, "Sentries need Ammo": true, "Sentry Ammo Slots": 6, "Sentry Range": 60.0, "Sentry Aim Cone": 2.0, "Delay between shots (seconds)": 0.115, "Sentry Health": 1500, "Ignore players on helicopters": false, "Only Target NPCs / Don't target players": false, "Sentries can take damage": true, "Sentry drops when floor missing": true, "Allow remote control (Set Identifier and control via computer station)": false, "Sam": { "Sentries can act like sam sites": false, "Requires ammo to shoot": true, "Vehicle Scan Radius (Vanilla = 150)": 150, "Missile Scan Radius (MLRS) (Vanilla = 225)": 225, "Burst Fire Count (Vanilla = 6)": 6, "Time between rockets in a burst (seconds) (Vanilla ~ 0.2)": 0.2, "Target helicopters that authed people are flying": false, "Target helicopters without a driver/passenger": false, "Target patrol helicopter": false }, "Warn player if has no ammo when turning on": true, "Warn player if ammo is low when turning on": true, "Base Damage": 15.0, "Default Ammo Type (Requires Sentries need Ammo to be false)": "ammo.rifle", "Ammunition": [ { "Short Name": "ammo.rifle", "Allowed": true, "Extra Damage": 0, "Create Fire": false, "Create Explosion": false, "Is Sam Ammo (Automatically disables ammo type if sam mode is off)": false }, { "Short Name": "ammo.rocket.sam", "Allowed": true, "Extra Damage": 0, "Create Fire": false, "Create Explosion": false, "Is Sam Ammo (Automatically disables ammo type if sam mode is off)": true } ... ] } Switch Placement Options front / leg1: In front of the sentry / front leg back: Behind the sentry leg2: On the second leg / right back leg leg3: On the third leg / left back leg north, south, east, west: Fixed compass directions northeast, northwest, southeast, southwest: Fixed diagonal directions$11.99- 11 comments
-
- 1
-
-
- #turret
- #scientist
- (and 7 more)
-
Version 1.3.2
1,366 downloads
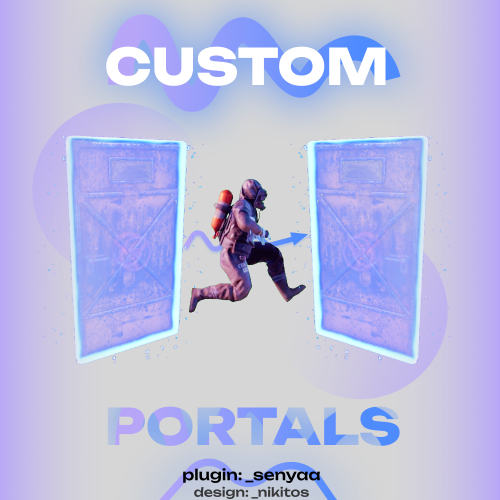
This plugin adds custom portals, which could be deployed on players' bases, vanilla and custom monuments. Custom maps To use Custom Portals on your map you need to place any prefab and create a custom prefab from it. Name it CustomPortals.<portal name> 2 portals with the same name will link. ! Make sure not to break the prefab and not to add them as part of other prefabs ! Commands Player Chat Commands /buyportal - buy portal (requires customportals.buy permission) /spawnportal - spawns portal (requires customportals.spawn permission) Admin Chat Commands All of the commands that are mentioned below require customportals.admin permission! /customportals add <portal name> - spawns portal on the monument you stand on /customportals remove - removes portal from the monument /customportals reset - removes all portals from the monument /changeportal - setup any portal Admin Console Commands giveportal <amount> <player name> - gives portal(s) to the specified player Permissions customportals.use - required to use portals customportals.admin - allows usage of /customportals and giveportal commands customportals.buy - allows players to buy portal, using /buyportal command customportals.free - allows players to get portal for free, using /buyportal command (buy permission is still required) customportals.freeuse - allows players to use the portal for free (if the use price is set) customportals.bypasslimit - allows players to place infinite amount of portals customportals.bypasslinkinglimits - allows players to link any portals customportals.spawn - alllows players to spawn portals using a command, instead of placing them manually If you are an admin, you can specify individual portal permissions. They are saved as customportals.portal.<portal permission name> Localization This plugin has built-in support for the following languages - English Russian API BasePortal SpawnPortal(Vector3 position, Quaternion rotation, string name) // spawns portal Item CreatePortalItem() // returns portal item$9.99 -
Version 1.0.48
5,782 downloads
Adds 85 new deployable items to your server!. Custom item collection system. Players can obtain these items while cutting trees, mining rocks and collecting plants. Includes a built in market that can be accessed via a chat command or a HumanNPC. Each base item can be configured to allow for a wide variety of placement options/restrictions. A large amount of configuration options are available for each item. Adjustable placement options while holding shift. Items can be picked up by holding a hammer, looking at the deployed entity and pressing your mouse3 button (scroll wheel button). deployablenature.admin - Required to use the giveprefab command. deployablenature.market.chat - Required to use the market chat command. deployablenature.ignore.restrictions - Allows a player to deploy items without restriction (TC etc). deployablenature.gather - Required for players to obtain drops while gathering. deployablenature.use - Required to deploy nature items. deployablenature.free - allows access to the nature market for free. There is also the option to create groups via the config, which will receive discounts in the market based on the value assigned to them. Example: "Permissions that will receive a discount on the store cost when purchasing [1.0 is full price]. Prefix with deployablenature.": { "deployablenature.vip": 0.5 }, This would give players with the deployablenature.vip permission a discount of 50% off of the market price. Command: giveprefab Parameters: <skin id> <quantity> Example: /giveprefab 2609145017 100 - spawns the user 100x medium clutter rocks" Permission: deployablenature.admin Command: naturemarket Permission: deployablenature.market.chat Command: dnpickup Permission: None Command: giveprefab (console) Parameters: <player id/name> <skin id> <quantity> Example: /giveprefab "new guy" 2609145017 100 - spawns the user 100x medium clutter rocks for new guy" Permission: deployablenature.admin Command: dnsetprefab Parameters: None Console Command: dnkillentities - wipes all nature entities from the map. Parameters: <optional parameter: true> - this wipes the data after the command executes. If not used, the nature items will respawn on plugin reload. Example: dnkillentities or dnkillentities true. Permission: deployablenature.admin if running from player console. Console Command: dnkillentitiesforplayer - wipes all nature entities from the map for the specified player Parameters: <player name/id> Example: dnkillentitiesforplayer "new guy" - would delete all entities for the player whose name contained "new guy". Permission: deployablenature.admin if running from player console. Console Command: dnpurge - enables purge mode, wiping all entities from the map (does not delete data), and preventing them from spawning on server start/being deployed by players while active. Automatically resets to false on server wipe. Parameters: <true/false> Example: dnpurge true - would enable purge mode. Permission: deployablenature.admin if running from player console. You most likely won't need the below information, but it is here for more advanced users. Prefab Types 0: Rock 1: Tree 2: Bush 3: Animal 4: Furniture 5: World Tree Types 0: None 1: Palm 2: Oak 3: Swamp 4: Birch 5: Beech 6: Pine 7: Cacti 8: Snow 9: Mauritia_Flexuosa 10: Hura_Crepitans 11: Trumpet_Tree 12: Schizolobium 13: Dead_Log 14: Dead_Log_Snow 15: Driftwood Bush Types 0: None 1: Willow 2: Willow_snow 3: Spice 4: Spice_snow 5: Creosote 6: Berries 7: Mushrooms 8: Ocotillo 9: Monstera_Deliciosa 10: Bromeliad 11: Heliconia_Rostrata API public bool IsDeployableNature(BaseEntity entity) Returns if an entity is a DeployableNature entity that has the prevent_gather attribute.$15.00 -
Version 2.4.94
558 downloads
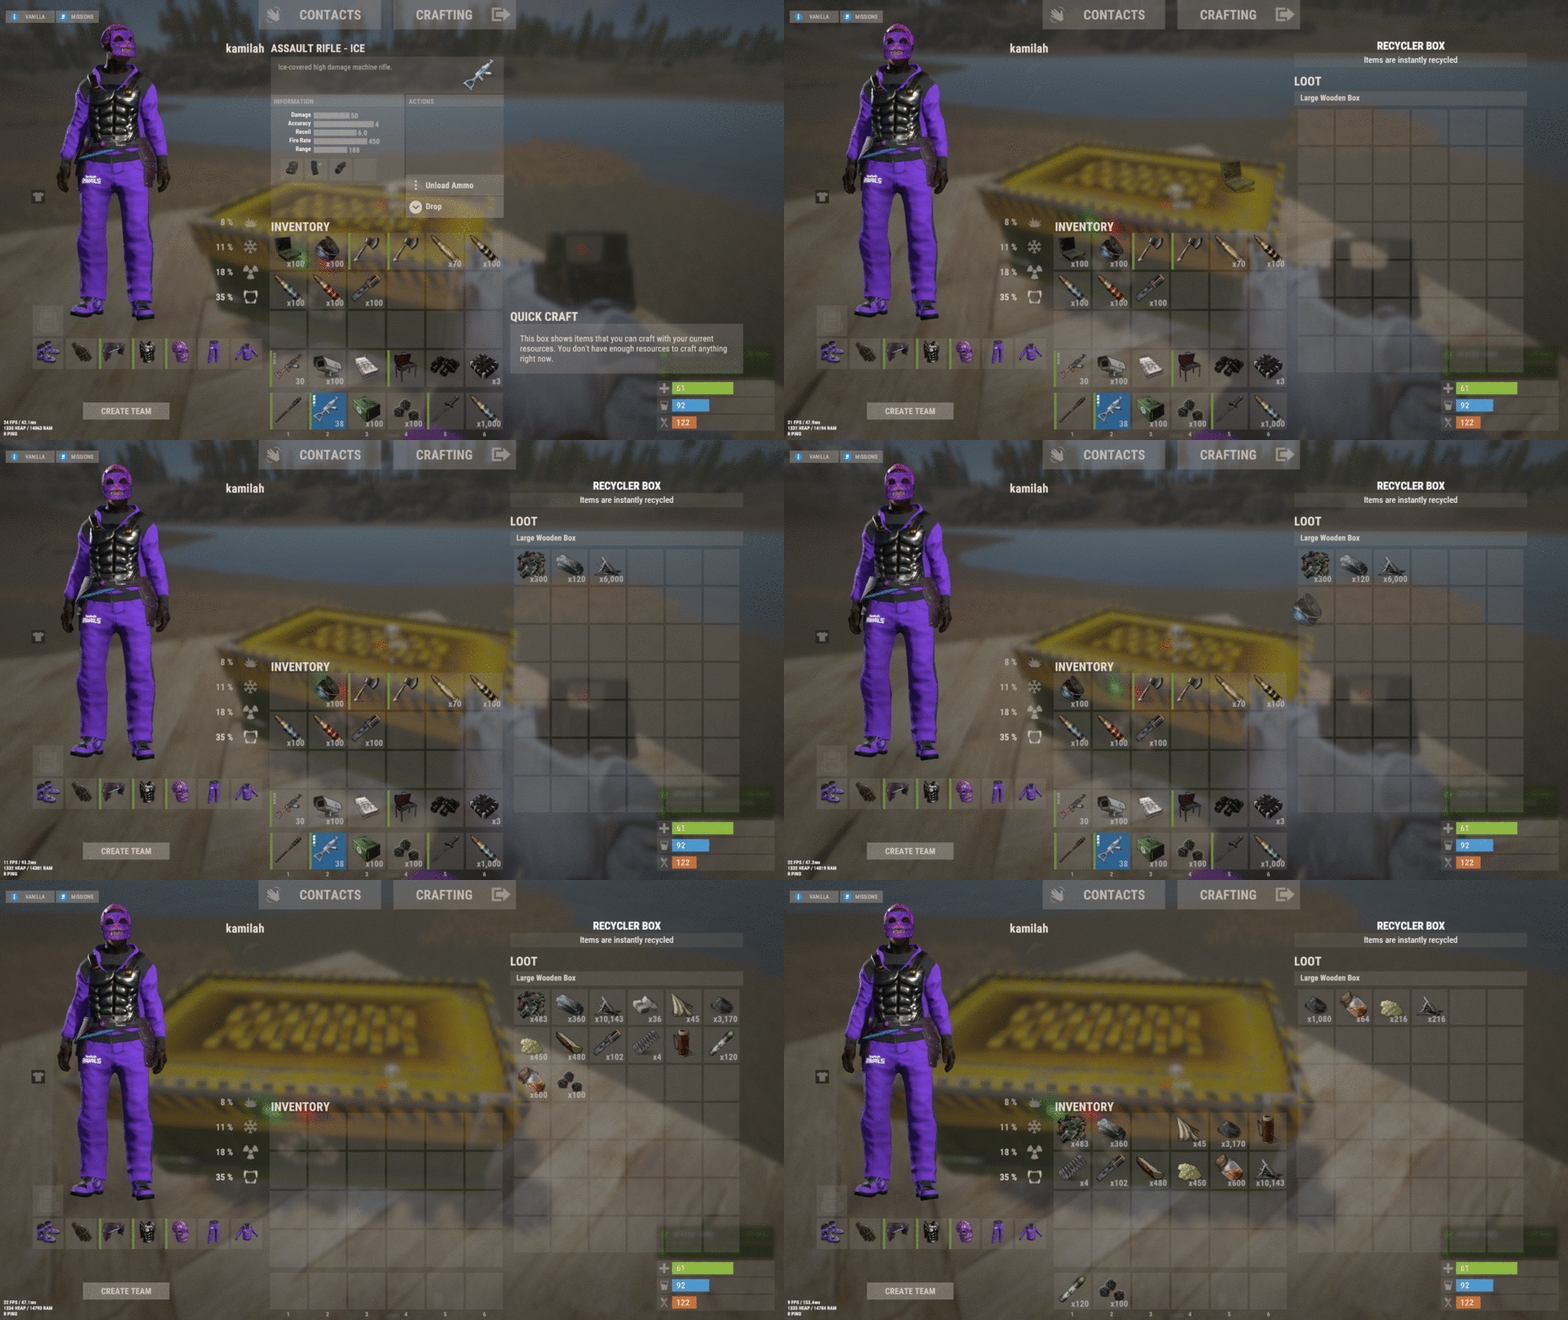
Recyclerbox allows players to convert large or small wooden boxes into recyclers through customizable commands. Simply select your desired box type, execute the command, and watch as items are automatically recycled with configurable efficiency. Customize your setup with blacklisted items, adjustable scrap ratios, and optional visual effects. Features Transform wooden boxes into recyclers instantly Virtual recycler for convenient on-the-go use Customizable commands and permissions Adjustable recycling efficiency and scrap yield Optional audio effects Permissions: Here is a description of how to use the specified permissions: Permission Get Recycler ("recyclerbox.get"): This permission allows the user to obtain the recycler box. Permission Transform Recycler ("recyclerbox.transform"): This permission enables users to transform a regular box into a recycler box. Permission Use Virtual Recycler ("recyclerbox.virtual"): With this permission, users can utilize a virtual recycler. Embrace efficient resource management and strategic gameplay with the Recyclerbox plugin. Perfect for players looking to optimize their Rust experience! Config File: { "Get Recyclerbox Command": [ "getrec", "getrecycler", "recyclerbox" ], "Transform Recyclerbox Command": [ "trarec", "boxtorecycler", "transformrecycler", "transforbox" ], "Virtual Recyclerbox Command": [ "rec", "vrec", "virtualrecycler" ], "Large Box SkinId Recycler": 2994391115, "Small Box SkinId Recycler": 2988594458, "RecyclerLimit": 1, "Recycler Efficiency": 0.6, "Ratio Scrap": 1.2, "Enable Prefab Fx": true, "Lock Recycler While In Use": false, "Disable During Raid Block (Requires No Escape plugin)": true, "Prefab Fx Open Recycler": "assets/bundled/prefabs/fx/build/promote_toptier.prefab", "Prefab Fx Close Recycler": "assets/bundled/prefabs/fx/build/promote_toptier.prefab", "Transfer Virtual Recycled Items to Inventory": false, "Blacklisted Items": [ "lmg.m249", "gunpowder" ], "Blacklisted Skins": [ 2994391115, 2988594458 ], "Check Player Alive": true, "Check Player Wounded": true, "Check Building Privilege": true, "Check Swimming": true, "Check Falling": true, "Check Mounted": true, "Check Cargo Ship": true, "Check Balloon": true, "Check Elevator": true, "Check Safe Zone": true, } Happy recycling!$9.00 -
Version 1.2.1
487 downloads
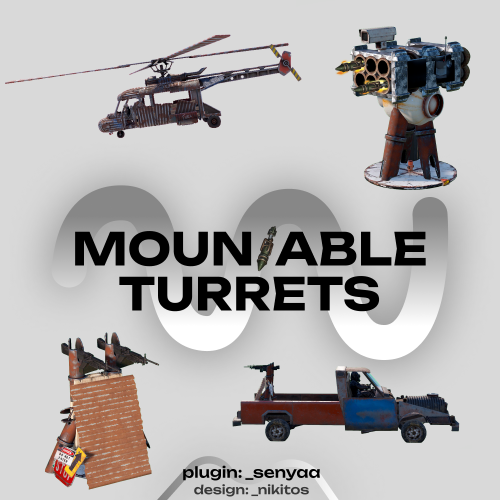
This plugin adds 2 new deployable turrets and IR-traps. Overview Anti-Aerial turret This turret can be accessed via computer station. It has several modes Automatic - shoots multiple homing rockets, which will follow the target Manual (single) - shoots a single rocket Manual (burst) - shoots multiple If the turret is in automatic mode it waits for target. To acquire target player needs to place the crosshair on it and wait some time, which is configured here -> ([AA Turret] Target acquiring time (seconds)). After that the turret will follow the target and player can shoot by pressing Middle Mouse Button. Manual modes just shoot regular rockets. Machine gun Turret This turret can be mounted by pressing E on any of its parts (such as pipes etc.). Players can just aim and shoot. Ammo type can be configured here -> [Machine Gun Turret] Ammo type (short prefab name, must be one of 5.56 Rifle ammo). IR-Traps IR-traps (or flares) are used as a counter-measure to the anti-aerial turret. They can be loaded in the fuel storage of minicopter or scrap heli and can be deployed by pressing E. Stack sizes, amount per use and cooldown are configurable. IR-Traps can also affect SAM sites, this option can be enabled here -> [IR Trap] Affects SAM Sites (true/false) Commands Chat Commands /aaturret - buy anti-aerial turret (requires mountableturrets.aaturret.give permission) /mgturret - buy machine gun turret (requires mountableturrets.machinegun.give permission) Admin Chat Commands Following commands require mountableturrets.admin permission to work. See "Permissions" chapter for more info. /mt command must be ran a monument you want to modify. Positions are saved relative to the monument and persist even after a wipe or a map change. /mt (requires mountableturrets.admin permission) /mt add aa - spawns anti-aerial turret on a monument /mt add mg - spawns machine gun turret on a monument /mt add comp - spawns computer station on a monument, which gets automatically linked to anti-aerial turrets /mt remove - removes turret/computer station from the monument /mt reset - clears all data for a monument Admin Console Commands giveaaturret <player name> - gives anti-aerial turret to specified player givemgturret <player name> - gives machine gun turret to specified player Permissions mountableturrets.admin - allows usage of giveaaturret, givemgturret and /mg commands mountableturrets.aaturret.give - allows players to buy AA turret using /aaturret mountableturrets.aaturret.free - allows players to get AA turret for free using /aaturret (give permission is still needed) mountableturrets.machinegun.give - allows players to buy machine gun turret using /mgturret mountableturrets.machinegun.free - allows players to get machine gun turret for free using /mgturret (give permission is still needed) Localization This plugin has built-in support for the following languages - English Russian Configuration Example of MountableTurrets.json (some parts are shortened) { "PVE Mode (true/false)": false, "[AA Turret] Price (set value to 0 to make it free, use ServerRewards as a key to use RP points)": { "Key": "scrap", "Value": 500 }, "[AA Turret] Item Skin ID (Workshop ID)": 2849176835, "[AA Turret] Item Name": "Anti-Aerial Turret", "[AA Turret] Cooldown between shots (seconds)": 10.0, "[AA Turret] Rocket fuse length (seconds)": 10.0, "[AA Turret] Rocket fuse length (meters)": 450.0, "[AA Turret] Entities that turret is able to lock on to (short prefab name)": [ "minicopter.entity", "scraptransporthelicopter", "hotairballoon" ], "[AA Turret] Target acquiring time (seconds)": 0.6, "[AA Turret] Rocket initial velocity (meters per second)": 30.0, "[AA Turret] Interval between shots in Burst mode (seconds)": 0.4, "[AA Turret] Rocket explosion radius (meters)": 5.0, "[AA Turret] Movement Speed Fast": 3.7, "[AA Turret] Movement Speed Normal": 2.0, "[AA Turret] Movement Speed Slow": 1.0, "[Machine Gun Turret] Price (set value to 0 to make it free, use ServerRewards as a key to use RP points)": { "Key": "ServerRewards", "Value": 250 }, "[Machine Gun Turret] Item Skin ID (Workshop ID)": 2849176974, "[Machine Gun Turret] Item Name": "Machine Gun Turret", "[Machine Gun Turret] Ammo type (short prefab name, must be one of 5.56 Rifle ammo)": "ammo.rifle", "[IR Trap] Stack size": 12, "[IR Trap] Amount per use": 2, "[IR Trap] Cooldown (seconds)": 3.0, "[IR Trap] Initial velocity (meters per seconds)": 20.0, "[IR Trap] Fuse length (seconds)": 10.0, "[IR Trap] Affects SAM Sites (true/false)": true, "[IR Trap] SAM Site blind time (seconds)": 5.0, "[IR Trap] Show IR-Trap hint UI (true/false)": true, "[IR Trap] Deploy positions": { "minicopter.entity": [ { <..> } <..> ] }, "[Misc] Spawn positions on other entities (full prefab name)": { "assets/content/vehicles/modularcar/module_entities/2module_flatbed.prefab": [ { "Type": "MachinegunTurret", "Position": { <..> }, "Rotation": { <..> } } ], "assets/content/vehicles/train/trainwagonb.entity.prefab": [ <..> }, "[Misc] UI Images (leave names intact)": { <...> } } API BaseEntity SpawnAATurret(Vector3 position, Quaternion rotation) // spawns anti-aerial turret BaseEntity SpawnMachinegunTurret(Vector3 position, Quaternion rotation) // spawns machinegun turret void DestroyTurret(BaseEntity turret) // destroys the turret Credits Thanks to Vitek & Nikitos for helping me with this plugin!$19.99




.thumb.png.ccf8a947948c9eb1445ad21a7931247b.png)