Image

A Complex Way To Push A Button

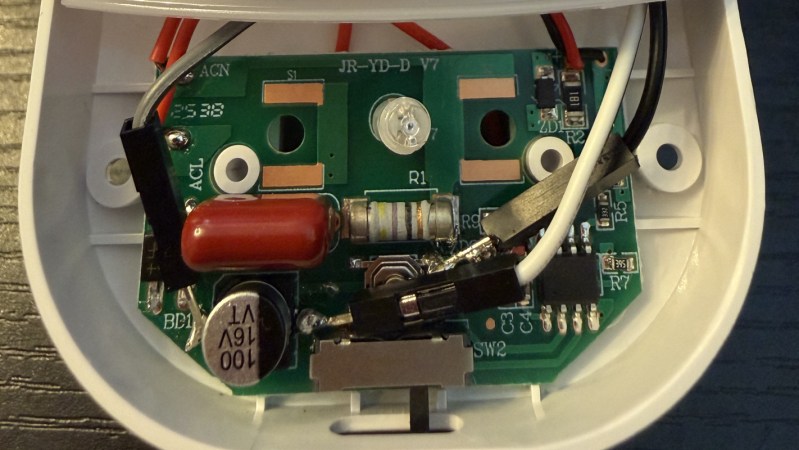
We’ve likely all looked at a simple problem in our lives and thought that it would be an easy fix, only to realize that the project is enormously more complicated than we first realized. Whether that’s starting a home improvement project, doing a quick repair to a bicycle or car, or trying to install an obscure piece of software on a Linux machine, the amount of time we budget for these tasks often ends up woefully underestimated. []’s night light needs to have its brightness set every night, and it seems easy enough to get a microcontroller to automate that, right?

Well, upon opening the small device, the first issue is that there is no labeling on any of the parts, so simply adding a jumper on to existing microcontroller pins without damaging anything wouldn’t easily be possible. Adding a secondary microcontroller is the next logical step, but the power supply in the night light is extremely underpowered so using even the smallest Raspberry Pi or off-the-shelf Arduino was out of the question too. [Oscar] instead chose an ATtiny85, which solves the power requirement issue, but these are a bit more of a challenge to program without a USB device. From there, it needs a transistor wired in to the circuit to actually push the button for him, plus a few support resistors, so [Oscar] actually had a PCB custom-built to hold all of these components.

Even after all of that, the space within the night light enclosure made installing the PCB a challenge, but in the end he has a device which, when his home automation system powers on the plug for the nightlight, automatically boots up and pushes the switch the required number of times and then puts itself to sleep. We’d call that a success even after the colossal effort getting this inexpensive, small light working the way he wanted. There are some other low-powered solutions for problems like these too, as long as being battery-powered isn’t a dealbreaker.
Image

DIY Smart Button Gets Surprisingly Complicated

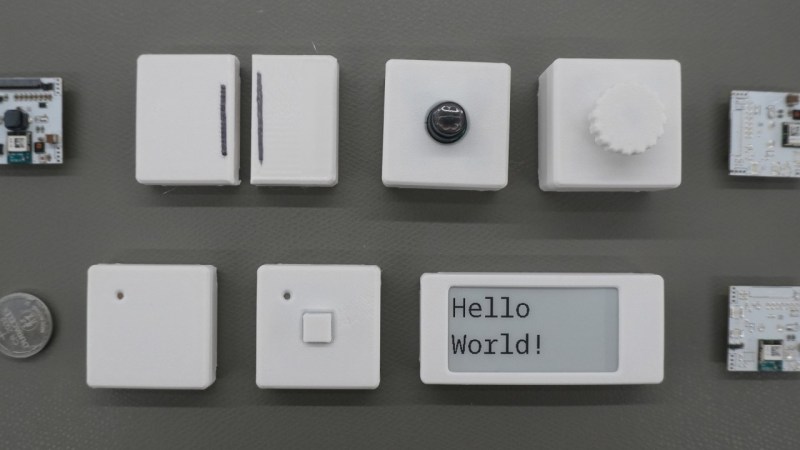
There’s a reason that the standards specifications for various wireless communications protocols are extremely long and detailed. [Made by Dennis] found this out first hand when he decided to build a wireless button from scratch.

The major issues with wireless devices is one of power consumption. If reliable power is available from a wall plug or solar panel, this isn’t as serious of a concern. But [Dennis] is using batteries for his buttons, so minimizing power consumption is a priority. He’s going with the nRF52, a microcontroller designed for low power and which has a built in wireless radio, and configuring it in a way that uses the least amount of energy possible.

From there, [Dennis] turns to the wireless communication. He goes into detail about how the microcontroller is woken up, how it sends its data packets to another wireless-enabled microcontroller, and how they handle handshakes and acknowledgements of data. For something as simple as a button press, it gets quickly more complicated especially when adding some basic encryption and security to the communications protocol.

With all the design decisions out of the way, the system can be built. [Dennis] has created custom PCBs for his devices, and also included some expansion I/O for other sensors and peripherals beyond just a pushbutton. All of the schematics and code are available on the project’s GitHub page and the STL files can be found at Printables.

For those new to offline home automation or who are turning away from cloud-based services lately, there are some easy entry points that don’t require much extra hardware or expenditure.

Continue reading “DIY Smart Button Gets Surprisingly Complicated”

Image

Fix That Old Remote With Graphite

A button that stopped working has probably led to more than a few smashed remotes over the years. Fortunately [pescado99] has shared a beautifully simple cure for dead or dying remote buttons: graphite dry lubricant.

Most remotes operate by pushing a conductive carbon coating on the back of the button onto a pair of contacts on the PCB. Unfortunately, that conductive coating can wear off, leaving you with a dead or dying button. The video after the break [pescado99] demonstrates how to use a cotton swab to apply powdered graphite to the rear of the buttons to make them conductive again. A soft pencil can also be used, but the graphite works better.

This beautifully simple hack is too good not to share and could save many remotes from landfills. If you’re more interested in upgrading remote, you can build your own universal remote or replace it with a web browser.

Continue reading “Fix That Old Remote With Graphite”

Image

Dynamic Buttons Are Weird Blobs You Can Press

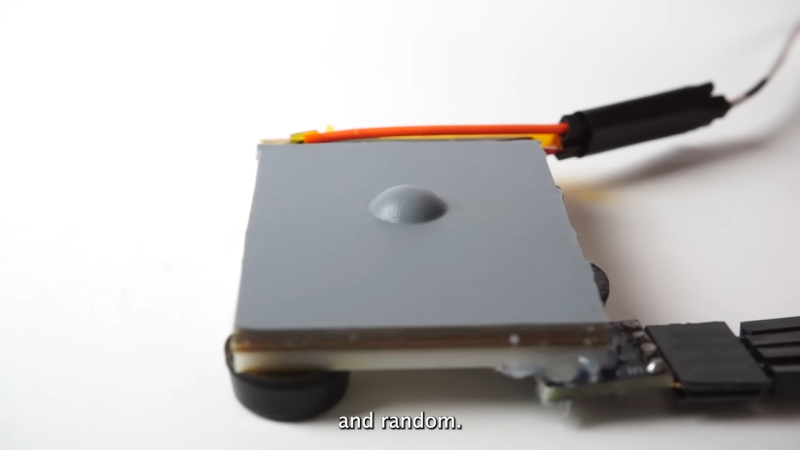
Imagine a flat surface that has no buttons on it, until they raise up like bubbles of goo for you to touch them. The Future Interface Group at Carnegie-Mellon has apparently developed just that. They’re calling the technology DynaButtons, and they look kinda weird…and very awesome.

The buttons use electro-osmotic pump technology. Basically, electricity is used to move a fluid under a flexible surface to create a dimple-shaped button. The team was able to increase the flow-rate of these pumps by 300% over traditional designs, while also integrating sensing for interactivity. This allowed the creation of a dynamic button that pops up as needed. The button design is fast and responsive. It’s able to readily change its position in an analog manner, both raising up and deflating below the base surface on command.

We don’t often cover weird goopy-looking projects around here, but maybe we should.

Continue reading “Dynamic Buttons Are Weird Blobs You Can Press”

Image

Big Tactile Button Is Silly But Cool

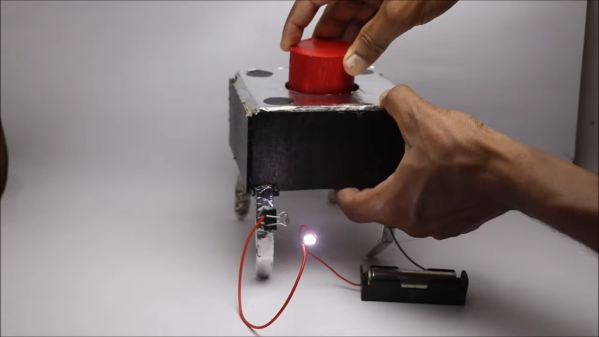
Every hacker is familiar with those teeny little tactile buttons that are so enjoyable to click over and over again. [ROBO HUB] has built a giant version as a tribute, and it works just like the real thing!

The giant button has been scaled up 20 times compared to the original. For simplicity’s sake, [ROBO HUB] designed this replica to use materials readily available around the home. Thanks to its cardboard construction, it’s easy to replicate with a minimum of tools. One need merely cut out the various sections before assembling them together with hot glue, with popsicle sticks serving as the legs. A juice bottle is used as the primary button itself, with aluminium foil serving as the contacts and rubber bands standing in for the spring.

It’s not the most useful button, given that it it’s quite fragile and has a weak spring return. However, it would be a great teaching tool to show students exactly what’s going on inside an actual button. As a bonus, it looks like it would be remarkably fun to pound on to activate some kind of massive air horn. Just an idea.

Continue reading “Big Tactile Button Is Silly But Cool”

Image

Pie Stop For Emergency DNS Needs

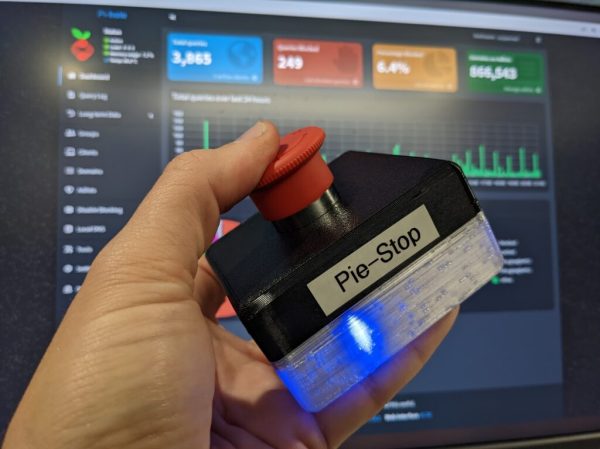
The war on Internet ads rages on, as the arms race between ad blockers and ad creators continues to escalate. To make a modern Internet experience even remotely palatable, plenty of people are turning to DNS-level filters to stop the ads from coming into the network at all. This solution isn’t without its collateral damage though, as the black lists available sometimes filter out something that should have made it to the user. For those emergencies, [Kristopher] created the Pie Stop, a physical button to enact a temporary passthrough on his Pi-Hole.

While [Kristopher] is capable of recognizing a problem and creating the appropriate white list for any of these incidents, others in his household do not find this task as straighforward. When he isn’t around to fix the problems, this emergency stop can be pressed by anyone to temporarily halt the DNS filtering and allow all traffic to pass through the network. It’s based on the ESP-01S, a smaller ESP8266 board with only two GPIO pins. When pressed, it sends a custom command to the Pi-Hole to disable the ad blocking. A battery inside the case allows it to be placed conveniently anywhere near anyone who might need it.

With this button deployed, network snafus can be effectively prevented even with the most aggressive of DNS-level ad blocking. If you haven’t thought about deploying one of these on your own network, they’re hard to live without once you see how powerful they are. Take a look at this one which also catches spam.

Image

Surprisingly Stomp-able Soft Switches

Competition sure brings out the brute in people, doesn’t it? So what do you do when you need a bunch of switches you can let people fist-pound or stomp on repeatedly without them taking damage? You could look to the guitar pedal industry and their tough latching switches, or you could simply build your own smash-resistant buttons as [wannabemadsci] has done.

ImageThe main thing about these switches is that they aren’t easily destroyed by shoes or angry fists. That’s because the shiny red push-me part of the button is made by cutting a foam ball in half.

Not easily crush-able Styrofoam, mind you — squishy, coated foam like an indoor football. This is mounted to the top of a sandwich made of hardboard and a couple pieces of easily-compressible foam from craft paintbrushes.

A brass washer is mounted to the middle of both pieces of hardboard, and these have wires soldered to them to read button presses. Then it’s just a matter of hooking it to a microcontroller like any other momentary.

There are all kinds of things you could cut in half for the top, like maybe tennis balls. Or, do what [Sprite_TM] did and use inverted plastic bowls.