
This tutorial introduces cryptoassets.core: what it does for you and how to set up a trivial command-line Bitcoin wallet application on the top of it.
cryptoassets.core is a Python framework providing safe, scalable and future-proof cryptocurrency and cryptoassets accounting for your Python application. You can use it to accept cryptocurrency payments, build cryptoasset services and exchanges.
1. Benefits
cryptoassets.core is built on the top of Python programming language, community ecosystem and best practices. Python is proven tool for building financial applications and is widely used to develop cryptoassets software and Bitcoin exchanges. cryptoassets.core is
- Easy: Documented user-friendly APIs.
- Extensible: Any cryptocurrency and cryptoassets support.
- Safe: Secure and high data integrity.
- Lock-in free: Vendor independent and platform agnostics.
- Customizable: Override and tailor any part of the framework for your specific needs.
2. Basics
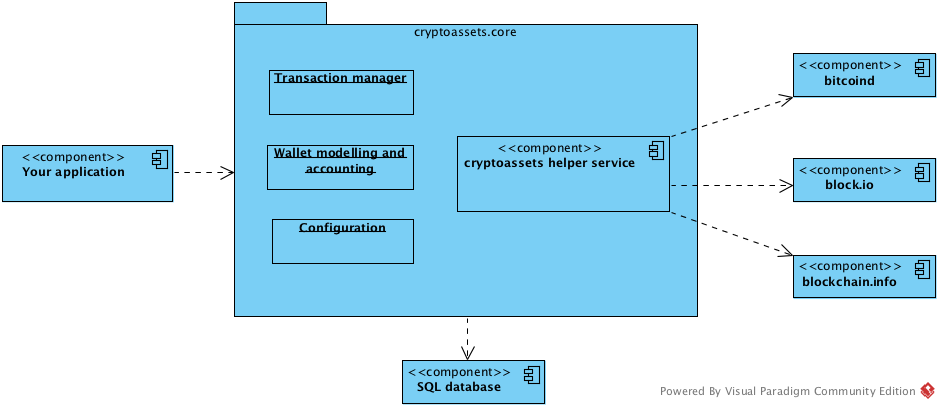
- You can use cryptoassets.core framework in any Python application, including Django applications. Python 3 is required.
- cryptoassets.core is designed to be extendable to support altcoins and different cryptoassets.
- cryptoassets.core works with API services (block.io, blockchain.info) and daemons (bitcoind, dogecoind). The framework uses term backend to refer these. You either sign up for an account on the API service or run the daemon on your own server (*)
- Basic SQLAlchemy knowledge is required for using the models API.
- A separate a cryptoassets helper service process is responsible for communicating between your application and cryptoasset networks. This process runs on background on your server.
- cryptoassets.core framework is initialized from a configuration, which can be passed in as a Python dictionary or a YAML configuration file.
- For data integrity reasons, cryptoassets.core database connection usually differs from the default application database connection.
- At the moment cryptoassets.core is in initial version 0.1 release. Expect the scope of the project to expand to support other cryptoassets (Counterparty, Ethereum, BitShares-X) out of the box.
Note: Please note that running bitcoind on a server requires at least 2 GB of RAM and 25 GB of disk space, so low end box hosting plans are not up for the task.
3. Interacting with cryptoassets.core
The basic programming flow with cryptoassets.core is
- You set up cryptoassets.core.app.CryptoAssetsApp instance and configure it inside your Python code.
- You set up a channel how cryptoassets helper service process calls backs your application. Usually this happens over HTTP web hooks.
- You put your cryptoassets database accessing code to a separate function and decorate it with cryptoassets.core.app.CryptoAssetsApp.conflict_resolver to obtain transaction conflict aware SQLAlchemy session.
- In your cryptoasset application logic, you obtain an instance to cryptoassets.core.models.GenericWallet subclass. Each cryptoasset has its own set of SQLAlchemy model classes. The wallet instance contains the accounting information: which assets and which transactions belong to which users. Simple applications usually require only one default wallet instance.
- After having set up the wallet, call various wallet model API methods like cryptoassets.core.models.GenericWallet.send().
- For receiving the payments you need to create at least one receiving address (see cryptoassets.core.models.GenericWallet.create_receiving_address()). Cryptoassets helper service triggers events which your application listens to and then performs application logic when a payment or a deposit is received.
Example command-line application
Below is a simple command line Bitcoin wallet application using block.io API service as the backend. It is configured to work with Bitcoin Testnet. Testnet Bitcoins are worthless, free to obtain and thus useful for application development and testing.The example comes with pre-created account on block.io. It is recommended that you sign up for your own block.io account and API key and use them instead of ones in the example configuration.
Install cryptoassets.core
First make sure you have created a virtualenv and installed cryptoassets.core and its dependencies.
Sample Application code
Note: The example is tested only for UNIX systems (Linux and OSX). The authors do not have availability of Microsoft development environments to ensure Microsoft Windows compatibility.
Here is an example walkthrough how to set up a command line application.
Save this as example.py file (see full source code with more comments):
import os
import warnings
from decimal import Decimal
import datetime


from sqlalchemy.exc import SAWarning

from cryptoassets.core.app import CryptoAssetsApp
from cryptoassets.core.configure import Configurator
from cryptoassets.core.utils.httpeventlistener import simple_http_event_listener
from cryptoassets.core.models import NotEnoughAccountBalance

# Because we are using a toy database and toy money, we ignore this SQLLite database warning
warnings.filterwarnings(
    'ignore',
    r"^Dialect sqlite\+pysqlite does \*not\* support Decimal objects natively\, "
    "and SQLAlchemy must convert from floating point - rounding errors and other "
    "issues may occur\. Please consider storing Decimal numbers as strings or "
    "integers on this platform for lossless storage\.$",
    SAWarning, r'^sqlalchemy\.sql\.type_api$')


assets_app = CryptoAssetsApp()

conf_file = os.path.join(os.path.dirname(__file__), "example.config.yaml")
configurer = Configurator(assets_app)
configurer.load_yaml_file(conf_file)

assets_app.setup_session()

@simple_http_event_listener(configurer.config)
def handle_cryptoassets_event(event_name, data):
    if event_name == "txupdate":
        address = data["address"]
        confirmations = data["confirmations"]
        txid = data["txid"]
        print("")
        print("")
        print("Got transaction notification txid:{} addr:{}, confirmations:{}".
            format(txid, address, confirmations))
        print("")


def get_wallet_and_account(session):
    WalletClass = assets_app.coins.get("btc").wallet_model

    wallet = WalletClass.get_or_create_by_name("default wallet", session)
    session.flush()

    account = wallet.get_or_create_account_by_name("my account")
    session.flush()

    # If we don't have any receiving addresses, create a default one
    if len(account.addresses) == 0:
        wallet.create_receiving_address(account, automatic_label=True)
        session.flush()

    return wallet, account

@assets_app.conflict_resolver.managed_transaction
def create_receiving_address(session):
    wallet, my_account = get_wallet_and_account(session)
    wallet.create_receiving_address(my_account, automatic_label=True)


@assets_app.conflict_resolver.managed_transaction
def send_to(session, address, amount):
    """Perform the actual send operation within managed transaction."""
    wallet, my_account = get_wallet_and_account(session)
    friendly_date = datetime.datetime.utcnow().strftime("%Y-%m-%dT%H:%M:%S")
    transaction = wallet.send(my_account, address, amount, "Test send at {}".format(friendly_date))
    print("Created new transaction #{}".format(transaction.id))


def send():
    """Ask how many BTCTEST bitcoins to send and to which address."""
    address = input("Give the bitcoin TESTNET address where you wish to send the bitcoins:")
    amount = input("Give the amount in BTC to send:")

    try:
        amount = Decimal(amount)
    except ValueError:
        print("Please enter a dot separated decimal number as amount.")
        return

    try:
        send_to(address, amount)
    except NotEnoughAccountBalance:
        print("*" * 40)
        print("Looks like your wallet doesn't have enough Bitcoins to perform the send. Please top up your wallet from testnet faucet.")
        print("*" * 40)


@assets_app.conflict_resolver.managed_transaction
def print_status(session):
    """Print the state of our wallet and transactions."""
    wallet, account = get_wallet_and_account(session)

    # Get hold of classes we use for modelling Bitcoin
    # These classes are defined in cryptoassets.core.coin.bitcoind.model models
    Address = assets_app.coins.get("btc").address_model
    Transaction = assets_app.coins.get("btc").transaction_model

    print("-" * 40)
    print("Account #{}, confirmed balance {:.8f} BTC, incoming BTC {:.8f}". \
        format(account.id, account.balance, account.get_unconfirmed_balance()))

    print("")
    print("Receiving addresses available:")
    print("(Send Testnet Bitcoins to them to see what happens)")

    for address in session.query(Address).filter(Address.account == account):
        print("- {}: confirmed received {:.8f} BTC".format(address.address, address.balance))
    print("")
    print("Wallet transactions:")
    for tx in session.query(Transaction):
        if tx.state in ("pending", "broadcasted"):

            # This transactions might not be broadcasted out by
            # cryptoassets helper service yet, thus it
            # does not have network txid yet
            txid = "(pending broadcast)" if tx.state == "pending" else tx.txid

            print("- OUT tx:{} to {} amount:{:.8f} BTC confirmations:{}".format(
                txid, tx.address.address, tx.amount, tx.confirmations))
        elif tx.state in ("incoming", "processed"):
            print("- IN tx:{} to:{} amount:{:.8f} BTC confirmations:{}".format(
                tx.txid, tx.address.address, tx.amount, tx.confirmations))
        else:
            print("- OTHER tx:{} {} amount:{:.8f} BTC".format(
                tx.id, tx.state, tx.amount))

    print("")
    print("Available commands:")
    print("1) Create new receiving address")
    print("2) Send bitcoins to other address")
    print("3) Quit")


print("Welcome to cryptoassets example app")
print("")

running = True
while running:

    print_status()
    command = input("Enter command [1-3]:")
    print("")
    if command == "1":
        create_receiving_address()
    elif command == "2":
        send()
    elif command == "3":
        running = False
    else:
        print("Unknown command!")
Example configuration
Save this as example.config.yaml file (see full source code with more comments):
---

database:
    url: sqlite:////tmp/cryptoassets.example.sqlite

coins:
    btc:
        backend:
            class: cryptoassets.core.backend.blockio.BlockIo
            api_key: b2db-xxxx-xxxx-xxxx
            pin: ThisIsNotVerySecret1
            network: btctest
            walletnotify:
                class: cryptoassets.core.backend.sochainwalletnotify.SochainWalletNotifyHandler
                pusher_app_key: e9f5cc20074501ca7395

events:
    example_app:
        class: cryptoassets.core.event.http.HTTPEventHandler
        url: http://localhost:10000
3. Creating the database structure
The example application uses SQLite database as a simple self-contained test database.
Run the command to create the database tables:
cryptoassets-initialize-database example.config.yaml
This should print out:
[11:49:16] cryptoassets.core version 0.0
[11:49:16] Creating database tables for sqlite:////tmp/cryptoassets.example.sqlite
Running the example
The example application is fully functional and you can start your Bitcoin wallet business right away. Only one more thing to do…
…the communication between cryptoasset networks and your application is handled by the cryptoassets helper service background process. Thus, nothing comes in or goes out to your application if the helper service process is not running. Start the helper service:
cryptoassets-helper-service example.config.yaml
You should see something like this:
...
[00:23:09] [cryptoassets.core.service.main splash_version] cryptoassets.core version 0.0
Now leave cryptoassets helper service running and start the example application in another terminal:
python example.py
You should see something like this:
Welcome to cryptoassets example app

Receiving addresses available:
(Send testnet Bitcoins to them to see what happens)
- 2MzGzEUyHgqBXzbuGCJDSBPKAyRxhj2q9hj: total received 0.00000000 BTC

We know about the following transactions:

Give a command
1) Create new receiving address
2) Send Bitcoins to other address
3) Quit
Now you can send or receive Bitcoins within your application. If you don’t start the helper service the application keeps functioning, but all external cryptoasset network traffic is being buffered until the cryptoassets helper service is running again.
If you want to reset the application just delete the database file /tmp/cryptoassets.test.sqlite.
Obtaining testnet Bitcoins and sending them
The example runs on testnet Bitcoins which are not real Bitcoins. Get some testnet coins and send them from the faucet to the receiving address provided by the application.
List of services providing faucets giving out Testnet Bitcoins.
No more than 0.01 Bitcoins are needed for playing around with the example app.
After sending the Bitcoins you should see a notification printed for an incoming transaction in ~30 seconds which is the time it takes for the Bitcoin transaction to propagate through testnet:
Got transaction notification txid:512a082c2f4908d243cb52576cd5d22481344faba0d7a837098f9af81cfa8ef3 addr:2N7Fi392deSEnQgiYbmpw1NmK6vMVrVzuwc, confirmations:0
After completing the example
Explore model API documentation, configuration and what tools there are available.
You can also study Liberty Music Store open source application, built on the top of Django and Bitcoin.
Django integration
If you are using Django see cryptoassets.django package.
 Subscribe to RSS feed
  Follow me on Twitter
 Follow me on Facebook
  Follow me Google+


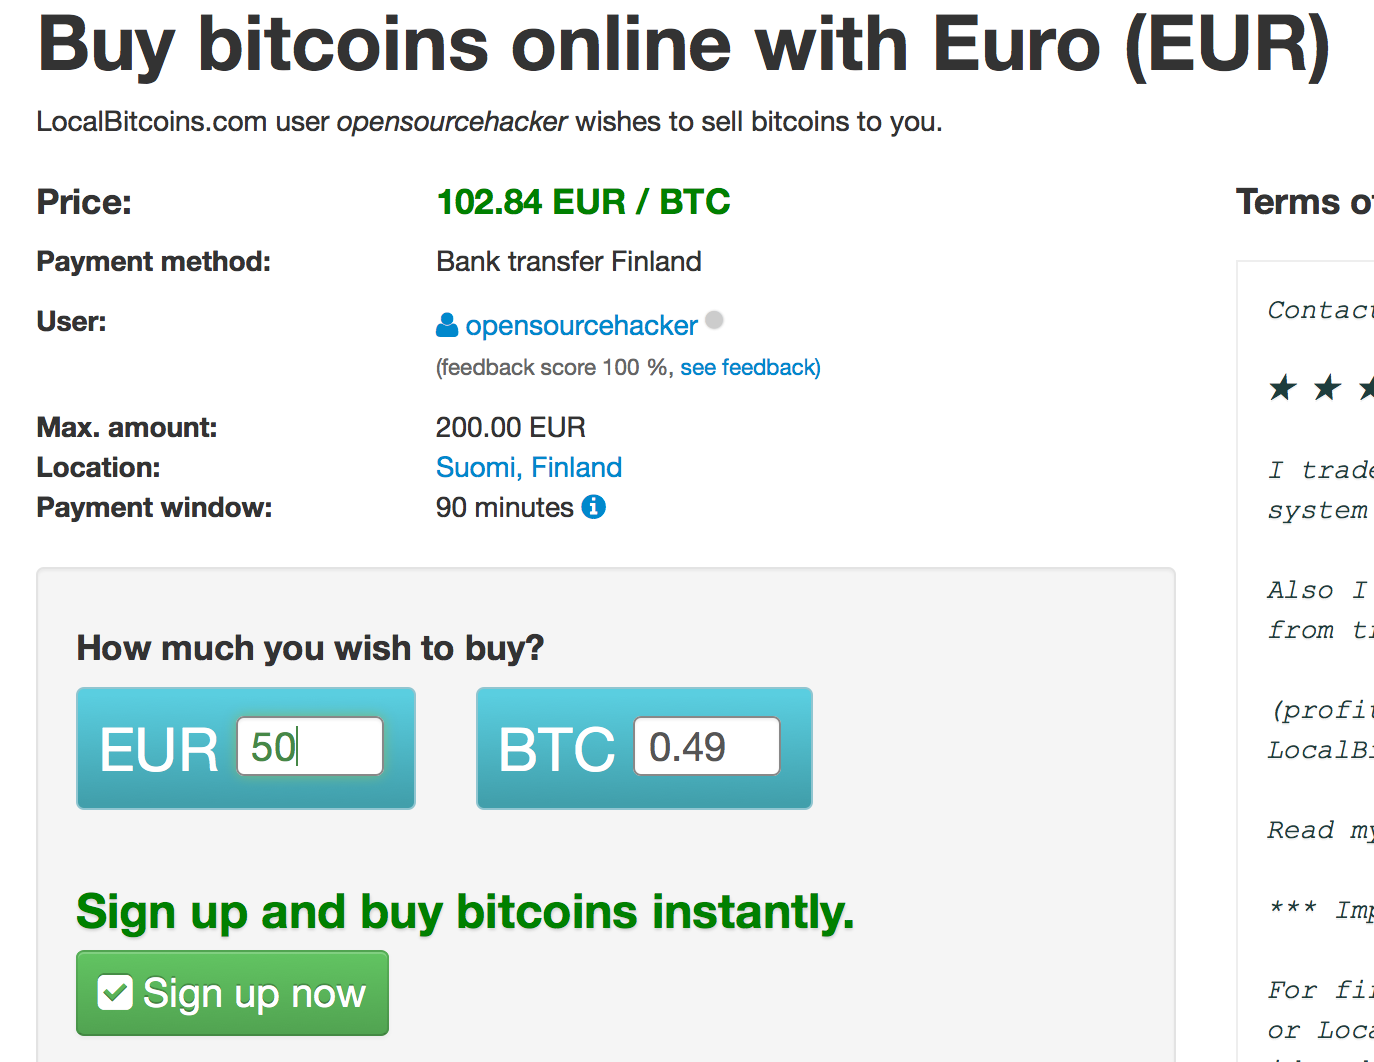
 When you hit the Send on LocalBitcoins.com, the site submits the transaction to the bitcoin network. Bitcoin network consists of nodes which will confirm your transaction. After the certain transaction confirmation threshold is exceeded you can assume the transaction was safe and not double spent attempt. Usually this confirmation threshold is six confirmations, but you can set it lower if you want to have faster customer experience. It takes 5-30 minutes to process a transaction with six confirmations.


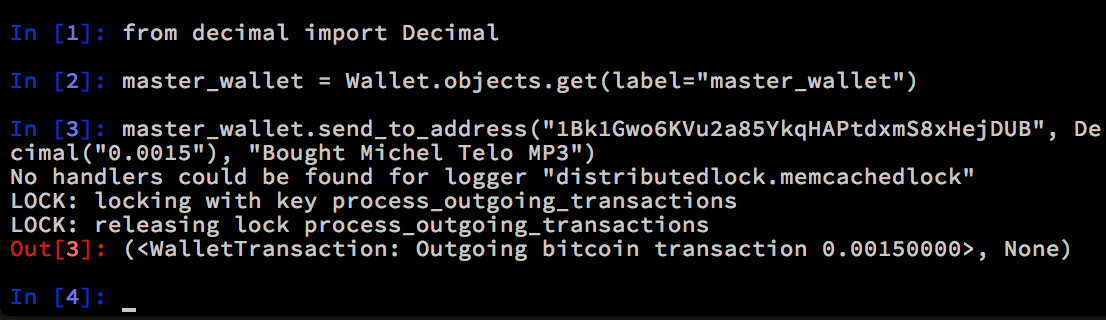

 And that’s it!
