Search the Community
Showing results for tags 'gamemode'.
Found 6 results
-
Version 1.3.8
248 downloads
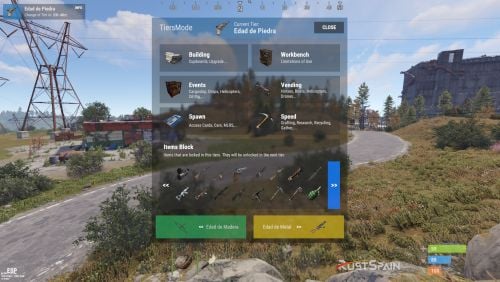
Rust / Server Plugins TiersMode Tier-Based ProgressionRust Plugin A new stage. New possibilities. Your wipe, at your pace. Create a staged progression system for your Rust server. Decide when players can access building grades, items, events, vendors and vehicles, and adjust crafting and gathering as the wipe progresses. 4 default tiers Add and customize your own stages Per-tier rules Building, events, access and rates In-game editing Manage blocked items with /tier edit 01 / Video demo See TiersMode in action Watch the video demo for a look at TiersMode. Watch on YouTube 02 / Progression Set the pace of your wipe Add a tier-based game mode to an existing modded server or build a new server around staged progression. TiersMode generates four tiers by default, and you can create additional stages and configure each one independently. Give every tier its own name, icon URL and color. Set stage duration in minutes: 60 for one hour, or 1,440 for one day. Customize what becomes available as your server moves through the tiers. 03 / Player information Keep players informed as the server progresses On-screen counter. Display the current tier and the time remaining until the next stage. Tier information window. Enable or disable the information screen and control whether players can view upcoming tiers. Configurable modal alerts. Notify players about restrictions, tier changes and events such as airdrops, Cargo Ship arrivals or Oil Rig respawns. Custom announcements. Send a server-wide modal message with /tieralert. Chat messages. Configure alert notifications and a welcome message explaining the game mode. Discord announcements. Announce wipe starts and tier changes using the Discord Messages plugin. Server title. Optionally update the server title using the configured tier placeholder. 04 / Building & workbenches Control building progression and research Tool cupboard limits. Set a maximum number of cupboards per player or allow unlimited placement. Cupboard destruction alerts. Optionally notify the server when a player destroys another player's tool cupboard. Building grades. Set the maximum upgrade level allowed in each tier. Workbench research. Allow or block research through workbenches by tier. Workbench placement. Allow all workbenches, block placement, or permit only the workbenches specified for that stage. 05 / Events & trading Decide when major events and services become available Server events Enable or disable Cargo Ship, Oil Rig, Chinook, Patrol Helicopter, Airdrop and Bradley APC events for each tier. Vendors and public trading Control helicopter, boat and horse vendors, drone use and public monument vending machines. 06 / Spawns & vehicles Unlock cards and vehicles stage by stage Keycard spawns. Choose which access cards can spawn in each tier. Start with green cards and introduce blue and red cards later. Car spawns. Choose which modular car sizes can appear around the map, or disable car spawns for a tier. Vehicle access. Allow or block MLRS, Workcart and Locomotive use independently. 07 / Rates & gathering Match crafting and resource rates to each tier Configure crafting speed, research time and recycling time independently for each stage. Keep vanilla values or adjust the pace as progression advances. The integrated gather system supports Dispenser Gather, Dispenser Bonus, Collectible Pickup, Growable Gathered, Survey Gather, Quarry Gather and Excavator Gather. Use one gather system for these rates: disable TiersMode's gather system if another gather plugin controls them, or remove the overlapping plugin before enabling the integrated system. 08 / Restrictions & automation Edit blocked items in game and run commands per tier Use /tier edit to manage the items blocked by each stage through the administrative interface, without manually searching for their names in the configuration. Block crafting of items restricted in the current tier. Prevent placement of specified deployables when the player lacks building privilege. Run your configured server commands when a tier loads, including on tier changes and server restarts. Use tier commands to enable or disable other plugins, trigger their events, or apply your own stage-specific server setup. 09 / Commands Player and administrator commands Command Purpose /tier Open the tier information window when enabled. /tier edit Open the blocked-item editor. Requires tiersmode.admin. /tieralert textmsg Send a custom modal alert to online players. Requires tiersmode.admin. 10 / Permissions Fine-tune access and bypass permissions Permission Purpose tiersmode.admin Access the tier editor and custom alert command. Assign to administrators only. tiersmode.bypass.use_workcart Bypass the Workcart use restriction. tiersmode.bypass.use_locomotive Bypass the Locomotive use restriction. tiersmode.bypass.use_mlrs Bypass the MLRS use restriction. tiersmode.bypass.limit_cupboard Bypass the tool cupboard limit. tiersmode.bypass.block_items Bypass item restrictions. tiersmode.bypass.block_place_no_building Bypass specified deployable restrictions without building privilege. tiersmode.bypass.upgrade Bypass the maximum building upgrade level. tiersmode.bypass.block_place_all_workbench Bypass workbench placement restrictions. tiersmode.bypass.block_research Bypass workbench research restrictions. tiersmode.bypass.block_vending_helis Bypass helicopter vendor restrictions. tiersmode.bypass.block_vending_boat Bypass boat vendor restrictions. tiersmode.bypass.block_vending_horses Bypass horse vendor restrictions. tiersmode.instant_research Instant research. tiersmode.alerts.block Disable alerts for the player. tiersmode.instant_recycler Instant recycling. 11 / Default configuration Four tiers to use as your starting point This example uses four stages: Wood Age, Stone Age, Metal Age and Explosive Age. Each lasts 1,440 minutes, with progressively higher building grades and different events, rates and restrictions. Tier names in the configuration are customizable and appear in Spanish in this example. Adjust the server title, image URLs, Discord webhook placeholder and server commands for your own setup. Discord announcements require the Discord Messages plugin when enabled. { "Automatic Server Title": { "Enabled Auto Changue": true, "Base title to modify": "RustSpain.com | Tiers Mode ({0})" }, "GUI Config": { "On-Screen GUI Counter": true, "Counter Config": { "Color Title": "1.0 1.0 1.0 0.70", "Color Subtitle": "1.0 1.0 1.0 0.70", "Color Button": "0.46 0.46 0.46 0.49", "Show Icon/Color": true, "Show Button Info": true }, "Enabled Alert Modal": true, "Modal Config": { "Duration Show": 10.0, "Color Title": "1.0 1.0 1.0 0.70", "Color Description": "1.0 1.0 1.0 0.70", "Sound Alert": true, "Prefab Sound": "assets/prefabs/tools/pager/effects/beep.prefab" }, "Enabled Alert Modal Changue Tier": true, "Modal Changue Config": { "Duration Show": 15.0, "Color Title": "1.0 1.0 1.0 0.70", "Color Description": "1.0 1.0 1.0 0.70", "Sound Alert": true, "Prefab Sound": "assets/bundled/prefabs/fx/item_unlock.prefab" }, "Enabled Alert Modal Events": true, "Modal Events Config": { "Duration Show": 15.0, "Color Title": "1.0 1.0 1.0 0.70", "Color Description": "1.0 1.0 1.0 0.70", "Sound Alert": true, "Prefab Sound": "assets/prefabs/tools/pager/effects/vibrate.prefab" }, "Enabled Custom Alert Modal": true, "Modal Custom Config": { "Duration Show": 15.0, "Color Title": "1.0 1.0 1.0 0.70", "Color Description": "1.0 1.0 1.0 0.70", "Sound Alert": true, "Prefab Sound": "assets/prefabs/tools/pager/effects/vibrate.prefab" }, "Windows Info Config": { "Show GUI Info Window on Enter": true, "Show GUI Info use Command": true, "Show Previous Tier Button": true, "Show Next Tier Button": true, "Color Title": "1.00 1.00 1.00 1.00", "Color Text": "0.90 0.90 0.90 1.00", "Color Header Info": "0.0 0.0 0.0 1.0", "Color Button Close": "0.20 0.20 0.20 0.80" } }, "Messages": { "Enabled Chat": true, "Enabled Welcome Chat": true, "Use Discord Message Plugin": true, "Webhook Channel Announcement Change of Stag": "Put here your Webhook of the Channel where you want to announce the changes of Tiers." }, "Tiers": [ { "Tier Name": "Edad de Madera", "Tier Icon URL": "https://img.rustspain.com/tiers/1.png", "Tier Color": "0.17 0.75 0.42 0.50", "Duration of the tier in Minutes": 1440, "Cupboards": { "Limit Maximum Placed Cupboards": true, "Maximum Cupboards per player": 3, "Global Alert for Destruction of Cupboard": false, "Config Destruction Alert": { "Show Name of the player who destroyed it in the info": true, "Show Position in info": true }, "Maximum Upgrade Level (1 = Wood, 2 = Stones, 3 = Metal, 4 = HQ)": 1 }, "Workbench": { "Allow research from Workbench": false, "Allow Place All Workbench": false, "Allow placing only the following workbenches": [ "assets/prefabs/deployable/tier 1 workbench/workbench1.deployed.prefab" ] }, "Events": { "Cargoship": false, "Oil Rig": false, "Chinook": false, "Patrol Helicopter": true, "Airdrop": true, "Bradley APC": false }, "Sellers": { "Helicopter Sale": false, "Boat Sales": false, "Horse Sales": false, "Use of Drones": false, "Use of Public Vending Machine (Rads)": false }, "Spawn": { "Spawn Cards": [ "keycard_green_pickup" ], "Spawn Vehicles (Cars)": [], "Use Vehicle MLRS": false, "Use Vehicle Workcart": true, "Use Vehicle Locomotive": true }, "Speed": { "Crafting Rate (1.0 = Vanilla | 0.0 = Instant)": 1.0, "Research Seconds (10.0 = Vanilla | 0.0 = Instant)": 10.0, "Recycler Seconds (5.0 = Vanilla | 0.0 = Instant)": 5.0, "Gather System (If you use another plugin for the Gather disable this or remove the other one)": false, "Gather Config (Setting 0.0 will disable this option and it will work as vanilla)": { "DispenserGather": 0.0, "DispenserBonus": 1.0, "CollectiblePickup": 0.0, "GrowableGathered": 0.0, "SurveyGather": 0.0, "QuarryGather": 0.0, "ExcavatorGather": 0.0 } }, "Lists": { "Items lock Craft": true, "Items lock": [ "shotgun.waterpipe", "shotgun.pump", "pistol.semiauto", "pistol.revolver", "rifle.semiauto", "maxhealthtea", "radiationresisttea", "healingtea", "ammo.rifle", "ammo.shotgun.fire", "ammo.shotgun", "ammo.shotgun.slug" ], "Deployable lock without Building Permissions": false, "Items lock without Building Permissions": { "trap.bear": "assets/prefabs/deployable/bear trap/beartrap.prefab", "trap.landmine": "assets/prefabs/deployable/landmine/landmine.prefab" }, "Server Commands": [ "o.unload Backpack", "o.unload TheStorm" ] } }, { "Tier Name": "Edad de Piedra", "Tier Icon URL": "https://img.rustspain.com/tiers/2.png", "Tier Color": "0.06 0.58 0.86 0.50", "Duration of the tier in Minutes": 1440, "Cupboards": { "Limit Maximum Placed Cupboards": true, "Maximum Cupboards per player": 5, "Global Alert for Destruction of Cupboard": false, "Config Destruction Alert": { "Show Name of the player who destroyed it in the info": true, "Show Position in info": true }, "Maximum Upgrade Level (1 = Wood, 2 = Stones, 3 = Metal, 4 = HQ)": 2 }, "Workbench": { "Allow research from Workbench": false, "Allow Place All Workbench": false, "Allow placing only the following workbenches": [ "assets/prefabs/deployable/tier 1 workbench/workbench1.deployed.prefab" ] }, "Events": { "Cargoship": true, "Oil Rig": false, "Chinook": true, "Patrol Helicopter": true, "Airdrop": true, "Bradley APC": false }, "Sellers": { "Helicopter Sale": false, "Boat Sales": true, "Horse Sales": true, "Use of Drones": false, "Use of Public Vending Machine (Rads)": false }, "Spawn": { "Spawn Cards": [ "keycard_green_pickup", "keycard_blue_pickup" ], "Spawn Vehicles (Cars)": [ "2module_car_spawned.entity" ], "Use Vehicle MLRS": false, "Use Vehicle Workcart": false, "Use Vehicle Locomotive": false }, "Speed": { "Crafting Rate (1.0 = Vanilla | 0.0 = Instant)": 0.6, "Research Seconds (10.0 = Vanilla | 0.0 = Instant)": 8.0, "Recycler Seconds (5.0 = Vanilla | 0.0 = Instant)": 4.0, "Gather System (If you use another plugin for the Gather disable this or remove the other one)": true, "Gather Config (Setting 0.0 will disable this option and it will work as vanilla)": { "DispenserGather": 1.5, "DispenserBonus": 1.5, "CollectiblePickup": 1.5, "GrowableGathered": 1.5, "SurveyGather": 1.5, "QuarryGather": 1.5, "ExcavatorGather": 1.5 } }, "Lists": { "Items lock Craft": true, "Items lock": [ "weapon.mod.8x.scope", "rifle.bolt", "hmlmg", "pistol.python", "smg.thompson", "shotgun.double", "roadsign.gloves", "roadsign.kilt", "hazmatsuit.arcticsuit", "explosives", "submarine.torpedo.straight", "ammo.rocket.basic", "ammo.rocket.hv", "ammo.rifle.incendiary", "ammo.pistol.fire", "ammo.rocket.fire", "ammo.rifle.hv", "ammo.pistol.hv" ], "Deployable lock without Building Permissions": true, "Items lock without Building Permissions": { "trap.bear": "assets/prefabs/deployable/bear trap/beartrap.prefab", "trap.landmine": "assets/prefabs/deployable/landmine/landmine.prefab" }, "Server Commands": [ "o.unload Backpack", "o.unload TheStorm" ] } }, { "Tier Name": "Edad de Metal", "Tier Icon URL": "https://img.rustspain.com/tiers/3.png", "Tier Color": "0.87 0.75 0.05 0.50", "Duration of the tier in Minutes": 1440, "Cupboards": { "Limit Maximum Placed Cupboards": false, "Maximum Cupboards per player": 5, "Global Alert for Destruction of Cupboard": false, "Config Destruction Alert": { "Show Name of the player who destroyed it in the info": true, "Show Position in info": true }, "Maximum Upgrade Level (1 = Wood, 2 = Stones, 3 = Metal, 4 = HQ)": 3 }, "Workbench": { "Allow research from Workbench": false, "Allow Place All Workbench": false, "Allow placing only the following workbenches": [ "assets/prefabs/deployable/tier 1 workbench/workbench1.deployed.prefab", "assets/prefabs/deployable/tier 2 workbench/workbench2.deployed.prefab" ] }, "Events": { "Cargoship": true, "Oil Rig": true, "Chinook": true, "Patrol Helicopter": true, "Airdrop": true, "Bradley APC": true }, "Sellers": { "Helicopter Sale": true, "Boat Sales": true, "Horse Sales": true, "Use of Drones": false, "Use of Public Vending Machine (Rads)": true }, "Spawn": { "Spawn Cards": [ "keycard_green_pickup", "keycard_blue_pickup", "keycard_red_pickup" ], "Spawn Vehicles (Cars)": [ "2module_car_spawned.entity", "3module_car_spawned.entity", "4module_car_spawned.entity" ], "Use Vehicle MLRS": false, "Use Vehicle Workcart": false, "Use Vehicle Locomotive": false }, "Speed": { "Crafting Rate (1.0 = Vanilla | 0.0 = Instant)": 0.3, "Research Seconds (10.0 = Vanilla | 0.0 = Instant)": 6.0, "Recycler Seconds (5.0 = Vanilla | 0.0 = Instant)": 3.0, "Gather System (If you use another plugin for the Gather disable this or remove the other one)": true, "Gather Config (Setting 0.0 will disable this option and it will work as vanilla)": { "DispenserGather": 2.0, "DispenserBonus": 2.0, "CollectiblePickup": 2.0, "GrowableGathered": 2.0, "SurveyGather": 2.0, "QuarryGather": 2.0, "ExcavatorGather": 2.0 } }, "Lists": { "Items lock Craft": true, "Items lock": [ "rifle.l96", "lmg.m249", "multiplegrenadelauncher", "pistol.m92", "shotgun.spas12", "rifle.m39", "explosive.timed", "weapon.mod.muzzlebrake", "weapon.mod.muzzleboost", "chainsaw", "jackhammer", "weapon.mod.extendedmags", "ammo.rocket.mlrs", "ammo.grenadelauncher.he", "ammo.grenadelauncher.buckshot", "ammo.grenadelauncher.smoke", "ammo.rifle.explosive" ], "Deployable lock without Building Permissions": false, "Items lock without Building Permissions": { "trap.bear": "assets/prefabs/deployable/bear trap/beartrap.prefab", "trap.landmine": "assets/prefabs/deployable/landmine/landmine.prefab" }, "Server Commands": [ "o.load Backpack", "o.unload TheStorm" ] } }, { "Tier Name": "Edad Explosiva", "Tier Icon URL": "https://img.rustspain.com/tiers/4.png", "Tier Color": "0.80 0.26 0.13 0.50", "Duration of the tier in Minutes": 1440, "Cupboards": { "Limit Maximum Placed Cupboards": false, "Maximum Cupboards per player": 5, "Global Alert for Destruction of Cupboard": false, "Config Destruction Alert": { "Show Name of the player who destroyed it in the info": true, "Show Position in info": true }, "Maximum Upgrade Level (1 = Wood, 2 = Stones, 3 = Metal, 4 = HQ)": 4 }, "Workbench": { "Allow research from Workbench": true, "Allow Place All Workbench": true, "Allow placing only the following workbenches": [ "assets/prefabs/deployable/tier 1 workbench/workbench1.deployed.prefab", "assets/prefabs/deployable/tier 2 workbench/workbench2.deployed.prefab", "assets/prefabs/deployable/tier 3 workbench/workbench3.deployed.prefab" ] }, "Events": { "Cargoship": true, "Oil Rig": true, "Chinook": true, "Patrol Helicopter": true, "Airdrop": true, "Bradley APC": true }, "Sellers": { "Helicopter Sale": true, "Boat Sales": true, "Horse Sales": true, "Use of Drones": true, "Use of Public Vending Machine (Rads)": true }, "Spawn": { "Spawn Cards": [ "keycard_green_pickup", "keycard_blue_pickup", "keycard_red_pickup" ], "Spawn Vehicles (Cars)": [ "2module_car_spawned.entity", "3module_car_spawned.entity", "4module_car_spawned.entity" ], "Use Vehicle MLRS": true, "Use Vehicle Workcart": false, "Use Vehicle Locomotive": false }, "Speed": { "Crafting Rate (1.0 = Vanilla | 0.0 = Instant)": 0.0, "Research Seconds (10.0 = Vanilla | 0.0 = Instant)": 4.0, "Recycler Seconds (5.0 = Vanilla | 0.0 = Instant)": 2.0, "Gather System (If you use another plugin for the Gather disable this or remove the other one)": true, "Gather Config (Setting 0.0 will disable this option and it will work as vanilla)": { "DispenserGather": 3.0, "DispenserBonus": 3.0, "CollectiblePickup": 3.0, "GrowableGathered": 3.0, "SurveyGather": 3.0, "QuarryGather": 3.0, "ExcavatorGather": 3.0 } }, "Lists": { "Items lock Craft": true, "Items lock": [], "Deployable lock without Building Permissions": true, "Items lock without Building Permissions": { "trap.bear": "assets/prefabs/deployable/bear trap/beartrap.prefab", "trap.landmine": "assets/prefabs/deployable/landmine/landmine.prefab", "water.catcher.large": "assets/prefabs/deployable/water catcher/water_catcher_large.prefab", "water.catcher.small": "assets/prefabs/deployable/water catcher/water_catcher_small.prefab" }, "Server Commands": [] } } ] } 12 / Language & support Make the game mode fit your community Language files are generated in English by default. A Spanish translation is available on request. For questions, problems, suggestions or help with your setup, contact ninco90 on Discord. A custom configuration service is also available for an additional fee if you would like the game mode configured around your server's preferences. Give every stage of your wipe its own rules Start with the four default tiers, adjust the timing and unlocks, and build a progression experience around your community.$45.00 -

Version 1.0.21
4,441 downloads
This plugin can be used by developers to manage their arena games etc. Developers can use this to handle the entry/exit of players into their games. The plugin will be primarily used by my HungerGames, ScubaArena and Skirmish game (soon to be released). It features: Registration calls to create and register the event with the plugin. Automatic running of the events in order, so you can have multiple event plugins running 1 after the other (configurable). Strip and save the players current inventory, and restore it after they leave the game. Store and restore the players metabolism stats when they join/leave the game. Register a destination for players to teleport to when joining the game. Command black listing. Build in hook management for popular plugins such as Backpacks and kits. API void EMCreateEvent(string eventName, bool automatic_start, bool stripItems, bool leaves_event_on_death, bool full_health_on_join, bool give_items_back_on_respawn, bool full_metabolism_on_join, Vector3 teleport_destination) Creates the event and allows the developer to specify the settings: eventName: the name of the event. this.Name is recommended. automatic_start: enrolls the event to be scheduled and ran by EventHelper. stripItems: strips the players items and stores them in the data file. Items will be returned upon leaving the event, or when they respawn after they have left the event unless give_items_back_on_respawn is set to false. leaves_event_on_death: Kicks the player from the event when they die. full_health_on_join: Stores the players health into the data file and sets their health to max. give_items_back_on_join: Gives the players items back when they leave the event, or when they respawn after leaving the event. If set to false, they will need to use the /recoveritems command to get their items back.This is useful if a server is running plugins such as kits, which wipes the players inventory to give the player a kit. full_metabolism_on_join: Saves and restores the players metabolism before and after a game. teleport_destination: The location that a player will teleport to when joining the game. Set to Vector3.new if you do not want them to teleport. void EMExternalPluginSettings(string eventName, bool canDropBackpack = false, bool canEraseBackpack = false, bool canOpenBackpack = false, bool canBackpackAcceptItem = false, bool canRedeemKit = false, bool CanLoseXP= false) Sets up the external plugin settings for the event. eventName: The registered name of the event. canDropBackpack: Backpack plugin. canEraseBackpack: Backpack plugin. canOpenBackpack: Backpack plugin. canBackpackAcceptItem: Backpack plugin. canRedeemKit: Can the player redeem kits. CanLoseXP: Can the player lose xp when dying in the game. void EMBlackListCommands(string eventName, string[] commands) Use to submit a list of commands that cannot be run while at the event. void EMRemoveEvent(string eventName) Removes the event from EventHelper. This will automatically trigger the EMPlayerLeaveEvent hook for each player if the event is active. void EMManuallyStarted(string eventName) Flags the event as manually started, preventing it from being run automatically if opting in for automatic_start. void EMUpdateLobby(string eventName, Vector3 pos) Allows you to update the lobby destination after an event has been created. void EMStartEvent(string eventName) Triggers an event to start. Marks the event as running so it can be used with the EMEndEvent hook. Call this when you want the game to start. void EMEndEvent(string eventName) Triggers the event to end. Goes through each participant and calls EMPlayerLeaveEvent on them before clearing the participants. Also resets manually_started to false and triggers the EMEndGame hook. bool EMEnrollPlayer(BasePlayer player, string eventName) Enrolls a player into the event. Follows the instructions of the EMCreateEvent settings by stripping items, setting health and metabolisms, as well as teleporting the player to the arena. Also checks for crafting queues, black listed items and escape blocks. Returns true if the player was enrolled successfully. void EMPlayerLeaveEvent(BasePlayer player, string eventName = null) Removes the player from the event. Strips the items that they have received from the event, then optionally restores their previous items, teleports them to the location that they were at prior to joining, sets their health and their metabolism etc, or will tell them that they need to use the command in order to get their inventory back. bool EMIsParticipating(BasePlayer player, string eventName) Returns true if a player is participating in an event (using the participants list associated with the event itself). bool EMAtEvent(ulong id) Returns true if a player is at an event (using the playerdata records). bool AddBan(BasePlayer player, string event_name) Bans the player from the specified event. bool RemoveBan(BasePlayer player, string event_name) Unbans the player from the specified event. Hooks void EMEndGame(string eventName) Is called when the game ends. Chat commands ehban <target name/id> - bans the player from all events globally. ehunban <target name/id> - unbans the player from all events globally.Free -
Version 1.0.9
12 downloads
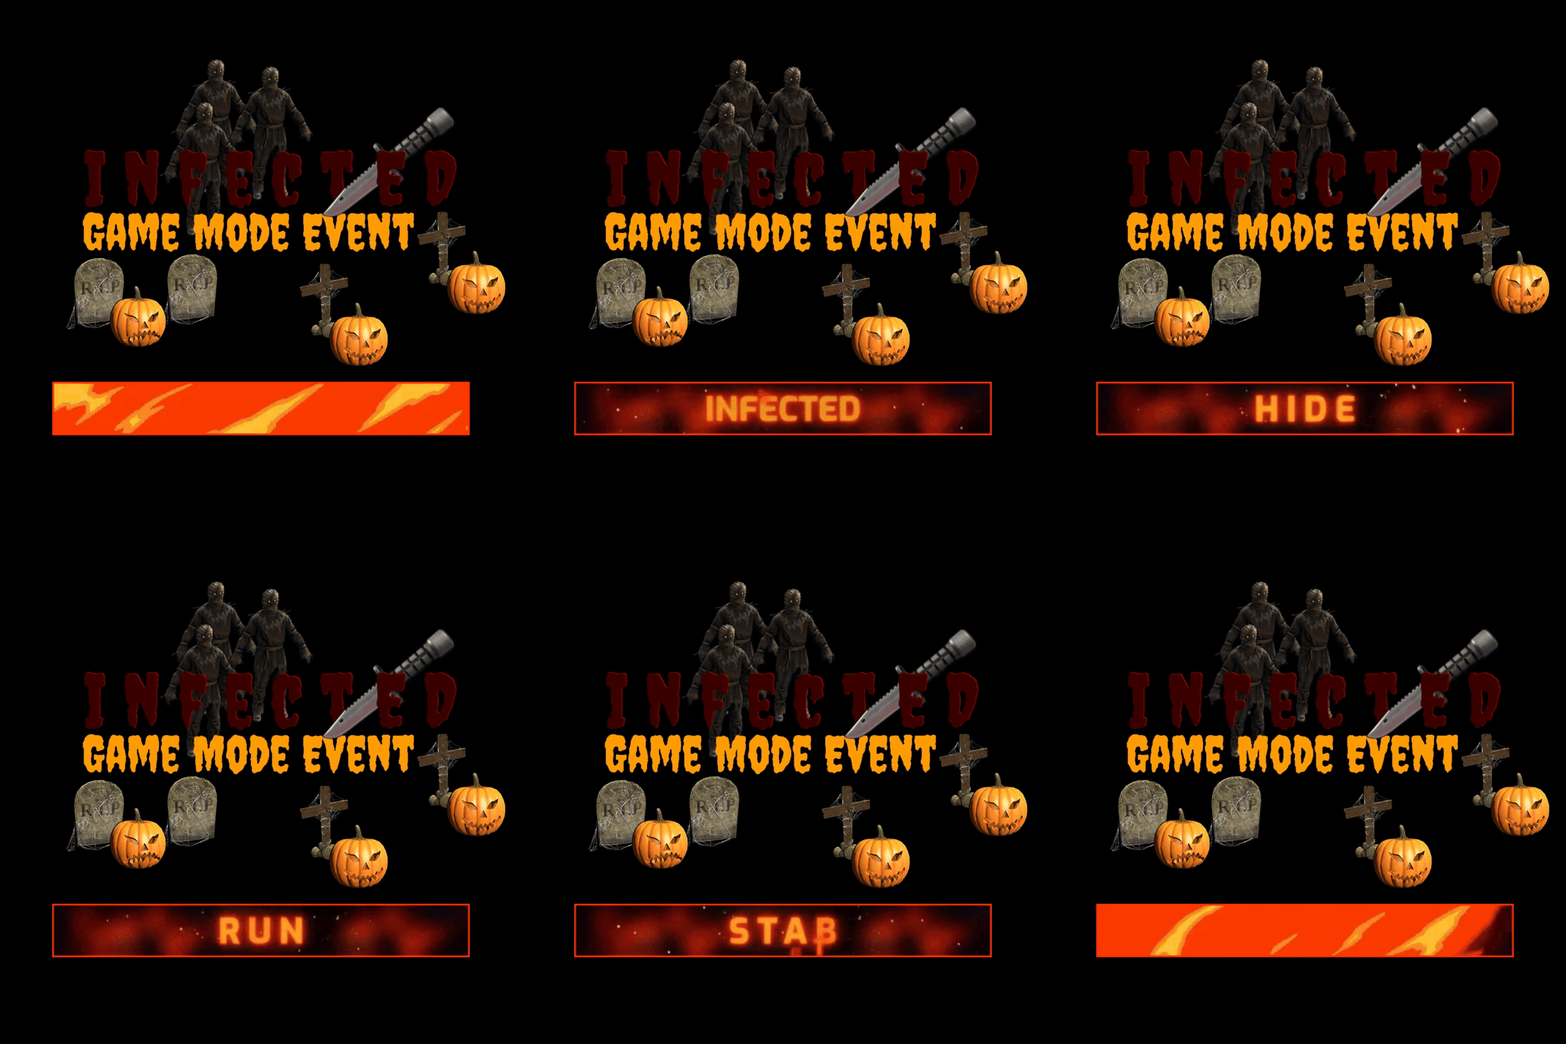
Infected Infected Style PVP Game Mode Event Demo Arena and Custom Arenas This plugin includes one spooky Halloween themed demo arena as seen in pictures. You can use this plugin with your own arena prefabs or by building a custom arena and setting the teleport location to your current position with a command. How the Infected game works Players are teleported to the arena naked and spread out to hide. One random player is automatically selected to be the first Infected. The Infected player gets an Infected Knife and must try to stab the remaining players. Each player who is stabbed will become Infected and will also get a knife. When there is only one player left who IS NOT infected, they get a gun to defend against the army of Infected for the final round. Infected players are one-shot to kill. Infected players respawn until the final round timer is over. If the survivor lasts until the end, they win the final round. Set how much ammo the last survivor player starts with. Set how much ammo the last survivor player gets per elimination. Use your shots wisely or risk running out of ammo. Optionally switch the mode in the configuration for the final round so the survivor can win by eliminating the infected. Features Build your own area - You can either build an arena or use a suitable prefab. Set the teleport location to your arena using a command. Use commands to set up arena teleports and Spectator teleports to your current location. Choose max game length, minimum players, time for registration period (joining). Set a custom display name and skin for your Infected Knife Choose a weapon and ammo for the last player alive to defend with. You can also skin the weapon. Command to set teleport position for spectator area and game area. Players are teleported to the spectator area location before the event starts (pre-game lobby) and when they are eliminated by the last player. Command: /spectatepos Players are teleported to the game area location when the game is about to begin. Command: /gamepos The spectator area should not allow players to jump in or reach the game area. The game area is where the players are playing the game and should be closed in. Command for admins to start the event and open registration: /startinfected. Command for players to join the event during registration: /infected. Language file for easy message customization. Includes 2 custom Skin IDs for combat knife and semi pistol. Notes You can throw your knife as infected and no one can pick it up. It will be automatically returned. Your inventory will be copied and cleared when you join the event, and returned after the event ends. Your arena must be fully contained so players can not escape and must have a separate contained spectator zone that can optionally overlook the main arena. Get creative and design an arena with lots of good hiding spots. Permissions infected.join - Required to join the event with command /infected. infected.start - Required to start the event with command /startinfected and required to use /gamepos and /spectatepos. This permission is intended for admins only. infected.debug - Required to use debugging command to spawn event items. Chat Commands /infected - Register for the event and teleport to lobby (Spectator area). Requires permission: infected.join. /startinfected - Open event registration and start event. Requires permission: infected.start. /gamepos - Set location for game teleport to your currently location. Requires permission: infected.start. /spectatepos - Set location for spectator/lobby teleport to your currently location. Requires permission: infected.start. /giveknife <player> - Give infected knife to player. Requires permission infected.debug. /spawninfected - Spawn infected knife, outfit, and defender's weapon items for debugging/testing. Requires permission infected.debug. Console Commands /startinfected - Open event registration and start event. Configuration { "Amount of time in seconds for event registration": 180, "Amount of time in seconds for game starting warning": 30, "Amount of time in seconds final round lasts before surviving player wins (RespawnInfected mode)": 180, "Minimum number of registered players required to start the game. Minimum = 3.": 3, "Respawn Infected players in the final round": true, "Respawn delay in seconds for Infected players in the final round": 5, "Knife Display Name": "Infected Knife", "Knife Skin ID": 3572376476, "Infected Outfit Item Shortname": "scarecrow.suit", "Weapon shortname for last player alive in bonus round": "pistol.semiauto", "Bonus Round Weapon Display Name": "Survivor's Gun", "Bonus Round Weapon Skin ID": 3572869503, "Ammo shortname for last player alive in bonus round": "ammo.pistol", "Amount of ammo last player alive in bonus round starts with": 3, "Amount of ammo last player alive in bonus round gets per elimination": 1, "Block teleporting with NTeleportation plugin during game": true, "Position to teleport players on game start (X)": 0.0, "Position to teleport players on game start (Y)": 0.0, "Position to teleport players on game start (Z)": 0.0, "Position to teleport players on pre-game lobby and spectate (X)": 0.0, "Position to teleport players on pre-game lobby and spectate (Y)": 0.0, "Position to teleport players on pre-game lobby and spectate (Z)": 0.0, } Configuration Notes Configuration property Infected Outfit Item Shortname must be a single item only. Good items to use for Infected outfits include scarescrow.suit, jumpsuit.waterwellnpc, pumpkin, or any hazmat suit. Halloween Arena The Halloween Arena is a Copy Paste data file. To use the Halloween Arena you must download Copy Paste by Misticos here and upload the arena_halloween.json file to your your server framework folder (oxide/carbon)/data/copypaste/arena_halloween.json. Paste the arena in-game using the command /paste arena_halloween. If you need to, you can adjust the height with /paste arena_halloween height 50 (to paste it in the air). Use the command /gamepos to set where players spawn in the arena and use /spectatepos to set where players spawn in the pre-game lobby and when spectating. Support Discord Click here for Discord support$30.00 -
Version 1.1.4
19 downloads
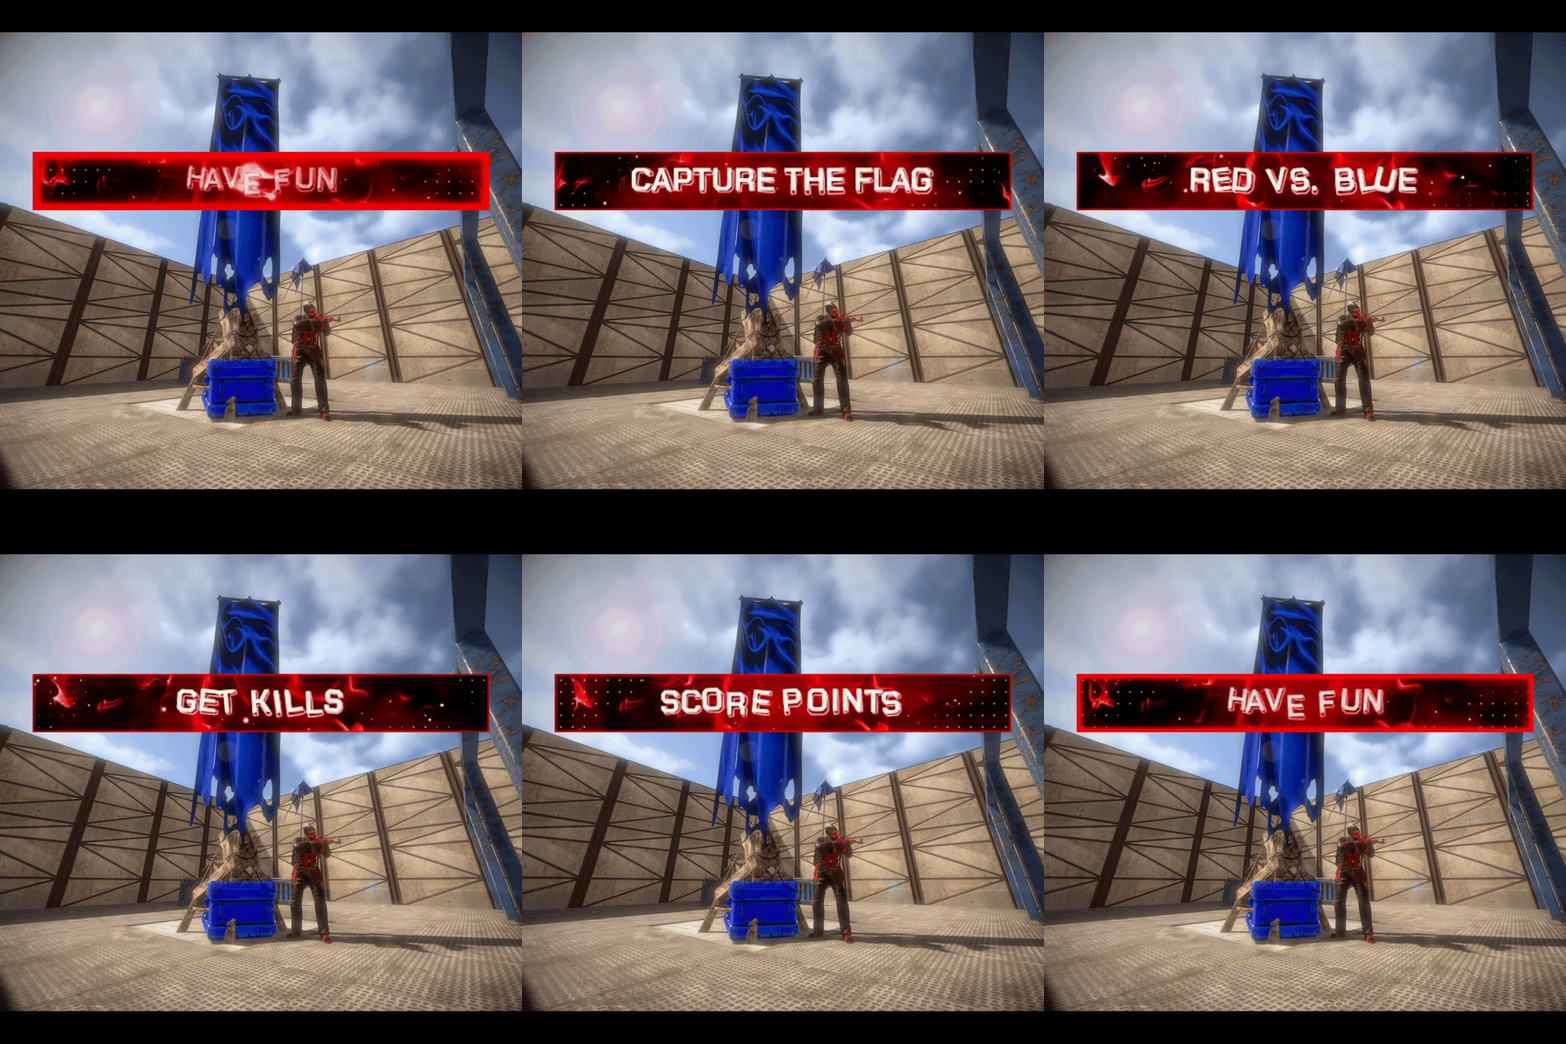
Capture The Flag Classic Capture The Flag game mode event where Red and Blue teams compete to capture each others flag and reach the score limit first. Dependencies The following plugins are required for Capture The Flag. ImageLibrary by k1lly0u - Required (Free) Rust Kits by k1lly0u - Required (Free) This plugin does not include pre-configured kits. You can choose what to give as a kit in the configuration. Features How Capture The Flag works: Each team spawns on the opposite side of the map. You could make the spawns anywhere but this is ideal for Capture The Flag. Red team players get a red kit and Blue team players get a blue kit. Make sure you set your kit skins. Each team must work their way to the opposite side of the map and retrieve the Flag item from the other team's flag box (which is a wearable backpack flag that makes a giant flag stick out from your player). Once the enemies flag is picked up you must return it safely to your team's flag box to score a point. Remember it is in your backpack slot and must be placed in your box to score a point. When you kill an enemy who has your flag and they drop it, you can press 'e' or interact with it to return it to your flag spawn automatically. When you don't return your own flag once it's been dropped by an enemy the other team can pick it up again in the same spot it was dropped. The game ends when one team reaches the score limit first. Three demo arenas included. As seen in images (small stone and jungle arenas, large sheet metal arena). These are Copy Paste files. Build your own custom arena: You can build a custom arena in-game or use an arena prefab and set the location where the game starts with commands. Use the commands /flag red, /flag blue, /spawnpoint red, /spawnpoint blue, and /spawnpoint spectate to set the teleport locations for the game to your arena. Location settings can be saved and loaded using the arena profile command. Lots of configurable options and an editable language file for in-game message customization. Customize your game settings including: Time limit for event registration Time limit for game (or disable by setting to 0). Number of flag captures (points) required to win. Minimum number of players required to start event. Choose if players get instant full health when they get a kill. Respawn Cooldown in seconds to delay a player respawning after they die. Respawn Protection period to prevent spawn killing. Increase or decrease randomized distance from spawn point to teleport players. Optional temporary Team UI with save and restore original team UI after the game. Works with vanilla teams only. Blocked command list to prevent players from using commands during the game. Choose kit name for Red and Blue teams to spawn with. Make sure you skin your kits red and blue! Choose kit for ammo and med restock when a player gets a kill. Choose skin ID for Red and Blue Flag boxes. Required. Choose background images for Red and Blue Flag Banners. More Features: Command for players to join event when registration opens. Chat command and console command to start event registration. Visible flag on player's back. (Color can not be changed). No friendly fire (no team damage). Chat notifications to participating players for events like kills, flag pickups, flag drops, captures. Scoreboard (sorted by kills) in chat at the end of the event with player names, kills, and captures. If you knock a player and they f1 kill it will count as a kill for the person who knocked them. Developer API hook OnGameWin to notify you when a game has been won along with the statistics. Good for rewards and score keeping. Optional temporary Team UI for players on the same team during the event. They will be returned to their original team after the event (vanilla teams only). Restore player items after the game. (Players are teleported to the event naked). After the event teleport players back to original location from when they joined the event. Player disconnection handling in case anyone leaves during the event. Flag boxes and banners are unbreakable. There are two commands /forceflag red and /forceflag blue for admins to force respawn a flag in it's box if it can't be accessed or glitches through the map. You can't hide the flag in your inventory so player's don't know you have it. It won't let you. You can't remove your team clothing and armor. Players can't pick up their own team's flag (except automatically returning it to spawn when they interact with it if it's dropped on the ground). Admin team change commands to change players teams with a configurable amount of time for team changing before game. Demo Arenas: If you want to use the two demo arenas that come with the plugin as seen in the images you will need: Copy Paste by misticos (https://umod.org/plugins/copy-paste) Skins: If you don't have a plugin to skin items already: Skins by misticos (https://umod.org/plugins/skins) Check out Steam Workshop for free skins for Rust. Permissions capturetheflag.join - Required to use /ctf command to join event. capturetheflag.admin - Required to use event management and setup commands. Chat Commands Join, start, stop event: /ctf - Command for players to join event during registration. Requires permission capturetheflag.join. /ctf start - Command for admins to start the event registration. Requires permission capturetheflag.admin. Optionally, you can also use /ctf start <profile name> to start a specific arena profile if you have any saved. /ctf stop - Command for admins to stop the event in progress. Requires permission capturetheflag.admin. Set flag locations: /flag red - Set location for Red Flag Spawn to where you are standing and which direction you are facing. Requires permission capturetheflag.admin. /flag blue - Set location for Blue Flag Spawn to where you are standing and which direction you are facing. Requires permission capturetheflag.admin. Set spawn locations: /spawnpoint red - Set location for Red Team Player Spawn to where you are standing. Requires permission capturetheflag.admin. /spawnpoint blue - Set location for Blue Team Player Spawn to where you are standing. Requires permission capturetheflag.admin. /spawnpoint spectate - Set location for pre-game lobby and spectator zone to where you are standing. Requires permission capturetheflag.admin. Team management: /team swap <player1> <player2> - Swap two players teams during the team swapping period. Requires permission capturetheflag.admin. /team red <player> - Force blue team player to join red team during team swapping period. Requires permission capturetheflag.admin. /team blue <player> - Force red team player to join blue team during team swapping period. Requires permission capturetheflag.admin Arena profiles (optional): /arena save <name> - Save current arena configuration to an arena profile. Requires permission capturetheflag.admin. /arena load <name> - Load arena configuration from an arena profile. Requires permission capturetheflag.admin Keep in mind you can also use /ctf start <profile name> to load and start a specific profile. /arena list - List saved arenas. Requires permission capturetheflag.admin. /arena option <name> <option> <value> - Change arena gameplay settings for a specific arena. Requires permission capturetheflag.admin. /arena show <name> - Display current settings for an arena profile. Requires permission capturetheflag.admin. Force flag respawn: /forceflag red - Force add a Red Flag to the Red Team's flag box. Requires permission capturetheflag.admin. /forceflag blue - Force add a Blue Flag to the Red Team's flag box. Requires permission capturetheflag.admin. Console Commands ctf start - Command for admins to start the event registration. ctf start <arena profile> - Command for admins to load an arena profile and start event registration. ctf stop - Command for admins to start the event registration. Configuration { "Amount of time in seconds for event registration": 180, "Amount of time in seconds before game ends for taking too long (0 to disable)": 1800, "Number of flag captures a team must get to win the game": 3, "Minimum number of players required to start the game": 2, "Maximum number of players before registration closes": 20, "Cooldown in seconds for respawning during game": 10, "Amount of time in seconds player will be invincible after spawning": 3, "Maximum distance from team spawn point player can spawn within": 4.0, "Grant player instant full health when they get a kill": true, "Amount of time in seconds between registration end and event start (for admin team swapping)": 15, "Create a temporary Team UI for players and restore vanilla teams after the game": false, "Blocked command list for players during game": [ "home", "outpost" ], "Red Team kit name": "red team", "Blue Team kit name": "blue team", "Ammo Restock and Meds on kill kit name": "restock ammo", "Red Flag Box Skin ID": 2133043744, "Blue Flag Box Skin ID": 2918303257, "Red Team Banner Flag background image link": "https://i.ibb.co/zhvx1xHZ/flagred.jpg", "Blue Team Banner Flag background image link": "https://i.ibb.co/dJKxLjZ5/flagblue.jpg", "Position to teleport players on pre-game lobby and spectate (X)": 0.0, "Position to teleport players on pre-game lobby and spectate (Y)": 0.0, "Position to teleport players on pre-game lobby and spectate (Z)": 0.0, "Red flag position (X)": 0.0, "Red flag position (Y)": 0.0, "Red flag position (Z)": 0.0, "Blue flag position (X)": 0.0, "Blue flag position (Y)": 0.0, "Blue flag position (Z)": 0.0, "Red flag facing position (X)": 0.0, "Red flag facing position (Y)": 0.0, "Red flag facing position (Z)": 0.0, "Blue flag facing position (X)": 0.0, "Blue flag facing position (Y)": 0.0, "Blue flag facing position (Z)": 0.0, "Red team spawn position (X)": 0.0, "Red team spawn position (Y)": 0.0, "Red team spawn position (Z)": 0.0, "Blue team spawn position (X)": 0.0, "Blue team spawn position (Y)": 0.0, "Blue team spawn position (Z)": 0.0 } Arena Profiles (optional): Save your arena settings and load them later. If you have multiple arenas on your map you can save your current arena configuration to an arena profile and load it when you need it. Use the /arena commands to manage your arena profiles. An arena profile contains player spawn locations and flag spawn locations and gameplay settings. What is an arena profile? Arena profiles are optional and are not required. They are used to make setting up games easier when you have multiple arenas on your map. Use arena profiles to save arena and game settings from your current configuration to a named profile that you can load back to your configuration when needed. This lets you configure multiple arenas on your map with different settings, and swap between them when you need to with one command. How do I create an arena profile? First, set up your /flag and /spawnpoint locations. Save your current config to an arena profile using the command /arena save <profile name>. Edit additional arena gameplay options using /arena option <profile name>. Load the arena with /arena load <profile name> when you need it. This will copy the arena profile to your current configuration. How do I edit an existing arena profile? Updating player and flag spawn points: Load the arena profile you want to edit. Use the commands /flag and /spawnpoint to set update teleport locations in your current configuration. Using the same saved profile name with /arena save, save the current configuration to the arena profile so the teleport locations are updated and your current profile options are still saved. Updating arena gameplay options: Save your arena profile after you set up the spawn points, then use the command /arena option to change your settings. Reload the arena profile to apply the updated profile to your current configuration. What arena gameplay options can I edit on the arena profile? You can use the /arena option command to modify: CapturesToWin MaxPlayers RespawnDelay RespawnProtection RespawnMaxDistance RedTeamKit BlueTeamKit AmmoRestockKit In case you want to have different settings per arena. Here's an example: /arena option <profile name> CapturesToWin 5. Included Arenas The included arenas are Copy Paste data files. To use the arenas you must download Copy Paste by Misticos here and upload the ctf_stone.json file to your your server framework folder (oxide/carbon)/data/copypaste/ctf_stone.json. Paste the arena in-game using the command /paste ctf_stone. If you need to, you can adjust the height with /paste ctf_stone height 50 (to paste it in the air). Use the available commands to set the flag spawns and teleport locations. Developer API Hooks void OnGameWin(string winningTeam, List<ulong> redTeamPlayers, List<ulong> blueTeamPlayers, Dictionary<ulong, int> playerKills, Dictionary<ulong, int> playerCaptures) - Called when a game is won. Good for rewards and score keeping. Support and Configuration Help Discord For support or for questions about the plugin before you purchase reach out on Codefling or visit the support Discord for my plugins here: https://discord.gg/25sR5EZktP Gameplay Video Turn the video to 1080p if it's blurry!$30.00- 4 comments
-
- 1
-

-
- #capture the flag
- #ctf
- (and 9 more)
-
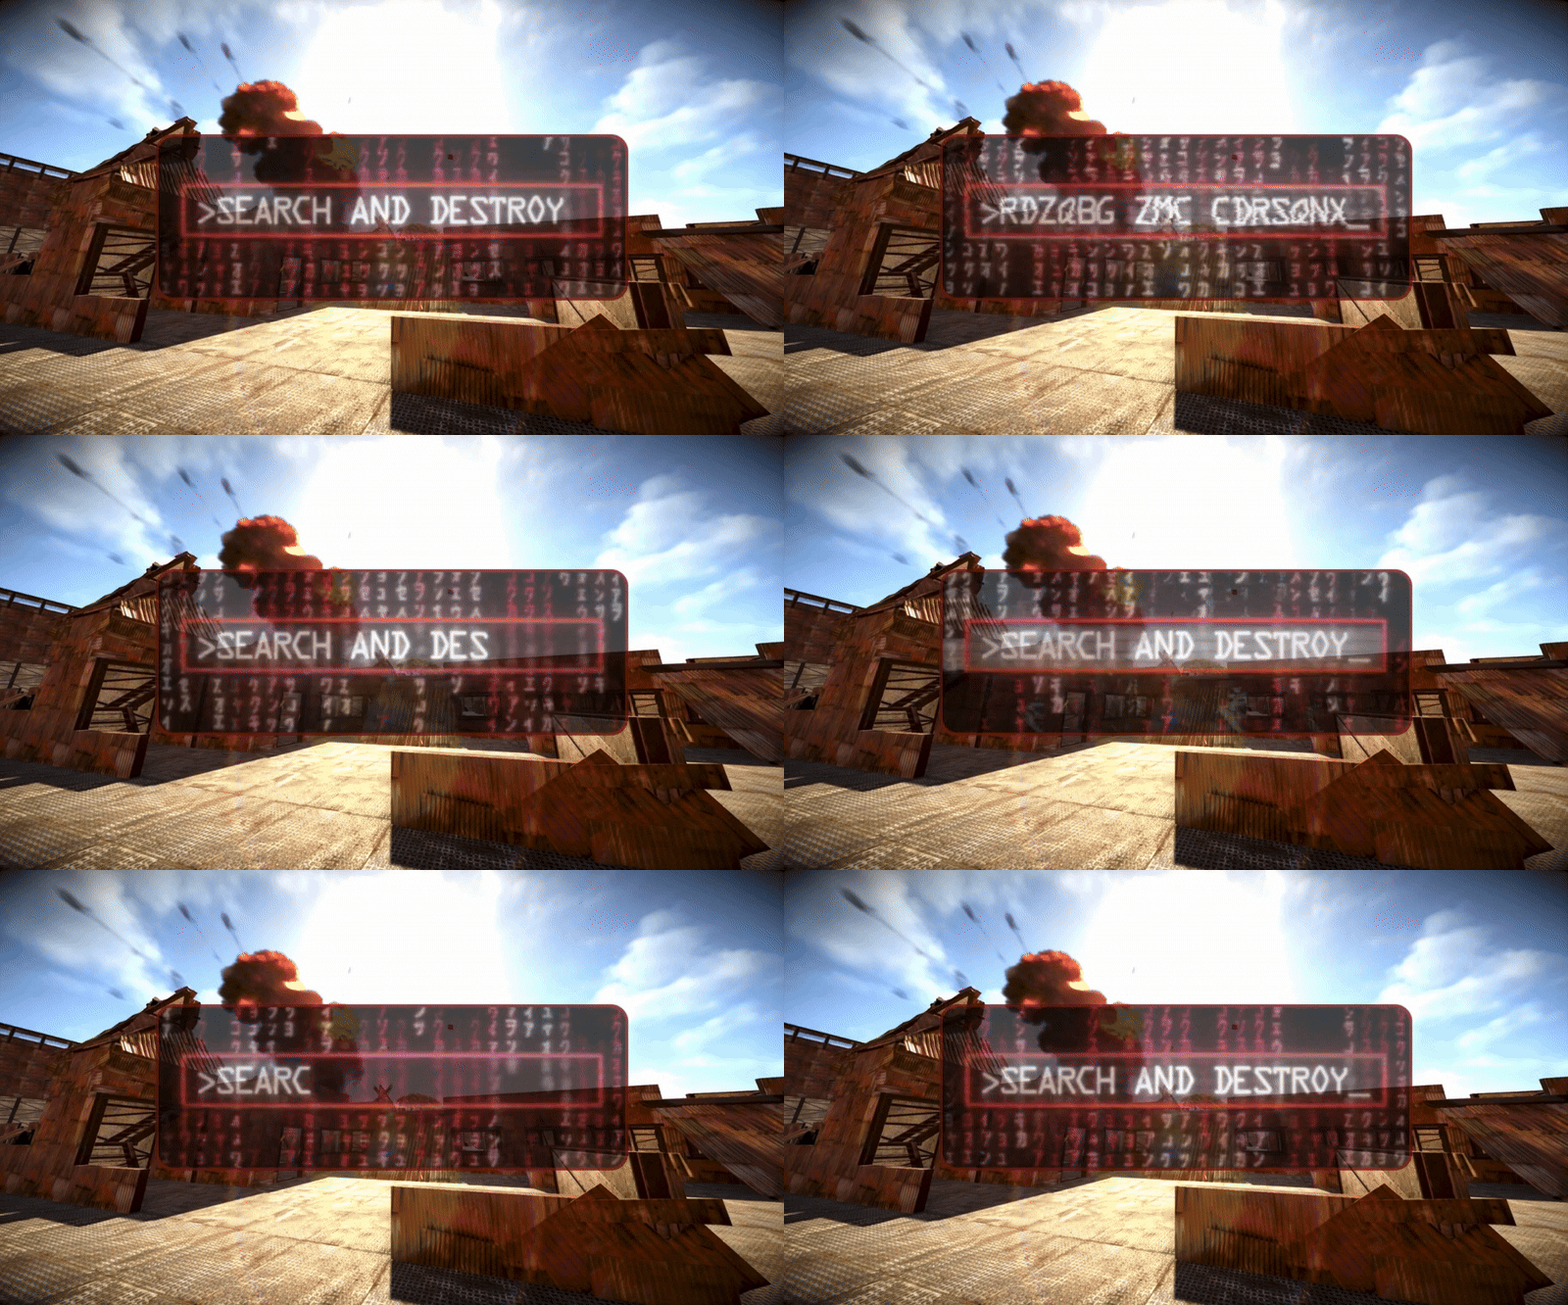
Version 1.0.3
18 downloads
Search And Destroy Search and Destroy Classic PVP Game Mode Event. 2 in 1: Respawn or No Respawn. Features How Search and Destroy works: Each team spawns on the opposite side of the arena. Both teams must locate the bomb sites. Each round one team defends and one team is the attacker, the objectives switch each round or halfway through depending on your configuration. The attackers can plant the bomb at a bomb site to start the countdown. If the bomb detonates before the defender team defuses it the attackers win the round. If the defenders prevent the attackers from planting, or defuse the bomb before it explodes they win the round. The game ends when one team reaches the score limit first. Choose if players respawn until the round time limit is reached or if players have one life per round so you can also win the round by eliminating the other team. Choose if anyone on the attacking team can plant the bomb or if one bomb spawns on the ground that someone from the attacking team must pick up to plant at the bomb site. Edit your game settings for a faster or slower paced game! Three demo arenas included as seen in images. These are Copy Paste files. Build your own custom arena: You can build a custom arena in-game or use an arena prefab and set the location where the game starts with commands. Use the commands /bomb 1, /bomb 2, /setspawn red, /setspawn blue, and /setspawn spectate to set the teleport locations for the game to your arena. Location settings can be saved and loaded using the arena profile command. Lots of configurable options and an editable language file for in-game message customization. Customize your game settings including: Time limit for event registration. Time limit per round if bomb is not planted. Choose if players respawn until the round time limit is reached or if they have one life per round. Choose optional respawn delay timer. Choose optional spawn protection timer. Choose how often sides switch. Choose if all attacking team players can plant bomb or if only one bomb spawns on the ground for the attackers to plant. Choose duration of bomb timer. Choose number of points points required to win. Choose if there are one or two bomb sites. Choose length of bomb plant code. Choose length of bomb defuse code. Minimum number of players required to start event. Maximum number of players required to start event. Choose if players get instant full health when they get a kill. Choose if players can team kill. Increase or decrease randomized distance from spawn point to teleport players. Optional temporary Team UI with save and restore original team UI after the game. Works with vanilla teams only. Blocked command list to prevent players from using commands during the game. Choose kit name for Red and Blue teams to spawn with. Choose kit for ammo and med restock when a player gets a kill. Configure skin ID for bomb site object (fridge). Required. Configure skin ID for ground bomb item (satchel). Required. More Features: GUI with random code for planting and defusing the bomb. Command for players to join event when registration opens. Chat command and console command to start event registration. If enabled, bomb item spawns in front of attacking teams spawn. One player can pick it up and it is required to plant the bomb at the bomb site. If they die with the bomb it will drop and only the attacking team can pick it up. Bomb ticking noise near bomb that speeds up in the last five seconds. Chat notifications to participating players for events like kills, bomb plants, etc. Scoreboard (sorted by kills) in chat at the end of the event with player names, kills, deaths, plants, and defuses. If you knock a player and they f1 kill it will count as a kill for the person who knocked them. Developer API hook OnGameWin to notify you when a game has been won along with the statistics. Good for rewards and score keeping. Optional temporary Team UI for players on the same team during the event. They will be returned to their original team after the event (vanilla teams only). Restore player items after the game. (Players are teleported to the event naked). After the event teleport players back to original location from when they joined the event. Player disconnection handling in case anyone leaves during the event. Bomb object is unbreakable during the event. You can't remove your team clothing and armor. No looting bodies or knocked players. Admin team change commands to change players teams with a configurable amount of time for team changing before game. Yes, the bomb explodes. Demo Arenas: If you want to use the three demo arenas that come with the plugin as seen in the images you will need: Copy Paste by misticos (https://umod.org/plugins/copy-paste) Skins: If you want colored kits and don't have a plugin to skin items already: Skins by misticos (https://umod.org/plugins/skins) Check out Steam Workshop for free skins. Dependencies The following plugin is required for Search And Destroy. Rust Kits by k1lly0u - Required (Free) This plugin does not include pre-configured kits. You can choose what to give as a kit in the configuration. Permissions searchanddestroy.join - Required to use /snd command to join event. searchanddestroy.admin - Required to use event management and setup commands. Chat Commands Join, start, stop event: /snd - Command for players to join event during registration. Requires permission searchanddestroy.join. /snd start - Command for admins to start the event registration. Requires permission searchanddestroy.admin. Optionally, you can also use /snd start <profile name> to start a specific arena profile if you have any saved. /snd stop - Command for admins to stop the event in progress. Requires permission searchanddestroy.admin. Set bomb locations: /bomb 1 - Set location for Bomb 1 to where you are standing Requires permission searchanddestroy.admin. /bomb 2 - Set location for Bomb 2 to where you are standing. Requires permission searchanddestroy.admin. Set spawn locations: /setspawn red - Set location for Red Team Player Spawn to where you are standing. Requires permission searchanddestroy.admin. /setspawn blue - Set location for Blue Team Player Spawn to where you are standing. Requires permission searchanddestroy.admin. /setspawn spectate - Set location for pre-game lobby and spectator zone to where you are standing. Requires permission searchanddestroy.admin. Team management: /sndteam swap <player1> <player2> - Swap two players teams during the team swapping period. Requires permission searchanddestroy.admin. /sndteam red <player> - Force blue team player to join red team during team swapping period. Requires permission searchanddestroy.admin. /sndteam blue <player> - Force red team player to join blue team during team swapping period. Requires permission searchanddestroy.admin Arena profiles (optional): /profile save <name> - Save current arena configuration to an arena profile. Requires permission searchanddestroy.admin. /profile load <name> - Load arena configuration from an arena profile. Requires permission searchanddestroy.admin Keep in mind you can also use /ctf start <profile name> to load and start a specific profile. /profile list - List saved arenas. Requires permission searchanddestroy.admin. /profile option <name> <option> <value> - Change arena gameplay settings for a specific arena. Requires permission searchanddestroy.admin. /profile show <name> - Display current settings for an arena profile. Requires permission searchanddestroy.admin. Console Commands snd start - Start the event. You can use snd start <arena profile> to load and start an arena profile. snd stop - Stop the event. Configuration { "Amount of time in seconds for event registration": 180, "Amount of time in seconds before a round ends for taking too long if bomb is not planted": 300, "Amount of time in seconds between registration end and event start (for admin team swapping)": 15, "First to reach this number of points wins": 4, "Minimum number of players required to start the game": 2, "Maximum number of players before registration closes": 20, "Maximum distance from team spawn point player can spawn within": 4.0, "Length of random code to enter when planting bomb": 10, "Length of random code to enter when defusing bomb": 10, "Duration of bomb timer in seconds": 60, "Use two bomb sites, otherwise use one": true, "Require bomb ground item to plant at bombsite, otherwise anyone on attacking team can plant": true, "Do players respawn until the round time limit is reached or bomb explodes?": false, "Cooldown in seconds for respawning during game": 10, "Amount of time in seconds player will be invincible after spawning": 5, "Can players on the same team kill each other?": false, "Grant player instant full health when they get a kill": false, "Create a temporary Team UI for players and restore vanilla teams after the game": false, "Blocked command list for players during game": [ "home", "outpost" ], "Red Team kit name": "red team", "Blue Team kit name": "blue team", "Ammo Restock and Meds on kill kit name": "restock ammo", "Bomb Skin ID (Fridge)": 3484089384, "Bomb ground item Skin ID (Satchel)": 2921225770, "Bomb one position (X)": 0.0, "Bomb one position (Y)": 0.0, "Bomb one position (Z)": 0.0, "Bomb two position (X)": 0.0, "Bomb two position (Y)": 0.0, "Bomb two position (Z)": 0.0, "Position to teleport players on pre-game lobby and spectate (X)": 0.0, "Position to teleport players on pre-game lobby and spectate (Y)": 0.0, "Position to teleport players on pre-game lobby and spectate (Z)": 0.0, "Red team spawn position (X)": 0.0, "Red team spawn position (Y)": 0.0, "Red team spawn position (Z)": 0.0, "Blue team spawn position (X)": 0.0, "Blue team spawn position (Y)": 0.0, "Blue team spawn position (Z)": 0.0 } Arena Profiles (optional): Save your arena settings and load them later. If you have multiple arenas on your map you can save your current arena configuration to an arena profile and load it when you need it. Use the /arena commands to manage your arena profiles. An arena profile contains player spawn locations and bomb spawn locations and gameplay settings. What is an arena profile? Arena profiles are optional and are not required. They are used to make setting up games easier when you have multiple arenas on your map. Use arena profiles to save arena and game settings from your current configuration to a named profile that you can load back to your configuration when needed. This lets you configure multiple arenas on your map with different settings, and swap between them when you need to with one command. How do I create an arena profile? First, set up your /bomb and /setspawn locations. Save your current config to an arena profile using the command /profile save <profile name>. Edit additional arena gameplay options using /profile option <profile name>. Load the arena with /profile load <profile name> when you need it. This will copy the arena profile to your current configuration. How do I edit an existing arena profile? Updating player and bomb spawn points: Load the arena profile you want to edit. Use the commands /bomb and /setspawn to set update teleport locations in your current configuration. Using the same saved profile name with /profile save, save the current configuration to the arena profile so the teleport locations are updated and your current profile options are still saved. Updating arena gameplay options: Save your arena profile after you set up the spawn points, then use the command /profile option to change your settings. Reload the arena profile to apply the updated profile to your current configuration. What arena gameplay options can I edit on the arena profile? You can use the /profile option command to modify: PointsToWin MaxPlayers SpawnMaxDistance BombTimer UseTwoBombSites RequireGroundBomb PlayerRespawn RespawnDelay RespawnProtection RedTeamKit BlueTeamKit AmmoRestockKit In case you want to have different settings per arena. Here's an example: /profile option <profile name> PointsToWin 5. Included Arenas The included arenas are Copy Paste data files. To use the arenas you must download Copy Paste by Misticos here and upload the snd_*.json files to your your server framework folder (oxide/carbon)/data/copypaste/snd_stone.json. Paste the arena in-game using the command /paste snd_stone. If you need to, you can adjust the height with /paste ctf_stone height 10 (to paste it in the air). Use the available commands to set the bomb spawns and teleport locations. Developer API Hooks void OnGameWin(string winningTeam, List<ulong> redTeamPlayers, List<ulong> blueTeamPlayers, Dictionary<ulong, int> playerKills, Dictionary<ulong, int> playerDetahs, Dictionary<ulong, int> playerPlants, Dictionary<ulong, int> playerDefuses) - Called when a game is won. Good for rewards and score keeping. Support and Configuration Help Discord For support or for questions about the plugin before you purchase reach out on Codefling or visit the support Discord for my plugins here: https://discord.gg/25sR5EZktP$30.00- 7 comments
-
- 1
-
-
- #search and destroy
- #snd
- (and 10 more)
-
Looking for a experienced developer or group of developers to create a system along with a number of different gamemodes for our upcoming minigames server we are wanting existing popular gamemodes along with new ones that haven’t been seen before if interested in this work feel free to comment or add my discord thank you. Daark#3840