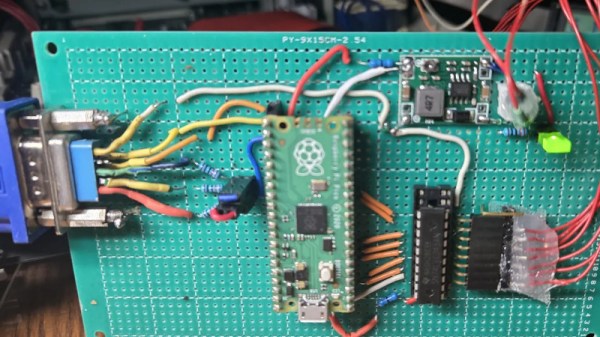
A quick search through AliExpress will find PCBs that take HDMI or VGA and translate them to DSI lanes for TFT panels, and even boards that translate DSI to HDMI in the other direction. Usually they need dedicated silicon or if you’re doing it yourself, an FPGA, but depending on the display that need not be the case. As an example, [Voltage Ventures] has replaced a defective STN display with a more modern one using nothing more complex than a Raspberry Pi Pico.
The display comes as part of a Samsung cash register that looks as though it comes from the 1990s, which is in keeping with it having a monochrome STN display. A replacement was going to cost a fortune, so some way of translating between the two was in order. It has a 4-bit data bus, so there’s a description of how they sampled the bus and identified the timing used. It’s hardly the highest resolution display by today’s standards, being a meager 320 by 240 pixels. Once the format is known it’s a case of transposing it to monochrome VGA in the microcontroller. Initial work was done with an STM series chip, later this was moved to the RP2040.
We like this project, and it’s a reminder that even something broken and old can still be rescued.
Given the modern trend of interconnecting anything and everything, we have no doubt that somebody sells a blood pressure monitor that will push its measurements out to all sorts of cloud services on your behalf. We’re equally sure that doing so requires you to sign up for some new account or service, and that there may even be a subscription cost hiding in there as well.
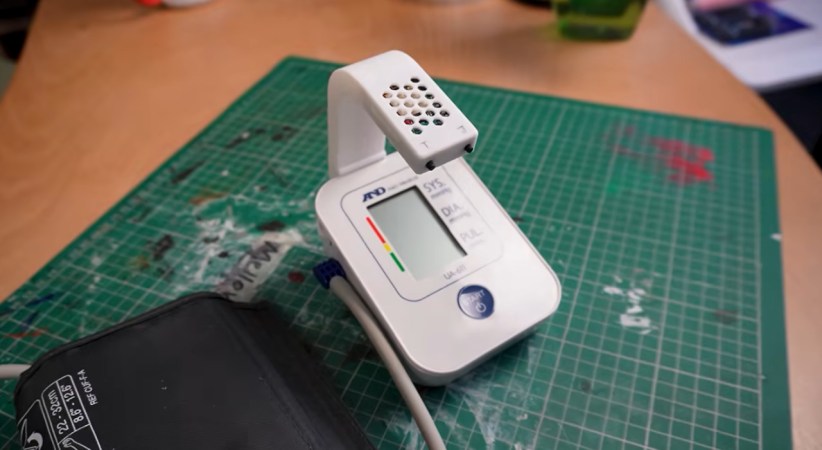
Looking to record his vitals on his own terms, [Tomasz Burzy] set out to modify a basic blood pressure monitor so that it would send its data out over WiFi. He succeeds in the end, but as is so often the case around these parts, the journey ended up being just as interesting as the final destination.
Optically detecting which LCD segments are activated.
His initial idea was to tap into the monitor’s PCB with his logic analyzer. He quickly found a test point that let him pull the raw value from the unit’s pressure sensor, and with a little massaging, he even got some code running that turned that into a fair estimation of his actual blood pressure. But it didn’t quite match what the display showed, and doing some research, he found that these monitors generally employ some unknowable Secret Sauce to derive the final result from the raw data.
Efforts to intercept the final number from the device’s main chip before it was sent off to the display driver were stymied by the fact that it was the display driver. The unit was so well integrated, presumably to drive down the cost, that there was a single IC handling essentially all aspects of its operation. So much for the logic analyzer route.
In the end, [Tomasz] took the nuclear option and used a camera mounted to the top of the unit to pull data off the display optically. But instead of a full-fat computer running some computer vision software, he’s able to pull it off on an ESP32-CAM module. How? Because he knows exactly where each segment of the LCD is, he simply needs to check a set array of coordinates in the camera’s image to see if they are lit up or not. This greatly reduces the complexity of the task, and brings it within the capabilities of the lowly microcontroller.
Although we love the idea of developing hacker-friendly medical devices that give up their data without having to jump through so many hoops, we appreciate the effort [Tomasz] put into this, and think it’s a fantastic example for similar reverse engineering efforts.
You’ve no doubt heard the saying, “If something is worth doing, it’s worth doing well.” But there’s actually a counter-perspective to this particular philosophy that says it’s also worth doing things badly, with the general idea being that even a semi-successful attempt at something is better than no attempt at all.
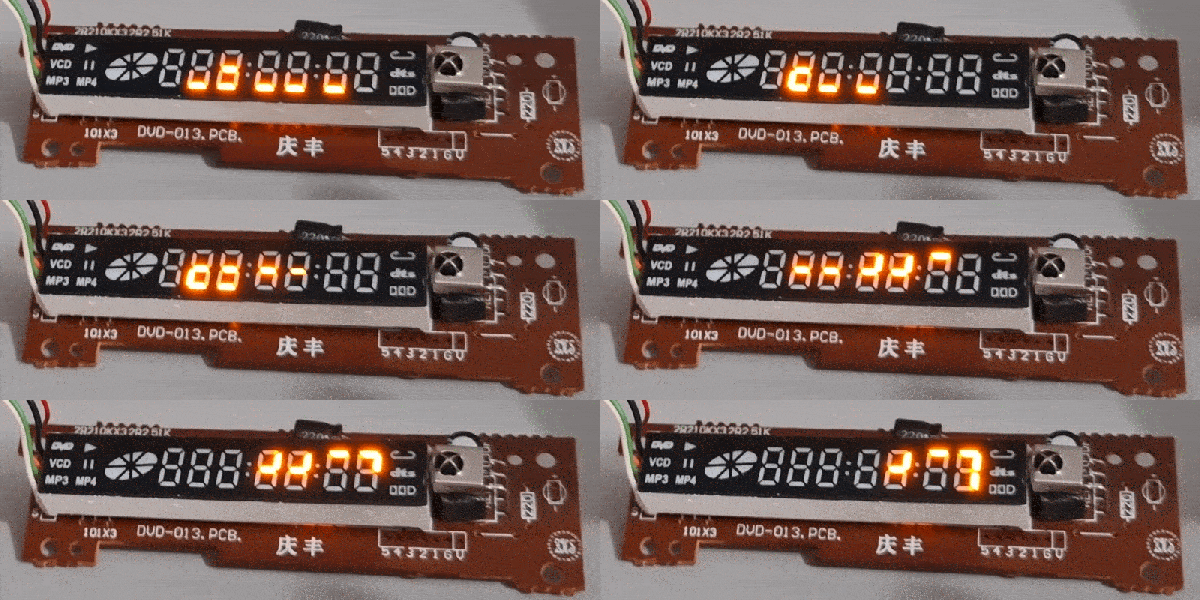
We’re not sure if that’s the principle [José Luis Monteiro] and his father had in mind while working on a way to play the classic Snake on a seven-segment LED display salvaged from an old DVD player, but surely the end result is the same. It’s not so much that the display isn’t a good fit for the eponymous snake, in fact, it actually makes a strange amount of sense. Each of the segments can stand in for a piece of the ever-growing serpent, and they’re already arranged in a roughly rectangular grid that makes moving around straightforward enough.
The issue is that the resolution — such as it is — of the display it pretty unforgiving for anything else. Namely, the “food” that your sake is after is naturally identical to one of its own segments, so it doesn’t take long before it’s all rather confusing visually. But in those brief opening moments, it actually works pretty well.
Even if you’re not interested in Snake, between the documentation, source code, and the video below, this project is a great primer on reverse engineering these types of displays. With a microcontroller, a datasheet, and a bit of patience, you could put together an unattractive and frustrating gameplay experience of your very own! If that’s not the dream, what is?
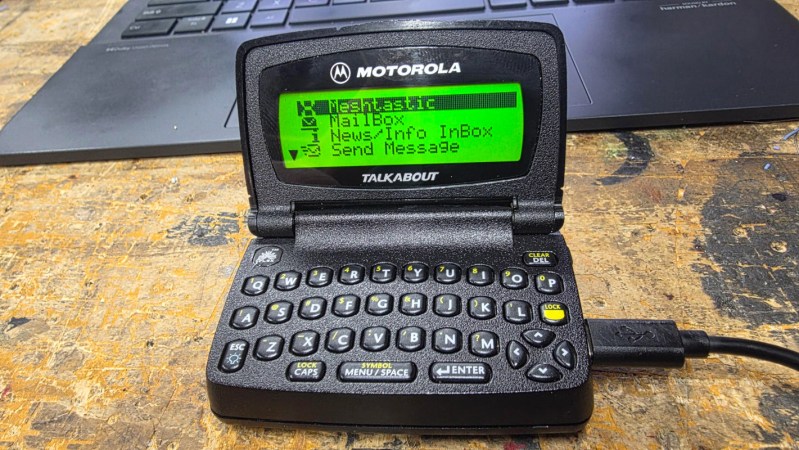
Text messaging has been around on cellular networks en masse for around three decades now. It’s so common that it’s difficult to remember a time without it. Its two-way quick messaging is incredibly useful, but for even simpler communications there’s a one-way system that predates it. Pagers are able to receive simple messages, but outside of hospitals are rarely used nowadays. Eventually some added in two-way communications like this Motorola T900, but they’re still mostly obsolete. That’s why [zindustries87] converted it to operate on the Meshtastic network instead.
To get this pager working, a lot of reverse engineering was needed. There is essentially no documentation on the chips in these devices, so the screen and keyboard both were reverse-engineered to work with other hardware. In this case, [zindustries87] found space for a Heltec V4 with an ESP32-S3, a popular Meshtastic node with a small form factor. Some programming was needed to get everything communicating together, but from the looks of things it seems to have basic functionality.
[zindustries87] points out that this is a prototype, and didn’t know going in if the keyboard and screen could be brought back to life, or if the other hardware would fit in the case. But with it working on this level, they plan to add a number of other features in and possibly build a drop-in PCB replacement for these devices. They were once fairly popular so there are plenty around, and they’re a good form factor for a dedicated Meshtastic device that doesn’t need a smartphone to work. The only other ways of bringing pagers back to life involve bootstrapping an entire pager network, and Meshtastic is a bit more useful than that now.
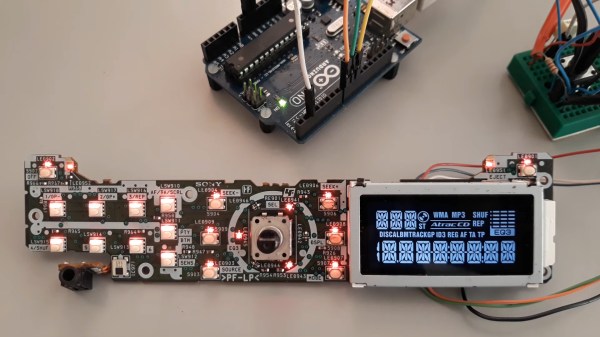
For his own reasons, [Jose Luis Monteiro] (aka [emsyscode]) decided he needed to drive the LCD on a Sony CDX-A250 car stereo’s front panel using an Arduino. There’s probably a sweet project in the works, or perhaps he just wanted to see if it could be done. Either way, more power to [Jose], because he totally pulled it off and put the results up on GitHub for all to enjoy. There’s also a project video showing how he did the reverse-engineering, which you can see below.
The driver for this diminutive LCD is a chip obviously labeled LC75826W, and that’s what the Arduino ends up talking to. Thankfully, there was a datasheet available for that part, which gave [Jose] a great starting point for figuring out how to use it. While [Jose] is working with the LC75826W driver, he’s quite explicit in his GitHub repo that this repository is not a driver library for that chip. The code only targets the specific LCD on the CDX-A250 head unit. Still, if you’ve got a different oddball LCD that uses this driver, [Jose]’s code is a great place to start, and since it’s under an MIT license, you can fork to your heart’s content.
Kudos to Sony for not obfuscating the part or using a chip-on-board black blob — you can reverse-engineer an LCD driven by one of those, but it’s a lot more work. If you’re wondering how and why those black blobs come to be, we’ve got you covered.
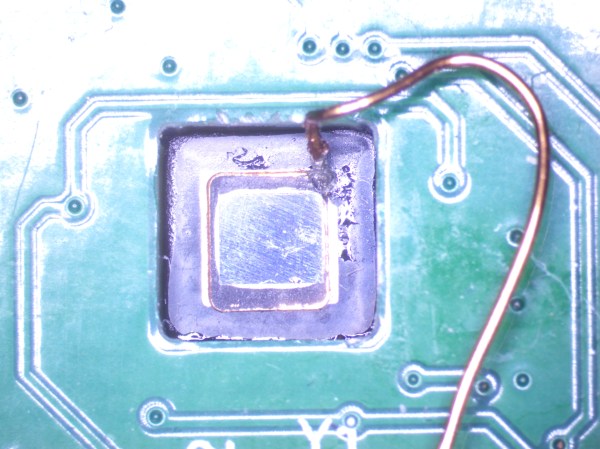
The RP2350 is actually a pretty secure chip, all things considered. It has secure boot, ARMv8’s TrustZone to split secure and non-secure execution, and you can permanently disable debug — the Pi Foundation even included glitch detection, meaning the traditional ‘zap the chip until it obeys’ technique is blocked. That’s why the [Ledger Donjon] security team went full Bond Villain and strapped everyone’s favourite fruit-flavoured microcontroller to a table with a slowly-approaching laser beam.
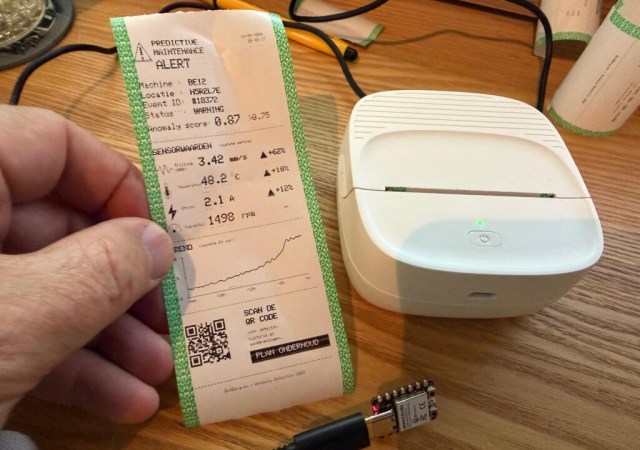
[Bas BotBerg] wanted to use a portable Bluetooth thermal printer to run off reports on sensor data collected by an ESP32-C3 microcontroller. But as is so often the case these days, the only official way to interface with the printer was through a proprietary smartphone application provided by the manufacturer. With no documentation on how the thing works, he set out to reverse engineer the printer’s communications protocol so he could control it from the MCU — but the route he took to get there was a bit different than what we usually see, and is an excellent case study for those who might have similar projects in mind.
The standard procedure for something like this, if it can be called that, is to use Android’s built-in debugging capability to log Bluetooth communications while running the manufacturer’s application. The resulting file can be fed into Wireshark, and with patience and some educated guesses, you can usually work out the various commands and values that get passed to the hardware.
But in this case, [Bas BotBerg] ignored the manufacturer’s software and instead used an application that can query a device and list its Bluetooth Low Energy services and characteristics. Specifically, he looks for services that are marked as writable, and starts pushing data into them to see how the printer responds. For this he uses Python with the Bleak library, as it allows him to rapidly iterate and adapt his code. After a bit of poking and experimentation, he finds the proper incantation to get the printer’s motor to kick on and advance the paper — a critical first milestone that tells him he’s on the right path.
Once [Bas BotBerg] mapped out what data needed to be sent to what endpoints to operate the printer in Python, it was a relatively straightforward process to send those same payloads using C++ code on the ESP32. For extra style points he also brought in the Adafruit GFX library so he could produce icons and more easily format the output of the printer.