Update 2014-03: Please see updated blog post for Sublime Text 3.
[toc]
Sublime Text 2 is a very powerful text editor which has gained popularity recently – for good reasons. It is commercial (59 USD). Plenty of power comes from the fact that Sublime has a plug-in framework built in Python. Even though the core app remains closed there exist a vibrant plug-in ecosystem around the editor.
Note: You can try Sublime for free. It simply gives nagging dialog “Please buy” now and then.
Here is my collection of tips how I squeezed more power out of the editor. The tips are written from OSX perspective, but should work fine on Linux and Windows too.
I used to be Aptana Studio (Eclipse) junkie. Even though Sublime does not have all the GUI power of Aptana (e.g. see the end of post here) I have found the current versions of Sublime serving my needs better. The biggest reason for the switch is that Aptana / Eclipse forces folders and files to be encapsulated inside “Eclipse space” to work well.
Sublime is more suitable for work where you work with various open source components which do not follow such rigid order you might find in in-house corporate software. When you need to integrate different tools and projects, Sublime scripting opportunities are more straightforward versus building thousands of lines Java code what could be need with Eclipse.
Note: Don’t write anything about Vim or Eclipse in this paragraph.
Unofficial manual
There exist a third-party maintained manual for Sublime. Especially parts for settings and keyboard shortcuts come very handy.
Add-on manager
Install Sublime Package Control. You need run this in order to install any Sublime Text plug-ins. It magically pulls plug-ins from thin air (or GitHub).
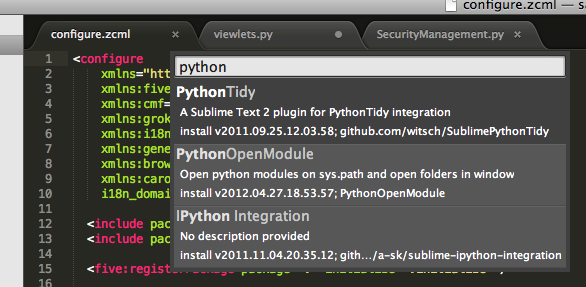
After Package Control has been installed you can add new packages with CMD + SHIFT + P, search Package Install. It has context sensitive search and you can find all packages by name.
Favorite plug-ins list
Based on the feedback from the blog friends you might want to install the following plug-ins through Sublime Package Control
More about specific plug-ins later.
Open files from command-line
I have the following in my shell .rc file, so I can open files directly from the terminal:
alias subl="'/Applications/Sublime Text 2.app/Contents/SharedSupport/bin/subl'"
alias nano="subl"
export EDITOR="subl"
Note: nice fallback for nano command which comes from the muscle memory sometimes.
Open folders as projects from command-line
You can also open folders in Sublime Text.
Just type e.g.
subl src
… and the whole src/ folder is opened in the Sublime Text project explorer (right hand).
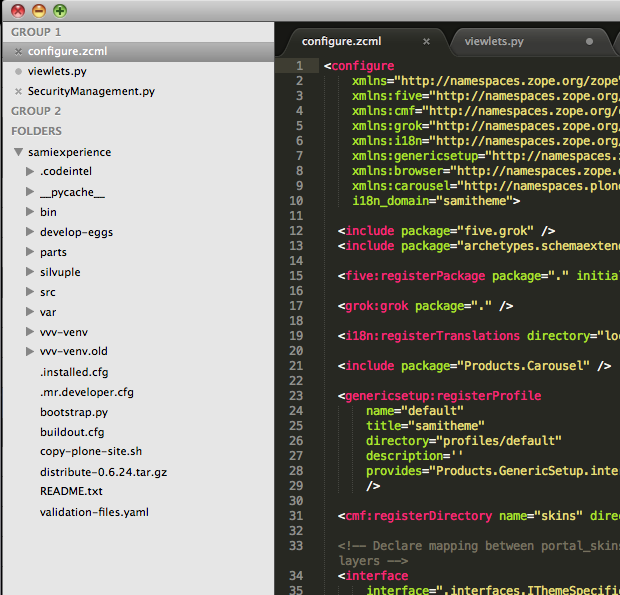
Note: One folder = one project = one window? I am not sure if there are ways to have multiple projects in the same window.
Searching multiple files
First open a folder as a project in Sublime Text 2. You can do this from the command line, as instructed above, or from File > Open menu.
Then right click the folder in the sidebar to search it:
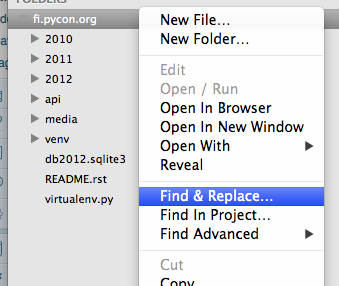
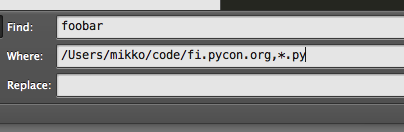
You can also specify a file extension mask as a comma separated in the Where: field.
Configure sane tab and whitespace policy and other settings
Never save your files with hard tabs characters in them. The same goes for trailing whitespaces which are against policy of many programming language style guides.
In the menu Sublime Text 2 > Preferences > File Settings – User drop in this snippet:
// Place user-specific overrides in this file, to ensure they're preserved
// when upgrading. See
// http://docs.sublimetext.info/en/latest/customization/settings.html
// for more info
{

    // Tab and whitespace handling.
    // Indent using spaces, 4 spaces ber indent by default, clean up extra whitespaces on save
    "tab_size": 4,
    "translate_tabs_to_spaces": true,
    "trim_automatic_white_space": true,
    "trim_trailing_white_space_on_save": true,

    // Do not try to detect the tab size from the opened file
    "detect_indentation" : false,

     // Don't do any VIM keybindings or other VIM fanatic sugar
    "ignored_packages": ["Vintage"],

    // Don't complain about plug-in responsive
    // (Too verbose when you have slow computer)
    "detect_slow_plugins": false,

    // http://www.granneman.com/webdev/editors/sublime-text/top-features-of-sublime-text/auto-completion-in-sublime-text/
    // The delay, in ms, before the auto complete window is shown after typing
    "auto_complete_delay": 500,

    // Install better them
    // (You can get this from the package control)
    // https://github.com/buymeasoda/soda-theme/
    "theme": "Soda Dark.sublime-theme",

    // Download better font
    // https://github.com/adobe/Source-Code-Pro

    "font_face" : "Source Code Pro",
     // Don't show hidden (dotted) directories and binary files in the sidebar
    // (You are not going to edit them in any case)
    "file_exclude_patterns": [".*", "*.pyc", "*.pyo", "*.exe", "*.dll", "*.obj","*.o", "*.a", "*.lib", "*.so", "*.dylib", "*.ncb", "*.sdf", "*.suo", "*.pdb", "*.idb", ".DS_Store", "*.class", "*.psd", "*.db"]
}
See more about the settings.
Note: Don’t confuse File Settings – User with Global Settings – User in Preferences menu. The latter doesn’t seem to work.
Note: Even though you configure this policy, Sublime Text 2 may auto-detect another tab_size policy when you open a file. See the explanation below.
Converting existing files to use spaces instead of tabs
Sublime tries to autodetect tab settings settings for every opened file and may fail, so keep your eye on this when working with uncleaned files. You might want to use git pre-commit to prevent committing files with tabs in them.
Do View > Indentation > Convert Indentation to Spaces and make sure Indent using spaces is turned on in the same menu. The new versions of Sublime should remember this setting on file type basis.
There are also config files which you can access from Preferences menu, but after many failed attempts and hacking several config files it did me no good. Maybe autodetect was overriding my simply attempt of never use tab.
Map file formats to syntax highlighting
If you a have a file format you want to recognize under a certain highlighter e.g. map ZCML files to XML highlighter.
Open any file of the format.
Then: View > Syntax > Open all with current extension as… ->[your syntax choice].
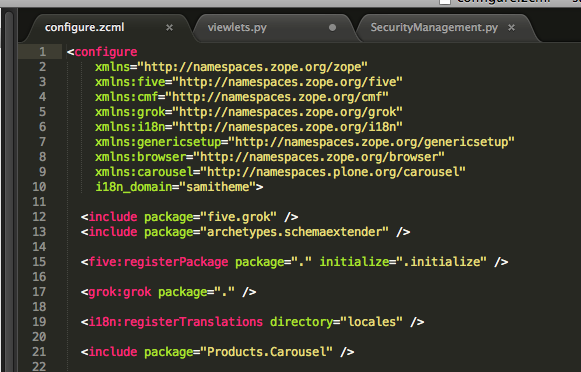
ZCML, now with full color
More info.
Disable automatic loading of the last session
By default, Sublime Text re-opens all files and folders you had when you closed the editor last time. Some people don’t like this.
Instructions to disable automatic session restore for Sublime Text.
Lint and validate your files while typing
SublimeLinter scans your files on the background when typing using validators and linters for various errors. Please see Configuration section in README as you might need to install additional software, like Node.js, to run some of the linters.

Detect mistypes CSS, yay!
SublimeLinter comes with built-in pylint and has Node’s jshint and csslint packages includes
Add CodeIntel autocompletion support
Install CodeIntel from Package Control.
If you are working with Python projects, using buildout, this recipe comes to handy.
[codeintel]
recipe = corneti.recipes.codeintel
eggs = ${instance:eggs}
extra-paths =
    ${omelette:location}
This will generate .codeintel file inside your buildout folder.
CodeIntel plug-in assumes .codeintel file is in your project root. Simply type
subl .
to open your buildout folder as Sublime project folder.
Now Sublime should support auto-completion. E.g. start typing
from zope.interface import <--- Auto completion pops up here

Also, with CodeIntel, ALT + mouse click takes you the source code of import, or the declaration of any function you click.
CodeIntel also supports PHP, Ruby and Javascript, to name few.
Note: If you are not using buildout, or Python, you can always create CodeIntel configuration file in old-fashioned way.
Go to anywhere shortcut
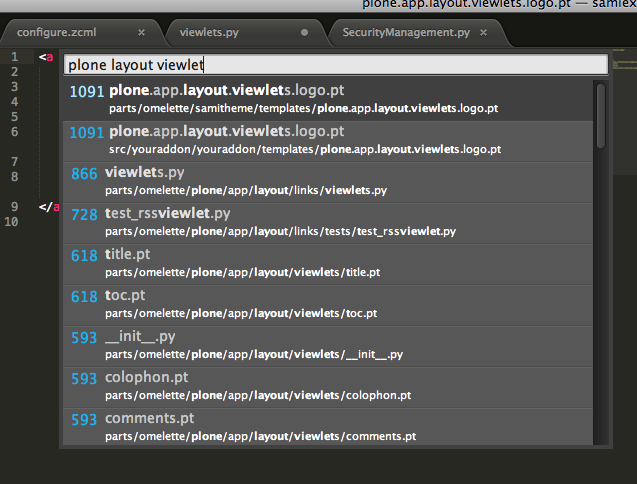
CMD + P. Type in a part of a filename and a part of a function / rule name. You are there. Very powerful, yet so simple feature.
Go to line shortcut
Use Go To Line functionality CTRL+G for more traditional jumps.
Context sensitive in-file search shortcut
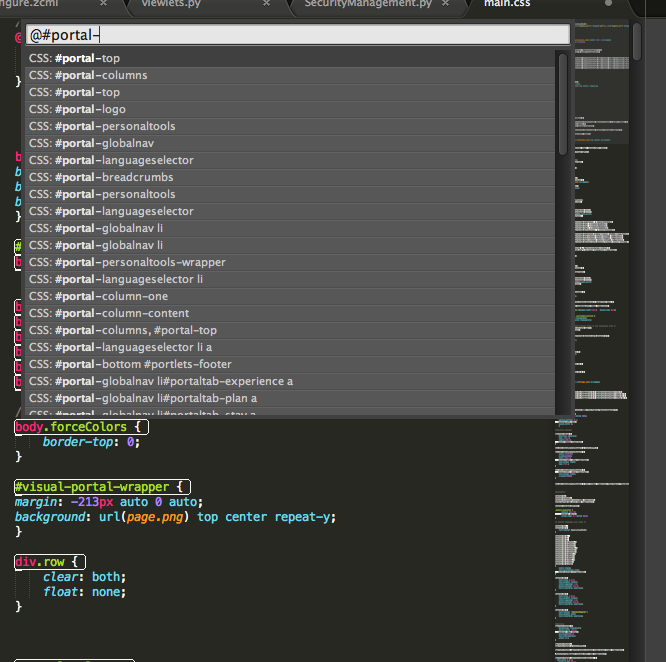
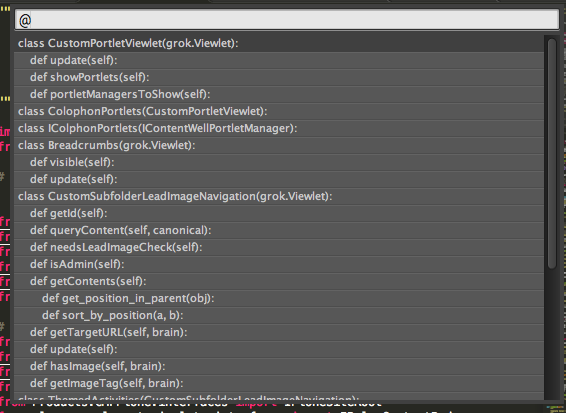
Handy for Javascript, CSS, Python, etc. CMD + R. Type your method or rule name and Sublime automatically jumps into its declaration.
… or in Python …
Edit multiple words or lines simultaneously using multi cursor
This trick is handy if you need to wrap / unwrap stuff in quotes, add commas, add parenthesis etc. on multiple lines or items simulatenously.
First select lines or items. You can select multiple individual words by holding down CMD and double clicking words. For lines you can do just the normal SHIFT selection.
Press SHIFT + CMD + L to activate the multi cursor mode.
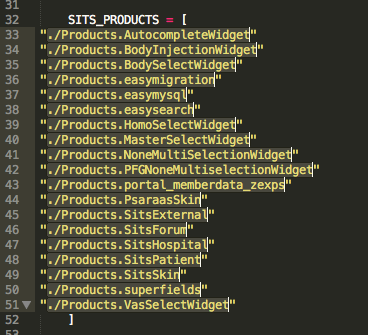
Then edit all the entries simultaneously. Use CMD + left and CMD + right etc. to move al the cursors to the beginning or the end of the linen and so on.
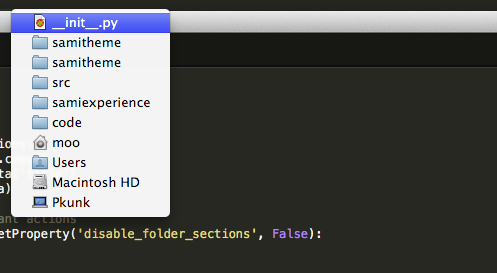
Open OS file browser for the currently opened file or any of its parent directories
CTRL + mouse click filename in the title bar of the edit window to show the full path to the file and open any of its parent folder.
Note: This is OSX’s Finder file browser standard behavior and might not work on other platforms.
More powerful sidebar
Install SideBarEnhanchements package to get more menu entries to sidebar which you can use to manage your source folder.

Theme and font
To further enhance readability of your text editing environment
See the results below.

Syncing and back-uping Sublime Text 2 settings and plug-ins with Dropbox
You may want to
- Save your Sublime Text 2 configuration for which you have spend so many tears to tune it up
- Sync your Sublime Text 2 configuration across different computers
Here are instructions for syncing and saving Sublime Text 2 settings with Dropbox.
HTML / XML tag tools
No one loves XML sit-ups. XML’ish languages where not intended to be written by hand. Sublime Text provides some pain killers on the matter.
Install Tag from Package Control. It comes handy when you are cleaning up those hard tabs….

Select text and then search from Command Palette (CMD + SHIFT + P): Tag: Auto Format Tags on Selection. Your HTML indent and other weirdness will be cleaned up. You can also configure it for different tag writing style preferences.
There is also built-in HTML: Wrap selection with tag command to insert parent or middle level tags in your HTML source.
Git
Though Sublime’s file explorer doesn’t support fiel state coloring or context sensitive menu shortcuts like in Eclipse, you still get some Git commands thru kemayo’s git plug-in (from Package Control, again).

Still unresolved
More tips
Translations
This article is translated to Serbo-Croatian language by Vera Djuraskovic from Webhostinggeeks.com.
 Subscribe to RSS feed
 Follow me on Twitter
 Follow me on Facebook
 Follow me Google+