Search the Community
Showing results for tags 'rust'.
-

Version 1.3.0
3,567 downloads
DynamicMonuments is a groundbreaking plugin for Rust servers that breathes new life into your maps! Say goodbye to tedious manual map editing or relying on RustEdit. With just a few clicks, your server will be transformed, featuring 18 unique monuments that blend seamlessly into any environment. Key Features: Dynamic Spawning: - Monuments can spawn randomly during wipes or with each server restart (optional) - Customize spawn frequency and zones through the plugin's configuration - A variety of monument complexities, ranging from cozy hideouts to sprawling fortresses 18 Unique Monuments: - Water Monuments - Coastal Monuments - River Monuments - Roadside Monuments - Modifications for Standard Monuments: (Metro entrances, power line towers, substations, quarries, and more). Personalization: - Give players personal monuments Versatility: - Compatible with both custom and procedural maps. - Automatically adapts to terrain, water, and roads. - No RustEdit required! Everything is managed through the plugin's configuration. Giving a monument to a player 9 out of 18 monuments can be given to players for personal placement. The dynamic monument is represented as a flare with a unique skin, which can be given to players in any way, such as through an in-game store. To spawn the monument, the player must hold the flare and find a suitable location, receiving instructions in the chat and notifications. Once placed, the monument is locked to the player, and only they can loot it. Chat commands (admin only) /killmonument - destroys the DynamicMonument you're looking at /replacecrate NewCratePresetName - replaces the crate you're looking at on the location with NewCratePresetName /spawnmonument PresetName - spawns a monument in a random position /spawnmonumentmypos PresetName - spawns the monument in your position /killallmonuments - destroys all DynamicMonuments on the server /respawnmonuments - forcibly launches automatic respawn of DynamicMonuments /givemonument PresetName - give the monument to yourself /addprefabspawnpoint PresetName — adds a crate or static NPC spawn point to a monument at your current position (only for Static Npc and crates) /removemonumententity command — removes entity spawn point you're looking at. (only for StaticNpc/crates/Entities for respawn) Console commands (RCON only) spawnmonument PresetName - spawns a monument in a random position killallmonuments - destroys all DynamicMonuments on the server respawnmonuments - forcibly launches automatic respawn of DynamicMonuments givemonument PresetName userID - give the DynamicMonument to the player Plugin Config en – example of plugin configuration in English ru – example of plugin configuration in Russian Check out the rest of my work: Adem's Codefling Library You can reach out to me in Discord: Adem's Discord Profile Join the Mad Mappers Discord!$49.99 -
Version 3.0.0
28 downloads
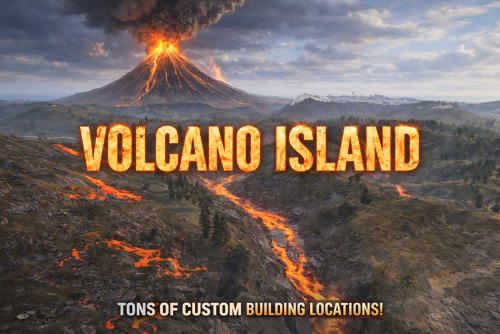
VOLCANO ISLAND – 4500K CREATIVE RUST MAP Volcano Island is a visually beautiful and fun to explore, builder-friendly 4500k Rust map loaded with every major monument and 50+ custom build spots marked with an "X". Designed for smooth performance, focusing on extreme low entity counts for a lag free experience, creative freedom, and competitive gameplay. Your players will NEVER run out of places to build on this Map! What Makes It Special 50+ Custom Build Zones marked with an "X" on the Map!!! The most buildable location for any Map of mine yet! Fully connected train tracks + underground rails for fast travel and tactical control Endless Custom Buildable areas/Caves/Rock Formations that players will love! Beautiful Volcano Mountains and Valleys players can Build on Diverse terrain: forests, deserts, coasts, cliffs, valleys & plateaus Perfect for solos, clans, builders, and high-pop servers. Low-prefab, FPS-friendly buildables: Custom caves Underwater Locations to build a base Hidden structures Unique build pockets Works with all Popular Events Plugins like Convoy, ArmoredTrain, Raidable Bases, Sputnik, Airfield Event and many more! All Facepunch Monuments Included Launch Site • Military Tunnels • Military Base • Silo • Airfield • Power Plant • Water Treatment • Trainyard • Harbors • Outpost • Excavator • Large Oil Rig • Small Oil Rig • Arctic Base • Junkyard • Sphere Tank • Satellite Dish • Ferry Terminal • Sewer Branch • Abandoned Supermarket • Oxum's Gas Station • Mining Outpost • Lighthouse • Bandit Camp • Fishing Village • Large Barn • Underwater Labs • Stone Quarry • Sulfur Quarry • HQM Quarry • Underwater Labs • Abandoned Cabins • Jungle Ziggurat • Jungle Ruins • Caves • Ranch — and more. Map Info Size: 4500k Prefabs: ~10,281 Support Discord: Dymize_$29.99- 4 comments
-
- 4
-

-

-
- #4500k
- #custom map
- (and 31 more)
-
Version 1.0.2
23 downloads
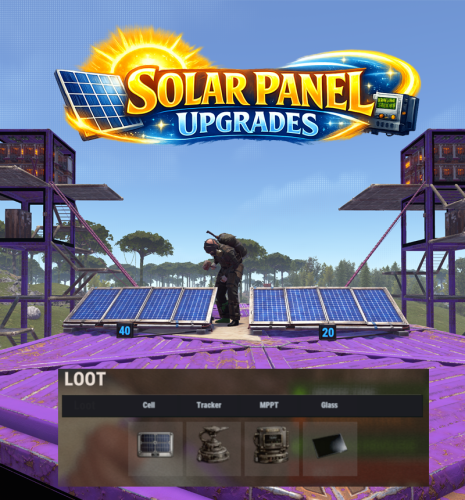
Solar Panel Upgrades adds a part-based upgrade system to electrical solar panels, allowing their performance to be enhanced through modular components. Each part type includes 3 tiers of progression. Players can open an upgrade interface while looking at a solar panel and holding a hammer, then install custom parts by dragging them into specific slots. The menu input button is fully configurable, supporting RELOAD, USE, MIDDLE CLICK, and RIGHT CLICK. Each upgrade part modifies the panel’s behavior, letting you fine-tune max output, sun angle efficiency, low-light performance, and damage power retention through a simple and intuitive interface. Upgrades are saved per panel, and all changes are applied directly to the entity in a lightweight and persistent system. The plugin also includes optional loot crate support, allowing you to control whether upgrade parts spawn in containers and define per-container drop chances for each tier. Alternatively, parts can be integrated into your existing systems such as shops or crafting plugins. All upgrade parts are fully configurable, including their stats and visuals, making it easy to adapt the system to your server’s balance and progression. A default English localization file is included, with full support for custom translations. Part shortnames and skins are pre-configured but can be modified or replaced with items from systems like Custom Item Manager. Permissions: solarpanelupgrades.use – Allows players to open and use the solar panel upgrade interface solarpanelupgrades.admin – Allows access to the admin part-giving command Commands: /sppart – Admin chat command to give yourself all available parts for testing or shop setup. Optionally specify an amount. Pre-Configured Parts: Cells: Tracking Mount: MPPT Controller: Tempered Glass: Default Config:$13.99 -
Version 1.0.3
32 downloads
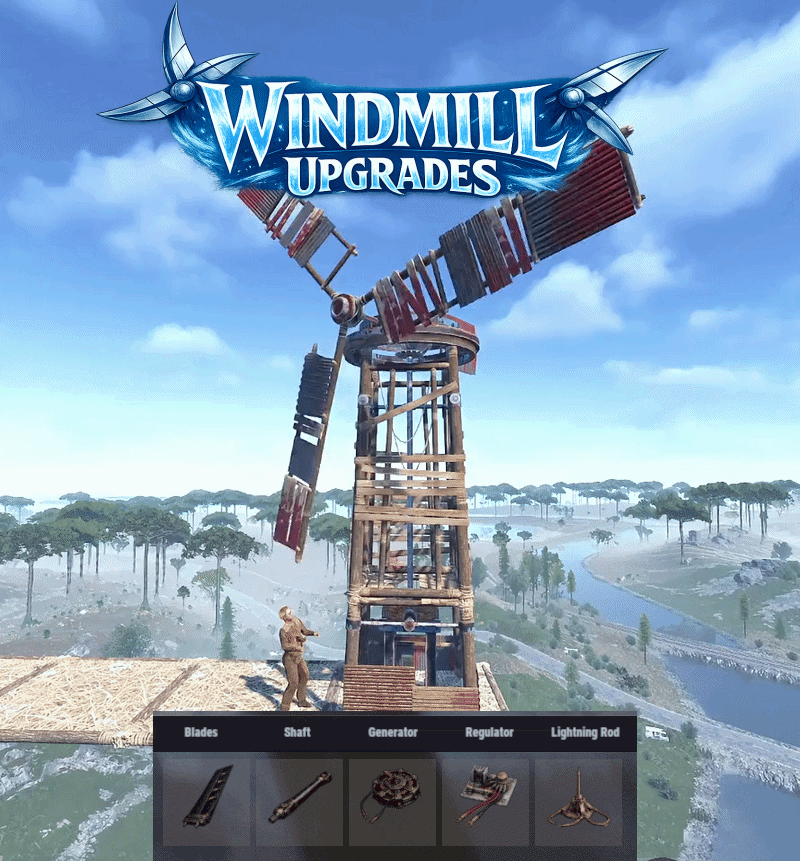
Windmill Upgrades adds a part based upgrade system to electrical windmills, allowing their performance to be improved. Each part type has 3 tiers. Players can open an upgrade interface while looking at a windmill and holding a hammer, then install custom parts by dragging them into specific slots. The menu input button is configurable, with support for RELOAD, USE, MIDDLE CLICK, and RIGHT CLICK. Each upgrade part affects the windmill’s stats, allowing you to tune max output, effective height, wind capture, power stability, and thunder performance through a simple interface. Parts are matched to their proper module slots, upgrades are saved per windmill, and all changes are applied directly to the entity in a lightweight, persistent system. The plugin also includes optional loot crate support, letting you control whether upgrade parts can appear in loot containers and set per-container drop chances for each tier. Alternatively, the parts can be added to any of your existing systems such as shops or crafting plugins. The upgrade parts are all configured in the config, with unique icons and stats, allowing you to quickly deploy this functionality to your server. As with most of my content, localization is possible, with a default English lang file included. The part shortnames and skins are all pre-configured but can be modified, or replaced with items from my Custom Item Manager. Permissions: windmillupgrades.use - Allows players to open and use the windmill upgrade interface. windmillupgrades.admin - Allows access to the admin part giving command. Commands: /wmpart - Admin chat command to give yourself all of the available parts for testing or adding to shops. Optionally can specify amount if you need more than one of each. Pre-Configured Parts: Blades: Shaft: Generator: Regulator: Lightning Rod: Default Config:$15.99 -
Version 1.1.3
2,006 downloads
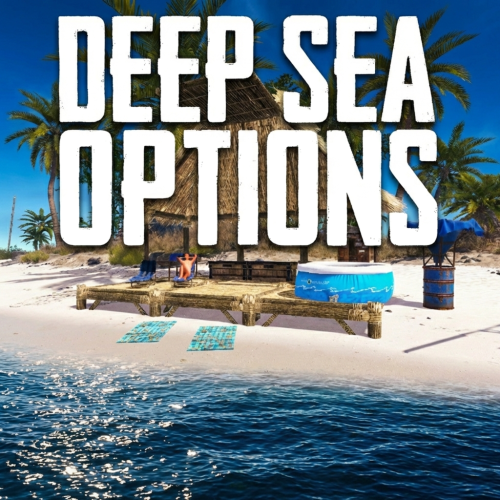
Deep Sea Options is a single config control plugin for Rust’s new Deep Sea feature. It lets server owners fully control when Deep Sea opens, what spawns inside it, what vehicles can enter, and how access rules are enforced. You can also configure if players can build inside deep sea. Building Control Enforce building allowed / blocked inside Deep Sea * Limit how many foundations a player can build in Deep Sea * Buildings persist restart, as long as the deep sea isnt being closed. Deep Sea Behavior Control Configure defaults: Whether the deep sea should always remain open, be on timers, or disabled Whether deepsea will auto open on server wipe (facepunch disables this by default) Control all phase timers GameTip messages to announce deep sea openinig/closing Deep Sea Content Control Configure procedural spawns: Island counts Ghost Ships counts RHIB counts Control: count spacing radius minimum distance between spawns distance from Deep Sea edges Settings are grouped and explained in the config Loot spawn Configurable respawn option for crates/ore/npc Respawn for scientist boat groups Access & Teleport Rules Control: Allow all vehicles (including planes and helis) or only an allow-listed set players can enter without a boat flying (noclip/admin) players can bypass checks NPC passengers are allowed on vehicles Prevent or allow “vehicle stacking” (boats/helis on deck) Also included is a mini plugin to fix Chinooks getting stuck in the deep sea portal when exiting this map. This is necessary due to the plugin increasing the portal height to allow Rust Planes and other high altitude custom vehicles or noclipping admins to enter. Chat Commands /deepsea status Shows current Deep Sea state /deepsea open Opens deep sea if not alrady open /deepsea close Closes current Deep Sea Console Commands dso open - to open the deepsea through the plugin dso close - to close the deepsea through the plugin dso forceclose - to force close the deepsea in case you need it closed but 'AlwaysOpen' is reopening it Note if you make changes to some config values (such as the procedural spawns, you will need to close the deep sea and reopen.) Config options: === GENERAL CONTROLS === Control - Schedule If ON: Plugin controls when Deep Sea opens/closes and how long it stays open. Control - Content If ON: Plugin controls how many islands, ghost ships, and RHIB patrol groups spawn and how they are placed. Control - Travel Rules If ON: Plugin controls who/what is allowed to use Deep Sea portals (vehicles, NPCs, players without vehicle, etc). Control - Building If ON: Plugin controls whether players can build while inside Deep Sea. Force Apply On Reload If ON: When plugin reloads, it forces Deep Sea to close and reopen so spawn changes apply immediately. If OFF: Changes apply next time Deep Sea opens normally. === SCHEDULE SETTINGS === Mode Vanilla = Normal Rust Deep Sea cycle. AlwaysOpen = Deep Sea never closes. Disabled = Deep Sea never opens. Plugin keeps pushing the next opening far into the future. Open Time Seconds How long Deep Sea stays open before closing. Cooldown Seconds How long Deep Sea stays closed before opening again. Final Phase Seconds End-of-cycle phase used for weather / atmosphere effects. Radiation Warning Phase Seconds When time left is below this, new entry is normally blocked unless late entry is allowed. AlwaysOpen - Keep Time Left Around Seconds In AlwaysOpen mode, plugin keeps the remaining open time around this value. AlwaysOpen - Refill When Below Seconds If time left drops below this, it refills back up to the target above. Disabled - Push Next Opening To Seconds In Disabled mode, pushes next open time far into the future. Entrance Portal Direction Forces the entrance portal direction. 0 = Map-based 1 = North 2 = East 3 = South 4 = West Set Open On Server Wipe If ON: Plugin controls the vanilla wipe setting. Open On Server Wipe Only used if above is ON. If enabled, Deep Sea is allowed to auto-open on server wipe Set Generation Pacing If ON: Plugin controls Deep Sea generation pacing values. Increasing this value can help if you experience long langs when deepsea is opening Entities Spawn Interval Seconds Only used if above is ON. Controls delay between general Deep Sea entity spawns during generation. Lower = faster generation. Spawn Groups Spawn Interval Seconds Only used if above is ON. Controls delay between Deep Sea spawn-group waves during generation. Lower = faster generation. === CONTENT SPAWNING === These control placement spacing for each Deep Sea content type. Islands / Ghost Ships / RHIB Groups all use the same logic: Count How many spawn each time Deep Sea opens. Spacing Size General spacing radius. Bigger = more spread out. Edge Buffer How far from the outer Deep Sea border spawns must stay. Bigger = more toward the center. Minimum Spacing Hard minimum distance between spawns. Overrides spacing size if larger. === RESPAWN (CRATES / NPCs / HACKABLES / RHIBS) === Enable Respawn System If ON: Plugin respawns eligible Deep Sea crates, ores, moving scientists, and optional RHIB patrol groups. Check Interval Minutes How often the respawn system runs. Min Distance From Players To Allow Respawn Entities only respawn if no players are within this distance. Respawn Hackable Crates Via Ghostship If ON: Hackable crates respawn through ghost ship crate spawning. Hackable Crates Count How many hackable crates the plugin wants available through ghost ship spawning. Respawn RHIB Patrol Groups When None Remain If ON: When all Deep Sea RHIB patrol groups are gone, plugin attempts to respawn them. Uses the current deepsea.rhib_count value, so it respawns however many RHIB groups are currently configured in the ConVar/content settings. === TRAVEL RULES === Allow Any Vehicle If ON: Any vehicle can use the portal. Allowed Vehicle Prefabs If Allow Any Vehicle is OFF, only vehicles matching these prefab names/partial names are allowed. Require Boat Type Only If ON: Even allowed vehicles must be boat-type vehicles. Allow Players Without Vehicle If ON: Players can teleport without standing on a vehicle. Allow Noclip Players If ON: Flying/admin players bypass normal vehicle checks. Allow Non-Player Passengers (NPCs) If OFF: Vehicles with NPC passengers cannot teleport. Allow Non-Player Entity Teleport (NPCs) If ON: NPC player-type entities themselves can teleport. Allow Entry During Radiation Warning Phase If ON: Players can still enter even when Deep Sea is near closing. Ignore Extra Vehicle Onboard Check If ON: Skips checks for extra vehicles being carried/on top of another vehicle, such as helicopters on boats. Log Entry/Exit If ON: Logs allow/deny travel decisions for debugging. === BUILDING === Allow Building In Deep Sea If OFF: Players cannot build inside Deep Sea. If ON: Building is allowed. DeepSea - Limit Foundations If ON: Limits how many foundations each player can place inside Deep Sea only. DeepSea - Max Foundations Per Player Maximum number of foundations a player can place inside Deep Sea. DeepSea - GameTip: Show Remaining On Successful Place If ON: When a player places a foundation in Deep Sea, shows how many they can still place. DeepSea - GameTip: Show Message When Denied If ON: When a player hits the Deep Sea foundation limit, shows a GameTip. === NOTIFICATIONS === GameTip - Deep Sea Opening If ON: Shows a GameTip when Deep Sea starts opening. GameTip - Deep Sea Opened If ON: Shows a GameTip when Deep Sea is fully open. GameTip - Deep Sea Closing If ON: Shows a GameTip when Deep Sea starts closing. GameTip - Deep Sea Closed If ON: Shows a GameTip when Deep Sea is fully closed.$8.99 -
Version 2.1.7
6,498 downloads
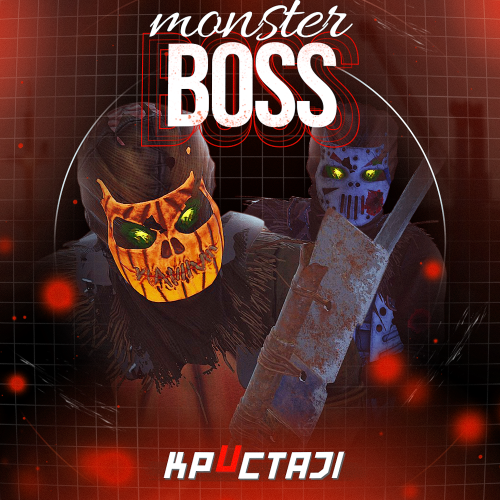
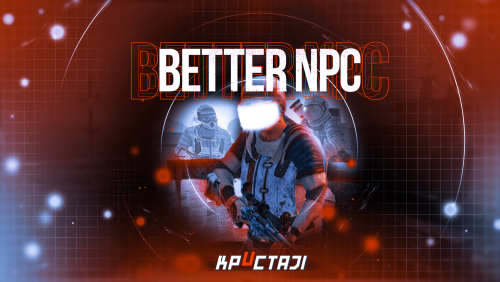
This plugin adds to the game a variety of NPC bosses with different abilities and a very adaptable configuration Description Using this plugin you can add NPC bosses to any point on the map. You can set up any ability with the plugin configuration. If it is necessary, you can add multiple abilities to one boss. Abilities are divided into two categories, ones take place in a certain radius from the NPC, and others are triggered by damaging from an NPC. The map also displays the location of the actual bosses (their name and amount of health). You can give any clothes and weapons for NPCs using the configuration. Custom Map Maps that have a configuration for the appearance of boss on their custom monuments You can also download all these files for all maps here Dark Ages Blue Tears All files for custom maps are stored in the folder oxide/data/BossMonster/CustomMap. You don't have to delete files from there, the plugin will understand by itself which map is currently installed on the server and will download only the necessary file if there is one in this folder. The plugin will tell you about this process in the console during the plugin loading. It will write in the console what file works on the current map, and what ones don’t work If you want to create a custom place for the boss to appear on your custom map or on a map that is not in this list, you have to create the ID of this custom map. After that you need to place an item such as a RAND Switch on your map. It must be placed randomly, where it will not be visible to other players. You will get the identifier, if you add up the three coordinates of the position of this object from RustEdit (x, y and z) and write the resulting value in the parameter of your file (an example file can be taken from ready-made files) - ID As an example, let's take the coordinates (26.896, -456.158, 527.258), then our identifier is 26.896 - 456.158 + 527.258 = 97.996 Then you need to indicate a list of bosses that will appear on your map. You need to copy the configuration data block for each boss. In the database parameters you will specify the name of the boss and a list of positions where it can appear Dependencies (optional, not required) GUI Announcements Notify Discord Messages AlphaLoot CustomLoot Economics Server Rewards IQEconomic PveMode Chat commands (only for administrators) /WorldPos - displays the actual player’s position on the map /SavePos <name> - saves a new position to the configuration file for the boss with the name - name, relative to the nearest monument /SpawnBoss <name> - spawn of the boss with the name - name in the coordinates of the administrator Console commands (RCON only) SpawnBoss <name> – spawn of the boss with the name – name KillBoss <name> – kill all bosses with the name – name Plugin Config en - example of plugin configuration in English ru - example of plugin configuration in Russian Boss Config en - example of plugin configuration in English ru - example of plugin configuration in Russian Custom Map Config en - example of plugin configuration in English ru - example of plugin configuration in Russian Hooks void OnBossSpawn(ScientistNPC boss) - сalled when a boss appears on the map void OnBossKilled(ScientistNPC boss, BasePlayer attacker) - сalled when a player kills a boss API ScientistNPC SpawnBoss(string name, Vector3 pos) - spawns a boss named name in position pos void DestroyBoss(ScientistNPC boss) - destroys the boss My Discord: KpucTaJl#8923 Join the Mad Mappers Discord here! Check out more of my work here!$35.00- 476 comments
- 13 reviews
-
- 22
-
-
-
- #abilities
- #boss
- (and 16 more)
-
Version 2.2.5
14,118 downloads
This plugin adds variety of NPC sets with very high number of parameter sets on standard and custom monuments. Also it is added during dropping the server AirDrop, locked crate and destroying a tank or helicopter Dependencies (optional, not required) AlphaLoot CustomLoot True PVE Kits Economics Server Rewards IQEconomic PveMode Custom maps Maps that have default settings for their custom monuments. For these maps, you will not need to create places for the appearance of NPCs, they have already been created by the map developer and are located inside the archive when buying the map You can also download all these files for all maps here Detroit: Irreparable Damage Oregon 2: Last Hope Lostly Island Frontier – American Old West Oregon: Land of Dead Badlands Foreign Lands Namalsk Kong: Skull Island Destroyed World Deathland Dreamland Last Train Pandora Railway Island Wasteland Cataclysm: Fury of Nature Last Oasis Crazy Island Standard monuments This item of the plugin settings is used for appearing NPCs in all standard monuments. All these settings are located in the Monument folder (oxide/data/BetterNpc/Monument). Each file in this folder corresponds to a standard monument If there is no standard monument file in the folder, you can create it (you need to name the file the same way as the standard monuments on the map inside the game). You can copy the settings from any other standard monument Configuration parameters: Enabled? [true/false] – It allows to enable/disable the appearance of NPC on the monument. If you need NPCs appearing on the map and don’t need it on another map, you can use this option simply The size of the monument – this parameter contains two values. It is the length and width of the monument. This parameter is necessary for random appearance of NPC on the monument and indication of limits of removal of standard NPCs on the monument (if it is necessary) Remove other NPCs? [true/false] – It deletes the standard NPCs inside the limits of this monument Presets – It is a list of all the NPC presets to appear on the monument (the description of the NPC preset settings is located below) Custom monuments This item of the plugin settings is responsible for the appearance of NPCs on custom monuments. All these settings are located in the Custom folder (oxide/data/BetterNpc/Custom). Each file in this folder corresponds to a custom monument If you have bought a map with already configured NPC appearance files for custom monuments you will copy these files into the Custom folder. If you want to create and configure the appearance of NPC in your custom location on the map, you will use the command in the administrators’ chat /SpawnPointAdd {name} (see the description of this command below in the instruction) Configuration parameters: Enabled? [true/false] – It allows to enable/disable the appearance of NPC on the monument. If you need NPCs appearing on the map and don’t need it on another map, you can use this option simply Position – It is a position of the custom monument on the map Rotation – It is a rotation of the custom monument on the map (this parameter is necessary for using custom places to appear of NPC on the monument, if the monument is used on more than one map) Radius – It is the radius of the custom monument from the position on the map Remove other NPCs? [true/false] – It removes the standard NPCs inside the limits of this monument Presets – It is a list of all the NPC presets to appear on the monument (the description of the NPC preset settings is located below) Roads This item of the plugin settings is used to appear NPCs on all types of roads. All these settings are located in the Road folder (oxide/data/BetterNpc/Road). Each file in this folder corresponds to a particular road type ExtraNarrow – It is a narrow, unpaved walkway ExtraWide It is a wide, paved, two-lane, beltway road Standard – It is a regular, paved road Configuration parameters: Enabled? [true/false] – It allows to enable/disable the appearance of NPC on the road. If you need NPCs appearing on the map and don’t need it on another map, you can use this option simply Presets – It is a list of all the NPC presets to appear on the road (the description of the NPC preset settings is located below) Biomes This item of the plugin settings is used to appear NPCs on all types of biomes. All these settings are located in the Biome folder (oxide/data/BetterNpc/Biome). Each file in this folder corresponds to a particular biome type (Arctic, Arid, Temperate, Tundra) Configuration parameters: Enabled? [true/false] – It allows to enable/disable the appearance of NPC on the biome. If you need NPCs appearing on the map and don’t need it on another map, you can use this option simply Presets – It is a list of all the NPC presets to appear on the biome (the description of the NPC preset settings is located below) In-game events This item of the plugin settings is used to appear the NPCs in standard Rust events. All of these settings are located in the Event folder (oxide/data/BetterNpc/Event). Each file in this folder corresponds to its own type of event The supported events: When the plane drops the server AirDrop, it will be guarded by specific NPC presets CH47 – When the chinook drops a locked crate during patrolling the map, it will be guarded by specific NPC presets Bradley – When someone destroys a tank, its crates will be guarded by specific NPC presets Helicopter – When someone shoots down a patrol helicopter, its crates will be guarded by specific NPC presets Configuration parameters: Enabled? [true/false] – It allows to enable/disable the appearance of NPC on the event. If you need NPCs appearing on the map and don’t need it on another map, you can use this option simply Radius – NPC appearance radius Presets – It is a list of all the NPC presets to appear on the event (the description of the NPC preset settings is located below) The NPC preset parameters Enabled? [true/false] – It is enabling/disabling the preset Minimum numbers – Day – It is the minimum number of NPCs from the day preset Maximum numbers – Day – It is the maximum number of NPCs from the day preset Minimum numbers – Night – It is the minimum number of NPCs from the night preset Maximum numbers – Night – It is the maximum number of NPCs from the night preset NPCs setting – It is all NPC settings of this preset (see the description of NPC settings for details) Type of appearance (0 – random; 1 – own list) – It is a type of NPC appearance. You can create your own list of places of NPC appearance. The NPC will appear only randomly. This parameter is not used in Road appearance types Own list of locations – It is your own list of NPC appearances. You need to use the number of locations at least the maximum possible number of NPCs in this preset. This parameter is not used in Road appearance types The path to the crate that appears at the place of death – It is the full path to the crate prefab that appears at the place of death of an NPC. If you don’t need this parameter, you should leave this blank Which loot table should the plugin use (0 – default; 1 – own; 2 – AlphaLoot; 3 – CustomLoot; 4 – loot table of the Rust objects; 5 – combine the 1 and 4 methods) – It is the type of the NPC loot table in this preset. Type 5 includes two types (1 and 4) at the same time and locates items from both types Loot table from prefabs (if the loot table type is 4 or 5) – It is a setting of the loot tables from Rust objects. You can see the loot table of Rust objects description for more details Own loot table (if the loot table type is 1 or 5) – It’s NPC’s own loot table. You can see the description of your own loot table for more details The NPC settings description Names is a list of NPC names. It is selected from the list randomly Health – It’s the HP amount of the NPC Roam Range – It’s the patrolling area distance. It’s the distance that the NPC can move from the place of appearance during patrolling Chase Range – It’s the chase range of the target. It’s the distance that the NPC can chase his target from the place of appearance Attack Range Multiplier – It’s the attack range multiplier of the NPC’s weapon Sense Range – It’s a target detection radius Target Memory Duration [sec.] – It’s the time that the NPC can remember his target Scale damage – It’s the damage multiplier from NPC to the player Aim Cone Scale – It’s the spread of NPC shooting, the default value in Rust is 2. It doesn’t take negative values Detect the target only in the NPCs viewing vision cone? [true/false] – It’s the parameter that allows detecting the target only in a certain NPC viewing. If you want to detect the target in 360 degrees, you will set the parameter "False” Vision Cone – It’s the NPC viewing. The range of values is from 20 to 180 degrees. If the previous parameter is False, this parameter is not used Speed – It’s the NPC speed. The default value in Rust is 5 Minimum time of appearance after death [sec.] – It’s the minimum time of NPC appearance after the death. This parameter is not used in the NPC Event places Maximum time of appearance after death [sec.] – It’s the maximum time of NPC appearance after the death. This parameter is not used in the NPC Event places Disable radio effects? [true/false] – You can disable/enable radio effects Is this a stationary NPC? [true/false] – If this parameter is True, the NPC will not move or run Remove a corpse after death? [true/false] – This parameter can control the deleting of NPC corpses (only backpacks are left). This parameter improves efficiency if there are a lot of NPCs Wear items – It’s a list of NPCs’ clothes and armor Belt items – It’s a list of weapons and items NPCs’ fast slots. Medical syringes are used for healing. If you give grenades to an NPC, he will use them. Smoke grenades are used for creating smoke screens (if you don’t need them, you should remove them from your inventory). If you give a Rocket Launcher to an NPC, he will raid the target’s building (if the target is inside it) Kits – It gives a pack of Kits plugin. If you don’t need this parameter, you should leave this blank. I recommend using the previous 2 points to configure NPC items A description of the Rust loot table settings Minimum numbers of prefabs –It’s the minimum numbers of prefabs that are needed to appear in the NPC loot table Maximum numbers of prefabs –It’s the maximum numbers of prefabs that are needed to appear in the NPC loot table Use minimum and maximum values? [true/false] – this parameter specifies whether to use the minimum and maximum numbers to limit the number of items List of prefabs – It’s a list of prefabs that need to add in the loot table. It is necessary to indicate the full path to the prefab and the probability of falling out this prefab A description of the own loot table settings Minimum numbers of items – It’s the minimum number of items Maximum numbers of items – It’s the maximum number of items Use minimum and maximum values? [true/false] – this parameter specifies whether to use the minimum and maximum numbers to limit the number of items List of items – It’s a total list of all items that can fall out in the NPC loot table. You can specify any standard items, their blueprints and any skinned or custom items The commands in the chat (for admins only) /SpawnPointPos {name} – To show the local admin’s position coordinates relative to the place where the NPC {name} appears /SpawnPointAdd {name} – To create the NPC appearance point {name} in the Admin’s custom coordinates. A file with this name will be created in the folder Custom and you can configure it as you need /SpawnPointAddPos {number} {name} – To write the local admin’s coordinate into the preset with the positional number {number} (starting from 1) to the place where the NPC {name} appears /SpawnPointAddWear {number} {name} – To write all the admin’s dressed clothes into the preset with the positional number {number} (starting from 1) to the place where the NPC {name} appears /SpawnPointAddBelt {number} {name} – To write all the admins’ quick slots cells into a preset with the positional number {number} ( starting from 1) to the place where the NPC {name} appears /SpawnPointShowPos {number} {name} – To show to the Admin all the custom NPC appearance points in the preset with the positional number {number} ( starting from 1) in the place where the NPC {name} appears /SpawnPointReload {name} – Reload Spawn Point with the name {name} Console commands (RCON only) ShowAllNpc – Shows the number of all NPCs of the BetterNpc plugin on your server Hooks object CanAirDropSpawnNpc(SupplyDrop supplyDrop) – It is called before an NPC appearance to guard an AirDrop. The returning of a non-zero value stops an NPC appearance object CanCh47SpawnNpc(HackableLockedCrate crate) – It is called before an NPC appearance to guard a locked chinook crate. The returning of a non-zero value stops an NPC appearance object CanBradleySpawnNpc(BradleyAPC bradley) – It is called before an NPC appearance to guard the boxes from crushed Bradley. The returning of a non-zero value stops an NPC appearance object CanHelicopterSpawnNpc(BaseHelicopter helicopter) – It is called before an NPC appearance to guard the crates from crushed patrol helicopter. The returning of a non-zero value stops an NPC appearance API void DestroyController(string name) – It destroys the place of appearance NPC with the name {name} void CreateController(string name) – It creates the place of appearance NPC with the name {name} These APIs can be used with standard monuments, custom monuments (NPC locations) and roads. The name of this monument is in standard monuments {name}. It is the name of the file in the Custom and Road folder in custom monuments and roads My Discord: KpucTaJl#8923 Join the Mad Mappers Discord here! Check out more of my work here! Creator of the default configuration – jtedal$35.00 -
Version 1.0.1
3,715 downloads
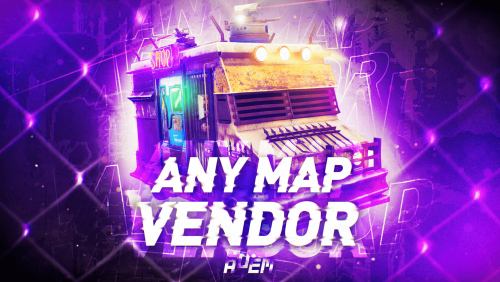
Allows the vendor to travel any maps, including those without ring roads. The map can be either custom or procedural. The vendor can drive on both country roads and paved roads. Chat commands (admin only) /vendorspawn - spawns a vendor /vendorroadblock - the vendor will not spawn on the road where you are standing (clear the Blocked roads section of config when you change maps) Console commands (RCON only) vendorspawn - spawns a vendor Plugin Config en – example of plugin configuration in English Check out the rest of my work: Adem's Codefling Library You can reach out to me in Discord: Adem's Discord Profile Join the Mad Mappers Discord!Free- 7 comments
- 6 reviews
-
- 13
-
-
-
- #trader
- #travelvendor
- (and 11 more)
-
Version 1.6.6
10,505 downloads
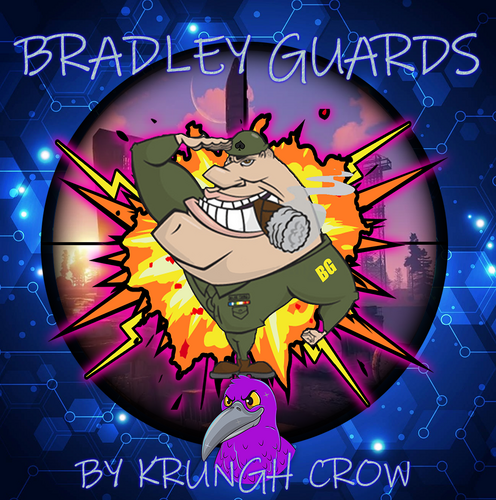
BradleyGuards minigame will make more fun of the boring Bradley. Spawning bombs molotovs and a Tank Crew Features : Minigame with Scientist NPC spawning after Bradley gets destroyed and various events during its attack phase It will throw random Bombs and Molotov when attacked. Hardmode will throw the Bombs and Molotov towards player instead around the Bradley When destroyed the Bradley does a close range Last Ditch Effort if the Driver is still alive and gets a last air support As of version 1.1.1 napalm support will be set to target player instead of Bradley position Give the NPC the choice of using some predefined outfits or use the vanilla Scientist Outfits Predefined weapon or a different weapon through config if using outfits Crew will be Despawned upon plugin unload or reload Compatible with NPCKITS Support for BetterNpcNames (v1.0.2 and higher) Support for Kits Permission system Warnings : backup your configs before plugin updates This is not compatible with BradleyControl Plugin !!!!! (since version 1.0.5) Version 1.4.0 has new options for MLRS and Convoy Bradleys "External Plugins": { "Armored Train : Can trigger Events": false, "Convoy : Can trigger Events": false, "SatDish/Harbor Event : Can trigger Events": false, "BradleyDrops : Can trigger Events": false, "BetterNpcNames : Driver Title": "Pilot", "BetterNpcNames : Guard Title": "Commander", "BetterNpcNames : Gunner Title": "Grunt" }, "Last Ditch Effort MLRS rocket Amount": 15 Permissions : BradleyGuards.ShowMessages (to show interaction messages) BradleyGuards.ShowKillMessages (to show messages after bradley is destroyed) Commands : (new in V1.0.5) /bginfo : Shows the available commands/version/author Logfiles : Log files are found in the oxide.logs folder Will log the Player and info regarding the spawns after destroying the Bradley Configuration : Example config below : { "Global NPC dont target": true, "External Plugins": { "Armored Train : Can trigger Events": false, "Convoy : Can trigger Events": false, "SatDish/Harbor Event : Can trigger Events": false, "BradleyDrops : Can trigger Events": false, "BetterNpcNames : Driver Title": "Pilot", "BetterNpcNames : Guard Title": "Commander", "BetterNpcNames : Gunner Title": "Grunt" }, "Bradley Settings": { "Change Values": true, "Bradley Health": 2222, "Bradley Max Fire Range": 100, "Bradley Throttle Responce": 1.0 }, "Bradley Loot": { "Change Values": true, "Bradley Max crates after kill": 4 }, "Bradley Canon": { "Change Values": true, "Bradley Canon Fire delay": 0.3, "Bradley Canon Firerate": 0.25 }, "Bradley Machinegun": { "Change Values": true, "Bradley Machinegun Bullet Damage": 15, "Bradley Machinegun Firerate": 0.06667 }, "Event Settings": { "Bradley Crew Max Spawn Distance": 10, "Bradley Crew Max Roam Distance": 20, "Bradley Crew Body to Bags": true, "Max throwing range of a Grenade": 25.0, "Max Grenades per trigger": 1, "Max throwing range of a Molotov": 25.0, "Max Molotovs per trigger": 1, "Use Firerockets (instead of Molotovs)": false, "Hard Mode : Throws towards player (Grenades)": true, "Hard Mode : Max Grenades per trigger": 1, "Hard Mode : Max radius of a Grenade on player": 15.0, "Hard Mode : Throws towards player (Molotovs)": true, "Hard Mode : Max Molotovs per trigger": 1, "Hard Mode : Max radius of a Molotov on player": 15.0, "Napalm Support": true, "Napalm Support Area Radius": 25.0, "Napalm Support Rocket Amount": 3, "Napalm Support Rocket Height": 150, "Last Ditch Effort Rocket Amount": 0, "Last Ditch Effort Grenade Amount": 5, "Last Ditch Effort MLRS rocket Radius": 15, "Last Ditch Effort MLRS rocket Amount": 15, "Last Ditch Effort Hard Mode : targets player location": true }, "Tank Crew Driver": { "Tank Driver Health": 450.0, "Tank Driver Lifetime (minutes)": 1.0, "Tank Driver Damage multiplier": 1.0, "Tank Driver Spawn Chance 0-1": 1.0, "Tank Driver Spawn Amount": 5, "Tank Driver Use Outfit": true, "Tank Driver Use other gun with outfit": false, "Tank Driver gun short prefabname": "smg.mp5", "Tank Driver gun skin id": 0, "Tank Driver Use kit (clothing)": false, "Tank Driver Kit ID": "" }, "Tank Crew Guards": { "Tank Guards Health": 800.0, "Tank Guards Lifetime (minutes)": 1.0, "Tank Guards Damage multiplier": 1.0, "Tank Guards Spawn Chance 0-1": 1.0, "Tank Guards Spawn Amount": 3, "Tank Guards Use Outfit": true, "Tank Guards Use other gun with outfit": false, "Tank Guards gun short prefabname": "smg.mp5", "Tank Guards gun skin id": 0, "Tank Guards Use kit (clothing)": false, "Tank Guards Kit ID": "" }, "Tank Crew Gunners": { "Tank Gunners Health": 600.0, "Tank Gunners Lifetime (minutes)": 1.0, "Tank Gunners Damage multiplier": 1.0, "Tank Gunners Spawn Chance 0-1": 1.0, "Tank Gunners Spawn Amount": 3, "Tank Gunners Use Outfit": true, "Tank Gunners Use other gun with outfit": false, "Tank Gunners gun short prefabname": "smg.mp5", "Tank Gunners gun skin id": 0, "Tank Gunners Use kit (clothing)": false, "Tank Gunners Kit ID": "" } } Localization : English language file included to use a diffrent language just make a new file in the language folder. { "BradleyDriver": "<color=yellow>Bradley Driver : </color>Damnit i just washed it!", "BradleyGuards": "<color=yellow>Bradley Guard : </color>Stay away from our Bradley!", "BradleyGunner": "<color=yellow>Bradley Gunner : </color>Prepare to die!", "BradleyDriverBomb": "<color=yellow>Bradley Driver : </color>Catch this!", "BradleyGunnerFire": "<color=yellow>Bradley Gunner : </color>Fire in the hooole!", "BradleyNapalmSupport": "<color=yellow>Bradley Operator : </color>Support incomming!" } API : bool IsBradleyNpc(global::HumanNPC npc) OnBradleyNPCGotHit(global::HumanNPC npc, HitInfo info) OnBradleyNPCDeath(global::HumanNPC npc, HitInfo info) example call : object OnEntityDeath(global::HumanNPC npc, HitInfo info) { if (npc == null) return null; if (BradleyGuards.Call<bool>("IsBradleyNpc", npc)) { Puts($"Target : {npc} net.ID : [{npc.net.ID}] Event : BradleyGuards NPC"); } return null; } private void OnBradleyNPCGotHit(global::HumanNPC npc, HitInfo info) { Debugmsg("OnBradleyNPCGotHit works!"); BasePlayer player = info.InitiatorPlayer; if (npc.health < (npc._maxHealth * 0.8) && npc.health > (npc._maxHealth * 0.72)) { if (!Burned) Player.Message(player , npcmsg(MSG) , Chaticon); return; } } private void OnBradleyNPCDeath(global::HumanNPC npc, HitInfo info) { Debugmsg("OnBradleyNPCDeath works!"); BasePlayer player = info.InitiatorPlayer; Debugmsg($"{player.displayName} killed {npc.displayName}"); } Changes made in 1.0.5 !!! Updated/Cleaned/Organized the Documentation. Added lifetime for each individual Crew Added use of kits + checks (if incorrect kit name Crew will spawn with default scientist or heavy scientist outfit). Changed the Npc Naming so they can be shown correctly with AdminRadar Added prefix and chaticon to chat messages (language file changed so delete it before updating to avoid weird chat messages). Added max roam range for the Bradley Crew Bradley Crew will now despawn when plugin gets unloaded/reloaded Removed the death sound when a npc dies. Fixed : Bradley will now ignore scientists from junkpiles added cfg : Tank Crew Lifetime (minutes) added cfg : Damage multiplier for each driver/guards/gunners added cfg : Napalm Support Rocket Height added cfg : Use kit (clothing) (for each driver/guards/gunners) added cfg : Kit ID (for each driver/guards/gunners) added cfg : Bradley Crew max roam rangeFree -
Version 1.0.0
9 downloads
Mini Raid Island 5 Pack Enhance your server's gameplay with this collection of 5 uniquely designed Mini Raid Islands. These compact, high-performance prefabs are designed specifically for Rust server owners looking to provide engaging PvP and PvE raiding experiences without sacrificing server performance. Each island in this pack offers a distinct layout, providing variety for your players and ensuring that no two raids feel the same. When used as automated raid bases, these islands are optimized for seamless integration. ### Key Features High Performance: Optimized with a low prefab count to ensure zero impact on server FPS. Compact Design: Small footprints allow for easy placement in ocean biomes or along coastlines. Diverse Layouts: Five distinct variations including industrial, rocky, and fortified themes. For any Assistance or questions Please contact me on Discord @ https://discord.gg/THf6dGN8eW$4.97 -
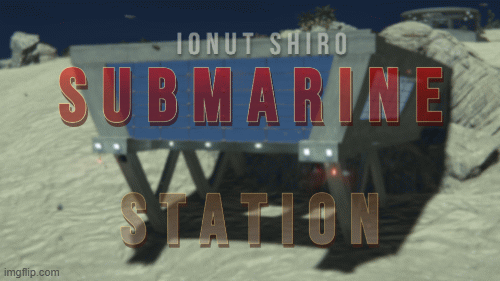
Version V1
6 downloads
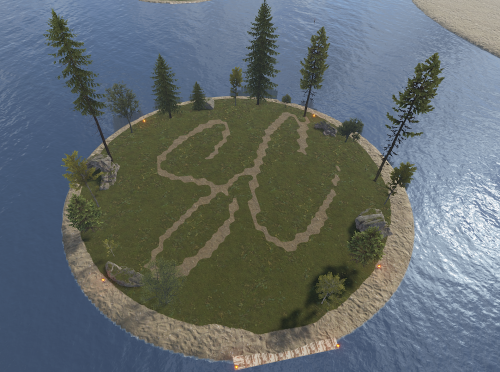
A small beachside monument with an elevator leading to a maritime base where you can dock your submarine and loot , access from elevator can be done with a green keycard which is also lootable on one of the desks before the puzzle door.$5.00- 1 review
-
- 2
-
-
- #submarine
- #station
- (and 6 more)
-

Version 1.2.5
10,853 downloads
Formerly NPCLoot. Populate npc corpses, containers, and barrels with custom loot. General info. Users can create as many loottables as required, and assign them to npc/container types by name. To create a new loot table, simply set the "lootTable" entry for some container type in config to a new made up name. This will create a new /data file of that name, which you can customise. The same loot table can be used for multiple corpse or container types. New categories and items are added automatically so, hopefully, data should never need to be wiped. Default loottable has all probabilities set to zero. By default this plugin spawns nothing and will require user customisation. It is your responsibility to ensure that your use of this plugin is in compliance with any relevant Terms of Service or other guidelines, regarding the spawning of DLC/Paid items/skins. Item choice is done by two-tier probability. For each spawned item a category is chosen first, based on your category probabilities, then an item is chosen from that category, based on your item probabilities for that category. See notes at bottom for further info on probabilities. Dec '23 1.2.2 update. Customloot now supports treating specific skinned items as if they are unique items. For example you could create skinned paper as ‘Money’, and it will be treated as unique, with totally separate settings and options from regular paper. The format for creating items is that you hold your skinned item and type /CustomLoot ExistingLootTable Category CustomName so, for example, if you want to skin paper with skin 012345 and use it as ‘Money’ in a loottable called ‘AirdropTable’, hold some paper with that money skin and type /CustomLoot AirdropTable Resources Money You can also specify "All” instead of a specific loottable /CustomLoot All Resources Money Optional dependencies - BotReSpawn Configuration. Global. corpseTypePerBotReSpawnProfile - true/false allowDuplicates - true/false Include_DM_Crates - true/false AllowSkinsFor - { "add", "items", "like", this" } NPC types. OilRig Excavator CompoundScientist BanditTown MountedScientist JunkPileScientist DungeonScarecrow ScareCrow MilitaryTunnelScientist CargoShip HeavyScientist TunnelDweller UnderwaterDweller Trainyard Airfield DesertScientist ArcticResearchBase LaunchSite Gingerbread ZombieHorde *if Global option 1 is true, this entry is replaced with one entry per existing BotReSpawn profile, by name. Eg, The Dome 0, Airfield 0, LaunchSite 0, etc. Container Types bradley_crate heli_crate supply_drop dm ammo dm c4 dm construction resources dm construction tools dm food dm medical dm res dm tier1 lootbox dm tier2 lootbox dm tier3 lootbox loot_barrel_1 loot_barrel_2 loot-barrel-1 loot-barrel-2 oil_barrel codelockedhackablecrate crate_basic crate_elite crate_mine crate_normal crate_normal_2 crate_normal_2_food crate_normal_2_medical crate_tools crate_underwater_advanced crate_underwater_basic foodbox minecart trash-pile-1 ...There may be more, as the plugin automatically adds new ones as they appear in-game. Options per type: "enabled": true/false (governs corpse loot-giving) "lootTable": "default" "minItems": 6 "maxItems": 6 "gunsWithAmmo": true/false "noGuns": true/false "MaxBps": 3 "WaterPreFillPercent": 20 "ClearContainerFirst": true/false Data: By default there is one data file : /data/CustomLoot/default.json If you specify a unique lootTable name for any corpse or container type, a new file will be created in the same folder, by name. Eg /CustomLoot/JunkPileLootTable.json Each data file contains: Blacklist : [] - These items will never spawn, and are removed from loottable. Setting to [] will repopulate with default blacklist. AlwaysSpawnList : [] - These items will always spawn, regardless of probabilities. allowChristmas = false allowHalloween = false allowKeycards = false By default all Christmas, Halloween and Keycard items are disabled. Items, grouped by category. *Each item has:* "probability": 5 "minStack": 10 "maxStack": 50 "blueprintChancePerfect": 0 - where applicable "skins": [] - where applicable "IncludeAllApprovedSkins" - false "MinConditionPercent": 90 - where applicable "MaxConditionPercent": 100 - where applicable Categories: Ammunition Attire Component Construction Electrical Food Fun Items Medical Misc Tool Traps Resources Weapon ...There may be more, as the plugin automatically adds new ones as they appear in-game. Options per category: "probability": 5 "allowBlueprints": true API. If the called config profile doesn't exist CustomLoot will create it under 'API'. Example call. [PluginReference] private Plugin CustomLoot; List<Item> lootcall = CustomLoot?.Call("MakeLoot", "Profile_Name"; if (lootcall is string) PrintWarning(string)lootcall); Object hooks are provided to prevent this plugin giving loot to your spawned npcs, or containers. Return non-null for the following. OnCustomLootNPC(uint) OnCustomLootContainer(uint) Notes. *Probability, in both cases above, is relative; There is no scale. If there were two categories with probabilities of 9 and 1, the first would have a 9 out of 10 chance of being picked. Probability of zero effectively means the item, or category is disabled. Categories with no enabled items will never be chosen. Their probability is irrelevant. Disabled categories will never be chosen. Their probability is irrelevant. Users should never have to manually add, or remove, items in the /data files. New items in Rust should be added automatically. The blacklist can be used to remove entries from the data file, if that's preferred. Reloading is not required to catch up with profile changes made in BotReSpawn.Free -
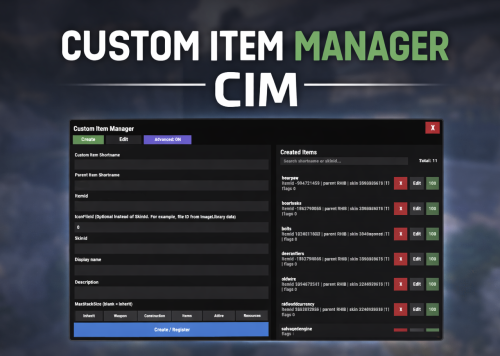
Version 1.0.6
250 downloads
Custom Item Manager is an in-game admin UI for creating true custom Rust items by registering brand-new ItemDefinitions, leveraging the CustomItemDefinitions* framework. Unlike traditional “skinned item” approaches, this plugin adds items directly into the game’s item manifest, allowing them to be spawned, stored, traded, and in many cases interacted with exactly like vanilla items. Because these items exist as real ItemDefinitions, they can have their own unique itemID, shortname, display names, meaningful descriptions, icons, categories, flags, and blueprint rules**. This solves one of the biggest limitations of skin-based custom items: skinned items can only reuse the original item’s shortname, description and behavior, while CustomItemManager allows you to define entirely new identity and metadata for each item. All item creation and editing is done through an in-game UI. Items can be created, edited, unregistered, and re-registered instantly without editing code or restarting the server. Created items are stored persistently and automatically re-registered on server start. A searchable list andone-click give buttons makes testing fast and convenient. In short, CustomItemManager provides a clean workflow for adding more vanilla-like custom items to Rust servers, not just reskinned vanilla items. Why use this instead of skinned existing items? Skinned vanilla items: Share the original item’s behavior Cannot change the description meaningfully Are limited to cosmetic differences Custom Item Manager items: Exist as unique ItemDefinitions Have their own display name and custom description, in place of the ownership label, as well as additional customizable labels. Can have different rules, eg can/can't be dropped, configurable category (e.g. for sorting). Integrate cleanly with most Rust plugins that give or require specific item shortnames. RECYCLABLE - setting the Craftable value to True, and setting Blueprint Ingredients, will allow the item to be recycled. CRAFTABLE- by giving players a blueprint for the custom item, it can be crafted using the industrial workbench If you want items to feel like true, purpose-built content instead of cosmetic overrides, this plugin is the better approach, and will save you a lot of time chasing down skinIDs when configuring other plugins. Data and Persistence All created items are stored in the plugin data file Items are automatically re-registered on server start and plugin reload It is safe to reload the plugin without losing definitions On unload, all existing items will appear as a fallback item, and be restored to their original condition upon plugin load. Permissions customitemmanager.admin - required to use the utility Commands /cim - opens the CIM UI Recommendations Ensure you have the latest version of Custom Item Definitions framework For non-usable items (eg custom craft components, quest items), use RHIB as the parent item. It has a blank description to avoid confusion. When using the items in other plugins, you do not need to specify the SkinID again, only the shortname (skinID should be 0) If the items are already in player containers, prefer editing and re-registering over deleting. Text of the first, Green label on the item is configured in the lang file for Custom Item Definitions. All Display Names and Descriptions will be available in the lang file for Custom Item Manager, allowing you to easily translate the items. Custom Labels Example: The green label text is configured in the Custom Item Definitions lang file. The text when hovering over it, is the item description configured via my plugin. The blue and orange labels, can also be created via my plugin, with or without additional text when hovering over it. SPECIAL ITEM=|QUEST ITEM= After = you would enter the text you wish to display when hovering over the additional label. It's up to you to experiment and adapt it for your own needs. * This plugin is a UI utility to easily create and manage custom items, based on the required dependency - Custom Item Definitions framework developed by 0xF ** The plugin allows specifying whether the item can have a blueprint as well as the required components to craft, which allows the custom item to be recycled. The blueprint itself can be given to players and learned, however it will not appear in the vanilla crafting menu. It can however be crafted with an industrial crafter,$9.99 -
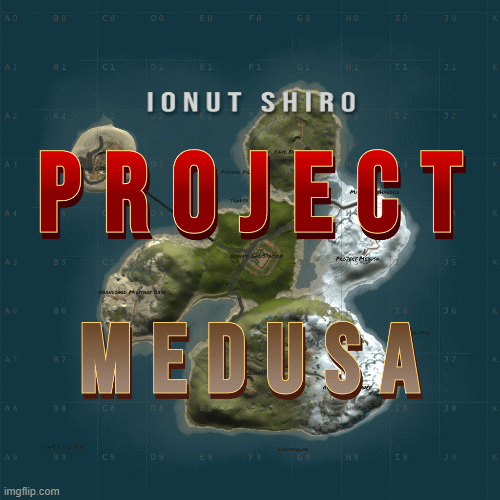
Version v1.2.7
78 downloads
This custom map has a story behind it, its a 1.5k Size custom map however there is plenty of building space for up to 50 - 100 people and 12 monuments with a Bradley path. Map originally made by @Umer778 Cave Excavation: Abandoned Tunnel: Project Medusa: Custom Monuments : Information Hub (Mid Tier loot) Project Medusa (High Tier loot) Trader (Safe Zone) Business Man (Safe Zone) Cave Excavation (Low Tier Loot - Chinook Drop zone) Abandoned Military Base (Mid Tier Loot - Chinook Drop zone) Abandoned Tunnel (Low Tier Loot) Customized Lighthouse (Mid Tier Loot) Makeshift Harbor (Low Tier Loot) Rust Monuments: Dome (Mid Tier Loot) Oxums Gas Station (Low Tier Loot - Chinook Drop zone) Large Oil Rig (High Tier Loot) Mining Outpost (Low Tier Loot) Fishing Village (Safe Zone) There is a Bradley setup that goes from Dome to the crossroads near Oxums gas station and then back again, this is for the story. If you don't want this then simply disable Bradley spawn in the rust config! There are a few plugins that will enhance the experience of this map, the BradleyGuards Plugin and Plagued Murderers Plugin! This map does require https://github.com/k1lly0u/Oxide.Ext.RustEdit to work, as do all custom rust maps.$5.00- 1 comment
-
- 2
-
-
- #custom map
- #custom
- (and 4 more)
-
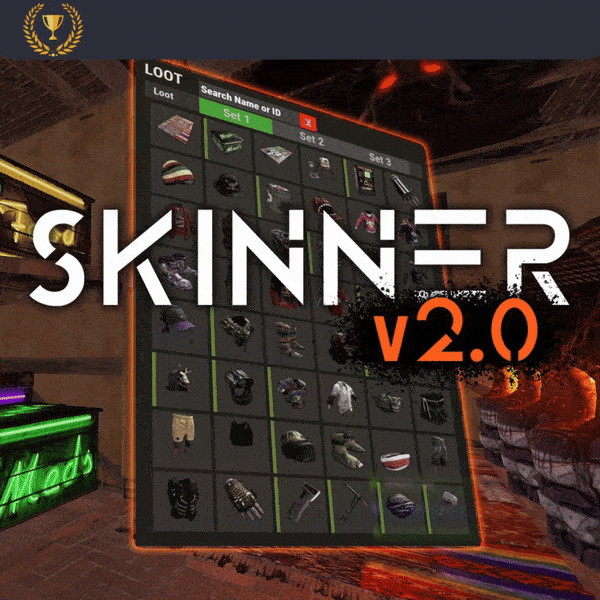
Version 3.1.4
10,991 downloads
Skinner! The unrivaled no.1 performance skinning plugin. Skin any item in the game with a unique skinbox giving you live skinning, auto skinning and skin sets. Thanks for everyone who has given feed back through the duration of the beta release. Skinner 3.0 is finally here! Visual overhaul! - with dynamic UI menus for permission based player menus Automatic skin filtering and dev modes for new TOS Permission based skin sets Team share skins! Auto unlock owned skins! and More!!! Live Skinning - Skin items in place without moving them Auto import - Automatically import and use all game approved skins Skin Sets - Create a variety of different skin sets for any item Skin Requests - Allows players to request and Admins to accept new skins in game Auto Skins - Automatically apply selected skins to every item that enters your inventory Skinner 2.0 offers unrivaled performance in plugin efficiency. Our standard testing shows runtime results were 60x faster and memory usage was 200x more efficient than the closest peforming plugin. SkinMenu Commands: /Skin or /S - Live skin any item in your inventory by selecting a skin you wish to apply /SkinCraft or /Sc - Create multiple skin sets for use in other functions such as skinauto or skinteam /Skinitem or /Si - Skin a deployable item you are looking at ingame. Args - Spectify 1, 2 or 3 to automatically use a skin set. Automatic Commands: /Skincon or /scon - sets all items in a container you are looking at to your default craft set Args - Optional, spectify 1, 2 or 3 to automatically use a skin set. /Skininv or /sinv - sets all items in your inventory to your default craft set Args - Optional, spectify 1, 2 or 3 to automatically use a skin set. /Skinauto or /Sauto - Automatically apply selected skins to every item that enters your inventory based off your skin sets. Args - Optional, spectify 1, 2 or 3 to automatically use a skin set. /Skinteam or /st - sets all items in your inventory and your teams to your default craft set Args - Optional, spectify 1, 2 or 3 to automatically use a skin set. Toggle - Use /skinteam toggle to opt in or out of the team skin set /SkinBase - Allows you to skin all deployables in your base to your default skincraft skins. Args - Optional, specify item name to filter items being skinned example: /Skinbase sleepingbag to only skin sleeping bags. /SkinAll Command - Skin all the items in all the containers in your base. Args - Optional, specify item by shortname example: /SkinAll rifle.ak to only skin ak47's. Skin Import Commands: /Skinimport or /sip - Import custom workshop skins Args - WorkshopID example: /Skinimport 2397648701 /Colimport or /cip - Import custom workshop collection using /skinimport collectionID Args - Collection ID example: /Colimport 2921147807 /Skinrequest or /Sr - Request a skin to be added to skinner, requested skins will show in the /Skinrequests UI for approval Args - WorkshopID example: /Skinrequest 2397648701 /Skinrequests or /Srs - Opens the the skinner menu with a box of skins awating approval Button Usage - Select an option and remove the skin to enact the process Try - Recieve a copy of an item with that skin Approve - Adds the skin from the menu to the imported skins list Deny - Removes the skin Note: All chat commands are universal meaning they can be used via the console, rcon(for import commands) and can be customized via the configuration. Player Permissions: Skinner.default - enables /skin command Skinner.items - enables /skinitem command Skinner.craft - enables /skincraft command Skinner.skinauto - enables /skinauto command Skinner.skincon - enables /skincon command Skinner.skininv - enables /skininv command Skinner.skinbase - for use of the /skinbase command Skinner.skinteam - Allows the use of the /skinteam command Skinner.skinall - for the use of the /skinall command Skinner.skinrequest - enables /skinrequest Cooldowns Permissions: Cooldown settins can be adjusted via the plugin config. Applying the cooldown permission example skinner.default30 will enforce cooldowns on those with the permission. If no cooldown permission is applied no cooldowns will be enforced. If multiple cooldown perms are assigned to a single player they fastest cooldown will be used. "Command based cooldowns ('permission' : 'command' seconds": { "Default30CD": { "skin": 30.0, "skinitem": 30.0, "skincraft": 30.0, "skincon": 30.0, "skininv": 30.0, "skinteam": 30.0, "skinbase": 60.0, "skinall": 60.0 } Admin Permissions: Skinner.import – enables /Skinimport, /Colimport and /Skinrequests Skinner.bypassauth - bypasses the building auth requirement when using /Skinitem Skinner.permskintry - enables try feature when using /Skinrequests Warning: trying a skin will make a copy of that item. Only give this perm to admins who are allowed to spawn items. Other Permissions: Skinner.skinautotoggled - applied when a player disables skinauto Skinner.skinteamblock - applied when a player disables team skins Skinner offers multiple ways of importing skins including via the config and through commands: Importing via the config: To import skins via the config insert workshopIDs into the imported skins list as per the code snippet below, once finished reload skinner and the shortname and displayname fields will be automatically populated. You can add extra skins at any stage using this method. "Imported Skins List": { "861142659": {}, "2617744110": {} }, Optionally entire workshop skin collections can be added to conifg, each item skin is automatically imported to your imported skins list on plugin load. "Import Skin collections (steam workshop ID)": [496517795,2921147807], Importing via commands: Commands can be used to edit the config options for imported skins and collections via RCON, chat commands and the f1 console. Commands include: /Skinimport WorkshopID /Colimport CollectionID Importing via Skin Requests: Players can requests skins to be added to the game using the skinrequests feature. By using the command /skinrequest WorkshoID a skin gets automatically uploaded to the skin requests box. Admins with the skinner.import permission can open the requests box with the /skinrequests command. Skins from the request box can then be "tried" approved or denied. Each skin requested can be logged to discord using the webhook in the config. Importing from other plugins: Skinner now has a tool for windows to import data from skinbox, xskins and skincontroller. Simply select your json data file with imported skins into the tool and copy the new imported skins list into the skinner config. https://github.com/Whispers88/SkinDataConverter/releases/tag/Main Note: The "Imported Skins (skinid : 'shortnamestring', skinid2 : 'shortnamestring2'": {}" is now redundant and automatically converted to imported skins list. { "Skin Commands (skin items in you inventory": [ "skin", "s", "skinbox", "sb" ], "Skin Items Commands (skin items you have already placed": [ "skinitem", "si", "skindeployed", "sd" ], "Set default items to be skinned": [ "skincraft", "sc" ], "Automatically set all items in you inventory to your default skins": [ "skininv", "sinv" ], "Automatically set all items a container to your default skins": [ "skincon", "scon" ], "Automatically skin all deployables in your base": [ "skinbase", "skinbuilding" ], "Automatically skin all items in your base": [ "skinall", "sa" ], "Automatically skin all items that are moved into you inventory": [ "skinauto", "sauto" ], "Skin your teams inventories with your skin set": [ "skinteam", "st" ], "Request workshop skins via workshop ID": [ "skinrequest", "sr" ], "Approve workshop skin requests": [ "skinrequests", "srs" ], "Set your selected skin set": [ "skinset", "ss" ], "Import Custom Skins": [ "skinimport", "sip" ], "Import Workshop Collection Command": [ "colimport", "cip" ], "Skin Request Notification Discord Webhook": "", "Custom Page Change UI Positon anchor/offset 'min x, min y', 'max x', max y'": [ "0.5 0.0", "0.5 0.0", "198 60", "400 97" ], "Custom Searchbar UI Positon anchor/offset 'min x, min y', 'max x', max y'": [ "0.5 0.0", "0.5 0.0", "410 635", "572 660" ], "Custom Set Selection UI Positon anchor/offset 'min x, min y', 'max x', max y'": [ "0.5 0.0", "0.5 0.0", "250 610", "573 633" ], "Auto import approved skins": true, "Remove player data after inactivity (days)": 14, "Apply names of skins to skinned items": true, "Add Search Bar UI": true, "Use on itemcraft hook (skin items after crafting - not required when using skinauto)": false, "Override spraycan behaviour": false, "Use spraycan effect when holding spraycan and skinning deployables": true, "Blacklisted Skins (skinID)": [], "Blacklisted Itemms (itemID)": [], "Import Skin collections (steam workshop ID)": [], "Command based cooldowns ('permission' : 'command' seconds": { "Default30CD": { "skin": 30.0, "skinitem": 30.0, "skincraft": 30.0, "skincon": 30.0, "skininv": 30.0, "skinteam": 30.0, "skinbase": 60.0, "skinall": 60.0 } }, "Imported Skins List": {} } //Get all Cached skins public Dictionary<int, List<ulong>> GetAllCachedSkins() { return _cachedSkins; } //Check if skin is a Redirect item public bool IsRedirectID(ulong uID) { return HasMask(uID); } //Convert Redirect ID to item ID public int RedirectIDtoItemID(ulong uID) { return (int)UnsetMask(uID); } //Get a list of skins for a particular item public List<ulong>? GetSkinsItemList(int itemid) { _cachedSkins.TryGetValue(itemid, out List<ulong>? cachedSkins); return cachedSkins; }$24.99 -

Version v1.6
37 downloads
North America 4K has been shaped after the North American continent in an attempt to do biomes and terrain elevations accordingly , map features solely procgen monuments no customs Map has been optimized to run with low entity count to ensure performance and players satisfaction. Password is given along with map for edits Put NorthAmericaMapLock in your plugins folder before starting your server. ~Procedural Monuments : - Launch Site - Military Tunnels - Airfield - Water Treatment Plant - Trainyard - Bandit Camp - Compound - Harbor - Junkyard - Sphere Tank - Satellite Dish - Arctic Research Base - Roadside monuments including Supermarkets - Mining Outposts - Fishing Villages - Lighthouses - Stables - Supermarkets & Mining Outposts and Gas Stations - Large and Small Oil Rigs - Several underwater Labs ~ Entity Count : 8480 ~ Map Size : 4000$10.00 -
Version 1.1.8
1,348 downloads
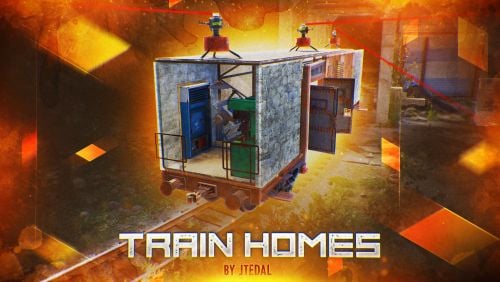
Live in one place? It's not interesting. Live in a camping car module? Too small. Have a full-fledged mobile home? That's what you need! Video How does it work? You cannot build a base on a wagon while the wagon is on the rails. In order to place something on the wagon, you need to move it to your base, which has at least 7x3 foundations. Everything is shown in more detail in this video.: With this plugin, your players will be able to build their own small base on the wagon and wander around the server with it. Or you can even assemble a whole train of such wagons. Chat Command (For admins) /showfreewagons - Writes the number of available wagons to the console, and also shows their location on the server. (Permission is required for use) /givewagon <amount> <SteamID or Name> - gives the specified player an item for the spawn of the wagon in the amount that you specify (Permission is required for use) Chat Command (For Player) /thinstruction - instructions on some features of the plugin /removewagon - take a hammer in your hands, write a command and hit the wagon Console Command (RCON only) clearallwagons - clears the server of all custom wagons. Be careful! The action is irreversible and players will lose all their items and resources. It should be used only before you want to turn off the plugin from the server, because after unloading, custom wagons can be created on the server. givewagon <amount> <SteamID or Name> - gives the specified player an item for the spawn of the wagon in the amount that you specify Plugin Config https://pastebin.com/jbsateCv Permissions trainhomes.givewagon - gives permission to use the chat command /givewagon trainhomes.showfreewagons - gives permission to view the location of free wagons Hooks private bool OnWagonSpawn(BasePlayer player) API private bool IsEntityFromBaseWagon(ulong netIdValue) Returns true if the netId of the object belongs to the wagon private bool IsBaseWagon(ulong netIdValue) Returns true if the netId belongs to a wagon on the base private bool IsTrainHomes(ulong netIdValue) Returns true if the netId belongs to a wagon on the track private bool IsFreeWagon(ulong netIdValue) Returns true if the netId belongs to a free wagon on the track Check out more of my work here JTedal's library. Come see our whole teams work Mad Mapper Library.$28.99- 131 comments
- 7 reviews
-
- 14
-
-
-
- #jtedal
- #mad mappers
- (and 10 more)
-
Version 1.4.6
4,928 downloads
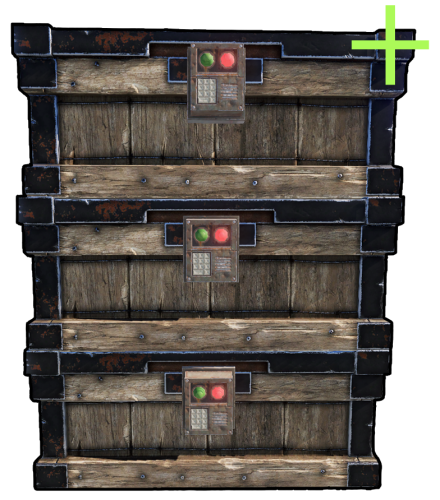
Chest Stacks is a Rust plugin that allows players to stack chests on top of each other! Configuration: { "Building privilege required": true, "Blacklisted Skins": [ 2618923347 ], "Permissions & their amount of stacked chests lmits": { "cheststacks.use": { "Chest type limits": { "SmallBox": 10, "LargeBox": 10 } }, "cheststacks.vip": { "Chest type limits": { "SmallBox": 5, "LargeBox": 10 } } }, "Supported box prefab offsets": { "assets/prefabs/deployable/woodenbox/woodbox_deployed.prefab": { "x": 0.0, "y": 0.57, "z": 0.0 }, "assets/prefabs/deployable/large wood storage/box.wooden.large.prefab": { "x": 0.0, "y": 0.75, "z": 0.0 }, "assets/prefabs/deployable/large wood storage/skins/medieval_large_wood_box/medieval.box.wooden.large.prefab": { "x": 0.0, "y": 0.76, "z": 0.0 }, "assets/prefabs/deployable/large wood storage/skins/abyss_dlc_large_wood_box/abyss_dlc_storage_vertical/abyss_barrel_vertical.prefab": { "x": 0.0, "y": 1.2, "z": 0.0 }, "assets/prefabs/deployable/large wood storage/skins/abyss_dlc_large_wood_box/abyss_dlc_storage_horizontal/abyss_barrel_horizontal.prefab": { "x": 0.0, "y": 0.9, "z": 0.0 }, "assets/prefabs/deployable/large wood storage/skins/jungle_dlc_large_wood_box/jungle_dlc_storage_horizontal/wicker_barrel.prefab": { "x": 0.0, "y": 0.8, "z": 0.0 }, "assets/prefabs/deployable/large wood storage/skins/warhammer_dlc_large_wood_box/krieg_storage_vertical/krieg_storage_vertical.prefab": { "x": 0.0, "y": 1.25, "z": 0.0 }, "assets/prefabs/misc/decor_dlc/storagebarrel/storage_barrel_b.prefab": { "x": 0.0, "y": 1.3, "z": 0.0 }, "assets/prefabs/misc/decor_dlc/storagebarrel/storage_barrel_c.prefab": { "x": 0.0, "y": 0.9, "z": 0.0 } }, "Supported prefab path offsets": { "assets/prefabs/deployable/large wood storage/skins/component_storage_boxes_dlc": { "x": 0.0, "y": 0.76, "z": 0.0 } } } Language: { "MaxStackAmount": "You are trying to stack more than {0} boxes!", "OnlyStackSameType": "You can only stack the same type of chests!", "CeilingBlock": "A ceiling is blocking you from stacking this chest!", "BuildingBlock": "You need to be Building Privileged in order to stack chests!" } Permissions: cheststacks.use (Always grant this permission for usage, grant additional permissions for different maximum stack amounts) In order to stack the chests you have to press RIGHT CLICK while looking at the placed chest and being near it!$14.99- 95 comments
- 12 reviews
-
- 10
-
-
-
- #rust
- #rust plugin
- (and 9 more)
-
Version 1.0.0
5 downloads
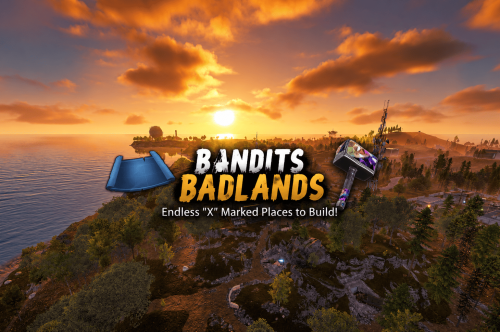
Bandits Badlands – 1650K A CREATIVE BUILDERS PARADISE RUST MAP MADE FOR BUILDERS AND EXPLORERS! Bandits Badlands is a Map that has its focus on extreme low prefab count performance! I have removed 1000s of unnecessary entities that slow server load times, by removing entities like Powerlines, certain rock types you can increase load times by 5x faster then a regular Map! A 1650K Rust map built for explorers, survivors, and creative builders alike. ACTION PACKED with tons of monuments for a One Grid Map and 15+ custom marked build locations strategically spaced and placed across fepic fields, and mysterious terrain. Designed with ultra low entity counts for buttery smooth performance, endless creativity, and nonstop gameplay. Your players will NEVER run out of new places to explore, conquer, and build on Bandits Badlands. What Makes It Special: 15+ Custom Build Zones marked with an "X" on the Map!!! Your players will NEVER run out of fun places to build their base! We use super shallow beach areas so there are always spots for players to build and endless spots for your Raidable Bases to spawn. These shallow beach waters go out very far allowing for spawning and building of all types! A beautifully designed Crystal Lake Swamp adds eye catching visual interest to the terrain! Above ground Train tracks + underground rails for fast travel and tactical control! Endless Custom Buildable areas/Caves/Rock Formations that players will love! Beautiful terrain of all biome types, mountains, swamps, icebergs and many flat areas players can Build on Diverse terrain: forests, deserts, coasts, cliffs, valleys & plateaus Perfect for solos, clans, builders, and high-pop servers. SUPER Low-prefab, FPS-friendly buildables: Custom caves Custom HUGE Bus Stop Bases! - Enjoy those nostalgic bus stop builds Underwater Locations to build a base Hidden structures Unique build pockets Works with 100% of all Popular Events Plugins like Convoy, ArmoredTrain, Raidable Bases, Sputnik and many more! Custom Monuments: Red Bunker Crystal Lake Swamp Many Facepunch Monuments Included: • Satellite Dish • Sewer Branch • Small Harbor • Radtown • Military Base • Missile Silo • Large Oil Rig • Small Oil Rig • Sphere Tank • SuperMarket • Warehouse • Gas Station • 2x Lighthouse • Underwater Labs • Mining outpost • HQM Quarry • Sulfur Quarry • Stone Quarry • Jungle Ruins • Jungle Zigguart • Fishing Village • Outpost/BanditCamp • Ranch Stables — and more. Map Info: Size: 1650k Prefabs: ~1212 Support: Discord: Dymize_$24.99 -
Version 2.2.6
5,519 downloads
Allows bases to become raidable when all players in a base become inactive. Compatible with TruePVE and NextGenPVE servers. This plugin is not compatible with servers that have server.pve set true. It is possible to implement this, but I see no reason to do so as TruePVE provides the same protection and more. Abandoned Bases checks each building on the server in order to determine which bases are inactive. Bases become inactive when all players authorized on the tool cupboard have been offline for the configured amount of days. When a base becomes inactive there are one of two outcomes. 1.) It will be immediately destroyed if it does not meet the configured minimum requirements. 2) It will become raidable for a configurable period of time, and when the time expires the base will be destroyed. Each zone has a map marker, allows PVP and is surrounded by a dome that protects it from being attacked from the outside. Players who zone hop will be flagged with a PVP delay where they can still be attacked for a configurable amount of time. Command /sar - requires abandonedbases.convert permission and converts a base into an abandoned base - this can be used on any base that you are authorized to and will cause the base to be destroyed when the timer expires Command /sab - starts a manual check for each building on the server in order to determine which bases are inactive (requires abandonedbases.admin permission) Command /sar radius - requires abandonedbases.convert permission and converts a base into an abandoned base and uses the specified radius for the dome / zone radius. Min and max radius are configurable. Command /sar cancel - requires abandonedbases.convert and abandonedbases.convert.cancel permissions - completely cancels an event (destroys map marker and dome, disables PVP and prevents base from being despawned) effectively allowing the base to be taken over Command /sar claim - requires abandonedbases.convert and abandonedbases.convert.claim permissions and converts a finished abandoned base into a claimed base that can be taken over by players "Loot Required (SAR)" "Foundations Required (SAR)" "Walls Required (SAR)" These options should be set realistically so that players cannot exploit the /sar command. I recommend Loot Required 100, Foundations Required 10, Walls Required 10 at minimum Command /sar purge - converts all bases on the server into abandoned bases for purge day (requires abandonedbases.convert, abandonedbases.admin and abandonedbases.purgeday permissions) This is a two part command that requires you type /sab afterwards to begin. Requires abandonedbases.purgeday, abandonedbases.convert, and abandonedbases.admin permissions. Announcements are muted during purge to prevent spam. Time To Wait Between Spawns (15) will delay how quickly every base is converted Permissions (ADMINS REQUIRE PERMISSIONS TOO) abandonedbases.convert - required to use /sar command abandonedbases.convert.free - converting is free for users that have this permission abandonedbases.convert.claim - required to use /sar claim command abandonedbases.purgeday - required to use /sar purge command abandonedbases.admin - required to use /sab and purge commands abandonedbases.notices - users with this command can see event-opened notices from the plugin abandonedbases.attack - lets players hunt bases and convert them by attacking if they're abandoned abandonedbases.attack.time - shows players how much time is left before a base becomes abandoned when they attack it abandonedbases.attack.lastseen - required to see the last time the player was online when attacking a base Auto-add abandonedbases.immune to configuration if one does not exist already (lifetime set to "none") - abandonedbases.immune will not be automatically added if the configuration contains a different immunity permission already - abandonedbases.immune will give the user immunity to any base they've built at or are authed at from becoming abandoned - abandonedbases.exclude does not provide immunity and is explicitly intended for the plugin to ignore the player only - abandonedbases.exclude is intended for admins, mods, staff or helpers to be able to freely make repairs or auth at bases without interfering with the abandoned timer abandonedbases.exclude: excludes the user from being checked as an authorized user to a TC this permission should not be used to exempt users - exempt users with immunity by assigning them a permission from a role that has the lifetime set to "none" example roles that includes permission abandonedbases.immune and lifetime set to "none" to properly exempt a user or group by granting abandonedbases.immune to a user or group: "Purge Settings": [ { "Permission": "abandonedbases.immune", "Lifetime (Days)": "none" }, { "Permission": "abandonedbases.vip", "Lifetime (Days)": "7" }, { "Permission": "abandonedbases.veteran", "Lifetime (Days)": "5" }, { "Permission": "abandonedbases.basic", "Lifetime (Days)": "3" } ], Purge Settings Permission - The permission to use with this setting Lifetime (Days) - The amount of time in days before a base is considered abandoned. Set to none to not consider players with this permission as inactive. Conversions Before Destroying Base (1) - The amount of times a base can become abandoned before it is finally destroyed when the Despawn Timer expires. Comes with 3 configured permissions and lifetime days by default Abandoned Settings Blacklisted Commands (command1, command2, command3) - Commands players are not allowed using at a raid or marked with PVP delay Marker Name (Minutes) (Abandoned Player Base [{time}m]) - Text shown on map marker for minutes Marker Name (Seconds) (Abandoned Player Base [{time}s]) - Text shown on map marker for seconds Foundations Required (4) - Minimum amount of foundations required to become raidable Walls Required (3) - Minimum amount of walls required to become raidable Sphere Amount (10) - Increase to darken the dome, or decrease to brighten it Sphere Radius (50) - How big the dome is in meters Use Dynamic Sphere Radius (false) - Allow the dome to detect the best dome size Max Dynamic Radius (75.0) - How maximum size of the dynamic radius Min Custom Sphere Radius - The minimum radius allowed when using /sar <radius> Max Custom Sphere Radius - The maximum radius allowed when using /sar <radius> PVP Delay (15.0) - The amount of time in seconds that players can take damage after leaving the dome Despawn Timer (1800.0) - The amount of time in seconds that players have to finish the raid Reset Despawn Timer When Base Is Attacked (true) - When enabled this will reset the above despawn timer back to 1800 seconds by default Do Not Destroy Base When Despawn Timer Expires (false) - Use this to override and prevent a base from being destroyed when Despawn Timer expires Backpacks Can Be Opened (true) - When enabled players will be allowed to open their backpacks while inside of the dome Backpacks Can Be Looted By Anyone (false) - Bypass PreventLooting plugin and allow backpacks to be lootable if enabled Corpses Can Be Looted By Anyone (true) - Bypass PreventLooting plugin and allow backpacks to be lootable if enabled Allow PVP (true) - Allows PVP while inside of the dome, and when flagged with a PVP delay Seconds Until Despawn After Looting (600) Seconds Until Despawn After Looting Resets When Damaged (true) Cancel Automated Events If Abandoned Owner Comes Online (false) Message Raiders When Event Ends During Automated Cancellation (true) Change Marker Color On First Entity Destroyed (true) Cooldown Between Conversions (3600) - Time required between each manual conversion of a base using /sar Cooldown Between Events (3600) - Time between each event - prevents looting, damage and using /sar claim Cooldown Between Cancel (3600) - Time the player must wait to use /sar cancel Cooldown Between Conversions Ignored During Purge (true) Cooldown Between Cancel Ignored During Purge (true) Cooldown Between Events Ignored During Purge (true) Prevent Hogging Ignored During Purge (false) Run Once On Server Startup (false) - Check for abandoned bases immediately after server startup is complete Run Every X Seconds (0.0) - The time in seconds to check for each building on the server in order to determine which bases are inactive Kill Inactive Sleepers (false) - When enabled players with a permission from purge settings will be executed when they are offline for the configured amount of lifetime days Let Players Kill Abandoned Sleepers (false) - Allows players to kill anyone sleeping inside of an abandoned base rather than the server killing them automatically Economics/ServerRewards Cost To Manually Convert (0 = disabled) - Used with /sar command to convert any base into an abandoned base Use Map Marker (true) Require Event Be Finished Before It Can Be Canceled (true) Various auto turret settings Hooks (implemented in 2.1.4, updated in 2.2.5) participants - anyone that has actively participated (excludes admin if configured, and those in noclip or vanish) - this should not contain null elements participantIds - contains the userid of all participants - this list is better as anyone offline and dead will be included in this but not in the participants list because they would be null! intruders - anyone currently inside of the event (does not exclude anyone) - this should not contain null elements intruderIds - contains the userid of everyone inside of the event (does not exclude anyone) - this list is better as anyone offline and dead will be included in the list but not in the intruders list because they would be null! void OnBaseSkipped(Vector3 v, ulong userid, HashSet<ulong> owners, string reason, BuildingManager.Building building) { } void OnTugboatSkipped(Vector3 v, ulong userid, HashSet<ulong> owners, string reason, BaseEntity entity) { } void OnShelterSkipped(Vector3 v, ulong userid, HashSet<ulong> owners, string reason, BaseEntity entity) { } void OnAbandonedBaseStarted(Vector3 center, float radius, bool AllowPVP, List<BasePlayer> intruders, List<ulong> intruderIds, List<BaseEntity> entities, List<BuildingPrivlidge> privs, bool canDropBackpack, bool automatedEvent, bool attackEvent, Guid guid) { } void OnAbandonedBaseEnded(Vector3 center, float radius, bool AllowPVP, List<BasePlayer> participants, List<ulong> participantIds, List<BaseEntity> entities, List<BuildingPrivlidge> privs, bool canDropBackpack, bool automatedEvent, bool attackEvent, Guid guid) { } void OnAbandonedBaseTurretsInitialized(List<AutoTurret> turrets,Vector3 center, float radius, bool AllowPVP, ulong raiderId, bool CanDropBackpack, List<BaseEntity> entities, List<BuildingPrivlidge> privs, bool canDropBackpack, bool automatedEvent, bool attackEvent, Guid guid) { } void OnRaidableDespawnUpdate(Vector3 center, float radius, bool AllowPVP, ulong raiderId, DateTime DespawnDateTime, List<BasePlayer> intruders, List<ulong> intruderIds, List<BaseEntity> entities, List<BuildingPrivlidge> privs, bool canDropBackpack, bool automatedEvent, bool attackEvent, Guid guid) { } void OnPlayerEnteredAbandonedBase(BasePlayer player, Vector3 center, float radius, bool AllowPVP, List<BasePlayer> intruders, List<ulong> intruderIds, List<BaseEntity> entities, List<BuildingPrivlidge> privs, bool canDropBackpack, bool automatedEvent, bool attackEvent, Guid guid) { } void OnPlayerExitAbandonedBase(BasePlayer player, Vector3 center, float radius, bool AllowPVP, List<BasePlayer> intruders, List<ulong> intruderIds, List<BaseEntity> entities, List<BuildingPrivlidge> privs, bool canDropBackpack, bool automatedEvent, bool attackEvent, Guid guid) { } void OnAbandonedBaseCompleted(Vector3 center, float radius, bool AllowPVP, List<BasePlayer> intruders, List<ulong> intruderIds, List<BaseEntity> entities, List<BuildingPrivlidge> privs, bool canDropBackpack, bool automatedEvent, bool attackEvent, Guid guid) { } void OnAbandonedBaseClaimed(BasePlayer player, Vector3 center, float radius, bool AllowPVP, List<BasePlayer> participants, List<ulong> participantIds, List<BaseEntity> entities, List<BuildingPrivlidge> privs, bool canDropBackpack, bool automatedEvent, bool attackEvent, Guid guid) { } void OnAbandonedBaseClaimFailed(BasePlayer player, Vector3 center, float radius, bool AllowPVP, List<BasePlayer> participants, List<ulong> participantIds, List<BaseEntity> entities, List<BuildingPrivlidge> privs, bool canDropBackpack, bool automatedEvent, bool attackEvent, Guid guid) { } object OnBlockRaidableBasesTeleport(BasePlayer player, Vector3 to) => null; // return true to allow the blocked teleport, return a string to block with your message instead void OnAbandonedBasePrivilegeDestroyed(Vector3 center, float radius, bool AllowPVP, List<BasePlayer> intruders, List<ulong> intruderIds, List<BaseEntity> entities, List<BuildingPrivlidge> privs, bool canDropBackpack, bool automatedEvent, bool attackEvent, BuildingPrivlidge priv, bool areCupboardsTaken, Guid guid) { } void OnPlayerPvpDelayStart(BasePlayer player, ulong userid, Vector3 eventPos, float radius, List<BasePlayer> intruders, List<ulong> intruderIds, List<BaseEntity> entities, List<BuildingPrivlidge> privs, bool canDropBackpack, bool automatedEvent, bool attackEvent, Guid guid) { } void OnPlayerPvpDelayExpiredII(BasePlayer player, ulong userid, Vector3 eventPos, float radius, List<BasePlayer> intruders, List<ulong> intruderIds, List<BaseEntity> entities, List<BuildingPrivlidge> privs, bool canDropBackpack, bool automatedEvent, bool attackEvent, Guid guid) { } void OnPlayerPvpDelayReset(BasePlayer player, ulong userid, Vector3 eventPos, float radius, List<BasePlayer> intruders, List<ulong> intruderIds, List<BaseEntity> entities, List<BuildingPrivlidge> privs, bool canDropBackpack, bool automatedEvent, bool attackEvent, Guid guid) { } void OnAbandonedBaseDespawned(Vector3 eventPos, float radius, bool allowPVP, List<BasePlayer> intruders, List<ulong> intruderIds, List<BaseEntity> entities, Guid guid) { } object OnProcessPlayerEntity(BaseEntity entity, HitInfo info) => null; // cancel to prevent the plugin from handling this entity, though it can still be an event entity already in some cases void OnAbandonedBaseDespawn(List<BaseEntity> entities) { } // only called when a base is not eligible to convert void OnAbandonedBaseDespawn(Vector3 center, float radius, bool AllowPVP, List<BasePlayer> intruders, List<ulong> intruderIds, List<BaseEntity> entities, List<BuildingPrivlidge> privs, bool canDropBackpack, bool automatedEvent, bool attackEvent, Guid guid) { } void OnAbandonedBaseStart(Vector3 center, float radius, bool allowPVP, List<BasePlayer> intruders, List<ulong> intruders, List<ulong> intruderIds, List<BaseEntity> entities, bool canDropBackpack, bool automatedEvent, bool attackEvent, Guid guid) Added OnEntityEnteredAbandonedBase(BaseEntity entity, Vector3 center, float radius, bool allowPVP, List<BasePlayer> intruders, List<ulong> intruderIds, List<BaseEntity> entities, List<BuildingPrivlidge> privs, bool canDropBackpack, bool automatedEvent, Guid guid) Convert Bases and/or Claim Bases Credits: misticos for giving permission to use some of his code$30.00- 634 comments
- 11 reviews
-
- 23
-
-
-
- #rust
- #rust plugin
- (and 6 more)
-
.thumb.gif.6e2af67439647ac375a17c187209072b.gif)
Version 1.1.17
2,812 downloads
Daily Rewards is a strong tool for Rust admins who want to keep their players engaged until the end of the wipe. You can provide your gamers with distinct daily rewards for logging in with this plugin. This way, you not only liven up gameplay, but also encourage longer playtime. With Daily Rewards, don't lose the chance to draw in new players and keep returning ones! Features of Daily Rewards Beautiful and user-friendly interface Daily rewards for logging Motivating players to stay in the game longer Retention of players until the end of the wipe Compatibility with many plugins Edit rewards and config via in-game interface (no JSON editing required) By default, the plugin supports English, Russian, and Chinese languages Cooldown time before receiving an award Saving rewards in the plugin's inventory Do not receive rewards from inventory while in the build block, raid block, or combat block Commands daily – open daily rewards interface dailyrewards.wipe – wipe of player data dailyrewards.top [format: csv, empty (default)] [limit (10 is default)] – get a list of players with the day their award. dailyrewards.manage – manage daily reward settings dailyrewards.manage playtime set <steam_id> <amount> – sets the playtime for the specified player. dailyrewards.template [fullscreen/inmenu] [target_template] – sets the interface template for daily rewards. Parameters: [fullscreen/inmenu]: Type of interface template to set. Valid values: fullscreen or inmenu. [target_template]: For the inmenu template, you must specify the template number (1 or 2). Permissions dailyrewards.use – allows you to open the DailyRewards menu dailyrewards.edit - allows you to enable edit mode Video FAQ Q: Where can I see an example of a config? A: Config Q: How do I add DailyRewards to the ServerPanel menu? A: You can do this directly from the ServerPanel in-game: 1. Open the ServerPanel menu in-game. 2. If you have permission to edit, switch the panel to edit mode so you can see the blue "EDIT CATEGORY" and "EDIT PAGES" buttons. 3. Choose the category where you want DailyRewards to appear and click the "EDIT CATEGORY" button for that category. 4. While you are in this category in the ServerPanel, click the "EDIT PAGES" button to create a new page (or edit an existing one) for DailyRewards. 5. For that page, set these exact parameters: Type: Plugin Plugin Name: DailyRewards Plugin Hook: API_OpenPlugin 6. Save the changes. The DailyRewards button will now appear in the ServerPanel in the category you selected.$34.95 -
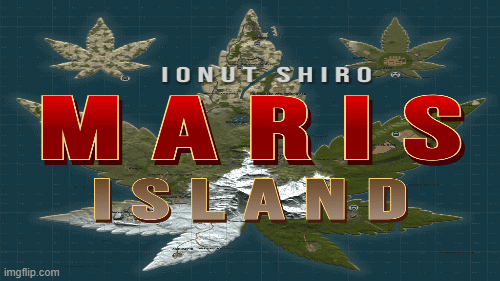
Version V1.2
49 downloads
Presenting the Maris Island, with the shape of happiness. You will find something to explore on Maris Island's custom-shaped map, which features plenty of custom monuments, prefabs, and more! You can find plenty of PVE zones that can easily be transformed in to PVP if you wish. Size: 4200 Entity Count : 28713 Can be edited: YES Password Protected: YES Monuments: 1 Large Oil Rig 1 Small Oil Rigs 2 Underwater labs 1 Harbors 1 Large Fishing Villages 3 Fishing Villages 1 Launch Site 1 The Dome 1 HQM Quarry 1 Radtown 1 Junk Yard 2 Caves 1 Ranch 1 Bandit Camp 1 Power Plant 1 Outpost 1 Giant Excavator Pit 1 Lighthouse 1 Missile Silo Custom prefabs and monuments: *Hotel compatible with Hotel plugin, for more info you can search for it in monuments here on this website. Has lobby floor with 10 NPC vending machines, poker tables, slot machines, arcade machines, tables/chairs, phone and radio. Has 3 floors with 8 rooms in each floor. Recycler on each floor. Can interact with everything in the rooms. Roof with helipad. Also has working CCTV on each floor. *Town has 18 houses. Each house comes with a nice yard where you can build on, you can build inside the house as well. Also all the houses come with several prefabs like lights, bed, tables, etc. All the houses have a helipad on top. You can only build inside the house and in the yard, everything else is blocked, makes it perfect for roleplay, pve or even pvp. *Shop with 3 NPC vending machines and a second floor for admins where they can place beds, crates etc. *Police Station with safe zone and 4 NPC vending machines, jail on the underground floor. For more info you can search for it in prefabs here on this website. *Underwater Bases with elevator, for more info you can search for it in prefabs here on this website. *Glaciar buildable bases. *Custom bridge between main island and right one. Zip lines between the main island and the small ones.$20.00 -
Version 2.1.23
3,146 downloads
Introducing Skills, the ultimate skill progression system for Rust servers featuring 71+ pre-configured skills across 13 categories! Complete with 4 UI templates, modal windows system, automatic migration from SkillTree/Skills V1, and comprehensive API. Transform your server into a world of specialization where players can master every aspect of Rust - from elite resource gathering and crafting to combat dominance and survival expertise. With intuitive progression, stunning visuals, and seamless integration, Skills delivers endless replayability and keeps players engaged for months! Why Choose Skills? Massive Skill Library - 71+ pre-configured skills covering every gameplay aspect Ready to Deploy - All skills are balanced and ready to use immediately Deep Progression - 10 levels per skill with meaningful advancement Visual Editor - Easy customization without coding knowledge Server Integration - Native support for ServerPanel V1/V2/V4, Notify/UINotify, and all major economy plugins Performance Focused - Optimized for high-population servers Seamless Migration - Automatic data conversion from SkillTree and Skills V1 Modal Windows - Advanced modal system for custom interfaces Multi-Template Support - Fullscreen, V1, V2, V4 ServerPanel templates Real-time Notifications - Integrated Notify/UINotify support Video Overview Showcase Templates Fullscreen Template ServerPanel V1 Template ServerPanel V2 Template ServerPanel V4 Template Modal Windows & Editor Modal Windows System Complete Skill Arsenal (71+ Skills) Skills comes with a massive library of pre-configured skills covering every aspect of Rust gameplay. All skills are ready to use with balanced 10-level progression systems! Mining Skills All Ores Mining - Boosts yields from stone, sulfur, metal, and HQM ore by up to 50% Stone Mining - Specialized stone gathering with up to 50% bonus Sulfur Mining - Enhanced sulfur ore collection up to 50% Metal Mining - Increased metal ore yields up to 50% HQM Mining - High-quality metal ore bonuses up to 50% Instant Ore Destruction - Chance to instantly destroy ore nodes (up to 20%) Durability Skills Tool Durability - Reduces wear on gathering tools Weapon Durability - Preserves weapon condition in combat Clothing Durability - Maintains armor integrity Wood Skills Wood Gathering - Increased wood collection from trees Instant Tree Chopping - Chance to fell trees instantly Coal Chance - Bonus coal drops from woodcutting Resources Skills Smelted Ore Chance - Bonus metal from ore smelting Animal Butchering - More meat from animal carcasses Instant Butchering - Chance to butcher animals instantly Plant Gathering - Better yields from bushes and hemp Crop Harvest - Increased vegetable production Fishing - Improved fishing success and rare catches Instant Barrel Destruction - Instant barrel breaking chance Crafting Skills Craft Duplicate - Chance for double crafted items Craft Speed - Faster crafting times Recycler Speed - Quicker recycling Furnace Smelting Speed - Faster ore smelting Component Find Chance - Bonus components from scrapping Cooking Speed - Faster food preparation Defense Skills Fire Resistance - Reduced fire damage Fall Damage Resistance - Less fall damage Temperature Resistance - Better cold/heat protection Radiation Resistance - Reduced radiation damage Explosive Resistance - Protection from explosions Stand Up Chance - Higher chance to stand when wounded Melee Damage Resistance - Less melee damage taken Damage From Scientists Resistance - Reduced scientist damage Damage From Players Resistance - PvP damage reduction Animal & Shark Defense Animal Damage Resistance - Protection from animal attacks Shark Damage Resistance - Reduced shark damage Metabolism Skills Hunger Metabolism - Slower hunger depletion Thirst Metabolism - Reduced thirst buildup Health Regeneration - Faster natural healing Horse Skills Horse Speed - Faster horse movement Horse Damage Resistance - Horse takes less damage Horse Fall Resistance - Better horse fall survival Underwater Skills Underwater Breathing - Extended underwater time Crate Skills Crate Unlocking Speed - Faster locked crate opening Crate Extra Loot - Bonus items from containers Building Skills Building Upgrade Cost - Reduced building upgrade costs Vehicle Skills Fuel Consumption - Reduced vehicle fuel usage Vehicle Repair Cost - Cheaper vehicle repairs Air Vehicle Takeoff Speed - Faster helicopter takeoff Damage Skills Damage To Scientists - Increased damage to scientists Damage To Animals - More damage to animals Damage To Players - Bonus PvP damage output Trap Damage - Increased trap and turret damage Combat Skills Magazine Size - Larger weapon magazines Effect Duration - Longer buff/debuff effects Revive Healing - More health from revives Special Skills Teleportation VIP - VIP teleport permissions Wipe Protection - Data protection across wipes Migration & Conversion Skills supports seamless data migration from popular skill plugins: SkillTree Plugin - Automatic conversion of player XP and skill levels Skills V1 - Full data transfer including custom skills and configurations Advanced Features Modal Windows System - Create custom modal interfaces for additional functionality Multi-Template UI - Support for Fullscreen, ServerPanel V1/V2/V4 templates Real-time Notifications - Integrated Notify/UINotify system for skill progression alerts Advanced API - Comprehensive developer API for third-party integrations ImageLibrary Integration - Offline image mode with automatic fallback Custom Economy Hooks - Flexible economy integration with plugin hooks XP Transfer System - Transfer XP between players on death (configurable) Cooldown System - Configurable action cooldowns to prevent spam Commands /skills or /skill - Opens the skills interface skills.modal <modalID> - Open specific modal window Admin Console Commands: skills.manage addxp <player> <amount> - Add XP to player skills.manage takexp <player> <amount> - Take XP from player skills.manage setxp <player> <amount> - Set player's XP balance skills.manage setskill <player> <skillId> <level> - Set skill level skills.manage giveskill <player> <skillId> <levels> - Increase skill level skills.manage resetskill <player> <skillId> - Reset specific skill skills.manage resetall <player> - Reset all skills skills.manage info <player> - Show player skill information Permissions skills.use - Access to skills interface (set in config as "Permission") skills.edit - Access to visual skill editor skills.xprate.vip - 1.5x XP rate bonus skills.xprate.premium - 2x XP rate bonus skills.xptransfer.vip - 75% XP transfer on death skills.xptransfer.premium - 100% XP transfer on death skills.gathering.level6-10 - Access to advanced gathering levels Developer API Skills provides a comprehensive API for developers: Methods: API_GetPlayerSkillLevel(ulong playerId, int skillId) - Get player's skill level API_AddPlayerXP(ulong playerId, float amount) - Grant XP to player API_GetSkillInfo(int skillId) - Get skill configuration data API_OnGather(BasePlayer player, Item item) - Handle gather events API_OnSkillLevelUp(BasePlayer player, int skillId, int level) - Skill level up events API_GetSkillLevel(BasePlayer player, int skillId) → int - Skill level API_GetSkillValue(BasePlayer player, int skillId) → float - Skill effect value API_GetPlayerSkills(BasePlayer player) → Dictionary<int, int> - All skill levels API_IsPlayerLoaded(BasePlayer player) → bool - Player data loaded API_SetSkillLevel(BasePlayer player, int skillId, int level) - Set skill level API_ResetPlayerSkills(BasePlayer player) - Reset all skills Hooks: OnSkillsPlayerLoaded(BasePlayer player) - Player data loaded OnSkillsXPEarned(BasePlayer player, float amount) - XP earned from gameplay (not admin commands) OnSkillsSkillLevelUp(BasePlayer player, int skillId, int newLevel) - Skill upgraded. Return null to allow, string to deny Web Config Editor Easily manage your Skills settings with our web-based configuration editor. This tool allows you to adjust plugin configurations through a user-friendly interface, eliminating the need to manually edit files on your server. P.S. Join our Discord at https://discord.gg/mevent and request the "Skills" group for access to the web configuration editor. FAQ Q: How many skills come with Skills? A: Skills includes 71+ pre-configured skills across 13 categories, all ready to use with balanced progression systems. Q: Do I need to configure anything? A: No! All skills are pre-configured and balanced. Simply install, enable desired skills, and grant permissions. Q: How does the XP system work? A: Players earn XP through gameplay activities (mining, combat, crafting, etc.) and spend it to unlock skill levels. Q: Can I customize skills? A: Yes! Use the visual editor to modify skill costs, bonuses, requirements, and create new custom skills. Q: What happens on server wipe? A: Fully configurable - you can preserve skills/XP, reset everything, or choose selective wipe protection. Q: Does it work with economy plugins? A: Yes! Full integration with ServerRewards, Economics, BankSystem, IQEconomic, and custom economy systems. Q: Can I migrate from SkillTree or Skills V1? A: Absolutely! Skills automatically converts data from both plugins. All player progress is preserved. Q: What are modal windows? A: Modal windows are custom popup interfaces you can create for additional features like shops, information displays, or mini-games. Q: Which ServerPanel versions are supported? A: Skills supports ServerPanel V1, V2, V4, and Fullscreen templates - all with dedicated banner images and layouts. Q: Can I use custom images? A: Yes! Skills supports ImageLibrary integration with offline image mode for custom skill icons and backgrounds. Q: Is there a cooldown system? A: Yes, configurable cooldowns prevent spam actions and maintain server performance. Q: How does XP transfer work? A: When enabled, defeated players can transfer a percentage of their XP to the killer, adding competitive depth. Q: Can I limit skill access? A: Yes! Skills support permission requirements, playtime requirements, and other prerequisites. Q: What's the performance impact? A: Skills is highly optimized with caching, batch processing, and efficient data structures for minimal server load. Q: How do I add Skills to the ServerPanel menu? A: You can do this directly from the ServerPanel in-game: 1. Open the ServerPanel menu in-game. 2. If you have permission to edit, switch the panel to edit mode so you can see the blue "EDIT CATEGORY" and "EDIT PAGES" buttons. 3. Choose the category where you want Skills to appear and click the "EDIT CATEGORY" button for that category. 4. While you are in this category in the ServerPanel, click the "EDIT PAGES" button to create a new page (or edit an existing one) for Skills. 5. For that page, set these exact parameters: Type: Plugin Plugin Name: Skills Plugin Hook: API_OpenPlugin 6. Save the changes. The Skills button will now appear in the ServerPanel in the category you selected.$24.95 -
Version 0.1.6
81 downloads
Adds a reputation system, similar to the well-known Infestation Survivor Stories(The WarZ). More information on how the plugin works can be found at the bottom in the "Principle of work" section. The ability to create an unlimited number of reputations. The only condition is that their value ranges must not overlap; The ability to flexibly customize the bar for each reputation; The ability to automatically reset reputations upon detecting a wipe; The ability to set a prefix for reputations; The ability to show your reputation by waving to players; The ability to see a player's reputation when aiming at them with scope items. Unfortunately, the reputation will also be displayed if a player is in certain bushes; The ability to see the reputation of all players in the bandit zone; The ability to prohibit players with a certain reputation from entering safe zones (except for the bandit zone). Also, notifying players about it; The ability to set fake reputations to confuse players. reputationmaster.vip - Provides the ability to set a fake rank value. reputationmaster.admin - Provides the ability to set or reset reputation value to other players. { "Chat command": "rep", "Is it worth enabling GameTips for messages?": true, "Is it worth using the AdvancedStatus plugin?": true, "List of language keys for creating language files": [ "en" ], "Is it worth using ddraw to display reputation? NOTE: To use, an administrator flag is required, which is granted before rendering and revoked immediately after issuing the command": true, "Is it worth displaying reputation when aiming at a player with a scope(ddraw should be enabled)? NOTE: The player's reputation may be displayed in certain bushes": true, "Is it worth resetting reputations upon detecting a wipe?": true, "Is it worth forbidding bandits from visiting safe zones(except for Banditcamp)?": true, "The time in seconds during which a bandit can stay in the safe zone(except for Banditcamp) before being killed, making their loot available to everyone": 10.0, "The prefab name for the effect when a bandit is killed in the safe zone. An empty string disables the effect": "assets/prefabs/misc/xmas/advent_calendar/effects/open_advent.prefab", "Assigning reputation for NPCs(Disabled, ForVanilla, ForAll)": "ForAll", "Minimum random reputation value for NPCs": -1000.0, "Maximum random reputation value for NPCs": 1000.0, "Is it worth enabling self-defense for NPCs?": false, "The time in seconds during which self-defense will be active for a lawman after being attacked by another lawman": 900, "The minimum value limit for fake reputation": -10000.0, "The maximum value limit for fake reputation": 10000.0, "UI. Position - Left to Right": true, "UI. Position - AnchorMin": "1 0.9", "UI. Position - AnchorMax": "1 0.9", "UI. Position - OffsetMin": "-208 -15", "UI. Position - OffsetMax": "-16 15", "UI. Reputation Positive Value Image - URL": "https://gitlab.com/IIIaKa/images/-/raw/main/ReputationMaster/ReputationMaster_Positive.png", "UI. Reputation Negative Value Image - URL": "https://gitlab.com/IIIaKa/images/-/raw/main/ReputationMaster/ReputationMaster_Negative.png", "UI. Added Value Sound - Prefab Name. An empty string disables the effect": "assets/bundled/prefabs/fx/notice/item.select.fx.prefab", "Wipe ID": null, "Version": { "Major": 0, "Minor": 1, "Patch": 6 } } Note: To use ddraw, an administrator flag is required, which is granted before rendering and revoked immediately after issuing the command. The player's reputation may be displayed in certain bushes. [ { "Name": "Assassin", "Prefix": "⁎✧⁎ ", "MinValue": -3.40282347E+38, "MaxValue": -1000.0, "Reward": 20.0, "LawmanPenalty": 0.0, "AllowSafeZone": false, "BarSettings": { "Text_Transparency": 1.0, "SubText_Transparency": 1.0, "Order": 20, "Height": 26, "Main_Color(Hex or RGBA)": "#FF341E", "Main_Transparency": 0.6, "Main_Material": "", "Image_Url": "https://gitlab.com/IIIaKa/images/-/raw/main/ReputationMaster/ReputationMaster_Assassin.png", "Image_Local(Leave empty to use Image_Url)": "ReputationMaster_Assassin", "Image_Sprite(Leave empty to use Image_Local or Image_Url)": "", "Image_IsRawImage": false, "Image_Color(Hex or RGBA)": "#FF341E", "Image_Transparency": 1.0, "Image_Outline_Color(Hex or RGBA)": "0.1 0.3 0.8 0.9", "Image_Outline_Transparency": 0.0, "Image_Outline_Distance(Leave empty to disable). Example '0.75 0.75'": null, "Text_Size": 14, "Text_Color(Hex or RGBA)": "#FF341E", "Text_Font(https://umod.org/guides/rust/basic-concepts-of-gui#fonts)": "RobotoCondensed-Bold.ttf", "Text_Offset_Horizontal": 0, "Text_Outline_Color(Hex or RGBA)": "#000000", "Text_Outline_Transparency": 1.0, "Text_Outline_Distance(Leave empty to disable)": null, "SubText_Size": 12, "SubText_Color(Hex or RGBA)": "#FF341E", "SubText_Font": "RobotoCondensed-Bold.ttf", "SubText_Outline_Color(Hex or RGBA)": "0.5 0.6 0.7 0.5", "SubText_Outline_Transparency": 0.0, "SubText_Outline_Distance(Leave empty to disable)": null } }, ... { "Name": "Civilian", "Prefix": "", "MinValue": -4.99, "MaxValue": 9.99, "Reward": 1.0, "LawmanPenalty": -1.0, "AllowSafeZone": true, "BarSettings": { "Text_Transparency": 1.0, "SubText_Transparency": 1.0, "Order": 20, "Height": 26, "Main_Color(Hex or RGBA)": "#5EC0CA", "Main_Transparency": 0.6, "Main_Material": "", "Image_Url": "https://gitlab.com/IIIaKa/images/-/raw/main/ReputationMaster/ReputationMaster_Civilian.png", "Image_Local(Leave empty to use Image_Url)": "ReputationMaster_Civilian", "Image_Sprite(Leave empty to use Image_Local or Image_Url)": "", "Image_IsRawImage": false, "Image_Color(Hex or RGBA)": "#5EC0CA", "Image_Transparency": 1.0, "Image_Outline_Color(Hex or RGBA)": "0.1 0.3 0.8 0.9", "Image_Outline_Transparency": 0.0, "Image_Outline_Distance(Leave empty to disable). Example '0.75 0.75'": null, "Text_Size": 14, "Text_Color(Hex or RGBA)": "#5EC0CA", "Text_Font(https://umod.org/guides/rust/basic-concepts-of-gui#fonts)": "RobotoCondensed-Bold.ttf", "Text_Offset_Horizontal": 0, "Text_Outline_Color(Hex or RGBA)": "#000000", "Text_Outline_Transparency": 1.0, "Text_Outline_Distance(Leave empty to disable)": null, "SubText_Size": 12, "SubText_Color(Hex or RGBA)": "#5EC0CA", "SubText_Font": "RobotoCondensed-Bold.ttf", "SubText_Outline_Color(Hex or RGBA)": "0.5 0.6 0.7 0.5", "SubText_Outline_Transparency": 0.0, "SubText_Outline_Distance(Leave empty to disable)": null } }, ... { "Name": "Paragon", "Prefix": "⋆☆⋆ ", "MinValue": 1000.0, "MaxValue": 3.40282347E+38, "Reward": 20.0, "LawmanPenalty": -125.0, "AllowSafeZone": true, "BarSettings": { "Text_Transparency": 1.0, "SubText_Transparency": 1.0, "Order": 20, "Height": 26, "Main_Color(Hex or RGBA)": "#0AFBFB", "Main_Transparency": 0.6, "Main_Material": "", "Image_Url": "https://gitlab.com/IIIaKa/images/-/raw/main/ReputationMaster/ReputationMaster_Paragon.png", "Image_Local(Leave empty to use Image_Url)": "ReputationMaster_Paragon", "Image_Sprite(Leave empty to use Image_Local or Image_Url)": "", "Image_IsRawImage": false, "Image_Color(Hex or RGBA)": "#0AFBFB", "Image_Transparency": 1.0, "Image_Outline_Color(Hex or RGBA)": "0.1 0.3 0.8 0.9", "Image_Outline_Transparency": 0.0, "Image_Outline_Distance(Leave empty to disable). Example '0.75 0.75'": null, "Text_Size": 14, "Text_Color(Hex or RGBA)": "#0AFBFB", "Text_Font(https://umod.org/guides/rust/basic-concepts-of-gui#fonts)": "RobotoCondensed-Bold.ttf", "Text_Offset_Horizontal": 0, "Text_Outline_Color(Hex or RGBA)": "#000000", "Text_Outline_Transparency": 1.0, "Text_Outline_Distance(Leave empty to disable)": null, "SubText_Size": 12, "SubText_Color(Hex or RGBA)": "#0AFBFB", "SubText_Font": "RobotoCondensed-Bold.ttf", "SubText_Outline_Color(Hex or RGBA)": "0.5 0.6 0.7 0.5", "SubText_Outline_Transparency": 0.0, "SubText_Outline_Distance(Leave empty to disable)": null } } ] MinRange, MaxRange - Range of values for the group rank; Name - Name of the rank; Reward - Reward for killing or reviving(divided by 2) a player in this rank. If the initiating player has IsLawman = true, the value will be positive, otherwise, it will be negative; LawmanPenalty - Penalty for a peaceful player of this rank, for killing another peaceful player. If the target did not initiate this pvp first; AllowSafeZone - Is this rank allowed to visit Safe Zones (except Bandit Camp)? The "Forbid bandits from visiting the SafeZone (except for Banditcamp)" config should be set to true. Path: *SERVER*\oxide\data\ReputationMaster\ReputationRanks.json EN: { "CmdNotAllowed": "You do not have permissions to use this command!", "CmdPlayerNotFound": "Player '{0}' not found! You must provide the player's name or Id.", "CmdNpcNotFound": "Npc '{0}' not found or has an invalid entity type! You must provide the npc's network Id.", "CmdEntityNotFound": "Entity not found! Try getting closer to the entity.", "CmdMultiplePlayers": "Multiple players found: {0}", "CmdAdmin": "Available admin commands:\n\n<color=#D1CBCB>/rep</color> <color=#D1AB9A>netId</color> - Get the netId of the entity you are looking at.\n<color=#D1CBCB>/rep</color> <color=#D1AB9A>set *floatValue* *nameOrId*</color> - Set reputation for the specified player.\n<color=#D1CBCB>/rep</color> <color=#D1AB9A>set *floatValue* self</color> - Set reputation for yourself.\n<color=#D1CBCB>/rep</color> <color=#D1AB9A>set *floatValue* npc *netId* force(optional)</color> - Set reputation for the specified npc. The last argument controls forced assignment.\n<color=#D1CBCB>/rep</color> <color=#D1AB9A>fake *floatValue* *nameOrId*</color> - Set fake reputation for the specified player.\n<color=#D1CBCB>/rep</color> <color=#D1AB9A>fake *floatValue* self</color> - Set fake reputation for yourself.\n<color=#D1CBCB>/rep</color> <color=#D1AB9A>fake *floatValue* npc *netId* force(optional)</color> - Set fake reputation for the specified npc. The last argument controls forced assignment.\n<color=#D1CBCB>/rep</color> <color=#D1AB9A>info *nameOrId*</color> - Show full reputation information for the specified player.\n<color=#D1CBCB>/rep</color> <color=#D1AB9A>info self</color> - Show full reputation information for yourself.\n<color=#D1CBCB>/rep</color> <color=#D1AB9A>reset *nameOrId*</color> - Reset reputation for the specified player.\n<color=#D1CBCB>/rep</color> <color=#D1AB9A>reset self</color> - Reset your reputation.\n<color=#D1CBCB>/rep</color> <color=#D1AB9A>reset all</color> - Reset reputation for all players.\n\n--------------------------------------------------", "CmdMain": "Available commands:\n\n<color=#D1CBCB>/rep</color> <color=#D1AB9A>fake *floatValue*</color> - Set fake reputation for yourself.\n\n--------------------------------------------------", "CmdSetNpcFailed": "Failed to set reputation for npc '{0}'! Try adding the 'force' argument for forced assignment.", "CmdSetNpc": "Npc '{0}' has received a new reputation value: {1}({2})!", "CmdSetPlayer": "Player '{0}' has received a new reputation value: {1}({2})!", "CmdFakeNpcFailed": "Failed to set fake reputation for npc '{0}'! Try adding the 'force' argument for forced assignment.", "CmdFakeNpc": "Npc '{0}' has received a new fake reputation value: {1}({2})!", "CmdFakeSelf": "A new fake reputation value has been successfully set: {0}({1})!", "CmdFakePlayer": "Player '{0}' has received a new fake reputation value: {1}({2})!", "CmdNetId": "The NetID of the entity you are looking at: '{0}'({1}).", "CmdInfoPlayer": "Player '{0}' reputation:\n<color=#D1AB9A>Reputation:</color> {1} ({2})\n<color=#D1AB9A>Fake Reputation:</color> {3} ({4})\n<color=#D1AB9A>Last Helper:</color> {5}\n\n--------------------------------------------------", "CmdInfoNPC": "NPC '{0}' reputation:\n<color=#D1AB9A>Reputation:</color> {1}({2})\n<color=#D1AB9A>Fake Reputation:</color> {3}({4})\n<color=#D1AB9A>Last Helper:</color> {5}\n\n--------------------------------------------------", "CmdResetTarget": "{0}'s reputation has been successfully reset!", "CmdResetSelf": "Your reputation has been successfully reset!", "CmdResetAll": "{0} reputations have been successfully reset!", "MsgReputation": "Reputation", "MsgShowPlayerReputation": "Player '{0}' reputation: {1}({2})", "MsgNewReputation": "Congratulations! You have received the reputation '{0}'!", "MsgSelfDefense": "You attacked a peaceful player '{0}'({1}) first. If they kill you within {2} minutes, they will not receive a penalty", "MsgSelfDefenseNoPenalty": "You killed a peaceful player '{0}'({1}). However, since they attacked you first, you will not be penalized", "MsgLawmanEnterBanditZone": "You have entered the Bandit Camp! Stay vigilant, this place is full of thugs!", "MsgLawmanLeaveBanditZone": "You have left the Bandit Camp! We recommend avoiding this area!", "MsgBanditEnterBanditZone": "Welcome to the Bandit Camp! We are glad to have you back!", "MsgBanditLeaveBanditZone": "You have left the Bandit Camp! We hope to see you again soon!", "MsgBanditEnterSafeZone": "You are not welcome here! If you do not leave this place, you will be killed in {0} seconds!", "MsgBanditLeaveSafeZone": "Do not come back here! People like you belong in the Bandit Camp!" } RU: { "CmdNotAllowed": "У вас недостаточно прав для использования этой команды!", "CmdPlayerNotFound": "Игрок '{0}' не найден! Вы должны указать имя или ID игрока.", "CmdNpcNotFound": "Нпц '{0}' не найден, либо не верный тип сущности! Вы должны указать Id нпц.", "CmdEntityNotFound": "Сущность не найдена! Попробуйте подойти ближе к объекту.", "CmdMultiplePlayers": "Найдено несколько игроков: {0}", "CmdAdmin": "Доступные админ команды:\n\n<color=#D1CBCB>/rep</color> <color=#D1AB9A>netId</color> - Получить netId сущности, на которую вы смотрите.\n<color=#D1CBCB>/rep</color> <color=#D1AB9A>set *дробноеЗначение* *имяИлиАйди*</color> - Установить репутацию указанному игроку.\n<color=#D1CBCB>/rep</color> <color=#D1AB9A>set *дробноеЗначение* self</color> - Установить репутацию себе.\n<color=#D1CBCB>/rep</color> <color=#D1AB9A>set *дробноеЗначение* npc *netId* force(опционально)</color> - Установить репутацию указанному npc. Последний аргумент принудительно задаёт значение.\n<color=#D1CBCB>/rep</color> <color=#D1AB9A>fake *дробноеЗначение* *имяИлиАйди*</color> - Установить ложную репутацию указанному игроку.\n<color=#D1CBCB>/rep</color> <color=#D1AB9A>fake *дробноеЗначение* self</color> - Установить себе ложную репутацию.\n<color=#D1CBCB>/rep</color> <color=#D1AB9A>fake *дробноеЗначение* npc *netId* force(опционально)</color> - Установить ложную репутацию указанному npc. Последний аргумент принудительно задаёт значение.\n<color=#D1CBCB>/rep</color> <color=#D1AB9A>info *имяИлиАйди*</color> - Показать полную информацию о репутации указанного игрока.\n<color=#D1CBCB>/rep</color> <color=#D1AB9A>info self</color> - Показать полную информацию о своей репутации.\n<color=#D1CBCB>/rep</color> <color=#D1AB9A>reset *имяИлиАйди*</color> - Сбросить репутацию указанному игроку.\n<color=#D1CBCB>/rep</color> <color=#D1AB9A>reset self</color> - Сбросить свою репутацию.\n<color=#D1CBCB>/rep</color> <color=#D1AB9A>reset all</color> - Сбросить репутацию всем игрокам.\n\n--------------------------------------------------", "CmdMain": "Доступные команды:\n\n<color=#D1CBCB>/rep</color> <color=#D1AB9A>fake *дробноеЗначение*</color> - Установить себе ложную репутацию.\n\n--------------------------------------------------", "CmdSetNpcFailed": "Не удалось установить репутацию нпц '{0}'! Попробуйте добавить аргумент 'force' для принудительной установки.", "CmdSetNpc": "Нпц '{0}' получил новое значение репутации: {1}({2})!", "CmdSetPlayer": "Игрок '{0}' получил новое значение репутации: {1}({2})!", "CmdFakeNpcFailed": "Не удалось установить ложную репутацию нпц '{0}'! Попробуйте добавить аргумент 'force' для принудительной установки.", "CmdFakeNpc": "Нпц '{0}' получил новое значение ложной репутации: {1}({2})!", "CmdFakeSelf": "Новое значение ложной репутации успешно установлено: {0}({1})!", "CmdFakePlayer": "Игрок '{0}' получил новое значение ложной репутации: {1}({2})!", "CmdNetId": "NetID сущности, на которую вы смотрите: '{0}'({1}).", "CmdInfoPlayer": "Репутация игрока '{0}':\n<color=#D1AB9A>Репутация:</color> {1}({2})\n<color=#D1AB9A>Ложная репутация:</color> {3}({4})\n<color=#D1AB9A>Последний помощник:</color> {5}\n\n--------------------------------------------------", "CmdInfoNPC": "Репутация нпц '{0}':\n<color=#D1AB9A>Репутация:</color> {1}({2})\n<color=#D1AB9A>Ложная репутация:</color> {3}({4})\n<color=#D1AB9A>Последний помощник:</color> {5}\n\n--------------------------------------------------", "CmdResetTarget": "Репутация '{0}' успешно сброшена!", "CmdResetSelf": "Ваша репутация успешно сброшена!", "CmdResetAll": "Успешно сброшено {0} репутаций!", "MsgReputation": "Репутация", "MsgShowPlayerReputation": "Репутация игрока '{0}': {1}({2})", "MsgNewReputation": "Поздравляем! Вы получили репутацию '{0}'!", "MsgSelfDefense": "Вы первым атаковали мирного игрока '{0}'({1}). Если он вас убьет в течении {2} минут, то не получит штрафа", "MsgSelfDefenseNoPenalty": "Вы убили мирного игрока '{0}'({1}). Но так как он первым вас атаковал, вас не накажут", "MsgLawmanEnterBanditZone": "Вы пришли в Лагерь Бандитов! Будьте бдительны, здесь полно разных отморозков!", "MsgLawmanLeaveBanditZone": "Вы покинули Лагерь Бандитов! Советуем обходить это место!", "MsgBanditEnterBanditZone": "Добро пожаловать в Лагерь Бандитов! Мы рады вашему возвращению!", "MsgBanditLeaveBanditZone": "Вы покинули Лагерь Бандитов! Надеемся на скорое ваше возвращение!", "MsgBanditEnterSafeZone": "Вам здесь не рады! Если вы не покинете это место, то вас убьет через {0} секунд!", "MsgBanditLeaveSafeZone": "Больше сюда не возвращайтесь! Таким как вы место в Лагере Бандитов!" } fake *floatValue* - Set a fake reputation. Permission "reputationmaster.vip" required; netId - Get the netId of the entity you are looking at. Permission "reputationmaster.admin" required; set *floatValue* *nameOrId* - Set reputation for the specified player. Permission "reputationmaster.admin" required; set *floatValue* self - Set reputation for yourself. Permission "reputationmaster.admin" required; set *floatValue* npc *netId* force(optional) - Set reputation for the specified npc. The last argument controls forced assignment. Permission "reputationmaster.admin" required; fake *floatValue* *nameOrId* - Set fake reputation for the specified player. Permission "reputationmaster.admin" required; fake *floatValue* self - Set fake reputation for yourself. Permission "reputationmaster.admin" required; fake *floatValue* npc *netId* force(optional) - Set fake reputation for the specified npc. The last argument controls forced assignment. Permission "reputationmaster.admin" required; info *nameOrId* - Show full reputation information for the specified player. Permission "reputationmaster.admin" required; info self - Show full reputation information for yourself. Permission "reputationmaster.admin" required; reset *nameOrId* - Reset reputation for the specified player. Permission "reputationmaster.admin" required; reset self - Reset your reputation. Permission "reputationmaster.admin" required; reset all - Reset reputation for all players. Permission "reputationmaster.admin" required. Example: /rep fake 150 /rep fake -40 iiiaka /rep set 23 iiiaka /rep set npc 64 4032 ReputationValueUpdated: Called after the player's reputation value has changed. Works only for players that are not NPCs. void ReputationValueUpdated(ulong userID, string repName, float repValue) { Puts($"{userID} updated a reputation value to {repValue}. Current reputation rank is {repName}."); } ReputationUpdated: Called after the player receives a new reputation rank. Works only for players that are not NPCs. void ReputationUpdated(ulong userID, string oldRep, string newRep, bool isLawman, bool allowSafeZone, float repValue) { Puts($"{userID} has updated their rank from {oldRep} to {newRep}. Is peaceful: {isLawman}\nSafe Zones: {allowSafeZone}\nReputation Value: {repValue}"); } [PluginReference] private Plugin ReputationMaster; There are 4 api methods: GetReputationValue: Used to retrieve the reputation value, real or fake. Returns null on failure. To call the GetReputationValue method, you need to pass 2 parameters: userID as a ulong; realRep as a bool. What reputation value to get, real or fake? This parameter is optional. (float)(ReputationMaster?.Call("GetReputationValue", player.userID, true) ?? 0f); GetReputationName: Used to retrieve the reputation name, real or fake. Returns an empty string on failure. To call the GetReputationName method, you need to pass 2 parameters: userID as a ulong; realRep as a bool. What reputation name to get, real or fake? This parameter is optional. (string)(ReputationMaster?.Call("GetReputationName", player.userID, true) ?? string.Empty); SetReputationValue: Used to retrieve the reputation name, real or fake. Returns a false on failure. To call the SetReputationValue method, you need to pass 3 parameters: Available options: userID as a ulong or a string; player as a BasePlayer. newValue as float; realRep as a bool. What reputation value to get, real or fake? This parameter is optional. (bool)(ReputationMaster?.Call("SetReputationValue", player.UserIDString, 150f, true) ?? false);//(string)userID (bool)(ReputationMaster?.Call("SetReputationValue", player.userID, 150f, true) ?? false);//(ulong)userID (bool)(ReputationMaster?.Call("SetReputationValue", player, 150f, true) ?? false);//(BasePlayer)player ***recommended option*** SetReputationValues: Used to retrieve the reputation name, real or fake. Returns a false on failure. To call the SetReputationValues method, you need to pass 3 parameters: Available options: userID as a ulong or a string; player as a BasePlayer. value as float; fakeValue as a float. (bool)(ReputationMaster?.Call("SetReputationValues", player.UserIDString, 150f, 50f) ?? false);//(string)userID (bool)(ReputationMaster?.Call("SetReputationValues", player.userID, 150f, 50f) ?? false);//(ulong)userID (bool)(ReputationMaster?.Call("SetReputationValues", player, 150f, 50f) ?? false);//(BasePlayer)player ***recommended option*** You can create as many reputation ranks as you want, but there are only two main groups: Lawmen(peaceful or civilians); Outlaws(bandits). Each kill has a different scores depending of the reputation rank of the victim and attacker. For exampe, if you are a Civilian, you will receive: Paragon: -20 Vigilant: -15 Guardian: -10 Lawman: -4 Deputy: -3 Constable: -2 Civillian: -1 Thug: +2 Outlaw: +3 Bandit: +4 Hitman: +10 Villain: +15 Assassin: +20 Reviving: For reviving a player, you will receive a reward divided by 2. If the target is a lawman, the reward will be positive, else if a target is a bandit, it will be negative. Also, this is the only way out of bandit rank for bandits. Outlaw: When you reach the outlaw reputation, you have no more back! Except for reviving a peaceful player. You can kill other bandits but still counting as negative reputation! So, after you reach the outlaw reputation rank, scores by killing a player of a certain reputation will be as follows(negative reward value) : Paragon: -20 Vigilant: -15 Guardian: -10 Lawman: -4 Deputy: -3 Constable: -2 Civillian: -1 Thug: -2 Outlaw: -3 Bandit: -4 Hitman: -10 Villain: -15 Assassin: -20 Lawman: The scores will be as follows for each kill a outlaw reputation ranks(positive reward value) : Assassin: +20 Villain: +15 Hitman: +10 Bandit: +4 Outlaw: +3 Thug: +2 But for killing a peaceful player, you will receive penalties based on your rank. A list of penalties for each reputation rank: Paragon: -125 Vigilante: -60 Guardian: -40 Lawman: -15 Deputy: -2 Constable: -1 Civilian: -1 There is also a self-defense system that works as follows: If a peaceful player initiates an attack on another peaceful player, a timer of 15 minutes(sets from config) is activated, during which the victim can kill the attacker without penalties. So, it's very hard to become a lawman, and it's very easy to get out from lawman.$4.99- 6 comments
-
- 1
-
-
- #rust
- #reputation
- (and 25 more)