Image

Hacking The Modern Tamagotchi With UART

Although not technically the first virtual pet, the Tamagotchi handhelds certainly popularized the idea and made it a worldwide phenomenon. In the late 90s it was hard to go out in public and not see them dangling from backpacks and belt loops. They turned out to be more than a passing fad, too. There have been Tamagotchis in various forms since then, and one of the latest, the Tamagotchi Paradise, is uniquely hackable thanks to this custom UART interface.

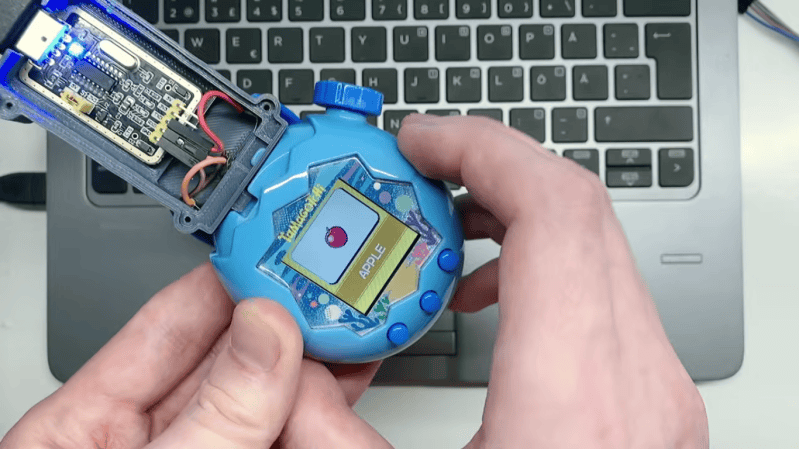
The build starts with a simple and inexpensive CH340G UART adapter with a built-in USB interface. A custom 3D printed enclosure is used to house the adapter and also help to expose the interface to the Tamagotchi. This is done by wiring three pins to nickel strips, which are threaded through slits in the case and looped back around to create a pogo-style adapter for the Tamagotchi’s custom dock. Normally this would be used to link to other Tamagotchis, but in this case the USB-to-UART adapter mimics it, allowing for all kinds of in-game shenanigans. The project’s creator [Squalius] shows it off by connecting it directly to a browser tool in Google Chrome.

Not only that, but this can also be used to modify the software running on the handheld entirely, with the video showing demos playing not only Super Mario but also DOOM (of course). This isn’t too surprising given that these games are built with modern 32-bit ARM microcontrollers. For the 90s purists, though, it probably won’t surprise anyone to know that these devices have been the subject of various hacks almost since they came out.
Continue reading “Hacking The Modern Tamagotchi With UART” →

Iz in ur Tenda AC10V6, hax0ring your printf output. (Credit: Low Level, YouTube)

Hacking A Tenda AC1200 Wi-Fi Router With A CVE Combo

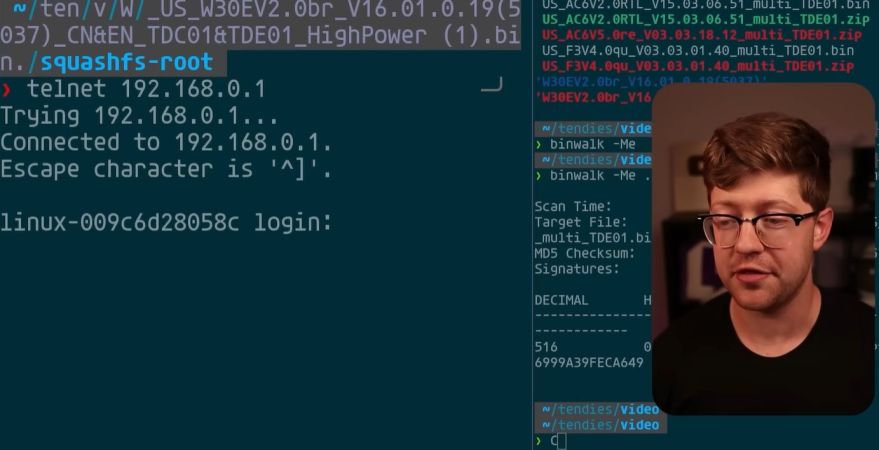
It’s rather awkward when you buy a piece of hardware like a sketchy router to make a video about its hidden admin password backdoor – known as CVE-2026-11405 – only to discover that you bought the wrong Tenda router, namely the AC10V6 model. After making this mistake, [Low Level] did the only reasonable thing one ought to do in this case, and try to find an exploit in this ‘wrong’ router as well.

The obvious start here is to do the same as with the other exploit, in that you download a firmware image from the manufacturer’s website, then pluck it apart using binwalk to do an initial check for juicy files. After that tools like Ghidra can be used to do a more in-depth analysis of any binary files, with a special focus on things like user-facing elements like login screen, as input validation will likely forever remain the number one type of exploited CVE.

One major change that Tenda made here was to encrypt the firmware image, which seemed suspicious. With that easy path blocked, the research of others on different Tenda routers was looked at, including the AC20 with the fascinating Telnet exploit in the form of CVE-2025-9090 where merely poking a file on the device turned on the Telnet service. This left the minor issue of finding a password to log into said Telnet session.

Continue reading “Hacking A Tenda AC1200 Wi-Fi Router With A CVE Combo” →

[Usagi Electric] and his home brew computer

TMS9900-based Home Brew Computer

[Usagi Electric] is known for minicomputers, but in a recent video, he shows off his TMS9900-based homebrew computer. The TMS9900 CPU was an early 16-bit CPU famously used in the old TI-99/4A computer, but as the video points out, it wasn’t put to particularly good use in the TI-99/4A because its RAM was hidden behind an inefficient interface and it didn’t leverage its 16-bit address space.

The plan is for this computer to have 2K words of ROM, 6K words of RAM, and three serial lines: one for the console terminal, another for a second user console terminal, and the third for access to a tape drive.

Continue reading “TMS9900-based Home Brew Computer” →

Image

Serial And UPDI Handled Together With One Convenient Circuit

Sometimes it’s nice when you can do everything you need to do with just one single port. In this vein, [Nicola Strappazzon] whipped up a circuit to combine serial and UPDI programming in a very convenient way.

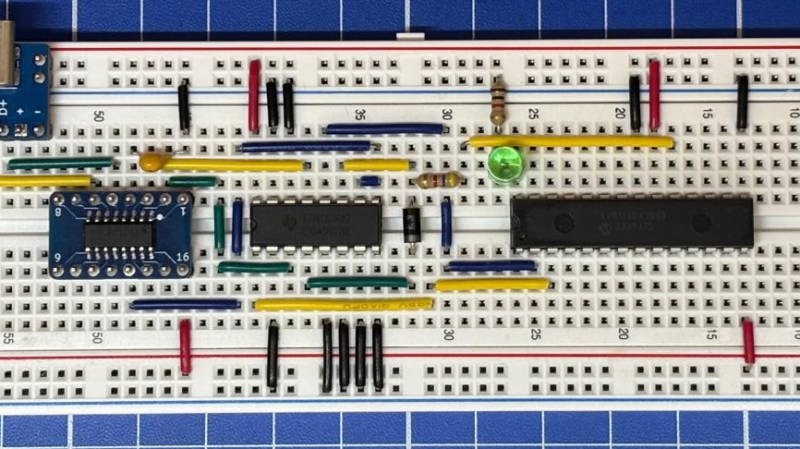
As an example, [Nicola] demonstrates the concept using an AVR128DA28 microcontroller. It’s paired with a 4052 multiplexer IC and a CH340 USB-to-serial chip. Everything is wired up such that the 4052 acts as a switch for the signal coming from the CH340. When the RTS flow-control signal is set high, it switches the 4052 to hook up the CH340’s RX and TX pins to the UDPI interface on the AVR microcontroller. Conversely, when the RTS signal is set low, the CH340 is instead hooked up to the serial UART on the microcontroller. From there, it’s a simple matter of configuring avrdude to properly set the RTS pin when attempting to program the attached device.

If you’re working with UPDI devices and you want to be able to talk to them and program them with a minimum of fuss, this project might be useful for you. We’ve looked at dedicated UPDI programmers before, too. If you’re cooking up your own nifty microcontroller hacks, don’t hesitate to let us know on the tipsline.

Two hands soldering components on a purpble PCB

Vintage Intel 8080 Runs On A Modern FPGA

If you’re into retro CPUs and don’t shy away from wiring old-school voltages, [Mark]’s latest Intel 8080 build will surely spark your enthusiasm. [Mark] has built a full system board for the venerable 8080A-1, pushing it to run at a slick 3.125 MHz. Remarkable is that he’s done so using a modern Microchip FPGA, without vendor lock-in or proprietary flashing tools. Every step is open source.

Getting this vintage setup to work required more than logical tinkering. Mark’s board supplies the ±5 V and +12 V rails the 8080 demands, plus clock and memory interfacing via the M2GL005-TQG144I FPGA. The design is lean: two-layer PCB, basic level-shifters, and a CM32 micro as USB-to-UART fallback. Not everything went smoothly: incorrect footprints, misrouted gate drivers, thermal runaway in the clock section; but he managed to tackle it.

What sets this project apart is the resurrection of a nearly 50-year-old CPU. It’s also, how thoroughly thought-out the modern bridge is—from bitstream loading via OpenOCD to clever debugging of crystal oscillator drift using a scope. [Mark]’s love of the architecture and attention to low-level detail makes this more than a show-off build.
Continue reading “Vintage Intel 8080 Runs On A Modern FPGA” →

Image

Exploring The RP2350’s UART-Bootloader

The RP2350 has a few advantages over its predecessor, one of which is the ability to load firmware remotely via UART, as [Thomas Pfister] has documented on his blog and in the video below.

[Thomas] had a project that needed more PWM than the RP2350 could provide, and hit upon the idea of using a second RP2350 as a port expander. Now, one could hard-code this, but dealing with two sets of firmware on one board can be annoying. That’s where the UART bootloader comes in: it will allow [Thomas] to program the port-expander RP2350 using the main microcontroller. Thus he only has to worry about one firmware, speeding up development.

Continue reading “Exploring The RP2350’s UART-Bootloader” →

Multifunctional USB controlled PCB on blue background

How A Tiny Relay Became A USB Swiss Army Knife

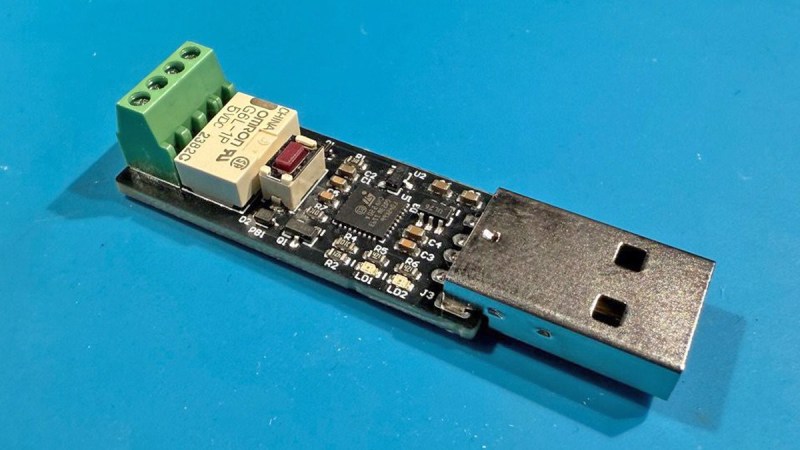
Meet the little board that could: [alcor6502]’s tiny USB relay controller, now evolved into a multifunction marvel. Originally built as a simple USB relay to probe the boundaries of JLCPCB’s production chops, it has become a compact utility belt for any hacker’s desk drawer. Not only has [alcor6502] actually built the thing, he even provided instructions. If you happened to be at Hackaday in Berlin, you now might even own one, as he handed out twenty of them during his visit. If not, read on and build it yourself.

This thing is not just a relay, and that is what makes it special. Depending on a few solder bridges and minimal components, it shape-shifts into six different tools: a fan controller (both 3- and 4-pin!), servo driver, UART interface, and of course, the classic relay. It even swaps out a crystal oscillator for USB self-sync using STM32F042‘s internal RC – no quartz, less cost, same precision. A dual-purpose BOOT0 button lets you flash firmware and toggle outputs, depending on timing. Clever reuse, just like our mothers taught us.

It’s the kind of design that makes you want to tinker again. Fewer parts. More function. And that little smile when it just works. If this kind of clever compactness excites you too, read [alcor6502]’s build log and instructions here.