Search the Community
Showing results for tags 'build'.
-
Version 0.1.29
2,831 downloads
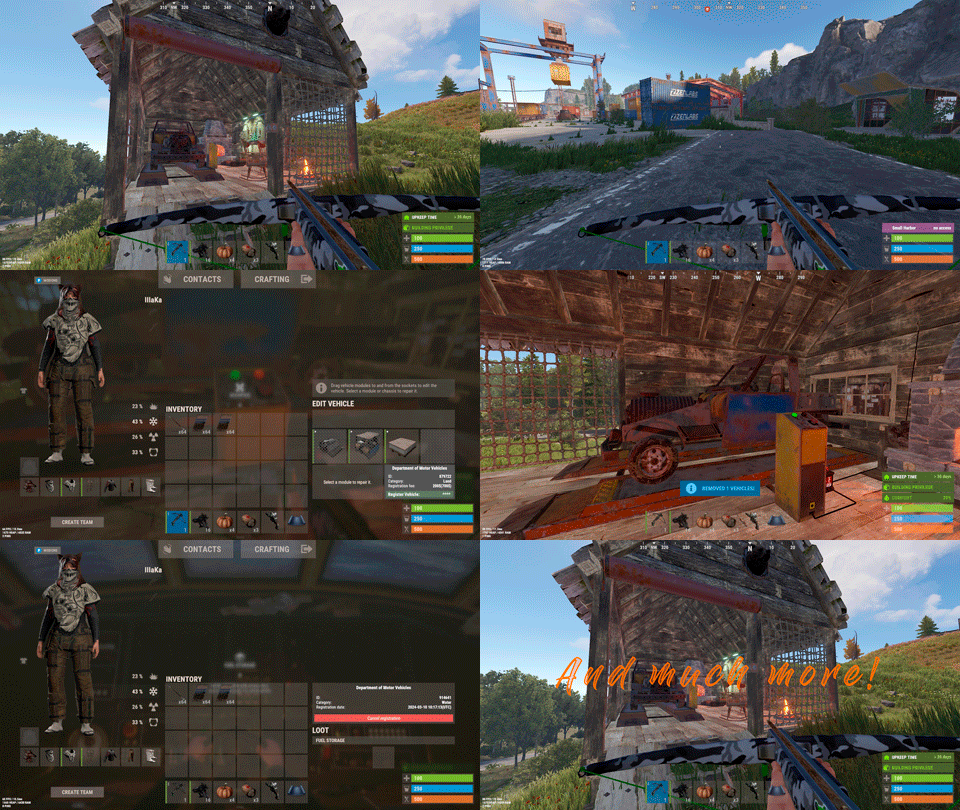
Plugin for Real PvE servers, featuring damage prevention, anti-griefing measures, customizable PvP zones, an automatic loot queue in radtowns and raid zones, and much more. The ability to set "server.pve" to "true", which allows the server to have a "PvE" flag; Damage from NPC's are enabled when server.pve is true; The ability to inflict damage to one's own structures with "server.pve true"; The ability to ignore Hostile depending on the zone(PvE/PvP) ; The ability to destroy(including external walls) or rotate one's structures without any time constraints; The ability to toggle the gather resource restriction in someone else's Building Privileges; No one, except the owner or their friends, will be able to open their loot containers (chests, storages, bodies, etc.); Administrators can bypass loot restrictions; The ability to schedule the killing of players if they disconnect within someone else's Building Privilege; Disabling backpack and active item drop upon death, even if backpack is full; The ability to modify the items given at spawn on the beach; The ability to create an unlimited number of custom permissions; The ability to allow players to bypass the queue; The ability to set limits on sleeping bags, shelters and auto turrets for each permission; The ability to set a multiplier for the prices of monuments and events for each permission; The ability to customize the price and amount of vehicles for each of your custom permissions; The ability to assign vehicles to each player; The ability to customize the assigned price and available amount of vehicles for each of your custom permissions; An assigned vehicle can't be damaged, looted or pushed by other players, but it can be pushed if it is within someone else's Building Privilege; The ability to loot monuments through a queue system; The ability to configure monuments, setting their looting price and time, and adjusting status bars for each monument; The ability to acquire the privilege to loot events (helicopters, bradleys, and raidable bases) through a purchase; The ability to customize the price of each event types and loot attempts (lives); NPCs only aggress against players who are looting monuments, events or raidable bases; Only players who are looting monuments, events or raidable bases can inflict damage to NPCs; RaidableBases are protected from griefing(no damage, no loot and etc). Only the owner can interact with the raid; Neutral RaidableBases can be purchased; Prices for purchasing neutral raids are configurable for each difficulty level; Configurable raid limits (currently available) along with discount multipliers for purchases, for each permission. File location: *SERVER*\oxide\data\RealPVE\PermissionConfig.json Default: https://pastebin.com/5VtWZZVr All permissions are created and configured in the config file under the "List of permissions" section. You can create as many permissions as needed and customize them flexibly. It is recommended to use the prefix "realpve" in the permission's name, for example: "realpve.vip". NOTE: The first permission will serve as the default permission for those who do not have any permissions. { "List of permissions. NOTE: The first permission will be used by default for those who do not have any permissions.": [ { "Permission Name": "realpve.default", "Bypass Queue": false, "Limit of beds": 15, "Limit of shelters": 1, "Limit of auto turrets": 12, "Seconds that will be skipped when opening HackableLockedCrate": 0.0, "Monuments price multiplier": 1.0, "Events price multiplier": 1.0, "Limit of RaidableBases(at the time)": 1, "RaidableBases price multiplier": 1.0, "Vehicles settings": { "Horse": { "Limit": 1, "Price": 10.0 }, "Bike": { "Limit": 1, "Price": 5.0 }, "MotorBike": { "Limit": 1, "Price": 20.0 }, "Car": { "Limit": 1, "Price": 25.0 }, ... } }, { "Permission Name": "realpve.vip", "Bypass Queue": true, "Limit of beds": 20, "Limit of shelters": 2, "Limit of auto turrets": 15, "Seconds that will be skipped when opening HackableLockedCrate": 450.0, "Monuments price multiplier": 0.9, "Events price multiplier": 0.9, "Limit of RaidableBases(at the time)": 2, "RaidableBases price multiplier": 0.9, "Vehicles settings": { "Horse": { "Limit": 5, "Price": 9.0 }, "Bike": { "Limit": 5, "Price": 4.5 }, "MotorBike": { "Limit": 5, "Price": 18.0 }, "Car": { "Limit": 5, "Price": 22.5 }, ... } } ], "Version": { "Major": 0, "Minor": 1, "Patch": 1 } } An example of a monument/event/rb multipliers using default permissions. For example, if you set the price for the Harbor at $1000, a player with the default permission(1.0) will pay $1000 * 1 = $1000. Meanwhile, a player with a VIP permission(0.9) will pay $1000 * 0.9 = $900. However, if a player possesses a misbehaving permission with a value of 1.1, they will need to pay $1000 * 1.1 = $1100. { "Chat command": "realpve", "Chat admin command": "adminpve", "Is it worth enabling GameTips for messages?": true, "Is it worth using Notify plugins for messages instead of the vanilla UI?": false, "Is it worth forcibly implementing PvE for a server?": true, "Is it worth forcing the tutorial mode support?": true, "Is it worth rechecking the limits when removing permissions?": true, "Is it worth preventing death on logout in safe zones?": true, "Entities spawned by the server allowed to be looted in someone else's building privilege zone(None, Wood, Ore, Flesh, Collectible, All)": "All", "Is it worth forcibly blocking damage from the patrol helicopter to building blocks and deployables?": false, "Is it worth preventing players from handcuffing others?": true, "Is it worth assigning portals(Halloween and Christmas) to the first player?": true, "Is it worth preventing a backpack from dropping upon player death?": true, "Is it worth preventing damage to the laptop of the Hackable Crate?": true, "Is it worth removing the penalties for recyclers in safe zones?": true, "Is it worth allowing all players to pick up items dropped by others? If enabled, personal settings will be ignored": false, "Is it worth protecting sleeping players from animals?": true, "Is it worth allowing players to loot banned players items?": false, "Specify the regular message type for notify": 0, "Specify the warning message type for notify": 1, "The format that will be used for prices": "${0}", "Vehicles - Time in seconds to display the marker when searching for a vehicle. A value of 0 disables the marker": 15.0, "Anti-Sleeper - Time in seconds after which a player will be killed if they disconnect while inside someone else's Building Privilege. Set to 0 to disable": 1200.0, "Is it worth enabling support for the 'Npc Random Raids' plugin?": true, "List of language keys for creating language files(excluding ru)": [ "en" ], "Settings id for the admin loot status bar": "admin_loot", "Is friendly fire enabled by default when creating a new team?": false, "PvP - Is it worth adding map markers for PvP zones?": true, "PvP - Name of the map maker": "PvP Zone!", "PvP - Settings id for the status bar": "pvp", "PvP - Settings id for the progress status bar": "pvp", "Wipe ID": null, "Version": { "Major": 0, "Minor": 1, "Patch": 24 } } ENG: https://pastebin.com/ZMUL6pYL RUS: https://pastebin.com/Mx8cbMts Main commands(/realpve) : autobuy - Toggle autobuy for monuments, vanilla events and raid bases with a total price greater than 0; pickup - Toggle access to pick up your items from the ground for all players; share - Manage access to looting your entities by other players(outside of the team): status *entityID*(optional) - Display information about the settings of the entity you are looking at or the one you specified; add *nameOrID* *entityID*(optional) - Add the specified player to the entity list you are looking at or the one you specified; remove *nameOrID* *entityID*(optional) - Remove the specified player from the entity list you are looking at or the one you specified; toggle *entityID*(optional) - Toggle the entity list you are looking at or the one you specified; delete *entityID*(optional) - Delete the settings for the entity you are looking at or the one you specified; clear - Delete the settings for all your entities. team - Manage your team: ff - Toggle the ability to damage your teammates. vehicle - Manage your vehicles: list - List of IDs for all your vehicles; find *vehicleID*(optional) - Help finding the vehicle you are looking at or the one you specified; unlink *vehicleID*(optional) - Unlink the vehicle you are looking at or the one you specified; clear - Unlink all your vehicles. Admin commands(/adminpve). Permission "realpve.admin" required: autobuy - Manage autobuy for monuments, vanilla events and raid bases: *nameOrId* - Toggle autobuy for the specified player; force monument/event/rb - Toggle forced autobuy. If enabled, player settings will be ignored; clear - Disable autobuy for everyone. config - Manage settings for values in the configuration file: forcepve *boolValue*(optional) - Is it worth forcibly implementing PvE for a server? forcetutorial *boolValue*(optional) - Is it worth forcing the tutorial mode support? gametips *boolValue*(optional) - Is it worth enabling GameTips for messages? perm_limits *boolValue*(optional) - Is it worth rechecking the limits when removing permissions? safe_death *boolValue*(optional) - Is it worth preventing death on logout in safe zones? hostile_zones *stringValues* - Zones where Hostile will be ignored(Disabled, PvE, PvP, All) ; loot_privilege *stringValues* - Entities spawned by the server allowed to be looted in someone else's building privilege zone(None, Wood, Ore, Flesh, Collectible, All) ; heli_damage *boolValue*(optional) - Is it worth forcibly blocking damage from the patrol helicopter to building blocks and deployables? breakin_apt *boolValue*(optional) - Is it worth preventing players from breaking into apartments? breakin_shop *boolValue*(optional) - Is it worth preventing players from breaking into rented shops? rerent_shop *boolValue*(optional) - Is it worth preventing players from re-renting occupied shops? handcuffs *boolValue*(optional) - Is it worth preventing players from handcuffing others? portals *boolValue*(optional) - Is it worth assigning portals(Halloween and Christmas) to the first player? backpack_drop *boolValue*(optional) - Is it worth preventing a backpack from dropping upon player death? laptop_damage *boolValue*(optional) - Is it worth preventing damage to the laptop of the Hackable Crate? recycler_safezone *boolValue*(optional) - Is it worth removing the penalties for recyclers in safe zones? item_pickup *boolValue*(optional) - Is it worth allowing all players to pick up items dropped by others? If enabled, personal settings will be ignored; safe_sleep *boolValue*(optional) - Is it worth protecting sleeping players from animals? priceformat *stringValue* - The format that will be used for prices; vehicle_marker_time *floatValue* - Vehicles - Time in seconds to display the marker when searching for a vehicle. A value of 0 disables the marker; antisleeper *floatValue* - Anti-Sleeper - Time in seconds after which a player will be killed if they disconnect while inside someone else's Building Privilege. Set to 0 to disable; randomraids *boolValue*(optional) - Is it worth enabling support for the 'Npc Random Raids' plugin? teamff *boolValue*(optional) - Is friendly fire enabled by default when creating a new team? pvpmarkers *boolValue*(optional) - PvP - Is it worth adding map markers for PvP zones? pvpmarkersname *stringValue* - PvP - Name of the map maker. loot - Manage player access to entities without restrictions: *nameOrId* - Toggle unrestricted access for the specified player; self - Toggle unrestricted access for yourself; clear - Revoke unrestricted access for all players. monument - Manage monuments: list - List of available monuments; ignore *nameOrID* *boolValue* - Add or remove a player from the monument entry ignore list; *monumentID*/this - Instead of the monumentID, you can use the word "this", but you must be inside the monument: suffix *boolValue*(optional) - Toggle the suffix display in the monument's name; broadcast *boolValue*(optional) - Toggle notifications about monument occupancy/release; time *intValue* - Set the looting time limit for the monument in seconds; price *floatValue* - Set the cost for looting rights. A value of 0 makes the monument free; offer *floatValue* - Set the offer duration for purchasing the monument in seconds; map_mode *intValue* - Set the marker display mode on the map. 0 - disabled, 1 - enabled, 2 - enabled during PvP mode; map_circle *boolValue*(optional) - Toggle the display of the monument's circle marker on the map; pvp *boolValue*(optional) - Toggle PvP mode for the monument; pvp_delay *floatValue* - Set the PvP mode duration in seconds for players after leaving the PvP monument; bar_progress *boolValue*(optional) - Toggle between TimeProgressCounter and TimeCounter bars for the monument. perm - Manage permissions: add *permName* - Adds a new permission to the list by copying values from the first(default) permission in the list. If the permission name starts with 'realpve', it will also register a new permission; add *permName* *sourcePermName* - Adds a new permission to the list by copying values from an existing permission in the list; remove *permName* - Removes an existing permission from the list; edit *permName* - Edits a permission: queue - Toggle the permission to bypass the server queue; unlockRespawn - Toggle the availability of the Outpost respawn point; beds *intValue* - Restriction on the number of available beds; shelters *intValue* - Restriction on the number of available shelters; turrets *intValue* - Restriction on the number of available turrets; hackable *floatValue* - Number of seconds(0-900) to skip when opening a hackable crate; monuments *floatValue* - Price multiplier for monuments; events *floatValue* - Price multiplier for vanilla events; rb_limit *intValue* - Restriction on the number of raid bases available simultaneously; rb_mult *floatValue* - Price multiplier for raid bases; vehicles *vehType* - Vehicles settings: limit *intValue* - Limit on the number of available vehicles by type; price *floatValue* - Price for registering a vehicle by type. clear - Removes all permissions from the list except the first one. pickup - Manage access to picking up another player's items from the ground: *nameOrId* - Toggle access to picking up a specific player's items from the ground; clear - Revoke access for all players to pick up items from the ground. share - Manage access to looting entities by other players(outside of the team): status *entityID*(optional) - Display information about the settings of the entity you are looking at or the one you specified; add *nameOrID* *entityID*(optional) - Add the specified player to the entity list you are looking at or the one you specified; remove *nameOrID* *entityID*(optional) - Remove the specified player from the entity list you are looking at or the one you specified; toggle *entityID*(optional) - Toggle the entity list you are looking at or the one you specified; delete *entityID*(optional) - Delete the settings for the entity you are looking at or the one you specified; clear *nameOrID*(optional) - Delete the settings for all entities or all entities of the specified player. tc - Manage building privilege: add self/*entityID* *nameOrID*(optional) - Add yourself or a specified player to the building privilege of the area you or the specified entity are in; remove self/*entityID* *nameOrID*(optional) - Remove yourself or a specified player from the building privilege of the area you or the specified entity are in; clear self/*entityID* - Clear the list of authorized players in the building privilege of the area you or the specified entity are in; info self/*entityID* - Get information about the building privilege of the area you or the specified entity are in. rshop - Rentable shop management: admin self/*nameOrID* *entityID*(optional) - Open the admin panel for the rentable shop you are looking at or the specified shop for yourself or the specified player; loot self/*nameOrID* *entityID*(optional) - Add yourself or the specified player to the loot access list of the rentable shop you are looking at or the specified shop; close *entityID*(optional) - End the rental of the rentable shop you are looking at or the specified shop. vehicle - List of all available vehicle types: types - List of available vehicle types. Example: /realpve pickup /realpve vehicle find *netID* /realpve team ff /adminpve config loot_privilege wood, ore /adminpve perm add realpve.vip2 /adminpve perm add realpve.vip2 realpve.vip /adminpve perm edit realpve.vip2 queue true /adminpve perm edit realpve.vip2 vehicles horse limit 5 /adminpve monument list /adminpve monument *monumentID* pvp /adminpve monument *monumentID* price 7.5 /adminpve loot iiiaka /adminpve pickup iiiaka /adminpve tc info self /adminpve tc info 6959689 /adminpve vehicle types This plugin provides the ability to claim vehicles, thereby preventing theft and griefing from other players. In permissions, you can set the price and quantity restrictions for each type of vehicle, ensuring flexible customization according to your preferences. An assigned vehicle can't be damaged, looted or pushed by other players, but it can be pushed if it is within someone else's Building Privilege. File location: *SERVER*\oxide\data\RealPVE\MonumentConfig.json Default: https://pastebin.com/XY1d9YaM This plugin introduces queue system and loot purchases for monuments. You can customize the price and time for looting for each monument. Within monuments, only the "Looter" and his friends have the ability to loot, pick up items or damage entities. Additionally and NPCs within monuments do not aggress against other players and do not receive damage from them. If a player dies within the monument, they will have a grace period to return. This allows players to safely loot monuments without fear of griefing. Example of monument configuration: "ferry_terminal_1": { "Type(This parameter is just a hint. Changes won’t have any effect)": "RadTown", "Is it worth displaying the suffix(if any) in the monument's name?": true, "Is it worth notifying all players about the occupation/release of the monument?": true, "The cost for the right to loot the monument. A value of 0 makes the monument free": 15.0, "The time in seconds(1-3600) given for looting the monument": 900, "The time in seconds(1-15) given to make a decision to purchase the monument": 5.0, "Map marker display mode: 0 - disabled, 1 - enabled, 2 - enabled during PvP mode": 1, "Is it worth creating a circle in the map marker?": true, "PvP - Is PvP enabled at this monument? If so, players will be able to kill each other and loot will be publicly accessible": false, "PvP - The time in seconds(0-60) during which the player retains PvP mode after leaving the PvP monument": 10.0, "Is it worth using a progress bar for bars with a counter?": true, "Settings for the status bar": { "Order": 10, "Height": 26, "Main_Color(Hex or RGBA)": "#FFBF99", "Main_Transparency": 0.8, "Main_Material": "", "Image_Url": "https://i.imgur.com/awUrIwA.png", "Image_Local(Leave empty to use Image_Url)": "RealPVE_ferry_terminal_1", "Image_Sprite(Leave empty to use Image_Local or Image_Url)": "", "Image_IsRawImage": false, "Image_Color(Hex or RGBA)": "#FFDCB6", "Image_Transparency": 1.0, "Is it worth enabling an outline for the image?": false, "Image_Outline_Color(Hex or RGBA)": "0.1 0.3 0.8 0.9", "Image_Outline_Transparency": 0.0, "Image_Outline_Distance": "0.75 0.75", "Text_Size": 12, "Text_Color(Hex or RGBA)": "1 1 1 1", "Text_Font(https://umod.org/guides/rust/basic-concepts-of-gui#fonts)": "RobotoCondensed-Bold.ttf", "Is it worth enabling an outline for the text?": false, "Text_Outline_Color(Hex or RGBA)": "#000000", "Text_Outline_Transparency": 1.0, "Text_Outline_Distance": "0.75 0.75", "SubText_Size": 12, "SubText_Color(Hex or RGBA)": "1 1 1 1", "SubText_Font": "RobotoCondensed-Bold.ttf", "Is it worth enabling an outline for the sub text?": false, "SubText_Outline_Color(Hex or RGBA)": "0.5 0.6 0.7 0.5", "SubText_Outline_Transparency": 0.0, "SubText_Outline_Distance": "0.75 0.75" }, "Settings for the progress status bar": { "Main_Color(Hex or RGBA)": "1 1 1 0.15", "Main_Transparency": 0.15, "Progress_Reverse": true, "Progress_Color": "#FFBF99", "Progress_Transparency": 0.7, "Progress_OffsetMin": "0 0", "Progress_OffsetMax": "0 0" } } Type - This field serves only as an indicator for you. The changes won't have any impact; ShowSuffix - Suffix display. Some monuments (for example Warehouses) have suffixes in the name, like "Warehouse #12"; Broadcast - Enabling or disabling broadcasts when a monument is occupied or vacated; LootingTime - Time allocated for looting the monument; Price - The price for which you can start looting the monument. 0 means looting is free; BarSettings - Settings for the Advanced Status Bar. You can also choose the types of monuments by specifying them under the "List of tracked types of monuments" section. A list of all available types can be viewed on the MonumentsWatcher's page in the "Developer API" section. "List of tracked types of monuments": [ "RadTown", "RadTownWater", "RadTownSmall", "TunnelStation", "Custom" ] Events, similar to monuments, offer the opportunity to claim events. All events are configured in the config file under the "Settings for the events" section. You can customize the price of looting and looting attempts(deaths, including friends). Just like in monuments, only the "Looter" and his friends have the ability to loot and damage entities. Additionally, in events, NPCs do not aggress against other players. If a player(including friends) exceeds the death limit, the event became free, thereby providing other players with the opportunity to claim the event. Example of event configuration: { "Is it worth enabling forced auto-buy for vanilla events where the final price is greater than 0?": false, "Settings for the PatrolHelicopter events": { "IsEnabled": true, "Time in seconds (1-15) given to respond for purchasing this event. Note: This is shown to everyone who deals damage, and the first person to buy it will claim it": 5.0, "Is it worth removing fire from crates?": true, "The price to claim the event. A value of 0 means it's free": 50.0, "The number of deaths after which the event becomes public. A value of 0 disables the limit": 5, "The time in seconds for which the event is locked to the player. A value of 0 disables the time limit": 1800.0 }, "Settings for the BradleyAPC events": { "IsEnabled": true, "Time in seconds (1-15) given to respond for purchasing this event. Note: This is shown to everyone who deals damage, and the first person to buy it will claim it": 5.0, "Is it worth removing fire from crates?": true, "The price to claim the event. A value of 0 means it's free": 50.0, "The number of deaths after which the event becomes public. A value of 0 disables the limit": 5, "The time in seconds for which the event is locked to the player. A value of 0 disables the time limit": 1800.0 }, "Version": { "Major": 0, "Minor": 1, "Patch": 0 } } Price - The price to claim the event. 0 means looting is free; DeathLimit - Limit of deaths after which the event becomes free. File location: *SERVER*\oxide\data\RealPVE\NewbieConfig.json Default: https://pastebin.com/QHZCqpji An example of an item list given for the main inventory: "List of items for the main inventory": [ { "ShortName": "note", "Slot": 0, "Amount": 1, "SkinID": 0, "Text": "MsgNoteText" } ] P.S. In the Text field, you need to specify the language key. Or, you can just write any text, but there won't be a translation of the text. File location: *SERVER*\oxide\data\RealPVE\RaidableBasesConfig.json Default: https://pastebin.com/rpDng7Fd Integration with the RaidableBases plugin does not restrict its functionality in any way. On the contrary, it adds an anti-grief system that protects bases from malicious players. In raid bases, NPCs and other entities can only receive damage from the raid owner or their friends; Turrets and traps do not aggress against outsiders; You can customize the price of claiming to each difficulty and set individual discounts for each permission. You can still purchase raid bases using the /buyraid command. Raid bases without owners(buyable, maintained, manual and scheduled) can be bought for a price set in the configuration file or assigned to the first player who enters its radius, if the final price(price * discount) less or equals to 0. Additionally, as a bonus, upon buying this plugin, you receive 5 free bases for 3 difficulty levels, along with configured loot for them. [PluginReference] private Plugin RealPVE; There are 6 universal hooks that the plugin is subscribed to, the use of which allows interaction with PVP in various PVE plugins: OnPlayerEnterPVP OnPlayerExitPVP OnEntityEnterPVP OnEntityExitPVP CreatePVPMapMarker DeletePVPMapMarker OnPlayerEnterPVP: Used to add a player to PVP mode/zone. To call the OnPlayerEnterPVP hook, you need to pass 2 parameters: <BasePlayer>player - The player to add to PVP; <string>zoneID - A unique identifier for your PVP zone. This parameter is very important because a player can be in multiple PVP zones at the same time and passing the zoneID in this case allows for correct processing of the player's location within them. Interface.CallHook("OnPlayerEnterPVP", player, "*Your unique zone identifier*");//Calling the OnPlayerEnterPVP hook to tell PVE plugins that the player needs to be added to the specified PVP zone. OnPlayerExitPVP: Used to remove a player from PVP mode/zone. Calling this hook guarantees the player’s removal from the specified PVP zone, but does not guarantee the removal from PVP mode, as there may be other zones in addition to yours. Also, when a player dies, they are automatically removed from all PVP zones. To call the OnPlayerExitPVP hook, you need to pass 3 parameters, 1 of which is optional: <BasePlayer>player - The player to remove from PVP; <string>zoneID - A unique identifier for your PVP zone; <float>pvpDelay - Optional. When the player exits your PVP zone, you can also pass the PVP delay time. However, if the player still has other active PVP zones, your PVP delay will not take effect. Interface.CallHook("OnPlayerExitPVP", player, "*Your unique zone identifier*", 10f);//Calling the OnPlayerExitPVP hook to tell PVE plugins that the player needs to be removed from the specified PVP zone, with the pvpDelay(10 seconds) specified if the player no longer has any active PVP zones. OnEntityEnterPVP: Used to add an entity to PVP mode/zone. In the case of RealPVE, this hook is only necessary to add entities with an owner(player) to a PVP, allowing other players to interact with them, such as a player's corpse after death(PlayerCorpse) or a backpack after the corpse disappears(DroppedItemContainer). To call the OnEntityEnterPVP hook, you need to pass 2 parameters: <BaseEntity>entity - The entity to add to PVP; <string>zoneID - A unique identifier for your PVP zone. Interface.CallHook("OnEntityEnterPVP", entity, "*Your unique zone identifier*");//Calling the OnEntityEnterPVP hook to tell PVE plugins that the entity needs to be added to the specified PVP zone. OnEntityExitPVP: Used to remove an entity from PVP mode/zone. When an entity dies, it is automatically removed from all PVP zones. To call the OnEntityExitPVP hook, you need to pass 3 parameters, 1 of which is optional: <BaseEntity>entity - The entity to remove from PVP; <string>zoneID - A unique identifier for your PVP zone; <float>pvpDelay - Optional. When the entity exits your PVP zone, you can also pass the PVP delay time. However, if the entity still has other active PVP zones, your PVP delay will not take effect. Interface.CallHook("OnEntityExitPVP", entity, "*Your unique zone identifier*", 10f);//Calling the OnEntityExitPVP hook to tell PVE plugins that the entity needs to be removed from the specified PVP zone, with the pvpDelay(10 seconds) specified if the entity no longer has any active PVP zones. CreatePVPMapMarker: Used to create a map marker for the PVP zone. To call the CreatePVPMapMarker hook, you need to pass 5 parameters, 2 of which is optional: <string>zoneID - A unique identifier for your PVP zone; <Vector3>pos - The position of your PVP zone; <float>radius - The radius of the circle for your PVP zone; <string>displayName - Optional. The display name for the map marker; <BaseEntity>entity - Optional. The entity to which the map marker should be attached. Interface.CallHook("CreatePVPMapMarker", "*Your unique zone identifier*", pos, 25f, "ATTENTION! This is a PVP zone!");//Calling the CreatePVPMapMarker hook to tell PVE plugins to create a map marker for the specified zone, at the specified position with the given radius, but without specifying a parent entity. DeletePVPMapMarker: Used to delete a map marker for the PVP zone. To call the DeletePVPMapMarker hook, you need to pass only 1 parameter: <string>zoneID - A unique identifier for your PVP zone. Interface.CallHook("DeletePVPMapMarker", "*Your unique zone identifier*");//Calling the DeletePVPMapMarker hook to tell PVE plugins to delete a map marker for the specified zone. There are 5 hooks that the plugin calls: OnPlayerPVPDelay OnPlayerPVPDelayed OnPlayerPVPDelayRemoved OnZoneStatusText CanRedeemKit OnPlayerPVPDelay: Called when a player exits the last active PVP zone, allowing other plugins to overwrite the value for pvpDelay. Returning a float value allows changing the pvpDelay for the player. A value less than zero disables the pvpDelay. When calling the OnPlayerPVPDelay hook, 3 parameters are passed: <BasePlayer>player - The player to whom the pvpDelay is applied; <float>pvpDelay - The initial value of pvpDelay; <string>zoneID - A unique identifier of PVP zone. object OnPlayerPVPDelay(BasePlayer player, float pvpDelay, string zoneID) { Puts($"Attempting to set a PvP delay of {pvpDelay} seconds for player {player.displayName} in zone {zoneID}!"); if (zoneID == "*Your unique zone identifier*") { return 15f;//Overriding the values for pvpDelay } return null;//Leave unchanged } OnPlayerPVPDelayed: Called after the PVP delay has been set for the player. When calling the OnPlayerPVPDelayed hook, 3 parameters are passed: <BasePlayer>player - The player to whom the pvpDelay is applied; <float>pvpDelay - The value of pvpDelay; <string>zoneID - A unique identifier of PVP zone. void OnPlayerPVPDelayed(BasePlayer player, float pvpDelay, string zoneID) { Puts($"A PvP delay of {pvpDelay} seconds has been set for player {player.displayName} in zone {zoneID}!"); } OnPlayerPVPDelayRemoved: Called when the PVP delay is removed from the player after they enter a PVP zone with an active PVP delay. When calling the OnPlayerPVPDelayRemoved hook, only 1 parameter is passed: <BasePlayer>player - The player from whom the PVP delay has been removed. void OnPlayerPVPDelayRemoved(BasePlayer player) { Puts($"PVP delay has been removed for player {player.displayName} as they entered a PVP zone!"); } OnZoneStatusText: Called when the text with the nice name for the specified zone is needed, to be displayed in the status bar. When calling the OnZoneStatusText hook, 2 parameters are passed: <BasePlayer>player - The player for whom the nice name for the zone is being requested; <string>zoneID - A unique identifier of PVP zone. object OnZoneStatusText(BasePlayer player, string zoneID) { Puts($"Text for the status bar is required for zone {zoneID}"); if (zoneID == "*Your unique zone identifier*") { return lang.GetMessage("*langKey*", this, player.UserIDString);//<string>Overriding the value for the status bar text } return null;//Leave unchanged } CanRedeemKit: Called before giving the starter kit, in the OnDefaultItemsReceive hook. A non-zero value cancels this action. When calling the CanRedeemKit hook, only 1 parameter is passed: <BasePlayer>player - The player to whom the kit is being attempted to be given. object CanRedeemKit(BasePlayer player) { Puts($"Attempting to give the kit to player {player.displayName}!"); if (player.IsAdmin) { return false;//Cancel the action } return null;//Leave unchanged }$24.99 -
Version R1438
434 downloads
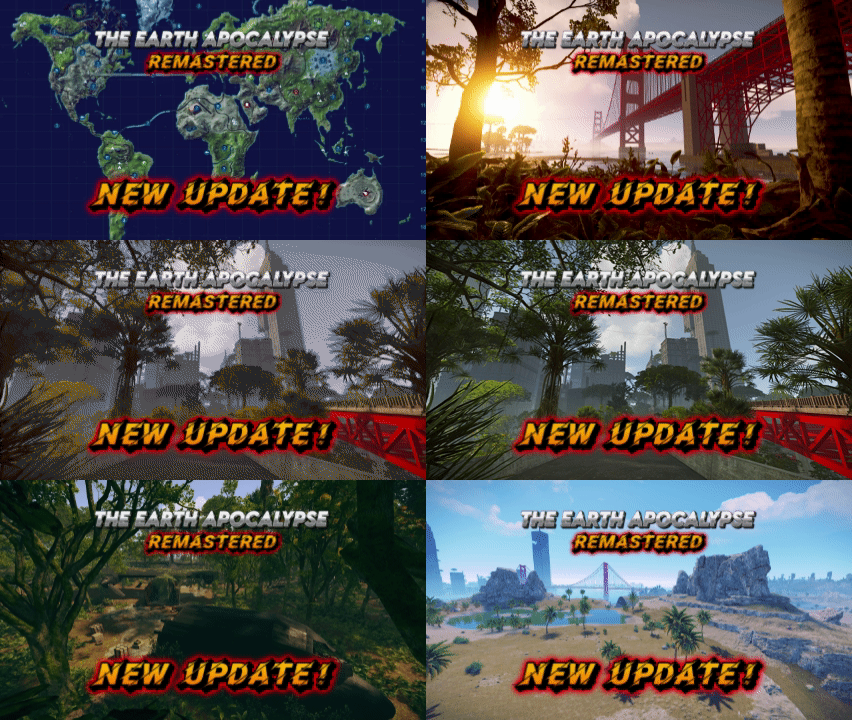
MAJOR RUSTEDIT 2 UPDATE ! Many new features, and NPC Paths. Read changelog for more details MAP NOW INCLUDE BOTS AGAIN AND DO NOT REQUIRE PAID PLUGIN This is The Earth Apocalypse, the most known custom map in Rust history, now available on Codefling ! This map has been showcased and played by Facepunch themselves, along with many youtubers such as Frost, hJune and more who made movies/livestreams and videos on it ! The map constantly receive new updates to keep in line with new rust contents. NEW UPDATE, Version R1365 : MAJOR MAP OVERHAUL : CLIFF, ROCKS, LAKES, JUNGLE ! The Earth – Apocalypse by Keirox. The craziest rust custom map ever made. Years of hardwork. This map features a post-apocalyptic city, many unique monuments, crazy electricity puzzles, custom caves, and much more… So many places to explore and great things to experience. When this map released it was an huge earthquake to the custom map world thanks to it’s endless amount of content and awesome builts, and it inspirated a lot of people. This map has also been showcased by Facepunch and multiple youtubers. https://youtu.be/ZHHAceDvsGk – Map Size : 5800 (Ocean) Terrain equal to 3500km – Monuments : Launch Site, Harbor, The Dome, Super Market, Compound, Giant Excavator, Large Oil Rig, Submarine Labs, Fishing Villages, Farm, Missile Outpost, Nuclear Silo, Ferry, Oil Rig, Radtown, Apartements – Custom : Installation 07, AC-130 Hangar, The Golden Gate Bridge, AC-130 Crash Site, Apocalyptic City, Infected Scientist Bunker, Mariana Trench, Abandonned Outpost, Custom Caves, Sea Safezone, and more. Performance is on point and everything is setup for vanila gameplay. BotRespawn and Kits data included for optimal experience. Prefabs count : 68000 Keirox Custom Maps Discord : https://discord.gg/GXz2v7K3FJ Keirox Custom Maps Website : https://rust-keiroxcustommaps.com/$54.90 -

Version 1.7.2
9,366 downloads
Rust / Server Plugins BetterTC Tool Cupboard ManagementRust Plugin Upgrade. Repair. Reskin. Make your base your own. Bring your most-used Tool Cupboard features together in one interface inspired by Rust’s item store. Automate building upgrades and repairs, manage authorizations, and personalize buildings, external walls, wallpapers and your TC. Automated upkeep tasks Upgrade and repair with TC resources Personalized buildings Skins, wallpapers and external walls Permission profiles Configure access, speed and costs 01 / Video demo See BetterTC in action Take a look at BetterTC’s interface and building management features. Watch on YouTube 02 / Skin ownership Compatibility with Facepunch’s server policy Facepunch’s policy prohibits granting paid skins or DLC to players who do not legitimately own them. BetterTC includes ownership validation for building skins, TC skins and wallpapers. Building skins: all available choices remain visible, but players can only apply skins they own or skins that are free. Wallpapers: only free, custom and owned wallpapers are visible. More custom wallpapers are planned. TC skins: only owned skins are visible and selectable. Read Facepunch’s official server policy Ownership checks are enabled with the following bypass option set to false: "Bypass DLC ownership check (⚠ only allowed on creative/test servers per Facepunch rules)": false ⚠ Very important Keep the bypass disabled on ordinary public PvP and PvE servers. Facepunch only permits temporary exceptions on servers specifically set up to test game mechanics, for testing purposes. A creative or training label alone is not an exemption. Misuse may result in delisting or other sanctions. 03 / Building management Let the TC do the work Automatic upgrades Upgrade building grades using resources directly from the TC. Select the default appearance or an eligible building skin, and use the information button to estimate the materials required. Configure upgrade speed and costs through permission profiles. Automatic repairs Repair the building and supported deployables, including doors, trapdoors, windows and boxes, with resources from the TC. Configure a cooldown after recent damage to help prevent repair abuse during raids. Automatic reskinning Change a building’s appearance without manually replacing each piece. Players can switch from a skinned grade back to its default appearance when they prefer. The Container skin’s multicolor selection can also be disabled to reduce client rendering load. Building downgrades Allow players to return to a lower building grade when their base becomes too expensive to maintain. Downgrading charges resources as a fresh upgrade to the selected grade; it is not a free conversion. Disable this feature if it does not fit your server, or retain a separate administrator-only downgrade override. Configure NoEscape or RaidBlock integration to stop automatic upgrades, repairs, building reskinning, wallpaper placement and external wall reskinning when a raid block starts. Ownership and team restrictions are also configurable. 04 / Building skins Keep the available skins up to date The skin update checker adds newly available construction skins and their options to the configuration. After installing BetterTC, grant yourself bettertc.admin and click Check Update to populate the available skins and options. Applying paid content remains subject to ownership checks. 05 / External walls Change the look. Preserve the damage. Reskin stone external walls with their adobe or ice variants, or switch wooden external walls to Frontier and back. Supported external gates can also be reskinned to their available variants. The original wall’s health is preserved, so reskinning a damaged wall does not repair it. Recommended setting: "Only reskin on wall of the same grade": true Keep this enabled to use external wall reskinning as an appearance change. Disabling it allows wood-to-stone and stone-to-wood changes without a resource charge, because this wall system has no cost mechanism. 06 / Wallpapers & TC skins Personalize the details Automatically place eligible wallpapers on walls, ceilings and floors. New game wallpapers are added to the list automatically. Use included custom wallpapers and add your own through the admin wallpaper commands. Configure placement on both sides of walls, including exterior sides. Apply wallpapers to both sides of a wall, including the exterior side when configured. Place wallpapers on boats with /wpb after sitting at the boat’s steering wheel. Let players change their TC’s appearance or deploy a TC with a skin, according to their permissions and ownership. Tool Cupboard skin selection Choose an eligible TC skin from the interface, or deploy a TC using the selected skin. BetterTC carries over the cupboard’s authorizations, contents and lock when replacing its appearance. Manual wallpaper tool menu Hold the wallpaper tool and open BetterTC’s selector with /wp or the configured input button. The default input is the middle mouse button. This menu must be enabled in the configuration and requires bettertc.wallpaper.toolmenu. Wallpaper rotation hammer Administrators can obtain a special wallpaper hammer with /wphammer. Hit a wallpapered floor or foundation with this hammer to rotate its wallpaper: 90° on square pieces and 120° on triangles. Configure the cloth cost of automated wallpaper placement. Building placement uses cloth from the TC; boat placement uses cloth from the player’s inventory. The no-cost wallpaper permission waives placement resource costs. Set "Wallpaper Damage": false to protect wallpapers from melee and ammunition damage. C4 and rockets can still damage them. 07 / Authorization & inventory Manage access from the cupboard Authorized player list Show who is authorized on the TC, optionally including Steam IDs and Online, Sleeping or Offline status through the player-status permission. Hide administrators with the configured option and allow individual authorization removal with a separate permission. Automatic TC locks Use separate permissions to automatically attach a locked key lock or code lock when a TC is deployed. Code locks use a generated code, authorize the deploying player and notify them of the code; the notification masks it in streamer mode. The code-lock permission takes priority when both lock permissions are assigned. Additional TC storage Configure which additional item types the TC accepts: gunpowder, sulfur, sulfur ore, explosives, diesel barrels, CCTV cameras and targeting computers. Each item type has its own switch. Select a general inventory filter: Resources, ResourcesAndComponents or All. The ResourcesAndComponents mode also accepts supported building and utility tools. 08 / Interface & integrations A panel that adapts to your players The panel keeps a consistent size across player UI scaling settings. Buttons rearrange automatically according to the functions the player can access. Authorization lists and construction skins support pagination. Building options can be automatically sorted by grade, or retain the configured order. Configure whether players can disable automatic construction effects. Most interface images load directly from the game client. Carbon servers use the built-in Image Module; Oxide servers use ImageLibrary. Configure game tip, chat and optional Notify or UINotify alerts, plus button colors and positioning. TiersMode and TCLevels When TiersMode is installed, BetterTC reads its maximum unlocked building grade for the upgrade menu. When TCLevels is installed, BetterTC adds a button to open its Tool Cupboard level-upgrade menu. 09 / Permissions Choose the functions each player can use Assign feature permissions and configure the standard and advanced profiles to match your server. Grant the no-cost permissions carefully. Permission Purpose bettertc.admin Admin update checks; also used to hide administrators from the authorization list when configured. bettertc.authlist Show the authorized-player list button. bettertc.playerstatus Show each authorized player's status next to their name in the TC authorization list: Online (green) when connected, Sleeping (light blue) when disconnected with a sleeping character in the server, or Offline (red) when registered but no active or sleeping character is found. Without this permission, only the player name is shown. This permission only displays status; it does not grant authorization or removal rights. bettertc.deleteauth Revoke individual player authorizations. bettertc.use Use the standard speed and cost profile defined in the configuration. bettertc.vip Use the advanced speed and cost profile defined in the configuration. bettertc.repair Access automatic building repair. bettertc.repair.nocost Repair without resource costs. bettertc.reskin Access automatic building reskinning. bettertc.reskin.nocost Reskin without resource costs. bettertc.upskin Show building upgrade options with skins. bettertc.upwall Access external wall reskinning. bettertc.upgrade Access building upgrades. bettertc.upgrade.nocost Upgrade without resource costs. bettertc.wallpaper Access wallpaper placement. bettertc.wallpaper.nocost Place wallpapers without resource costs. bettertc.wallpaper.custom Show custom wallpapers. bettertc.wallpaper.toolmenu Access the manual wallpaper tool selector when enabled. bettertc.tcskinchange Change the TC skin. bettertc.tcskindeployed Deploy a TC with a skin. bettertc.autolock Automatically add a locked key lock when deploying a TC. bettertc.autocodelock Automatically add a locked code lock with a generated code when deploying a TC. Skin-related permissions do not replace paid-content ownership checks. 10 / Commands Add custom wallpapers Command Purpose /addwp <skinid> <Wall|Floor|Ceiling> Chat: add a custom wallpaper for the selected surface type. addwp <skinid> <Wall|Floor|Ceiling> Console: add a custom wallpaper for the selected surface type. /wpb Chat: place wallpapers on boats; first sit at the boat’s steering wheel. /wp Chat: open the manual wallpaper menu while holding the wallpaper tool; requires bettertc.wallpaper.toolmenu. /wphammer Chat: give yourself the wallpaper rotation hammer; requires bettertc.admin. wphammer Player console: give yourself the wallpaper rotation hammer; requires bettertc.admin. wphammer <playername or steamid> Server console: give the wallpaper rotation hammer to a selected player. Adding wallpapers from chat or a player console requires bettertc.admin. Example for a wall wallpaper: /addwp 3356517390 Wall Console equivalent: addwp 3356517390 Wall 11 / Configuration Selected configuration options This excerpt covers the settings supplied with this description, including ownership checks, raid blocking, repairs, wallpapers and permission profiles. It is not the complete configuration file, and these supplied example values may differ from the defaults in your installed version. Edit the configuration generated by your installed BetterTC version. { "Check for updates when loading": true, "Bypass DLC ownership check (⚠ only allowed on creative/test servers per Facepunch rules)": false, "Use NoEscape Plugin": false, "Use RaidBlock Plugin": true, "GUI Buttons TC - Color Default": "0.3 0.40 0.3 0.60", "GUI Buttons TC - Color Active": "0.90 0.20 0.20 0.50", "GUI Buttons TC - OffsetMin": "280 621", "GUI Buttons TC - OffsetMax": "573 643", "GUI Buttons TC - AnchorMin": "0.5 0", "GUI Buttons TC - AnchorMax": "0.5 0", "Alert Gametip": true, "Alert Chat": true, "Alert Notify Plugin": false, "Notify: select what notification type to be used": { "error": 0, "info": 0 }, "Color Prefix Chat": "#f74d31", "Show Admin Auth List": false, "Show SteamID Auth List": true, "Upgrade Effect": true, "Colour Selection MultiColor Option": false, "Reskin Enable": true, "Reskin Wall Enable": true, "Only reskin on wall of the same grade": true, "Reskin Wall TC Distance (Default: 100)": 100.0, "Deployables Repair": true, "Repair Cooldown After Recent Damage (seconds)": 30.0, "Downgrade Enable": true, "Downgrade only Owner Entity Build": false, "Upgrade only Owner Entity Build": false, "Upgrade / Downgrade only Owner and Team": true, "Wallpaper Enable": true, "Wallpaper placement Cost (Cloth)": 5, "Wallpaper Damage": true, "Wallpaper both sides": true, "Force both sides including external sides": true, "Cooldown Frequency Upgrade (larger number is slower)": { "bettertc.use": 2.0, "bettertc.vip": 1.0 }, "Cooldown Frequency Reskin (larger number is slower)": { "bettertc.use": 2.0, "bettertc.vip": 1.0 }, "Cooldown Frequency Repair (larger number is slower)": { "bettertc.use": 2.0, "bettertc.vip": 1.0 }, "Cooldown Frequency Wallpaper (larger number is slower)": { "bettertc.use": 2.0, "bettertc.vip": 1.0 }, "Cost Modifier for repairs": { "bettertc.use": 1.5, "bettertc.vip": 1.0 }, "Allow Items in TC Inventory": { "gunpowder": false, "sulfur": false, "sulfur.ore": false, "explosives": false, "diesel_barrel": true, "cctv.camera": true, "targeting.computer": true }, "Downgrade Admin": true, "Use BetterTC Wallpaper Tool Menu (requires bettertc.wallpaper.toolmenu permission)": true, "BetterTC Wallpaper Tool Menu input button (FIRE_THIRD = middle mouse button)": "FIRE_THIRD", "Item Category Filter (Resources, ResourcesAndComponents, All)": "Resources", "Auto Sort Items by Grade": true } 12 / Known issue Unexpected default blue wallpapers If default blue wallpapers appear randomly, check whether TruePVE or a similar plugin is protecting wallpaper damage. Disable that wallpaper protection in the other plugin and use BetterTC’s own wallpaper protection instead. BetterTC’s protection reduces damage, especially from melee attacks, but does not block all damage. 13 / Support Questions, ideas or a problem to report? Contact ninco90 on Discord for questions, suggestions or assistance. Custom server configuration is also available for an additional fee if you would like the plugin set up around your preferences.$30.00- 464 comments
- 33 reviews
-
- 14
-

-

-
- #builder
- #automation
- (and 9 more)
-

Version 2.0.2
70 downloads
This custom package, created by us, includes 100 handcrafted bases across three difficulty levels, ranging from Easy to Hard. Note: The building skins in the package showcase images may differ from the spawned bases or use the default building skin. If you're looking for a more advanced pack, you can get the upgraded version here, which includes 210 bases ranging from Easy to Nightmare along with the Loot Tables package: https://codefling.com/bases/raidable-bases-mega-pack-loot-tables-210-bases Warning: The Raidable Bases plugin requires the Copy Paste plugin to function. You must install both for this bases pack to work. Raidable Bases (Paid): https://codefling.com/plugins/raidable-bases Copy Paste (Free): https://umod.org/plugins/copy-paste This Raidable Bases package includes: (In addition to the bases, it includes a well-configured config file that can be uploaded to /serverfiles/oxide/config, but its usage is optional. It also contains 5 different profile configs that can be uploaded to /oxide/data/RaidableBases/Profiles. These are also well-configured and optional to use. The usage of both is entirely up to you.) 40 Easy Bases 30 Medium Bases 30 Hard Bases WARNING: TWO DIFFERENT INSTALLATION METHODS (PLEASE READ BOTH AND APPLY ONLY THE ONE THAT FITS YOUR NEEDS) INSTALLATION GUIDE 1 (If you do not have a custom configuration and are not a professional in server configurations, choose this option. However, if you already have your own configuration and profile settings and do not wish to use the optional configs we provide—in other words, if you only need the bases—use the second installation guide instead.) Step 1: Place the Config File From the extracted ZIP files, locate the config folder and find the RaidableBases.json file. Move it to the following directory: /serverfiles/oxide/config Step 2: Place the Bases From the extracted ZIP files, locate the copypaste folder and move it to the following directory: /serverfiles/oxide/data Step 3: Place the Profiles Folder From the extracted ZIP files, locate the profiles folder and move it to the following directory: /serverfiles/oxide/data/RaidableBases Why Are Profiles Important? The profiles folder contains crucial settings that allow you to: Enable/disable the dome Enable/disable NPCs Adjust the number of lootable items These are just a few examples—there are dozens of important settings that directly affect how raid bases function. The config file alone is not enough—these files play a major role in customizing your raid bases. I strongly recommend reviewing each difficulty setting (Easy to Hard) inside the profiles folder and adjusting them based on your needs. Step 4: Restart the plugin via RCON: o.reload RaidableBases INSTALLATION GUIDE 2 (Use this installation method if you do not want to use our configurations and instead prefer to use your own config files and your own /oxide/data/RaidableBases/Profiles configurations.) In this case, you only need to add the bases. To do this, use the following commands in RCON: Step 1: You can add bases one by one or in bulk. After executing the commands in RCON, the bases will be registered inside the Profiles configuration. If you do not want to deal with these adjustments, it is recommended to use Installation Guide 1 instead. A- Example RCON commands: rb.config add "Easy Bases" fullwipedeasy31 rb.config add "Hard Bases" fullwipedhard31 B- Commands to Integrate Raid Bases in Bulk via RCON: rb.config add "Easy Bases" fullwipedeasy31 fullwipedeasy32 fullwipedeasy33 fullwipedeasy34 fullwipedeasy35 fullwipedeasy36 fullwipedeasy37 fullwipedeasy38 fullwipedeasy39 fullwipedeasy40 fullwipedeasy41 fullwipedeasy42 fullwipedeasy43 fullwipedeasy44 fullwipedeasy45 fullwipedeasy46 fullwipedeasy47 fullwipedeasy48 fullwipedeasy49 fullwipedeasy50 fullwipedeasy51 fullwipedeasy52 fullwipedeasy53 fullwipedeasy54 fullwipedeasy55 fullwipedeasy56 fullwipedeasy57 fullwipedeasy58 fullwipedeasy59 fullwipedeasy60 fullwipedeasy61 fullwipedeasy62 fullwipedeasy63 fullwipedeasy64 fullwipedeasy65 fullwipedeasy66 fullwipedeasy67 fullwipedeasy68 fullwipedeasy69 fullwipedeasy70 rb.config add "Medium Bases" fullwipedmed31 fullwipedmed32 fullwipedmed33 fullwipedmed34 fullwipedmed35 fullwipedmed36 fullwipedmed37 fullwipedmed38 fullwipedmed39 fullwipedmed40 fullwipedmed41 fullwipedmed42 fullwipedmed43 fullwipedmed44 fullwipedmed45 fullwipedmed46 fullwipedmed47 fullwipedmed48 fullwipedmed49 fullwipedmed50 fullwipedmed51 fullwipedmed52 fullwipedmed53 fullwipedmed54 fullwipedmed55 fullwipedmed56 fullwipedmed57 fullwipedmed58 fullwipedmed59 fullwipedmed60 rb.config add "Hard Bases" fullwipedhard31 fullwipedhard32 fullwipedhard33 fullwipedhard34 fullwipedhard35 fullwipedhard36 fullwipedhard37 fullwipedhard38 fullwipedhard39 fullwipedhard40 fullwipedhard41 fullwipedhard42 fullwipedhard43 fullwipedhard44 fullwipedhard45 fullwipedhard46 fullwipedhard47 fullwipedhard48 fullwipedhard49 fullwipedhard50 fullwipedhard51 fullwipedhard52 fullwipedhard53 fullwipedhard54 fullwipedhard55 fullwipedhard56 fullwipedhard57 fullwipedhard58 fullwipedhard59 fullwipedhard60 Step 3: Restart the plugin via RCON: o.reload RaidableBases EXTRA IMPORTANT INFORMATIONS: We do not use a dome, NPCs, or arena walls around raid bases on our servers, and in the ZIP file we provided, these features are also disabled by default. If you want to enable them, you will need to adjust the settings accordingly. For example, to enable the dome, follow the steps below: Navigate to: /oxide/data/RaidableBases/Profiles Open the files inside the Profiles folder with a text editor. Locate the following settings: (This is already set to false because it is required for markers to appear on the map.) "Spawn Silently (No Notification, No Dome, No Map Marker)": false, "Create Dome Around Event Using Spheres (0 = disabled, recommended = 5)": 0, Change the value from 0 to 5 as shown below: "Create Dome Around Event Using Spheres (0 = disabled, recommended = 5)": 5, In our setup: - Timed events and purchasable events are disabled. - After a wipe, easy bases will start spawning 30 minutes later. - Nightmare bases will begin spawning 48 hours (2 days) later. Imagine starting the game with just a torch in hand and immediately encountering a nightmare base on the shore. You’d likely quit the game right away—this setting is crucial for us to avoid such scenarios. Configuration Example: serverfiles/oxide/config "Maintained Events": { "Always Maintain Max Events": true, "Max Maintained Events": 30, "Enable X Hours After Wipe (0 = immediately)": { "Easy": 0.5, "Medium": 1.0, "Hard": 3.0, "Expert": 24.0, "Nightmare": 48.0 All of our bases from Easy to Nightmare are equipped with turret protection. If you do not want turrets to spawn in your raidable bases on your server, you can use the following method. Go to the file path /data/RaidableBases/Profiles, open the JSON files inside with a text editor, and apply the following: "Kill These Prefabs After Paste": [ "assets/prefabs/npc/autoturret/autoturret_deployed.prefab", "autoturret_deployed" ], If you need not only these bases but also the loot tables for the items that will spawn inside them, check out our one-of-a-kind, exceptional Raidable Base Loot Tables at the link below: https://codefling.com/customizations/raidable-bases-loot-tables-pack (Our loot tables are designed to cater to different server types, including Vanilla (1x) servers as well as 2x, 3x, 5x, 10x, and higher multipliers to match various loot requirements.) If you are satisfied with this package, you can support us by leaving a 5-star review on the site where you purchased it. Your feedback motivates us to continue improving and providing even better configurations for dedicated server owners like you. Thank you! Support: FULLWIPED DISCORD$24.99-
- 2
-

-
-
- #raid
- #raidable bases
- (and 27 more)
-
Version 2.0.2
633 downloads
This is a custom package designed by us, featuring 210 unique bases and a specialized loot setup for five different difficulty levels, ranging from Easy to Nightmare. Note: The building skins in the package showcase images may differ from the spawned bases or use the default building skin. This MEGA PACK is an upgraded version of the FullWiped-110 Bases + Loot Pack we previously offered. If you've already purchased the FullWiped-110 Bases + Loot Pack, you only need to buy the expansion pack, which includes 100 new bases ranging from Easy to Hard. Get it here: https://codefling.com/bases/raidable-bases-pack-100-bases-expanded-package-from-easy-to-hard Warning: The Raidable Bases plugin requires the Copy Paste plugin to function. You must install both for this bases pack to work. Raidable Bases (Paid): https://codefling.com/plugins/raidable-bases Copy Paste (Free): https://umod.org/plugins/copy-paste This Raidable Bases Pack & Loot Tables package includes: 70 Easy Bases +Base_Loot Tables (Easy "Vanilla" and "Enhanced" tables included) 60 Medium Bases +Base_Loot Tables (Medium "Vanilla" and "Enhanced" tables included) 60 Hard Bases +Base_Loot Tables (Hard "Vanilla" and "Enhanced" tables included) 10 Expert Bases +Base_Loot Tables (Expert "Vanilla" and "Enhanced" tables included) 10 Nightmare Bases +Base_Loot Tables (Nightmare "Vanilla" and "Enhanced" tables included) Beware: Our loot table package includes only the 5-tier loot tables within the Base_loot folder, ranging from easy to nightmare. It does not include the loot tables from the Difficulty_Loot or Weekday_Loot folders. VANILLA AND ENHANCED LOOT TABLES FOR RAIDABLE BASES This package includes 10 different base loot table files, ensuring a well-structured and advanced configuration for every difficulty level, from Easy to Nightmare. - 5 loot files for the Vanilla setup (Easy, Medium, Hard, Expert, Nightmare), offering a balanced loot experience with some junk items, staying close to a 1x rate. - 5 loot files for the Enhanced setup (Easy, Medium, Hard, Expert, Nightmare), designed for modded servers with 2x, 3x, or higher gather rates, featuring cleaner loot tables with minimal junk and more valuable rewards. Installation Path: All loot table files are intended for the /oxide/data/RaidableBases/Base_Loot directory. Setup Requirement: You must choose and install only one loot table setup at a time—either Vanilla or Enhanced. If you want to switch, you can replace the current files with the other set, but both cannot be active simultaneously. For those exclusively seeking the loot table, we offer it as a standalone product: https://codefling.com/customizations/raidable-bases-loot-tables-pack (Note: If you've purchased our Raidable Bases Mega Pack & Loot Tables (210 Bases) package, there is no need to buy this separately.) WARNING: TWO DIFFERENT INSTALLATION METHODS (PLEASE READ BOTH AND APPLY ONLY THE ONE THAT FITS YOUR NEEDS) INSTALLATION GUIDE 1: (If you do not have a custom configuration and are not a professional in server configurations, choose this option. However, if you already have your own configuration and profile settings and do not wish to use the optional configs we provide—in other words, if you only need the bases and loot tables—use the second installation guide instead.) ▶ Step 1: Place the Config File From the extracted ZIP files, locate the config folder and find the RaidableBases.json file. Move it to the following directory: /serverfiles/oxide/config ▶ Step 2: Place the Bases From the extracted ZIP files, locate the copypaste folder and move it to the following directory: /serverfiles/oxide/data ▶ Step 3: Place the Base_Loot Tables From the extracted ZIP files, locate the Base_Loot folder and move it to the following directory: /serverfiles/oxide/data/RaidableBases Important: If there are any existing JSON files inside this folder that are not part of our loot tables, delete them to ensure proper functionality. Choose between Vanilla or Enhanced loot tables based on your preference. If the folder is named "Base_Loot (Enhanced loot)", remove the text in parentheses so that the correct folder name is simply: "Base_Loot" (Otherwise, the loot tables will not work properly.) ▶ Step 4: Place the Profiles Folder From the extracted ZIP files, locate the profiles folder and move it to the following directory: /serverfiles/oxide/data/RaidableBases Why Are Profiles Important? The profiles folder contains crucial settings that allow you to: Enable/disable the dome Enable/disable NPCs Adjust the number of lootable items These are just a few examples—there are dozens of important settings that directly affect how raid bases function. The config file alone is not enough—these files play a major role in customizing your raid bases. I strongly recommend reviewing each difficulty setting (Easy to Nightmare) inside the profiles folder and adjusting them based on your needs. ▶ Step 5: Restart the plugin via RCON: o.reload RaidableBases INSTALLATION GUIDE 2: (Use this installation method if you do not want to use our configurations and instead prefer to use your own config files and your own /oxide/data/RaidableBases/Profiles configurations.) In this case, you only need to add the bases. To do this, use the following commands in RCON: ▶ Step 1: You can add bases one by one or in bulk. After executing the commands in RCON, the bases will be registered inside the Profiles configuration. If you do not want to deal with these adjustments, it is recommended to use Installation Guide 1 instead. A- Example RCON commands: rb.config add "Easy Bases" fullwipedeasy1 rb.config add "Hard Bases" fullwipedhard1 B- Commands to Integrate Raid Bases in Bulk via RCON: rb.config add "Easy Bases" fullwipedeasy1 fullwipedeasy2 fullwipedeasy3 fullwipedeasy4 fullwipedeasy5 fullwipedeasy6 fullwipedeasy7 fullwipedeasy8 fullwipedeasy9 fullwipedeasy10 fullwipedeasy11 fullwipedeasy12 fullwipedeasy13 fullwipedeasy14 fullwipedeasy15 fullwipedeasy16 fullwipedeasy17 fullwipedeasy18 fullwipedeasy19 fullwipedeasy20 fullwipedeasy21 fullwipedeasy22 fullwipedeasy23 fullwipedeasy24 fullwipedeasy25 fullwipedeasy26 fullwipedeasy27 fullwipedeasy28 fullwipedeasy29 fullwipedeasy30 fullwipedeasy31 fullwipedeasy32 fullwipedeasy33 fullwipedeasy34 fullwipedeasy35 fullwipedeasy36 fullwipedeasy37 fullwipedeasy38 fullwipedeasy39 fullwipedeasy40 fullwipedeasy41 fullwipedeasy42 fullwipedeasy43 fullwipedeasy44 fullwipedeasy45 fullwipedeasy46 fullwipedeasy47 fullwipedeasy48 fullwipedeasy49 fullwipedeasy50 fullwipedeasy51 fullwipedeasy52 fullwipedeasy53 fullwipedeasy54 fullwipedeasy55 fullwipedeasy56 fullwipedeasy57 fullwipedeasy58 fullwipedeasy59 fullwipedeasy60 fullwipedeasy61 fullwipedeasy62 fullwipedeasy63 fullwipedeasy64 fullwipedeasy65 fullwipedeasy66 fullwipedeasy67 fullwipedeasy68 fullwipedeasy69 fullwipedeasy70 rb.config add "Medium Bases" fullwipedmed1 fullwipedmed2 fullwipedmed3 fullwipedmed4 fullwipedmed5 fullwipedmed6 fullwipedmed7 fullwipedmed8 fullwipedmed9 fullwipedmed10 fullwipedmed11 fullwipedmed12 fullwipedmed13 fullwipedmed14 fullwipedmed15 fullwipedmed16 fullwipedmed17 fullwipedmed18 fullwipedmed19 fullwipedmed20 fullwipedmed21 fullwipedmed22 fullwipedmed23 fullwipedmed24 fullwipedmed25 fullwipedmed26 fullwipedmed27 fullwipedmed28 fullwipedmed29 fullwipedmed30 fullwipedmed31 fullwipedmed32 fullwipedmed33 fullwipedmed34 fullwipedmed35 fullwipedmed36 fullwipedmed37 fullwipedmed38 fullwipedmed39 fullwipedmed40 fullwipedmed41 fullwipedmed42 fullwipedmed43 fullwipedmed44 fullwipedmed45 fullwipedmed46 fullwipedmed47 fullwipedmed48 fullwipedmed49 fullwipedmed50 fullwipedmed51 fullwipedmed52 fullwipedmed53 fullwipedmed54 fullwipedmed55 fullwipedmed56 fullwipedmed57 fullwipedmed58 fullwipedmed59 fullwipedmed60 rb.config add "Hard Bases" fullwipedhard1 fullwipedhard2 fullwipedhard3 fullwipedhard4 fullwipedhard5 fullwipedhard6 fullwipedhard7 fullwipedhard8 fullwipedhard9 fullwipedhard10 fullwipedhard11 fullwipedhard12 fullwipedhard13 fullwipedhard14 fullwipedhard15 fullwipedhard16 fullwipedhard17 fullwipedhard18 fullwipedhard19 fullwipedhard20 fullwipedhard21 fullwipedhard22 fullwipedhard23 fullwipedhard24 fullwipedhard25 fullwipedhard26 fullwipedhard27 fullwipedhard28 fullwipedhard29 fullwipedhard30 fullwipedhard31 fullwipedhard32 fullwipedhard33 fullwipedhard34 fullwipedhard35 fullwipedhard36 fullwipedhard37 fullwipedhard38 fullwipedhard39 fullwipedhard40 fullwipedhard41 fullwipedhard42 fullwipedhard43 fullwipedhard44 fullwipedhard45 fullwipedhard46 fullwipedhard47 fullwipedhard48 fullwipedhard49 fullwipedhard50 fullwipedhard51 fullwipedhard52 fullwipedhard53 fullwipedhard54 fullwipedhard55 fullwipedhard56 fullwipedhard57 fullwipedhard58 fullwipedhard59 fullwipedhard60 rb.config add "Expert Bases" fullwipedexp1 fullwipedexp2 fullwipedexp3 fullwipedexp4 fullwipedexp5 fullwipedexp6 fullwipedexp7 fullwipedexp8 fullwipedexp9 fullwipedexp10 rb.config add "Nightmare Bases" fullwipednight1 fullwipednight2 fullwipednight3 fullwipednight4 fullwipednight5 fullwipednight6 fullwipednight7 fullwipednight8 fullwipednight9 fullwipednight10 ▶ Step 2: Place the Base_Loot Tables From the extracted ZIP files, locate the Base_Loot folder and move it to the following directory: /serverfiles/oxide/data/RaidableBases Important: If there are any existing JSON files inside this folder that are not part of our loot tables, delete them to ensure proper functionality. Choose between Vanilla or Enhanced loot tables based on your preference. If the folder is named "Base_Loot (Enhanced loot)", remove the text in parentheses so that the correct folder name is simply: "Base_Loot" (Otherwise, the loot tables will not work properly.) ▶ Step 3: Restart the plugin via RCON: o.reload RaidableBases EXTRA IMPORTANT INFORMATIONS: We do not use a dome, NPCs, or arena walls around raid bases on our servers, and in the ZIP file we provided, these features are also disabled by default. If you want to enable them, you will need to adjust the settings accordingly. For example, to enable the dome, follow the steps below: Navigate to: /oxide/data/RaidableBases/Profiles Open the files inside the Profiles folder with a text editor. Locate the following settings: (This is already set to false because it is required for markers to appear on the map.) "Spawn Silently (No Notification, No Dome, No Map Marker)": false, "Create Dome Around Event Using Spheres (0 = disabled, recommended = 5)": 0, Change the value from 0 to 5 as shown below: "Create Dome Around Event Using Spheres (0 = disabled, recommended = 5)": 5, Additionally, the loot amount for bases varies depending on the difficulty level (easy, medium, hard, expert, and nightmare). You can adjust this setting in the same Profiles location according to your needs: "Amount Of Items To Spawn": 210, For example, in medium bases, this value is set to 210, which determines the total number of items that will appear in crates, furnaces, and the cupboard. Our current configuration is specifically adjusted to prevent players from feeling overwhelmed by massive buildings right after a wipe. We have configured Maintained Events accordingly to ensure a balanced experience. In our setup: - Timed events and purchasable events are disabled. - After a wipe, easy bases will start spawning 30 minutes later. - Nightmare bases will begin spawning 48 hours (2 days) later. Imagine starting the game with just a torch in hand and immediately encountering a nightmare base on the shore. You’d likely quit the game right away—this setting is crucial for us to avoid such scenarios. Configuration Example: /serverfiles/oxide/config "Maintained Events": { "Always Maintain Max Events": true, "Max Maintained Events": 30, "Enable X Hours After Wipe (0 = immediately)": { "Easy": 0.5, "Medium": 1.0, "Hard": 3.0, "Expert": 24.0, "Nightmare": 48.0 All of our bases from Easy to Nightmare are equipped with turret protection. If you do not want turrets to spawn in your raidable bases on your server, you can use the following method. Go to the file path /data/RaidableBases/Profiles, open the JSON files inside with a text editor, and apply the following: "Kill These Prefabs After Paste": [ "assets/prefabs/npc/autoturret/autoturret_deployed.prefab", "autoturret_deployed" ], If you are satisfied with this package, you can support us by leaving a 5-star review on the site where you purchased it. Your feedback motivates us to continue improving and providing even better configurations for dedicated server owners like you. Thank you!$62.49 -
Version 1.2.4
232 downloads
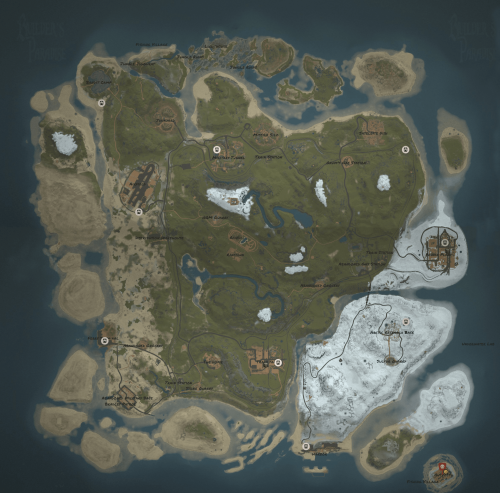
Welcome to Builder's Paradise: Vol #1. A map focused on providing players many fun and interesting places to build! Build a more traditional base on flat land or get creative on one of the many buildable in-game prefabs or custom caves. The monuments, roads, rails, rivers, etc were placed on the map to compliment the terrain giving the map a much more natural feeling to play and explore as compared to AI generated terrain. All custom monuments with puzzles contain key cards and fuel to complete the puzzle. Current file contents: Builder's Paradise: Vol #1 - Summer Biome/Splat Automated Workcarts plugin & data file for automated train loop RaceTrack custom car & tracks to race (plugin not included!) Text file with hosted map links for easy hosting of custom maps Oxide.Ext.RustEdit.dll file for functionality of custom map & puzzles Explore: 3333k in size 12,212 Prefabs 42,513 Fresh wipe entities 22 default monuments 7 custom monuments Build: 32 buildable prefabs 32 underground caves 10 underground bunkers 11 floating water prefabs 13 underwater submarine entrance bases Many flat places to build large bases or spawn points for raidable bases Default Monuments: Abandoned Supermarket Abandoned Military Base & Bradley Patrol Loop Air Field Apartment Building Arctic Research Base - buffed with crate Bandit Camp Ferry Terminal Fishing Village Junkyard Harbor Lighthouse Missile Silo Military Tunnels Oil-Large Oil - Small Outpost - Mini (admin will have to manually set teleport cords!) Oxum’s Gas Station Power Plant Rad Town Ranch & custom horse track Satellite Dish Train Yard Underwater Labs Custom Monuments: Line #7 Train Station - Early game, green puzzle. Abandoned Grocery - Early game, green puzzle. Distribution Warehouse - Mid game, 3x green puzzles Abandoned Gas Station - Late game, 1x green & 1x red puzzle + crate Rad Lake - Deep underwater hackable crate & radiation Spawn Lobby Buildable Locations: Airfield Hangar - Full Size Airfield Hangar - Small Airfield Guard Towers Cave - Mine Tunnel Cave - Mountain Igloo Cave - Mountain Rocks Military Hangar Ocean Barge Rock Pit - Above Ground Rock Pit - Below Ground Satellite Dish Bunker Wooden Shacks (4 versions) Jungle Building Floating Water Base Hidden Submarine Base Please contact me directly for comments or suggestions on the map. Builder's Paradise Discord info in Downloaded Zip file. This map is our in-house map that we play on. It will continue to be improved as more hours get played on it.$33.33 -

Version 1.0.0
22 downloads
Ready to level up your server’s raiding experience? This premium pack contains 120 unique, handcrafted, high quality raidable bases divided into 5 distinct difficulty tiers (Easy, Medium, Hard, Expert, and Nightmare). Every base was built manually in-game, saved with CopyPaste, and tested on a live server. The Easy and Medium bases are bigger and more challenging than usual, and 44 of the bases come in a festive Christmas style. Everything is 100% Plug & Play — no setup or editing required! What Makes This Pack Unique: 120 Custom Bases: Includes 35 Easy, 30 Medium, 30 Hard, 15 Expert, and 10 Nightmare bases. Complete Loot Table Set: A fully balanced loot table for every tier, tuned so each difficulty rewards properly without breaking your server’s economy. Bigger Easy & Medium Tiers: Around 280 and 340 entities each with real defences — far more challenging than the usual small starter raids. Fully Defended & Clever Layouts: Built with auto turrets, shotgun traps, flame turrets, SAM sites, land mines, and tesla coils. Some bases feature hidden traps crafted with EditTool so raiders can’t easily spot every defense. Visual Variety & Heavy Challenge: Higher tiers utilize mostly Metal and HQM building grades along with custom skinned blocks and deployables. 44 bases come in a festive Christmas style. Paste-Tested: All 120 base files were checked and corrected one by one, so nothing collapses or goes missing when a base spawns. Plug & Play Setup: Pre-configured profiles and main plugin settings included. Just copy, paste, and reload! Important! - In case that you are buying this pack to update your server, contact me, and after buying the pack I can rename the bases special for you, and will send the updated profiles so you won’t lose any time. How to Install (Step-by-Step): Setting this up on your server takes less than 2 minutes: Base Files: Extract all .json files from all subfolders (copypaste/Easy/, Medium/, etc.) and place them directly into oxide/data/copypaste/. (Do not copy subfolders, only the files inside them!) Loot Tables: Copy all 5 .json files from Difficulty_Loot/ into oxide/data/RaidableBases/Difficulty_Loot/. Default Loot: Replace oxide/data/RaidableBases/Default_Loot.json with the empty one included. The plugin mixes this file into every difficulty, so emptying it keeps the loot exactly as balanced. (Optional, but recommended!) Profiles: Copy all files from Profiles/ into oxide/data/RaidableBases/Profiles/. Plugin Config (Optional): If you want to use the included custom config, copy config/RaidableBases.json into oxide/config/. (Note: This will overwrite your existing config!) Reload: Run o.reload RaidableBases in your server console. Requirements: This pack requires an Oxide/uMod Rust server with the paid RaidableBases plugin (by nivex) and the CopyPaste plugin installed. The bases work well. The only thing is that a few of them have lower stability by design, so "stability": "false" needs to be set in the profile’s CopyPaste Options — otherwise those parts can drop after pasting. It’s already set that way in all the profiles that come with the pack, so there’s nothing to do on your side. IMPORTANT: Remove Stone Walls (Enclosures): By default, the plugin spawns a giant stone wall around bases. To remove it: Open oxide/config/RaidableBases/Profiles/Easy.json Find the "Arena Walls" section and change "Enabled" to false: "Arena Walls": { "Enabled": false, ... } Run command: rb.reload in console. Loot Hints (enabled by default): Players type /rb hint and the containers that still hold loot are drawn for them — very useful on the big Hard, Expert and Nightmare bases. To turn it off: "Loot Hints": { "Enabled (/rb hint)": false, "Required Loot Percentage To See Loot Left": 85.0, ... } In Case that you feel that it's too much loot: Open oxide/config/RaidableBases/Profiles/Easy.json or any tother Difficulty "Amount Of Items To Spawn": 120, Change the Amount Of Items to a lower number. Modifying Base Despawn Timers: If you want to change how long a base stays on the map before disappearing, find these lines under "Raid Management" in config: "Minutes Until Despawn After Looting (min: 1)": 15, "Minutes Until Despawn After Inactive (0 = disabled)": 45 Controlling Automatically Maintained Events: It's spawning 6 bases at every 30 mins - 1h 30 mins, randomly. Easy & Medium got higher chances to spawn. Takes 30 seconds per base to spawn so it's not going to make the server to lag. "Always Maintain Max Events": true, "Max Maintained Events": 6 NPCs: Default is 1+1 on Easy up to 3+3 on Nightmare. Raise these for a harder fight: "NPCs": { "Enabled": true, "Amount Of Scientists To Spawn": 2, "Minimum Amount Of Scientists To Spawn": 2, "Amount Of Murderers To Spawn": 2, "Minimum Amount Of Murderers To Spawn": 2, ... } Auto-Cooking & Sorting (Furnace & Base Sorting): If you want to know how the pack automatically moves resources or food into the right containers when a base spawns, look for these options under "Raid Management" in config: "Move Cookables Into Ovens": true, "Move Food Into BBQ Or Fridge": true, "Move Resources Into Tool Cupboard": true, "Move Items Into Lockers": true Turning Lights and Furnaces On Automatically: "Turn Lights On At Night": true, "Turn Lights On Indefinitely": true, "Furnace Starting Fuel": 1000 Automatic Chat Announcements: If you want the entire server to know when a new raid has appeared on the map, look for "Event Messages" in config: "Announce Buy Base Messages": false, "Show Opened Message For PVE Bases": true, "Show Opened Message For PVP Bases": true Manual Base Registration (Console Commands) If you already have existing bases and do not want to overwrite your profiles, run these commands in your server console (F1 or RCON) to add all 120 bases manually, then run o.reload RaidableBases: (Important! - In case that you are buying this pack to update your server, contact me, and after buying the pack I can rename the bases special for you, and will send the updated profiles so you won’t lose any time.) rb.config add "Easy Bases" Easy easy1 easy2 easy3 easy4 easy5 easy6 easy7 easy8 easy9 easy10 rb.config add "Easy Bases" easy11 easy12 easy13 easy14 easy15 easy16 easy17 easy18 easy19 easy20 rb.config add "Easy Bases" easy21 easy22 easy23 easy24 easy25 easy26 easy27 easy28 easy29 easy30 rb.config add "Easy Bases" easy31 easy32 easy33 easy34 easy35 rb.config add "Medium Bases" Medium medium1 medium2 medium3 medium4 medium5 medium6 medium7 medium8 medium9 medium10 rb.config add "Medium Bases" medium11 medium12 medium13 medium14 medium15 medium16 medium17 medium18 medium19 medium20 rb.config add "Medium Bases" medium21 medium22 medium23 medium24 medium25 medium26 medium27 medium28 medium29 medium30 rb.config add "Hard Bases" Hard hard1 hard2 hard3 hard4 hard5 hard6 hard7 hard8 hard9 hard10 rb.config add "Hard Bases" hard11 hard12 hard13 hard14 hard15 hard16 hard17 hard18 hard19 hard20 rb.config add "Hard Bases" hard21 hard22 hard23 hard24 hard25 hard26 hard27 hard28 hard29 hard30 rb.config add "Expert Bases" Expert expert1 expert2 expert3 expert4 expert5 expert6 expert7 expert8 expert9 expert10 rb.config add "Expert Bases" expert11 expert12 expert13 expert14 expert15 rb.config add "Nightmare Bases" Nightmare nightmare1 nightmare2 nightmare3 nightmare4 nightmare5 nightmare6 nightmare7 nightmare8 nightmare9 nightmare10 Optimized NPCs The number of NPCs is fully optimized for each difficulty tier — from 1 scientist and 1 murderer on Easy up to 3 and 3 on Nightmare. You can find and tweak these balanced guard configurations inside the Profiles/ folder. A Note From Me Hello and welcome! I’ve put my heart and countless hours into creating Raidable Bases Pack 3. Everything was built by me from scratch on my online server. I am incredibly proud of this project — especially the bigger, more challenging Easy and Medium tiers, and the festive Christmas-style builds. In case that you want to see few of my bases by urself, contact me and I will join on my public server and will spawn some of them, the ip: 148.251.177.248:28020 Why only $25? A pack with 120 custom, fully tested bases easily goes for more on the market. But as a former server owner myself, I know how hard and expensive it is to find high-quality setups that don’t break the bank. I wanted to keep it at a fair, accessible price while giving you top-tier quality for your server! Support the Work If you love this pack, please consider leaving a 5-star review! Your feedback means the world to me and motivates me to keep building and improving future packs. Thank you for your support, and happy raiding!$25.00 -
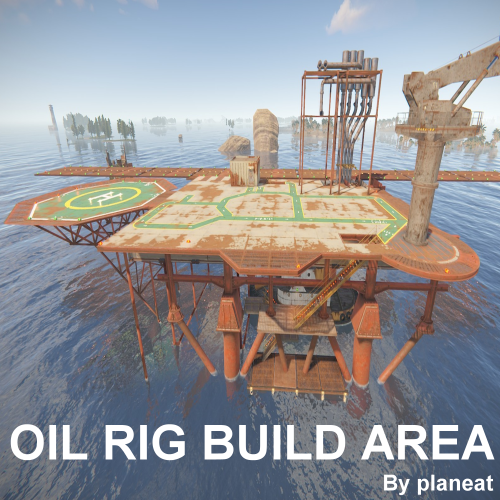
Version 1.0.1
18 downloads
Custom Oil Rig to build a base, can build on deck 1.This Area are built with a full flight deck similar in appearance to an aircraft carrier to operate Minicopter and Scrap Transport Helicopter, Attack Helicopter. 2Adam plugins "Biplane” can take off and land on the runway. 3.Tugboat can dock below deck INSTALLATION Drag & Drop Gently adjust to the water and land.$9.00- 3 comments
-
- 1
-
-
- #build base
- #prefab
- (and 4 more)
-
Version 1.0.0
5 downloads
Ready to bring Christmas to your server’s raiding experience? This seasonal pack contains 75 unique, handcrafted, high quality raidable bases divided into 5 distinct difficulty tiers (Easy, Medium, Hard, Expert, and Nightmare). Every base was built manually in-game, saved with CopyPaste, and tested on a live server. All 75 bases are fully decorated in a festive Christmas style. The Easy and Medium bases are bigger and more challenging than usual. Everything is 100% Plug & Play — no setup or editing required! What Makes This Pack Unique: 75 Custom Bases: Includes 20 Easy, 15 Medium, 15 Hard, 15 Expert, and 10 Nightmare bases. Decorated By Hand: 8,159 string lights, 80 christmas trees and 55 snowmen placed one by one across the pack. Not a filter or a reskin — the decorations are part of every build. Complete Loot Table Set: A fully balanced loot table for every tier, tuned so each difficulty rewards properly without breaking your server’s economy. Fully Defended & Clever Layouts: Built with auto turrets, shotgun traps, flame turrets, SAM sites, land mines. A Real Difficulty Curve: An Easy base is a quick starter raid at around 270 entities. The toughest Nightmare fortress runs to 1,790 entities with 114 traps and turrets across multiple levels. Visual Variety & Heavy Challenge: Higher tiers are built mostly in Metal and HQM. Paste-Tested: All 75 base files were checked and corrected one by one, so nothing collapses, explodes or goes missing when a base spawns. Plug & Play Setup: Pre-configured profiles and main plugin settings included. Just copy, paste, and reload! Important! — In case that you are buying this pack to update your server, contact me, and after buying the pack I can rename the bases special for you, and will send the updated profiles so you won’t lose any time. How to Install (Step-by-Step): Setting this up on your server takes less than 2 minutes: Base Files: Extract all 75 .json files from all subfolders (copypaste/Easy/, Medium/, etc.) and place them directly into oxide/data/copypaste/. (Do not copy subfolders, only the files inside them! The plugin does not look inside subfolders — the profiles reference the bases as easy1, medium1 and so on, with no folder prefix.) Loot Tables: Copy all 5 .json files from Difficulty_Loot/ into oxide/data/RaidableBases/Difficulty_Loot/. Default Loot: Replace oxide/data/RaidableBases/Default_Loot.json with the empty one included. The plugin mixes this file into every difficulty, so emptying it keeps the loot exactly as balanced. (Optional, but recommended!) Profiles: Copy all files from Profiles/ into oxide/data/RaidableBases/Profiles/. Keep the filenames exactly as they are, spaces included — “Easy Bases.json”, not “EasyBases.json”. Plugin Config (Optional): If you want to use the included custom config, copy config/RaidableBases.json into oxide/config/. (Note: This will overwrite your existing config!) Reload: Run o.reload RaidableBases in your server console. For later changes you can use rb.reloadconfig, rb.reloadprofiles and rb.reloadtables instead, without reloading the whole plugin. Requirements: This pack requires an Oxide/uMod Rust server with the paid RaidableBases plugin (by nivex) and the CopyPaste plugin installed. The bases work well. The only thing is that a few of them have lower stability by design, so "stability": "false" should be set in the profile’s CopyPaste Options. It’s already set that way in all the profiles that come with the pack, so there’s nothing to do on your side. IMPORTANT: Remove Stone Walls (Enclosures): By default, the plugin spawns a giant stone wall around bases. To remove it: Open oxide/config/RaidableBases/Profiles/Easy.json Find the "Arena Walls" section and change "Enabled" to false: "Arena Walls": { "Enabled": false, ... } Run command: rb.reload in console. Loot Hints (enabled by default): Players type /rb hint and the containers that still hold loot are drawn for them — very useful on the big Hard, Expert and Nightmare bases. To turn it off: "Loot Hints": { "Enabled (/rb hint)": false, "Required Loot Percentage To See Loot Left": 85.0, ... } In Case that you feel that it's too much loot: Open oxide/config/RaidableBases/Profiles/Easy.json or any tother Difficulty "Amount Of Items To Spawn": 185, Change the Amount Of Items to a lower number. Modifying Base Despawn Timers: If you want to change how long a base stays on the map before disappearing, find these lines under "Raid Management" in config: "Minutes Until Despawn After Looting (min: 1)": 15, "Minutes Until Despawn After Inactive (0 = disabled)": 45 Controlling Automatically Maintained Events: It's spawning 6 bases at every 30 mins - 1h 30 mins, randomly. Easy & Medium got higher chances to spawn. Takes 30 seconds per base to spawn so it's not going to make the server to lag. "Always Maintain Max Events": true, "Max Maintained Events": 6 NPCs: Default is 1+1 on Easy up to 3+3 on Nightmare. Raise these for a harder fight: "NPCs": { "Enabled": true, "Amount Of Scientists To Spawn": 2, "Minimum Amount Of Scientists To Spawn": 2, "Amount Of Murderers To Spawn": 2, "Minimum Amount Of Murderers To Spawn": 2, ... } Auto-Cooking & Sorting (Furnace & Base Sorting): If you want to know how the pack automatically moves resources or food into the right containers when a base spawns, look for these options under "Raid Management" in config: "Move Cookables Into Ovens": true, "Move Food Into BBQ Or Fridge": true, "Move Resources Into Tool Cupboard": true, "Move Items Into Lockers": true Turning Lights and Furnaces On Automatically: "Turn Lights On At Night": true, "Turn Lights On Indefinitely": true, "Furnace Starting Fuel": 1000 Automatic Chat Announcements: If you want the entire server to know when a new raid has appeared on the map, look for "Event Messages" in config: "Announce Buy Base Messages": false, "Show Opened Message For PVE Bases": true, "Show Opened Message For PVP Bases": true Manual Base Registration (Console Commands) If you already have existing bases and do not want to overwrite your profiles, run these commands in your server console (F1 or RCON) to add all 75 bases manually, then run o.reload RaidableBases: (Important! - In case that you are buying this pack to update your server, contact me, and after buying the pack I can rename the bases special for you, and will send the updated profiles so you won’t lose any time.) rb.config add “Easy Bases” Easy easy1 easy2 easy3 easy4 easy5 easy6 easy7 easy8 easy9 easy10 rb.config add “Easy Bases” easy11 easy12 easy13 easy14 easy15 easy16 easy17 easy18 easy19 easy20 rb.config add “Medium Bases” Medium medium1 medium2 medium3 medium4 medium5 medium6 medium7 medium8 medium9 medium10 rb.config add “Medium Bases” medium11 medium12 medium13 medium14 medium15 rb.config add “Hard Bases” Hard hard1 hard2 hard3 hard4 hard5 hard6 hard7 hard8 hard9 hard10 rb.config add “Hard Bases” hard11 hard12 hard13 hard14 hard15 rb.config add “Expert Bases” Expert expert1 expert2 expert3 expert4 expert5 expert6 expert7 expert8 expert9 expert10 rb.config add “Expert Bases” expert11 expert12 expert13 expert14 expert15 rb.config add “Nightmare Bases” Nightmare nightmare1 nightmare2 nightmare3 nightmare4 nightmare5 nightmare6 nightmare7 nightmare8 nightmare9 nightmare10 Optimized NPCs The number of NPCs is fully optimized for each difficulty tier — from 1 scientist and 1 murderer on Easy up to 3 and 3 on Nightmare. You can find and tweak these balanced guard configurations inside the Profiles/ folder. A Note From Me Hello and welcome! I’ve put my heart and countless hours into creating this Christmas pack. Everything was built by me from scratch on my online server, and every single one of the 75 bases was decorated by hand — the lights, the trees, the snowmen, all placed one at a time. In case that you want to see few of my bases by urself, contact me and I will join on my public server and will spawn some of them, the ip: 148.251.177.248:28020 Why only $17? Seasonal content has a short window, and I would rather have it running on your server this December than sitting unsold. As a former server owner myself, I know how hard and expensive it is to find high-quality setups that don’t break the bank. Everything is tested and plug & play, at a price that makes it an easy decision. Support the Work If you love this pack, please consider leaving a 5-star review! Your feedback means the world to me and motivates me to keep building and improving future packs. Thank you for your support, and Merry Christmas! Happy raiding!$17.00 -
Version 1.0.4
73 downloads
Ready to level up your server's raiding experience? This premium pack contains 300 unique, handcrafted raidable bases divided into 5 distinct difficulty tiers (Easy, Medium, Hard, Expert, and Nightmare). Every base was built manually in-game, saved with CopyPaste, and tested on a live server. Everything is 100% Plug & Play — no setup or editing required! What Makes This Pack Unique: 300 Custom Bases: Includes 100 Easy, 100 Medium, 40 Hard, 30 Expert, and 30 Nightmare bases. 2 Complete Loot Table Sets: Choose between Difficulty_Loot (higher amounts for modded/high-rate servers) or Difficulty_Loot2 (lower amounts for vanilla-style servers). Fully Defended & Clever Layouts: Built with auto turrets, shotgun traps, flame turrets, SAM sites, land mines, and tesla coils. Some bases feature hidden traps crafted with EditTool so raiders can't easily spot every defense. Visual Variety & Heavy Challenge: Higher tiers utilize mostly Metal and HQM building grades along with custom skinned blocks and deployables. Plug & Play Setup: Pre-configured profiles and main plugin settings included. Just copy, paste, and reload! Important! - In case that you are buying this pack to update your server, contact me, and after buying the pack I can rename the bases special for you, and will send the updated profiles so you won't lose any time. How to Install (Step-by-Step): Setting this up on your server takes less than 2 minutes: Base Files: Extract all .json files from all subfolders (copypaste/Easy/, Medium/, etc.) and place them directly into oxide/data/copypaste/. (Do not copy subfolders, only the files inside them!) Loot Tables: Pick ONE of the loot folders (Difficulty_Loot/ for higher rewards or Difficulty_Loot2/ for lower rewards). Copy all 5 .json files into oxide/data/RaidableBases/Difficulty_Loot/. (Do not copy both!) Profiles: Copy all files from Profiles/ into oxide/data/RaidableBases/Profiles/. Plugin Config (Optional): If you want to use the included custom config, copy config/RaidableBases.json into oxide/config/. (Note: This will overwrite your existing config!) Reload: Run o.reload RaidableBases in your server console. Requirements: This pack requires an Oxide/uMod Rust server with the paid RaidableBases plugin (by nivex) and the CopyPaste plugin installed. IMPORTANT: Remove Stone Walls (Enclosures): By default, the plugin spawns a giant stone wall around bases. To remove it: Open oxide/config/RaidableBases/Profiles/Easy.json Find the "Arena Walls" section and change "Enabled" to false: "Arena Walls": { "Enabled": false, ... } Run command: rb.reload in console. In Case that you feel that it's too much loot: Open oxide/config/RaidableBases/Profiles/Easy.json or any tother Difficulty "Amount Of Items To Spawn": 45, A tip from me, I would rather put a little bit more loot in the profiles, so the players wil have a better gameplay. Change the Amount Of Items to a lower number. Modifying Base Despawn Timers: If you want to change how long a base stays on the map before disappearing, find these lines under "Raid Management" in config: "Minutes Until Despawn After Looting (min: 1)": 15, "Minutes Until Despawn After Inactive (0 = disabled)": 45 Controlling Automatically Maintained Events: It's spawning 6 bases at every 30 mins - 1h 30 mins, randomly. Easy & Medium got higher chances to spawn. Takes 30 seconds per base to spawn so it's not going to make the server to lag. "Always Maintain Max Events": true, "Max Maintained Events": 6 Auto-Cooking & Sorting (Furnace & Base Sorting): If you want to know how the pack automatically moves resources or food into the right containers when a base spawns, look for these options under "Raid Management" in config: "Move Cookables Into Ovens": true, "Move Food Into BBQ Or Fridge": true, "Move Resources Into Tool Cupboard": true, "Move Items Into Lockers": true Turning Lights and Furnaces On Automatically: "Turn Lights On At Night": true, "Turn Lights On Indefinitely": true, "Furnace Starting Fuel": 1000 Automatic Chat Announcements: If you want the entire server to know when a new raid has appeared on the map, look for "Event Messages" in config: "Announce Buy Base Messages": false, "Show Opened Message For PVE Bases": true, "Show Opened Message For PVP Bases": true Manual Base Registration (Console Commands) If you already have existing bases and do not want to overwrite your profiles, run these commands in your server console (F1 or RCON) to add all 300 bases manually, then run o.reload RaidableBases: (Important! - In case that you are buying this pack to update your server, contact me, and after buying the pack I can rename the bases special for you, and will send the updated profiles so you won't lose any time.) rb.config add "Easy Bases" easy1 easy2 easy3 easy4 easy5 easy6 easy7 easy8 easy9 easy10 rb.config add "Easy Bases" easy11 easy12 easy13 easy14 easy15 easy16 easy17 easy18 easy19 easy20 rb.config add "Easy Bases" easy21 easy22 easy23 easy24 easy25 easy26 easy27 easy28 easy29 easy30 rb.config add "Easy Bases" easy31 easy32 easy33 easy34 easy35 easy36 easy37 easy38 easy39 easy40 rb.config add "Easy Bases" easy41 easy42 easy43 easy44 easy45 easy46 easy47 easy48 easy49 easy50 rb.config add "Easy Bases" easy51 easy52 easy53 easy54 easy55 easy56 easy57 easy58 easy59 easy60 rb.config add "Easy Bases" easy61 easy62 easy63 easy64 easy65 easy66 easy67 easy68 easy69 easy70 rb.config add "Easy Bases" easy71 easy72 easy73 easy74 easy75 easy76 easy77 easy78 easy79 easy80 rb.config add "Easy Bases" easy81 easy82 easy83 easy84 easy85 easy86 easy87 easy88 easy89 easy90 rb.config add "Easy Bases" easy91 easy92 easy93 easy94 easy95 easy96 easy97 easy98 easy99 easy100 rb.config add "Medium Bases" medium1 medium2 medium3 medium4 medium5 medium6 medium7 medium8 medium9 medium10 rb.config add "Medium Bases" medium11 medium12 medium13 medium14 medium15 medium16 medium17 medium18 medium19 medium20 rb.config add "Medium Bases" medium21 medium22 medium23 medium24 medium25 medium26 medium27 medium28 medium29 medium30 rb.config add "Medium Bases" medium31 medium32 medium33 medium34 medium35 medium36 medium37 medium38 medium39 medium40 rb.config add "Medium Bases" medium41 medium42 medium43 medium44 medium45 medium46 medium47 medium48 medium49 medium50 rb.config add "Medium Bases" medium51 medium52 medium53 medium54 medium55 medium56 medium57 medium58 medium59 medium60 rb.config add "Medium Bases" medium61 medium62 medium63 medium64 medium65 medium66 medium67 medium68 medium69 medium70 rb.config add "Medium Bases" medium71 medium72 medium73 medium74 medium75 medium76 medium77 medium78 medium79 medium80 rb.config add "Medium Bases" medium81 medium82 medium83 medium84 medium85 medium86 medium87 medium88 medium89 medium90 rb.config add "Medium Bases" medium91 medium92 medium93 medium94 medium95 medium96 medium97 medium98 medium99 medium100 rb.config add "Hard Bases" hard1 hard2 hard3 hard4 hard5 hard6 hard7 hard8 hard9 hard10 rb.config add "Hard Bases" hard11 hard12 hard13 hard14 hard15 hard16 hard17 hard18 hard19 hard20 rb.config add "Hard Bases" hard21 hard22 hard23 hard24 hard25 hard26 hard27 hard28 hard29 hard30 rb.config add "Hard Bases" hard31 hard32 hard33 hard34 hard35 hard36 hard37 hard38 hard39 hard40 rb.config add "Expert Bases" expert1 expert2 expert3 expert4 expert5 expert6 expert7 expert8 expert9 expert10 rb.config add "Expert Bases" expert11 expert12 expert13 expert14 expert15 expert16 expert17 expert18 expert19 expert20 rb.config add "Expert Bases" expert21 expert22 expert23 expert24 expert25 expert26 expert27 expert28 expert29 expert30 rb.config add "Nightmare Bases" nightmare1 nightmare2 nightmare3 nightmare4 nightmare5 nightmare6 nightmare7 nightmare8 nightmare9 nightmare10 rb.config add "Nightmare Bases" nightmare11 nightmare12 nightmare13 nightmare14 nightmare15 nightmare16 nightmare17 nightmare18 nightmare19 nightmare20 rb.config add "Nightmare Bases" nightmare21 nightmare22 nightmare23 nightmare24 nightmare25 nightmare26 nightmare27 nightmare28 nightmare29 nightmare30 You will see photos only with 10 bases per Difficulty, beacause I am aware of people stealing my designs. In the pack you will se a file named: RaidableBases_Testing_cfg (this is another config for the pack, that makes the bases to spawn without any cooldown, while the main configuration in the pack makes the bases to spawn between 30 min up to 1h 30 mins) Optimized NPCs The number of NPCs is fully optimized for each difficulty tier. You can find and tweak these balanced guard configurations inside the Profiles/ folder A Note From Me Hello and welcome! I’ve put my heart and countless hours into creating Raidable Bases Pack 2. Everything was built by me from scratch on my online server. I am incredibly proud of this project, especially the dual-loot table options designed to fit any server economy seamlessly. In case that you want to see few of my bases by urself, contact me and I will join on my public server and will spawn some of them, the ip: 148.251.177.248:28020 . Why only $60? A massive pack with 300 custom bases and dual loot tables easily goes for $100+ on the market. But as a former server owner myself, I know how hard and expensive it is to find high-quality setups that don't break the bank. I wanted to keep it at a fair, accessible price while giving you top-tier quality for your server! Support the Work If you love this pack, please consider leaving a 5-star review! Your feedback means the world to me and motivates me to keep building and improving future packs. Thank you for your support, and happy raiding!$60.00 -

Version 12.0.0
180 downloads
In the heart of this EPIC ONE GRID RUST MAP, spanning a compact 1500 in size, lies a breathtaking landscape crafted for high-FPS and fast-paced PvP gameplay. Amidst towering mountains and sprawling valleys, players navigate custom buildable underwater caves that offer strategic advantages for building and hiding bases. At its center, a colossal mountain dominates the skyline with a Custom Buildable Warehouse Monument and many more Custom Buildable Monuments all optimized for peak performance with minimal entity counts. This central area becomes the hub for players to practice PvP while fending off enemies and honing their raid defense and offense skills. NEW BUILDING EXPERIENCE! Scattered across the terrain are many bespoke buildable monuments, each marked with an X on the map, drawing players in with fresh and exciting base-building locations. This masterpiece of design not only promises thrilling PvP encounters but also showcases a commitment to immersive gameplay and efficient server performance, making it the best released Map for One Grid Rust servers to date! FEATURES • Size: 1500 • Prefab Count: 3874 • Map Optimized for Performance! • Map Password: Included. • Vast array of many EPIC Custom Buildable Monuments! • Designated building zones (marked X on the minimap) • Majestic Underwater Buildable Cave Bunkers! • Legendary Battle Iceberg Build Zone: An expansive above water custom-built zone featuring multiple icebergs for epic building, raiding, and intense PVP combat! • Monuments crafted for peak performance with minimal entities! • EPIC Scale PVP Mountain center of map with Buildable Warehouse Monument! • Everything crafted with One Grid Servers in mind for peak performance and EPIC scaled FUN! • Monumental and realistic landscape! • Underground railway. • Combined Outpost/BanditCamp/Fishing Village Safe Zone Monument on the water. CUSTOM BUILDABLE MONUMENTS • Amount: 6 Total! • Custom Underwater Bunkers • Battle Iceberg • Customized Large Bus Stop Base to Build inside • Bunker Base on Mountain to build inside • + MORE! Facepunch Monuments Airfield Dome Jungle Ziggurat Jungle Ruins Large Oilrig Small Oilrig Satellite Dish 2X Lighthouse Gas Station 1X Quarry Supermarket Warehouse Fishing Village/BanditCamp Mixed Ranch Stables To Enable the Travelling Vendor on Custom Maps its optional to use this Oxide Plugin: https://codefling.com/plugins/anymapvendor Help Discord: DarkoRust$9.99 -

Version 6.0.0
45 downloads
BUILDERS OASIS – 4250K CREATIVE RUST MAP Builders Oasis is a fast-paced, builder-friendly 4250k Rust map loaded with every major monument and a ton of custom build spots. Designed for smooth performance, creative freedom, and competitive gameplay. What Makes It Special Fully connected train tracks + underground rails for fast travel and tactical control Endless Custom Buildable areas that players will love! Diverse terrain: forests, deserts, coasts, cliffs, valleys & plateaus Perfect for solos, clans, builders, and high-pop servers. Custom Build Zones Low-prefab, FPS-friendly buildables: Custom caves Underwater bases Hidden structures Unique build pockets All Facepunch Monuments Included Launch Site • Military Tunnels • Military Base • Silo • Airfield • Power Plant • Water Treatment • Trainyard • Harbors • Outpost • Excavator • Oil Rigs • Arctic Base • Junkyard • Sphere Tank • Satellite Dish • Ferry Terminal • Sewer Branch — and more. Map Info Size: 4250k Prefabs: ~14607 Support Discord: DarkoRust$19.99 -

Version 8.0.0
156 downloads
In the heart of this EPIC RUST BATTLEFIELD MAP lies a breathtaking landscape crafted for High-FPS and fast paced PVP Gameplay. Amidst towering mountains and sprawling valleys, players navigate custom buildable underwater caves that offer strategic advantages for building and hiding bases. At its center, a colossal mountain dominates the skyline with the iconic Large Oil Rig and a meticulously designed Buildable Dome, all optimized for peak performance with minimal entity counts. This will be the central area where your players gather to practice PVP in the Large Oil Rig and fend off enemies practicing Raid Defense and Offense in the EPIC scale Buildable Dome! NEW EXPERIENCE! Battle Towers Buildable Zone stands as a fortress of opportunity and conflict. Towering HUGE structures invite players to build bases on top of, defend against raids, and engage in intense PvP battles atop their formidable heights, giving one of the most FUN experiences any player can have in Rust! Scattered across the terrain are 22 bespoke buildable monuments, each marked with an X on the map, bringing in your players with a fresh take on base building locations. This masterpiece of design not only promises thrilling PvP encounters but also showcases a commitment to immersive gameplay and efficient server performance, making it the best released Map for Battlefield Rust servers to date! FEATURES • Size: 2800 • Prefab Count: 6352 • Map Optimized for Performance! • Map Password: Included. • Vast array of 22 EPIC Custom Buildable Monuments! • Designated building zones (marked X on the minimap) • Several Majestic Underwater Buildable Cave Bunkers! • Legendary Battle Towers Build Zone: An expansive custom-built zone featuring multiple towers for epic building, raiding, and intense PVP combat! • Monuments crafted for peak performance with minimal entities! • EPIC Scale PVP Mountain center of map with Large Oil Rig and Buildable Dome! • Everything crafted with Battlefield PVP Servers in mind for peak performance and EPIC scale FUN! • Monumental and realistic landscape! • Underground railway. CUSTOM BUILDABLE MONUMENTS: • Amount: 22 Total! • Buildable Dome • Custom Underwater Bunkers • Custom Large Size Bus Stop Base • EPIC Scale Rock Formation Cave • Medium Sized Glass Roof Cave • + MANY MORE! Facepunch Monuments: Launch Site Dome Giant Excavator Military Base 2X Large Oilrig Small Oilrig Nuclear Missile Silo Ferry Terminal Satellite Dish Small Harbor 2X Lighthouse 2X Gas Station 2X HQM Quarry Sulfur Quarry Stone Quarry Supermarket RadTown Power Substations Small and Large Jungle Ziggurat Cave Large Sewers Hard Cave Large Hard Cave Medium Medium Cave Large Medium Ranch Stables Fishing Village Bandit Town Outpost To Enable the Travelling Vendor on Custom Maps its optional to use this Oxide Plugin: https://codefling.com/plugins/anymapvendor Help Discord: @DarkoRust$19.99- 3 reviews
-
- 2
-
-
-
- #battlefield
- #custom map
- (and 26 more)
-

Version 1.0.1
156 downloads
Rock pool POI suitable for standalone application or integration with a custom build site; there's a rock positioned for pump placement. Topology has been sorted to manage unwanted spawns; suited to any biome. 36 entities - RustEdit 2 compatible. Enjoy - Nnertz.Free -
Version 1.0.4
240 downloads
Ready to level up your server's raiding experience? This premium pack contains 210 unique, handcrafted raidable bases divided into 5 distinct difficulty tiers (Easy, Medium, Hard, Expert, and Nightmare). Each tier comes with its own custom, balanced loot tables —the bigger the challenge, the better the reward! Everything is 100% Plug & Play. You don’t need to spend hours editing configurations; just copy, paste, and you're good to go! What makes this pack unique: Easy & Medium Bases: Built to be starter-friendly, utilizing a massive variety of awesome skins to make your server look incredibly alive and high-quality. Hard, Expert & Nightmare Bases: Features complex layouts, multiple entrances, clever trap placements, and a heavy challenge loaded with top-tier rewards. Plug & Play Setup: Comes with everything pre-configured—loot tables, difficulty profiles, and the main plugin settings are all included. No setup required! How to Install (Step-by-Step) As detailed in the README.txt.txt file, setting this up on your server takes less than 2 minutes: Base Files: Extract all .json files from the copypaste/ folders and place them directly into: oxide/data/copypaste/ (Do not copy the subfolders, only the files inside them!) Loot Tables: Copy all files from Difficulty_Loot/ into: oxide/data/RaidableBases/Difficulty_Loot/ Profiles: Copy all files from Profiles/ into: oxide/data/RaidableBases/Profiles/ Plugin Config (Optional): If you want to use the included custom config, copy RaidableBases.json from the config/ folder into: oxide/config/ (Note: This will overwrite your existing config!) Reload: Run o.reload RaidableBases in your server console. Note: This pack requires the paid Raidable Bases plugin (by nivex) and the CopyPaste plugin installed on an Oxide/uMod Rust server. IMPORTANT: Remove Stone Walls (Enclosures): By default, the plugin spawns a giant stone wall around bases. To remove it: Open oxide/config/RaidableBases/Profiles/Easy.json Find the "Arena Walls" section and change "Enabled" to false: "Arena Walls": { "Enabled": false, ... } Run command: rb.reload in console. In Case that you feel that it's too much loot: Open oxide/config/RaidableBases/Profiles/Easy.json or any tother Difficulty "Amount Of Items To Spawn": 45, Change the Amount Of Items to a lower number. Modifying Base Despawn Timers: If you want to change how long a base stays on the map before disappearing, find these lines under "Raid Management" in config: "Minutes Until Despawn After Looting (min: 1)": 15, "Minutes Until Despawn After Inactive (0 = disabled)": 45 Controlling Automatically Maintained Events: It's spawning 6 bases at every 30 mins - 1h 30 mins, randomly. Easy & Medium got higher chances to spawn. Takes 30 seconds per base to spawn so it's not going to make the server to lag. "Always Maintain Max Events": true, "Max Maintained Events": 6 Auto-Cooking & Sorting (Furnace & Base Sorting): If you want to know how the pack automatically moves resources or food into the right containers when a base spawns, look for these options under "Raid Management" in config: "Move Cookables Into Ovens": true, "Move Food Into BBQ Or Fridge": true, "Move Resources Into Tool Cupboard": true, "Move Items Into Lockers": true Turning Lights and Furnaces On Automatically: "Turn Lights On At Night": true, "Turn Lights On Indefinitely": true, "Furnace Starting Fuel": 1000 Automatic Chat Announcements: If you want the entire server to know when a new raid has appeared on the map, look for "Event Messages" in config: "Announce Buy Base Messages": false, "Show Opened Message For PVE Bases": true, "Show Opened Message For PVP Bases": true If you already have other bases installed and don't want to use the included Profiles, you can register all 210 bases directly into your difficulty profiles by running the commands below in your server console (F1 or RCON). After pasting all commands, reload the plugin with o.reload RaidableBases. rb.config add "Easy Bases" easy1 easy2 easy3 easy4 easy5 easy6 easy7 easy8 easy9 easy10 rb.config add "Easy Bases" easy11 easy12 easy13 easy14 easy15 easy16 easy17 easy18 easy19 easy20 rb.config add "Easy Bases" easy21 easy22 easy23 easy24 easy25 easy26 easy27 easy28 easy29 easy30 rb.config add "Easy Bases" easy31 easy32 easy33 easy34 easy35 easy36 easy37 easy38 easy39 easy40 rb.config add "Easy Bases" easy41 easy42 easy43 easy44 easy45 easy46 easy47 easy48 easy49 easy50 rb.config add "Easy Bases" easy51 easy52 easy53 easy54 easy55 easy56 easy57 easy58 easy59 easy60 rb.config add "Medium Bases" medium1 medium2 medium3 medium4 medium5 medium6 medium7 medium8 medium9 medium10 rb.config add "Medium Bases" medium11 medium12 medium13 medium14 medium15 medium16 medium17 medium18 medium19 medium20 rb.config add "Medium Bases" medium21 medium22 medium23 medium24 medium25 medium26 medium27 medium28 medium29 medium30 rb.config add "Medium Bases" medium31 medium32 medium33 medium34 medium35 medium36 medium37 medium38 medium39 medium40 rb.config add "Medium Bases" medium41 medium42 medium43 medium44 medium45 medium46 medium47 medium48 medium49 medium50 rb.config add "Medium Bases" medium51 medium52 medium53 medium54 medium55 medium56 medium57 medium58 medium59 medium60 rb.config add "Hard Bases" hard1 hard2 hard3 hard4 hard5 hard6 hard7 hard8 hard9 hard10 rb.config add "Hard Bases" hard11 hard12 hard13 hard14 hard15 hard16 hard17 hard18 hard19 hard20 rb.config add "Hard Bases" hard21 hard22 hard23 hard24 hard25 hard26 hard27 hard28 hard29 hard30 rb.config add "Expert Bases" expert1 expert2 expert3 expert4 expert5 expert6 expert7 expert8 expert9 expert10 rb.config add "Expert Bases" expert11 expert12 expert13 expert14 expert15 expert16 expert17 expert18 expert19 expert20 rb.config add "Expert Bases" expert21 expert22 expert23 expert24 expert25 expert26 expert27 expert28 expert29 expert30 rb.config add "Nightmare Bases" nightmare1 nightmare2 nightmare3 nightmare4 nightmare5 nightmare6 nightmare7 nightmare8 nightmare9 nightmare10 rb.config add "Nightmare Bases" nightmare11 nightmare12 nightmare13 nightmare14 nightmare15 nightmare16 nightmare17 nightmare18 nightmare19 nightmare20 rb.config add "Nightmare Bases" nightmare21 nightmare22 nightmare23 nightmare24 nightmare25 nightmare26 nightmare27 nightmare28 nightmare29 nightmare30 You will see photos only with 5 bases per Difficulty, beacause I am aware of people stealing my designs. In the pack you will se a file named: RaidableBases_Testing_cfg (this is another config for the pack, that makes the bases to spawn without any cooldown, while the main configuration in the pack makes the bases to spawn between 30 min up to 1h 30 mins) Optimized NPCs The number of NPCs is fully optimized for each difficulty tier. You can find and tweak these balanced guard configurations inside the Profiles/ folder! A Note From Me Hello and welcome! I’ve put my heart and countless hours into creating this professional, 100% plug-and-play pack. Everything was built by me from absolute scratch on my local server. I am incredibly proud of it, especially the loot tables—honestly, you won't find a better-balanced reward system out there! Why only $30? A massive pack like this usually costs around $70–$80. But as a former server owner myself, I know how hard and expensive it is to find high-quality setups that don't break the bank. I wanted to give back and support the Rust community with a top-tier pack at an affordable price. Support the Work If you love this pack, please consider leaving a 5-star review! Your feedback means the world to me and motivates me to keep building and improving the configurations for you! Thank you for your support, and happy raiding!$30.00 -
Version 3.0.0
105 downloads
Bring your bases to life easily with PNPC Builder AI Addon — it makes your PNPCs able to construct any CopyPaste base design! Just assign a build point, and your bot will get to work! Features: 🏗 Automated Construction • Activate builder mode using /pnpc build. • Choose a build location, and bot will begin constructing your base. Landscape & Obstacle Check • Terrain scanning ensures proper placement. • Prevents building near restricted zones such as roads, monuments, or other tool cupboards. Customisation • Configure build speed, obstacles check and other settings. • You can optionally require resources for construction. How to Use: Spawn your Personal NPC and enter "/pnpc build" command. Use the middle mouse button to select your build point. The NPC checks the area and starts construction. Relax and watch how your bot brings your base to life! Requirements: • PersonalNPC Plugin • CopyPaste Plugin • Build files must be stored in /oxide/data/copypaste/ This addon is free for all owners of the PersonalBuilder plugin. Contact me in PM to receive your free copy. See it in Action! Watch the Video Configuration: To make the default config work, you need to download the build file (link below) and place it in this directory "/oxide/data/copypaste". Link: https://drive.google.com/file/d/1Y5ja8DvWVvcPl92hDfJeu0iZe9_YSuKk/view?usp=sharing { "Available buildings (by PNPC bot spawn name)": { "bot1": [ { "The name of the building to be selected via /pnpc build {building_name}": "builder_test1", "CopyPaste file name": "builder_test", "Require resources?": false, "Enable building block upgrade effects?": true, "Speed": { "Bot speed multiplier": 1.0, "Build speed multiplier": 1.0, "Time to check 1 foundation": 0.15, "Time to check 1 building block": 0.15 }, "Build": { "Max allowable height of foundation": 3.1, "Start height to ground": 0.5, "Max depth when building in water": 2.5, "Disable stability?": false, "Checks": { "Check is close to road?": true, "Check is building blocked?": true, "Check for Prevent Building triggers": true, "Prevent Building check radius": 10.0 }, "Doors": { "Deploy doors?": false }, "Cupboards (experimental)": { "Deploy cupboards?": false, "Authorize the owner?": false } } } ] } }$9.90 -
Version 1.2.0
3,274 downloads
Deep Sea Options is a single config control plugin for Rust’s new Deep Sea feature. It lets server owners fully control when Deep Sea opens, what spawns inside it, what vehicles can enter, and how access rules are enforced. You can also configure if players can build inside deep sea. Building Control Enforce building allowed / blocked inside Deep Sea * Limit how many foundations a player can build in Deep Sea * Buildings persist restart, as long as the deep sea isnt being closed. Deep Sea Behavior Control Configure defaults: Whether the deep sea should always remain open, be on timers, or disabled Whether deepsea will auto open on server wipe (facepunch disables this by default) Control all phase timers GameTip messages to announce deep sea openinig/closing Deep Sea Content Control Configure procedural spawns: Island counts Ghost Ships counts RHIB counts Control: count spacing radius minimum distance between spawns distance from Deep Sea edges Settings are grouped and explained in the config Loot spawn Configurable respawn option for crates/ore/npc Respawn for scientist boat groups Access & Teleport Rules Control: Allow all vehicles (including planes and helis) or only an allow-listed set players can enter without a boat flying (noclip/admin) players can bypass checks NPC passengers are allowed on vehicles Prevent or allow “vehicle stacking” (boats/helis on deck) Chat Commands /deepsea status Shows current Deep Sea state /deepsea open Opens deep sea if not alrady open /deepsea close Closes current Deep Sea Console Commands dso open - to open the deepsea through the plugin dso close - to close the deepsea through the plugin dso forceclose - to force close the deepsea in case you need it closed but 'AlwaysOpen' is reopening it Note if you make changes to some config values (such as the procedural spawns, you will need to close the deep sea and reopen.) Config options: === GENERAL CONTROLS === Control - Schedule If ON: Plugin controls when Deep Sea opens/closes and how long it stays open. Control - Content If ON: Plugin controls how many islands, ghost ships, RHIB patrol groups, and initial loot scale Deep Sea uses. Control - Travel Rules If ON: Plugin controls who/what is allowed to use Deep Sea portals (vehicles, NPCs, players without vehicle, etc). Control - Building If ON: Plugin controls whether players can build while inside Deep Sea. Force Apply On Reload If ON: When plugin reloads, it forces Deep Sea to close and reopen so spawn changes apply immediately. If OFF: Changes apply next time Deep Sea opens normally. === SCHEDULE SETTINGS === Mode Vanilla = Normal Rust Deep Sea cycle. AlwaysOpen = Deep Sea never closes. Disabled = Deep Sea never opens. Plugin keeps pushing the next opening far into the future. Open Time Seconds How long Deep Sea stays open before closing. Cooldown Seconds How long Deep Sea stays closed before opening again. Final Phase Seconds End-of-cycle phase used for weather / atmosphere effects. Radiation Warning Phase Seconds When time left is below this, new entry is normally blocked unless late entry is allowed. AlwaysOpen - Keep Time Left Around Seconds In AlwaysOpen mode, plugin keeps the remaining open time around this value. AlwaysOpen - Refill When Below Seconds If time left drops below this, it refills back up to the target above. Disabled - Push Next Opening To Seconds In Disabled mode, pushes next open time far into the future. Entrance Portal Direction Forces the entrance portal direction. 0 = Map-based 1 = North 2 = East 3 = South 4 = West Set Open On Server Wipe If ON: Plugin controls the vanilla wipe setting. Open On Server Wipe Only used if above is ON. If enabled, Deep Sea is allowed to auto-open on server wipe. Set Generation Pacing If ON: Plugin controls Deep Sea generation pacing values. Increasing these delays can help if you experience long lag spikes when Deep Sea is opening. Entities Spawn Interval Seconds Only used if above is ON. Controls delay between general Deep Sea entity spawns during generation. Lower = faster generation. Spawn Groups Spawn Interval Seconds Only used if above is ON. Controls delay between Deep Sea spawn-group waves during generation. Lower = faster generation. NavMesh Spawn Interval Seconds Only used if above is ON. Controls delay between Deep Sea island navmesh generation steps. Lower = faster generation. === CONTENT SPAWNING === These control placement spacing for each Deep Sea content type. Islands / Ghost Ships / RHIB Groups all use the same logic: Count How many spawn each time Deep Sea opens. Spacing Size General spacing radius. Bigger = more spread out. Edge Buffer How far from the outer Deep Sea border spawns must stay. Bigger = more toward the center. Minimum Spacing Hard minimum distance between spawns. Overrides spacing size if larger. Loot Initial Loot Scale Controls the initial vanilla Deep Sea loot population multiplier when Deep Sea generates. 1.0 = vanilla amount. Higher = more initial loot spawned. Lower = less initial loot spawned. === RESPAWN (CRATES / NPCs / HACKABLES / RHIBS) === Enable Respawn System If ON: Plugin respawns eligible Deep Sea crates, ores, island scientists, hackable crates, and optional RHIB/PT boat patrol groups. Enable Debug Logging If ON: Plugin prints debug messages for entity removal, queueing, cleanup, and respawning. Check Interval Minutes How often the respawn system runs. Min Distance From Players To Allow Respawn Entities only respawn if no players are within this distance. Respawn Hackable Crates Via Ghostship If ON: Hackable crates respawn through ghost ship crate spawning. Hackable Crates Count How many hackable crates the plugin wants available through ghost ship spawning. Respawn RHIB Patrol Groups When None Remain If ON: Plugin maintains Deep Sea RHIB/PT patrol groups by checking current live patrol boats and respawning missing groups up to the configured boat count. === TRAVEL RULES === Allow Any Vehicle If ON: Any vehicle can use the portal. Allowed Vehicle Prefabs If Allow Any Vehicle is OFF, only vehicles matching these prefab names/partial names are allowed. If Any Vehicle, Require Boat Type Only? If ON: Even allowed vehicles must still be boat-type vehicles. Allow Players Without Vehicle If ON: Players can teleport without standing on a vehicle. Allow Noclip Players If ON: Flying/admin players bypass normal vehicle checks. Allow Non-Player Passengers (NPCs) If OFF: Vehicles with NPC passengers cannot teleport. Allow Non-Player Entity Teleport (NPCs) If ON: NPC player-type entities themselves can teleport. Allow Entry During Radiation Warning Phase If ON: Players can still enter even when Deep Sea is near closing. Modify DeepSea Portal Height? If ON: Plugin enlarges the Deep Sea portal height to help high-flying or tall custom vehicles enter more reliably. Ignore Extra Vehicle Onboard Check If ON: Skips checks for extra vehicles being carried/on top of another vehicle, such as helicopters on boats. Log Entry/Exit If ON: Logs allow/deny travel decisions for debugging. === BUILDING === Allow Building In Deep Sea If OFF: Players cannot build inside Deep Sea. If ON: Building is allowed. DeepSea - Limit Foundations If ON: Limits how many foundations each player can place inside Deep Sea only. DeepSea - Max Foundations Per Player Maximum number of foundations a player can place inside Deep Sea. DeepSea - GameTip: Show Remaining On Successful Place If ON: When a player places a foundation in Deep Sea, shows how many they can still place. DeepSea - GameTip: Show Message When Denied If ON: When a player hits the Deep Sea foundation limit, shows a GameTip. === NOTIFICATIONS === GameTip - Deep Sea Opening If ON: Shows a GameTip when Deep Sea starts opening. GameTip - Deep Sea Opened If ON: Shows a GameTip when Deep Sea is fully open. GameTip - Deep Sea Closing If ON: Shows a GameTip when Deep Sea starts closing. GameTip - Deep Sea Closed If ON: Shows a GameTip when Deep Sea is fully closed.$9.99 -
Version 1.0.0
2 downloads
MODERN HOUSE "A sleek and stylish modern house, designed with a contemporary and minimalist aesthetic. This prefab features a harmonious structure with clean lines, large glass windows for abundant natural light, and a blend of concrete, wood, and metal materials for a refined and modern look. The design includes a spacious interior with well-defined areas, a terrace or panoramic balcony, and architectural details that make it stand out in any setting. Perfect for urban-themed maps, residential roleplay zones, or as a standout feature in Rust environments. This prefab is both functional and visually appealing, adaptable for various in-game uses." - Modern walls: Using concrete and wood. - Large Glass Windows: To allow natural light. - Internal garage: a garage in the living room, very elegant! - Two bedrooms with bathrooms, a kitchen and a fireplace, perfect for snowy environments! I hope you enjoy it! Discord support - DISCORD$10.00 -
Version 1.0.23
754 downloads
Zombie Infection is an arena style plugin that creates an arena high in the sky. It pits 2 teams against each other: Survivors and Zombies. All players spawn as Survivors when the game begins. The survivors must find weapons and ammunition to defend themselves from the oncoming Horde. After 45 seconds (configurable), a random player is selected to become the leader of the Zombies, otherwise known as Zombie Prime. They are re-equipped and are allocated a large amount of health When a zombie hits a survivor with a melee weapon, that player is infected and is re-spawned as a zombie. Regular zombies do not have as much health as Zombie Prime, but they will re-spawn an infinite amount of times when killed. The survivors win by surviving for the entire round (default 10 minutes), or by eliminating Zombie Prime. The Zombies win by infecting all of the survivors. It is worth mentioning that only Zombie Prime is rewarded for the zombie team win. Regular zombies are instead rewarded based on the number of survivors they infect. Each prize type can be changed via the config. zistart <arena name> - Manually starts the Zombie Infection game [requires zombieinfection.admin] ziend - Manually ends the game [requires zombieinfection.admin] zisetcentrepoint - Changes the spawn location of the arena [requires zombieinfection.admin] ziwipeoldarena - Manually wipes old arena data [requires zombieinfection.admin] zijoin - Joins an active lobby zileave - Leaves the game and returns the player to their last location with all of their equipment ziprize - Redeems outstanding prizes to the players inventory$19.99 -

Version 1.0.1
25 downloads
The APRemove plugin enhances the standard system for removing and rotating building blocks in Rust using a hammer. It allows players with the appropriate permissions to remove and rotate building elements with personalized time limits. Additionally, the plugin adds a visual display at the hammer strike location, showing the remaining time for interaction. Аnd now adds a handy sticky grade upgrade mode. Запись 2026-08-27 201548.mp4 Plugin Features: Personalized label display for each user based on their permissions. Multi-language support (e.g., English and Russian) for the interface. Removal of foreign objects if the player is authorized in the cupboard Configurable time limits for object removal. Automatic cleanup and data saving for building blocks. Support for colored text labels. Sticky upgrade Sticky upgrade Pick a material and skin once in the normal upgrade wheel — for a while you can left-click blocks with your hammer and they’ll upgrade to that level without opening the wheel again. Resources are spent the same as in vanilla. If the mode is off, upgrades work the usual way through the radial menu. command /remove - Opens your personal settings menu. There you can: turn sticky upgrade on or off; choose how long the selected material stays active (5, 10, 20, 30 seconds, etc.); pick the color of on-screen hints when removing or upgrading. HUD above the hotbar While the mode is active, a small panel above your belt shows the locked material and the time left. Configuration: { "Active label display time (seconds)": 10, "Allow removal of foreign objects with cupboard authorization": true, "Chat command for personal settings UI": "remove", "Cleanup and save interval for building blocks (seconds)": 600, "Data save interval (seconds)": 30, "Display frequency interval (seconds)": 10, "Object removal time limit after expiration (seconds)": 21600, "Permissions list for object removal - Time (seconds)": { "apremove.gold": 172800, "apremove.prem": 86400, "apremove.vip": 54000 }, "Sticky grade upgrade settings": { "Ddraw color palette": [ "#FFFFFF", "#EEEEEE", "#CCCCCC", "#FFD700", "#FFF066", "#FFFF55", "#FFCC33", "#FFAA44", "#FF9944", "#FF7744", "#FF5555", "#FFB6C1", "#FF69B4", "#FF1493", "#FF85C8", "#E879F9", "#CC88FF", "#BB77FF", "#9988FF", "#66BBFF", "#55AAFF", "#44DDFF", "#00E5D0", "#90EE90", "#66FF99", "#55FF88", "#ADFF2F", "#00FFAA" ], "Default ddraw color": "#FFFFFF", "Default timer (seconds)": 20, "Enabled by default": true, "Show sticky HUD": true, "Sticky HUD offset X (px)": -9, "Sticky HUD offset Y (px)": 0, "Timer presets (seconds)": [ 5, 10, 15, 20, 25, 30, 40, 50, 60, 120 ] }, "Text color": "#FFFFFF", "Version": { "Major": 1, "Minor": 0, "Patch": 0 } } The plugin’s configuration options include: ActiveLabelTime: Active label display time (in seconds). AllowAuthorizedRemove: Allow removal of foreign objects with cupboard authorization. PermissionTimes: A list of permissions and their respective removal time limits. SaveInterval: Data save interval (in seconds). DisplayFrequency: Display frequency interval (seconds) CleanUpInterval: Cleanup and save interval for building blocks (seconds) You can change the configuration language in the APRemove.cs file // | Line: 16, Pos: 506 private string currentLanguage = "en"; // en or ru The configuration supports localization, providing convenience for users in different languages. Permissions: apremove.gold apremove.prem apremove.vip apremove.use apremove.admin$15.00 -
Version 1.0.9
3,198 downloads
Basements lets players build underground rooms beneath their bases. Place a hatch on your foundation and dig straight down into a hidden basement with walls, ceilings, and full building privileges. Great for stashing loot, setting up secret bunkers, or just adding extra space. Readme Link - Click Here for Instruction and Documentation Highly recommend reading the FAQ section! BUILD Build basements easily from your tool cupboard. Just place an entrance to get started. EXPAND Expand your basement by drilling underground. But don't forget to bring a headlamp - its dark down there! TRAVERSE Place multiple entryways, building out your labyrinth of tunnels beneath your base. DECORATE All deployables, electricity, and storage items can be placed in your basement. Take advantage of your new space! RAID Nothing is safe in Rust, including your basement. If all the entrances are destroyed, then the basement is too. Any loot below will float to the surface. Protect the entrance at all costs! API METHODS (For Plugin Developers) // Returns true if the given entityId is part of a basement. bool IsBasementEntity(ulong entityId) // Returns the building ids of the basements connected to a given surface building id. uint[] GetBasementBuildingIds(uint surfaceBuildingId) // Returns the building ids of the surface buildings connected to a given basement building id. uint[] GetSurfaceBuildingIds(uint basementBuildingId) Extension Plugins These are free plugins that add additional functionality to Basements. BasementsManager Provides a UI for admins to view and manage the basements on the server. Useful for debugging & fixing issues. Use with the /bm command, requires the basements.admin permission to use. BasementsManager.cs$29.99 -
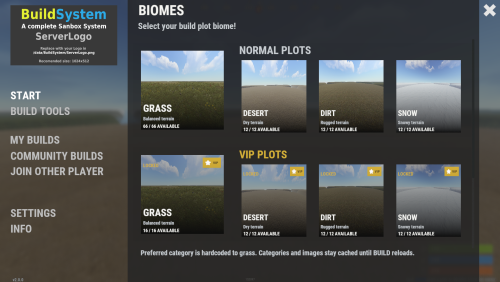
Version 2.3.4
617 downloads
BuildSystem is a creative building and sandbox system for Rust servers. Players get their own plot (or claim one anywhere on the map), build for free with god mode and noclip, save and reload their bases, share them with the community, and invite friends to build with them. As the server owner you get configurable ranks and limits, an in-game admin panel, and a ready-to-use map with 160 plots. Tip Try it live: client.connect 23.81.34.186:25015 Jump to: Features · What's included · Ranks · Permissions · Commands · Configuration · Developers Features Plots and claims Three build modes: fixed plots, procedural claims (players roam the map and /claim any spot), or both Normal and VIP plot categories, each split into grass, desert, dirt, and snow biomes Players pick a biome from the start menu, and plots are handed out in order or at random Central lobby with spawn, respawn, dome, and teleport handling Map markers, coloured domes, and boundary protection for every plot Sound isolation, so players only hear what happens inside their own plot Damage outside the plot radius is blocked Creative building Free building and repairing, all blueprints unlocked, crafting without workbenches God mode and noclip, with separate rules for the lobby, plots, and roaming Auto-upgrade to any grade as you place, and upgrade or downgrade the whole plot in one click Auto-lock for doors and boxes, open or close all doors at once Turn all electrics on or off, or use No Electricity mode to power everything without wiring A stability toggle: switch it off and nothing collapses while you build Built-in hammer remove (hold R) Remove deployables, remove vehicles, wipe to foundation, or clear the whole plot Vehicles from the F1 spawn menu (configurable list) Build cost calculator with total cost and 24h upkeep Entity and vehicle limits per rank, shown on a live HUD Symmetry building Hit a foundation with the hammer to set the centre, and every piece you place, upgrade, rotate, or remove is mirrored Square, triangle, and hexagon layouts Single, Quad, Rot2, Rot3, Rot4, and Rot6 modes Visual guides, plus pause, resume, cycle, and disable controls Mirrored copies count toward the player's entity limit Saving and loading BuildSystem has its own save system, so CopyPaste is not required. Save, load, rename, and delete builds from the My Builds menu Plots auto-save when the owner leaves or disconnects, and when the server saves or shuts down Restores entities, inventories, locks, authorisations, signs, vehicles, and electrical/IO wiring Saves and loads run one at a time in a queue, with a timeout Unlimited saves by default, or per-rank save limits Every save file is backed up, and a console command restores it Migrates old CopyPaste saves Community builds Publish a build to the in-game community gallery, with or without a Rust camera photo Browse builds as cards, or load one with a share code Each build has a title, description, author, photo, and star rating Preview an imported build before saving your own copy Admins can hide, edit, re-photo, or remove any published build Building with friends Invite a player, or ask to join their plot, from chat or from the player list in the menu Accept, decline, or cancel requests Guests are authorised on the plot's cupboards and turrets automatically The owner chooses what guests can do: build, remove, demolish, craft, and save/copy. All of these start off. Guests are sent back safely when the owner leaves Export and import (optional) This is off by default. When you turn it on, players can move builds in and out of the server in CopyPaste format, for example to test a base in Fortify, build bases for Raidable Bases, or move bases between servers. Export a plot to a link on bases.hionet.com, to a file on the server, or both Import from a link, or from files you approve in data/copypaste/approvedfiles Allowed per rank, with a cooldown Note Export and import is the only feature that needs the CopyPaste plugin. Everything else works without it. Player menu Players open it with /build or the middle mouse button. It has these tabs: Start: pick a plot biome, or go exploring to claim your own spot Build Tools: the Upgrade, Symmetry, Personal, Remove, Doors, Electrical, Save Manager, Build Cost, and Plot Manager cards My Builds: saved builds, save slots, and publishing Community Builds: the shared build gallery Join Other Player: the online player list and join requests Settings: what guests can do on your plot Info: your server's Discord and website links You can hide any Build Tools card or button from the config or the admin panel, and the remaining cards close up the gap. Admin panel Admins open it with /badmin. It has these tabs: Dashboard: server overview Categories: create, rename, and remove plot categories Slots: add, remove, teleport to, and identify plot slots Plots: active plots and their players; teleport, delete, or send to the lobby Community: manage published builds and their photos Maintenance: reload categories, refresh markers and UI, create or recreate the lobby, run plot cleanups Permissions: a quick reference for BuildSystem permissions Settings: search and edit config values in game; changes apply immediately Destructive actions ask for confirmation, back up what they change, and are logged. What's included 12 plugins: BuildAdmin, BuildConfig, BuildCore, BuildCosts, BuildGuests, BuildIO, BuildLang, BuildMirror, BuildOptions, BuildPlots, BuildSaves, BuildUI 5 build maps with the same lobby and plot layout, so you can pick the one you like Plot data for 160 plots: 124 normal and 36 VIP, across grass, desert, dirt, and snow An install guide, server startup arguments, and upgrade notes Procedural and combined modes also work on your own custom or procedural maps. BuildSystem runs on both Oxide and Carbon. Ranks Every limit a player has comes from a rank in BuildConfig.json. A rank is one block in the Ranks list: { "Permission": "buildcore.vip", "Max entities": 6000, "Max vehicles": 8, "Plot radius (meters)": 120.0, "Claim radius (meters)": 120.0, "Max saved builds": 6, "Plot types they can use": [ "normal", "vip" ], "Allow export and import": true, "Allow symmetry": true } Setting What it does Permission The permission that gives this rank. Leave it empty for the rank every player gets Max entities How many entities the player can have in their plot Max vehicles How many vehicles the player can have Plot radius (meters) Size of the plot they get from the start menu Claim radius (meters) Size of the area they get with /claim Max saved builds Number of save slots. Only applies when Limit how many builds each player can save (in the Saving section) is true Plot types they can use Which plot categories they can pick, e.g. normal, vip, or your own Allow export and import Can use CopyPaste export/import (when the feature is on) Allow symmetry Can use symmetry building Default ranks Rank Permission Entities Vehicles Plot / claim radius Saved builds Plot types Everyone (empty) 2000 5 60 m 3 normal VIP buildcore.vip 6000 8 120 m 6 normal, vip VIP Max buildcore.vipmax 10000 12 120 m 10 normal, vip Adding your own rank Open oxide/config/BuildConfig.json (Carbon: carbon/configs/BuildConfig.json). Copy one block in the Ranks list, paste it below, and change the permission, for example to buildcore.elite. Change the limits you want. Reload the config with oxide.reload BuildConfig (Carbon: c.reload BuildConfig). The new permission registers itself. Grant it with oxide.grant group elite buildcore.elite (Carbon: c.grant group elite buildcore.elite). How ranks combine: The rank with the empty permission is the base for every player, so don't delete it. A player with several ranks gets the best value of each setting, so the order in the list doesn't matter. Any rank can unlock any plot type. Nothing is hardcoded to "VIP". Start custom permissions with buildcore., otherwise Oxide logs a warning for each one. Permissions Permission What it gives buildcore.vip The default VIP rank buildcore.vipmax The default top rank buildcore.<anything> Any rank you add to the Ranks list buildplots.explore Leave your plot to visit other players' plots. No building, removing, demolishing, damaging, or upgrading outside your own plot buildplots.lobbyexit Leave the lobby without being pulled back (for servers using other teleport plugins), and open the menu from outside managed areas buildadmin.use Open the admin panel (/badmin) and run the buildsaves.* console commands Note Symmetry and export/import are set per rank with Allow symmetry and Allow export and import, not with permissions. If you are upgrading from an older version, these permissions are no longer used: buildcore.normal: the rank with the empty permission covers every player buildmirror.use: use Allow symmetry on a rank buildio.copypaste: use Allow export and import on a rank buildsaves.admin: use buildadmin.use buildplots.freeroam: renamed to buildplots.explore Server admins (ownerid) have full admin access without any permission. Commands Player commands Command What it does /build Open the BuildSystem menu (or press the middle mouse button) /leave Leave your plot or stop roaming /myplot Go back to your plot /claim Claim the spot you are standing on (procedural mode) /fly, /f, /noclip Toggle noclip /god, /g Toggle god mode /buildcost Show your plot's build cost and 24h upkeep /invite <player> Invite a player to your plot /request <player> Ask to join a player's plot /accept <player> Accept a request or invitation /decline <player> Decline a request or invitation /guestperm <option> <true|false> Set what your guests can do: build, remove, demolish, craft, savecopy /listguestperms Show your current guest permissions /bm shape <auto|single|triangle|hexagon> Pick the triangle layout for symmetry building /showui, /hideui Open or close the BuildSystem menu You can rename /build and /claim or add more names for them in the config. For example, add b to Chat commands in the Build menu section to get /b. Admin commands Command Who What it does /badmin buildadmin.use Open the admin panel /cleanupslot <category> <slot> Admin Clear the builds in one plot slot Most admin work is done from the /badmin panel. These console commands cover the jobs the panel doesn't. Run them from the server console, RCON, or F1 as an admin. Command What it does buildio.cleanupslot <category> <slot> Clear the builds in one plot slot buildio.rebuildindex Rebuild the saved-builds index buildsaves.restore <filename> Restore a save from its backup buildsaves.sanitizeall Check and repair all save files buildsaves.migrate Import old CopyPaste saves Configuration All settings are in one file, BuildConfig.json, and the setting names are plain English. You can also change most of them in game from the Settings tab in /badmin. Developers Hooks Hook When it's called object CanBuildSystemKillEntity(BaseEntity entity) Before BuildSystem removes an entity during cleanup or clear actions. Return non-null to keep it object CanBuildSystemHammerRemoveEntity(BaseEntity entity) Before hammer remove (hold R) deletes an entity or a sleeping player. Return non-null to block it void OnBuildZoneEnter(BasePlayer player, string zoneName) Player enters the lobby or a plot void OnBuildZoneExit(BasePlayer player, string zoneName) Player leaves the lobby or a plot API calls you can use from your own plugin: If you need another hook or more detail on any of these, contact me.$99.99 -
Version 1.5.5
1,536 downloads
DeepSeaPlus is a comprehensive enhancement plugin for Rust's Deep Sea system, giving server administrators full control over scheduling, loot, portal access, events, building, player tracking, and more. It transforms the vanilla Deep Sea experience into a highly configurable, event-driven endgame zone with leaderboards, boss encounters, treasure hunts, Discord integration, and granular admin tools. Main Features Permissions deepseaplus.admin: Full administrative access, status, kick, force open/close, reset stats, Bradley debug, waypoint mapping. deepseaplus.tp: Allows teleporting to and from the Deep Sea via /deepsea tp. deepseaplus.vip: Bypasses portal cooldown and food toll (configurable per feature). deepseaplus.notify: Grants access to notification features. deepseaplus.stats: Allows viewing personal Deep Sea statistics and leaderboards. deepseaplus.build.bypass: Bypasses all building restrictions and foundation limits in the Deep Sea. Chat Commands /deepsea: Shows a context-aware help menu listing all available commands based on the player's permissions. /deepsea status: Displays a full Deep Sea status panel — state, schedule mode, time to wipe or next opening, player count, island/ghost ship/floating city/RHIB counts, and event entity count. (Requires deepseaplus.admin) /deepsea tp [island#]: Teleports to the nearest Deep Sea island, or to a specific island by index. If already in the Deep Sea, teleports back to the mainland shore. (Requires deepseaplus.tp or deepseaplus.admin) /deepsea kick <player>: Ejects a player from the Deep Sea and teleports them to the nearest shore. (Requires deepseaplus.admin) /deepsea stats [player]: Displays lifetime Deep Sea statistics — visits, time spent, NPC kills, containers looted, and deaths. Admins can view other players' stats. (Requires deepseaplus.stats or deepseaplus.admin) /deepsea top [kills|looted|time|visits|deaths|score]: Shows the top 10 leaderboard sorted by the chosen metric. Defaults to kills. (Requires deepseaplus.stats or deepseaplus.admin) /deepsea resetstats <player|all>: Resets Deep Sea stats for a specific player or all players. (Requires deepseaplus.admin) /deepsea forceopen: Force-opens the Deep Sea immediately. (Requires deepseaplus.admin) /deepsea forceclose: Force-closes the Deep Sea immediately, killing all vanilla entities and bypassing the radiation/end phase. (Requires deepseaplus.admin) Console Commands deepsea.forceopen: Force-opens the Deep Sea. deepsea.forceclose: Force-closes the Deep Sea immediately. deepsea.spawnboss: Manually spawns a Bradley APC boss in the Deep Sea. deepsea.showpath: Toggles Bradley patrol path debug visualization (draws waypoints, arcs, detour points, and state info). Run again to toggle off. deepsea.mapstart: Begins recording a new Bradley patrol route. Walk to each point and use deepsea.mappoint. deepsea.mappoint: Records your current position as a local-space waypoint relative to the nearest island. deepsea.mapdone: Finishes mapping and outputs a ready-to-paste code snippet for IslandPatrolRoutes. deepsea.mapundo: Removes the last recorded waypoint. Config { "General Controls": { "Control schedule (enables schedule modes)": false, "Control content (enables spawn count overrides)": false, "Control travel rules (enables granular portal access)": false, "Control building (enables building controls)": false, "Control loot (enables loot overrides)": true, "Control events (enables deep sea events)": true, "Control notifications (enables announcements)": true, "Force apply on reload (close and reopen Deep Sea)": false, "Enforce interval seconds (0 = once on startup, >0 = repeating)": 0.0 }, "Schedule": { "Mode (Vanilla, AlwaysOpen, Disabled)": "Vanilla", "Open time seconds (Vanilla mode, overrides wipeDuration)": 10800, "Cooldown seconds (Vanilla mode, overrides wipeCooldown)": 5400, "Final phase seconds (Vanilla mode, overrides wipeEndPhaseDuration)": 1800, "Radiation warning phase seconds (Vanilla mode)": 300, "AlwaysOpen - Keep time left around (seconds)": 9000.0, "AlwaysOpen - Refill when below (seconds)": 3600.0, "Disabled - Push next opening to (seconds)": 999999.0, "Deep Sea enabled override (DontTouch, ForceEnabled, ForceDisabled)": "DontTouch" }, "Notifications": { "Announce when Deep Sea opens": true, "Announce when Deep Sea closes": true, "Countdown intervals (seconds remaining)": [ 1800, 900, 300, 60 ], "Use toast messages": true, "Use chat messages": true, "Countdown check interval (seconds)": 10.0, "Use NCP notifications (requires NCP plugin)": false }, "Loot Overrides": { "Enable loot overrides": true, "Stack size multiplier": 1.5, "Bonus items": [ { "Item shortname": "rifle.ak", "Amount": 1, "Chance (0.0 - 1.0)": 0.1, "Skin ID": 0 }, { "Item shortname": "ammo.rifle", "Amount": 128, "Chance (0.0 - 1.0)": 0.5, "Skin ID": 0 } ], "Override hackable crate loot on ghost ships": false, "Override hackable crate hack time in Deep Sea (seconds, 0 to use vanilla)": 450.0, "Hackable crate bonus items": [], "Dynamic Loot Scaling": { "Enable dynamic scaling": false, "Base player threshold": 3, "Max bonus multiplier": 2.0, "Bonus per extra player": 0.1 } }, "Portal Settings": { "Enable portal features": true, "Cooldown after leaving Deep Sea (seconds)": 300.0, "Entry fee amount (0 to disable)": 500.0, "Entry fee plugin (Economics or ServerRewards)": "Economics", "VIP bypasses cooldown": true, "VIP bypasses food toll": true, "Allow any vehicle (bypass whitelist)": false, "Allowed vehicle prefabs (overrides vanilla whitelist)": [], "Require boat type only": true, "Allow players without vehicle (on foot)": false, "Allow noclip/admin players to bypass checks": true, "Allow NPC passengers": false, "Allow NPC player teleport": false, "Allow entry during radiation warning phase": false, "Ignore extra vehicle onboard check": false, "Log entry/exit decisions": false, "Show info panel on portal approach": true, "Portal approach trigger radius (portals are ~300 wide)": 150.0, "Portal info cooldown per player (seconds)": 30.0 }, "Deep Sea Overrides": { "Enable ConVar overrides": false, "Wipe duration (seconds)": 10800, "Wipe cooldown (seconds)": 5400, "Radiation phase duration (seconds)": 300, "End phase duration (seconds)": 1800, "Island Spawns": { "Count": 6, "Radius": 100.0, "Edge margin": 200.0, "Minimum distance": 400.0 }, "Ghost Ship Spawns": { "Count": 4, "Radius": 200.0, "Edge margin": 450.0, "Minimum distance": 400.0 }, "Floating City Spawns": { "Count": 1, "Radius": 300.0, "Edge margin": 1500.0, "Minimum distance": 1500.0 }, "RHIB Spawns": { "Count": 4, "Radius": 10.0, "Edge margin": 1150.0, "Minimum distance": 300.0 }, "Hackable crate count": 1, "Force entrance portal direction (0=Map-based, 1=N, 2=E, 3=S, 4=W)": 0, "Remove fog of war": false }, "Respawn System": { "Enable respawn system": false, "Check interval (minutes)": 15.0, "Minimum distance from players to respawn": 50.0, "Respawn hackable crates via ghost ships": true, "Maximum hackable crates active at once": 1, "Trigger island spawn groups (NPCs/loot)": true }, "Building Controls": { "Allow building in Deep Sea": false, "Limit foundations per player": false, "Max foundations per player": 10, "Show remaining foundations on place": true, "Show message when denied": true }, "Events": { "Treasure Hunt": { "Enable treasure hunt": true, "Number of stashes to spawn": 3, "Treasure items": [ { "Item shortname": "supply.signal", "Amount": 2, "Chance (0.0 - 1.0)": 1.0, "Skin ID": 0 }, { "Item shortname": "targeting.computer", "Amount": 1, "Chance (0.0 - 1.0)": 0.5, "Skin ID": 0 }, { "Item shortname": "techparts", "Amount": 3, "Chance (0.0 - 1.0)": 1.0, "Skin ID": 0 } ], "Show treasure markers on map": true, "Map marker radius": 0.08 }, "Boss Spawn": { "Enable boss spawn": false, "Minutes before wipe to spawn boss": 30, "Boss health multiplier": 2.0, "Patrol radius around island": 75.0, "Show boss marker on map": true, "Boss map marker radius": 0.15 }, "Supply Drops": { "Enable supply drops": true, "Interval between drops (minutes)": 45, "Show supply drop markers on map": true }, "Announce ghost ship crate hacking": true }, "Death Rules": { "Enable death tracking": true, "Show death summary message": true, "Snapshot inventory on entry": false, "Restore inventory on respawn after Deep Sea death": false }, "Discord Webhook": { "Enable Discord webhook": false, "Webhook URL": "", "Announce Deep Sea open": true, "Announce Deep Sea close": true, "Announce notable player achievements": true, "Embed color (decimal)": 3447003 }, "Config Version (DO NOT MODIFY)": { "Major": 1, "Minor": 0, "Patch": 0 } } Developer API Other plugins can call the following methods: bool IsPlayerInDeepSea(ulong userId) — Returns true if the player is currently inside the Deep Sea. bool IsDeepSeaOpen() — Returns true if the Deep Sea is currently open. int GetDeepSeaPlayerCountApi() — Returns the number of players currently in the Deep Sea. string[] GetDeepSeaPlayerIds() — Returns an array of Steam ID strings for all players in the Deep Sea. Dictionary<string, object> GetPlayerDeepSeaStats(ulong userId) — Returns lifetime stats (DisplayName, TotalVisits, TotalTimeSpent, TotalNpcKills, TotalContainersLooted, TotalDeaths) or null if no stats exist. The plugin also fires the following hooks for other plugins to subscribe to: void OnDeepSeaPlayerEnter(ulong userId) — Called when a player enters the Deep Sea zone. void OnDeepSeaPlayerExit(ulong userId) — Called when a player leaves the Deep Sea zone.Free -

Version 2.6.2
40 downloads
Description The Townhall plugin introduces a new level of realism to Rust by requiring players to own a plot of land before building. Players can claim land by setting up a mailbox. This can be done creatively, such as placing a vending machine in a safe zone or having an NPC distribute mailboxes in a town hall. Once a mailbox is placed, the plot of land is protected immediately: only the owner and the owner's Rust team may build inside the plot, everyone else is blocked. Building is also blocked everywhere outside of an owned plot, so a mailbox is the only way onto the map. Every plot owner gets a small management UI to rename their plot, control who gets ejected, manage a whitelist, and pick a color for the plot's visual boundary dome. Townhall enhances gameplay for RP servers and is versatile enough for PvE and mixed-variant servers. Dependencies Townhall requires two other plugins to be installed and loaded: - ZoneManager by k1lly0u - ZoneDomes by k1lly0u Townhall waits up to 30 seconds after startup for both plugins to load before it initializes. To limit your mailboxes on the server, you can use Entity Limit. Functions - Must own a plot of land (a placed mailbox) in order to build anywhere on the map - Only the plot owner and the owner's Rust team may build inside that plot, all other players are rejected - Plot boundaries are shown as a colored dome for a configurable duration - The plot boundary can be shown again at any time with the /myplot command - Owners can pick the dome color for their own plot from five colors (Standard, Red, Blue, Green, Purple) directly in the management UI, the change applies instantly if the dome is currently visible - Owners can rename their plot from the management UI - Owners can toggle ejecting non-whitelisted players from the plot - Owners can toggle ejecting sleeping players from the plot - Owners can add and remove players from a whitelist per plot - Plot size, dome duration and messages can all be set in the config - Optional mailbox pickup system: owners can pick their mailbox back up with a hammer, which removes the plot and returns the mailbox as an item - Mailboxes carried on death are safely returned to the player on respawn instead of being lost to the corpse Permissions townhall.myplotofland Chat Commands - /myplot shows the boundary dome of the nearest owned plot - /townhallhelp opens the plot management UI when standing near an owned plot - /mailboxpickup shows a short info message about the pickup feature (only available if mailbox pickup is enabled in the config) Config { "Show Zone Messages": true, "Mailbox Check Radius": 50.0, "Zone Dome Visibility Duration (seconds)": 60.0, "Zone Update Interval (seconds)": 300.0, "Default Zone Radius": 50.0, "UI Panel Color": "0.106 0.114 0.129 0.98", "UI Surface Color": "0.145 0.157 0.184 1.0", "UI Border Color": "0.204 0.224 0.263 1.0", "UI Button Color": "0.169 0.180 0.212 1.0", "UI Button Hover Color": "0.216 0.231 0.271 1.0", "UI Accent Color": "0.290 0.560 0.960 1.0", "UI Text Color": "0.902 0.922 0.949 1.0", "UI Muted Text Color": "0.549 0.580 0.639 1.0", "UI Danger Color": "0.859 0.361 0.380 1.0", "UI Default Position": "Center", "Enable Mailbox Pickup": true, "Require Ownership for Pickup": true, "Show Pickup Messages": true, "Enable Zone List Teleport": true } UI Default Position determines where the plot management UI appears on the screen by default. Players can cycle through the position using a button in the UI itself; this value is only the starting value. Possible values: Center Bottom Left Top Left Top Right Bottom Right Attention this plugin works and harmonizes perfectly with our MyHouse plugin load, run, enjoy$13.99 -
Version 1.0.0
772 downloads
I want to introduce you to a flying island under construction. It consists of: If you like my prefab, please write a review about it. I will take into account everything you wish! • One large area • 4 small squares • 4 trees • 4 Sulfur-Ore • 4 Metall-Ore • 4 Stone-Ore I'll give you some advice, if you don't want there to be flying trees on the map, then they will need to be removed. on the main island there is a large enough area for development. If you liked my work, you can see the rest of my work. Other Works: If you have any questions for me, then you can write to me in person on codefling or in discord - jerwizFree