
Search the Community
Showing results for tags 'raidable'.
-
Version 0.1.29
2,833 downloads
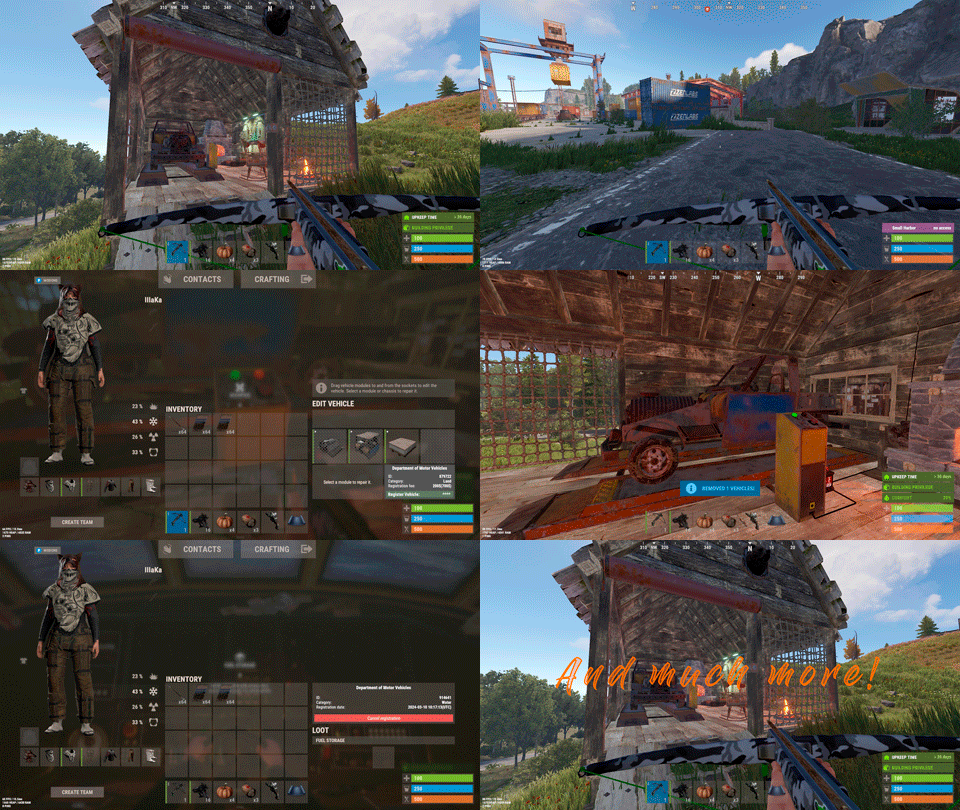
Plugin for Real PvE servers, featuring damage prevention, anti-griefing measures, customizable PvP zones, an automatic loot queue in radtowns and raid zones, and much more. The ability to set "server.pve" to "true", which allows the server to have a "PvE" flag; Damage from NPC's are enabled when server.pve is true; The ability to inflict damage to one's own structures with "server.pve true"; The ability to ignore Hostile depending on the zone(PvE/PvP) ; The ability to destroy(including external walls) or rotate one's structures without any time constraints; The ability to toggle the gather resource restriction in someone else's Building Privileges; No one, except the owner or their friends, will be able to open their loot containers (chests, storages, bodies, etc.); Administrators can bypass loot restrictions; The ability to schedule the killing of players if they disconnect within someone else's Building Privilege; Disabling backpack and active item drop upon death, even if backpack is full; The ability to modify the items given at spawn on the beach; The ability to create an unlimited number of custom permissions; The ability to allow players to bypass the queue; The ability to set limits on sleeping bags, shelters and auto turrets for each permission; The ability to set a multiplier for the prices of monuments and events for each permission; The ability to customize the price and amount of vehicles for each of your custom permissions; The ability to assign vehicles to each player; The ability to customize the assigned price and available amount of vehicles for each of your custom permissions; An assigned vehicle can't be damaged, looted or pushed by other players, but it can be pushed if it is within someone else's Building Privilege; The ability to loot monuments through a queue system; The ability to configure monuments, setting their looting price and time, and adjusting status bars for each monument; The ability to acquire the privilege to loot events (helicopters, bradleys, and raidable bases) through a purchase; The ability to customize the price of each event types and loot attempts (lives); NPCs only aggress against players who are looting monuments, events or raidable bases; Only players who are looting monuments, events or raidable bases can inflict damage to NPCs; RaidableBases are protected from griefing(no damage, no loot and etc). Only the owner can interact with the raid; Neutral RaidableBases can be purchased; Prices for purchasing neutral raids are configurable for each difficulty level; Configurable raid limits (currently available) along with discount multipliers for purchases, for each permission. File location: *SERVER*\oxide\data\RealPVE\PermissionConfig.json Default: https://pastebin.com/5VtWZZVr All permissions are created and configured in the config file under the "List of permissions" section. You can create as many permissions as needed and customize them flexibly. It is recommended to use the prefix "realpve" in the permission's name, for example: "realpve.vip". NOTE: The first permission will serve as the default permission for those who do not have any permissions. { "List of permissions. NOTE: The first permission will be used by default for those who do not have any permissions.": [ { "Permission Name": "realpve.default", "Bypass Queue": false, "Limit of beds": 15, "Limit of shelters": 1, "Limit of auto turrets": 12, "Seconds that will be skipped when opening HackableLockedCrate": 0.0, "Monuments price multiplier": 1.0, "Events price multiplier": 1.0, "Limit of RaidableBases(at the time)": 1, "RaidableBases price multiplier": 1.0, "Vehicles settings": { "Horse": { "Limit": 1, "Price": 10.0 }, "Bike": { "Limit": 1, "Price": 5.0 }, "MotorBike": { "Limit": 1, "Price": 20.0 }, "Car": { "Limit": 1, "Price": 25.0 }, ... } }, { "Permission Name": "realpve.vip", "Bypass Queue": true, "Limit of beds": 20, "Limit of shelters": 2, "Limit of auto turrets": 15, "Seconds that will be skipped when opening HackableLockedCrate": 450.0, "Monuments price multiplier": 0.9, "Events price multiplier": 0.9, "Limit of RaidableBases(at the time)": 2, "RaidableBases price multiplier": 0.9, "Vehicles settings": { "Horse": { "Limit": 5, "Price": 9.0 }, "Bike": { "Limit": 5, "Price": 4.5 }, "MotorBike": { "Limit": 5, "Price": 18.0 }, "Car": { "Limit": 5, "Price": 22.5 }, ... } } ], "Version": { "Major": 0, "Minor": 1, "Patch": 1 } } An example of a monument/event/rb multipliers using default permissions. For example, if you set the price for the Harbor at $1000, a player with the default permission(1.0) will pay $1000 * 1 = $1000. Meanwhile, a player with a VIP permission(0.9) will pay $1000 * 0.9 = $900. However, if a player possesses a misbehaving permission with a value of 1.1, they will need to pay $1000 * 1.1 = $1100. { "Chat command": "realpve", "Chat admin command": "adminpve", "Is it worth enabling GameTips for messages?": true, "Is it worth using Notify plugins for messages instead of the vanilla UI?": false, "Is it worth forcibly implementing PvE for a server?": true, "Is it worth forcing the tutorial mode support?": true, "Is it worth rechecking the limits when removing permissions?": true, "Is it worth preventing death on logout in safe zones?": true, "Entities spawned by the server allowed to be looted in someone else's building privilege zone(None, Wood, Ore, Flesh, Collectible, All)": "All", "Is it worth forcibly blocking damage from the patrol helicopter to building blocks and deployables?": false, "Is it worth preventing players from handcuffing others?": true, "Is it worth assigning portals(Halloween and Christmas) to the first player?": true, "Is it worth preventing a backpack from dropping upon player death?": true, "Is it worth preventing damage to the laptop of the Hackable Crate?": true, "Is it worth removing the penalties for recyclers in safe zones?": true, "Is it worth allowing all players to pick up items dropped by others? If enabled, personal settings will be ignored": false, "Is it worth protecting sleeping players from animals?": true, "Is it worth allowing players to loot banned players items?": false, "Specify the regular message type for notify": 0, "Specify the warning message type for notify": 1, "The format that will be used for prices": "${0}", "Vehicles - Time in seconds to display the marker when searching for a vehicle. A value of 0 disables the marker": 15.0, "Anti-Sleeper - Time in seconds after which a player will be killed if they disconnect while inside someone else's Building Privilege. Set to 0 to disable": 1200.0, "Is it worth enabling support for the 'Npc Random Raids' plugin?": true, "List of language keys for creating language files(excluding ru)": [ "en" ], "Settings id for the admin loot status bar": "admin_loot", "Is friendly fire enabled by default when creating a new team?": false, "PvP - Is it worth adding map markers for PvP zones?": true, "PvP - Name of the map maker": "PvP Zone!", "PvP - Settings id for the status bar": "pvp", "PvP - Settings id for the progress status bar": "pvp", "Wipe ID": null, "Version": { "Major": 0, "Minor": 1, "Patch": 24 } } ENG: https://pastebin.com/ZMUL6pYL RUS: https://pastebin.com/Mx8cbMts Main commands(/realpve) : autobuy - Toggle autobuy for monuments, vanilla events and raid bases with a total price greater than 0; pickup - Toggle access to pick up your items from the ground for all players; share - Manage access to looting your entities by other players(outside of the team): status *entityID*(optional) - Display information about the settings of the entity you are looking at or the one you specified; add *nameOrID* *entityID*(optional) - Add the specified player to the entity list you are looking at or the one you specified; remove *nameOrID* *entityID*(optional) - Remove the specified player from the entity list you are looking at or the one you specified; toggle *entityID*(optional) - Toggle the entity list you are looking at or the one you specified; delete *entityID*(optional) - Delete the settings for the entity you are looking at or the one you specified; clear - Delete the settings for all your entities. team - Manage your team: ff - Toggle the ability to damage your teammates. vehicle - Manage your vehicles: list - List of IDs for all your vehicles; find *vehicleID*(optional) - Help finding the vehicle you are looking at or the one you specified; unlink *vehicleID*(optional) - Unlink the vehicle you are looking at or the one you specified; clear - Unlink all your vehicles. Admin commands(/adminpve). Permission "realpve.admin" required: autobuy - Manage autobuy for monuments, vanilla events and raid bases: *nameOrId* - Toggle autobuy for the specified player; force monument/event/rb - Toggle forced autobuy. If enabled, player settings will be ignored; clear - Disable autobuy for everyone. config - Manage settings for values in the configuration file: forcepve *boolValue*(optional) - Is it worth forcibly implementing PvE for a server? forcetutorial *boolValue*(optional) - Is it worth forcing the tutorial mode support? gametips *boolValue*(optional) - Is it worth enabling GameTips for messages? perm_limits *boolValue*(optional) - Is it worth rechecking the limits when removing permissions? safe_death *boolValue*(optional) - Is it worth preventing death on logout in safe zones? hostile_zones *stringValues* - Zones where Hostile will be ignored(Disabled, PvE, PvP, All) ; loot_privilege *stringValues* - Entities spawned by the server allowed to be looted in someone else's building privilege zone(None, Wood, Ore, Flesh, Collectible, All) ; heli_damage *boolValue*(optional) - Is it worth forcibly blocking damage from the patrol helicopter to building blocks and deployables? breakin_apt *boolValue*(optional) - Is it worth preventing players from breaking into apartments? breakin_shop *boolValue*(optional) - Is it worth preventing players from breaking into rented shops? rerent_shop *boolValue*(optional) - Is it worth preventing players from re-renting occupied shops? handcuffs *boolValue*(optional) - Is it worth preventing players from handcuffing others? portals *boolValue*(optional) - Is it worth assigning portals(Halloween and Christmas) to the first player? backpack_drop *boolValue*(optional) - Is it worth preventing a backpack from dropping upon player death? laptop_damage *boolValue*(optional) - Is it worth preventing damage to the laptop of the Hackable Crate? recycler_safezone *boolValue*(optional) - Is it worth removing the penalties for recyclers in safe zones? item_pickup *boolValue*(optional) - Is it worth allowing all players to pick up items dropped by others? If enabled, personal settings will be ignored; safe_sleep *boolValue*(optional) - Is it worth protecting sleeping players from animals? priceformat *stringValue* - The format that will be used for prices; vehicle_marker_time *floatValue* - Vehicles - Time in seconds to display the marker when searching for a vehicle. A value of 0 disables the marker; antisleeper *floatValue* - Anti-Sleeper - Time in seconds after which a player will be killed if they disconnect while inside someone else's Building Privilege. Set to 0 to disable; randomraids *boolValue*(optional) - Is it worth enabling support for the 'Npc Random Raids' plugin? teamff *boolValue*(optional) - Is friendly fire enabled by default when creating a new team? pvpmarkers *boolValue*(optional) - PvP - Is it worth adding map markers for PvP zones? pvpmarkersname *stringValue* - PvP - Name of the map maker. loot - Manage player access to entities without restrictions: *nameOrId* - Toggle unrestricted access for the specified player; self - Toggle unrestricted access for yourself; clear - Revoke unrestricted access for all players. monument - Manage monuments: list - List of available monuments; ignore *nameOrID* *boolValue* - Add or remove a player from the monument entry ignore list; *monumentID*/this - Instead of the monumentID, you can use the word "this", but you must be inside the monument: suffix *boolValue*(optional) - Toggle the suffix display in the monument's name; broadcast *boolValue*(optional) - Toggle notifications about monument occupancy/release; time *intValue* - Set the looting time limit for the monument in seconds; price *floatValue* - Set the cost for looting rights. A value of 0 makes the monument free; offer *floatValue* - Set the offer duration for purchasing the monument in seconds; map_mode *intValue* - Set the marker display mode on the map. 0 - disabled, 1 - enabled, 2 - enabled during PvP mode; map_circle *boolValue*(optional) - Toggle the display of the monument's circle marker on the map; pvp *boolValue*(optional) - Toggle PvP mode for the monument; pvp_delay *floatValue* - Set the PvP mode duration in seconds for players after leaving the PvP monument; bar_progress *boolValue*(optional) - Toggle between TimeProgressCounter and TimeCounter bars for the monument. perm - Manage permissions: add *permName* - Adds a new permission to the list by copying values from the first(default) permission in the list. If the permission name starts with 'realpve', it will also register a new permission; add *permName* *sourcePermName* - Adds a new permission to the list by copying values from an existing permission in the list; remove *permName* - Removes an existing permission from the list; edit *permName* - Edits a permission: queue - Toggle the permission to bypass the server queue; unlockRespawn - Toggle the availability of the Outpost respawn point; beds *intValue* - Restriction on the number of available beds; shelters *intValue* - Restriction on the number of available shelters; turrets *intValue* - Restriction on the number of available turrets; hackable *floatValue* - Number of seconds(0-900) to skip when opening a hackable crate; monuments *floatValue* - Price multiplier for monuments; events *floatValue* - Price multiplier for vanilla events; rb_limit *intValue* - Restriction on the number of raid bases available simultaneously; rb_mult *floatValue* - Price multiplier for raid bases; vehicles *vehType* - Vehicles settings: limit *intValue* - Limit on the number of available vehicles by type; price *floatValue* - Price for registering a vehicle by type. clear - Removes all permissions from the list except the first one. pickup - Manage access to picking up another player's items from the ground: *nameOrId* - Toggle access to picking up a specific player's items from the ground; clear - Revoke access for all players to pick up items from the ground. share - Manage access to looting entities by other players(outside of the team): status *entityID*(optional) - Display information about the settings of the entity you are looking at or the one you specified; add *nameOrID* *entityID*(optional) - Add the specified player to the entity list you are looking at or the one you specified; remove *nameOrID* *entityID*(optional) - Remove the specified player from the entity list you are looking at or the one you specified; toggle *entityID*(optional) - Toggle the entity list you are looking at or the one you specified; delete *entityID*(optional) - Delete the settings for the entity you are looking at or the one you specified; clear *nameOrID*(optional) - Delete the settings for all entities or all entities of the specified player. tc - Manage building privilege: add self/*entityID* *nameOrID*(optional) - Add yourself or a specified player to the building privilege of the area you or the specified entity are in; remove self/*entityID* *nameOrID*(optional) - Remove yourself or a specified player from the building privilege of the area you or the specified entity are in; clear self/*entityID* - Clear the list of authorized players in the building privilege of the area you or the specified entity are in; info self/*entityID* - Get information about the building privilege of the area you or the specified entity are in. rshop - Rentable shop management: admin self/*nameOrID* *entityID*(optional) - Open the admin panel for the rentable shop you are looking at or the specified shop for yourself or the specified player; loot self/*nameOrID* *entityID*(optional) - Add yourself or the specified player to the loot access list of the rentable shop you are looking at or the specified shop; close *entityID*(optional) - End the rental of the rentable shop you are looking at or the specified shop. vehicle - List of all available vehicle types: types - List of available vehicle types. Example: /realpve pickup /realpve vehicle find *netID* /realpve team ff /adminpve config loot_privilege wood, ore /adminpve perm add realpve.vip2 /adminpve perm add realpve.vip2 realpve.vip /adminpve perm edit realpve.vip2 queue true /adminpve perm edit realpve.vip2 vehicles horse limit 5 /adminpve monument list /adminpve monument *monumentID* pvp /adminpve monument *monumentID* price 7.5 /adminpve loot iiiaka /adminpve pickup iiiaka /adminpve tc info self /adminpve tc info 6959689 /adminpve vehicle types This plugin provides the ability to claim vehicles, thereby preventing theft and griefing from other players. In permissions, you can set the price and quantity restrictions for each type of vehicle, ensuring flexible customization according to your preferences. An assigned vehicle can't be damaged, looted or pushed by other players, but it can be pushed if it is within someone else's Building Privilege. File location: *SERVER*\oxide\data\RealPVE\MonumentConfig.json Default: https://pastebin.com/XY1d9YaM This plugin introduces queue system and loot purchases for monuments. You can customize the price and time for looting for each monument. Within monuments, only the "Looter" and his friends have the ability to loot, pick up items or damage entities. Additionally and NPCs within monuments do not aggress against other players and do not receive damage from them. If a player dies within the monument, they will have a grace period to return. This allows players to safely loot monuments without fear of griefing. Example of monument configuration: "ferry_terminal_1": { "Type(This parameter is just a hint. Changes won’t have any effect)": "RadTown", "Is it worth displaying the suffix(if any) in the monument's name?": true, "Is it worth notifying all players about the occupation/release of the monument?": true, "The cost for the right to loot the monument. A value of 0 makes the monument free": 15.0, "The time in seconds(1-3600) given for looting the monument": 900, "The time in seconds(1-15) given to make a decision to purchase the monument": 5.0, "Map marker display mode: 0 - disabled, 1 - enabled, 2 - enabled during PvP mode": 1, "Is it worth creating a circle in the map marker?": true, "PvP - Is PvP enabled at this monument? If so, players will be able to kill each other and loot will be publicly accessible": false, "PvP - The time in seconds(0-60) during which the player retains PvP mode after leaving the PvP monument": 10.0, "Is it worth using a progress bar for bars with a counter?": true, "Settings for the status bar": { "Order": 10, "Height": 26, "Main_Color(Hex or RGBA)": "#FFBF99", "Main_Transparency": 0.8, "Main_Material": "", "Image_Url": "https://i.imgur.com/awUrIwA.png", "Image_Local(Leave empty to use Image_Url)": "RealPVE_ferry_terminal_1", "Image_Sprite(Leave empty to use Image_Local or Image_Url)": "", "Image_IsRawImage": false, "Image_Color(Hex or RGBA)": "#FFDCB6", "Image_Transparency": 1.0, "Is it worth enabling an outline for the image?": false, "Image_Outline_Color(Hex or RGBA)": "0.1 0.3 0.8 0.9", "Image_Outline_Transparency": 0.0, "Image_Outline_Distance": "0.75 0.75", "Text_Size": 12, "Text_Color(Hex or RGBA)": "1 1 1 1", "Text_Font(https://umod.org/guides/rust/basic-concepts-of-gui#fonts)": "RobotoCondensed-Bold.ttf", "Is it worth enabling an outline for the text?": false, "Text_Outline_Color(Hex or RGBA)": "#000000", "Text_Outline_Transparency": 1.0, "Text_Outline_Distance": "0.75 0.75", "SubText_Size": 12, "SubText_Color(Hex or RGBA)": "1 1 1 1", "SubText_Font": "RobotoCondensed-Bold.ttf", "Is it worth enabling an outline for the sub text?": false, "SubText_Outline_Color(Hex or RGBA)": "0.5 0.6 0.7 0.5", "SubText_Outline_Transparency": 0.0, "SubText_Outline_Distance": "0.75 0.75" }, "Settings for the progress status bar": { "Main_Color(Hex or RGBA)": "1 1 1 0.15", "Main_Transparency": 0.15, "Progress_Reverse": true, "Progress_Color": "#FFBF99", "Progress_Transparency": 0.7, "Progress_OffsetMin": "0 0", "Progress_OffsetMax": "0 0" } } Type - This field serves only as an indicator for you. The changes won't have any impact; ShowSuffix - Suffix display. Some monuments (for example Warehouses) have suffixes in the name, like "Warehouse #12"; Broadcast - Enabling or disabling broadcasts when a monument is occupied or vacated; LootingTime - Time allocated for looting the monument; Price - The price for which you can start looting the monument. 0 means looting is free; BarSettings - Settings for the Advanced Status Bar. You can also choose the types of monuments by specifying them under the "List of tracked types of monuments" section. A list of all available types can be viewed on the MonumentsWatcher's page in the "Developer API" section. "List of tracked types of monuments": [ "RadTown", "RadTownWater", "RadTownSmall", "TunnelStation", "Custom" ] Events, similar to monuments, offer the opportunity to claim events. All events are configured in the config file under the "Settings for the events" section. You can customize the price of looting and looting attempts(deaths, including friends). Just like in monuments, only the "Looter" and his friends have the ability to loot and damage entities. Additionally, in events, NPCs do not aggress against other players. If a player(including friends) exceeds the death limit, the event became free, thereby providing other players with the opportunity to claim the event. Example of event configuration: { "Is it worth enabling forced auto-buy for vanilla events where the final price is greater than 0?": false, "Settings for the PatrolHelicopter events": { "IsEnabled": true, "Time in seconds (1-15) given to respond for purchasing this event. Note: This is shown to everyone who deals damage, and the first person to buy it will claim it": 5.0, "Is it worth removing fire from crates?": true, "The price to claim the event. A value of 0 means it's free": 50.0, "The number of deaths after which the event becomes public. A value of 0 disables the limit": 5, "The time in seconds for which the event is locked to the player. A value of 0 disables the time limit": 1800.0 }, "Settings for the BradleyAPC events": { "IsEnabled": true, "Time in seconds (1-15) given to respond for purchasing this event. Note: This is shown to everyone who deals damage, and the first person to buy it will claim it": 5.0, "Is it worth removing fire from crates?": true, "The price to claim the event. A value of 0 means it's free": 50.0, "The number of deaths after which the event becomes public. A value of 0 disables the limit": 5, "The time in seconds for which the event is locked to the player. A value of 0 disables the time limit": 1800.0 }, "Version": { "Major": 0, "Minor": 1, "Patch": 0 } } Price - The price to claim the event. 0 means looting is free; DeathLimit - Limit of deaths after which the event becomes free. File location: *SERVER*\oxide\data\RealPVE\NewbieConfig.json Default: https://pastebin.com/QHZCqpji An example of an item list given for the main inventory: "List of items for the main inventory": [ { "ShortName": "note", "Slot": 0, "Amount": 1, "SkinID": 0, "Text": "MsgNoteText" } ] P.S. In the Text field, you need to specify the language key. Or, you can just write any text, but there won't be a translation of the text. File location: *SERVER*\oxide\data\RealPVE\RaidableBasesConfig.json Default: https://pastebin.com/rpDng7Fd Integration with the RaidableBases plugin does not restrict its functionality in any way. On the contrary, it adds an anti-grief system that protects bases from malicious players. In raid bases, NPCs and other entities can only receive damage from the raid owner or their friends; Turrets and traps do not aggress against outsiders; You can customize the price of claiming to each difficulty and set individual discounts for each permission. You can still purchase raid bases using the /buyraid command. Raid bases without owners(buyable, maintained, manual and scheduled) can be bought for a price set in the configuration file or assigned to the first player who enters its radius, if the final price(price * discount) less or equals to 0. Additionally, as a bonus, upon buying this plugin, you receive 5 free bases for 3 difficulty levels, along with configured loot for them. [PluginReference] private Plugin RealPVE; There are 6 universal hooks that the plugin is subscribed to, the use of which allows interaction with PVP in various PVE plugins: OnPlayerEnterPVP OnPlayerExitPVP OnEntityEnterPVP OnEntityExitPVP CreatePVPMapMarker DeletePVPMapMarker OnPlayerEnterPVP: Used to add a player to PVP mode/zone. To call the OnPlayerEnterPVP hook, you need to pass 2 parameters: <BasePlayer>player - The player to add to PVP; <string>zoneID - A unique identifier for your PVP zone. This parameter is very important because a player can be in multiple PVP zones at the same time and passing the zoneID in this case allows for correct processing of the player's location within them. Interface.CallHook("OnPlayerEnterPVP", player, "*Your unique zone identifier*");//Calling the OnPlayerEnterPVP hook to tell PVE plugins that the player needs to be added to the specified PVP zone. OnPlayerExitPVP: Used to remove a player from PVP mode/zone. Calling this hook guarantees the player’s removal from the specified PVP zone, but does not guarantee the removal from PVP mode, as there may be other zones in addition to yours. Also, when a player dies, they are automatically removed from all PVP zones. To call the OnPlayerExitPVP hook, you need to pass 3 parameters, 1 of which is optional: <BasePlayer>player - The player to remove from PVP; <string>zoneID - A unique identifier for your PVP zone; <float>pvpDelay - Optional. When the player exits your PVP zone, you can also pass the PVP delay time. However, if the player still has other active PVP zones, your PVP delay will not take effect. Interface.CallHook("OnPlayerExitPVP", player, "*Your unique zone identifier*", 10f);//Calling the OnPlayerExitPVP hook to tell PVE plugins that the player needs to be removed from the specified PVP zone, with the pvpDelay(10 seconds) specified if the player no longer has any active PVP zones. OnEntityEnterPVP: Used to add an entity to PVP mode/zone. In the case of RealPVE, this hook is only necessary to add entities with an owner(player) to a PVP, allowing other players to interact with them, such as a player's corpse after death(PlayerCorpse) or a backpack after the corpse disappears(DroppedItemContainer). To call the OnEntityEnterPVP hook, you need to pass 2 parameters: <BaseEntity>entity - The entity to add to PVP; <string>zoneID - A unique identifier for your PVP zone. Interface.CallHook("OnEntityEnterPVP", entity, "*Your unique zone identifier*");//Calling the OnEntityEnterPVP hook to tell PVE plugins that the entity needs to be added to the specified PVP zone. OnEntityExitPVP: Used to remove an entity from PVP mode/zone. When an entity dies, it is automatically removed from all PVP zones. To call the OnEntityExitPVP hook, you need to pass 3 parameters, 1 of which is optional: <BaseEntity>entity - The entity to remove from PVP; <string>zoneID - A unique identifier for your PVP zone; <float>pvpDelay - Optional. When the entity exits your PVP zone, you can also pass the PVP delay time. However, if the entity still has other active PVP zones, your PVP delay will not take effect. Interface.CallHook("OnEntityExitPVP", entity, "*Your unique zone identifier*", 10f);//Calling the OnEntityExitPVP hook to tell PVE plugins that the entity needs to be removed from the specified PVP zone, with the pvpDelay(10 seconds) specified if the entity no longer has any active PVP zones. CreatePVPMapMarker: Used to create a map marker for the PVP zone. To call the CreatePVPMapMarker hook, you need to pass 5 parameters, 2 of which is optional: <string>zoneID - A unique identifier for your PVP zone; <Vector3>pos - The position of your PVP zone; <float>radius - The radius of the circle for your PVP zone; <string>displayName - Optional. The display name for the map marker; <BaseEntity>entity - Optional. The entity to which the map marker should be attached. Interface.CallHook("CreatePVPMapMarker", "*Your unique zone identifier*", pos, 25f, "ATTENTION! This is a PVP zone!");//Calling the CreatePVPMapMarker hook to tell PVE plugins to create a map marker for the specified zone, at the specified position with the given radius, but without specifying a parent entity. DeletePVPMapMarker: Used to delete a map marker for the PVP zone. To call the DeletePVPMapMarker hook, you need to pass only 1 parameter: <string>zoneID - A unique identifier for your PVP zone. Interface.CallHook("DeletePVPMapMarker", "*Your unique zone identifier*");//Calling the DeletePVPMapMarker hook to tell PVE plugins to delete a map marker for the specified zone. There are 5 hooks that the plugin calls: OnPlayerPVPDelay OnPlayerPVPDelayed OnPlayerPVPDelayRemoved OnZoneStatusText CanRedeemKit OnPlayerPVPDelay: Called when a player exits the last active PVP zone, allowing other plugins to overwrite the value for pvpDelay. Returning a float value allows changing the pvpDelay for the player. A value less than zero disables the pvpDelay. When calling the OnPlayerPVPDelay hook, 3 parameters are passed: <BasePlayer>player - The player to whom the pvpDelay is applied; <float>pvpDelay - The initial value of pvpDelay; <string>zoneID - A unique identifier of PVP zone. object OnPlayerPVPDelay(BasePlayer player, float pvpDelay, string zoneID) { Puts($"Attempting to set a PvP delay of {pvpDelay} seconds for player {player.displayName} in zone {zoneID}!"); if (zoneID == "*Your unique zone identifier*") { return 15f;//Overriding the values for pvpDelay } return null;//Leave unchanged } OnPlayerPVPDelayed: Called after the PVP delay has been set for the player. When calling the OnPlayerPVPDelayed hook, 3 parameters are passed: <BasePlayer>player - The player to whom the pvpDelay is applied; <float>pvpDelay - The value of pvpDelay; <string>zoneID - A unique identifier of PVP zone. void OnPlayerPVPDelayed(BasePlayer player, float pvpDelay, string zoneID) { Puts($"A PvP delay of {pvpDelay} seconds has been set for player {player.displayName} in zone {zoneID}!"); } OnPlayerPVPDelayRemoved: Called when the PVP delay is removed from the player after they enter a PVP zone with an active PVP delay. When calling the OnPlayerPVPDelayRemoved hook, only 1 parameter is passed: <BasePlayer>player - The player from whom the PVP delay has been removed. void OnPlayerPVPDelayRemoved(BasePlayer player) { Puts($"PVP delay has been removed for player {player.displayName} as they entered a PVP zone!"); } OnZoneStatusText: Called when the text with the nice name for the specified zone is needed, to be displayed in the status bar. When calling the OnZoneStatusText hook, 2 parameters are passed: <BasePlayer>player - The player for whom the nice name for the zone is being requested; <string>zoneID - A unique identifier of PVP zone. object OnZoneStatusText(BasePlayer player, string zoneID) { Puts($"Text for the status bar is required for zone {zoneID}"); if (zoneID == "*Your unique zone identifier*") { return lang.GetMessage("*langKey*", this, player.UserIDString);//<string>Overriding the value for the status bar text } return null;//Leave unchanged } CanRedeemKit: Called before giving the starter kit, in the OnDefaultItemsReceive hook. A non-zero value cancels this action. When calling the CanRedeemKit hook, only 1 parameter is passed: <BasePlayer>player - The player to whom the kit is being attempted to be given. object CanRedeemKit(BasePlayer player) { Puts($"Attempting to give the kit to player {player.displayName}!"); if (player.IsAdmin) { return false;//Cancel the action } return null;//Leave unchanged }$24.99 -

Version 2.0.2
70 downloads
This custom package, created by us, includes 100 handcrafted bases across three difficulty levels, ranging from Easy to Hard. Note: The building skins in the package showcase images may differ from the spawned bases or use the default building skin. If you're looking for a more advanced pack, you can get the upgraded version here, which includes 210 bases ranging from Easy to Nightmare along with the Loot Tables package: https://codefling.com/bases/raidable-bases-mega-pack-loot-tables-210-bases Warning: The Raidable Bases plugin requires the Copy Paste plugin to function. You must install both for this bases pack to work. Raidable Bases (Paid): https://codefling.com/plugins/raidable-bases Copy Paste (Free): https://umod.org/plugins/copy-paste This Raidable Bases package includes: (In addition to the bases, it includes a well-configured config file that can be uploaded to /serverfiles/oxide/config, but its usage is optional. It also contains 5 different profile configs that can be uploaded to /oxide/data/RaidableBases/Profiles. These are also well-configured and optional to use. The usage of both is entirely up to you.) 40 Easy Bases 30 Medium Bases 30 Hard Bases WARNING: TWO DIFFERENT INSTALLATION METHODS (PLEASE READ BOTH AND APPLY ONLY THE ONE THAT FITS YOUR NEEDS) INSTALLATION GUIDE 1 (If you do not have a custom configuration and are not a professional in server configurations, choose this option. However, if you already have your own configuration and profile settings and do not wish to use the optional configs we provide—in other words, if you only need the bases—use the second installation guide instead.) Step 1: Place the Config File From the extracted ZIP files, locate the config folder and find the RaidableBases.json file. Move it to the following directory: /serverfiles/oxide/config Step 2: Place the Bases From the extracted ZIP files, locate the copypaste folder and move it to the following directory: /serverfiles/oxide/data Step 3: Place the Profiles Folder From the extracted ZIP files, locate the profiles folder and move it to the following directory: /serverfiles/oxide/data/RaidableBases Why Are Profiles Important? The profiles folder contains crucial settings that allow you to: Enable/disable the dome Enable/disable NPCs Adjust the number of lootable items These are just a few examples—there are dozens of important settings that directly affect how raid bases function. The config file alone is not enough—these files play a major role in customizing your raid bases. I strongly recommend reviewing each difficulty setting (Easy to Hard) inside the profiles folder and adjusting them based on your needs. Step 4: Restart the plugin via RCON: o.reload RaidableBases INSTALLATION GUIDE 2 (Use this installation method if you do not want to use our configurations and instead prefer to use your own config files and your own /oxide/data/RaidableBases/Profiles configurations.) In this case, you only need to add the bases. To do this, use the following commands in RCON: Step 1: You can add bases one by one or in bulk. After executing the commands in RCON, the bases will be registered inside the Profiles configuration. If you do not want to deal with these adjustments, it is recommended to use Installation Guide 1 instead. A- Example RCON commands: rb.config add "Easy Bases" fullwipedeasy31 rb.config add "Hard Bases" fullwipedhard31 B- Commands to Integrate Raid Bases in Bulk via RCON: rb.config add "Easy Bases" fullwipedeasy31 fullwipedeasy32 fullwipedeasy33 fullwipedeasy34 fullwipedeasy35 fullwipedeasy36 fullwipedeasy37 fullwipedeasy38 fullwipedeasy39 fullwipedeasy40 fullwipedeasy41 fullwipedeasy42 fullwipedeasy43 fullwipedeasy44 fullwipedeasy45 fullwipedeasy46 fullwipedeasy47 fullwipedeasy48 fullwipedeasy49 fullwipedeasy50 fullwipedeasy51 fullwipedeasy52 fullwipedeasy53 fullwipedeasy54 fullwipedeasy55 fullwipedeasy56 fullwipedeasy57 fullwipedeasy58 fullwipedeasy59 fullwipedeasy60 fullwipedeasy61 fullwipedeasy62 fullwipedeasy63 fullwipedeasy64 fullwipedeasy65 fullwipedeasy66 fullwipedeasy67 fullwipedeasy68 fullwipedeasy69 fullwipedeasy70 rb.config add "Medium Bases" fullwipedmed31 fullwipedmed32 fullwipedmed33 fullwipedmed34 fullwipedmed35 fullwipedmed36 fullwipedmed37 fullwipedmed38 fullwipedmed39 fullwipedmed40 fullwipedmed41 fullwipedmed42 fullwipedmed43 fullwipedmed44 fullwipedmed45 fullwipedmed46 fullwipedmed47 fullwipedmed48 fullwipedmed49 fullwipedmed50 fullwipedmed51 fullwipedmed52 fullwipedmed53 fullwipedmed54 fullwipedmed55 fullwipedmed56 fullwipedmed57 fullwipedmed58 fullwipedmed59 fullwipedmed60 rb.config add "Hard Bases" fullwipedhard31 fullwipedhard32 fullwipedhard33 fullwipedhard34 fullwipedhard35 fullwipedhard36 fullwipedhard37 fullwipedhard38 fullwipedhard39 fullwipedhard40 fullwipedhard41 fullwipedhard42 fullwipedhard43 fullwipedhard44 fullwipedhard45 fullwipedhard46 fullwipedhard47 fullwipedhard48 fullwipedhard49 fullwipedhard50 fullwipedhard51 fullwipedhard52 fullwipedhard53 fullwipedhard54 fullwipedhard55 fullwipedhard56 fullwipedhard57 fullwipedhard58 fullwipedhard59 fullwipedhard60 Step 3: Restart the plugin via RCON: o.reload RaidableBases EXTRA IMPORTANT INFORMATIONS: We do not use a dome, NPCs, or arena walls around raid bases on our servers, and in the ZIP file we provided, these features are also disabled by default. If you want to enable them, you will need to adjust the settings accordingly. For example, to enable the dome, follow the steps below: Navigate to: /oxide/data/RaidableBases/Profiles Open the files inside the Profiles folder with a text editor. Locate the following settings: (This is already set to false because it is required for markers to appear on the map.) "Spawn Silently (No Notification, No Dome, No Map Marker)": false, "Create Dome Around Event Using Spheres (0 = disabled, recommended = 5)": 0, Change the value from 0 to 5 as shown below: "Create Dome Around Event Using Spheres (0 = disabled, recommended = 5)": 5, In our setup: - Timed events and purchasable events are disabled. - After a wipe, easy bases will start spawning 30 minutes later. - Nightmare bases will begin spawning 48 hours (2 days) later. Imagine starting the game with just a torch in hand and immediately encountering a nightmare base on the shore. You’d likely quit the game right away—this setting is crucial for us to avoid such scenarios. Configuration Example: serverfiles/oxide/config "Maintained Events": { "Always Maintain Max Events": true, "Max Maintained Events": 30, "Enable X Hours After Wipe (0 = immediately)": { "Easy": 0.5, "Medium": 1.0, "Hard": 3.0, "Expert": 24.0, "Nightmare": 48.0 All of our bases from Easy to Nightmare are equipped with turret protection. If you do not want turrets to spawn in your raidable bases on your server, you can use the following method. Go to the file path /data/RaidableBases/Profiles, open the JSON files inside with a text editor, and apply the following: "Kill These Prefabs After Paste": [ "assets/prefabs/npc/autoturret/autoturret_deployed.prefab", "autoturret_deployed" ], If you need not only these bases but also the loot tables for the items that will spawn inside them, check out our one-of-a-kind, exceptional Raidable Base Loot Tables at the link below: https://codefling.com/customizations/raidable-bases-loot-tables-pack (Our loot tables are designed to cater to different server types, including Vanilla (1x) servers as well as 2x, 3x, 5x, 10x, and higher multipliers to match various loot requirements.) If you are satisfied with this package, you can support us by leaving a 5-star review on the site where you purchased it. Your feedback motivates us to continue improving and providing even better configurations for dedicated server owners like you. Thank you! Support: FULLWIPED DISCORD$24.99-
- 2
-

-

-
- #raid
- #raidable bases
- (and 27 more)
-

Version 3.0.2
253 downloads
This is a custom package created by us, featuring 110 handcrafted bases across five difficulty levels, ranging from Easy to Nightmare. Note: The building skins in the package showcase images may differ from the spawned bases or use the default building skin. (This package does not include loot tables. If you need bases + loot tables, you may want to check out the higher-tier package: 110 Raibable Bases + Loot Tables package) Warning: The Raidable Bases plugin requires the Copy Paste plugin to function. You must install both for this bases pack to work. Raidable Bases (Paid): https://codefling.com/plugins/raidable-bases Copy Paste (Free): https://umod.org/plugins/copy-paste This Raidable Bases package includes: (In addition to the bases, it includes a well-configured config file that can be uploaded to /serverfiles/oxide/config, but its usage is optional. It also contains 5 different profile configs that can be uploaded to /oxide/data/RaidableBases/Profiles. These are also well-configured and optional to use. The usage of both is entirely up to you.) 30 Easy Bases 30 Medium Bases 30 Hard Bases 10 Expert Bases 10 Nightmare Bases WARNING: TWO DIFFERENT INSTALLATION METHODS (PLEASE READ BOTH AND APPLY ONLY THE ONE THAT FITS YOUR NEEDS) INSTALLATION GUIDE 1 (If you do not have a custom configuration and are not a professional in server configurations, choose this option. However, if you already have your own configuration and profile settings and do not wish to use the optional configs we provide—in other words, if you only need the bases—use the second installation guide instead.) ▶ Step 1: Place the Config File From the extracted ZIP files, locate the config folder and find the RaidableBases.json file. Move it to the following directory: /serverfiles/oxide/config ▶ Step 2: Place the Bases From the extracted ZIP files, locate the copypaste folder and move it to the following directory: /serverfiles/oxide/data ▶ Step 3: Place the Profiles Folder From the extracted ZIP files, locate the profiles folder and move it to the following directory: /serverfiles/oxide/data/RaidableBases Why Are Profiles Important? The profiles folder contains crucial settings that allow you to: Enable/disable the dome Enable/disable NPCs Adjust the number of lootable items These are just a few examples—there are dozens of important settings that directly affect how raid bases function. The config file alone is not enough—these files play a major role in customizing your raid bases. I strongly recommend reviewing each difficulty setting (Easy to Nightmare) inside the profiles folder and adjusting them based on your needs. ▶ Step 4: Restart the plugin via RCON: o.reload RaidableBases INSTALLATION GUIDE 2 (Use this installation method if you do not want to use our configurations and instead prefer to use your own config files and your own /oxide/data/RaidableBases/Profiles configurations.) In this case, you only need to add the bases. To do this, use the following commands in RCON: ▶ Step 1: You can add bases one by one or in bulk. After executing the commands in RCON, the bases will be registered inside the Profiles configuration. Note: If you do not want to deal with these adjustments, it is recommended to use Installation Guide 1 instead. A- Example RCON commands: rb.config add "Easy Bases" fullwipedeasy1 rb.config add "Hard Bases" fullwipedhard1 B- Commands to Integrate Raid Bases in Bulk via RCON: rb.config add "Easy Bases" fullwipedeasy1 fullwipedeasy2 fullwipedeasy3 fullwipedeasy4 fullwipedeasy5 fullwipedeasy6 fullwipedeasy7 fullwipedeasy8 fullwipedeasy9 fullwipedeasy10 fullwipedeasy11 fullwipedeasy12 fullwipedeasy13 fullwipedeasy14 fullwipedeasy15 fullwipedeasy16 fullwipedeasy17 fullwipedeasy18 fullwipedeasy19 fullwipedeasy20 fullwipedeasy21 fullwipedeasy22 fullwipedeasy23 fullwipedeasy24 fullwipedeasy25 fullwipedeasy26 fullwipedeasy27 fullwipedeasy28 fullwipedeasy29 fullwipedeasy30 rb.config add "Medium Bases" fullwipedmed1 fullwipedmed2 fullwipedmed3 fullwipedmed4 fullwipedmed5 fullwipedmed6 fullwipedmed7 fullwipedmed8 fullwipedmed9 fullwipedmed10 fullwipedmed11 fullwipedmed12 fullwipedmed13 fullwipedmed14 fullwipedmed15 fullwipedmed16 fullwipedmed17 fullwipedmed18 fullwipedmed19 fullwipedmed20 fullwipedmed21 fullwipedmed22 fullwipedmed23 fullwipedmed24 fullwipedmed25 fullwipedmed26 fullwipedmed27 fullwipedmed28 fullwipedmed29 fullwipedmed30 rb.config add "Hard Bases" fullwipedhard1 fullwipedhard2 fullwipedhard3 fullwipedhard4 fullwipedhard5 fullwipedhard6 fullwipedhard7 fullwipedhard8 fullwipedhard9 fullwipedhard10 fullwipedhard11 fullwipedhard12 fullwipedhard13 fullwipedhard14 fullwipedhard15 fullwipedhard16 fullwipedhard17 fullwipedhard18 fullwipedhard19 fullwipedhard20 fullwipedhard21 fullwipedhard22 fullwipedhard23 fullwipedhard24 fullwipedhard25 fullwipedhard26 fullwipedhard27 fullwipedhard28 fullwipedhard29 fullwipedhard30 rb.config add "Expert Bases" fullwipedexp1 fullwipedexp2 fullwipedexp3 fullwipedexp4 fullwipedexp5 fullwipedexp6 fullwipedexp7 fullwipedexp8 fullwipedexp9 fullwipedexp10 rb.config add "Nightmare Bases" fullwipednight1 fullwipednight2 fullwipednight3 fullwipednight4 fullwipednight5 fullwipednight6 fullwipednight7 fullwipednight8 fullwipednight9 fullwipednight10 ▶ Step 2: Restart the plugin via RCON: o.reload RaidableBases EXTRA IMPORTANT INFORMATIONS: We do not use a dome, NPCs, or arena walls around raid bases on our servers, and in the ZIP file we provided, these features are also disabled by default. If you want to enable them, you will need to adjust the settings accordingly. For example, to enable the dome, follow the steps below: Navigate to: /oxide/data/RaidableBases/Profiles Open the files inside the Profiles folder with a text editor. Locate the following settings: (This is already set to false because it is required for markers to appear on the map.) "Spawn Silently (No Notification, No Dome, No Map Marker)": false, "Create Dome Around Event Using Spheres (0 = disabled, recommended = 5)": 0, Change the value from 0 to 5 as shown below: "Create Dome Around Event Using Spheres (0 = disabled, recommended = 5)": 5, In our setup: - Timed events and purchasable events are disabled. - After a wipe, easy bases will start spawning 30 minutes later. - Nightmare bases will begin spawning 48 hours (2 days) later. Imagine starting the game with just a torch in hand and immediately encountering a nightmare base on the shore. You’d likely quit the game right away—this setting is crucial for us to avoid such scenarios. Configuration Example: /serverfiles/oxide/config "Maintained Events": { "Always Maintain Max Events": true, "Max Maintained Events": 30, "Enable X Hours After Wipe (0 = immediately)": { "Easy": 0.5, "Medium": 1.0, "Hard": 3.0, "Expert": 24.0, "Nightmare": 48.0 All of our bases from Easy to Nightmare are equipped with turret protection. If you do not want turrets to spawn in your raidable bases on your server, you can use the following method. Go to the file path /data/RaidableBases/Profiles, open the JSON files inside with a text editor, and apply the following: "Kill These Prefabs After Paste": [ "assets/prefabs/npc/autoturret/autoturret_deployed.prefab", "autoturret_deployed" ], If you need not only these bases but also the loot tables for the items that will spawn inside them, check out our one-of-a-kind, exceptional Raidable Base Loot Tables at the link below: https://codefling.com/customizations/raidable-bases-loot-tables-pack (Our loot tables are designed to cater to different server types, including Vanilla (1x) servers as well as 2x, 3x, 5x, 10x, and higher multipliers to match various loot requirements.) If you are satisfied with this package, you can support us by leaving a 5-star review on the site where you purchased it. Your feedback motivates us to continue improving and providing even better configurations for dedicated server owners like you. Please leave a review here: https://codefling.com/bases/raidable-bases-pack-110-bases?tab=reviews Thank you!$34.99 -
Version 3.0.2
741 downloads
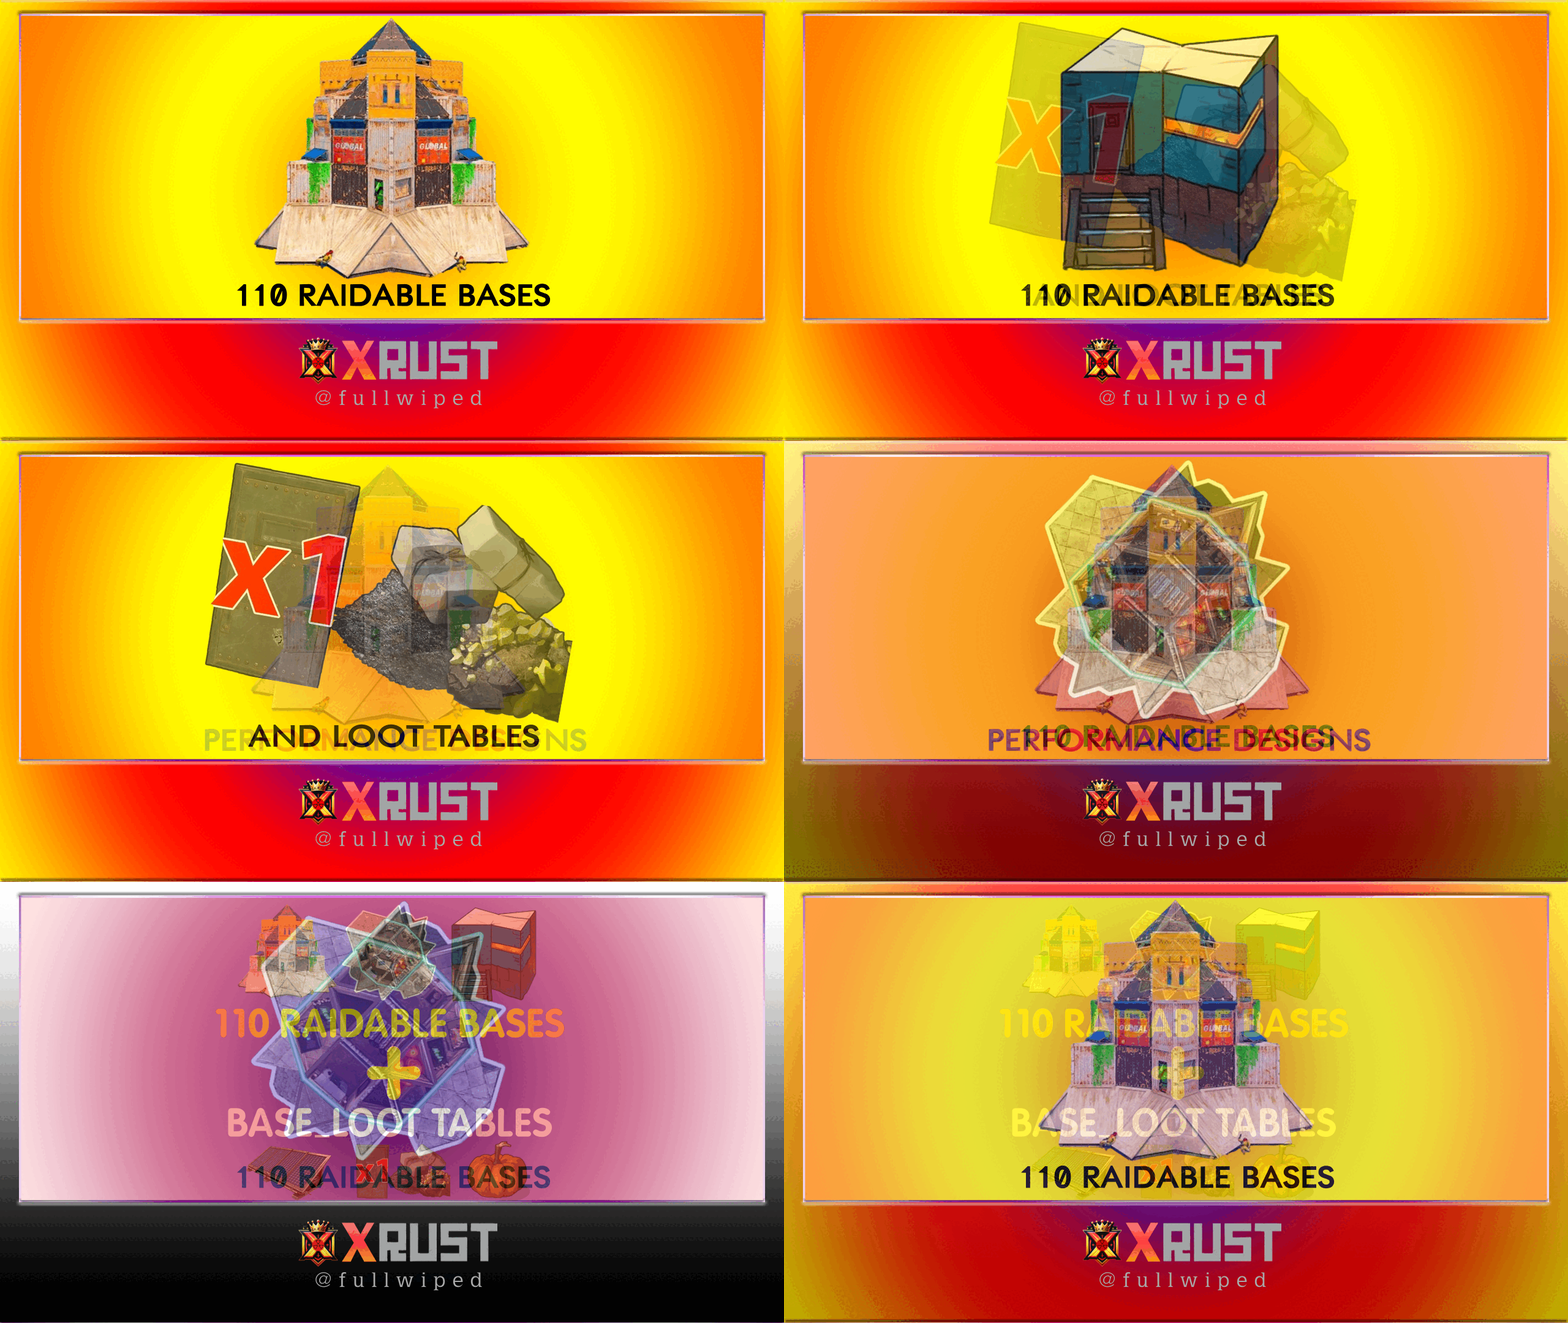
This is a custom package created by us, featuring 110 unique bases and a specialized loot setup tailored for five difficulty levels, ranging from Easy to Nightmare. Note: The building skins in the package showcase images may differ from the spawned bases or use the default building skin. Warning: The Raidable Bases plugin requires the Copy Paste plugin to function. You must install both for this bases pack to work. Raidable Bases (Paid): https://codefling.com/plugins/raidable-bases Copy Paste (Free): https://umod.org/plugins/copy-paste This Raidable Bases Pack & Loot Tables package includes: 30 Easy Bases +Base_Loot Tables (Easy "Vanilla" and "Enhanced" tables included) 30 Medium Bases +Base_Loot Tables (Medium "Vanilla" and "Enhanced" tables included) 30 Hard Bases +Base_Loot Tables (Hard "Vanilla" and "Enhanced" tables included) 10 Expert Bases +Base_Loot Tables (Expert "Vanilla" and "Enhanced" tables included) 10 Nightmare Bases +Base_Loot Tables (Nightmare "Vanilla" and "Enhanced" tables included) Beware: Our loot table package includes only the 5-tier loot tables within the Base_loot folder, ranging from easy to nightmare. It does not include the loot tables from the Difficulty_Loot or Weekday_Loot folders. With a total of 110 bases, this package focuses on simplicity and optimization. Most bases are protected by turrets and traps, and each base is designed with player PC performance and server stability in mind. VANILLA AND ENHANCED LOOT TABLES FOR RAIDABLE BASES This package includes 10 different base loot table files, ensuring a well-structured and advanced configuration for every difficulty level, from Easy to Nightmare. 5 loot files for the Vanilla setup (Easy, Medium, Hard, Expert, Nightmare), offering a balanced loot experience with some junk items, staying close to a 1x rate. 5 loot files for the Enhanced setup (Easy, Medium, Hard, Expert, Nightmare), designed for modded servers with 2x, 3x, or higher gather rates, featuring cleaner loot tables with minimal junk and more valuable rewards. Installation Path: All loot table files are intended for the /oxide/data/RaidableBases/Base_Loot directory. Setup Requirement: You must choose and install only one loot table setup at a time—either Vanilla or Enhanced. If you want to switch, you can replace the current files with the other set, but both cannot be active simultaneously. For those exclusively seeking the loot table, we offer it as a standalone product: https://codefling.com/customizations/raidable-bases-loot-tables-pack (Note: If you've purchased our Raidable Bases Pack & Loot Tables (110 Bases) package, there is no need to buy this separately.) WARNING: TWO DIFFERENT INSTALLATION METHODS (PLEASE READ BOTH AND APPLY ONLY THE ONE THAT FITS YOUR NEEDS) INSTALLATION GUIDE 1: (If you do not have a custom configuration and are not a professional in server configurations, choose this option. However, if you already have your own configuration and profile settings and do not wish to use the optional configs we provide—in other words, if you only need the bases and loot tables—use the second installation guide instead.) Step 1: Place the Config File From the extracted ZIP files, locate the config folder and find the RaidableBases.json file. Move it to the following directory: /serverfiles/oxide/config Step 2: Place the Bases From the extracted ZIP files, locate the copypaste folder and move it to the following directory: /serverfiles/oxide/data Step 3: Place the Base_Loot Tables From the extracted ZIP files, locate the Base_Loot folder and move it to the following directory: /serverfiles/oxide/data/RaidableBases Important: If there are any existing JSON files inside this folder that are not part of our loot tables, delete them to ensure proper functionality. Choose between Vanilla or Enhanced loot tables based on your preference. If the folder is named "Base_Loot (Enhanced loot)", remove the text in parentheses so that the correct folder name is simply: "Base_Loot" (Otherwise, the loot tables will not work properly.) Step 4: Place the Profiles Folder From the extracted ZIP files, locate the profiles folder and move it to the following directory: /serverfiles/oxide/data/RaidableBases Why Are Profiles Important? The profiles folder contains crucial settings that allow you to: Enable/disable the dome Enable/disable NPCs Adjust the number of lootable items These are just a few examples—there are dozens of important settings that directly affect how raid bases function. The config file alone is not enough—these files play a major role in customizing your raid bases. I strongly recommend reviewing each difficulty setting (Easy to Nightmare) inside the profiles folder and adjusting them based on your needs. Step 5: Restart the plugin via RCON: o.reload RaidableBases INSTALLATION GUIDE 2: (Use this installation method if you do not want to use our configurations and instead prefer to use your own config files and your own /oxide/data/RaidableBases/Profiles configurations.) In this case, you only need to add the bases. To do this, use the following commands in RCON: Step 1: You can add bases one by one or in bulk. After executing the commands in RCON, the bases will be registered inside the Profiles configuration. If you do not want to deal with these adjustments, it is recommended to use Installation Guide 1 instead. A- Example RCON commands: rb.config add "Easy Bases" fullwipedeasy1 rb.config add "Hard Bases" fullwipedhard1 B- Commands to Integrate Raid Bases in Bulk via RCON: rb.config add "Easy Bases" fullwipedeasy1 fullwipedeasy2 fullwipedeasy3 fullwipedeasy4 fullwipedeasy5 fullwipedeasy6 fullwipedeasy7 fullwipedeasy8 fullwipedeasy9 fullwipedeasy10 fullwipedeasy11 fullwipedeasy12 fullwipedeasy13 fullwipedeasy14 fullwipedeasy15 fullwipedeasy16 fullwipedeasy17 fullwipedeasy18 fullwipedeasy19 fullwipedeasy20 fullwipedeasy21 fullwipedeasy22 fullwipedeasy23 fullwipedeasy24 fullwipedeasy25 fullwipedeasy26 fullwipedeasy27 fullwipedeasy28 fullwipedeasy29 fullwipedeasy30 rb.config add "Medium Bases" fullwipedmed1 fullwipedmed2 fullwipedmed3 fullwipedmed4 fullwipedmed5 fullwipedmed6 fullwipedmed7 fullwipedmed8 fullwipedmed9 fullwipedmed10 fullwipedmed11 fullwipedmed12 fullwipedmed13 fullwipedmed14 fullwipedmed15 fullwipedmed16 fullwipedmed17 fullwipedmed18 fullwipedmed19 fullwipedmed20 fullwipedmed21 fullwipedmed22 fullwipedmed23 fullwipedmed24 fullwipedmed25 fullwipedmed26 fullwipedmed27 fullwipedmed28 fullwipedmed29 fullwipedmed30 rb.config add "Hard Bases" fullwipedhard1 fullwipedhard2 fullwipedhard3 fullwipedhard4 fullwipedhard5 fullwipedhard6 fullwipedhard7 fullwipedhard8 fullwipedhard9 fullwipedhard10 fullwipedhard11 fullwipedhard12 fullwipedhard13 fullwipedhard14 fullwipedhard15 fullwipedhard16 fullwipedhard17 fullwipedhard18 fullwipedhard19 fullwipedhard20 fullwipedhard21 fullwipedhard22 fullwipedhard23 fullwipedhard24 fullwipedhard25 fullwipedhard26 fullwipedhard27 fullwipedhard28 fullwipedhard29 fullwipedhard30 rb.config add "Expert Bases" fullwipedexp1 fullwipedexp2 fullwipedexp3 fullwipedexp4 fullwipedexp5 fullwipedexp6 fullwipedexp7 fullwipedexp8 fullwipedexp9 fullwipedexp10 rb.config add "Nightmare Bases" fullwipednight1 fullwipednight2 fullwipednight3 fullwipednight4 fullwipednight5 fullwipednight6 fullwipednight7 fullwipednight8 fullwipednight9 fullwipednight10 Step 2: Place the Base_Loot Tables From the extracted ZIP files, locate the Base_Loot folder and move it to the following directory: /serverfiles/oxide/data/RaidableBases Important: If there are any existing JSON files inside this folder that are not part of our loot tables, delete them to ensure proper functionality. Choose between Vanilla or Enhanced loot tables based on your preference. If the folder is named "Base_Loot (Enhanced loot)", remove the text in parentheses so that the correct folder name is simply: "Base_Loot" (Otherwise, the loot tables will not work properly.) Step 3: Restart the plugin via RCON: o.reload RaidableBases EXTRA IMPORTANT INFORMATIONS: We do not use a dome, NPCs, or arena walls around raid bases on our servers, and in the ZIP file we provided, these features are also disabled by default. If you want to enable them, you will need to adjust the settings accordingly. For example, to enable the dome, follow the steps below: Navigate to: /oxide/data/RaidableBases/Profiles Open the files inside the Profiles folder with a text editor. Locate the following settings: (This is already set to false because it is required for markers to appear on the map.) "Spawn Silently (No Notification, No Dome, No Map Marker)": false, "Create Dome Around Event Using Spheres (0 = disabled, recommended = 5)": 0, Change the value from 0 to 5 as shown below: "Create Dome Around Event Using Spheres (0 = disabled, recommended = 5)": 5, Additionally, the loot amount for bases varies depending on the difficulty level (easy, medium, hard, expert, and nightmare). You can adjust this setting in the same Profiles location according to your needs: "Amount Of Items To Spawn": 210, For example, in medium bases, this value is set to 210, which determines the total number of items that will appear in crates, furnaces, and the cupboard. Our current configuration is specifically adjusted to prevent players from feeling overwhelmed by massive buildings right after a wipe. We have configured Maintained Events accordingly to ensure a balanced experience. In our setup: - Timed events and purchasable events are disabled. - After a wipe, easy bases will start spawning 30 minutes later. - Nightmare bases will begin spawning 48 hours (2 days) later. Imagine starting the game with just a torch in hand and immediately encountering a nightmare base on the shore. You’d likely quit the game right away—this setting is crucial for us to avoid such scenarios. Configuration Example: serverfiles/oxide/config "Maintained Events": { "Always Maintain Max Events": true, "Max Maintained Events": 30, "Enable X Hours After Wipe (0 = immediately)": { "Easy": 0.5, "Medium": 1.0, "Hard": 3.0, "Expert": 24.0, "Nightmare": 48.0 All of our bases from Easy to Nightmare are equipped with turret protection. If you do not want turrets to spawn in your raidable bases on your server, you can use the following method. Go to the file path /data/RaidableBases/Profiles, open the JSON files inside with a text editor, and apply the following: "Kill These Prefabs After Paste": [ "assets/prefabs/npc/autoturret/autoturret_deployed.prefab", "autoturret_deployed" ], If you are satisfied with this package, you can support us by leaving a 5-star review on the site where you purchased it. Your feedback motivates us to continue improving and providing even better configurations for dedicated server owners like you. Please leave a review here: https://codefling.com/bases/raidable-bases-pack-loot-tables-110-bases?tab=reviews Thank you! Support: FULLWIPED DISCORD$49.99 -
Version 2.0.2
81 downloads
This custom package, designed by us, features 210 handcrafted bases across five difficulty levels, ranging from Easy to Nightmare. Note: The building skins in the package showcase images may differ from the spawned bases or use the default building skin. This MEGA PACK is an upgraded version of the FullWiped-110 base pack we previously offered. If you've already purchased the FullWiped-110 bases, you only need to buy the expanded package, which includes 100 new bases ranging from Easy to Hard. Get it here: https://codefling.com/bases/raidable-bases-pack-100-bases-expanded-package-from-easy-to-hard Warning: The Raidable Bases plugin requires the Copy Paste plugin to function. You must install both for this bases pack to work. Raidable Bases (Paid): https://codefling.com/plugins/raidable-bases Copy Paste (Free): https://umod.org/plugins/copy-paste This Raidable Bases package includes: (In addition to the bases, it includes a well-configured config file that can be uploaded to /serverfiles/oxide/config, but its usage is optional. It also contains 5 different profile configs that can be uploaded to /oxide/data/RaidableBases/Profiles. These are also well-configured and optional to use. The usage of both is entirely up to you.) 70 Easy Bases 60 Medium Bases 60 Hard Bases 10 Expert Bases 10 Nightmare Bases WARNING: TWO DIFFERENT INSTALLATION METHODS (PLEASE READ BOTH AND APPLY ONLY THE ONE THAT FITS YOUR NEEDS) INSTALLATION GUIDE 1 (If you do not have a custom configuration and are not a professional in server configurations, choose this option. However, if you already have your own configuration and profile settings and do not wish to use the optional configs we provide—in other words, if you only need the bases—use the second installation guide instead.) ▶ Step 1: Place the Config File From the extracted ZIP files, locate the config folder and find the RaidableBases.json file. Move it to the following directory: /serverfiles/oxide/config ▶ Step 2: Place the Bases From the extracted ZIP files, locate the copypaste folder and move it to the following directory: /serverfiles/oxide/data ▶ Step 3: Place the Profiles Folder From the extracted ZIP files, locate the profiles folder and move it to the following directory: /serverfiles/oxide/data/RaidableBases Why Are Profiles Important? The profiles folder contains crucial settings that allow you to: Enable/disable the dome Enable/disable NPCs Adjust the number of lootable items These are just a few examples—there are dozens of important settings that directly affect how raid bases function. The config file alone is not enough—these files play a major role in customizing your raid bases. I strongly recommend reviewing each difficulty setting (Easy to Nightmare) inside the profiles folder and adjusting them based on your needs. ▶ Step 4: Restart the plugin via RCON: o.reload RaidableBases INSTALLATION GUIDE 2 (Use this installation method if you do not want to use our configurations and instead prefer to use your own config files and your own /oxide/data/RaidableBases/Profiles configurations.) In this case, you only need to add the bases. To do this, use the following commands in RCON: ▶ Step 1: You can add bases one by one or in bulk. After executing the commands in RCON, the bases will be registered inside the Profiles configuration. Note: If you do not want to deal with these adjustments, it is recommended to use Installation Guide 1 instead. A- Example RCON commands: rb.config add "Easy Bases" fullwipedeasy1 rb.config add "Hard Bases" fullwipedhard1 B- Commands to Integrate Raid Bases in Bulk via RCON: rb.config add "Easy Bases" fullwipedeasy1 fullwipedeasy2 fullwipedeasy3 fullwipedeasy4 fullwipedeasy5 fullwipedeasy6 fullwipedeasy7 fullwipedeasy8 fullwipedeasy9 fullwipedeasy10 fullwipedeasy11 fullwipedeasy12 fullwipedeasy13 fullwipedeasy14 fullwipedeasy15 fullwipedeasy16 fullwipedeasy17 fullwipedeasy18 fullwipedeasy19 fullwipedeasy20 fullwipedeasy21 fullwipedeasy22 fullwipedeasy23 fullwipedeasy24 fullwipedeasy25 fullwipedeasy26 fullwipedeasy27 fullwipedeasy28 fullwipedeasy29 fullwipedeasy30 fullwipedeasy31 fullwipedeasy32 fullwipedeasy33 fullwipedeasy34 fullwipedeasy35 fullwipedeasy36 fullwipedeasy37 fullwipedeasy38 fullwipedeasy39 fullwipedeasy40 fullwipedeasy41 fullwipedeasy42 fullwipedeasy43 fullwipedeasy44 fullwipedeasy45 fullwipedeasy46 fullwipedeasy47 fullwipedeasy48 fullwipedeasy49 fullwipedeasy50 fullwipedeasy51 fullwipedeasy52 fullwipedeasy53 fullwipedeasy54 fullwipedeasy55 fullwipedeasy56 fullwipedeasy57 fullwipedeasy58 fullwipedeasy59 fullwipedeasy60 fullwipedeasy61 fullwipedeasy62 fullwipedeasy63 fullwipedeasy64 fullwipedeasy65 fullwipedeasy66 fullwipedeasy67 fullwipedeasy68 fullwipedeasy69 fullwipedeasy70 rb.config add "Medium Bases" fullwipedmed1 fullwipedmed2 fullwipedmed3 fullwipedmed4 fullwipedmed5 fullwipedmed6 fullwipedmed7 fullwipedmed8 fullwipedmed9 fullwipedmed10 fullwipedmed11 fullwipedmed12 fullwipedmed13 fullwipedmed14 fullwipedmed15 fullwipedmed16 fullwipedmed17 fullwipedmed18 fullwipedmed19 fullwipedmed20 fullwipedmed21 fullwipedmed22 fullwipedmed23 fullwipedmed24 fullwipedmed25 fullwipedmed26 fullwipedmed27 fullwipedmed28 fullwipedmed29 fullwipedmed30 fullwipedmed31 fullwipedmed32 fullwipedmed33 fullwipedmed34 fullwipedmed35 fullwipedmed36 fullwipedmed37 fullwipedmed38 fullwipedmed39 fullwipedmed40 fullwipedmed41 fullwipedmed42 fullwipedmed43 fullwipedmed44 fullwipedmed45 fullwipedmed46 fullwipedmed47 fullwipedmed48 fullwipedmed49 fullwipedmed50 fullwipedmed51 fullwipedmed52 fullwipedmed53 fullwipedmed54 fullwipedmed55 fullwipedmed56 fullwipedmed57 fullwipedmed58 fullwipedmed59 fullwipedmed60 rb.config add "Hard Bases" fullwipedhard1 fullwipedhard2 fullwipedhard3 fullwipedhard4 fullwipedhard5 fullwipedhard6 fullwipedhard7 fullwipedhard8 fullwipedhard9 fullwipedhard10 fullwipedhard11 fullwipedhard12 fullwipedhard13 fullwipedhard14 fullwipedhard15 fullwipedhard16 fullwipedhard17 fullwipedhard18 fullwipedhard19 fullwipedhard20 fullwipedhard21 fullwipedhard22 fullwipedhard23 fullwipedhard24 fullwipedhard25 fullwipedhard26 fullwipedhard27 fullwipedhard28 fullwipedhard29 fullwipedhard30 fullwipedhard31 fullwipedhard32 fullwipedhard33 fullwipedhard34 fullwipedhard35 fullwipedhard36 fullwipedhard37 fullwipedhard38 fullwipedhard39 fullwipedhard40 fullwipedhard41 fullwipedhard42 fullwipedhard43 fullwipedhard44 fullwipedhard45 fullwipedhard46 fullwipedhard47 fullwipedhard48 fullwipedhard49 fullwipedhard50 fullwipedhard51 fullwipedhard52 fullwipedhard53 fullwipedhard54 fullwipedhard55 fullwipedhard56 fullwipedhard57 fullwipedhard58 fullwipedhard59 fullwipedhard60 rb.config add "Expert Bases" fullwipedexp1 fullwipedexp2 fullwipedexp3 fullwipedexp4 fullwipedexp5 fullwipedexp6 fullwipedexp7 fullwipedexp8 fullwipedexp9 fullwipedexp10 rb.config add "Nightmare Bases" fullwipednight1 fullwipednight2 fullwipednight3 fullwipednight4 fullwipednight5 fullwipednight6 fullwipednight7 fullwipednight8 fullwipednight9 fullwipednight10 ▶ Step 2: Restart the plugin via RCON: o.reload RaidableBases EXTRA IMPORTANT INFORMATIONS: We do not use a dome, NPCs, or arena walls around raid bases on our servers, and in the ZIP file we provided, these features are also disabled by default. If you want to enable them, you will need to adjust the settings accordingly. For example, to enable the dome, follow the steps below: Navigate to: /oxide/data/RaidableBases/Profiles Open the files inside the Profiles folder with a text editor. Locate the following settings: (This is already set to false because it is required for markers to appear on the map.) "Spawn Silently (No Notification, No Dome, No Map Marker)": false, "Create Dome Around Event Using Spheres (0 = disabled, recommended = 5)": 0, Change the value from 0 to 5 as shown below: "Create Dome Around Event Using Spheres (0 = disabled, recommended = 5)": 5, In our setup: - Timed events and purchasable events are disabled. - After a wipe, easy bases will start spawning 30 minutes later. - Nightmare bases will begin spawning 48 hours (2 days) later. Imagine starting the game with just a torch in hand and immediately encountering a nightmare base on the shore. You’d likely quit the game right away—this setting is crucial for us to avoid such scenarios. Configuration Example: serverfiles/oxide/config "Maintained Events": { "Always Maintain Max Events": true, "Max Maintained Events": 30, "Enable X Hours After Wipe (0 = immediately)": { "Easy": 0.5, "Medium": 1.0, "Hard": 3.0, "Expert": 24.0, "Nightmare": 48.0 All of our bases from Easy to Nightmare are equipped with turret protection. If you do not want turrets to spawn in your raidable bases on your server, you can use the following method. Go to the file path /data/RaidableBases/Profiles, open the JSON files inside with a text editor, and apply the following: "Kill These Prefabs After Paste": [ "assets/prefabs/npc/autoturret/autoturret_deployed.prefab", "autoturret_deployed" ], If you need not only these bases but also the loot tables for the items that will spawn inside them, check out our one-of-a-kind, exceptional Raidable Base Loot Tables at the link below: https://codefling.com/customizations/raidable-bases-loot-tables-pack (Our loot tables are designed to cater to different server types, including Vanilla (1x) servers as well as 2x, 3x, 5x, 10x, and higher multipliers to match various loot requirements.) If you are satisfied with this package, you can support us by leaving a 5-star review on the site where you purchased it. Your feedback motivates us to continue improving and providing even better configurations for dedicated server owners like you. Thank you! Support: FULLWIPED DISCORD$49.99- 6 comments
-
- 1
-
-
- #raid bases
- #base
- (and 33 more)
-
Version 2.0.2
633 downloads
This is a custom package designed by us, featuring 210 unique bases and a specialized loot setup for five different difficulty levels, ranging from Easy to Nightmare. Note: The building skins in the package showcase images may differ from the spawned bases or use the default building skin. This MEGA PACK is an upgraded version of the FullWiped-110 Bases + Loot Pack we previously offered. If you've already purchased the FullWiped-110 Bases + Loot Pack, you only need to buy the expansion pack, which includes 100 new bases ranging from Easy to Hard. Get it here: https://codefling.com/bases/raidable-bases-pack-100-bases-expanded-package-from-easy-to-hard Warning: The Raidable Bases plugin requires the Copy Paste plugin to function. You must install both for this bases pack to work. Raidable Bases (Paid): https://codefling.com/plugins/raidable-bases Copy Paste (Free): https://umod.org/plugins/copy-paste This Raidable Bases Pack & Loot Tables package includes: 70 Easy Bases +Base_Loot Tables (Easy "Vanilla" and "Enhanced" tables included) 60 Medium Bases +Base_Loot Tables (Medium "Vanilla" and "Enhanced" tables included) 60 Hard Bases +Base_Loot Tables (Hard "Vanilla" and "Enhanced" tables included) 10 Expert Bases +Base_Loot Tables (Expert "Vanilla" and "Enhanced" tables included) 10 Nightmare Bases +Base_Loot Tables (Nightmare "Vanilla" and "Enhanced" tables included) Beware: Our loot table package includes only the 5-tier loot tables within the Base_loot folder, ranging from easy to nightmare. It does not include the loot tables from the Difficulty_Loot or Weekday_Loot folders. VANILLA AND ENHANCED LOOT TABLES FOR RAIDABLE BASES This package includes 10 different base loot table files, ensuring a well-structured and advanced configuration for every difficulty level, from Easy to Nightmare. - 5 loot files for the Vanilla setup (Easy, Medium, Hard, Expert, Nightmare), offering a balanced loot experience with some junk items, staying close to a 1x rate. - 5 loot files for the Enhanced setup (Easy, Medium, Hard, Expert, Nightmare), designed for modded servers with 2x, 3x, or higher gather rates, featuring cleaner loot tables with minimal junk and more valuable rewards. Installation Path: All loot table files are intended for the /oxide/data/RaidableBases/Base_Loot directory. Setup Requirement: You must choose and install only one loot table setup at a time—either Vanilla or Enhanced. If you want to switch, you can replace the current files with the other set, but both cannot be active simultaneously. For those exclusively seeking the loot table, we offer it as a standalone product: https://codefling.com/customizations/raidable-bases-loot-tables-pack (Note: If you've purchased our Raidable Bases Mega Pack & Loot Tables (210 Bases) package, there is no need to buy this separately.) WARNING: TWO DIFFERENT INSTALLATION METHODS (PLEASE READ BOTH AND APPLY ONLY THE ONE THAT FITS YOUR NEEDS) INSTALLATION GUIDE 1: (If you do not have a custom configuration and are not a professional in server configurations, choose this option. However, if you already have your own configuration and profile settings and do not wish to use the optional configs we provide—in other words, if you only need the bases and loot tables—use the second installation guide instead.) ▶ Step 1: Place the Config File From the extracted ZIP files, locate the config folder and find the RaidableBases.json file. Move it to the following directory: /serverfiles/oxide/config ▶ Step 2: Place the Bases From the extracted ZIP files, locate the copypaste folder and move it to the following directory: /serverfiles/oxide/data ▶ Step 3: Place the Base_Loot Tables From the extracted ZIP files, locate the Base_Loot folder and move it to the following directory: /serverfiles/oxide/data/RaidableBases Important: If there are any existing JSON files inside this folder that are not part of our loot tables, delete them to ensure proper functionality. Choose between Vanilla or Enhanced loot tables based on your preference. If the folder is named "Base_Loot (Enhanced loot)", remove the text in parentheses so that the correct folder name is simply: "Base_Loot" (Otherwise, the loot tables will not work properly.) ▶ Step 4: Place the Profiles Folder From the extracted ZIP files, locate the profiles folder and move it to the following directory: /serverfiles/oxide/data/RaidableBases Why Are Profiles Important? The profiles folder contains crucial settings that allow you to: Enable/disable the dome Enable/disable NPCs Adjust the number of lootable items These are just a few examples—there are dozens of important settings that directly affect how raid bases function. The config file alone is not enough—these files play a major role in customizing your raid bases. I strongly recommend reviewing each difficulty setting (Easy to Nightmare) inside the profiles folder and adjusting them based on your needs. ▶ Step 5: Restart the plugin via RCON: o.reload RaidableBases INSTALLATION GUIDE 2: (Use this installation method if you do not want to use our configurations and instead prefer to use your own config files and your own /oxide/data/RaidableBases/Profiles configurations.) In this case, you only need to add the bases. To do this, use the following commands in RCON: ▶ Step 1: You can add bases one by one or in bulk. After executing the commands in RCON, the bases will be registered inside the Profiles configuration. If you do not want to deal with these adjustments, it is recommended to use Installation Guide 1 instead. A- Example RCON commands: rb.config add "Easy Bases" fullwipedeasy1 rb.config add "Hard Bases" fullwipedhard1 B- Commands to Integrate Raid Bases in Bulk via RCON: rb.config add "Easy Bases" fullwipedeasy1 fullwipedeasy2 fullwipedeasy3 fullwipedeasy4 fullwipedeasy5 fullwipedeasy6 fullwipedeasy7 fullwipedeasy8 fullwipedeasy9 fullwipedeasy10 fullwipedeasy11 fullwipedeasy12 fullwipedeasy13 fullwipedeasy14 fullwipedeasy15 fullwipedeasy16 fullwipedeasy17 fullwipedeasy18 fullwipedeasy19 fullwipedeasy20 fullwipedeasy21 fullwipedeasy22 fullwipedeasy23 fullwipedeasy24 fullwipedeasy25 fullwipedeasy26 fullwipedeasy27 fullwipedeasy28 fullwipedeasy29 fullwipedeasy30 fullwipedeasy31 fullwipedeasy32 fullwipedeasy33 fullwipedeasy34 fullwipedeasy35 fullwipedeasy36 fullwipedeasy37 fullwipedeasy38 fullwipedeasy39 fullwipedeasy40 fullwipedeasy41 fullwipedeasy42 fullwipedeasy43 fullwipedeasy44 fullwipedeasy45 fullwipedeasy46 fullwipedeasy47 fullwipedeasy48 fullwipedeasy49 fullwipedeasy50 fullwipedeasy51 fullwipedeasy52 fullwipedeasy53 fullwipedeasy54 fullwipedeasy55 fullwipedeasy56 fullwipedeasy57 fullwipedeasy58 fullwipedeasy59 fullwipedeasy60 fullwipedeasy61 fullwipedeasy62 fullwipedeasy63 fullwipedeasy64 fullwipedeasy65 fullwipedeasy66 fullwipedeasy67 fullwipedeasy68 fullwipedeasy69 fullwipedeasy70 rb.config add "Medium Bases" fullwipedmed1 fullwipedmed2 fullwipedmed3 fullwipedmed4 fullwipedmed5 fullwipedmed6 fullwipedmed7 fullwipedmed8 fullwipedmed9 fullwipedmed10 fullwipedmed11 fullwipedmed12 fullwipedmed13 fullwipedmed14 fullwipedmed15 fullwipedmed16 fullwipedmed17 fullwipedmed18 fullwipedmed19 fullwipedmed20 fullwipedmed21 fullwipedmed22 fullwipedmed23 fullwipedmed24 fullwipedmed25 fullwipedmed26 fullwipedmed27 fullwipedmed28 fullwipedmed29 fullwipedmed30 fullwipedmed31 fullwipedmed32 fullwipedmed33 fullwipedmed34 fullwipedmed35 fullwipedmed36 fullwipedmed37 fullwipedmed38 fullwipedmed39 fullwipedmed40 fullwipedmed41 fullwipedmed42 fullwipedmed43 fullwipedmed44 fullwipedmed45 fullwipedmed46 fullwipedmed47 fullwipedmed48 fullwipedmed49 fullwipedmed50 fullwipedmed51 fullwipedmed52 fullwipedmed53 fullwipedmed54 fullwipedmed55 fullwipedmed56 fullwipedmed57 fullwipedmed58 fullwipedmed59 fullwipedmed60 rb.config add "Hard Bases" fullwipedhard1 fullwipedhard2 fullwipedhard3 fullwipedhard4 fullwipedhard5 fullwipedhard6 fullwipedhard7 fullwipedhard8 fullwipedhard9 fullwipedhard10 fullwipedhard11 fullwipedhard12 fullwipedhard13 fullwipedhard14 fullwipedhard15 fullwipedhard16 fullwipedhard17 fullwipedhard18 fullwipedhard19 fullwipedhard20 fullwipedhard21 fullwipedhard22 fullwipedhard23 fullwipedhard24 fullwipedhard25 fullwipedhard26 fullwipedhard27 fullwipedhard28 fullwipedhard29 fullwipedhard30 fullwipedhard31 fullwipedhard32 fullwipedhard33 fullwipedhard34 fullwipedhard35 fullwipedhard36 fullwipedhard37 fullwipedhard38 fullwipedhard39 fullwipedhard40 fullwipedhard41 fullwipedhard42 fullwipedhard43 fullwipedhard44 fullwipedhard45 fullwipedhard46 fullwipedhard47 fullwipedhard48 fullwipedhard49 fullwipedhard50 fullwipedhard51 fullwipedhard52 fullwipedhard53 fullwipedhard54 fullwipedhard55 fullwipedhard56 fullwipedhard57 fullwipedhard58 fullwipedhard59 fullwipedhard60 rb.config add "Expert Bases" fullwipedexp1 fullwipedexp2 fullwipedexp3 fullwipedexp4 fullwipedexp5 fullwipedexp6 fullwipedexp7 fullwipedexp8 fullwipedexp9 fullwipedexp10 rb.config add "Nightmare Bases" fullwipednight1 fullwipednight2 fullwipednight3 fullwipednight4 fullwipednight5 fullwipednight6 fullwipednight7 fullwipednight8 fullwipednight9 fullwipednight10 ▶ Step 2: Place the Base_Loot Tables From the extracted ZIP files, locate the Base_Loot folder and move it to the following directory: /serverfiles/oxide/data/RaidableBases Important: If there are any existing JSON files inside this folder that are not part of our loot tables, delete them to ensure proper functionality. Choose between Vanilla or Enhanced loot tables based on your preference. If the folder is named "Base_Loot (Enhanced loot)", remove the text in parentheses so that the correct folder name is simply: "Base_Loot" (Otherwise, the loot tables will not work properly.) ▶ Step 3: Restart the plugin via RCON: o.reload RaidableBases EXTRA IMPORTANT INFORMATIONS: We do not use a dome, NPCs, or arena walls around raid bases on our servers, and in the ZIP file we provided, these features are also disabled by default. If you want to enable them, you will need to adjust the settings accordingly. For example, to enable the dome, follow the steps below: Navigate to: /oxide/data/RaidableBases/Profiles Open the files inside the Profiles folder with a text editor. Locate the following settings: (This is already set to false because it is required for markers to appear on the map.) "Spawn Silently (No Notification, No Dome, No Map Marker)": false, "Create Dome Around Event Using Spheres (0 = disabled, recommended = 5)": 0, Change the value from 0 to 5 as shown below: "Create Dome Around Event Using Spheres (0 = disabled, recommended = 5)": 5, Additionally, the loot amount for bases varies depending on the difficulty level (easy, medium, hard, expert, and nightmare). You can adjust this setting in the same Profiles location according to your needs: "Amount Of Items To Spawn": 210, For example, in medium bases, this value is set to 210, which determines the total number of items that will appear in crates, furnaces, and the cupboard. Our current configuration is specifically adjusted to prevent players from feeling overwhelmed by massive buildings right after a wipe. We have configured Maintained Events accordingly to ensure a balanced experience. In our setup: - Timed events and purchasable events are disabled. - After a wipe, easy bases will start spawning 30 minutes later. - Nightmare bases will begin spawning 48 hours (2 days) later. Imagine starting the game with just a torch in hand and immediately encountering a nightmare base on the shore. You’d likely quit the game right away—this setting is crucial for us to avoid such scenarios. Configuration Example: /serverfiles/oxide/config "Maintained Events": { "Always Maintain Max Events": true, "Max Maintained Events": 30, "Enable X Hours After Wipe (0 = immediately)": { "Easy": 0.5, "Medium": 1.0, "Hard": 3.0, "Expert": 24.0, "Nightmare": 48.0 All of our bases from Easy to Nightmare are equipped with turret protection. If you do not want turrets to spawn in your raidable bases on your server, you can use the following method. Go to the file path /data/RaidableBases/Profiles, open the JSON files inside with a text editor, and apply the following: "Kill These Prefabs After Paste": [ "assets/prefabs/npc/autoturret/autoturret_deployed.prefab", "autoturret_deployed" ], If you are satisfied with this package, you can support us by leaving a 5-star review on the site where you purchased it. Your feedback motivates us to continue improving and providing even better configurations for dedicated server owners like you. Thank you!$62.49 -
Version 3.2.4
59,958 downloads
Create fully automated raidable bases with NPCs in Rust. Raidable Bases supports maintained, scheduled, buyable and manually spawned events, with separate options for each difficulty. Compatibility notes server.pve true is not supported; please use TruePVE or another compatible PVE plugin that calls the necessary hooks required by Raidable Bases. Raidable Bases does not currently use Harmony patches. I could implement such patches, but it's often better to use a supported hook when it exists instead. Raidable Bases is not compatible with Raid Windows in Softcore mode after the Tool Cupboard is destroyed or after raidwindow_fresh_tc_seconds elapses. This will be supported when the appropriate hooks exist for this behavior. Raidable Bases & Boats Loot Editor by @beee This is the easiest way to create and manage Raidable Bases loot tables. It provides a visual editor for item selection, amounts, probability, skins and other loot fields, making it the best starting point for most server owners. https://codefling.com/tools/raidable-bases-boats-loot-editor/ Built with performance in mind Raidable Bases manages a lot of work behind the scenes, so performance is treated as a core part of development. Pasting and cleanup are batched, recurring work is shared through central schedulers, temporary collections are pooled, and spawn searches are spread across frames to reduce noticeable spikes. These systems help provide a smoother experience across a wide range of server sizes. Performance will continue to be reviewed and improved anywhere measurable gains can be made. There are just a few steps Get bases spawning within minutes An experienced administrator may finish in a few minutes. A novice should allow roughly 30 minutes, while a complete beginner may need 60 to 120 minutes. Fine-tuning depends on how large you want the project to become. Once the initial setup is complete, maintaining the plugin is fairly simple, and growing your base catalog becomes an art form of its own. Server owners regularly report that players love the variety, which makes building that collection rewarding for everyone involved. Step 1 - Add your bases You can obtain bases by: Downloading them from Fortify. Purchasing a Raidable Bases package. Purchasing compatible CopyPaste files from another creator. Creating your own bases. Place the CopyPaste JSON files in: Oxide — oxide/data/copypaste/ Carbon — carbon/data/copypaste/ Step 2 - Set up profiles Profiles serve a specific purpose: they extend the main configuration file. For clarity, they should always be referred to as profiles. Profiles are located in: Oxide — oxide/data/RaidableBases/Profiles/ Carbon — carbon/data/RaidableBases/Profiles/ Bases can be added manually or with the command: rb.config add "Easy Bases" raideasy1 raideasy2 raideasy3 rb.config add "Medium Bases" raidmed1 raidmed2 raidmed3 The named profile can contain any number of CopyPaste bases that share its options. Quotes around the profile name are required, and it is best practice to use them even when the name has no spaces. Use straight double quotes only; curly quotes will not work correctly. Step 3 - Enable automatic events For public automated events, enable Maintained Events or Scheduled Events in the main configuration and choose how many events you would like active. The main configuration file is located in: Oxide — oxide/config/RaidableBases.json Carbon — carbon/configs/RaidableBases.json Edit the configuration file. Maintained Events: keeps the configured number of raids available. Max Maintained Events: Set this to the amount of events that you want to always have spawned. Max Amount Allowed To Automatically Spawn Per Difficulty: Set this to the amount of events that you want to spawn per difficulty. Scheduled Events: spawns raids according to a timer. Max Scheduled Events: Set this to the amount of events that you want spawned on a timed basis. Max To Spawn At Once: Set this to the amount of events that can spawn at once from Max Scheduled Events. Set to 0 to use the full amount from Max Scheduled Events. Step 4 - Save your files then use the commands: Oxide: o.reload RaidableBases Carbon: c.reload RaidableBases Shortcuts: rb.reloadconfig rb.reloadprofiles Once grid initialization completes, automatic events can begin spawning. The included Default_Loot table is enough to get started and can be replaced whenever you are ready. Ultimately, the Default_Loot table should be discarded once your other loot tables are configured. File locations Main configuration Oxide: oxide/config/RaidableBases.json Carbon: carbon/configs/RaidableBases.json Profiles Oxide: oxide/data/RaidableBases/Profiles/ Carbon: carbon/data/RaidableBases/Profiles/ CopyPaste bases Oxide: oxide/data/copypaste/ Carbon: carbon/data/copypaste/ Loot and data Oxide: oxide/data/RaidableBases/ Carbon: carbon/data/RaidableBases/ The main configuration controls server-wide behavior. Profiles contain options for specific difficulties, while loot tables and CopyPaste files provide the content used by each event. Map terrain and spawn locations Raidable Bases depends on the map having enough flat, unobstructed terrain for automated events. Most procedural maps provide plenty of locations, while custom or heavily modified maps may need additional flat terrain, islands, or custom spawn points. The grid scans the map when the plugin initializes and reports the number of potential spawn locations. A low location count usually means the map offers fewer suitable areas or the current settings narrow the available terrain. Spawns Database files are useful for sky bases, underwater bases, custom maps and any setup that needs exact locations. You can disable using the grid by providing a valid spawn file for each raid type (buyable, maintained, scheduled and manual). You may view the grid by typing /rb grid in-game to view detailed drawings of all locations on the grid. X - Green - Potential spawn point, generally in clusters X - Red - Currently in use C - Cyan - Construction detected nearby TC - Yellow - TC detected nearby W - Blue - Water depth is too high - Refreshes on ocean level change Green clusters have the highest chance of being picked as a spawn point, constantly changing depending on player activity and remaining a safe distance away. Profiles and difficulties A profile is where options can be found that pertain to specific difficulties. Any number of CopyPaste bases can share the same profile, so a large base rotation can be managed while the difficulty is adjusted in one place. Profiles can control loot, NPCs, PVP or PVE behavior, protection radius, damage, doors, locks, water placement, height, rewards, building options and much more. Dynamic difficulties rb.difficulty add "Sky" rb.difficulty remove "Sky" Adding a difficulty creates the matching configuration and language entries. Profiles and loot tables can then be assigned to it. Removing a difficulty removes its active configuration entries without deleting the related files. Event types Maintained — Keeps up to the configured number of public raids available. Another can spawn after one despawns. Scheduled — Spawns public raids between the configured minimum and maximum interval. Buyable — Lets players purchase a raid through the configured buy command, subject to availability, costs and cooldowns. Manual — Lets an administrator spawn a selected raid at a chosen location. Each event type can use the automatic grid or its own Spawns Database file. Loot tables Loot can come from a base-specific table, difficulty table, weekday table and the default table. The plugin combines the available sources according to the profile and loot settings until it has enough usable entries. Default loot Default_Loot.json contains a small demonstration loot list. It is enough to show how the plugin works, but most servers should replace it with loot tables in the Base_Loot and/or Difficulty_Loot folders. Loot table editor For most servers, the Loot Table Editor by @beee is the quickest way to build and manage these files. Thanks, beee! https://codefling.com/tools/raidable-bases-boats-loot-editor/ Important loot fields shortname — Rust item shortname. amount — Maximum amount created for the entry. amountMin — Minimum amount created for the entry. probability — Spawn chance from 0.0 to 1.0, where 1.0 is 100%. stacksize — Optional stack-size override. Use -1 to use the item's normal Rust stack size. skin — Optional skin ID. Editable item lists The rb.populate all command creates a file for each difficulty inside the Editable_Lists folder. Each file contains every available Rust item, allowing you to remove unwanted entries and configure the amounts for items you would like to spawn. Any items with an amount set to 0 will be inactive, so you do not have to remove any entry. A list containing hundreds of items may look intimidating at first, but deleting unwanted entries or configuring from a preset list is usually much faster than adding every item manually. The command also includes items already present in your Difficulty_Loot files. This makes it useful when you want to rebuild a list and reevaluate which items should be available later. Files inside Editable_Lists are for editing only. Their contents need to be copied into an active loot file before the plugin will use them. To use Editable_Lists/Easy.json for Easy raids, copy its contents into Difficulty_Loot/Easy.json. To use Editable_Lists/Expert.json for a profile named Expert Bases, copy its contents into Base_Loot/Expert Bases.json. Item amounts and probability An item will not spawn when both amount and amountMin are set to 0. You may remove these entries or leave them in the file for later use. When amountMin is 0, probability determines whether the item spawns. If the item fails its probability check, another item will not automatically replace it unless additional eligible entries are available. Tool Cupboard loot Items moved into the Tool Cupboard may combine into larger stacks. The visible stack count can therefore be lower than the amount that was originally generated. Loot priority Loot is loaded from the data files inside: Oxide: oxide/data/RaidableBases/ Carbon: carbon/data/RaidableBases/ The Profiles folder is not a loot source. It contains the options used by each profile and difficulty. Please do not place any file in the Profiles folder that is not a profile, the hamsters will cry. Base Loot If a file inside Base_Loot has the same name as a profile, the bases assigned to that profile can use that loot table. For example: Base_Loot/Expert Bases.json applies to the profile named: Expert Bases Enable Always Spawn Base Loot Table in the profile when items from that table should always be included. Difficulty Loot Files inside Difficulty_Loot are selected according to the difficulty assigned to the profile. For example: Difficulty_Loot/Hard.json is used by profiles assigned to the Hard difficulty. Day of Week Loot When Use Day Of Week Loot is enabled, the plugin selects the loot table matching the current day. Default Loot Default_Loot.json acts as the fallback table. It is used when the other available loot tables do not provide enough eligible items to satisfy Amount Of Items To Spawn. Generally, this file should be discarded once Base Loot and Difficulty Loot tables have been created. NPCs Profiles include NPC options for scientists, murderers and sleepers. You can keep the defaults or tailor their amount, health, accuracy, kits, movement and loot to suit each difficulty. Valid Kits entries take priority over the matching manual loadout lists. NPCs spawned inside bases remain stationary, while outdoor NPCs can roam and engage players around the event. More NPCs naturally create more work, so busy servers may prefer to increase counts gradually. PVP, PVE, ownership and raid options Raid behavior is controlled by a combination of profile options and server-wide configuration. Together, these determine whether a raid is PVP or PVE and can control ownership, team or clan access, building, teleporting, cupboard access, damage across the dome, PVP delay, completion requirements and rewards. Ownership and participation Public raids can lock to the first attacker, while purchased raids can remain associated with their buyer. Players may become participants by damaging the base, killing NPCs, looting or using other supported raiding methods. PVP delay PVP delay can keep a player temporarily vulnerable after leaving a PVP raid. This discourages zone hopping across the event boundary to gain an unfair advantage on a PVE server, where normal protection would otherwise resume immediately after leaving. Buyable raids and shop plugins Buyable raids use the configured buy command, commonly /buyraid. A purchase can still be declined by cooldowns, ownership options, event limits, permissions, availability or the inability to find a suitable location. Using a shop plugin (support is not guaranteed) The shop should provide the buyraid command for free or at zero cost, while Raidable Bases handles the actual payment and any refund. This allows the plugin to safely return the payment when the raid cannot be created. Shop plugins that cannot sell the command at zero cost are not supported. buyraid 0 <steamid> The player placeholder depends on the shop plugin. Prices are configured in Raidable Bases and should remain zero in the external shop. If using a Tier Package of mine, the only requirement to use Buyable Events with the /buyraid command is to enable a cost per difficulty in the config file. These are not configured for obvious reasons; I don't know your servers economy. Config snippet: https://i.ibb.co/x8XW9Lbs/image.png Options that benefit from an explanation (the majority have names that are meant to be self-explanatory to save time) The complete configuration already lists every available option. This section only covers settings that are easier to understand with a little context. Advanced Protection Radius — Controls the event area used by domes, markers, damage checks, ejection, NPC ranges and nearby spawn checks. Configurable per event type: Buyable Events, Maintained Events, Manual Events, and Scheduled Events. Amount Of Items To Spawn — Sets the target amount of generated loot, limited by available entries from your loot tables and container space in each base. Divide Loot Into All Containers — Spreads generated loot across the raid's available containers. This does not serve much purpose when disabled, it is advised to keep it set to true. Create Dome Around Event Using Spheres — Creates the visible event boundary. Set to 0 to disable it. Spawn Silently — Hides the normal announcement, dome and map marker for the profile. Height Adjustment Applied To This Paste — Adds the same vertical offset whenever a base using this profile is pasted. Forced Height — Uses a fixed world height for controlled sky or special-event setups. Allow Players To Raid With Items Up To What Workbench Level? — Limits raiding items according to their workbench level. Water Settings — Controls floating, surface, underwater and seabed placement. Workbench-level option -1 — No workbench-level limit, future-proof where level 3 may be increased to 4 in a later Rust update. 0 — Allows raiding items that require no workbench. 1 — Allows items up to Workbench Level 1. 2 — Allows items up to Workbench Level 2. 3 — Allows items up to Workbench Level 3. The plugin checks the available workbench information for weapons, ammunition, attack entities and projectiles. A player is notified when the item being used exceeds the profile's allowed level. Commands and permissions Many command names are configurable. The examples below use their common defaults. /buyraid — Open or use the buyable raid system. /rb — View player-facing raid information and available subcommands. rbe [base] [difficulty] — Spawn a manual event using the configured event command. rb.config add "<profile>" <bases...> — Add CopyPaste bases that share the selected profile options. Straight quotes around the profile name are required. rb.config list — List configured bases. rb.config remove <base> — Remove a configured base from any profiles containing it. rb.config maintained — Toggle Maintained Events in the config on or off. rb.config scheduled — Toggle Scheduled Events in the config on or off. rb.toggle - Temporarily toggles events on or off, refreshing when toggled back on or when the plugin is reloaded again. rb.reloadconfig — Reload the main configuration. rb.reloadprofiles — Reload profiles. rb.reloadtables — Reload loot tables. rb.populate all — Create editable item reference lists. rb.difficulty add "name" — Create a new difficulty and its matching configuration entries. rb.difficulty remove "name" — Remove a difficulty from the active configuration without deleting its files. rbe despawn - Despawns the base you are nearest to. Use noclip or vanish to ensure other options do not block the despawn. Cannot be used while a base is pasting or being setup by the plugin, wait to use until after the event has started. Players do not require permissions by default. Administrative permissions are best limited to trusted administrators, moderators and staff only. raidablebases.allow — Allows player to use the available ADMIN commands. This is NOT recommended as players can use the commands 'buyraid' and 'rb' already. raidablebases.canbypass — Bypass dome restrictions. Noclip or vanish will bypass many features too, so you can assist players without interfering. raidablebases.blockbypass — Bypass Owning More Than One Raid settings for Clans/Friends/Teams raidablebases.mapteleport — Teleporting to map marker now simply requires this permission and to be enabled in config raidablebases.ddraw — Allows support for direct draw to players. raidablebases.config — Allows access to rb.config command in-game (server console does not require this permission) raidablebases.banned — Bans the user from entering any raids - accidentally banned yourself? Use /rb unban raidablebases.durabilitybypass — Bypass `Block Plugins Which Prevent Item Durability Loss` raidablebases.notitle — Exclude users from ranked title rewards raidablebases.buyraid — Optionally require this permission with `Use Permission (raidablebases.buyraid)` (not required by default) See other permissions using Permissions Manager (click the link to visit the page on Codefling) RBE DEBUG The RBE DEBUG command displays information related to the configuration, profiles, map and spawn checks. Using it before requesting support usually makes the cause much easier to identify. Too much information displayed at once? Not a problem, it is constantly recording data but the solution is very simple. Run RBE DEBUG once to enable it, then run it again to disable it and clear the previously recorded data. Next, attempt to spawn the raid using /buyraid or /rbevent Run RBE DEBUG again to view any newly recorded information. Do this promptly, as it will immediately continue to record. When you are finished, toggle it off by typing the command again. It will continue to output debug until it is turned off. Helpful information to include Raidable Bases and CopyPaste versions. The base filename, profile, difficulty and event type. The command used and relevant console output. Whether the same file works when pasted directly with CopyPaste. Map seed, size and whether the map is procedural or custom when the issue involves placement. Debug contains all relevant information to events, good or bad. Use this information to determine what is happening and how to resolve the issue on your own. Facepunch Terms of Service Raidable Bases includes safeguards designed to help servers remain compliant with Facepunch policies for paid DLC items and restricted cosmetic content. These safeguards may remove restricted deployables or loot and prevent unauthorized pickup. Server-owner responsibility Changes that disable or bypass these safeguards can place a server outside Facepunch policy. Custom loot tables, imported workshop skins, CopyPaste files and third-party content should be reviewed before use. Tools and further reference Community-made Facepunch content checker by ninco90: https://app.rustspain.com/facepunch/checkitems Loot Table Editor: https://codefling.com/tools/raidable-bases-boats-loot-editor/ Developer API Signatures reflect Raidable Bases 3.1.5 The following hooks receive this argument set: OnRaidableBaseStarted, OnRaidableBaseEnded, OnRaidableBasePrivilegeDestroyed, OnRaidableBaseDespawn, OnRaidableBaseDespawned and one overload of OnRaidableBaseCompleted and OnRaidableAwardOwner. Please note that unused args will be removed in a future update. object[] raidData = { Vector3 location, int level, bool allowPVP, string id, float unused1, float unused2, float loadTime, ulong ownerId, BasePlayer owner, List<BasePlayer> raiders, List<BasePlayer> intruders, List<BaseEntity> entities, string baseName, DateTime spawnDateTime, DateTime despawnDateTime, float protectionRadius, int lootRemaining }; OnPlayerPvpDelayStart, OnPlayerPvpDelayReset and OnPlayerPvpDelayExpired receive this argument set. object[] delayData = { BasePlayer player, ulong userid, int level, Vector3 location, bool allowPVP, string id, ulong ownerId, string baseName, DateTime spawnDateTime, DateTime despawnDateTime, int lootRemaining }; Event hooks void OnRaidableBaseStarted(Vector3 location, int level, bool allowPVP, string id, float unused1, float unused2, float loadTime, ulong ownerId, BasePlayer owner, List<BasePlayer> raiders, List<BasePlayer> intruders, List<BaseEntity> entities, string baseName, DateTime spawnDateTime, DateTime despawnDateTime, float protectionRadius, int lootRemaining) — Called when setup finishes. void OnRaidableBaseStarted(RandomBase rb) — Also called with the active spawn request. void OnRaidableBaseEnded(Vector3 location, int level, bool allowPVP, string id, float unused1, float unused2, float loadTime, ulong ownerId, BasePlayer owner, List<BasePlayer> raiders, List<BasePlayer> intruders, List<BaseEntity> entities, string baseName, DateTime spawnDateTime, DateTime despawnDateTime, float protectionRadius, int lootRemaining) — Called when the raid object is being released. void OnRaidableBaseDespawn(Vector3 location, int level, bool allowPVP, string id, float unused1, float unused2, float loadTime, ulong ownerId, BasePlayer owner, List<BasePlayer> raiders, List<BasePlayer> intruders, List<BaseEntity> entities, string baseName, DateTime spawnDateTime, DateTime despawnDateTime, float protectionRadius, int lootRemaining) — Called when despawn begins. void OnRaidableBaseDespawned(Vector3 location, int level, bool allowPVP, string id, float unused1, float unused2, float loadTime, ulong ownerId, BasePlayer owner, List<BasePlayer> raiders, List<BasePlayer> intruders, List<BaseEntity> entities, string baseName, DateTime spawnDateTime, DateTime despawnDateTime, float protectionRadius, int lootRemaining) — Called after entity cleanup completes. void OnRaidableBasePrivilegeDestroyed(Vector3 location, int level, bool allowPVP, string id, float unused1, float unused2, float loadTime, ulong ownerId, BasePlayer owner, List<BasePlayer> raiders, List<BasePlayer> intruders, List<BaseEntity> entities, string baseName, DateTime spawnDateTime, DateTime despawnDateTime, float protectionRadius, int lootRemaining) — Called when the primary Tool Cupboard is destroyed. void OnRaidableBaseCompleted(Vector3 location, int level, bool allowPVP, string id, float unused1, float unused2, float loadTime, ulong ownerId, BasePlayer owner, List<BasePlayer> raiders, List<BasePlayer> intruders, List<BaseEntity> entities, string baseName, DateTime spawnDateTime, DateTime despawnDateTime, float protectionRadius, int lootRemaining) — Called when the raid is completed. void OnRaidableBaseCompleted(Vector3 location, int level, bool allowPVP, ulong ownerId, List<ulong> raiders) — Completion overload containing eligible raider IDs. void OnRaidableAwardOwner(Vector3 location, int level, bool allowPVP, string id, float unused1, float unused2, float loadTime, ulong ownerId, BasePlayer owner, List<BasePlayer> raiders, List<BasePlayer> intruders, List<BaseEntity> entities, string baseName, DateTime spawnDateTime, DateTime despawnDateTime, float protectionRadius, int lootRemaining) — Called when the owner qualifies for awards. void OnRaidableAwardOwner(Vector3 location, int level, bool allowPVP, ulong ownerId, List<ulong> raiders) — Compact overload containing eligible raider IDs. void OnRaidableAwardGiven(string username, string userid, string serializedPlayerInfo) — Called after ranked-ladder data is updated. void OnRaidableDespawnUpdate(Vector3 location, int level, bool allowPVP, ulong ownerId, string baseName, float protectionRadius, int lootRemaining, DateTime despawnDateTime) — Called when the despawn time changes. void OnRaidableTurretsInitialized(List<AutoTurret> turrets, Vector3 location, float radius, int level, bool allowPVP, ulong ownerId) — Called after event turrets finish initialization. void OnPlayerEnteredRaidableBase(BasePlayer player, Vector3 location, bool allowPVP, int level, string id, float unused1, float unused2, float loadTime, ulong ownerId, string baseName, DateTime spawnDateTime, DateTime despawnDateTime, float protectionRadius, int lootRemaining) — Called when a player enters the event. void OnPlayerExitedRaidableBase(BasePlayer player, Vector3 location, bool allowPVP, int level, string id, float unused1, float unused2, float loadTime, ulong ownerId, string baseName, DateTime spawnDateTime, DateTime despawnDateTime, float protectionRadius, int lootRemaining) — Called when a player exits the event. void OnPlayerPvpDelayStart(BasePlayer player, ulong userid, string pluginName, int level, Vector3 location, bool allowPVP, string id, ulong ownerId, string baseName, DateTime spawnDateTime, DateTime despawnDateTime, int lootRemaining) — Called when PVP delay begins. void OnPlayerPvpDelayReset(BasePlayer player, ulong userid, string pluginName, int level, Vector3 location, bool allowPVP, string id, ulong ownerId, string baseName, DateTime spawnDateTime, DateTime despawnDateTime, int lootRemaining) — Called when an active PVP delay is refreshed. void OnPlayerPvpDelayExpired(BasePlayer player, ulong userid, string pluginName, int level, Vector3 location, bool allowPVP, string id, ulong ownerId, string baseName, DateTime spawnDateTime, DateTime despawnDateTime, int lootRemaining) — Called when PVP delay expires. Purchase, ownership, backpack, and other special hooks void OnRaidableBasePurchased(string userid, Vector3 location, string grid, int level, bool allowPVP, string baseName, DateTime spawnDateTime, DateTime despawnDateTime) — Called when a purchased raid is created. void OnRaidableBaseLocked(string userid, Vector3 location, string grid, int level, bool allowPVP, float loadTime, string baseName, DateTime spawnDateTime, DateTime despawnDateTime) — Called when a public raid becomes locked. void OnRaidableBaseUnlocked(string userid, Vector3 location, string grid, int level, bool allowPVP, string baseName, DateTime spawnDateTime, DateTime despawnDateTime) — Called when a raid unlocks. object OnRaidableResetPublicOwner(ulong ownerId, Vector3 location, float radius, List<BasePlayer> raiders, List<BaseEntity> entities, int level) — Return a non-null value to prevent the public owner reset. object OnRaidableResetPayLock(ulong ownerId, Vector3 location, float radius, List<BasePlayer> raiders, List<BaseEntity> entities, int level) — Return a non-null value to prevent the purchased lock reset. object OnRaidableBaseBackpackEject(DroppedItemContainer container, ulong playerSteamID, Vector3 location, bool allowPVP, int level, BasePlayer owner, List<BasePlayer> raiders, string baseName, bool playersLootable) — Return a non-null value to prevent Raidable Bases from ejecting the backpack. void OnRaidableBaseBackpackEjected(BasePlayer player, ulong playerSteamID, BaseEntity container, Vector3 location, bool allowPVP, int level, BasePlayer owner, List<BasePlayer> raiders, string baseName) — Called after a backpack or corpse container is ejected. object OnRaidablePlayerCorpseCreate(PlayerCorpse corpse, Vector3 location, bool allowPVP, int level, BasePlayer owner, List<BasePlayer> raiders, string baseName, bool playersLootable) — Return a non-null value to prevent Raidable Bases corpse handling. void OnRaidableLootDestroyed(Vector3 location, float radius, int lootRemaining, StorageContainer container, int level) — Called when a tracked loot container is destroyed. void OnRaidableBaseHint(BasePlayer player, Vector3 location, float radius, int level, int lootRemaining, BasePlayer owner, List<BasePlayer> raiders) — Called after loot hints are drawn. void OnRaidableTableLoaded(string filename, int count, string serializedLoot) — Called after a loot table is loaded. object OnRaidableNpcStrip(BasePlayer npc, int reason) — Return a non-null value to prevent inventory stripping. object OnBlockRaidableBasesTeleport(BasePlayer player, Vector3 location) — Return a non-null value to allow another plugin to override RB's teleport block. object CanRaidableBasesRemoveClutter(BaseEntity entity, Vector3 location, float radius, bool kill) — Return a non-null value to prevent clutter removal or ejection. object OnPurchaseBase(BasePlayer buyer, BasePlayer recipient) — Return a non-null value to stop the no-argument purchase flow. object OnPurchaseTakePayments(BasePlayer buyer, BasePlayer recipient, string value, string mode) — Return a non-null value to replace or stop the normal payment flow. float GetGridWaitTime() — Return a float to override the grid coroutine wait time. int GetGridWaitThreshold() — Return an int to override how many grid checks occur before yielding. Callable API methods bool AddLootToDifficultyProfile(string mode, List<object[]> lootObjects) — Adds loot entries to a difficulty profile. float GetSpawnHeight(Vector3 position, bool max = true, bool shouldSkipSmallRock = false, int mask = 8454145, BasePlayer player = null) — Returns the spawn height calculated by Raidable Bases. List<string> GetRaidableModes() — Returns the configured difficulty names. List<(string mode, int level)> GetAllDifficulties() — Returns difficulty names and numeric levels. bool HasPVPDelay(ulong userid) — Returns true while the player has an active PVP delay. int GetAllEventsCount() — Returns the total number of active raid objects. int GetActiveEventCount() — Returns the number of raids with progress. List<(Vector3 location, string mode, int level, bool allowPVP, string id, float unused1, float unused2, float unused3, ulong ownerId, BasePlayer owner, List<BasePlayer> raiders, List<BasePlayer> intruders, HashSet<BaseEntity> entities, string baseName, DateTime spawnDateTime, DateTime despawnDateTime, float protectionRadius, int lootRemaining)> GetAllEvents() — Returns information for all current raids. void GetAllEventsNonAlloc(List<(Vector3 location, string mode, int level, bool allowPVP, string id, float unused1, float unused2, float unused3, ulong ownerId, BasePlayer owner, List<BasePlayer> raiders, List<BasePlayer> intruders, HashSet<BaseEntity> entities, string baseName, DateTime spawnDateTime, DateTime despawnDateTime, float protectionRadius, int lootRemaining)> results) — Fills a supplied list with current raid information. bool EventTerritory(Vector3 position, float extra = 0f) — Returns true when the position is inside an event. bool EventTerritoryAny(Vector3[] positions, float extra = 0f) — Returns true when any supplied position is inside an event. bool EventTerritoryAll(Vector3[] positions, float extra = 0f) — Returns true when all supplied positions are inside events. List<BasePlayer> GetPlayersFrom(Vector3 position, float extra = 0f, bool intruders = false) — Returns raiders or intruders from the event at the position. BasePlayer GetOwnerFrom(Vector3 position, float extra = 0f) — Returns the owner of the event at the position.$40.00 -

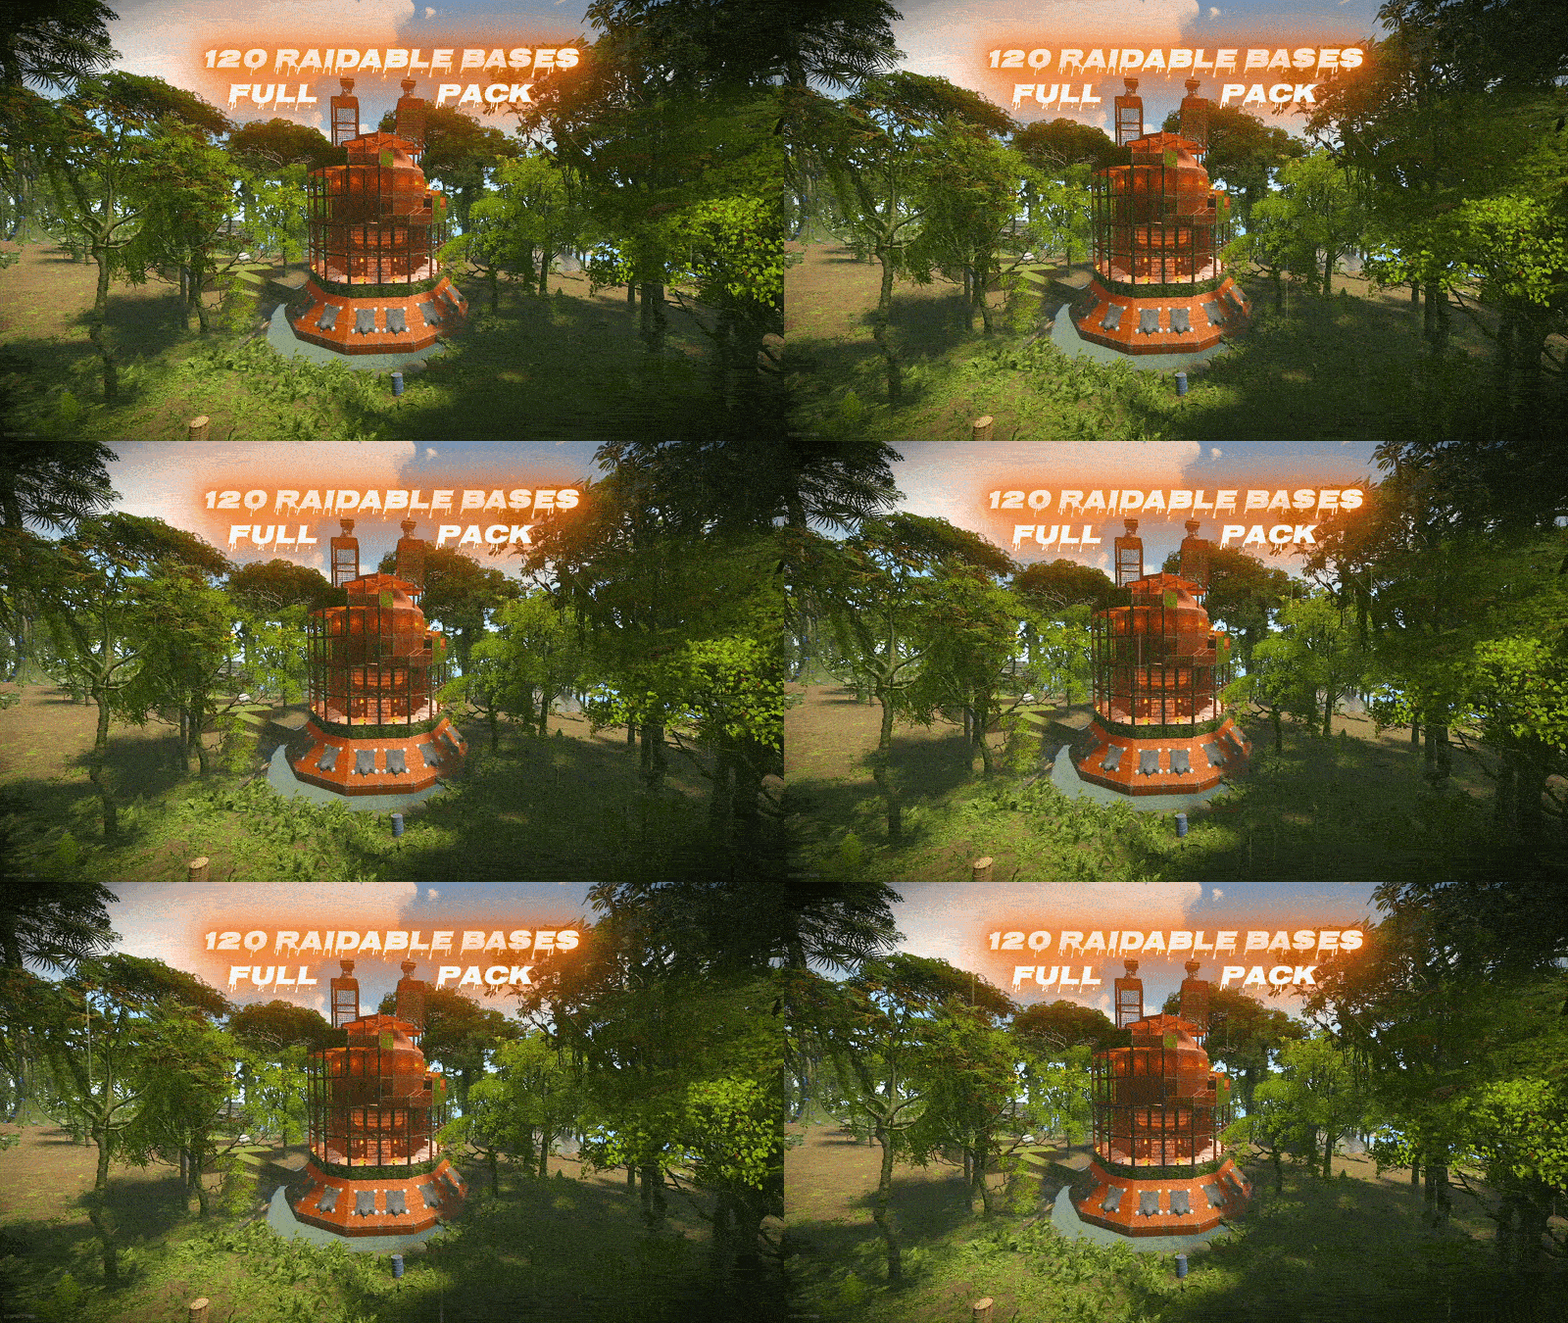
Version 1.0.0
22 downloads
Ready to level up your server’s raiding experience? This premium pack contains 120 unique, handcrafted, high quality raidable bases divided into 5 distinct difficulty tiers (Easy, Medium, Hard, Expert, and Nightmare). Every base was built manually in-game, saved with CopyPaste, and tested on a live server. The Easy and Medium bases are bigger and more challenging than usual, and 44 of the bases come in a festive Christmas style. Everything is 100% Plug & Play — no setup or editing required! What Makes This Pack Unique: 120 Custom Bases: Includes 35 Easy, 30 Medium, 30 Hard, 15 Expert, and 10 Nightmare bases. Complete Loot Table Set: A fully balanced loot table for every tier, tuned so each difficulty rewards properly without breaking your server’s economy. Bigger Easy & Medium Tiers: Around 280 and 340 entities each with real defences — far more challenging than the usual small starter raids. Fully Defended & Clever Layouts: Built with auto turrets, shotgun traps, flame turrets, SAM sites, land mines, and tesla coils. Some bases feature hidden traps crafted with EditTool so raiders can’t easily spot every defense. Visual Variety & Heavy Challenge: Higher tiers utilize mostly Metal and HQM building grades along with custom skinned blocks and deployables. 44 bases come in a festive Christmas style. Paste-Tested: All 120 base files were checked and corrected one by one, so nothing collapses or goes missing when a base spawns. Plug & Play Setup: Pre-configured profiles and main plugin settings included. Just copy, paste, and reload! Important! - In case that you are buying this pack to update your server, contact me, and after buying the pack I can rename the bases special for you, and will send the updated profiles so you won’t lose any time. How to Install (Step-by-Step): Setting this up on your server takes less than 2 minutes: Base Files: Extract all .json files from all subfolders (copypaste/Easy/, Medium/, etc.) and place them directly into oxide/data/copypaste/. (Do not copy subfolders, only the files inside them!) Loot Tables: Copy all 5 .json files from Difficulty_Loot/ into oxide/data/RaidableBases/Difficulty_Loot/. Default Loot: Replace oxide/data/RaidableBases/Default_Loot.json with the empty one included. The plugin mixes this file into every difficulty, so emptying it keeps the loot exactly as balanced. (Optional, but recommended!) Profiles: Copy all files from Profiles/ into oxide/data/RaidableBases/Profiles/. Plugin Config (Optional): If you want to use the included custom config, copy config/RaidableBases.json into oxide/config/. (Note: This will overwrite your existing config!) Reload: Run o.reload RaidableBases in your server console. Requirements: This pack requires an Oxide/uMod Rust server with the paid RaidableBases plugin (by nivex) and the CopyPaste plugin installed. The bases work well. The only thing is that a few of them have lower stability by design, so "stability": "false" needs to be set in the profile’s CopyPaste Options — otherwise those parts can drop after pasting. It’s already set that way in all the profiles that come with the pack, so there’s nothing to do on your side. IMPORTANT: Remove Stone Walls (Enclosures): By default, the plugin spawns a giant stone wall around bases. To remove it: Open oxide/config/RaidableBases/Profiles/Easy.json Find the "Arena Walls" section and change "Enabled" to false: "Arena Walls": { "Enabled": false, ... } Run command: rb.reload in console. Loot Hints (enabled by default): Players type /rb hint and the containers that still hold loot are drawn for them — very useful on the big Hard, Expert and Nightmare bases. To turn it off: "Loot Hints": { "Enabled (/rb hint)": false, "Required Loot Percentage To See Loot Left": 85.0, ... } In Case that you feel that it's too much loot: Open oxide/config/RaidableBases/Profiles/Easy.json or any tother Difficulty "Amount Of Items To Spawn": 120, Change the Amount Of Items to a lower number. Modifying Base Despawn Timers: If you want to change how long a base stays on the map before disappearing, find these lines under "Raid Management" in config: "Minutes Until Despawn After Looting (min: 1)": 15, "Minutes Until Despawn After Inactive (0 = disabled)": 45 Controlling Automatically Maintained Events: It's spawning 6 bases at every 30 mins - 1h 30 mins, randomly. Easy & Medium got higher chances to spawn. Takes 30 seconds per base to spawn so it's not going to make the server to lag. "Always Maintain Max Events": true, "Max Maintained Events": 6 NPCs: Default is 1+1 on Easy up to 3+3 on Nightmare. Raise these for a harder fight: "NPCs": { "Enabled": true, "Amount Of Scientists To Spawn": 2, "Minimum Amount Of Scientists To Spawn": 2, "Amount Of Murderers To Spawn": 2, "Minimum Amount Of Murderers To Spawn": 2, ... } Auto-Cooking & Sorting (Furnace & Base Sorting): If you want to know how the pack automatically moves resources or food into the right containers when a base spawns, look for these options under "Raid Management" in config: "Move Cookables Into Ovens": true, "Move Food Into BBQ Or Fridge": true, "Move Resources Into Tool Cupboard": true, "Move Items Into Lockers": true Turning Lights and Furnaces On Automatically: "Turn Lights On At Night": true, "Turn Lights On Indefinitely": true, "Furnace Starting Fuel": 1000 Automatic Chat Announcements: If you want the entire server to know when a new raid has appeared on the map, look for "Event Messages" in config: "Announce Buy Base Messages": false, "Show Opened Message For PVE Bases": true, "Show Opened Message For PVP Bases": true Manual Base Registration (Console Commands) If you already have existing bases and do not want to overwrite your profiles, run these commands in your server console (F1 or RCON) to add all 120 bases manually, then run o.reload RaidableBases: (Important! - In case that you are buying this pack to update your server, contact me, and after buying the pack I can rename the bases special for you, and will send the updated profiles so you won’t lose any time.) rb.config add "Easy Bases" Easy easy1 easy2 easy3 easy4 easy5 easy6 easy7 easy8 easy9 easy10 rb.config add "Easy Bases" easy11 easy12 easy13 easy14 easy15 easy16 easy17 easy18 easy19 easy20 rb.config add "Easy Bases" easy21 easy22 easy23 easy24 easy25 easy26 easy27 easy28 easy29 easy30 rb.config add "Easy Bases" easy31 easy32 easy33 easy34 easy35 rb.config add "Medium Bases" Medium medium1 medium2 medium3 medium4 medium5 medium6 medium7 medium8 medium9 medium10 rb.config add "Medium Bases" medium11 medium12 medium13 medium14 medium15 medium16 medium17 medium18 medium19 medium20 rb.config add "Medium Bases" medium21 medium22 medium23 medium24 medium25 medium26 medium27 medium28 medium29 medium30 rb.config add "Hard Bases" Hard hard1 hard2 hard3 hard4 hard5 hard6 hard7 hard8 hard9 hard10 rb.config add "Hard Bases" hard11 hard12 hard13 hard14 hard15 hard16 hard17 hard18 hard19 hard20 rb.config add "Hard Bases" hard21 hard22 hard23 hard24 hard25 hard26 hard27 hard28 hard29 hard30 rb.config add "Expert Bases" Expert expert1 expert2 expert3 expert4 expert5 expert6 expert7 expert8 expert9 expert10 rb.config add "Expert Bases" expert11 expert12 expert13 expert14 expert15 rb.config add "Nightmare Bases" Nightmare nightmare1 nightmare2 nightmare3 nightmare4 nightmare5 nightmare6 nightmare7 nightmare8 nightmare9 nightmare10 Optimized NPCs The number of NPCs is fully optimized for each difficulty tier — from 1 scientist and 1 murderer on Easy up to 3 and 3 on Nightmare. You can find and tweak these balanced guard configurations inside the Profiles/ folder. A Note From Me Hello and welcome! I’ve put my heart and countless hours into creating Raidable Bases Pack 3. Everything was built by me from scratch on my online server. I am incredibly proud of this project — especially the bigger, more challenging Easy and Medium tiers, and the festive Christmas-style builds. In case that you want to see few of my bases by urself, contact me and I will join on my public server and will spawn some of them, the ip: 148.251.177.248:28020 Why only $25? A pack with 120 custom, fully tested bases easily goes for more on the market. But as a former server owner myself, I know how hard and expensive it is to find high-quality setups that don’t break the bank. I wanted to keep it at a fair, accessible price while giving you top-tier quality for your server! Support the Work If you love this pack, please consider leaving a 5-star review! Your feedback means the world to me and motivates me to keep building and improving future packs. Thank you for your support, and happy raiding!$25.00 -
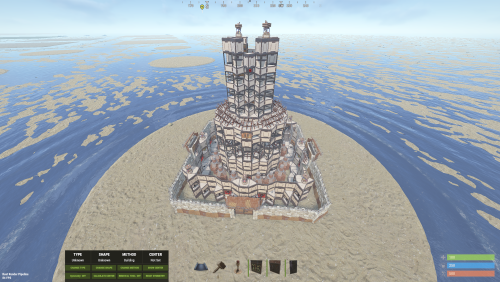
Version 1.0.0
6 downloads
Hello! This is a pack of 15 bases created for everyone who wants to try out and explore our bases. We’ve made it available at a very low price so everyone can afford to download and test them. Please note: This is NOT the Raidable Bases plugin. It is a pack of bases designed for raiding!$0.99 -
Version 1.0.0
5 downloads
Ready to bring Christmas to your server’s raiding experience? This seasonal pack contains 75 unique, handcrafted, high quality raidable bases divided into 5 distinct difficulty tiers (Easy, Medium, Hard, Expert, and Nightmare). Every base was built manually in-game, saved with CopyPaste, and tested on a live server. All 75 bases are fully decorated in a festive Christmas style. The Easy and Medium bases are bigger and more challenging than usual. Everything is 100% Plug & Play — no setup or editing required! What Makes This Pack Unique: 75 Custom Bases: Includes 20 Easy, 15 Medium, 15 Hard, 15 Expert, and 10 Nightmare bases. Decorated By Hand: 8,159 string lights, 80 christmas trees and 55 snowmen placed one by one across the pack. Not a filter or a reskin — the decorations are part of every build. Complete Loot Table Set: A fully balanced loot table for every tier, tuned so each difficulty rewards properly without breaking your server’s economy. Fully Defended & Clever Layouts: Built with auto turrets, shotgun traps, flame turrets, SAM sites, land mines. A Real Difficulty Curve: An Easy base is a quick starter raid at around 270 entities. The toughest Nightmare fortress runs to 1,790 entities with 114 traps and turrets across multiple levels. Visual Variety & Heavy Challenge: Higher tiers are built mostly in Metal and HQM. Paste-Tested: All 75 base files were checked and corrected one by one, so nothing collapses, explodes or goes missing when a base spawns. Plug & Play Setup: Pre-configured profiles and main plugin settings included. Just copy, paste, and reload! Important! — In case that you are buying this pack to update your server, contact me, and after buying the pack I can rename the bases special for you, and will send the updated profiles so you won’t lose any time. How to Install (Step-by-Step): Setting this up on your server takes less than 2 minutes: Base Files: Extract all 75 .json files from all subfolders (copypaste/Easy/, Medium/, etc.) and place them directly into oxide/data/copypaste/. (Do not copy subfolders, only the files inside them! The plugin does not look inside subfolders — the profiles reference the bases as easy1, medium1 and so on, with no folder prefix.) Loot Tables: Copy all 5 .json files from Difficulty_Loot/ into oxide/data/RaidableBases/Difficulty_Loot/. Default Loot: Replace oxide/data/RaidableBases/Default_Loot.json with the empty one included. The plugin mixes this file into every difficulty, so emptying it keeps the loot exactly as balanced. (Optional, but recommended!) Profiles: Copy all files from Profiles/ into oxide/data/RaidableBases/Profiles/. Keep the filenames exactly as they are, spaces included — “Easy Bases.json”, not “EasyBases.json”. Plugin Config (Optional): If you want to use the included custom config, copy config/RaidableBases.json into oxide/config/. (Note: This will overwrite your existing config!) Reload: Run o.reload RaidableBases in your server console. For later changes you can use rb.reloadconfig, rb.reloadprofiles and rb.reloadtables instead, without reloading the whole plugin. Requirements: This pack requires an Oxide/uMod Rust server with the paid RaidableBases plugin (by nivex) and the CopyPaste plugin installed. The bases work well. The only thing is that a few of them have lower stability by design, so "stability": "false" should be set in the profile’s CopyPaste Options. It’s already set that way in all the profiles that come with the pack, so there’s nothing to do on your side. IMPORTANT: Remove Stone Walls (Enclosures): By default, the plugin spawns a giant stone wall around bases. To remove it: Open oxide/config/RaidableBases/Profiles/Easy.json Find the "Arena Walls" section and change "Enabled" to false: "Arena Walls": { "Enabled": false, ... } Run command: rb.reload in console. Loot Hints (enabled by default): Players type /rb hint and the containers that still hold loot are drawn for them — very useful on the big Hard, Expert and Nightmare bases. To turn it off: "Loot Hints": { "Enabled (/rb hint)": false, "Required Loot Percentage To See Loot Left": 85.0, ... } In Case that you feel that it's too much loot: Open oxide/config/RaidableBases/Profiles/Easy.json or any tother Difficulty "Amount Of Items To Spawn": 185, Change the Amount Of Items to a lower number. Modifying Base Despawn Timers: If you want to change how long a base stays on the map before disappearing, find these lines under "Raid Management" in config: "Minutes Until Despawn After Looting (min: 1)": 15, "Minutes Until Despawn After Inactive (0 = disabled)": 45 Controlling Automatically Maintained Events: It's spawning 6 bases at every 30 mins - 1h 30 mins, randomly. Easy & Medium got higher chances to spawn. Takes 30 seconds per base to spawn so it's not going to make the server to lag. "Always Maintain Max Events": true, "Max Maintained Events": 6 NPCs: Default is 1+1 on Easy up to 3+3 on Nightmare. Raise these for a harder fight: "NPCs": { "Enabled": true, "Amount Of Scientists To Spawn": 2, "Minimum Amount Of Scientists To Spawn": 2, "Amount Of Murderers To Spawn": 2, "Minimum Amount Of Murderers To Spawn": 2, ... } Auto-Cooking & Sorting (Furnace & Base Sorting): If you want to know how the pack automatically moves resources or food into the right containers when a base spawns, look for these options under "Raid Management" in config: "Move Cookables Into Ovens": true, "Move Food Into BBQ Or Fridge": true, "Move Resources Into Tool Cupboard": true, "Move Items Into Lockers": true Turning Lights and Furnaces On Automatically: "Turn Lights On At Night": true, "Turn Lights On Indefinitely": true, "Furnace Starting Fuel": 1000 Automatic Chat Announcements: If you want the entire server to know when a new raid has appeared on the map, look for "Event Messages" in config: "Announce Buy Base Messages": false, "Show Opened Message For PVE Bases": true, "Show Opened Message For PVP Bases": true Manual Base Registration (Console Commands) If you already have existing bases and do not want to overwrite your profiles, run these commands in your server console (F1 or RCON) to add all 75 bases manually, then run o.reload RaidableBases: (Important! - In case that you are buying this pack to update your server, contact me, and after buying the pack I can rename the bases special for you, and will send the updated profiles so you won’t lose any time.) rb.config add “Easy Bases” Easy easy1 easy2 easy3 easy4 easy5 easy6 easy7 easy8 easy9 easy10 rb.config add “Easy Bases” easy11 easy12 easy13 easy14 easy15 easy16 easy17 easy18 easy19 easy20 rb.config add “Medium Bases” Medium medium1 medium2 medium3 medium4 medium5 medium6 medium7 medium8 medium9 medium10 rb.config add “Medium Bases” medium11 medium12 medium13 medium14 medium15 rb.config add “Hard Bases” Hard hard1 hard2 hard3 hard4 hard5 hard6 hard7 hard8 hard9 hard10 rb.config add “Hard Bases” hard11 hard12 hard13 hard14 hard15 rb.config add “Expert Bases” Expert expert1 expert2 expert3 expert4 expert5 expert6 expert7 expert8 expert9 expert10 rb.config add “Expert Bases” expert11 expert12 expert13 expert14 expert15 rb.config add “Nightmare Bases” Nightmare nightmare1 nightmare2 nightmare3 nightmare4 nightmare5 nightmare6 nightmare7 nightmare8 nightmare9 nightmare10 Optimized NPCs The number of NPCs is fully optimized for each difficulty tier — from 1 scientist and 1 murderer on Easy up to 3 and 3 on Nightmare. You can find and tweak these balanced guard configurations inside the Profiles/ folder. A Note From Me Hello and welcome! I’ve put my heart and countless hours into creating this Christmas pack. Everything was built by me from scratch on my online server, and every single one of the 75 bases was decorated by hand — the lights, the trees, the snowmen, all placed one at a time. In case that you want to see few of my bases by urself, contact me and I will join on my public server and will spawn some of them, the ip: 148.251.177.248:28020 Why only $17? Seasonal content has a short window, and I would rather have it running on your server this December than sitting unsold. As a former server owner myself, I know how hard and expensive it is to find high-quality setups that don’t break the bank. Everything is tested and plug & play, at a price that makes it an easy decision. Support the Work If you love this pack, please consider leaving a 5-star review! Your feedback means the world to me and motivates me to keep building and improving future packs. Thank you for your support, and Merry Christmas! Happy raiding!$17.00 -
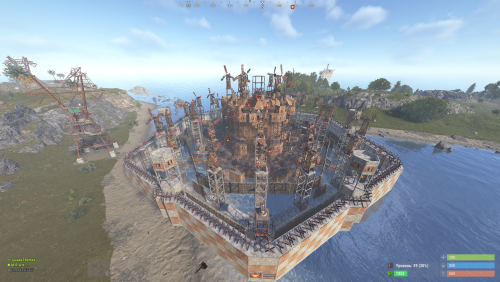
Version 1.0.1
14 downloads
About RaidableBases By JaaaaaThomas (79 Bases Clan Pack ) CLAN BASES | Big-PACK (Tier 6) — Updated 01.07.2026 If you find the price too high, you can click on 'Price History' and set up an alert for your desired price! We will see this, and you will receive a notification when it reaches your target price, or if our team decides to, we may be able to offer you your desired price individually. This is the ultimate Big-Pack featuring 79 elite Tier 6 clan bases, containing every single Tier 6 design created up until today (01.08.2026). Want the ultimate power of a mega-clan fortress? This exclusive Big-Pack features 79 of our most elite, top-tier designs, perfect for server owners who want maximum quality and a massive, complete collection. Why this Big-Pack? The Complete Tier 6 Collection: This pack includes all 79 high-performance clan bases created up to 01.08.2026, defining the absolute current meta. Pro-Level Defense: Each base features advanced architectural engineering like multi-TC coverage, wide-gap shooting floors, and unlootable room designs. Cost-Effective: Get the absolute best professional building designs at a fraction of the individual price. Perfect for Events: Ideal for server owners looking to host massive, high-stakes Raidable Base events. The "Raid Luck" Experience What makes this Big-Pack unique is the variable difficulty. We have intentionally included a diverse mix of designs: The Strategic Trap: Some bases might appear easier at first glance but hide complex pathing, dead ends, and deceptive honeycombing. The Hardened Fortress: Others are pure nightmares of steel and high-quality metal, built to withstand hours of constant, heavy raiding. Your Luck, Your Raid: It all depends on your luck! You might encounter a "softer" target or a "brick wall" fortress. This variety keeps your players on their toes and ensures no two raids ever feel the same. The Element of Surprise: Deceptive Shells You might notice that some bases in this pack share a similar exterior—and that is strictly by design. We created these "twin" structures to solve a common problem for server owners: Predictability. If a player raids the same base design multiple times, they learn exactly where the loot is hidden. To counter this, we’ve developed Deceptive Interiors: Identical Outsides: Keeps raiders guessing from the very start. They won’t know which version they are facing until they blow the first door. Completely Different Internals: While the shells look the same, the pathing, loot room locations, TC spots, and trap placements are entirely different. Anti-Meta Tech: This forces raiders to actually scout and spend resources instead of relying on memory. Don't let them raid with their eyes closed. Keep your players on their toes with our unpredictable layouts! 🛠 Technical Specs Quantity: 79 Full Elite Clan Bases (The complete Tier 6 collection up to 01.08.2026). Format: Fully compatible with the CopyPaste plugin (.json files). Optimization: Professionally tested for stability, entity count, and raiding flow to ensure the best player experience without lagging your server. Important Reminder This is a Base Model Pack (.json files) and Loot Tables. It is NOT the Raidable Bases plugin script itself. These are the premium blueprints crafted by our professional building team. Level Up Your Server Don't settle for basic cubes. Give your players a challenge they’ll never forget. Whether you're looking for a "Hardcore" wipe event or permanent fortresses for your top clans, these 79 bases are built to dominate. [ Buy Now & Start Building]$79.99 -
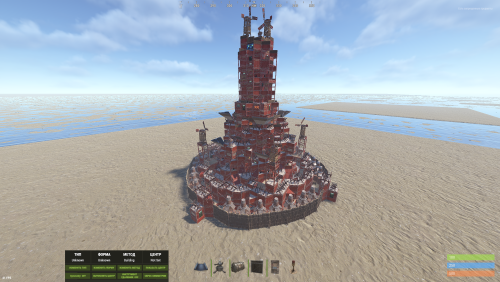
Version 1.0.7
26 downloads
460 New Raidable Bases by JaaaaaThomas Hello everyone, I’m excited to present a brand new base pack! I’ve put a lot of hard work into this project and I hope you’ll appreciate the quality. THE PACK IS NOW COMPLETE The pre-order is finished, and all 460 bases have been uploaded to the package successfully. A big thank you to everyone who trusted us and supported us from the start. You made this possible! The pack is now full, so you get everything in one download. What Makes This Pack Different? This massive package includes a total of 460 raid-ready bases distributed across all difficulty tiers to ensure a well-balanced progression: Level 1 (Easy): 150 bases (150/150 - complete) Level 2 (Medium): 150 bases (150/150 - complete) Level 3 (Hard): 100 bases (100/100 - complete) Level 4 (Expert): 20 bases (20/20 - complete) Level 5 (Nightmare): 20 bases (20/20 - complete) Level 6 (Clan Bases): 20 bases (20/20 - complete) Why Choose Us? Structured Progression: A massive variety of bases ranging from beginner tiers to extreme challenges and the exclusive Clan Base tier. Realistic Rust Design: Built to look and feel like a real player lives in them. No empty boxes or laggy, useless decoration spam. 100% Original Designs: Fresh architecture you won’t find anywhere else. Superior Quality: Crafted professionally by an experienced building team. Important Reminder This is a Base Model Pack (.json files). It is NOT the Raidable Bases plugin script. These are the blueprints crafted by our professional building team. Level Up Your Server Don’t settle for basic cubes. Give your players a challenge they’ll never forget. Whether you’re looking for a progressive event setup or a permanent fortress for your top clan, these bases are built to dominate. I hope you enjoy these builds! If you’re satisfied, please leave a positive review, it helps a lot. Also, if you have any suggestions for future updates, feel free to leave a comment below! Thank you! [ Get the Complete Pack Now ]$50.00 -
Version 1.0.4
73 downloads
Ready to level up your server's raiding experience? This premium pack contains 300 unique, handcrafted raidable bases divided into 5 distinct difficulty tiers (Easy, Medium, Hard, Expert, and Nightmare). Every base was built manually in-game, saved with CopyPaste, and tested on a live server. Everything is 100% Plug & Play — no setup or editing required! What Makes This Pack Unique: 300 Custom Bases: Includes 100 Easy, 100 Medium, 40 Hard, 30 Expert, and 30 Nightmare bases. 2 Complete Loot Table Sets: Choose between Difficulty_Loot (higher amounts for modded/high-rate servers) or Difficulty_Loot2 (lower amounts for vanilla-style servers). Fully Defended & Clever Layouts: Built with auto turrets, shotgun traps, flame turrets, SAM sites, land mines, and tesla coils. Some bases feature hidden traps crafted with EditTool so raiders can't easily spot every defense. Visual Variety & Heavy Challenge: Higher tiers utilize mostly Metal and HQM building grades along with custom skinned blocks and deployables. Plug & Play Setup: Pre-configured profiles and main plugin settings included. Just copy, paste, and reload! Important! - In case that you are buying this pack to update your server, contact me, and after buying the pack I can rename the bases special for you, and will send the updated profiles so you won't lose any time. How to Install (Step-by-Step): Setting this up on your server takes less than 2 minutes: Base Files: Extract all .json files from all subfolders (copypaste/Easy/, Medium/, etc.) and place them directly into oxide/data/copypaste/. (Do not copy subfolders, only the files inside them!) Loot Tables: Pick ONE of the loot folders (Difficulty_Loot/ for higher rewards or Difficulty_Loot2/ for lower rewards). Copy all 5 .json files into oxide/data/RaidableBases/Difficulty_Loot/. (Do not copy both!) Profiles: Copy all files from Profiles/ into oxide/data/RaidableBases/Profiles/. Plugin Config (Optional): If you want to use the included custom config, copy config/RaidableBases.json into oxide/config/. (Note: This will overwrite your existing config!) Reload: Run o.reload RaidableBases in your server console. Requirements: This pack requires an Oxide/uMod Rust server with the paid RaidableBases plugin (by nivex) and the CopyPaste plugin installed. IMPORTANT: Remove Stone Walls (Enclosures): By default, the plugin spawns a giant stone wall around bases. To remove it: Open oxide/config/RaidableBases/Profiles/Easy.json Find the "Arena Walls" section and change "Enabled" to false: "Arena Walls": { "Enabled": false, ... } Run command: rb.reload in console. In Case that you feel that it's too much loot: Open oxide/config/RaidableBases/Profiles/Easy.json or any tother Difficulty "Amount Of Items To Spawn": 45, A tip from me, I would rather put a little bit more loot in the profiles, so the players wil have a better gameplay. Change the Amount Of Items to a lower number. Modifying Base Despawn Timers: If you want to change how long a base stays on the map before disappearing, find these lines under "Raid Management" in config: "Minutes Until Despawn After Looting (min: 1)": 15, "Minutes Until Despawn After Inactive (0 = disabled)": 45 Controlling Automatically Maintained Events: It's spawning 6 bases at every 30 mins - 1h 30 mins, randomly. Easy & Medium got higher chances to spawn. Takes 30 seconds per base to spawn so it's not going to make the server to lag. "Always Maintain Max Events": true, "Max Maintained Events": 6 Auto-Cooking & Sorting (Furnace & Base Sorting): If you want to know how the pack automatically moves resources or food into the right containers when a base spawns, look for these options under "Raid Management" in config: "Move Cookables Into Ovens": true, "Move Food Into BBQ Or Fridge": true, "Move Resources Into Tool Cupboard": true, "Move Items Into Lockers": true Turning Lights and Furnaces On Automatically: "Turn Lights On At Night": true, "Turn Lights On Indefinitely": true, "Furnace Starting Fuel": 1000 Automatic Chat Announcements: If you want the entire server to know when a new raid has appeared on the map, look for "Event Messages" in config: "Announce Buy Base Messages": false, "Show Opened Message For PVE Bases": true, "Show Opened Message For PVP Bases": true Manual Base Registration (Console Commands) If you already have existing bases and do not want to overwrite your profiles, run these commands in your server console (F1 or RCON) to add all 300 bases manually, then run o.reload RaidableBases: (Important! - In case that you are buying this pack to update your server, contact me, and after buying the pack I can rename the bases special for you, and will send the updated profiles so you won't lose any time.) rb.config add "Easy Bases" easy1 easy2 easy3 easy4 easy5 easy6 easy7 easy8 easy9 easy10 rb.config add "Easy Bases" easy11 easy12 easy13 easy14 easy15 easy16 easy17 easy18 easy19 easy20 rb.config add "Easy Bases" easy21 easy22 easy23 easy24 easy25 easy26 easy27 easy28 easy29 easy30 rb.config add "Easy Bases" easy31 easy32 easy33 easy34 easy35 easy36 easy37 easy38 easy39 easy40 rb.config add "Easy Bases" easy41 easy42 easy43 easy44 easy45 easy46 easy47 easy48 easy49 easy50 rb.config add "Easy Bases" easy51 easy52 easy53 easy54 easy55 easy56 easy57 easy58 easy59 easy60 rb.config add "Easy Bases" easy61 easy62 easy63 easy64 easy65 easy66 easy67 easy68 easy69 easy70 rb.config add "Easy Bases" easy71 easy72 easy73 easy74 easy75 easy76 easy77 easy78 easy79 easy80 rb.config add "Easy Bases" easy81 easy82 easy83 easy84 easy85 easy86 easy87 easy88 easy89 easy90 rb.config add "Easy Bases" easy91 easy92 easy93 easy94 easy95 easy96 easy97 easy98 easy99 easy100 rb.config add "Medium Bases" medium1 medium2 medium3 medium4 medium5 medium6 medium7 medium8 medium9 medium10 rb.config add "Medium Bases" medium11 medium12 medium13 medium14 medium15 medium16 medium17 medium18 medium19 medium20 rb.config add "Medium Bases" medium21 medium22 medium23 medium24 medium25 medium26 medium27 medium28 medium29 medium30 rb.config add "Medium Bases" medium31 medium32 medium33 medium34 medium35 medium36 medium37 medium38 medium39 medium40 rb.config add "Medium Bases" medium41 medium42 medium43 medium44 medium45 medium46 medium47 medium48 medium49 medium50 rb.config add "Medium Bases" medium51 medium52 medium53 medium54 medium55 medium56 medium57 medium58 medium59 medium60 rb.config add "Medium Bases" medium61 medium62 medium63 medium64 medium65 medium66 medium67 medium68 medium69 medium70 rb.config add "Medium Bases" medium71 medium72 medium73 medium74 medium75 medium76 medium77 medium78 medium79 medium80 rb.config add "Medium Bases" medium81 medium82 medium83 medium84 medium85 medium86 medium87 medium88 medium89 medium90 rb.config add "Medium Bases" medium91 medium92 medium93 medium94 medium95 medium96 medium97 medium98 medium99 medium100 rb.config add "Hard Bases" hard1 hard2 hard3 hard4 hard5 hard6 hard7 hard8 hard9 hard10 rb.config add "Hard Bases" hard11 hard12 hard13 hard14 hard15 hard16 hard17 hard18 hard19 hard20 rb.config add "Hard Bases" hard21 hard22 hard23 hard24 hard25 hard26 hard27 hard28 hard29 hard30 rb.config add "Hard Bases" hard31 hard32 hard33 hard34 hard35 hard36 hard37 hard38 hard39 hard40 rb.config add "Expert Bases" expert1 expert2 expert3 expert4 expert5 expert6 expert7 expert8 expert9 expert10 rb.config add "Expert Bases" expert11 expert12 expert13 expert14 expert15 expert16 expert17 expert18 expert19 expert20 rb.config add "Expert Bases" expert21 expert22 expert23 expert24 expert25 expert26 expert27 expert28 expert29 expert30 rb.config add "Nightmare Bases" nightmare1 nightmare2 nightmare3 nightmare4 nightmare5 nightmare6 nightmare7 nightmare8 nightmare9 nightmare10 rb.config add "Nightmare Bases" nightmare11 nightmare12 nightmare13 nightmare14 nightmare15 nightmare16 nightmare17 nightmare18 nightmare19 nightmare20 rb.config add "Nightmare Bases" nightmare21 nightmare22 nightmare23 nightmare24 nightmare25 nightmare26 nightmare27 nightmare28 nightmare29 nightmare30 You will see photos only with 10 bases per Difficulty, beacause I am aware of people stealing my designs. In the pack you will se a file named: RaidableBases_Testing_cfg (this is another config for the pack, that makes the bases to spawn without any cooldown, while the main configuration in the pack makes the bases to spawn between 30 min up to 1h 30 mins) Optimized NPCs The number of NPCs is fully optimized for each difficulty tier. You can find and tweak these balanced guard configurations inside the Profiles/ folder A Note From Me Hello and welcome! I’ve put my heart and countless hours into creating Raidable Bases Pack 2. Everything was built by me from scratch on my online server. I am incredibly proud of this project, especially the dual-loot table options designed to fit any server economy seamlessly. In case that you want to see few of my bases by urself, contact me and I will join on my public server and will spawn some of them, the ip: 148.251.177.248:28020 . Why only $60? A massive pack with 300 custom bases and dual loot tables easily goes for $100+ on the market. But as a former server owner myself, I know how hard and expensive it is to find high-quality setups that don't break the bank. I wanted to keep it at a fair, accessible price while giving you top-tier quality for your server! Support the Work If you love this pack, please consider leaving a 5-star review! Your feedback means the world to me and motivates me to keep building and improving future packs. Thank you for your support, and happy raiding!$60.00 -
Version 1.0.4
240 downloads
Ready to level up your server's raiding experience? This premium pack contains 210 unique, handcrafted raidable bases divided into 5 distinct difficulty tiers (Easy, Medium, Hard, Expert, and Nightmare). Each tier comes with its own custom, balanced loot tables —the bigger the challenge, the better the reward! Everything is 100% Plug & Play. You don’t need to spend hours editing configurations; just copy, paste, and you're good to go! What makes this pack unique: Easy & Medium Bases: Built to be starter-friendly, utilizing a massive variety of awesome skins to make your server look incredibly alive and high-quality. Hard, Expert & Nightmare Bases: Features complex layouts, multiple entrances, clever trap placements, and a heavy challenge loaded with top-tier rewards. Plug & Play Setup: Comes with everything pre-configured—loot tables, difficulty profiles, and the main plugin settings are all included. No setup required! How to Install (Step-by-Step) As detailed in the README.txt.txt file, setting this up on your server takes less than 2 minutes: Base Files: Extract all .json files from the copypaste/ folders and place them directly into: oxide/data/copypaste/ (Do not copy the subfolders, only the files inside them!) Loot Tables: Copy all files from Difficulty_Loot/ into: oxide/data/RaidableBases/Difficulty_Loot/ Profiles: Copy all files from Profiles/ into: oxide/data/RaidableBases/Profiles/ Plugin Config (Optional): If you want to use the included custom config, copy RaidableBases.json from the config/ folder into: oxide/config/ (Note: This will overwrite your existing config!) Reload: Run o.reload RaidableBases in your server console. Note: This pack requires the paid Raidable Bases plugin (by nivex) and the CopyPaste plugin installed on an Oxide/uMod Rust server. IMPORTANT: Remove Stone Walls (Enclosures): By default, the plugin spawns a giant stone wall around bases. To remove it: Open oxide/config/RaidableBases/Profiles/Easy.json Find the "Arena Walls" section and change "Enabled" to false: "Arena Walls": { "Enabled": false, ... } Run command: rb.reload in console. In Case that you feel that it's too much loot: Open oxide/config/RaidableBases/Profiles/Easy.json or any tother Difficulty "Amount Of Items To Spawn": 45, Change the Amount Of Items to a lower number. Modifying Base Despawn Timers: If you want to change how long a base stays on the map before disappearing, find these lines under "Raid Management" in config: "Minutes Until Despawn After Looting (min: 1)": 15, "Minutes Until Despawn After Inactive (0 = disabled)": 45 Controlling Automatically Maintained Events: It's spawning 6 bases at every 30 mins - 1h 30 mins, randomly. Easy & Medium got higher chances to spawn. Takes 30 seconds per base to spawn so it's not going to make the server to lag. "Always Maintain Max Events": true, "Max Maintained Events": 6 Auto-Cooking & Sorting (Furnace & Base Sorting): If you want to know how the pack automatically moves resources or food into the right containers when a base spawns, look for these options under "Raid Management" in config: "Move Cookables Into Ovens": true, "Move Food Into BBQ Or Fridge": true, "Move Resources Into Tool Cupboard": true, "Move Items Into Lockers": true Turning Lights and Furnaces On Automatically: "Turn Lights On At Night": true, "Turn Lights On Indefinitely": true, "Furnace Starting Fuel": 1000 Automatic Chat Announcements: If you want the entire server to know when a new raid has appeared on the map, look for "Event Messages" in config: "Announce Buy Base Messages": false, "Show Opened Message For PVE Bases": true, "Show Opened Message For PVP Bases": true If you already have other bases installed and don't want to use the included Profiles, you can register all 210 bases directly into your difficulty profiles by running the commands below in your server console (F1 or RCON). After pasting all commands, reload the plugin with o.reload RaidableBases. rb.config add "Easy Bases" easy1 easy2 easy3 easy4 easy5 easy6 easy7 easy8 easy9 easy10 rb.config add "Easy Bases" easy11 easy12 easy13 easy14 easy15 easy16 easy17 easy18 easy19 easy20 rb.config add "Easy Bases" easy21 easy22 easy23 easy24 easy25 easy26 easy27 easy28 easy29 easy30 rb.config add "Easy Bases" easy31 easy32 easy33 easy34 easy35 easy36 easy37 easy38 easy39 easy40 rb.config add "Easy Bases" easy41 easy42 easy43 easy44 easy45 easy46 easy47 easy48 easy49 easy50 rb.config add "Easy Bases" easy51 easy52 easy53 easy54 easy55 easy56 easy57 easy58 easy59 easy60 rb.config add "Medium Bases" medium1 medium2 medium3 medium4 medium5 medium6 medium7 medium8 medium9 medium10 rb.config add "Medium Bases" medium11 medium12 medium13 medium14 medium15 medium16 medium17 medium18 medium19 medium20 rb.config add "Medium Bases" medium21 medium22 medium23 medium24 medium25 medium26 medium27 medium28 medium29 medium30 rb.config add "Medium Bases" medium31 medium32 medium33 medium34 medium35 medium36 medium37 medium38 medium39 medium40 rb.config add "Medium Bases" medium41 medium42 medium43 medium44 medium45 medium46 medium47 medium48 medium49 medium50 rb.config add "Medium Bases" medium51 medium52 medium53 medium54 medium55 medium56 medium57 medium58 medium59 medium60 rb.config add "Hard Bases" hard1 hard2 hard3 hard4 hard5 hard6 hard7 hard8 hard9 hard10 rb.config add "Hard Bases" hard11 hard12 hard13 hard14 hard15 hard16 hard17 hard18 hard19 hard20 rb.config add "Hard Bases" hard21 hard22 hard23 hard24 hard25 hard26 hard27 hard28 hard29 hard30 rb.config add "Expert Bases" expert1 expert2 expert3 expert4 expert5 expert6 expert7 expert8 expert9 expert10 rb.config add "Expert Bases" expert11 expert12 expert13 expert14 expert15 expert16 expert17 expert18 expert19 expert20 rb.config add "Expert Bases" expert21 expert22 expert23 expert24 expert25 expert26 expert27 expert28 expert29 expert30 rb.config add "Nightmare Bases" nightmare1 nightmare2 nightmare3 nightmare4 nightmare5 nightmare6 nightmare7 nightmare8 nightmare9 nightmare10 rb.config add "Nightmare Bases" nightmare11 nightmare12 nightmare13 nightmare14 nightmare15 nightmare16 nightmare17 nightmare18 nightmare19 nightmare20 rb.config add "Nightmare Bases" nightmare21 nightmare22 nightmare23 nightmare24 nightmare25 nightmare26 nightmare27 nightmare28 nightmare29 nightmare30 You will see photos only with 5 bases per Difficulty, beacause I am aware of people stealing my designs. In the pack you will se a file named: RaidableBases_Testing_cfg (this is another config for the pack, that makes the bases to spawn without any cooldown, while the main configuration in the pack makes the bases to spawn between 30 min up to 1h 30 mins) Optimized NPCs The number of NPCs is fully optimized for each difficulty tier. You can find and tweak these balanced guard configurations inside the Profiles/ folder! A Note From Me Hello and welcome! I’ve put my heart and countless hours into creating this professional, 100% plug-and-play pack. Everything was built by me from absolute scratch on my local server. I am incredibly proud of it, especially the loot tables—honestly, you won't find a better-balanced reward system out there! Why only $30? A massive pack like this usually costs around $70–$80. But as a former server owner myself, I know how hard and expensive it is to find high-quality setups that don't break the bank. I wanted to give back and support the Rust community with a top-tier pack at an affordable price. Support the Work If you love this pack, please consider leaving a 5-star review! Your feedback means the world to me and motivates me to keep building and improving the configurations for you! Thank you for your support, and happy raiding!$30.00 -
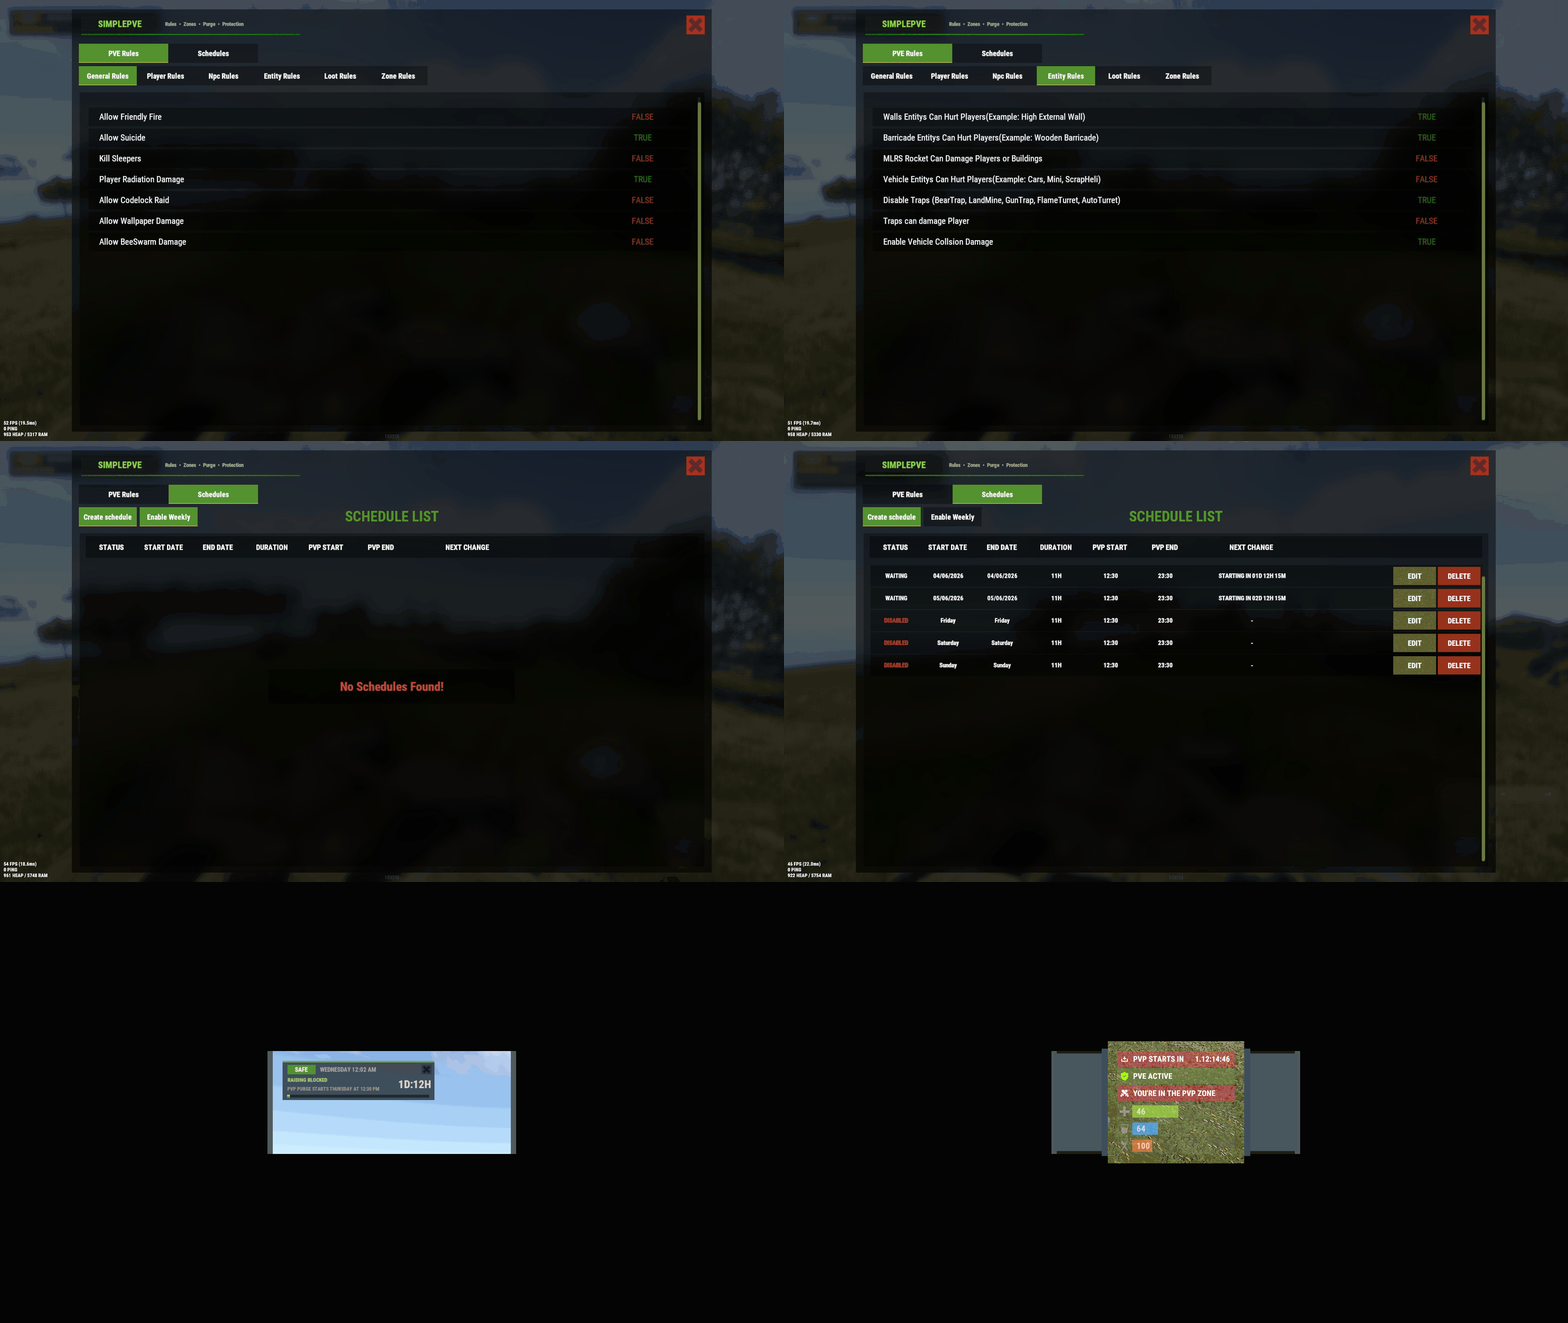
Version 1.3.9
5,099 downloads
SimplePVE Simple, powerful PVE for Rust. Control every damage, raid, loot and protection rule from a clean in-game menu. Save rules as profiles and switch between them on a schedule. Run a full PVE server, weekend purges or a hybrid PVE/PVP server, all from one plugin. Tip No server.pve needed. SimplePVE handles everything itself. Keep server.pve false. Video Showcase Features Rules and profiles In-game rule manager (/sprules). Toggle every rule with one click, no config editing needed. Rule profiles. Save several rule sets (for example Normal PVE, Raid Weekend, Event Night), then duplicate, rename and switch them live. Easy rule categories. Damage, raiding, looting, NPCs, traps, vehicles, Deep Sea and Apartments. Debug mode (/spdebug). Shows exactly which rule blocked or allowed a hit. Schedules and purges Automatic PVE/PVP purges. PVP turns on and off by itself on your schedule. Weekly schedules. Pick days and times, like Friday 18:00 → Sunday 22:00 or weekends only. Dated schedules. For example January 1 → January 7, holiday events or wipe weekends. Priorities. Several schedules can overlap and the highest priority wins. Outside every schedule, your base profile runs. Run commands when a purge starts or ends. Master switch (/simplepve on|off). Pauses everything and turns the server vanilla in one command. Protection Loot protection. Corpses, backpacks, boxes and supply drops are protected from other players, with team access. Building, vehicle and boat protection. Separate rules for your own, your team's and other players' property. Vehicle auto-claim. Vehicles are claimed when you start the engine. You can also lock claimed vehicles to the owner and their team. Admin bypass permissions for loot and damage. Zones and events ZoneManager support. Create PVP zones inside your PVE server. Exclude zones from the global PVE rules. PVP delay when leaving a PVP zone. Nobody can escape a fight by stepping out. Works with many popular event plugins. HUD, status and notifications SimplePVE HUD. Shows the current mode, what's next, a live countdown and a progress bar. Green when safe, red during raid time. In-game HUD editor (/sp_change). Move it and save it without touching the config. Status UI for PVE/PVP, PVP zones, PVP delay, purge countdown and Deep Sea (via CustomVitalsManager). Discord embeds when a purge starts or ends, plus optional early warnings. In-game warnings before every schedule change. Chat, UI, Toastify or Notify for warning messages. Multi-language. Every message is in the lang file, sent in each player's language. Profile names can be translated too. How it works Rules. Open /sprules and set what players can and can't do. Profiles. Save those rules as a profile, and create more for different situations. Schedules. Tell SimplePVE when each profile (or full PVP) should run. Players see it. The HUD shows the current mode and counts down to the next change, with chat and Discord warnings ahead of time. Note Example setup: Base profile PVE all week. A weekly schedule switches to PVE OFF (full PVP and raiding) every Saturday 18:00 → Sunday 23:00. Players get a warning 30 minutes before, and Discord announces the purge. Rule categories Category What it controls General Friendly fire, suicide, sleepers, radiation, codelock raids, wallpaper, bee swarms, clan support Player Player vs player, animals, NPCs, vehicles, boats, buildings (own / team / others), twigs Deep Sea PVP and boat damage out in the Deep Sea NPC NPCs, animals, Patrol Heli, Bradley and SAM sites vs players and buildings Entity Walls, barricades, MLRS, vehicle collisions and all traps Loot Loot protection, team access, PVP-zone looting, supply drops, Deep Sea looting Zone ZoneManager integration and the PVP delay Apartment Apartment combat zones, master keys, break-ins, rental shops, basement bribes Commands Command Type Description /sprules Chat Open the menu for rules, profiles and schedules /simplepve Chat & Console Toggle SimplePVE on or off /simplepve on / /simplepve off Chat & Console Turn SimplePVE on, or turn it off (vanilla, schedules paused) /spdebug Chat & Console Debug mode: shows why damage was blocked or allowed /sp_change Chat Open the in-game HUD position editor /sp_hide Chat Hide or show the SimplePVE HUD (players, name set in the config) /spve.langkeys Chat & Console Create lang keys for your profile names so they can be translated /resetsprules Chat & Console Reset the rules to default Permissions Permission Allows simplepve.admin Using the admin commands and the /sprules menu simplepve.adminloot Looting other players' protected containers and using their claimed vehicles simplepve.admindamage Damaging any entity while PVE is on Hosting partner Game hosting perfected, that's Physgun. Join the thousands of server owners using Physgun to take their game server communities to the top. Get your server at Physgun Installation Upload SimplePVE.cs to oxide/plugins. Make sure server.pve is false. Grant yourself admin: oxide.grant user YourName simplepve.admin Type /sprules in game and set up your rules. (Optional) Create profiles and schedules in the same menu. (Optional) Set your timezone (see below) if you use schedules. Schedule timezone Schedules use UTC plus your offset in minutes. Set it in the config under Schedules Setting → UTC Time Difference. Your timezone Calculation Value UTC 60 × 0 0 United Kingdom (GMT+1, summer) 60 × 1 60 Central Europe (UTC+2) 60 × 2 120 Bangladesh (UTC+6) 60 × 6 360 US Eastern (UTC−4) 60 × −4 -240 US Pacific (UTC−7) 60 × −7 -420 Warning Schedules starting at the wrong time? Your UTC Time Difference doesn't match your timezone. Fix it and reload the plugin. Configuration Tip Translating: copy the lang file to another folder (for example oxide/lang/de/SimplePVE.json) and translate the values. Each player gets their own language. Run /spve.langkeys to add lang keys for your profile names too. FAQ Does SimplePVE need server.pve? No. Keep server.pve set to false. SimplePVE does all the protection itself. Where do I change the rules? Type /sprules in game (needs simplepve.admin). Every rule is a toggle, and changes save to the profile you're editing. What are profiles? A profile is a saved set of rules. Make one for normal PVE days and one for raid weekends, then switch them by hand or let a schedule switch them. Can I make automatic purges? Yes. Create a schedule in /sprules → Schedules, pick what it runs (a profile, PVE ON or PVE OFF) and when. Outside every schedule, your base profile runs. Weekly or date-based schedules? Both. A schedule's time windows can be weekly (days and times, or a day-to-day span) or dated (a date range, or a daily time inside a date range). When schedules overlap, the one with the highest priority wins. My schedules start at the wrong time. Your UTC Time Difference doesn't match your timezone. See Schedule timezone above. How do I turn PVE on or off by hand? /simplepve on or /simplepve off (needs simplepve.admin). Off makes the server vanilla and pauses all schedules until you turn it back on. Damage still happens in PVE mode. Why? Either one of your rules allows that damage, or another plugin changes damage too. Turn on /spdebug to see which rule decided each hit, and turn it off again when you're done. How does loot protection work? Players can't loot other players' corpses, backpacks, containers and called supply drops. Teammates can if you allow it. Admins with simplepve.adminloot can bypass it. Add entity short names to Loot Protection Excluded Entitys to keep them open to everyone (mailboxes and drop boxes by default). Can admins damage things while PVE is on? Yes, with the simplepve.admindamage permission. Does it support ZoneManager? Yes. ZoneManager zones can run PVP inside your PVE server, with an optional PVP delay when players leave. List zone IDs under Exclude Zone IDs From Rules to keep SimplePVE out of them completely. Can it post to Discord? Yes. It sends embeds when a purge starts or ends, and optional warnings a set number of minutes before. In-game warnings work without Discord too (Warn Players Before Schedule Change). Can I run commands when a purge starts or ends? Yes. Add them to Commands when PVP Purge Starts and Commands when PVP Purge Ends. The menu or HUD looks see-through. Keep UI - Use blur materials set to false. Blur is broken on Rust's new render pipeline. For developers Hooks and API void OnSPVEPurgeStarted() void OnSPVEPurgeEnded() TimeSpan GetPVPStartTimeRemaining() TimeSpan GetPVPEndTimeRemaining() bool IsServerPVE() bool IsStatusEnabled_API() bool AddToExcludeZone(string zoneId) bool RemoveFromExcludeZone(string zoneId) Override hooks. Return true or false to force the result and skip SimplePVE's own checks. Return null to let SimplePVE decide. object CanEntityTakeDamage(BaseCombatEntity entity, HitInfo hitInfo) // true = allow damage, false = block object CanEntityBeTargeted(BasePlayer player, BaseEntity entity) // true = allow targeting, false = block object CanEntityTrapTrigger(BaseTrap trap, BasePlayer player) // true = allow trigger, false = block Support Need help or found a bug? Open a support ticket on this page or join the Discord. Check out my other plugins$19.99 -


Version 1.0.1
9 downloads
330 Raidable bases by JaaaaaThomas All bases up until 08.06.2026 Important Reminder This is a Base Model Pack (.json files). It is NOT the Raidable Bases plugin script. These are the blueprints crafted by our professional building team. Level Up Your Server Don't settle for basic cubes. Give your players a challenge they’ll never forget. Whether you're looking for a "Hardcore" event or a permanent fortress for your top clan, these 330 bases are built to dominate. [ Buy Now & Start Building] This package includes all of my other packages.$159.99 -
Version 1.0.2
5 downloads
About 450 Raidable bases by JaaaaaThomas All bases up until 01.07.2026 If you find the price too high, you can click on 'Price History' and set up an alert for your desired price! We will see this, and you will receive a notification when it reaches your target price, or if our team decides to, we may be able to offer you your desired price individually. 450 Raidable bases by JaaaaaThomas All bases up until 01.07.2026 Important Reminder This is a Base Model Pack (.json files). It is NOT the Raidable Bases plugin script. These are the blueprints crafted by our professional building team. Level Up Your Server It includes 450 unique bases, with over 70+ designs for every skill level (from starter to endgame). Don't settle for basic cubes. Give your players a challenge they’ll never forget. Whether you're looking for a "Hardcore" event or a permanent fortress for your top clan, these 450 bases are built to dominate. [ Buy Now & Start Building] This package includes all of my other packages.$210.00 -
Version 1.0.4
41 downloads
Raidable Bases: Tier 6 (Clan Bases) Config Setup Looking to expand your server's end-game content? This is the complete configuration profile for Tier 6: Clan Bases. This product is a pre-configured settings file designed to integrate perfectly with the Raidable Bases plugin. It handles all the essential backend mechanics, player limits, costs, and rewards specific to the Clan Base difficulty. Note: This is a Configuration Only file. Base builds/schematics are NOT included in this download.ю$15.00 -
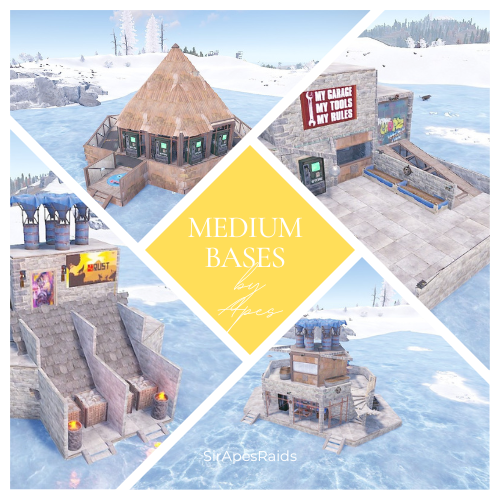
Version 1.0.3
106 downloads
About Medium Bases by Apes (25 Pack) Due to the new TOS: Please remove your players ability to pick up deployables in raids! This pack uses several DLC content and skins to hide traps! Torture your players with these Medium bases that have death around every corner! Tons of sneaky traps and layouts guaranteed to make your players hate you! Hand crafted by the great SirApesALot these bases will leave your players running back naked over and over again, definitely not beginner friendly raids. All of these medium raids cost 30-35 satchels to raid, but bring your skills (and grenades)! Because you will need every raiding trick in the book to conquer these. In the "Bases" Folder you will find 25 medium bases that you can add to your servers Raidable Bases by Nivex. Everyone of these torture chambers was created by me for my vanilla gather rate weekly server. These are best suited for servers that are more balanced loot wise, and a more advanced player base with experience raiding (beginners WILL rage quit). None of these are walk throughs, I have no mercy on my players....do you? Here is a video of us testing the 2 x 2 in this pack on my friends server (edits were made to the base, stone exterior and one less hatch now- raid #3) These are not simple raids for beginners, if they don't understand how to use twig and ladders to work around traps, or pay attention for eco raidable walls they will struggle. But, they will laugh and feel a sense of accomplishment after completing a raid! Mediums #15, #17 and #21 of this pack is marked with an s in the file to remember to turn stability to "true" on that base if you have it false. They have collapsing floors that require it. Near everything is skinned, some just to look pretty, some themed. If upgrading or replacing doors be sure to check it a door controller is attached. The average raid cost in this pack is 30-35 satchels + an occasional eco raidable wall or two. May be better suited as easy bases on servers with tons of boom in circulation and higher raid costs Loot Tables: As said on Raidable Bases plugin you need your own loot tables. All raids are tested on either Rustmode PvE or Planet of the Apes PvE. It is recommended you have 2 NPC's inside and configured to "spawn on bags" Check out the other configuration and data settings below to get the most out of these bases. With Tesla coils, swinging doors, collapsing structures along with features like automatic lights, sprinklers and music to help distract the raider a lot can be done with these bases. If you have any questions feel free to stop in our discord (https://discord.gg/M228N2F79m), or if you would like to test our raids that can be arranged Helpful Configuration and Data Settings: The following settings will help you get the most from these bases Configuration: "Entities Allowed To Drop Loot": { "Auto Turrets": true, "Flame Turret": true, "Fog Machine": false, "Gun Trap": true, "SAM Site": true "Allow Players To Loot Traps": false, "Allow Npcs To Target Other Npcs": false, "Turn Lights On At Night": false, "Turn Lights On Indefinitely": false, "Skins": { "Boxes": { "Preset Skins": [], "Ignore If Skinned Already": false, "Use Identical Skins": false, "Use Random Skin": false, "Use Workshop Skins": false, "Use Imported Workshop Skins File": true, "Use Approved Workshop Skins Only": false }, "Npcs": { "Use Identical Skins": true, "Use Random Skin": true, "Use Workshop Skins": true, "Use Imported Workshop Skins File": true, "Use Approved Workshop Skins Only": false }, "Deployables": { "Partial Names": [ "door", "barricade", "chair", "fridge", "furnace", "locker", "reactivetarget", "rug", "sleepingbag", "table", "vendingmachine", "waterpurifier", "skullspikes", "skulltrophy", "summer_dlc", "sled" ], "Preset Door Skins": [], "Skin Everything": false, "Ignore If Skinned Already": false, "Use Identical Skins": false, "Use Random Skin": false, "Use Workshop Skins": false, "Use Imported Workshop Skins File": true, "Use Approved Workshop Skins Only": false } "Weapons": { "Infinite Ammo": { "AutoTurret": false, "FlameTurret": false, "FogMachine": false, "GunTrap": false, "SamSite": false }, "Ammo": { "AutoTurret": 90, "FlameTurret": 40, "FogMachine": 50, "GunTrap": 32, "SamSite": 24 }, "Fog Machine Allows Motion Toggle": true, "Fog Machine Requires A Power Source": true, "Spooky Speakers Requires Power Source": false, "Test Generator Power": 100.0, "SamSite Repairs Every X Minutes (0.0 = disabled)": 5.0, "SamSite Range (350.0 = Rust default)": 100.0, "SamSite Requires Power Source": false }, Profiles (Raidable Bases Data Folder): "Entities Not Allowed To Be Picked Up": [ "generator.small", "generator.static", "autoturret_deployed" ], "NPC Levels": { "Level 2 - Final Death": true }, "Spawn Inside Bases": { "Spawn On Floors": false, "Spawn On Beds": true, "Spawn On Rugs": false, "Spawn On Rugs With Skin Only": 1, "Bed Health Multiplier": 1.0, "Rug Health Multiplier": 1.0, "Spawn Murderers Outside": true, "Spawn Scientists Outside": true, "Minimum Inside (-1 = ignore)": 2, "Maximum Inside (-1 = ignore)": 2 }, "Event Traps And Turrets Ignore Npcs": true, "Auto Turrets": { "Aim Cone": 5.0, "Wait To Power On Until Event Starts": false, "Start Health": 1000.0, "Sight Range": 30.0, "Double Sight Range When Shot": false, "Set Hostile (False = Do Not Set Any Mode)": true, "Requires Power Source": false, "Sam Site": { "Repairs Every X Minutes (0.0 = disabled)": 5.0, "Range (350.0 = Rust default)": 100.0, "Requires Power Source": false, "Minimum Health": 1000.0, "Maximum Health": 1000.0 }, "Tesla Coil": { "Requires A Power Source": true, "Max Discharge Self Damage Seconds (0 = None, 120 = Rust default)": 0.0, "Max Damage Output": 35.0, "Health": 250.0 }, "Add Code Lock To Unlocked Or KeyLocked Doors": true, "Add Key Lock To Unlocked Or CodeLocked Doors": false, "Add Code Lock To Tool Cupboards": true, "Add Key Lock To Tool Cupboards": false, "Add Code Lock To Boxes": false, "Add Key Lock To Boxes": false, "Add Code Lock To Lockers": true, "Add Key Lock To Lockers": false, "Close Open Doors With No Door Controller Installed": true, "Allow Duplicate Items": false, "Allow Players To Pickup Deployables": true, "Allow Players To Deploy A Cupboard": true, "Allow Players To Deploy Barricades": true, "Divide Loot Into All Containers": true, "Empty All Containers Before Spawning Loot": true,$4.00 -
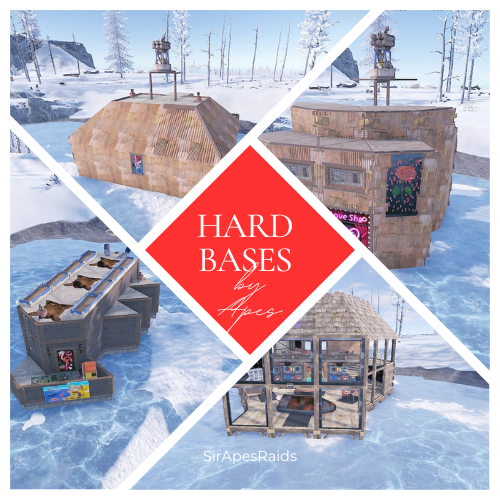
Version 1.0.3
146 downloads
About Hard Bases by Apes (25 Pack) Due to the new TOS: Please remove your players ability to pick up deployables in your raids! This pack uses several DLC content and skins to hide traps! Torture your players with these Hard bases that have death around every corner! Tons of sneaky traps and layouts guaranteed to make your players hate you! Hand crafted by the great SirApesALot these bases will leave your players running back naked over and over again, definitely not beginner friendly raids. All of these hard raids cost 18-22 rockets to raid, but bring your skills (and grenades)! Because you will need every raiding trick in the book to conquer these. In the "Bases" Folder you will find 25 hard bases total that you can add to your servers Raidable Bases by Nivex. Everyone of these torture chambers was created by me for my vanilla gather rate weekly server. These are best suited for servers that are more balanced loot wise, and a more advanced player base with experience raiding (beginners WILL rage quit). None of these are walk throughs, I have no mercy on my players....do you? I recommend giving more satchels and C4 in the lower tier raids to increase the effectiveness of traps (rockets ruin everything lol) and players are more likely to blow themselves up with satchels which is always entertaining. Here is a video of us testing Sev's Seaside Shanty in this pack on my friends Server These are not simple raids for beginners, if they don't understand how to use twig and ladders to work around traps, or pay attention for eco raidable walls they will struggle. But, they will laugh and feel a sense of accomplishment after completing a raid! Hards #11 and #18 of this pack is marked with an s in the file to remember to turn stability to "true" on that base if you have it false. They have collapsing floors that require it. Near everything is skinned, some just to look pretty, some themed. If upgrading or replacing doors be sure to check it a door controller is attached. The average raid cost in this pack is 18-22 rockets to raid. May be better suited as medium bases on servers with tons of boom in circulation and higher raid costs/longer wipe durations Loot Tables: As said on Raidable Bases plugin you need your own loot tables. All raids are tested on either Rustmode PvE or Planet of the Apes PvE. If you have any questions feel free to stop in our discord (https://discord.gg/M228N2F79m), or if you would like to test our raids that can be arranged Helpful Configuration and Data Settings: The following settings will help you get the most from these bases Configuration: "Entities Allowed To Drop Loot": { "Auto Turrets": true, "Flame Turret": true, "Fog Machine": false, "Gun Trap": true, "SAM Site": true "Allow Players To Loot Traps": false, "Allow Npcs To Target Other Npcs": false, "Turn Lights On At Night": false, "Turn Lights On Indefinitely": false, "Skins": { "Boxes": { "Preset Skins": [], "Ignore If Skinned Already": false, "Use Identical Skins": false, "Use Random Skin": false, "Use Workshop Skins": false, "Use Imported Workshop Skins File": true, "Use Approved Workshop Skins Only": false }, "Npcs": { "Use Identical Skins": true, "Use Random Skin": true, "Use Workshop Skins": true, "Use Imported Workshop Skins File": true, "Use Approved Workshop Skins Only": false }, "Deployables": { "Partial Names": [ "door", "barricade", "chair", "fridge", "furnace", "locker", "reactivetarget", "rug", "sleepingbag", "table", "vendingmachine", "waterpurifier", "skullspikes", "skulltrophy", "summer_dlc", "sled" ], "Preset Door Skins": [], "Skin Everything": false, "Ignore If Skinned Already": false, "Use Identical Skins": false, "Use Random Skin": false, "Use Workshop Skins": false, "Use Imported Workshop Skins File": true, "Use Approved Workshop Skins Only": false } "Weapons": { "Infinite Ammo": { "AutoTurret": false, "FlameTurret": false, "FogMachine": false, "GunTrap": false, "SamSite": false }, "Ammo": { "AutoTurret": 90, "FlameTurret": 40, "FogMachine": 50, "GunTrap": 32, "SamSite": 24 }, "Fog Machine Allows Motion Toggle": true, "Fog Machine Requires A Power Source": true, "Spooky Speakers Requires Power Source": false, "Test Generator Power": 100.0, "SamSite Repairs Every X Minutes (0.0 = disabled)": 5.0, "SamSite Range (350.0 = Rust default)": 100.0, "SamSite Requires Power Source": false }, Profiles (Raidable Bases Data Folder): "Entities Not Allowed To Be Picked Up": [ "generator.small", "generator.static", "autoturret_deployed" ], "NPC Levels": { "Level 2 - Final Death": true }, "Spawn Inside Bases": { "Spawn On Floors": false, "Spawn On Beds": true, "Spawn On Rugs": false, "Spawn On Rugs With Skin Only": 1, "Bed Health Multiplier": 1.0, "Rug Health Multiplier": 1.0, "Spawn Murderers Outside": true, "Spawn Scientists Outside": true, "Minimum Inside (-1 = ignore)": 3, "Maximum Inside (-1 = ignore)": 3 }, "Event Traps And Turrets Ignore Npcs": true, "Auto Turrets": { "Aim Cone": 5.0, "Wait To Power On Until Event Starts": false, "Start Health": 1000.0, "Sight Range": 30.0, "Double Sight Range When Shot": false, "Set Hostile (False = Do Not Set Any Mode)": true, "Requires Power Source": false, "Sam Site": { "Repairs Every X Minutes (0.0 = disabled)": 5.0, "Range (350.0 = Rust default)": 100.0, "Requires Power Source": false, "Minimum Health": 1000.0, "Maximum Health": 1000.0 }, "Tesla Coil": { "Requires A Power Source": true, "Max Discharge Self Damage Seconds (0 = None, 120 = Rust default)": 0.0, "Max Damage Output": 35.0, "Health": 250.0 }, "Add Code Lock To Unlocked Or KeyLocked Doors": true, "Add Key Lock To Unlocked Or CodeLocked Doors": false, "Add Code Lock To Tool Cupboards": true, "Add Key Lock To Tool Cupboards": false, "Add Code Lock To Boxes": false, "Add Key Lock To Boxes": false, "Add Code Lock To Lockers": true, "Add Key Lock To Lockers": false, "Close Open Doors With No Door Controller Installed": true, "Allow Duplicate Items": false, "Allow Players To Pickup Deployables": true, "Allow Players To Deploy A Cupboard": true, "Allow Players To Deploy Barricades": true, "Divide Loot Into All Containers": true, "Empty All Containers Before Spawning Loot": true,$4.50 -
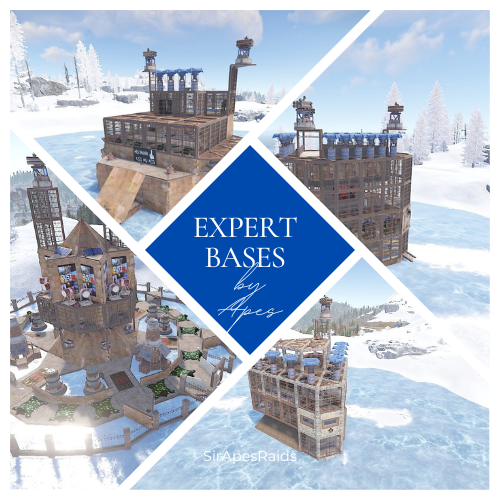
Version 1.0.3
144 downloads
About Expert Bases by Apes (20+ Pack) Due to the new TOS: Please remove the ability for your players to pick up deployables in your raids! This pack uses multiple DLC and paid skins to hide traps! Torture your players with these Expert bases that have death around every corner! Tons of sneaky traps and layouts guaranteed to make your players hate you! Hand crafted by the great SirApesALot these bases will leave your players running back naked over and over again, definitely not beginner friendly raids. All of these Expert raids cost 35-38 rockets to raid, but bring your skills (and grenades)! Because you will need every raiding trick in the book to conquer these. In the "Bases" Folder you will find 20+ expert bases total that you can add to your servers Raidable Bases by Nivex. Everyone of these torture chambers was created by me for my vanilla gather rate weekly server. These are best suited for servers that are more balanced loot wise, and a more advanced player base with experience raiding (beginners WILL rage quit). None of these are walk throughs, I have no mercy on my players....do you? I recommend giving more satchels and C4 in the lower tier raids to increase the effectiveness of traps (rockets ruin everything lol) and players are more likely to blow themselves up with satchels which is always entertaining. These are not simple raids for beginners, if they don't understand how to use twig and ladders to work around traps, or pay attention for eco raidable walls they will struggle. They also may never trust rugs or spiral stairs ever again! But, they will laugh and feel a sense of accomplishment after completing a raid! Expert #13 of this pack is marked with an s in the file to remember to turn stability to "true" on that base if you have it false. It has a collapsing floor that requires it. Near everything is skinned, some just to look pretty, some themed. If upgrading or replacing doors be sure to check if a door controller is attached. Have Npcs "spawn on bags" inside the bases, 4 per base (that is just inside, make sure to count the # you want outside) The average raid cost in this pack is 35-38 rockets to raid. May be better suited as hard bases on servers with tons of boom in circulation and higher raid costs/longer wipe durations Loot Tables: As said on Raidable Bases plugin you need your own loot tables. Additional 5 raids are included in case there is a few you are not happy with and want to remove. Otherwise they are just an added value! All raids are tested on either Rustmode PvE or Planet of the Apes PvE. If you have any questions feel free to stop in our discord (https://discord.gg/M228N2F79m), or if you would like to test our raids that can be arranged Helpful Configuration and Data Settings: The following settings will help you get the most from these bases Configuration: "Entities Allowed To Drop Loot": { "Auto Turrets": true, "Flame Turret": true, "Fog Machine": false, "Gun Trap": true, "SAM Site": true "Allow Players To Loot Traps": false, "Allow Npcs To Target Other Npcs": false, "Turn Lights On At Night": false, "Turn Lights On Indefinitely": false, "Skins": { "Boxes": { "Preset Skins": [], "Ignore If Skinned Already": false, "Use Identical Skins": false, "Use Random Skin": false, "Use Workshop Skins": false, "Use Imported Workshop Skins File": true, "Use Approved Workshop Skins Only": false }, "Npcs": { "Use Identical Skins": true, "Use Random Skin": true, "Use Workshop Skins": true, "Use Imported Workshop Skins File": true, "Use Approved Workshop Skins Only": false }, "Deployables": { "Partial Names": [ "door", "barricade", "chair", "fridge", "furnace", "locker", "reactivetarget", "rug", "sleepingbag", "table", "vendingmachine", "waterpurifier", "skullspikes", "skulltrophy", "summer_dlc", "sled" ], "Preset Door Skins": [], "Skin Everything": false, "Ignore If Skinned Already": false, "Use Identical Skins": false, "Use Random Skin": false, "Use Workshop Skins": false, "Use Imported Workshop Skins File": true, "Use Approved Workshop Skins Only": false } "Weapons": { "Infinite Ammo": { "AutoTurret": false, "FlameTurret": false, "FogMachine": false, "GunTrap": false, "SamSite": false }, "Ammo": { "AutoTurret": 90, "FlameTurret": 40, "FogMachine": 50, "GunTrap": 32, "SamSite": 24 }, "Fog Machine Allows Motion Toggle": true, "Fog Machine Requires A Power Source": true, "Spooky Speakers Requires Power Source": false, "Test Generator Power": 100.0, "SamSite Repairs Every X Minutes (0.0 = disabled)": 5.0, "SamSite Range (350.0 = Rust default)": 100.0, "SamSite Requires Power Source": false }, Profiles (Raidable Bases Data Folder): "Entities Not Allowed To Be Picked Up": [ "generator.small", "generator.static", "autoturret_deployed" ], "NPC Levels": { "Level 2 - Final Death": true }, "Spawn Inside Bases": { "Spawn On Floors": false, "Spawn On Beds": true, "Spawn On Rugs": false, "Spawn On Rugs With Skin Only": 1, "Bed Health Multiplier": 1.0, "Rug Health Multiplier": 1.0, "Spawn Murderers Outside": true, "Spawn Scientists Outside": true, "Minimum Inside (-1 = ignore)": 4, "Maximum Inside (-1 = ignore)": 4 }, "Event Traps And Turrets Ignore Npcs": true, "Auto Turrets": { "Aim Cone": 5.0, "Wait To Power On Until Event Starts": false, "Start Health": 1000.0, "Sight Range": 30.0, "Double Sight Range When Shot": false, "Set Hostile (False = Do Not Set Any Mode)": true, "Requires Power Source": false, "Sam Site": { "Repairs Every X Minutes (0.0 = disabled)": 5.0, "Range (350.0 = Rust default)": 100.0, "Requires Power Source": false, "Minimum Health": 1000.0, "Maximum Health": 1000.0 }, "Tesla Coil": { "Requires A Power Source": true, "Max Discharge Self Damage Seconds (0 = None, 120 = Rust default)": 0.0, "Max Damage Output": 35.0, "Health": 250.0 }, "Add Code Lock To Unlocked Or KeyLocked Doors": true, "Add Key Lock To Unlocked Or CodeLocked Doors": false, "Add Code Lock To Tool Cupboards": true, "Add Key Lock To Tool Cupboards": false, "Add Code Lock To Boxes": false, "Add Key Lock To Boxes": false, "Add Code Lock To Lockers": true, "Add Key Lock To Lockers": false, "Close Open Doors With No Door Controller Installed": true, "Allow Duplicate Items": false, "Allow Players To Pickup Deployables": true, "Allow Players To Deploy A Cupboard": true, "Allow Players To Deploy Barricades": true, "Divide Loot Into All Containers": true, "Empty All Containers Before Spawning Loot": true,$5.00 -
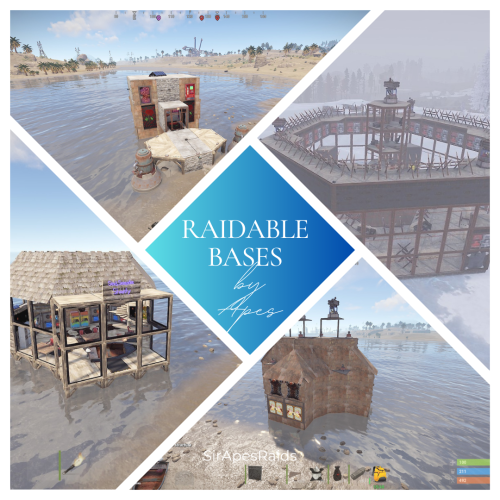
Version 1.0.5
431 downloads
About Raidable Bases By Apes (200+ Pack) All Tiers! DUE TO THE NEW TOS: please remove the ability for your players to pick up deployables in your raids! This pack uses several DLC content and skins to hide traps! Torture your players with these Raidable Bases that have death around every corner! Tons of sneaky traps and layouts guaranteed to make your players hate you! Hand crafted by the great SirApesALot these bases will leave your players running back naked over and over again, definitely not beginner friendly raids. Bring your skills (and grenades)! Because you will need every raiding trick in the book to conquer these. In the "Bases" Folder you will find over 200 raidable bases (I try to add regularly, so the number goes up) that you can add to your servers Raidable Bases by Nivex. All levels are included (60+ easy, 50+ medium, 25+ hard, 25+ expert and 25+ nightmare) including Christmas and Halloween packs! Everyone of these torture chambers was created by me for my vanilla gather rate weekly server. These are best suited for servers that are more balanced loot wise, and a more advanced player base with experience raiding (beginners WILL rage quit). None of these are walk throughs, I have no mercy on my players....do you? I recommend giving more satchels and C4 in the lower tier raids to increase the effectiveness of traps (rockets ruin everything lol) and players are more likely to blow themselves up with satchels which is always entertaining. These are not simple raids for beginners, if they don't understand how to use twig and ladders to work around traps, or pay attention for eco raidable walls they will struggle. They also may never trust rugs or spiral stairs ever again! Understanding when to take your time, and when to jam a med stick in your arm and push past a trap is necessary! But, they will laugh and feel a sense of accomplishment after completing a raid! Raids in this pack marked with an s in the file to remember to turn stability to "true" on that base if you have it false. they have collapsing floor mechanics that requires it. Near everything is skinned, some just to look pretty, some themed. Traps are everywhere, containers already placed for loot If upgrading or replacing doors be sure to check if a door controller is attached. Loot Tables: As said on Raidable Bases plugin you need your own loot tables. Additional 40+ raids are included in case there is a few you are not happy with and want to remove (10+ easy, 10+ medium, 5+ hard, 5+ expert and 5+ nightmare). Otherwise they are just an added value! So 190+ raids in total in this pack! All raids are tested on Planet of the Apes PvE. It is recommended you have NPC's inside and configured to "spawn on bags" --- Easy - 1, Medium - 2, Hard - 3, Expert - 4, Nightmare - 5 Check out the other configuration and data settings below to get the most out of these bases. With Tesla coils, swinging doors, collapsing structures along with features like automatic lights, sprinklers and music to help distract the raider a lot can be done with these bases. If you have any questions feel free to stop in our discord (https://discord.gg/M228N2F79m), or if you would like to test our raids that can be arranged If you previously purchased any of the following, you will be purchasing duplicate bases: Easy Bases by Apes Pack 1 (25 pack) Easy Bases by Apes Pack 2 (25 pack) Medium Bases by Apes Pack 1 (25 pack) Medium Bases by Apes Pack 2 (25 pack) Hard Bases by Apes Pack 1 (25 pack) Expert Bases by Apes Pack 1 (25 pack) Nightmare Bases by Apes Pack 1 (20 pack) Halloween Bases by Apes (30 pack) Christmas Bases by Apes (15 Pack) Helpful Configuration and Data Settings: The following settings will help you get the most from these bases Configuration: "Entities Allowed To Drop Loot": { "Auto Turrets": true, "Flame Turret": true, "Fog Machine": false, "Gun Trap": true, "SAM Site": true "Allow Players To Loot Traps": false, "Allow Npcs To Target Other Npcs": false, "Turn Lights On At Night": false, "Turn Lights On Indefinitely": false, "Skins": { "Boxes": { "Preset Skins": [], "Ignore If Skinned Already": false, "Use Identical Skins": false, "Use Random Skin": false, "Use Workshop Skins": false, "Use Imported Workshop Skins File": true, "Use Approved Workshop Skins Only": false }, "Npcs": { "Use Identical Skins": true, "Use Random Skin": true, "Use Workshop Skins": true, "Use Imported Workshop Skins File": true, "Use Approved Workshop Skins Only": false }, "Deployables": { "Partial Names": [ "door", "barricade", "chair", "fridge", "furnace", "locker", "reactivetarget", "rug", "sleepingbag", "table", "vendingmachine", "waterpurifier", "skullspikes", "skulltrophy", "summer_dlc", "sled" ], "Preset Door Skins": [], "Skin Everything": false, "Ignore If Skinned Already": false, "Use Identical Skins": false, "Use Random Skin": false, "Use Workshop Skins": false, "Use Imported Workshop Skins File": true, "Use Approved Workshop Skins Only": false } "Weapons": { "Infinite Ammo": { "AutoTurret": false, "FlameTurret": false, "FogMachine": false, "GunTrap": false, "SamSite": false }, "Ammo": { "AutoTurret": 90, "FlameTurret": 40, "FogMachine": 50, "GunTrap": 32, "SamSite": 24 }, "Fog Machine Allows Motion Toggle": true, "Fog Machine Requires A Power Source": true, "Spooky Speakers Requires Power Source": false, "Test Generator Power": 100.0, "SamSite Repairs Every X Minutes (0.0 = disabled)": 5.0, "SamSite Range (350.0 = Rust default)": 100.0, "SamSite Requires Power Source": false }, Profiles (Raidable Bases Data Folder): This needs to be done for all 5 levels "Entities Not Allowed To Be Picked Up": [ "generator.small", "generator.static", "autoturret_deployed" ], "NPC Levels": { "Level 2 - Final Death": true }, "Spawn Inside Bases": { "Spawn On Floors": false, "Spawn On Beds": true, "Spawn On Rugs": false, "Spawn On Rugs With Skin Only": 1, "Bed Health Multiplier": 1.0, "Rug Health Multiplier": 1.0, "Spawn Murderers Outside": true, "Spawn Scientists Outside": true, "Minimum Inside (-1 = ignore)": 1, "Maximum Inside (-1 = ignore)": 1 }, "Event Traps And Turrets Ignore Npcs": true, "Auto Turrets": { "Aim Cone": 5.0, "Wait To Power On Until Event Starts": false, "Start Health": 1000.0, "Sight Range": 30.0, "Double Sight Range When Shot": false, "Set Hostile (False = Do Not Set Any Mode)": true, "Requires Power Source": false, "Sam Site": { "Repairs Every X Minutes (0.0 = disabled)": 5.0, "Range (350.0 = Rust default)": 100.0, "Requires Power Source": false, "Minimum Health": 1000.0, "Maximum Health": 1000.0 }, "Tesla Coil": { "Requires A Power Source": true, "Max Discharge Self Damage Seconds (0 = None, 120 = Rust default)": 0.0, "Max Damage Output": 35.0, "Health": 250.0 }, "Add Code Lock To Unlocked Or KeyLocked Doors": true, "Add Key Lock To Unlocked Or CodeLocked Doors": false, "Add Code Lock To Tool Cupboards": true, "Add Key Lock To Tool Cupboards": false, "Add Code Lock To Boxes": false, "Add Key Lock To Boxes": false, "Add Code Lock To Lockers": true, "Add Key Lock To Lockers": false, "Close Open Doors With No Door Controller Installed": true, "Allow Duplicate Items": false, "Allow Players To Pickup Deployables": true, "Allow Players To Deploy A Cupboard": true, "Allow Players To Deploy Barricades": true, "Divide Loot Into All Containers": true, "Empty All Containers Before Spawning Loot": true,$24.99 -
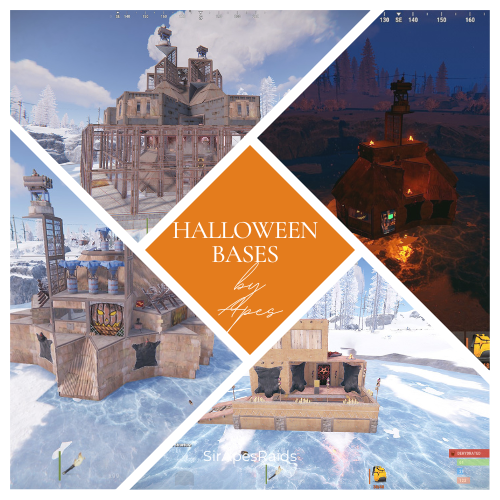
Version 1.0.4
43 downloads
About Halloween Bases By Apes (30+ Pack) All Tiers! Due to the new TOS: Please remove the ability for your players to pick up deployables in your raids! This pack uses several DLC content and skins to hide traps! Give your players the gift of many deaths this Halloween! Torture your players with these Halloween Bases that have death around every corner! Tons of sneaky traps and layouts guaranteed to make your players hate you! Hand crafted by the great SirApesALot these bases will leave your players running back naked over and over again, definitely not beginner friendly raids. Bring your skills (and grenades)! Because you will need every raiding trick in the book to conquer these. In the "Bases" Folder you will find 30+ raidable bases that you can add to your servers Raidable Bases by Nivex. All levels are included Everyone of these torture chambers was created by me for my vanilla gather rate weekly server. These are best suited for servers that are more balanced loot wise, and a more advanced player base with experience raiding (beginners WILL rage quit). None of these are walk throughs, I have no mercy on my players....do you? I recommend giving more satchels and C4 in the lower tier raids to increase the effectiveness of traps (rockets ruin everything lol) and players are more likely to blow themselves up with satchels which is always entertaining. These are not simple raids for beginners, if they don't understand how to use twig and ladders to work around traps, or pay attention for eco raidable walls they will struggle. They also may never trust rugs or spiral stairs ever again! Understanding when to take your time, and when to jam a med stick in your arm and push past a trap is necessary! But, they will laugh and feel a sense of accomplishment after completing a raid! Raids in this pack marked with an s in the file to remember to turn stability to "true" on that base if you have it false. they have collapsing floor mechanics that requires it. (hmedium1s, hexpert2s, and hnightmare2s) Make sure to have your config set so autoturrets and sam sites do not require power. It is recommended you have NPC's spawn inside and configured to "spawn on bags" --- Easy - 1, Medium - 2, Hard - 3, Expert - 4, Nightmare - 5 Two bases (hhard2 and hexpert2) have a trap that requires npcs, their death triggers a trap door. So you need npcs in each raid and the raidable bases data file set to npcs spawn on bag. Raid works without the npcs, but noone expects that trigger lol. Near everything is skinned for Halloween, with sound effects and more traps than you can shake a stick at! Traps are everywhere, containers already placed for loot If upgrading or replacing doors be sure to check if a door controller is attached. Loot Tables: As said on Raidable Bases plugin you need your own loot tables. All raids are tested on Planet of the Apes PvE. If you have any questions feel free to stop in our discord (https://discord.gg/M228N2F79m), or if you would like to test our raids that can be arranged ------------------------------------------------------------------------------------------------------------------------------------------------------------------------------------------------------------------------------------------------------------------------------- Helpful Configuration and Data Settings: The following settings will help you get the most from these bases Configuration: "Entities Allowed To Drop Loot": { "Auto Turrets": true, "Flame Turret": true, "Fog Machine": false, "Gun Trap": true, "SAM Site": true "Allow Players To Loot Traps": false, "Allow Npcs To Target Other Npcs": false, "Turn Lights On At Night": false, "Turn Lights On Indefinitely": false, "Skins": { "Boxes": { "Preset Skins": [], "Ignore If Skinned Already": false, "Use Identical Skins": false, "Use Random Skin": false, "Use Workshop Skins": false, "Use Imported Workshop Skins File": true, "Use Approved Workshop Skins Only": false }, "Npcs": { "Use Identical Skins": true, "Use Random Skin": true, "Use Workshop Skins": true, "Use Imported Workshop Skins File": true, "Use Approved Workshop Skins Only": false }, "Deployables": { "Partial Names": [ "door", "barricade", "chair", "fridge", "furnace", "locker", "reactivetarget", "rug", "sleepingbag", "table", "vendingmachine", "waterpurifier", "skullspikes", "skulltrophy", "summer_dlc", "sled" ], "Preset Door Skins": [], "Skin Everything": false, "Ignore If Skinned Already": false, "Use Identical Skins": false, "Use Random Skin": false, "Use Workshop Skins": false, "Use Imported Workshop Skins File": true, "Use Approved Workshop Skins Only": false } "Weapons": { "Infinite Ammo": { "AutoTurret": false, "FlameTurret": false, "FogMachine": false, "GunTrap": false, "SamSite": false }, "Ammo": { "AutoTurret": 90, "FlameTurret": 40, "FogMachine": 50, "GunTrap": 32, "SamSite": 24 }, "Fog Machine Allows Motion Toggle": true, "Fog Machine Requires A Power Source": true, "Spooky Speakers Requires Power Source": false, "Test Generator Power": 100.0, "SamSite Repairs Every X Minutes (0.0 = disabled)": 5.0, "SamSite Range (350.0 = Rust default)": 100.0, "SamSite Requires Power Source": false }, Profiles (Raidable Bases Data Folder): This needs to be done for all 5 levels "Entities Not Allowed To Be Picked Up": [ "generator.small", "generator.static", "autoturret_deployed" ], "NPC Levels": { "Level 2 - Final Death": true }, "Spawn Inside Bases": { "Spawn On Floors": false, "Spawn On Beds": true, "Spawn On Rugs": false, "Spawn On Rugs With Skin Only": 1, "Bed Health Multiplier": 1.0, "Rug Health Multiplier": 1.0, "Spawn Murderers Outside": true, "Spawn Scientists Outside": true, "Minimum Inside (-1 = ignore)": 1, "Maximum Inside (-1 = ignore)": 1 }, "Event Traps And Turrets Ignore Npcs": true, "Auto Turrets": { "Aim Cone": 5.0, "Wait To Power On Until Event Starts": false, "Start Health": 1000.0, "Sight Range": 30.0, "Double Sight Range When Shot": false, "Set Hostile (False = Do Not Set Any Mode)": true, "Requires Power Source": false, "Sam Site": { "Repairs Every X Minutes (0.0 = disabled)": 5.0, "Range (350.0 = Rust default)": 100.0, "Requires Power Source": false, "Minimum Health": 1000.0, "Maximum Health": 1000.0 }, "Tesla Coil": { "Requires A Power Source": true, "Max Discharge Self Damage Seconds (0 = None, 120 = Rust default)": 0.0, "Max Damage Output": 35.0, "Health": 250.0 }, "Add Code Lock To Unlocked Or KeyLocked Doors": true, "Add Key Lock To Unlocked Or CodeLocked Doors": false, "Add Code Lock To Tool Cupboards": true, "Add Key Lock To Tool Cupboards": false, "Add Code Lock To Boxes": false, "Add Key Lock To Boxes": false, "Add Code Lock To Lockers": true, "Add Key Lock To Lockers": false, "Close Open Doors With No Door Controller Installed": true, "Allow Duplicate Items": false, "Allow Players To Pickup Deployables": true, "Allow Players To Deploy A Cupboard": true, "Allow Players To Deploy Barricades": true, "Divide Loot Into All Containers": true, "Empty All Containers Before Spawning Loot": true,$5.00-
- 1
-

-
- #trap
- #trap base
- (and 14 more)
-

Version 1.0.7
690 downloads
Warning: To use this loot tables pack, you need to purchase the paid Raidable Bases plugin if you do not already own it: https://codefling.com/plugins/raidable-bases ENHANCED LOOT TABES FOR RAIDABLE BASES: This package includes only the Base_Loot folder, offering balanced loot tables designed for Raidable Bases. What's New? 1) Two Loot Options: - Vanilla Loot: Classic setup for a traditional experience. - Enhanced Loot: Optimized for 2x, 3x, 5x, and higher servers, with fewer junk items. 2) Balanced Across 5 Levels: Loot is tailored across Easy to Nightmare levels, ensuring rewards match the effort (e.g., a 30 C4 raid gives proportional loot). 3) Regular Updates: Loot tables are kept updated for consistent balance and fairness. This simple, plug-and-play package ensures a clean and rewarding raiding experience for your server. This Raidable Bases Loot Tables (Easy to Nightmare) package includes: - Easy Bases Base_Loot "Vanilla" & "Enhanced" tables - Medium Bases Base_Loot "Vanilla" & "Enhanced" tables - Hard Bases Base_Loot "Vanilla" & "Enhanced" tables - Expert Bases Base_Loot "Vanilla" & "Enhanced" tables - Nightmare Bases Base_Loot "Vanilla" & "Enhanced" tables Beware: Our loot table package includes only the 5-tier loot tables within the Base_loot folder, ranging from easy to nightmare. It does not include the loot tables from the Difficulty_Loot or Weekday_Loot folders. It includes a separate loot table setup for each of the five tiers, with each one meticulously configured individually. With future updates, we aim to continue improving our loot table day by day. We additionally offer a package with 110 bases, including loot tables: https://codefling.com/bases/raidable-bases-pack-loot-tables-110-bases INSTALLATION INSTRUCTIONS: Extract the downloaded zip file using WinRAR. Then, move the files to the following location, ensuring a clean setup without any other files: /serverfiles/oxide/data/RaidableBases/Base_Loot You need to place the five prepared .json files for Easy through Nightmare bases into the Base_Loot folder. The number of items that spawn in crates is determined not by the loot table but by five different configs found in the /serverfiles/oxide/data/RaidableBases/Profiles directory, using the code below. For example, open Easy Bases.json inside the Profiles folder with Notepad, press CTRL+F, and search for "Amount Of Items To Spawn" In the example below, the spawn amount is set to 90. You can adjust this number to your preference, either increasing or decreasing it. Keep in mind that changing this will affect the drop rates in the loot table. "Amount Of Items To Spawn": 90, You may also open the individual base profile files (e.g., Easy Bases.json, Medium Bases.json, Hard Bases.json, Expert Bases.json, Nightmare Bases.json) located in /serverfiles/oxide/data/RaidableBases/Profiles and adjust the "Loot Amount Multiplier" to values such as 2.0 or 5.0. This will alter the existing loot balance. However, we recommend keeping this setting at 1.0, as changing it may disrupt the intended loot balance: "Loot Amount Multiplier": 1.0$19.99- 3 comments
- 2 reviews
-
- 3
-
-
-
- #raidable
- #raidable bases
- (and 35 more)
-

Version 1.0.1
5 downloads
About 120 new Raidable bases by JaaaaaThomas July Pack About my new 120 Raidable bases by JaaaaaThomas 29.06.2026 June Pack Hello everyone, I’m excited to present a brand new base pack! I’ve put a lot of hard work into this project and I hope you’ll appreciate the quality. In fact, we are already working on the next one! This pack includes 120 completely new, raid-ready bases. You will find 20 unique designs for every difficulty level, from Easy all the way up to Clan Bases. I hope you enjoy these builds! If you’re satisfied, please leave a positive review—it helps a lot. Also, if you have any suggestions for future updates, feel free to leave a comment below! Thank you!" Important Reminder This is a Base Model Pack (.json files). It is NOT the Raidable Bases plugin script. These are the blueprints crafted by our professional building team. Level Up Your Server Don't settle for basic cubes. Give your players a challenge they’ll never forget. Whether you're looking for a "Hardcore" event or a permanent fortress for your top clan, these 120 new bases are built to dominate. [ Buy Now & Start Building]$94.95