
Search the Community
Showing results for tags 'ai'.
Found 22 results
-

Version 0.1.4
594 downloads
Translate your Rust plugin messages Translate a Rust plugin’s language file with a single command. Free translates from English only, one file at a time, into the language you choose. Use Pro to translate several plugins in one go. Free plugin · Oxide and Carbon · Your own OpenAI API key Open the Free configurator → MyPlugin.json translated from English into French Manual installation Put AITranslation.cs in oxide/plugins/ or carbon/plugins/. Copy plugins/AITranslation.cs. Set OpenAIToken in config/AITranslation.json after the first load and reload the plugin. Put your English source in lang/en/MyPlugin.json, then run aitfree.translateplugin MyPlugin fr in the server console. Review the result in lang/fr/MyPlugin.json. You can edit the JSON directly or use the optional PimpMyRust configurator. To review a translation before applying it from the Hub, open the plugin’s language files and choose Translate with AI. What will the API cost? Example Estimated API cost (USD) One file, one language $0.0012 Ten files, one language each $0.012 OpenAI bills for API use. These examples assume 2,000 tokens sent and 2,000 returned for each file and language, at the standard GPT-6 Luna rates of $0.10 and $0.50 per million tokens respectively. Amounts are before tax and assume no retries, extra reasoning tokens or discounts. OpenAI pricing → Configure and translate with PimpMyRust Configure AI Translation Free → Change your settings. Edit AITranslation.json directly, or use the PimpMyRust configurator to choose an OpenAI model and set usage limits. Download your settings or sync them with a connected server. Translate from the Hub. Connect your server over SFTP and RCON, and make sure AI Translation Free is running on it. You’ll need access to the Hub’s server tools. Generating a preview can incur API charges. Choose a model and response size in the configurator Free or Pro? Feature Free Pro Language files One file at a time, from English Several plugins or languages at once, with a choice of source language Review before saving Hub Hub or server console Player chat — Translation and three /ait layouts Player panel setup — PimpMyCUI 1.4.0 included with Pro Translation services OpenAI OpenAI, DeepL and others Frameworks Oxide, Carbon Oxide, Carbon With Pro, translate several plugins’ language files into several languages in one run. In Rust, players can also read chat in their own language. View AI Translation Pro on Codefling → What happens to an existing translation? Before saving the translation, the plugin checks that the file is valid JSON and that its keys and markers like {0} are still there. It backs up an existing translation before replacing it. Read through the result before using it with players. Who can run the command? Use the server console, RCON or a Rust administrator account. Other operators can run it with aitranslation.admin. Grant that permission only to people you trust to make paid API requests. The plugin sends the selected file’s text to OpenAI. Use either Free or Pro on a given server. Installation and recovery guide → · Codefling support →Free -
Version 2.1.1
125 downloads
Translate Rust chat and plugin language files In-game chat. Players can read messages in the language they choose. Plugin language files. Translate several plugins at once and review the results before saving. Oxide and Carbon · Translation service billed separately Open the PimpMyRust configurator → Glass Cards Translate several plugins at once Pick the plugins and languages. For example, translate the welcome messages, alerts and menu labels from three plugins into French and German in one run. Preview the translations before replacing the files on your server. After an update. Find new or changed messages that still need translating. One plugin file translated into French and German Let players choose their language Players type /ait to choose their language, turn translation on or off, or show the original message alongside the translation. Global chat is supported. You can also enable translation for team, clan or local chat. Pick and customize one of the three menu templates in the PimpMyRust configurator. Field Radio Compact Console What will translation cost? Your translation provider bills for usage. These estimates use GPT-6 Luna from OpenAI. Example Estimated API cost (USD) One file into one language $0.0012 Ten files into three languages each $0.036 1,000 chat messages a day, one language $0.96 / 30 days 1,000 chat messages a day, three languages $2.88 / 30 days Files. 2,000 input and 2,000 output tokens per file and language. Chat. 120 input and 40 output tokens per translation. The three-language example assumes a higher daily request limit than the default. Estimates use standard rates and exclude tax, retries and extra reasoning tokens. GPT-6 Luna pricing → Configure and translate with PimpMyRust Configure AI Translation Pro → Edit AITranslationPro.json directly or change your settings in the PimpMyRust configurator. Download your files or sync them with a connected server. Choose your translation provider, such as OpenAI, DeepL or Gemini. You can use a different provider for chat and files. Translate from the Hub. Open a plugin’s language files and choose Translate with AI. You can review the result before applying it. This requires access to the Hub’s server tools and a server connected over SFTP and RCON with Pro running. Manual installation Extract the ZIP and merge its folders into oxide/ or carbon/. Load the included PimpMyCUI 1.4.0, then AITranslationPro. Keep the manifest and three layouts together in data/PimpMyCUI/plugin-pages/aitranslationpro/. Set your provider and its API key in config/AITranslationPro.json, then reload. Grant aitranslationpro.chat.use to the groups that can use translated chat and test /ait in game. PimpMyCUI renders the player menu. Chat and file translation work without the menu. To translate a file into French and German from the server console, run aitpro.translateplugin MyPlugin fr de. You can edit the JSON directly or use the optional PimpMyRust configurator. Installation and command guide → · Codefling support →$9.98 -

Version 2.0.0
727 downloads
Want more intense air combat and dynamic patrols on your Rust server? HeliPilots introduces AI helicopter pilots ready to dominate the skies and attack players from the air. Customize everything - from helicopter type and pilot behavior to flight routes! Features: Helicopter Setup • Supports Scrap Transport Helicopter, Minicopter and Attack Helicopter. • Customizable AI pilots with adjustable health, clothes, weapons, and combat behaviour. • Define specific flight behavior, speed, altitude, and route paths — random or pre-defined. Combat & AI Behavior • Pilots dynamically engage or avoid player attacks. • Setup rockets and turret for Attack Helicopter. • Customize aggression level — determine whether AI attacks immediately or must be provoked. • Customize damage, accuracy, and targeting behavior. ⚙ Advanced Heli Customization • Modify flight speed, fuel consumption, durability, and damage rate. • Customize helicopter loot tables and drop rates. • Configure crash behavior, detonator and other. Pilot Customization • Set health, clothes, weapon loadouts, and equipment. • Custom damage multipliers. • Customize pilot loot, including weapons, items and resources. 🛠 Event & Path System • Record custom flight paths or let the plugin auto-generate patrol routes. • Control event triggers, spawn rates, patrol frequency, and respawn timers. 🖥 Admin Commands (permission drivercontroller.admin) • spawnhelitest – Spawn a test helicopter with AI pilot. • removehelitest – Delete spawned test helicopters. • visibleheli – Toggle admin visibility of AI helicopters. • recordhelipath – Record a custom helicopter patrol path. See It in Action! Watch the Video After downloading you’ll also get plugin called DriverController. It’s a single plugin to setup presets of bots and loot between all of my plugins. Configuration: { "Event settings": { "Allowed events (vehicle) count": { "Min": 3.0, "Max": 6.0 }, "Event restart delay": { "Min": 60.0, "Max": 120.0 }, "Prevent NPC from attacking drivers and companions?": true, "Block damage to transport from not players?": true, "Block damage to driver and companion from not players?": true, "Destroy events of this plugin when pause is enabled?": true, "Delete the event if ran out of fuel?": true, "Marker text color": { "Color (for HEX, put # at the beginning)": "0.4 0.5 0.6 1" }, "Event name for the marker": "EVENT HELI", "Route recording settings": { "Enable recorded routes usage?": true, "Clear saved routes after wipe?": true, "Minimum distance between points to record in route (used when recording route)": 40.0, "Minimum number of points to save (used when recording route)": 30.0, "Recorder route height": 50.0 }, "Route generation": { "Enable route generation": true, "Maximum number of monuments for a flight, when generating a route": 5, "Names of monuments, prefabs or their part, for the blacklist (will be excluded when generating a route)": [ "Outpost" ] }, "Controller settings": { "Controller update timer (0 - 0.2)": 0.0 } }, "Loot container position settings": { "Minicopter": { "Container position offset on the vehicle": { "x": 0.0, "y": 0.95, "z": -0.8 }, "Container rotation offset on the vehicle": { "x": 0.0, "y": 0.0, "z": 0.0 } }, "TransportHeli": { "Container position offset on the vehicle": { "x": 0.0, "y": 0.95, "z": -0.8 }, "Container rotation offset on the vehicle": { "x": 0.0, "y": 0.0, "z": 0.0 } } }, "Heli settings": [ { "Activate this event?": true, "Transport type for event(Minicopter, TransportHeli)": "Minicopter", "Driver name (key) from driver settings in DriverController plugin": "PilotHeli", "Companion name (key) from companion settings in DriverController plugin (list to occupy free seats in the vehicle)": [ "Companion1" ], "Loot container settings": { "Enable loot in vehicle container?": true, "Drop the loot when destroying the transport?": false, "Amount of slots": 1, "Name of loot set from loot settings in DriverController plugin (list loot sets for random selection)": [ "ResourcesHeli" ] }, "Сontroller settings": { "Max speed (km/h)": 40.0, "Maximum speed when obstacles detected (km/h)": 15.0, "Height for flying along the route": { "Min": 30.0, "Max": 60.0 }, "Chase mode settings": { "Chase attacking players?": true, "Max chase distance": 250.0, "Chase timer": 120.0, "Maximum speed during chase (km/h)": 60.0, "Height for flying during chase": { "Min": 10.0, "Max": 30.0 } } }, "Damage receive rate": 0.5, "Fuel settings": { "Enable automatic fuel refueling?": true, "Remove fuel when unlocking vehicle?": true, "Maximum fuel in vehicle": 500 }, "Vehicle headlight settings": { "Enable vehicle headlights?": true, "Use headlights only at night?": true }, "Detonator settings": { "Add C4 to the vehicle after the death of the driver (used to despawn vehicles)": true, "After how many seconds explosives will be blown up": 60.0, "Explosives position offset": { "x": 0.0, "y": 0.1, "z": 0.0 } } }, { "Activate this event?": true, "Transport type for event(Minicopter, TransportHeli)": "TransportHeli", "Driver name (key) from driver settings in DriverController plugin": "PilotHeli", "Companion name (key) from companion settings in DriverController plugin (list to occupy free seats in the vehicle)": [ "Companion1" ], "Loot container settings": { "Enable loot in vehicle container?": true, "Drop the loot when destroying the transport?": false, "Amount of slots": 1, "Name of loot set from loot settings in DriverController plugin (list loot sets for random selection)": [ "ResourcesHeli" ] }, "Сontroller settings": { "Max speed (km/h)": 40.0, "Maximum speed when obstacles detected (km/h)": 15.0, "Height for flying along the route": { "Min": 40.0, "Max": 70.0 }, "Chase mode settings": { "Chase attacking players?": true, "Max chase distance": 250.0, "Chase timer": 120.0, "Maximum speed during chase (km/h)": 60.0, "Height for flying during chase": { "Min": 5.0, "Max": 20.0 } } }, "Damage receive rate": 0.5, "Fuel settings": { "Enable automatic fuel refueling?": true, "Remove fuel when unlocking vehicle?": true, "Maximum fuel in vehicle": 500 }, "Vehicle headlight settings": { "Enable vehicle headlights?": true, "Use headlights only at night?": true }, "Detonator settings": { "Add C4 to the vehicle after the death of the driver (used to despawn vehicles)": true, "After how many seconds explosives will be blown up": 60.0, "Explosives position offset": { "x": 0.0, "y": 0.8, "z": 0.0 } } } ] } DriverController Configuration: { "Drivers settings": { "DriverBike": { "Bot health": { "Min": 100.0, "Max": 150.0 }, "Prevent attacking players first?": true, "Damage receive rate": 2.0, "Damage rate": 2.0, "Spawn bag with items instead of corpse on death?": true, "In how many seconds remove bots, after destroying the vehicle? (0 - will not remove)": 120.0, "Clothes": [ { "Item": { "Item shortname or ID": "shoes.boots", "Item skin": 0 }, "Item custom name (if not needed leave empty)": null, "Amount": 1 }, { "Item": { "Item shortname or ID": "wood.armor.pants", "Item skin": 0 }, "Item custom name (if not needed leave empty)": null, "Amount": 1 }, { "Item": { "Item shortname or ID": "pants", "Item skin": 0 }, "Item custom name (if not needed leave empty)": null, "Amount": 1 }, { "Item": { "Item shortname or ID": "wood.armor.jacket", "Item skin": 0 }, "Item custom name (if not needed leave empty)": null, "Amount": 1 }, { "Item": { "Item shortname or ID": "hoodie", "Item skin": 0 }, "Item custom name (if not needed leave empty)": null, "Amount": 1 }, { "Item": { "Item shortname or ID": "riot.helmet", "Item skin": 0 }, "Item custom name (if not needed leave empty)": null, "Amount": 1 } ], "Weapons": [ { "Item": { "Item shortname or ID": "pistol.revolver", "Item skin": 0 }, "Item custom name (if not needed leave empty)": null, "Amount": 1 } ], "Bot loot": { "Enable loot after bot's death?": true, "Amount of slots": 5, "Loot set name (key) from loot settings (you can enter many sets for random selection)": [ "ResourcesDriver" ] } }, "DriverCar": { "Bot health": { "Min": 100.0, "Max": 150.0 }, "Prevent attacking players first?": true, "Damage receive rate": 2.0, "Damage rate": 2.0, "Spawn bag with items instead of corpse on death?": true, "In how many seconds remove bots, after destroying the vehicle? (0 - will not remove)": 120.0, "Clothes": [ { "Item": { "Item shortname or ID": "hazmatsuit", "Item skin": 0 }, "Item custom name (if not needed leave empty)": null, "Amount": 1 } ], "Weapons": [ { "Item": { "Item shortname or ID": "rifle.ak", "Item skin": 0 }, "Item custom name (if not needed leave empty)": null, "Amount": 1 } ], "Bot loot": { "Enable loot after bot's death?": true, "Amount of slots": 5, "Loot set name (key) from loot settings (you can enter many sets for random selection)": [ "ResourcesDriver" ] } }, "DriverBoat": { "Bot health": { "Min": 100.0, "Max": 150.0 }, "Prevent attacking players first?": true, "Damage receive rate": 2.0, "Damage rate": 2.0, "Spawn bag with items instead of corpse on death?": true, "In how many seconds remove bots, after destroying the vehicle? (0 - will not remove)": 120.0, "Clothes": [ { "Item": { "Item shortname or ID": "hazmatsuit", "Item skin": 0 }, "Item custom name (if not needed leave empty)": null, "Amount": 1 } ], "Weapons": [ { "Item": { "Item shortname or ID": "t1_smg", "Item skin": 0 }, "Item custom name (if not needed leave empty)": null, "Amount": 1 } ], "Bot loot": { "Enable loot after bot's death?": true, "Amount of slots": 5, "Loot set name (key) from loot settings (you can enter many sets for random selection)": [ "ResourcesDriver" ] } }, "PilotHeli": { "Bot health": { "Min": 100.0, "Max": 150.0 }, "Prevent attacking players first?": true, "Damage receive rate": 2.0, "Damage rate": 2.0, "Spawn bag with items instead of corpse on death?": true, "In how many seconds remove bots, after destroying the vehicle? (0 - will not remove)": 120.0, "Clothes": [ { "Item": { "Item shortname or ID": "jumpsuit.suit.blue", "Item skin": 0 }, "Item custom name (if not needed leave empty)": null, "Amount": 1 } ], "Weapons": [ { "Item": { "Item shortname or ID": "rifle.ak", "Item skin": 0 }, "Item custom name (if not needed leave empty)": null, "Amount": 1 } ], "Bot loot": { "Enable loot after bot's death?": true, "Amount of slots": 5, "Loot set name (key) from loot settings (you can enter many sets for random selection)": [ "ResourcesDriver" ] } } }, "Companion settings": { "Companion1": { "Bot health": { "Min": 100.0, "Max": 150.0 }, "Prevent attacking players first?": true, "Damage receive rate": 2.0, "Damage rate": 2.0, "Spawn bag with items instead of corpse on death?": true, "In how many seconds remove bots, after destroying the vehicle? (0 - will not remove)": 120.0, "Clothes": [ { "Item": { "Item shortname or ID": "hazmatsuit_scientist_nvgm", "Item skin": 0 }, "Item custom name (if not needed leave empty)": null, "Amount": 1 } ], "Weapons": [ { "Item": { "Item shortname or ID": "rifle.ak", "Item skin": 0 }, "Item custom name (if not needed leave empty)": null, "Amount": 1 } ], "Bot loot": { "Enable loot after bot's death?": true, "Amount of slots": 5, "Loot set name (key) from loot settings (you can enter many sets for random selection)": [ "ResourcesCompanion", "WeaponsCompanion" ] } }, "Companion2": { "Bot health": { "Min": 100.0, "Max": 150.0 }, "Prevent attacking players first?": true, "Damage receive rate": 2.0, "Damage rate": 2.0, "Spawn bag with items instead of corpse on death?": true, "In how many seconds remove bots, after destroying the vehicle? (0 - will not remove)": 120.0, "Clothes": [ { "Item": { "Item shortname or ID": "hazmatsuit.arcticsuit", "Item skin": 0 }, "Item custom name (if not needed leave empty)": null, "Amount": 1 } ], "Weapons": [ { "Item": { "Item shortname or ID": "rifle.ak", "Item skin": 0 }, "Item custom name (if not needed leave empty)": null, "Amount": 1 } ], "Bot loot": { "Enable loot after bot's death?": true, "Amount of slots": 5, "Loot set name (key) from loot settings (you can enter many sets for random selection)": [ "ResourcesCompanion", "WeaponsCompanion" ] } }, "Companion3": { "Bot health": { "Min": 100.0, "Max": 150.0 }, "Prevent attacking players first?": true, "Damage receive rate": 2.0, "Damage rate": 2.0, "Spawn bag with items instead of corpse on death?": true, "In how many seconds remove bots, after destroying the vehicle? (0 - will not remove)": 120.0, "Clothes": [ { "Item": { "Item shortname or ID": "hazmatsuit.lumberjack", "Item skin": 0 }, "Item custom name (if not needed leave empty)": null, "Amount": 1 } ], "Weapons": [ { "Item": { "Item shortname or ID": "rifle.ak", "Item skin": 0 }, "Item custom name (if not needed leave empty)": null, "Amount": 1 } ], "Bot loot": { "Enable loot after bot's death?": true, "Amount of slots": 5, "Loot set name (key) from loot settings (you can enter many sets for random selection)": [ "ResourcesCompanion", "WeaponsCompanion" ] } }, "Companion4": { "Bot health": { "Min": 100.0, "Max": 150.0 }, "Prevent attacking players first?": true, "Damage receive rate": 2.0, "Damage rate": 2.0, "Spawn bag with items instead of corpse on death?": true, "In how many seconds remove bots, after destroying the vehicle? (0 - will not remove)": 120.0, "Clothes": [ { "Item": { "Item shortname or ID": "hazmatsuit.spacesuit", "Item skin": 0 }, "Item custom name (if not needed leave empty)": null, "Amount": 1 } ], "Weapons": [ { "Item": { "Item shortname or ID": "rifle.ak", "Item skin": 0 }, "Item custom name (if not needed leave empty)": null, "Amount": 1 } ], "Bot loot": { "Enable loot after bot's death?": true, "Amount of slots": 5, "Loot set name (key) from loot settings (you can enter many sets for random selection)": [ "ResourcesCompanion", "WeaponsCompanion" ] } } }, "Loot settings": { "ResourcesBike": [ { "Item": { "Item shortname or ID": "wood", "Item skin": 0 }, "Item custom name (if not needed leave empty)": null, "Spawn chance (0-100%)": { "Min": 100.0, "Max": 100.0 }, "Amount": { "Min": 5000.0, "Max": 50000.0 } }, { "Item": { "Item shortname or ID": "stones", "Item skin": 0 }, "Item custom name (if not needed leave empty)": null, "Spawn chance (0-100%)": { "Min": 100.0, "Max": 100.0 }, "Amount": { "Min": 1000.0, "Max": 10000.0 } } ], "ResourcesCar": [ { "Item": { "Item shortname or ID": "wood", "Item skin": 0 }, "Item custom name (if not needed leave empty)": null, "Spawn chance (0-100%)": { "Min": 100.0, "Max": 100.0 }, "Amount": { "Min": 5000.0, "Max": 50000.0 } }, { "Item": { "Item shortname or ID": "stones", "Item skin": 0 }, "Item custom name (if not needed leave empty)": null, "Spawn chance (0-100%)": { "Min": 100.0, "Max": 100.0 }, "Amount": { "Min": 1000.0, "Max": 10000.0 } } ], "ResourcesBoat": [ { "Item": { "Item shortname or ID": "wood", "Item skin": 0 }, "Item custom name (if not needed leave empty)": null, "Spawn chance (0-100%)": { "Min": 100.0, "Max": 100.0 }, "Amount": { "Min": 5000.0, "Max": 50000.0 } }, { "Item": { "Item shortname or ID": "stones", "Item skin": 0 }, "Item custom name (if not needed leave empty)": null, "Spawn chance (0-100%)": { "Min": 100.0, "Max": 100.0 }, "Amount": { "Min": 1000.0, "Max": 10000.0 } } ], "ResourcesHeli": [ { "Item": { "Item shortname or ID": "wood", "Item skin": 0 }, "Item custom name (if not needed leave empty)": null, "Spawn chance (0-100%)": { "Min": 100.0, "Max": 100.0 }, "Amount": { "Min": 5000.0, "Max": 50000.0 } }, { "Item": { "Item shortname or ID": "stones", "Item skin": 0 }, "Item custom name (if not needed leave empty)": null, "Spawn chance (0-100%)": { "Min": 100.0, "Max": 100.0 }, "Amount": { "Min": 1000.0, "Max": 10000.0 } } ], "ResourcesDriver": [ { "Item": { "Item shortname or ID": "wood", "Item skin": 0 }, "Item custom name (if not needed leave empty)": null, "Spawn chance (0-100%)": { "Min": 100.0, "Max": 100.0 }, "Amount": { "Min": 1000.0, "Max": 10000.0 } }, { "Item": { "Item shortname or ID": "stones", "Item skin": 0 }, "Item custom name (if not needed leave empty)": null, "Spawn chance (0-100%)": { "Min": 100.0, "Max": 100.0 }, "Amount": { "Min": 100.0, "Max": 1000.0 } } ], "ResourcesCompanion": [ { "Item": { "Item shortname or ID": "wood", "Item skin": 0 }, "Item custom name (if not needed leave empty)": null, "Spawn chance (0-100%)": { "Min": 100.0, "Max": 100.0 }, "Amount": { "Min": 100.0, "Max": 1000.0 } }, { "Item": { "Item shortname or ID": "stones", "Item skin": 0 }, "Item custom name (if not needed leave empty)": null, "Spawn chance (0-100%)": { "Min": 100.0, "Max": 100.0 }, "Amount": { "Min": 10.0, "Max": 100.0 } } ], "WeaponsCompanion": [ { "Item": { "Item shortname or ID": "rifle.ak", "Item skin": 0 }, "Item custom name (if not needed leave empty)": null, "Spawn chance (0-100%)": { "Min": 40.0, "Max": 80.0 }, "Amount": { "Min": 1.0, "Max": 1.0 } } ] } }$29.90 -

Version 1.4.6
1,336 downloads
Galium: detect, decide, enforce automatically. A complete, mostly-automated anti-cheat and moderation layer for Rust organizations, from the moment a suspicious player joins to the moment they're removed, across every server you run. Detect. Decide. Enforce automatically, across every server you run. Request Access Join Discord Catch the cheats the client tries to hide. Galium reads live, server-side gameplay to flag aimbot, silent aim, no-recoil, no-spread, spinbot, scripting, flyhack, spiderman, speedhack and exploits. Know exactly who to check first. Alert score and Guard ranking side by side, sortable and searchable, filtered by status and server. Cheat detection, anti-team, risk scoring, automated enforcement, moderation and persistent profiles that follow each SteamID across servers and wipes. Moderation that doesn't need a human watching. Chat and text filters are included; voice toxicity detection and automated sign and image moderation are add-ons. 40,000+ players monitored in real time, 947,687 unique players tracked in September 2026, 6,346,504 unique users indexed and profiled, and a record 61,774 players tracked at once. Automated moderation at scale starts here If you operate Rust servers and need cross-server cheat detection, teaming intelligence and automated enforcement that runs itself, and Galium is the infrastructure to support it. Request Access Join Discord See every feature in detail at galium.gg/features Automated Rust anti-cheat since 2021 · 40,000+ players monitored live · Built by CyberSynthetics Solutions LLCFree- 2 comments
- 70 reviews
-
- 11
-

-

-
- #anticheat
- #moderation
- (and 17 more)
-

Version 1.2.2
28 downloads
Extra Music Player Bring a full in-game music player to your Rust server ! Extra Music Player adds a beautiful, fully interactive music player UI to Rust. Players can browse tracks, play music in stereo, seek through songs, adjust volume with a draggable knob, bookmark favorites, and enjoy a real-time sound visualizer. Music is streamed through Rust's built-in voice system, so every player can hear it with zero downloads or client installs required. Additionally, it includes developer hooks for music playback, enabling the development of more original plugins. To add music, you need to use the included application, 'ExtraSoundConverter', to convert MP3 or WAV files into data that can be played on the server. Note: ExtraSoundConverter is only compatible with Windows 64-bit systems. Note: Please exercise caution regarding the handling of existing music, including songs, from a legal standpoint. If you plan to monetize music content through shop plugins or similar means, we recommend using automatically generated music such as SunoAI. https://suno.com/ In-Game Music Player UI - Full playlist menu with album art, track title, and artist display - Play / Pause / Stop / Restart / Next controls - Clickable seek bar — jump to any point in a song - Draggable volume knob with live percentage display (volume is saved per player) - Repeat toggle - "Like" button — players can bookmark songs into their own personal playlist - Track list automatically sorted by folder, then by name — organize your library with subfolders True Stereo Playback - You can play music in stereo. (Playback via certain dev hooks is not supported.) - Automatic synchronization keeps stereo tight even when players teleport, warp long distances, spin their camera, or experience ping spikes Real-Time Sound Visualizer - Animated spectrum visualizer rendered in the UI, synced to the music Per-Player Track Access Control - `Show all tracks` config option: when disabled, players only see tracks granted to their SteamID - Grant/revoke tracks with `addtrack` / `removetrack` console commands - Sell songs in your server shop, use them as rewards. Protected Track Files - Tracks use a dedicated encrypted format (.rusttrack) with embedded title, artist, cover art, spectrum data, and loop points - Your audio library can't simply be copied out as ordinary audio files Multi-Language Support - Built-in translations: English, Japanese, Simplified Chinese, Traditional Chinese, Russian, French, and Ukrainian Developer API - Simple hooks to play, pause, resume, and stop music from your own plugins - TTS/speech API — feed external Opus frames (e.g. from a TTS service) and play them to a player - Loop support and per-call volume control 1. Install the plugin place `ExtraMusicPlayer.cs` into your `oxide/plugins` folder. 2. Add music put your `.rusttrack` files into `oxide/data/ExtraMusicPlayer/`. Subfolders are supported and are used to group/sort the track list. Creating track files: `.rusttrack` files are created from your own audio files using the included ExtraSoundConverter.exe. Sample Music Pack 138 Song Free Download https://hstorage.jp/dl/gg3vufqfsg6O.zip You can download the Sample Music Pack and add 138 music tracks to your server for free. Please give it a try. Download the "Sample Music Pack," move the folder containing the `rusttrack` data to `oxide/data/ExtraMusicPlayer/`, and reload the plugin. 3. Open the player players type /music to open the music player and press play. How to convert music data using ExtraSoundConverter Requirements Windows x64, no .NET needed, ffmpeg required. Requires ffmpeg. Easy install on Windows: open PowerShell and run winget install --id=Gyan.FFmpeg -e 1. Add audio drag & drop mp3/wav/ogg/flac/m4a/aac (or click Add). Unsupported types are rejected. Title/Artist/cover are auto-read from tags. 2. Select format: .rusttrack = music player (spectrum + 2s silence pad). Title/Artist/cover stored. .rustbgm = developer-hook BGM (no spectrum); use the Loop editor to set loop points. 3. Convert Pick quality (kbps) and the output folder, then Convert. Output files are named after the Title (spaces → _); if the Title is empty, the original filename is used. Reverse: a data file wav or mp3 (pick in Format). mp3 embeds the Title, Artist and cover art into the single file; wav keeps Title/Artist only. No separate image file. Loop editor (.rustbgm only) three markers — P (blue) = playback start (where the server FIRST begins), S (green) = loop start, E (red) = loop end (the playhead jumps from E back to S). P and E are always present and placed automatically on load (P at the very start, E at the very end); move them by dragging. S is set by LEFT-clicking the waveform. They are always kept in order P ≤ S ≤ E (a marker won't move if you try to drag it out of order). A loop is exported only once you place S — it then loops S→E (E defaults to the track end, so the whole tail loops; drag E earlier to fold sooner). RIGHT-click anywhere = play from there; ▶ Play previews the loop seamlessly. Playback always stops at E (the part after E is never played, even with no loop start). The waveform outside the played range (before P / after E) is shown dimmed in gray. Zoom with the buttons or the mouse wheel, scroll with the bar. Points are quantized to chunk boundaries on export. No loop start (or Reset) = the whole track loops. "Trim outside markers" drops audio before P and after E on export — the result sounds identical. Chat Commands (permission: `extramusicplayer.use`) /music - Open Music Player Server Console Commands addtrack <SteamID> <trackFileName> - Grant a track to a player. (used with `Show all tracks: false`) removetrack <SteamID> <trackFileName> - Revoke a granted track. extramusicplayer.use - Allow the music player to open. { "Selected track color (R G B)": "1 0.55 0.30", "Gauge color (R G B A)": "0.79 0.34 0.16 1", "Spectrum / visualizer color (R G B)": "0.90 0.45 0.20", "Selected button color (R G B A)": "1 0.62 0.28 1", "Volume knob color (R G B A)": "1 1 1 0.75", "Time & volume % text color (R G B A)": "0.9 0.9 0.9 1", "Image - background": "https://i.imgur.com/FqQPPki.jpg", "Image - list row box": "https://i.imgur.com/h1dQNSB.png", "Image - button": "https://i.imgur.com/JNZDC27.png", "Image - play": "https://i.imgur.com/V02YZLb.png", "Image - pause": "https://i.imgur.com/IGnNjXC.png", "Image - volume": "https://i.imgur.com/GjEauMr.png", "Image - repeat": "https://i.imgur.com/VmdWTpQ.jpg", "Image - restart": "https://i.imgur.com/hUpU119.jpg", "Image - next": "https://i.imgur.com/kYpQ8Tt.jpg", "Image - playlist": "https://i.imgur.com/xDlj1pT.jpg", "Image - like": "https://i.imgur.com/kxPSF85.png", "Sound visualizer enabled": true, "Visualizer framerate (updates per second)": 30.0, "Playback gauge framerate (updates per second)": 10.0, "Show all tracks (false = only tracks granted per-SteamID via addtrack)": true } Developer API Please call the following APIs from your custom plugins. // Plays the track to the player (loop playback and volume adjustment are optional) bool ok = (bool)ExtraMusicPlayer.Call("ExtraMusicPlay", player, "MyTrack", true, 80); // Controls player playback // Pause ExtraMusicPlayer.Call("ExtraMusicPause", player); // Resume ExtraMusicPlayer.Call("ExtraMusicResume", player); // Stop ExtraMusicPlayer.Call("ExtraMusicStop", player); // Play from the entity's position.Duplicate playback is not possible. ExtraMusicPlayer.Call("ExtraMusicArea", sourceEntity, "MyTrack", false, 100); // AI Voice/TTS — Plays raw Opus frames to the player.Only audio compatible with Opus, such as Open AI and FishAudio, can be played. // Play ExtraMusicPlayer.Call("ExtraMusicSpeak", player, opusFrames, 20, 24000, 80); // Stop ExtraMusicPlayer.Call("ExtraMusicSpeakStop", player); // Check if the player is playing bool playing = (bool)ExtraMusicPlayer.Call("ExtraMusicIsPlaying", player); // Check if AI voice/TTS is playing bool speaking = (bool)ExtraMusicPlayer.Call("ExtraMusicIsSpeaking", player); Implementation example Q: What audio formats can I use? A: The plugin plays `.rusttrack` files, created from your own audio using the included converter tool. The format embeds the title, artist, cover art, and visualizer data, and is encrypted to protect your library. Q: Where do I put the music files? A: In `oxide/data/ExtraMusicPlayer/`. Subfolders are supported — the track list is sorted by folder, then by file name. Q: The sound becomes distorted when the player quickly switches the viewpoint while music is playing. A: Phenomena resembling the Doppler effect are part of the vanilla game mechanics. We are currently working on improvements to mitigate this issue. Q: Can I sell individual songs to players? A: Yes. Set `"Show all tracks"` to `false`, then grant songs per SteamID with `addtrack <SteamID> <file>`. Integrate the console command with your shop or reward plugin. Q: I added new files but they don't show up. A: Reload the plugin to refresh the track list. Q: Is Image Library required? A: No. The plugin caches its UI images by itself. No dependencies are required. Q: Will the visualizer hurt performance? A: The visualizer's update rate is configurable, and it can be disabled entirely. UI updates are throttled and pooled to stay lightweight. Q: What languages are supported? A: English, Japanese, Simplified Chinese, Traditional Chinese, Russian, French, and Ukrainian. VOID / NINJA WORKS DISCORD : https://discord.gg/U8uxePjSyA MADE IN JAPAN$30.00 -
Version 3.0.0
105 downloads
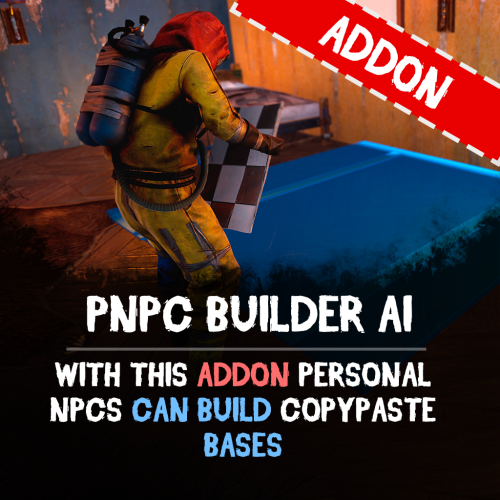
Bring your bases to life easily with PNPC Builder AI Addon — it makes your PNPCs able to construct any CopyPaste base design! Just assign a build point, and your bot will get to work! Features: 🏗 Automated Construction • Activate builder mode using /pnpc build. • Choose a build location, and bot will begin constructing your base. Landscape & Obstacle Check • Terrain scanning ensures proper placement. • Prevents building near restricted zones such as roads, monuments, or other tool cupboards. Customisation • Configure build speed, obstacles check and other settings. • You can optionally require resources for construction. How to Use: Spawn your Personal NPC and enter "/pnpc build" command. Use the middle mouse button to select your build point. The NPC checks the area and starts construction. Relax and watch how your bot brings your base to life! Requirements: • PersonalNPC Plugin • CopyPaste Plugin • Build files must be stored in /oxide/data/copypaste/ This addon is free for all owners of the PersonalBuilder plugin. Contact me in PM to receive your free copy. See it in Action! Watch the Video Configuration: To make the default config work, you need to download the build file (link below) and place it in this directory "/oxide/data/copypaste". Link: https://drive.google.com/file/d/1Y5ja8DvWVvcPl92hDfJeu0iZe9_YSuKk/view?usp=sharing { "Available buildings (by PNPC bot spawn name)": { "bot1": [ { "The name of the building to be selected via /pnpc build {building_name}": "builder_test1", "CopyPaste file name": "builder_test", "Require resources?": false, "Enable building block upgrade effects?": true, "Speed": { "Bot speed multiplier": 1.0, "Build speed multiplier": 1.0, "Time to check 1 foundation": 0.15, "Time to check 1 building block": 0.15 }, "Build": { "Max allowable height of foundation": 3.1, "Start height to ground": 0.5, "Max depth when building in water": 2.5, "Disable stability?": false, "Checks": { "Check is close to road?": true, "Check is building blocked?": true, "Check for Prevent Building triggers": true, "Prevent Building check radius": 10.0 }, "Doors": { "Deploy doors?": false }, "Cupboards (experimental)": { "Deploy cupboards?": false, "Authorize the owner?": false } } } ] } }$9.90 -

Version 1.1.10
565 downloads
Mounted NPCs The road stops being empty Between monuments a Rust map is nothing — trees, gravel, and a run you have already made a hundred times. This puts armoured scientists on horseback out there. They patrol terrain you never had a reason to watch, they ride you down when provoked, and they are gone from the save file the moment you unload the plugin. 60 Seconds between population top-ups 25 Metre no-spawn ring around bases 4 Things you define per rider type 0 Dependencies ✓Rider types you write yourself — NPC prefab, weapon, every worn item with its skin ID, and the horse's armour ✓Peaceful until you shoot first — and then that player is remembered for the rest of the rider's life ✓Never spawns on somebody's roof — the map is pre-scanned and anything within 25 m of a building block is thrown out ✓The horses don't rot — decay damage is zeroed and Rust's decay replacement is blocked, so a patrol doesn't end in a pile of parts ✓Nothing touches your save file — riders and horses are unsaveable by design and every one of them dies on unload 01 — Riders Dress them however you like A rider type is four fields, and you can have as many types as you want. Every spawn picks one at random, so a road can hand you a hazmat scientist with an LR300 and then something you built yourself. Any NPC prefab as the base The default is the full-kit LR300 scientist, but the prefab path is a plain config string — heavy scientists, tunnel dwellers, anything on the scientist chassis goes in the same field. Clothing with skin IDs The wear list is shortname paired with skin ID, so a rider can turn up in your server's own skinned gear rather than the stock hazmat suit. The prefab's default clothing is cleared first, so you get exactly what you listed and nothing underneath it. One weapon, by shortname Name a weapon and the belt is cleared and rebuilt around it. Leave it empty and the prefab keeps whatever it came with. Bows are the one exception — they are skipped deliberately, because a mounted NPC cannot draw one. Armour on the horse too Roadsign barding by default, and it is equipped properly rather than dropped in the inventory — the horse renders with it on. 02 — Spawning Out in the world, not in your compound The map is surveyed once on startup and the plugin keeps a list of places a horse can actually stand. Nothing is placed blind. Terrain only, and above the waterline Candidate points are traced straight down from 100 m and kept only if they land on terrain. Water, construction and prevent-building volumes are rejected, and so is anything at or below sea level — no riders trotting along the seabed. A 25-metre ring around anything built A point with a building block inside 25 m is dropped, and the check runs against the live map, not a snapshot. Players who wall off a hillside stop riders appearing on it. Topped up every minute A timer refills the roster to your population figure once a minute, so a night of hunting doesn't leave the map empty by morning. /spawnrider puts one in front of you when you want to look at your config instead of waiting for one to ride past. 03 — Behaviour Scenery until you make it personal Riders do not open fire on sight. Left alone they are something you watch cross a ridge; shoot one and it becomes a problem that follows you. They shadow you before they shoot you With the passive switch on, a rider will still ride over and pace you — the scientist just won't pull the trigger. It is a far better encounter than an NPC that either ignores you or kills you, and a rider who is only shadowing gets bored after 25 seconds and goes looking for somebody else. Hit one and it never forgets Damage the scientist or the horse and you are added to that rider's grudge list permanently. The 25-second boredom timer does not apply to you any more — it will keep coming while you are both alive. It knows when a chase is over Targets are dropped the moment they enter a safe zone, start swimming, go to sleep, disconnect or die. Nobody gets shot at while loading into an outpost, and no rider stands in the surf waiting for a swimmer. A damage dial so the fight stays winnable A mounted scientist is a small target sitting behind a large animal, so incoming damage to him is multiplied — six times by default. Turn it down for a rider who takes real work to bring down, or to 1 for stock scientist health. 04 — Horses The mount is handled properly Rust's horses were built to be owned, fed and stabled. Three of those systems have to be switched off before a horse can just live outdoors, and all three are. No decay, no decay replacement Decay damage to a rider's horse is zeroed outright, and the engine's swap-it-for-a-wreck routine is refused. A rider left alone on the far side of the map is still a rider tomorrow. No ragdoll flailing A Harmony patch suppresses the horse ragdoll for plugin mounts only, keyed on their own skin ID. Your players' horses ragdoll exactly as they always did. You decide what happens to the horse Kill the scientist and the horse either drops with him or is cut loose as a riderless animal standing where the fight ended — one switch. The second option turns every encounter into a horse worth walking over for. Reliability Leaves nothing behind ✓Riders and horses are never saved — both are marked unsaveable at spawn, so they cannot accumulate in your map file or come back as orphans after a wipe ✓Unload kills every one of them — scientist and horse together, no strays left standing in a field ✓A dead rider frees its slot immediately — the roster is corrected on death, not on a sweep, so the population figure means what it says ✓The AI stops itself — the moment a horse or its scientist is gone, the controlling component tears itself down instead of ticking against a dead entity ✓No dependencies — nothing to install alongside it, and no economy or NPC framework required Commands One command, for you Players never type anything, and there is nothing to hand out — the command is gated on admin, not on a permission. /spawnriderSpawn a random rider type at your feet — the fast way to check a config change Questions Before you buy Can I change what they wear and what they carry?Yes, per rider type. The wear list takes a shortname and a skin ID for each item, so custom-skinned outfits work, and the weapon is a single shortname. Bows are ignored on purpose. There is no kit-plugin integration — the items are named directly in the config. Can I have several kinds of rider on one map?Yes. Rider types are a list, and each spawn picks one at random. Each type carries its own scan radius, so a lightly armed scout can notice you from further away than a heavy. Can I set my own spawn points, or spawn a type in one region?No. Positions are generated from the terrain at startup and used for every type equally. There is no per-type placement and no way to hand-pick a location beyond spawning one yourself with the command. Do they drop the gear I dressed them in?Yes — the corpse carries whatever you put on the rider, and there is no switch to strip it. Price the outfit accordingly: expensive clothing on a common rider is a loot faucet. What about snowmobiles or other vehicles?Horses only. The movement code drives the horse's own gait and steering directly, so it does not transfer to another vehicle. Will they camp new players or shoot into outposts?No. Safe-zone players are never valid targets and an existing target is dropped the moment they enter one, along with anyone swimming, sleeping, disconnected or dead. Leave the passive switch on and a rider will not fire at all until it is shot. Do they survive a restart?No, and that is deliberate — they are never written to the save. The map is re-surveyed and the population rebuilt on load, so a restart costs you nothing but gives you a fresh spread of riders.$12.99- 19 comments
- 3 reviews
-
- 1
-
-
- #scientist
- #horse
- (and 4 more)
-

Version 1.0.0
81 downloads
Scarecrow Control Scarecrow Control gives server owners full control over vanilla Scarecrow NPCs without replacing their original AI. Customize their names, health, movement, senses, equipment, targeting behavior, population and more through a simple configuration file. Perfect for Halloween servers, PvE environments, seasonal events, or any server that wants to make vanilla Scarecrows more interesting. Features Custom Names — Set one fixed name or randomly select names from a configurable list. Custom Health — Adjust Scarecrow maximum health. Movement Control — Configure walking and running speed. AI Senses — Control attack range, target lost range and detection range. Safe Zone Behavior — Choose whether Scarecrows ignore players inside safe zones. Custom Clothing — Equip Scarecrows with custom clothing and Workshop skins. Custom Weapons — Configure their weapon and skin. Targeting Control — Configure interactions with Scientists, Bandit Guards, Bradley APC and NPC Turrets. Loot Control — Optionally remove loot from Scarecrow corpses. Custom Death Sound — Play a configurable effect when a Scarecrow dies. Population Control — Override vanilla Scarecrow population and beancan settings. Night Mode — Automatically increase population or change combat stats during the night. Existing NPC Support — Settings are also applied to already spawned Scarecrows. Vanilla AI — Keeps Rust's original Scarecrow AI and behavior. Safe Unload — Modified vanilla ConVars are restored when the plugin unloads. Custom Names Give every Scarecrow the same name or enable a pool of random names. "Name Settings": { "Enabled": true, "Use Random Names": true, "Name": "Scarecrow", "Random Names": [ "Scarequack", "Strawbill", "Gravebill", "Rotten Quack", "Hollow Quack" ] } Each Scarecrow receives its own random name when spawned. Custom names are also transferred to their corpses, so players will see the correct NPC name while looting. Custom Equipment Replace the default Scarecrow outfit with your own clothing and skins. "Clothing": { "Enabled": true, "Clear Default Clothing": true, "Items": [ { "Shortname": "hoodie", "Skin ID": 0 }, { "Shortname": "pants", "Skin ID": 0 } ] } Clear Default Clothing determines whether the original Scarecrow clothing is removed before applying configured equipment. Custom Weapons You can also replace their weapon: "Weapon": { "Enabled": true, "Shortname": "machete", "Skin ID": 0 } Use weapons compatible with vanilla Scarecrow AI. Scarecrow Control does not replace Rust's weapon or combat AI. Targeting Control Decide exactly how Scarecrows interact with other vanilla NPCs and defenses. "Targeting Settings": { "Bradley APC Can Target Scarecrows": true, "NPC Turrets Can Target Scarecrows": true, "Scientists Can Target Scarecrows": true, "Scarecrows Can Target Scientists": true, "Bandit Guards Can Target Scarecrows": true, "Scarecrows Can Target Bandit Guards": true } Every interaction can be enabled or disabled independently. For example, you can allow Scarecrows to attack Scientists while preventing Scientists from fighting back. Night Mode Make the night considerably more dangerous. Night Mode can automatically apply separate: Health Sense Range Attack Range Target Lost Range Walk Speed Run Speed Scarecrow Population Example: "Night Settings": { "Enabled": true, "Start Hour": 18.0, "End Hour": 7.0, "Scarecrow Population": 15.0, "Override Stats": true, "Health": 500.0, "Attack Range Multiplier": 1.0, "Target Lost Range": 30.0, "Sense Range": 25.0, "Walk Speed Fraction": 0.4, "Run Speed Fraction": 1.2 } When night ends, Scarecrows automatically return to their normal configured stats. Existing Scarecrows are updated automatically when the day/night state changes. Vanilla Spawn Control Scarecrow Control can optionally override Rust's vanilla Halloween Scarecrow settings. "Spawn Settings": { "Override Vanilla Settings": false, "Scarecrow Population": 5.0, "Scarecrows Throw Beancans": true, "Beancan Throw Global Delay": 8.0 } When Override Vanilla Settings is disabled, the plugin leaves the server's vanilla population settings untouched. Any vanilla values modified by the plugin are automatically restored when Scarecrow Control unloads. Loot Control Don't want vanilla Scarecrow loot? Simply enable: "Loot Settings": { "Disable Loot": true } Their corpse containers will be cleared automatically while the corpse itself remains available. Death Sound Scarecrow Control supports an optional custom effect when a Scarecrow dies. "Sound Settings": { "Death Sound Enabled": false, "Death Sound": "" } The feature is disabled by default and can be configured with your preferred compatible Rust effect. Configuration All settings are controlled through: oxide/config/ScarecrowControl.json Most features can be enabled or disabled independently, so you can use only the systems your server needs. The plugin also validates important configuration values during startup and reports invalid settings or item shortnames in the server console. Installation Download ScarecrowControl.cs Place it in: oxide/plugins/ The configuration will be generated automatically. Configure oxide/config/ScarecrowControl.json. Reload the plugin: oxide.reload ScarecrowControl Notes Scarecrow Control modifies vanilla Scarecrow NPCs — it does not replace their AI. Weapon handling, combat behavior and other core NPC mechanics therefore remain dependent on Rust's vanilla Scarecrow AI. No dependencies No custom AI replacement Lightweight configuration Works with vanilla Scarecrows Take Control of the Scarecrows Turn Rust's standard Halloween Scarecrows into configurable NPCs with custom identities, equipment, stats, behavior and nighttime difficulty — while keeping the original vanilla AI.Free -

Version 3.1
336 downloads
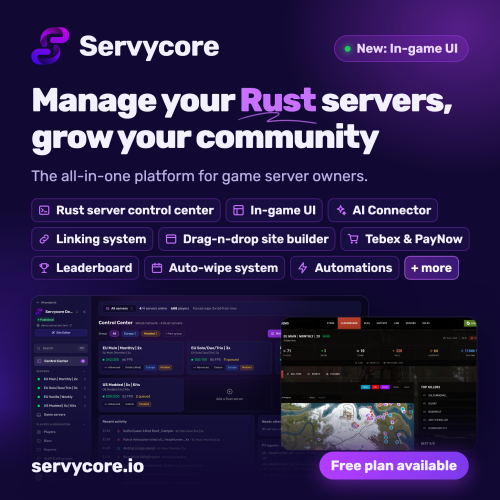
Start free on servycore.io · Live demo · Discord Servycore is the all-in-one platform for game server owners. Run your Rust servers from one panel, build your community website with drag and drop, and reward the players who link Discord, Steam or Twitch. Start on the Free plan. See Servycore in action (73 s) Rust Control Center. Your whole network live in one place: web RCON console, in-game chat, player profiles, bans enforced before connection, F7 reports, combat log, Discord alerts and a kill feed. Your moderators get the tools, never the RCON password. Wipe day on autopilot. The Auto-wipe system follows Facepunch's forced wipe, warns your players in game and on Discord, sets the new map and restarts the server. Automations handle restarts, the chat filter, VIP trials and vote rewards, and your uMod and Codefling plugins install and update in one click. In-game UI. Your players type /info, /store or /kit and your server opens in game: wipes, account linking, rules, your servers, your Tebex or PayNow store, kits with cooldowns, the leaderboard and your own pages, in your colours with your logo. You design it in your browser and publish it live; it runs with the free Servycore In-game UI plugin on Oxide or Carbon. In every plan, the Free one too. AI Connector (MCP). Connect Claude, ChatGPT, Cursor or any MCP assistant and manage your servers by talking to it, with your rights and nothing more. It asks before anything your players can see. How it works Your community website. A drag-and-drop page builder with 15+ content blocks and 3 themes (Outpost looks like the Rust menus), custom pages, a blog, support tickets, the Rust leaderboard and your Tebex or PayNow integration. Custom domain and custom CSS from Basic. See the live demo Linking system. Players link Discord, Steam and Twitch once, and your linking commands reward them in game on every server. Missed rewards are given when they join, and regular verification unlinks inactive members. Everything included. Almost every feature is in every plan, the Free one too. No add-ons to buy. Made for Rust, ready for your other games. ARK, Counter-Strike, Garry's Mod, 7 Days to Die and Pterodactyl servers get the website, the linking system and server commands. Pricing. Free, Basic (€5/month) and Pro (€10/month): plans differ mostly by their limits. The In-game UI is in every plan. Need more than Pro? Contact us on Discord. Trusted by Rust communities for 5+ years. Servycore is the new name of Social Link: same team, same support, many more tools. Everything Servycore does for your Rust server Rust admin panel: Web RCON console, live player list and in-game chat, player profiles with linked accounts, Steam account and VAC bans, network bans enforced before connection, F7 reports, combat log and a live staff map. Auto wipe: Wipe schedules that follow Facepunch's forced wipe, map or full wipes, a new map seed, an in-game countdown, the restart and the Discord wipe announcement, all automatic. In-game UI: A /info welcome panel and server info menu, a kits menu with cooldowns, your store, rules, wipe calendar, account linking and leaderboard pages, designed in your browser and published live. Plugins and permissions: uMod and Codefling plugin installs and updates, a config editor, Oxide and Carbon groups and permissions, timed VIP and in-game staff roles. Community website: A drag and drop website builder with themes, custom pages, a blog, support tickets, your Tebex or PayNow store integration and a custom domain. Linking system: Discord, Steam and Twitch account linking with Discord roles, Steam group and Twitch follower or subscriber checks, and in-game rewards on every server. Rust leaderboard: Kills, K/D, raids, resources, playtime and a heatmap for every wipe, on your website. Integrations: Discord notifications and kill feed, a REST API, signed webhooks, the AI Connector (MCP), and Pterodactyl, Pelican, WISP and AMP host access. Website: servycore.io Live demo: demo.slink.gg Discord: discord.servycore.io Documentation: servycore.io/knowledgebaseFree -

Version 1.0.0
23 downloads
Tired of monuments feeling empty and lifeless? This is a professionally configured for Monuments that adds strategically placed Scientists to most monuments. Instead of just spamming NPCs, I have spent countless hours manually placing them where they make the most impact—guarding rooftops, watching over loot crates, and securing strategic entrances. This is not some huge, over-the-top config. It’s a reasonable touch designed to bring some extra action to your server without players complaining that it feels "too modded" or impossible to play. Why choose this setup? Ready-to-Use: Plug-and-play file that works instantly after installation. Step-by-step installation instructions are included in the download. Strategic Placement: NPCs are positioned to protect loot, forcing players to use tactics. Map Independent: Works on all procedural maps as coordinates are saved relative to the monuments. Performance Optimized: Balanced NPC counts to maintain server FPS while keeping the challenge. Guarded Locations: Sphere Tank (Dome), Harbor (Large & Small), Junkyard, Satellite Dish, Lighthouse, Ferry Terminal, Sewer Branch, Jungle Ziggurat, Gas Station, Supermarket, Mining Outpost and a few more. Requirement: This product requires the Monument Addons plugin to function, simply download it and its done! Support: If you have any issues or need help with the configuration, feel free to reach out to me. I'm happy to help you get the most out of this setup! Check out my Medium setup: Monument Guards Medium Video:$9.98 -

Version 1.0.1
44 downloads
Short Description: Makes your guns create entities/explosions/animals wherever your bullet impacts, or freezes/removes entities/NPCs that you hit with your bullet. Configured via commands. Allow players to use certain guns to spawn animals, explosions, or entities wherever their bullet lands. Or maybe freezing entities is up your alley! If you've ever wanted to do the mannequin challenge with NPCs/Entities in Rust, now you can! You freeze almost every entity in the game using a specified, configurable gun. Not interested in freezing entities? How about deleting them from existence because they are bothering you, well, lucky for you this plugin has that too! Anywhere you shoot will have any of the above abilities if you activate them! The plugin automatically unfreezes all entities that were frozen upon unloading the plugin. This is a configurable setting you can disable, however, Cargo will always unfreeze itself the way I have it set up to not cause any issues. Cargo is also currently the only one that freezes itself upon loading the plugin if it was already frozen when unloading it. You can freeze entities with this plugin in your own plugins via calling the methods: GunTypes.Call("MethodName", parameter1, parameter2, parameterX); // EX: GunTypes.Call("CargoFreeze", CargoShip, IPlayer, string, bool); FEATURES: Explosive Gun: MLRS Rocket Incendiary Rocket Satchel Charge F1 Grenade Flash Bang Napalm Fire (the fire that Bradley/Attack Heli drops) Supply Signal Animal Gun: Wolf Bear Polar Bear Boar Chicken Stag Shark NPC Gun: Scarecrow NPC Bandit Camp Scientist/Guard Cargo LR-300 Scientist Cargo MP5 Scientist Underwater Dweller Tunnel Dweller CH47 Chinook Scientist (M249) (cannot move) Outpost Scientist Entity Gun: Scarecrow (entity, the T-Posed object with a hat meant to scare crows) Snowman Christmas Tree Candy Canes Present Zombie Test (Customizable via Config, just put the prefab) Freeze Gun (What it's able to Freeze) Cargo Attack Heli Bradley Chinook/CH47 All Vehicles (Mini Copter, Car (Modular Cars), Sedan, Rhib, Tugboat, Rowboat, Paddle Boat, Subs, Scarp Heli, Trains/Workcarts, Snowmobiles, Ridable Horse) Animals ALL AI (Scientists, Underwater Dwellers, NPCMissionProviders, Etc.) Traps (Landmines, Bear Traps, Gun Traps) Auto Turrets/Flame Turrets (Safezone turrets and regular ones) Sam Sites (Safezone Sam Sites and regular ones) Conveyors Doors Hackable Crate StorageContainers Remove Gun (What its able to Remove) Everything that is Interactable. Abandoned Military Base (Basically all of the monument can be removed for whatever reason, only things that will remain are the entrances and outlined portion of the monument where the ground is raised) Car Gun (What its able to shoot) Rhib Attack Helicopter (new one, not patrol heli) Chinook Sedan Minicopter Tugboat Tomaha Solo Sub Modular 4 Car Modular 2 Car Video Examples: Note: The SPAS12 video used 4x the explosive amount per pellet. More Videos to come! EXAMPLE OF CAR GUN (NOT IN PLUGIN YET This is also a slightly older implementation, and has now been slowed down to prevent as much clipping into the ground/through objects. Permissions: guntypes.gun - Allows user to use the /gun command. guntypes.setgun - Allows user to use the /gun set command. guntypes.animal - Allows user to use the /gun animal command. guntypes.explosive - Allows user to use the /gun explosive command. guntypes.entity - Allows user to use the /gun entity command. guntypes.remove - Allows user to use the /gun remove command. guntypes.freeze - Allows user to use the /gun freeze command. guntypes.npc - Allows uers to use the /gun npc command. Any other permission you see DO NOT USE OR ACTIVE YOURSELF they are for internal plugin use. You SHOULD NOT attempt to give a user ALL permissions when giving permissions to a user. Give them manually. Chat Commands: Note: Turning on any of the gun modes via their direct name (i.e: animal, entity, etc.) will also effectively do `/gun on` for you. /gun off - Disables gun mode in general to prevent use of any of the types below. /gun on - Activates gun mode in general to allow use of any of the types below. /gun animal - Activates animal gun mode. /gun explosive - Activates explosive gun mode. /gun entity - Activates animal gun mode. /gun freeze - Activates animal gun mode. /gun remove - Activates animal gun mode. Use Shortnames to change the gun type, or their defining part of their name. EX: for "pistol_revolver", do "revolver". /gun set animal wolf - Sets your current held gun to the wolf gun. /gun set explosive mlrs m249 - Sets the M249 to the MLRS gun. /gun set freeze - Sets your current held gun to the freeze gun. (only 1 freeze type so no type specification required) /gun set remove pistol_revolver - Sets revolver to the remove gun. (only 1 remove type so no type specification required) /gun spawnfrozen on - Sets NPCs and Animals to spawn frozen. /gun spawn frozen on - Sets NPCs and Animals to spawn frozen. Lots of QoL allowances for freeze AoE commands. /gun set freeze aoe on - Sets freeze AoE (radius) on. /gun freeze aoe on - Sets freeze AoE (radius) on. /gun set freeze aoe 12 - Sets freeze AoE (radius) to 12m. /gun freeze aoe 12 - Sets freeze AoE (radius) to 12m. Note/Be Aware: A gun that is used multiple times in the same gun type will only allow for 1 of the specified events to occur. EX: using explosive gun and having M249 set to both C4 and MLRS will only allow either C4 or MLRS to happen, not both. You will need to manually set the other M249 value to something other than the M249 value for the type you're not attempting to use. Meaning if you are trying to use C4 and NOT MLRS, then set MLRS to something other than the C4 value. You can now change your guns without affecting other users guns! Note 2: You setting the gun for yourself also sets it for ALL other players who are using the plugin. My goal is to eventually change this to individual gun settings for each user, but current implementation does not allow for it yet. Config: { "The command you type in to use the plugin": "gun", "Color/Hex for Syntax in Lang": "#ff3d3d", "Color/Hex for Commands in Syntax in Lang": "orange", "Color/Hex for 'Animal Gun' in Lang when calling the Gun Types commands": "#30D5C8", "Color/Hex for 'Explosive Gun' in Lang when calling the Gun Types commands": "orange", "Color/Hex for 'Entity Gun' in Lang when calling the Gun Types commands": "purple", "Color/Hex for 'Remove Gun' in Lang when calling the Gun Types commands": "#ff3d3d", "Color/Hex for 'Freeze Gun' in Lang when calling the Gun Types commands": "#30D5C8", "Color/Hex for 'NPC Gun' in Lang when calling the Gun Types commands": "#cf1d40", "Color/Hex for 'Activated' in Lang when calling the Gun Types commands": "green", "Color/Hex for 'Deactivated' in Lang when calling the Gun Types commands": "red", "The Color/Hex of the attempted entity/gun in the response for successful/failed gun setting": "orange", "The Color/Hex of the attempted spawn type in the response for successful/failed gun setting": "#40E0D0", "The test entity spawned using the entity gun": "assets/content/structures/interactive_garage_door/sliding_blast_door.prefab", "Unfreeze ALL frozen entities upon unloading (Excluding Cargo, it will automatically unfreeze).": true, "Freeze AoE (radius) Effect Enabled for ALL user with freeze permission (if set to false, no one can use AoE. If enabled, allows AoE Freeze)": true, "Max AoE (radius) a user is allowed to set for AoE freezing": 350, "Spawn tamable animals": true, "Spawn animals already tamed by the user who shot the gun": true } Credits: bmgjet - Thanks to bmgjet for allowing me to use code that they had made to get the closest cargo node, and also informing me on a way to freeze cargo!$9.99 -

Version 3.0.0
37 downloads
Unleash the wild side of your NPCs with the PNPC Hunter AI Addon — it allows your NPCs to hunt, harvest animals and use bows/crossbows. Features: Automated Hunting • Activate hunting mode with "/pnpc hunting" command. • Your NPC will scan the area for animals within a set radius and start to hunt animals. Combat & Harvesting • Adds bow and crossbow support for PNPCs. • After the kill, bot will automatically harvest the animal if equipped with needed tools (e.g., bone knife, combat knife). Customization & Control • Configure hunt radius for target detection. • Specify which tools and weapons are allowed to use for hunting and harvesting. How to Use: Spawn your Personal NPC and equip it with allowed weapon. Optionally provide a harvesting tool for resource collection. Use /pnpc hunting to start the hunting mode. Your NPC will hunt, kill, and harvest nearby animals! Requirements: • PersonalNPC Plugin See it in Action! Watch the Video Configuration: { "Hunting radius": 100.0, "Allowed weapons for hunting (shortnames)": [ "bow.compound", "crossbow", "bow.hunting", "legacy.bow", "minicrossbow", "rifle.ak" ], "Allowed tools for hunting (shortnames)": [ "knife.bone", "knife.butcher", "knife.combat", "knife.bone.obsidian", "knife.skinning", "sunken.knife" ] }$9.90 -

Version 1.0.0
159 downloads
Death Feed Free adds AI-powered death commentary to your Rust server using Hugging Face Inference Providers. When a player dies, the plugin sends the death message to an AI model and broadcasts a short, witty comment in chat—no paid API required. It hooks into DeathNotes and optionally uses BetterChat for a polished chat experience. Full Documentation (README) Features Free AI commentary via Hugging Face Configurable model & provider (auto/groq/together/cerebras) Custom system prompt (sports commentator, pirate, etc.) Cooldown, max tokens, temperature Optional sound on comment Config Response prefix & color (hex) Bot name & Steam ID Chat channel (global/team) Debug mode Requirements DeathNotes (required) BetterChat (optional) Hugging Face token (free) Commands deathfeed.status — status & config deathfeed.test — test API (admin) Quick setup: Install DeathNotes, add DeathFeedFree.cs to oxide/plugins, add your Hugging Face API token in oxide/config/DeathFeedFree.json (get one at hf.co/settings/tokens with "Make calls to Inference Providers"), then reload. Default model is meta-llama/Llama-3.3-70B-Instruct with provider auto; adjust the system prompt to change the commentator style. Author: Goo_ · Version: 1.0.0Free -
Version 3.0.0
470 downloads
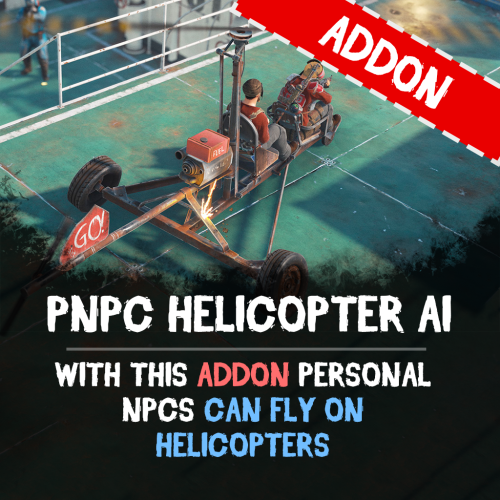
Let your Personal NPCs fly helicopters for you with the Heli AI Addon! This addon for Personal NPC enables your bots to take control of helicopters, allowing you to sit back and enjoy the flight while they fly to the destination. Features: Fully Automated AI Pilots • Spawn a Personal NPC bot • Select a point on the in-game map, and the bot will fly there. • Works perfect with all helicopters in Rust. Smooth Flight Controls • Adjustable altitude, flight speed, and maneuverability. • Setup pitch, throttle, and rotation for better control. • Automatically adjusts height above the ground to avoid obstacles. ⚙ Other Customization • Set minimum and maximum flight altitude. • Adjust landing speed, flight slope, and pitch strength. • Optimize rotation and throttle power for smoother navigation. How to Use: Spawn a bot using the PersonalNPC plugin. Enter the helicopter as a passenger. Mark your destination on the in-game map. Sit back and let your AI pilot handle the flight! Requirements: PersonalNPC Plugin (must be installed & enabled). Addon must be activated in bot settings. See It in Action! Watch the Video Configuration: { "Max height above the ground": 25.0, "Minimum height to fly forward/backward": 15.0, "Max slope by forward axis": 0.3, "Pitch strength": 0.2, "Throttle strength": 1.0, "Land throttle strength": 0.5, "YAW strength (rotation around its axis)": 1.0 }$9.90 -
Version 2.2.0
355 downloads
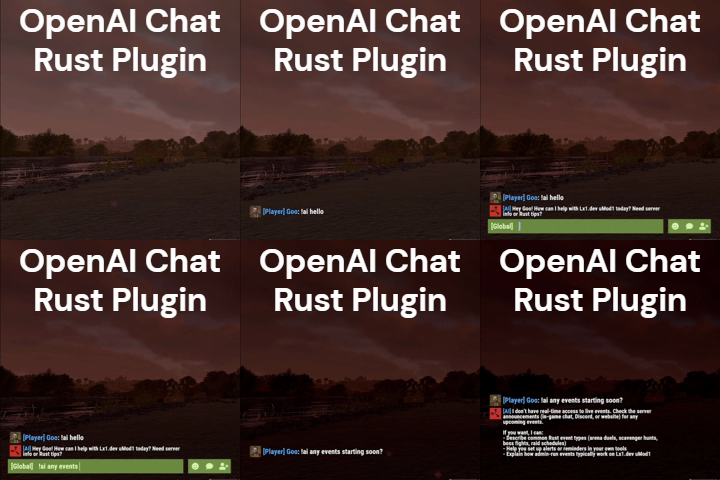
AI assistant plugin for Rust game servers using the OpenAI Responses API. Players can ask questions in-game via a chat command (default: !ai) and receive AI-generated responses. Supports conversation context, a custom knowledge base for server-specific documents, multi-tier rate limiting, and optional integrations like Discord webhooks and BetterChat. Full Documentation Here Features Chat command trigger Conversation context Knowledge base (vector store) Customizable personalities Prompt injection filtering Message chunking Chat / Bot Configurable command prefix Global Chat Bot mode BetterChat integration Custom response colors Personality presets Team chat monitoring Rate Limits Per-player cooldowns Requests per minute cap Daily token budgets Per-player token limits Persistent usage tracking Integrations Discord webhook logging Optional web search Death Notes support Developer hooks API Reasoning model support Knowledge base made easy Use the Rust Server Knowledge Generator to build knowledge files for your server. Fill out a form (server info, wipe schedule, rules, commands, FAQ, etc.), use the AI Assistant or Quick Server Lookup (BattleMetrics), then either deploy to an OpenAI vector store from the site or download a .zip and sync from your server with openai.kb sync. See How It Works for the full guide. Commands and plugins In the Commands form section you can search and add plugins (from the default catalog or your own), add chat commands, and contribute commands for plugins. These feed into commands.txt for the knowledge base. Free AI Knowledge GeneratorFree -
Version 1.9.0
2,100 downloads
Are you tired of playing Rust like everyone else? Yeah, we get it. That's why we created RustGPT 1.8 - now with multi-provider support! Chat with OpenAI, Anthropic, or XAI while you're getting raided. Because who needs survival skills when you have AI to keep you company? Fix 1.8.2 Fixed the chat icon feature. New in 1.8.1 Added image generation capabilities Added rate limiting for API requests Added image history tracking New Hooks RustGPTGenerateImage - provides a way for other plugins to request image generation from the active AI provider. Only works for OpenAI and Grok for now. Anthropic does not support image generation. GetRemoteAIParams - provides a list of cost effective AIP Url and models. This list is pulled by default if server admins have an empty field in their config. New Command `/rustgpt.image <prompt>` Automatically sends generated images to a configured Discord webhook. Requires the permission RustGPT.images The image gen command is more of a tool for admins and developers to check image generation settings and verify provider capabilities. An image_history.json is created in the data folder. - Death commentary removed. Will be implemented in a new plugin called AI Death Feed Installation Download RustGPT.cs Place it in your server's oxide/plugins or carbon/plugins directory Configure the plugin using the generated config file at ..config/RustGPT.json Configuration The plugin generates a default configuration with support for multiple AI providers: { "AIProviders": { "openai": { "API Key": "your-api-key-here", "url": "https://api.openai.com/v1/chat/completions", "model": "gpt-4", "Max Tokens": 1500 }, "anthropic": { "API Key": "your-api-key-here", "url": "https://api.anthropic.com/v1/messages", "model": "claude-3-opus-20240229", "Max Tokens": 1500 }, "xai": { "API Key": "your-api-key-here", "url": "https://api.x.ai/v1/chat/completions", "model": "grok-1", "Max Tokens": 1500 }, "Active Provider": "OpenAI" }, "AIPromptParameters": { "System role": "You are a helpful assistant on a Rust game server.", "User Custom Prompt": "Server wipes Thursdays at 2pm CST.", "Share Server Name": true, "Share Server Description": true, "Share Player Names": true, "AI Rules": [] }, "ChatSettings": { "Chat Message Color": "#FFFFFF", "Chat Message Font Size": 12, "Response Prefix": "[RustGPT]", "Response Prefix Color": "#55AAFF", "Question Pattern": "!gpt", "Chat cool down in seconds": 10, "Broadcast Response to the server": false } } Permissions RustGPT.use - Allows players to use the chat command RustGPT.admin - Grants access to admin commands and provider management Commands !gpt <message> - Send a message to the active AI provider /provider [name] - Switch between available AI providers (requires RustGPT.admin) /rustgpt.image <prompt> - generates an image based on prompt and sends it to discord. Chat Players can interact with the AI using the configured command (default: !gpt): !gpt When does this server wipe? LLM Provider Management Admins can switch between providers using the /provider command: /provider openai # Switch to OpenAI /provider anthropic # Switch to Anthropic /provider xai # Switch to XAI Settings 1. API Keys: Configure your API keys for each provider you want to use 2. Active Provider: Choose your default AI provider. (Optional - you can just put add your API key to the config and RustGPT will use that provider.) 3. System Prompt: Customize the AI's role and behavior 4. Chat Settings: Adjust message formatting and cooldown times Optional Features Discord Integration: Enable UseDiscordWebhookChat Add your Discord webhook URL (This is setup for admin logging. This webhook should point to a private discord channel.) Custom Rules: AI rules are attached to every message sent to the AI provider. Message Formatting Customize colors using hex codes Adjust font sizes for messages Configure response prefix and colors Support For issues, questions, or contributions: https://discord.gg/EQNPBxdjRuFree -

Version 3.0.0
102 downloads
Let your Personal NPCs drive boats for you with Boat AI Addon! This addon for the Personal NPC plugin lets your NPCs navigate boats, while you sit back, relax, and enjoy the sea! Features: Fully Automated Boat Navigation • Just hop in, choose your destination on the in-game map, and your NPC captain takes the wheel. • Obstacle detection keeps your journey smooth and safe. Intelligent Navigation System • Smart AI dynamically calculates the most efficient route to your chosen location. • Customizable settings for maximum speed and navigation precision. • Utilizes waterways intelligently to provide the smoothest possible journey. How to Use: 1. Spawn your NPC and sit in the boat 2. Select your destination on the in-game map 3. Enjoy the ride ! Requirements: • Personal NPC Plugin (must be installed and enabled). • Boat AI Addon activated within the Personal NPC settings. Commands: • /pnpc tugboat - makes the bot a driver of the tugboat (owner should be on tugboat and authorized in it) See It in Action! Watch the Video Configuration: { "Permission to use this addon on all bots of player (not required)": "pnpcaddonboat.override-setup", "General settings": { "Automatic fuel supply from bot inventory (0 - disables supply)": 100, "Distance to route control point to reach": 15.0, "Number of processes per cycle in 1 tick when searching for a route(increasing the parameter - reduces the time of searching for a route, but increases the load on fps)": 10, "Grid step for route search (increasing the parameter - increases the time of searching for a route, but makes it harder to lay out a route in narrow places)": 60 }, "Boat motor settings": { "Max speed": 20.0, "Max speed on obstacle detection": 5.0, "Transport push force from obstacle in collision(0 - disables push)": 3.0, "Minimum depth for determining transport passability when searching for a route": 0.5 }, "RHIB settings": { "Max speed": 20.0, "Max speed on obstacle detection": 5.0, "Transport push force from obstacle in collision(0 - disables push)": 3.0, "Minimum depth for determining transport passability when searching for a route": 0.5 }, "Tugboat settings": { "Max speed": 20.0, "Max speed on obstacle detection": 5.0, "Transport push force from obstacle in collision(0 - disables push)": 3.0, "Minimum depth for determining transport passability when searching for a route": 0.5 } }$9.90 -

Version 1.0.1
385 downloads
AI Assistant Bot Overview This AI Assistant bot is designed to interact with users on Discord by connecting to the OpenAI API. It supports a variety of features, including reading documents, handling attachments, and maintaining configurable conversation histories. Here's everything you need to know about configuring and using the bot. IMPORTANT NOTE Before continuing to read the instructions and explanations, please be aware that this bot relies on paid dependencies, including the OpenAI API key. You must ensure your API key has sufficient balance, as the cost depends on the size of your documents and the level of player interaction. While the cost is minimal for smaller servers, it may increase for larger communities with higher usage. I’ve explained more about the costs and other details below. If you’re looking for the installation guide, scroll down a bit past the explanation, and you’ll find it there. File and Folder Structure 1. As soon as you launch the bot for the first time, if no configuration file exists, you will see the following message: Default config.json file created. Please update it with your API keys and preferences. 2. You must update the `config.json` file with your desired settings, API keys, and preferences before relaunching the bot. After making the necessary configurations, restart the bot to apply the changes. 3. When you launch the bot for the first time, several files and folders are automatically generated to support its functionality. These include: Generated Folders: 1. `docs/`: - You can store documents in a folder for the bot to reference during conversations. While I haven’t tested it with many users simultaneously, the model-switching feature helps avoid rate limits, ensuring smooth operation. One of the models has no daily limits, so the bot should function without interruptions. However, your total text file size **should not exceed 10-12 MB** since no AI currently supports processing that much text efficiently. If you have large files, it's best to **split them into smaller chunks**—for example, separate files for topics like "raid," "ranks," and other categories to ensure optimal performance.(again please be sure your total documents wont hit 10-12 MB) In the near future, I plan to develop a **search system** that will make document retrieval **more efficient and cost-effective** for long-term usage! I hope this update will allow the bot to process documents in **image formats or PDFs** and support much larger files for better exploration. 2. `usage/`: - Contains two important configuration files: - **`whoami.txt`**: A file where you define the bot's identity. Use this file to explain who the bot is and configure its personality and purpose step by step. - **`conditions.txt`**: A file to specify conditions for the bot’s responses. For example, you can add rules like "Never generate harmful content" or "Avoid generating code." I’ve included my own configurations in the ZIP file you’ll receive—these have been tested and work well. However, you can edit them as needed. Some essential settings have already been added to ensure the bot functions properly. 3. `userschat/`: - Stores user conversation histories. The bot uses these files to remember the context of recent interactions for a configurable amount of time. 4. `downloads/`: - A folder to store files uploaded or downloaded by users during their interactions with the bot. 5. How to Configure the Usage Files The `usage/` folder includes the following AI-readable files: 1. `whoami.txt`: - Use this file to define the bot's identity. For example, you can write: `You are a helpful and friendly AI assistant designed to answer questions, provide guidance, and help users interact with documents.` - Configure it incrementally to refine the bot's personality. 2. `conditions.txt`: - Add conditions to guide the bot's responses. For example: `Never generate harmful or inappropriate content.` `Avoid generating programming code unless explicitly requested.` `Always provide accurate and ethical answers.` - These conditions help you customize the bot's behavior to align with your community's values. Tips for Efficient Configuration 1. Less is More: Write concise and clear prompts in these files to minimize token usage. Fewer but well-structured instructions reduce costs and improve the bot’s understanding. 2. Cost Insight: API usage costs are minimal. For instance, after over 1,000 requests and millions of tokens, the total cost was only 40 cents. However, ensure your OpenAI account has enough funds, as the bot will stop functioning if the balance is insufficient. AI-Understandable Files The bot processes these files naturally, so you can write them in plain, conversational language. For example: - Whoami Example: "You are a smart and efficient assistant that helps users manage files, answer queries, and provide creative solutions." - Conditions Example: "Avoid political discussions, never generate malicious content, and always prioritize user privacy." These files act as dynamic prompts that guide the bot’s behavior in real-time. Cost Management Tips - While the cost of running the bot is minimal, it scales based on the number of requests and tokens used. - Use concise prompts and optimize file content to reduce token usage. In future updates, I will introduce a token limit and methods to save tokens both on the bot side and the player side. However, there is already a setting called "temperature of response" in the bot config, which controls message length and creativity—making responses either longer and more creative or shorter and more precise. - Regularly monitor your OpenAI account balance to avoid interruptions. Adding funds ensures smooth operation, especially when the bot is used in a large community. Key Features 1. Multi-functional AI Assistant: - The bot connects to OpenAI API and supports multiple AI models such as `gpt-3.5-turbo`, `gpt-4`, and others. - It intelligently answers questions based on provided information and configuration settings. - I have carefully optimized the list of AI models to prioritize efficiency and avoid rate limits, all while maintaining functionality. Each request to the bot incurs a cost, as OpenAI's API usage is paid. If cost isn't a concern, the GPT-4 models are the best choice due to their superior creativity and advanced responses. However, for cost-effective usage, the configuration balances between model capabilities and expenses, ensuring a practical yet powerful bot experience. 2. Highly Configurable: - The bot is driven by a comprehensive configuration file generated on the first launch. You can customize nearly every aspect of its functionality. 3. Document Handling: - The bot supports attachments in formats like `txt`, `json`, and `csv`. These files can be processed for extended interactions, although this feature can be disabled if not preferred. 4. Conversation Tracking: - The bot maintains user conversations in files for a configured duration (`time_to_keep_history_conversation_in_secconds`). This helps the bot remember context within a specified timeframe before creating a new history file. 5. Rate Limit Handling: - Supports switching between AI models to avoid rate limits imposed by OpenAI's API tiers. - You can configure the rate limit thresholds for individual users. I was concerned about large communities using lower-tier OpenAI API keys, as they may face rate limit issues. To address this, I implemented a model-switching function to avoid these rate limits per minute. However, if you upgrade your account for long-term usage, you can reduce these problems. You can find more information about how OpenAI’s usage tiers work at this link: OpenAI Rate Limits Guide. On higher tiers, there are no usage limits, so you won’t encounter the same restrictions. If you spend over an specific amount, you should see no issues and enjoy smoother performance in the long run. 6. Spam Protection: - Users are limited to a configurable number of messages (e.g., 5 messages per minute) to prevent spam and API overuse. 7. Admin and Owner Controls: - Owner IDs in the configuration file can configure advanced settings and access an "EditingMode" for direct file and folder operations, allowing them to bypass limits on the code or have root access in the current or future updates. 8. Status and Activity Configuration: - The bot can display a custom status, activity type (e.g., "Playing AI-Assistant"), and optional activity URL. It supports most status and activity types based on the available Discord status documentation. 9. Response Temperature: - Adjust the bot's creativity and response tone using configurable temperature settings (e.g., "cold" for factual precision, "hot" for maximum creativity). How to Configure the Bot 1. Configuration File The bot generates a `config.json` file on its first launch. You'll need to configure this file step-by-step: - Discord Bot Token: Obtain it from Discord Developer Portal . Ensure to enable intents (Message Content, Presence, and Server Members) in the bot settings. - OpenAI API Key: Generate an API key from OpenAI Platform . Note that OpenAI is a paid service, and API usage costs depend on your tier (e.g., $5/month for basic usage). Each tier has different rate limits. - Owner IDs: Add your Discord user IDs to grant access to advanced bot controls. - Log Channels and Warnings: Configure `log_channel_ids` for file upload/download logs and `warning_ids` to notify admins of unauthorized access attempts. How to Use the Bot 1. Editing Mode Admins can enter Editing Mode to manage files and folders using simple commands. All explanations can be found once you enter Editing Mode by typing the available help commands. 1. Change Directory: Use commands like `cd <directoryname>` or `cd ..` to navigate between directories. 2. List Files: Use `ls` or `list` to see the files in the current directory. 3. View File: Use `view <filename>` to display the contents of a file. 4. Edit File: Use `edit <filename>` to modify a file's contents. 5. Download Files: Use `download <filename>` to download a specific file, or `download all` to download all files. 6. Create/Remove Files: Use `add <filename>` to create a file, and `rm <filename>` to delete a file. 7. Exit Editing Mode: Use `exit` to leave Editing Mode. Handling Attachments - The bot can process file attachments in supported formats (`txt`, `json`, `csv`). However, enabling this feature may lead to excessive API usage if users send large files. You can enable or disable this feature in the configuration: "handle_attachments (true/false) - Enable this to allow the bot to respond to file uploads or images. Note: This will use more tokens per API request depending on how large the text file is.": "false", 2. Configurable Settings 1. Bot Status You can set the bot's status and activity type in the configuration: "bot_status": { "status(e.g. online,idle,dnd)": "online", "activity_type(e.g. playing, listening, watching, competing or streaming)": "playing", "activity_text": "AI-Assistant", "activity_url": "https://www.twitch.tv/your_channel - Place a twitch link here if activity type is set to streaming." }, 2. Spam Protection To prevent abuse, configure message rate limits: "spam_detection": { "message_limit": 5, "rate_limit_period (in seconds)": 60 }, This limits users to 5 messages per minute by default. Adjust these settings as needed. 3. Response Temperature Control the bot's tone and creativity: - Cold: Factual and precise. - Neutral: Balanced between precision and creativity. - Warm: Creative responses while maintaining relevance. - Hot: Highly creative and speculative. You can also override with a temperature value between `0.1` and `1.0`: "Response Temperature": { "Ai_selected_mode(e.g. cold,natural,warm,hot)": "natural", "Ai_promopts_explnation": { "Cold (Low creativity, high precision)": "Respond with factual and precise information, avoiding creative or speculative responses.", "Neutral (Balanced creativity and precision)": "Respond with a balance of creativity and accuracy, adapting tone to fit the context.", "Warm (Higher creativity, moderate precision)": "Respond creatively while maintaining relevance to the topic.", "Hot (Max creativity, low precision)": "Respond with maximum creativity, even if it involves speculative or unconventional ideas." }, "Temperature Value (Optional Override 0.1 to 1.0 (Cant be 0.0 it means disabled temp minimum is 0.1))": 0.0, "Temperature_Value_prompt": "Your selected response temperature has been set to {prompt_temp_value} please resonse the message according to this temprature float number that is between 0.1 and 1 anythings beyond 1.0 is equal to 1.0 low means less creativity and amount of text higher means lots of creativity and explnation", "Set this to false to disable the `no_temp_error` message. Remove Ai_selected_mode and set temperature to 0.0 for a natural AI response.": "true" }, 4. file Cleanup Configuration The File Cleanup section in the configuration file controls how the bot manages and cleans up old user conversation files. This feature ensures that storage isn't unnecessarily occupied by outdated conversation histories. "file_cleanup": { "file_age_limit_seconds": 727200, "cleanup_interval_seconds - if = 0 it means disable and never clean the users conversation": 43200 }, Key Parameters: 1. "file_age_limit_seconds": - Specifies the maximum age (in seconds) a conversation file can reach before being deleted. - For example, if set to `727200`, files older than 8 days (727200 seconds) will be automatically removed. 2. "cleanup_interval_seconds - if = 0 it means disable and never clean the users conversation": - Defines the interval (in seconds) at which the bot will check for and delete outdated files. - If set to `43200`, the bot will check for aged files every 12 hours. 3. Disable Cleanup: - To disable the cleanup feature entirely and retain all conversation histories permanently, set `cleanup_interval_seconds` to `0`: "cleanup_interval_seconds - if = 0 it means disable and never clean the users conversation" How It Works: - The bot periodically scans the `userschat/` folder to identify files older than the age limit ("file_age_limit_seconds"). - Any files that exceed this age are automatically deleted during the cleanup interval. - This ensures efficient management of storage and prevents excessive buildup of old files. By adjusting these settings, you can control how long user conversations are retained and the frequency of cleanup operations. For servers with strict data retention policies, this feature can be fine-tuned or disabled entirely. 5. Bot Messages Every bot message is fully configurable in the `bot_messages` section. You can edit warnings, greetings, or any response to match your preferences or server culture. Version and Updates - Current Version: `1.0.0` - Updates are guaranteed if there are any issues or bugs in the code. New feature updates will only be provided if new ideas come to mind or are suggested through user feedback. However: > This bot is actively used by me, so any new updates or enhancements will be released as soon as they are ready! # Guide to Install and Run Your Discord AI Assistant Bot # Update Your Server Ensure your server is up-to-date before proceeding (this is crucial if you are hosting the bot on your own machine): sudo apt update && sudo apt upgrade -y Install Python 3 and pip Install Python 3 and `pip` (Python package manager). If you're logged in as `root`, you can omit `sudo`: sudo apt install python3 python3-pip -y Verify the Installation Run the following commands to confirm Python 3 and `pip` are installed correctly: python3 --version pip3 --version > Example Output: SHAYAN:/home python3 --version Python 3.8.10 SHAYAN:/home pip3 --version pip 20.0.2 from /usr/lib/python3/dist-packages/pip (python 3.8) Install Virtual Environment (Optional but Recommended) To isolate your Python project, install the `venv` module: sudo apt install python3-venv -y Create a Virtual Environment Create a virtual environment to keep dependencies isolated: python3 -m venv venv Activate the Virtual Environment Activate the virtual environment to work within it: source venv/bin/activate Note: To deactivate the virtual environment, run the following command later:: deactivate Install Required Dependencies Use `pip3` (or `pip` inside the virtual environment) to install the necessary libraries for the bot: pip3 install discord.py openai Important Note If you encounter errors like: `Error: module 'openai' has no attribute 'error'` or issues related to the version of the `openai` library being outdated, too new, or incompatible, use the following command to fix the problem: pip install openai==0.28.0 This will install the specific version `0.28.0` of the `openai` library, which is known to work with the bot. Once installed, the bot should start working without issues. Run Your Bot Navigate to the directory where your bot script (`AIasistant.py`) is located and run it: cd /path/to/your/script python3 AIasistant.py 1.Navigation Tips: - Use `cd directory_name` to go into a directory. - Use `cd ..` to go back one directory. - If you need to upload the script file (`AIasistant.py`) from your local PC to your host, use an SFTP client like WinSCP or FileZilla. Alternatively, open the file on your host using `nano`: nano AIasistant.py Paste the bot code, then save and exit using `Ctrl + X`, `Y`, and `Enter`. Hosting Platforms for Your Bot While this guide assumes you're running the bot on your own server, there are several platforms where you can host your Discord bot. Tip: Many of these platforms provide pre-installed Python environments with dependencies. If you're using such a platform, you may not need to install Python manually—just upload the bot code and define dependencies. Pre-Bundled Virtual Environment (Optional) I’ve already set up a virtual environment (`venv`) with all dependencies installed alongside the bot code. You can simply transfer it to your host and run the bot. However: - Python 3 must still be installed on the host. - The `venv` may not work directly if the host's OS differs from your local system. To make it work: 1. Upload the zip file to the host using SFTP or any file transfer method. 2. Extract the contents using the following command: unzip -o AI-Assistant.zip 3. Navigate to the directory containing the files: cd AI-Assistant 4. Activate the virtual environment: source venv/bin/activate 5. Run the bot: python3 AIassistant.py Tip: You can use tools like **tmux** or **nohup** to keep the bot running on your host permanently. These tools allow the bot to continue running even if you disconnect from the server. You can search online for tutorials on how to use them. While the bot itself is stable and won’t crash, occasional Discord rate limits or heartbeat issues might cause it to stop. Most professional bot hosting platforms include anti-crash mechanisms, so you generally don’t need to worry about this. If transferring the `AI-Assistant.zip` does not work, simply recreate the virtual environment on the host and install dependencies by following the initial setup steps above. # Final Note # Please remember that OpenAI's API is a paid service, and there is a usage cost per message. Be sure to check your usage to manage costs effectively. If you need help or have questions about the bot, feel free to reach out to me on Discord: ` shayan_. ` You can contact me there for assistance. As far as this post and tool are concerned, I’ve decided to give a part of this project to AI. I wrote the message fully and gave some parts of it to AI to fix and format the tutorial and explanations for me For sure, it’s much more readable than my original text But thanks to AI, our world might be an easier—or scarier—place in close future! # Exact Configuration File # { "discord_bot_token": "Enter your Discord bot token from https://discord.com/developers/applications. Remember to enable intents in the bot configuration.", "openai_api_key": "Enter your OpenAI API key here. Purchase it at https://platform.openai.com/ to use OpenAI models. More details are in the README file.", "discord_link": "Your Discord Server Link Here", "ai_models": [ "gpt-3.5-turbo-16k", "gpt-3.5-turbo", "chatgpt-4o-latest", "gpt-4o-mini", "gpt-4o" ], "time_to_keep_history_conversation_in_secconds": 3600, "handle_attachments (true/false) - Enable this to allow the bot to respond to file uploads or images. Note: This will use more tokens per API request depending on how large the text file is.": "false", "send_bot_response_in_2000_characters_chunks": "true", "allowed_file_extentions": [ "txt", "json", "csv" ], "blacklisted_directories_to_expand": [ "userschat" ], "owner_ids": [ "User IDs listed here will have access to editing mode and avoid rate limits.", "owner_discord_user_id_1", "owner_discord_user_id_2" ], "warning_ids": [ "Warnings about unauthorized access will be sent to these user IDs.", "warning_discord_user_id_1", "warning_discord_user_id_2" ], "warning_channel_ids": [ "Warnings about unauthorized access will be sent to these channels.", "warning_discord_channel_id_1", "warning_discord_channel_id_2" ], "warning_role_ids": [ "Discord role IDs listed here will be tagged in warning channel messages.", "discord_role_to_tag_1", "discord_role_to_tag_2" ], "log_channel_ids": [ "Logs related to file uploads and downloads will be sent to these channels.", "log_discord_channel_id_1", "log_discord_channel_id_2" ], "editingmode_commands": { "enter_editingmode": [ "editingmode", "editmode" ], "listing_command": [ "ls", "list", "files", "avilable" ], "change_dir": [ "cd", "dir", "directory" ], "change_dir_return": [ "..", "back", "return" ], "show_file": [ "view", "show" ], "download_file": [ "download", "get" ], "download_all": [ "all", "everything" ], "edit_file": [ "edit", "change", "replace" ], "append_to_file": [ "append", "addto" ], "new_file": [ "add", "new", "mk" ], "remove_file": [ "remove", "rm", "del" ], "exiting_command": [ "exit", "quit", "deactive", "leave" ], "help_commands": [ "cmd", "help", "command", "commands" ] }, "auto_cleanup": { "Clear the last conversation from the bot prompt if its size exceeds the specified limit in kilobytes (KB). This helps reduce token usage per request and improves efficiency.": 20, "Create_new_conversation_file_if_size_limit_exceeded": "true" }, "file_cleanup": { "file_age_limit_seconds": 727200, "cleanup_interval_seconds - if = 0 it means disable and never clean the users conversation": 43200 }, "chat_history": { "allow_users_to_clearself_history (true/false)": "true", "clear_chat_history_commands": [ "clearhistory", "clean", "clear", "reset" ], "not_allowed_message": "**You dont have permission to clear your chat history it would automatically be reseted every `{time_threshold_secconds}` secconds.**" }, "bot_status": { "status(e.g. online,idle,dnd)": "online", "activity_type(e.g. playing, listening, watching, competing or streaming)": "playing", "activity_text": "AI-Assistant", "activity_url": "https://www.twitch.tv/your_channel - Place a twitch link here if activity type is set to streaming." }, "spam_detection": { "message_limit": 5, "rate_limit_period (in seconds)": 60 }, "Response Temperature": { "Ai_selected_mode(e.g. cold,natural,warm,hot)": "natural", "Ai_promopts_explnation": { "Cold (Low creativity, high precision)": "Respond with factual and precise information, avoiding creative or speculative responses.", "Neutral (Balanced creativity and precision)": "Respond with a balance of creativity and accuracy, adapting tone to fit the context.", "Warm (Higher creativity, moderate precision)": "Respond creatively while maintaining relevance to the topic.", "Hot (Max creativity, low precision)": "Respond with maximum creativity, even if it involves speculative or unconventional ideas." }, "Temperature Value (Optional Override 0.1 to 1.0 (Cant be 0.0 it means disabled temp minimum is 0.1))": 0.0, "Temperature_Value_prompt": "Your selected response temperature has been set to {prompt_temp_value} please resonse the message according to this temprature float number that is between 0.1 and 1 anythings beyond 1.0 is equal to 1.0 low means less creativity and amount of text higher means lots of creativity and explnation", "Set this to false to disable the `no_temp_error` message. Remove Ai_selected_mode and set temperature to 0.0 for a natural AI response.": "true" }, "bot_messages": { "warning_message": "# {role_tags} \n **Warning!** User ID `{user_id}` - tagged as <@{user_id}> tried to access the editing system without permission.", "warning_message_direct": "# **Warning!** User ID `{user_id}` - tagged as <@{user_id}> tried to access the editing system without permission.", "not_owner_message": " You are not an owner to use this command. This action has been reported to the admins to take actions. ", "not_allowed_assistant": "**Assistant is not allowed to assist with the following files: {attachment}. Files like photos, PDFs, or any type of attachments are not assistable due to security reasons. This feature has been disabled by the admins. If you need assistance with something that requires attachments uploading, please contact Admins themselves. You can open a ticket on our Discord server:** \n {discord_link}", "file_upload": "**[`{attachment.filename}`]({attachment.url}) uploaded to `{user_state.current_directory}` by <@{user_id}> (UserID:`{user_id}`)**", "file_download": "**[`{file_name}`]({file_link}) downloaded by <@{user_id}> (UserID: `{user_id}`)**", "limited_use": "<@{user_id}>, you're sending too many messages! Please wait `{time_left}` more seconds before sending another message.", "not_allowed_to_leave": "**You are not allowed to leave this directory! (No other Direcotry with bot access exist please type the command with a directory name after it to switch path)**", "no_temp_error": " No temperature is defined. Please contact the developers about this problem.", "no_valid_defined_prompt": "No response temperature is defined. Response as you like", "normal_users_greeting": "# You are now connected with **Epic-Rust.org AI Assistant**. Feel free to ask any questions about the server! Please note that your conversation with the bot is being saved to improve your experience. Join our [Discord](https://epic-rust.org/discord) | Visit our [Shop](https://epic-rust.org/) | Check out our [Steam Group](https://epic-rust.org/steam)", "normal_users_greeting_clearning_access": "# You are now connected with **Epic-Rust.org AI Assistant**. Feel free to ask any questions about the server! Please note that your conversation with the bot is being saved to improve your experience - If you encounter bot issues or bad responses, simply clear the conversation history using {clear_commands} for a fresh start and more accurate answers. Join our [Discord](https://epic-rust.org/discord) | Visit our [Shop](https://epic-rust.org/) | Check out our [Steam Group](https://epic-rust.org/steam)", "owner_users_greeting": "# Welcome, Admin! You can enter **Editing Mode** by simply typing {formatted_editing_mode_args}. Once inside, use {formatted_Valid_Help_Commands} to view all available commands and options for the bot. ", "how_to_use": "**Available Commands:**\n# 1. **{formatted_change_dir_args} <directoryname> or using {formatted_change_dir_args} {formatted_dir_return_args}**: Change the current directory.\n# 2. **{formatted_listing_args}**: List the contents of the current directory.\n# 3. **{formatted_show_file_args} <filename>**: View the contents of a specific file.\n# 4. **{formatted_download_file_args} <filename>**: Download a specific file.\n# 5. **{formatted_download_file_args} {formatted_download_all_args}**: Download all files in the current directory, 8 files at a time.\n# 6. **{formatted_edit_file_args} <filename>**: Edit the contents of a specific file. You will be prompted to enter the new content for the file.\n# 7. **{formatted_append_to_files_args} <filename>**: Append content to an existing file. You will be prompted to provide the content to append.\n# 8. **{formatted_new_file_args} <filename>**: Create a new file and add content to it. You will be prompted to enter the content for the new file.\n# 9. **{formatted_remove_file_args} <filename>**: Delete a specific file.\n# 10. **{formatted_exit_command_args}**: Exit editing mode if you are in it.\n# For more help, just type {formatted_Valid_Help_Commands} again. Happy exploring!", "bot_cleared_message": "**The bot does not remember the last conversation due to file size limits and long conversation. A new conversation file has been created. Please proceed with your questions again.**" }, "version": "1.0.1", "Created By": "SHAYAN - Discord Id for more support: shayan_. " } Discord ID : SHAYAN_.Free -

Version 1.1.1
461 downloads
Auto Sign Moderation is an AI based moderation plugin to automatically handle moderation of all signs and images in rust. Automatically hide, remove and log signs on your server Free Moderation mode - Basic AI moderation completely free Advance Moderation mode - Custom AI instructions to moderate content Discord logging of moderated signs Batch mode - Send images in batches for better performance and less cost Auto Sign Moderation has an optional loading image for when an image is pending approval and a Discord logging mode, where moderated content is logged to discord. autosignmoderation.whitelist - bypass sign checks There are two main moderation modes. The first is the moderation API, which is a free API endpoint of Open AI. This model has limited options for what it can moderate generally speaking it works best for sexual and violent type content. The Advance Moderation API uses the gpt-4o-mini model. This is a paid model, where each request will cost the end user. This plugin has been designed in a way to reduce costs of using the paid model, dependant on image size the cost per image is close to $0.15 per 100 images checked (more about this in the FAQ). { "Image Size 25 - 100%": 50.0, "Image Quality 25 - 100%": 75.0, "Sign Update Cooldown (seconds)": 5.0, "Player Moderated Cooldown (seconds)": 300.0, "Hide signs while being checked": true, "Use Temp Loading Image": false, "Temp Loading Image URL:": "https://i.postimg.cc/4NNrqT2x/pngegg-2.png", "Logging Mode Only": false, "Send Player Chat Warnings": false, "Batch Mode - Disables hiding of signs": { "Check images in batches (Advance Mode Only)": true, "Batch Image Check Rate (Minutes)": 15.0, "Minimum images to batch check": 3.0, "Max checks to bypass minimum images 0 = no bypass": 4.0 }, "Discord Settings": { "Log to Discord": false, "Log moderated Images to Discord (WARNING THIS MAY SEND NSFW CONTENT TO YOUR DISCORD)": false, "Discord Webhook": "https://support.discord.com/hc/en-us/articles/228383668-Intro-to-Webhooks", "Discord Username": "Sign Moderator", "Server Name": "", "Avatar URL": "https://i.ibb.co/sQ10728/Loading-Pls-Wait2.png" }, "Moderation API (Free) - Limited Options": { "Enable": true, "Open AI Token": "https://openai.com/index/openai-api/", "Cooldown between API Checks (seconds)": 1.0, "Block images of harassment": true, "Block images of harassment/threatening": true, "Block images of sexual": true, "Block images of hate": true, "Block images of hate/threatening": true, "Block images of illicit": true, "Block images of illicit/violent": true, "Block images of self-harm/intent": true, "Block images of self-harm/instructions": true, "Block images of self-harm": true, "Block images of sexual/minors": true, "Block images of violence": true, "Block images of violence/graphic": true }, "Advance Moderation API (Paid)": { "Enable GPT Model (WARNING THIS IS PAID PLEASE READ DOCS)": false, "Open AI Token": "https://openai.com/index/openai-api/", "Cooldown between API Checks (seconds)": 1.0, "Model (Don't change this if you dont know what it is)": "gpt-4o-mini", "Content to moderate": "Pornography, Hate Speech, Child Exploitation, Racist images signs text or symbols, Words like nigger, symbols which resemble swastikas" } } FAQ: Whats the difference between the paid model vs the free one? The paid model allows for complete customization of content to be moderated and it has text recognition. Meaning it is extreamly useful for symbols and hate text. What are the settings to make checks cheapest? Batch mode, will send multiple images within the same batch. This effectively reduces the default cost by about half once you send images in batches of 3 or more. Reducing the image size and resolution also assists in reducing the cost. Be mindful that if your quality reduction setting is too high the AI model may struggle moderating fine detailed content. Keeping your content to moderate prompt simple and straight forward is important as well. If the query becomes extreamly long or complex it may cost more. How do I set up an OpenAPI Token? First sign up to OpenAPI if you dont have an account: https://platform.openai.com/signup Set up an organisation this can be called anything https://platform.openai.com/settings/organization/general Create a project https://platform.openai.com/settings/organization/projects Create an API key in your organisation under the just created project https://platform.openai.com/api-keys If you wish to use the paid model there are two more steps Set your usage limits for your organisation start with a low amount for testing such as $10 https://platform.openai.com/settings/organization/limits Add credit to your account https://platform.openai.com/settings/organization/billing/overview. Its best to just add a small amount of credit such as $10 and then top up later. Where do i monitior API usuage? You can monitor usage here: https://platform.openai.com/settings/organization/usageFree- 7 comments
- 1 review
-
- 6
-
-
-
- #auto sign moderation
- #autosignmoderation
- (and 21 more)
-

Version 3.0.0
247 downloads
Let your Personal NPCs drive for you with the Car AI Addon! This addon for Personal NPC enables your bots to take control of cars, allowing you to sit back and enjoy the ride while they drive to the destination. Features: Fully Automated Driving • Hop into the passenger seat, set your destination on the in-game map, and let your bot take the wheel. • Obstacle detection system ensures smooth and safe driving (can be disabled in settings). Smart Navigation System • AI calculates the route to your selected location. • Adjustable maximum speed and navigation accuracy. • Crossway search system to use all available roads How to Use: Spawn a bot using the PersonalNPC plugin. Take a seat in the passenger seat of any vehicle. Select your destination on the in-game map. Your AI driver will drive to the destination automatically! Requirements: • PersonalNPC Plugin (must be installed and enabled). • Driving Addon must be enabled in the PersonalNPC settings. See It in Action! Watch the Video Configuration: { "Permission to use this addon on all bots of player (not required)": "pnpcaddoncar.override-setup", "Search Mechanism settings": { "Max crossways amount for search method (0-2)": 2 }, "Driver settings": { "Max speed": 15.0 }, "Obstacle detection settings": { "Disable obstacle detection?": false, "Ray length": 5.0 }, "Minor settings": { "Enable visual debug?": false } }$9.90 -

Version 1.1.0
76 downloads
HOW TO ADD A TRACK? If you have already created your own track file, skip the first 3 steps. To add a new track, it’s very easy, follow the steps below: 1 ° Have the midi file (.mid) you want to add ready. 2 ° Goto the https://npcbands.vercel.app 3 ° Upload your file and click in the DOWNLOAD button 4 ° Move the downloaded file to oxide/data/NPCBands/Notes/ Now, the track name to add to the configuration file will be the file name without the .json extension. AVAILABLE INSTRUMENTS Guitar Trumpet Flute Sousaphone Canbourine Jerry Can Guitar Shovel Bass Piano Drumkit Xylophone FEATURES ■ª Create multiple bands ■ª Clean music controls UI ■ª Spawn unlimited bands ■ª Create a song-notes filter for each NPC ■ª Add custom clothing for each NPC ■ª Use of deployable instruments ■ª Fully customizable UI ■ª 2 band-mode (automatic and proximity) ■ª Unlimited NPCs for the same band ■ª All NPCs will play the notes that the instrument allows (can be filtered) ■ª Interval between songs ■ª Permission to use controls ■ª High performance, no server lag ■ª Option to force immediate stop ■ª Easily convert your midi files using the npcbands website ■ª 1 file for each track to avoid a large configuration/data file ■ª Delete all bands automatically when clearing the map ■ª Destroy all NPCs automatically when unloading the plugin ■ª Delete all NPCs on the plugin load in case of possible server crash ■ª Custom chat command ■ª Custom band radius ■ª Notifies you when you enter the band area COMMANDS /npcbands spawn <band_key> to spawn a new band /npcbands remove <band_id> to remove an existing band /npcbands list [page] to list all existing bands PERMISSIONS npcbands.admin - Permission for chat commands & music control npcbands.control - Permission for the music control only CONFIGURATION FILE NPCBands.json$20.00- 30 comments
- 3 reviews
-
- 4
-
-
-
- #bands
- #npc bands
- (and 13 more)
-

Version 2021.12.07
5 downloads
The prefab is currently compatible for the current gamemode(s): Hide&Seek (I recommend playing it at night for more fun!) . . . If you buy this product before end of the year (2021), you will get the following products & prefabs for FREE: Combat Mania [PvP] ~Collection One~ Combat Mania [CTF] ~Collection One~ Combat Mania [Monument] ~Collection One~ MBASE1 MBASE2 MBASE4 MBASE5 MBASE6 MBASE7 MBASE8 MBASE9 MBASE10 MBASETOWER . . . CCTV ID: COBALT2923 - Location: (46.3, 18.7, -73.2) ID: COBALT5683 - Location: (49.7, 15.4, -96.6) ID: COBALT7666 - Location: (60.6, 15.7, -122.8) ID: COBALT7743 - Location: (90.1, 12.2, -83.9) ID: COBALT8239 - Location: (42.1, 21.5, -7.3) ID: COBALT2070 - Location: (89.0, 42.0, 39.2) ID: COBALT1350 - Location: (131.1, 21.6, -38.0) Combat Mania [H&S] ~Collection One~ [758] Drag & Drop --------------------------------------------------------------------------------------- Primary screenshot by https://codefling.com/disguise Where the journey begins -Ventura Designs- Discord CCTV_IDs.txt$30.00