Search the Community
Showing results for tags 'tool'.
-
Version 1.1.1
70 downloads
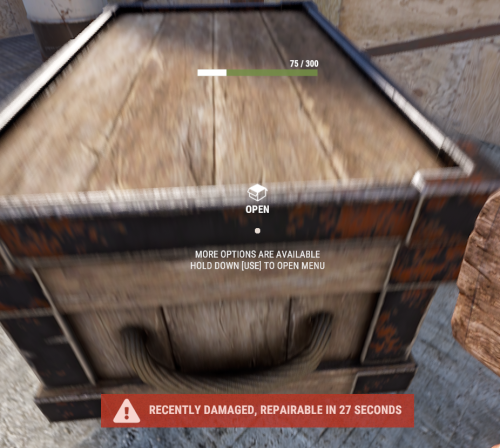
With just one tap, you can fully repair your base blocks and base items—no more having to tap repeatedly! Includes permission support and is optimized for top performance, with rotation & demolition support! Features * One Tap Repairs - Supports Base Blocks & Base Items & Vehicles, etc * Rotation - Re-Enables Base Blocks for easy native rotation again! * Demolition - Re-Enables Base Blocks for easy native demolition again! Permissions betterhammer.use ( required to do full 1 tap hit repairs with hammer & to use any features/functions )$5.00 -

Version 0.1.5
70 downloads
What is it? A nice user-friendly warning system Usage When someone is breaking rules or trolling others just warn them, you can also set a command that will be executed through server console that will get executed upon reachin certain amount of warnings (can be configured in cfg) Permissions warnmenu.use -- Gives you full control to operate the WarnMenu Chat command /warn -- Opens the WarnMenu /warn "Name/SteamID" "Warning reason" -- Warns the specified player with your reason /warnmenu.save -- Force the plugin to write the data from memory to the data file /wmessage <NameOrID | * > <message> - Shows a gametip message (Doesn't count as a warning) to specific player or to all players when you put * instead of the name Data files All Data files can be located at: \oxide\data\WarnMenu\warns There you can find all the warnings for each player Features WarnMenu features * Online Tab - In this tab you can easily select any online player that you want to warn * Search All Tab - Once you open this tab, there you can see all the players and browse in them * Find player Tab - When you click on the button you will be able to search for a specific player using his Name or SteamID Warn Types * CUI-Based - A CUI warning message will pop-up on player's screen when he gets warned * Chat-Based - A chat message will pop-up in player's chat when he gets warned Executable commands * On reaching certain amount of warnings, you can make the server execute a command on a player(configurable in cfg) F.e.: "1": "say {0} just reached 1 warning! SHAME on him!", "3": "kick {0} Kicked for reaching 3 warnings", Localization { "Syntax": "Commands:\n/report (Opens Reporter GUI)", "CUI Online": "Online Players", "CUI Player": "Player: {0}", "CUI SteamID": "SteamID64: {0}", "CUI Warnings": "Warnings: <color=#8f1919>{0}</color>", "CUI NewWarn": "New\nWarning", "CUI WarningID": "Warning ID: {0}", "CUI WarnedBy": "Warned by: {0}", "CUI Date": "Date: {0}", "CUI Reason": "Reason: \n{0}", "CUI Remove": "Remove", "CUI Close": "close", "CUI Warn": "Warn", "CUI WarnAddMenuPlayer": "Warning for\n<color=#d43939>{0}</color>", "CUI SearchAll": "Search All", "CUI SelectPlayer": "Select a player to warn:", "CUI Find": "Find player", "CUI Find2": "Select", "CUI Find3": "Find player:\n(steamID/Name)", "CUI CantFindPlayer": "Couldn't find the player\nsearching argument: {0}", "CUI FoundPlayer": "Found player: {0}", "CUI Refresh": "Refresh", "CantFindPlayer": "Couldn't find that player", "WarnMessage": "Warned: <color=#8f1919>{0}</color>\nReason: {1}", "JoinMessage": "{0} has joined with <color=#8f1919>{1}</color> warnings", "WarnReceive": "You have received a <color=#8f1919>warning</color>\nBy: {0}\nReason: {1}", "CUI WarnReceive": "<color=#8f1919>Warning</color>\nreceived", "CUI WarnReceive2": "By: {0}\nReason: {1}", "Message Syntax": "/wmessage <player|*> <message>", "No Player": "Couldn't find player with that name", "CUI WarnAddMenuClans": "Warning for clan\n<color=#d43939>{0}</color>", "CUI Clans": "Clans", "SyntaxClan": "Syntax: /warn.clan (p | g) (clan tag) (reason)", "ClansNotLoaded": "Clans plugin is not loaded!", "ClanNotFound": "Couldn't find a clan with that tag!", "ClanWarnedGlobal": "{0} clan has been warned: {1}", "CUI isGlobal": "Global announce?\n{0}", "CUI ClansNot": "Clans plugin is not loaded!" } Configuration { "Announce on join with warnings?(to admins)": true, "Execute commands on reaching count:": { "Enabled?": true, "(Format: 5 : mute {0}) where 5 is number of warns and {0} is player's id": { "5": "example.command {0}", "7": "example.command {0}", "10": "example.command {0}" } }, "Warn message settings": { "Text-based warn message?": true, "CUI-based warn message?": true, "How long until CUI message gets removed (secs)": 5.0 }, "Audio settings": { "Enable audio on warning?": true, "Audio path": "assets/content/nexus/ferry/effects/nexus-ferry-departure-horn.prefab" }, "Highlight settings": { "Enabled?": true, "Minimum amount of warns to highlight": 3 }, "wMessage settings": { "Audio path": "assets/content/nexus/ferry/effects/nexus-ferry-departure-horn.prefab", "Time before disappear": 10.0 }, "Discord (clan)": { "Webhook url": "WEBHOOK", "Enabled?": true }, "Discord (player)": { "Webhook url": "WEBHOOK", "Enabled?": true } }$10.00 -
Version 1.4.12
6,841 downloads
Manage your Rust server easier and more efficiently with the AdminMenu plugin. Track players, interact with them, edit their data and permissions, as well as change server convars and manage plugins. Features: Menu retains its state after closing, you won't lose everything you did before. Ability to fully translate the menu into any language. Large range of permissions for each action, will allow you to flexibly customize the admin menu for each group of administrators. Quick menu that allows you to perform quick actions Full list of players with the ability to filter by online, offline, admins and moderators. Also has a frame of different colors depending on the level of authorization. Wide range of information and actions for the selected player. Editing convars with search. Has a complete list of editable convars with descriptions for some of them. Extensive issue menu by category, with easy management of name, skin and amount (manual, +1, +100, +1000, +10000). Plugin management menu. It is possible to reload, unload or load a plugin easily and quickly. Updates occur in real time. Ability to create your own custom buttons that execute several commands Quick Start: You install the plugin in the plugins folder. Give yourself the adminmenu.fullaccess permission. Commands, use one of your choice, one for the player and one for the admin group: o.grant user [name or steamid] adminmenu.fullaccess o.grant group admin adminmenu.fullaccess Press the X button (swap seat button) or type adminmenu in the console. Enjoy Useful stuff: You can quickly open a player in the admin menu. To do this, point at the player and press X. You don't have to hover over the player exactly, you will be able to open players within a certain radius of the place you are looking at. CUSTOM BUTTONS Custom buttons are buttons that when pressed will execute commands on behalf of the administrator, commands can be several, below will be the details. At the moment, custom buttons can be created in two places: in the quick menu and in the menu when selecting a player. These places are separated in the config. Button Fields: "Execution as server" - Call the command on behalf of the server, not the administrator "Label" - Text that will be on the button, for each such inscription creates a field in the lang file, accordingly you can translate this text into several languages. "Commands" - Array of commands that will be executed on behalf of the administrator. Chat commands require a special entry, see examples. "Permission"- permission to display and use the button. You need to write the permission that will be after "adminmenu.". Example: if you enter the permission "test" the permission will be adminmenu.test "Position" - The location for the button, the first number is responsible for the row number, the second for the position within the row, starts from 0.There are limits of locations, if you have gone beyond the limit - the button will not be displayed. Common Tags: {adminUID} - administrator's id. {position} - administrator coordinates (underfoot) {view_position} - the position where the administrator is looking (can be used for spawning or something similar) {view_direction_forward} - forward view direction of the administrator {view_direction_backward} - the direction the administrator is looking backwards {view_direction_left} - direction of the administrator’s view to the left {view_direction_right} - administrator’s view direction to the right Tags for target only: {steamid}, {steamID}, {userID}, {STEAMID}, {USERID} - mean the same thing, namely the id of the selected player. {target_position} - target coordinates (underfoot) Example of commands: chat.say \"/{chat command}\" vanish ban {steamID} teleport {steamID} {adminUID} More information about the grant menu: The grant menu includes the full list of items including hidden items as well as custom items created by the CustomItemDefinitions library. The menu can be accessed from the navigation or from the menu of the selected player. When issuing itself has categories. Search works in any registry by any part of the name or short name. Has a page system at any stage. More information about the buttons in the Quick Menu: [Teleport to 0 0 0] - Teleport to coordinates 0 0 0. Requires adminmenu.quickmenu.teleportto000 permission [Teleport to Deathpoint] - Teleport to your deathpoint. Requires adminmenu.quickmenu.teleporttodeath permission [Teleport to Spawn point] - Teleport to a random spawn point. Requires adminmenu.quickmenu.teleporttospawnpoint permission [Kill Self] - Kill Self, kills even when immortal. Does not require permission. [Heal Self] - Fully heal yourself. Requires adminmenu.quickmenu.healself permission [Call Heli] - Call Helicopter to yourself (arrives in time). Requires adminmenu.quickmenu.helicall permission [Spawn Bradley] - Spawn bradley on yourself. Requires adminmenu.quickmenu.spawnbradley permission More information about the buttons in the menu of the selected player: [Teleport Self To] - Teleport yourself to the selected player. Requires adminmenu.userinfo.teleportselfto permission [Teleport To Self] - Teleport the selected player to yourself. Requires adminmenu.userinfo.teleporttoself permission [Teleport To Auth] - Teleportation to random authorization (TC). Requires adminmenu.userinfo.teleporttoauth permission [Teleport to Deathpoint] - Teleportation to a player's deathpoint. Requires adminmenu.userinfo.teleporttodeath permission [Heal] - Full healing, including metabolism. Requires adminmenu.userinfo.fullheal permission [Heal 50%] - Half healing. Requires adminmenu.userinfo.halfheal permission. [View Inventory] - View and edit player's inventory. Requires adminmenu.userinfo.viewinv permission [Strip Inventory] - Clear player's inventory. Requires adminmenu.userinfo.stripinventory permission [Unlock Blueprints] - Unlock all Blueprints. Requires adminmenu.userinfo.unlockblueprints permission [Revoke Blueprints] - Reset all Blueprints. Requires adminmenu.userinfo.revokeblueprints permission. [Kill] - Kill a player. Requires adminmenu.userinfo.kill permission [Kick] - Kick a player. Requires adminmenu.userinfo.kick permission [Ban] - Ban a player. Requires adminmenu.userinfo.ban permission More information about the buttons in the menu of the selected group: [Remove Group] - Remove group, has confirmation. Requires adminmenu.groupinfo.removegroup permission [Clone Group] - Clone group with the ability to copy users. Requires adminmenu.groupinfo.clonegroup permission Permissions: adminmenu.use - Ability to use admin menu with basic set. Open tab quick menu (each button has its own permission, without permissions is present only kill yourself button) and the list of players. adminmenu.fullaccess - Full access to all functions without the need for each permission, includes also adminmenu.use. It is recommended to give only to the main administrators. adminmenu.quickmenu.teleportto000 - Access to the button in the quick menu, teleportation to coordinates 0 0 0 0. adminmenu.quickmenu.teleporttodeath - Access to the button in the quick menu, teleportation to the point of your death. adminmenu.quickmenu.teleporttospawnpoint - Access to the button in the quick menu, teleportation to a random spawn point. adminmenu.quickmenu.healself - Access button in quickmenu, heal yourself completely. adminmenu.quickmenu.helicall - Access to the button in the quick menu, call a helicopter to yourself (arrives in time). adminmenu.quickmenu.spawnbradley - Access button in quickmenu, spawn bradley. adminmenu.userinfo.teleportselfto - Access to the button in the menu of the selected player, teleportation to the selected player. adminmenu.userinfo.teleporttoself - Access to the button in the menu of the selected player, teleport the selected player to himself. adminmenu.userinfo.teleporttoauth - Access to the button in the menu of the selected player, teleportation to random authorization (TC). adminmenu.userinfo.teleporttodeath - Access to the button in the menu of the selected player, teleportation to the place of death of the player. adminmenu.userinfo.fullheal - Access to the button in the menu of the selected player, full healing, including metabolism. adminmenu.userinfo.halfheal - Access to the button in the menu of the selected player, half healing. adminmenu.userinfo.viewinv - Access to the button in the selected player's menu, view and edit the player's inventory. adminmenu.userinfo.stripinventory - Access to the button in the menu of the selected player, clear the player's inventory. adminmenu.userinfo.unlockblueprints - Access the button in the menu of the selected player, unlock all drafts. adminmenu.userinfo.revokeblueprints - Access to the button in the menu of the selected player, reset all drafts. adminmenu.userinfo.kill - Access the button in the selected player's menu to kill the player. adminmenu.userinfo.kick - Access the button in the selected player's menu to kick the player. adminmenu.userinfo.ban - Access to the button in the menu of the selected player, ban the player. adminmenu.groupinfo.removegroup - Access to the button in the menu of the selected group, the ability to remove the group. adminmenu.groupinfo.clonegroup - Access to the button in the menu of the selected group, the ability to clone the group. adminmenu.convars - View and edit convars. adminmenu.permissionmanager - View and edit permissions in groups, player groups, create, delete and clone groups (requires additional permissions from these buttons). adminmenu.pluginmanager - Access to plugin management, reloading, unloading, loading plugins. adminmenu.give - Access to give resources, as well as yourself and the selected player.$30.00 -

Version 1.0.0
10 downloads
Spectate is an advanced administration tool that makes player monitoring fast and convenient. Start spectating any active player by name or Steam ID, switch between valid targets with the arrow keys, and view the current player's name and Steam ID in a clean on-screen panel. Features - Spectate players by partial name, Steam ID - Switch targets using the **Left** and **Right** keys - Displays the target's name and Steam ID - Automatically skips dead, sleeping, disconnected, and vanished players - Stops safely when the target disconnects - English and Russian localization included - Optional **Vanish** integration for status checks and direct spectate voice relay - When an administrator speaks in voice chat while spectating, the player being watched can hear them directly - Optional player notifications when an administrator starts or stops spectating them. This feature is disabled by default and can be enabled in `oxide/config/Spectate.json` Installation 1. Upload `Spectate.cs` to `oxide/plugins`. 2. Grant the required permission to your admin group. oxide.grant group admin spectate.use Permission `spectate.use` - Allows an administrator to use all spectate commands. Commands - `/spec <Part of name or Steam ID>` - Start spectating a player - `/stop` - Stop spectating and respawn While spectating, use the **A/D** keys to change targets. The **Vanish** plugin is optional and is only required for its related integration features.$10.00 -
Version 1.1.2
183 downloads
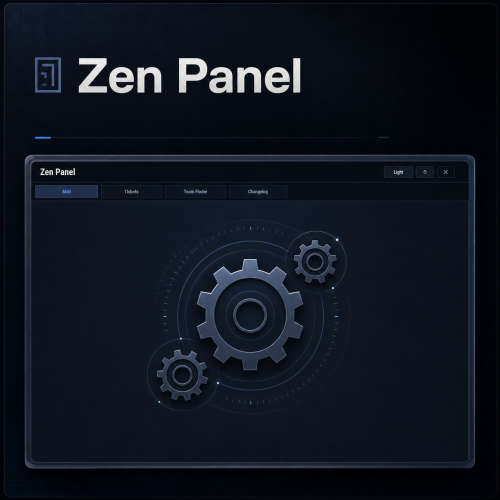
Zen Panel is my modular UI framework/API, designed to power an ecosystem of UI plugins through one shared panel and common functions. It provides the main interface, centralized theme and layout handling, notification support, image utilities, and a clean integration surface for my utility plugins like Zen Mail, Zen Tickets, Zen Team Finder, and more. This plugin servers as a dependency and has no real function on it's own. Carbon Aliases by thepitereq is required only if your server uses the Oxide modding framework (Carbon users do not need to install Carbon Aliases) Zen Panel comes with it's own configuration where you can specify which Zen plugin tabs to display and their order. You can also modify the themes to your liking and configure the timestamp if you wish to offset it (in minutes) from your server time. You can configure the position and size of the HUD notification bell using a chat command (opens a basic repositioning tool) Permissions: zenpanel.admin - Lets you use the /notif_iconpos command to resize/reposition the HUD notification bell Chat commands: /notif_iconpos - Opens and uses the HUD bell position/size editor Default Config: { "UI - Tabs In Order (omit to hide)": [ "mail", "tickets", "teamfinder", "changelog" ], "Notification Icon Image URL (HUD bell)": "https://i.ibb.co/FkBKbkVc/bell.png", "UI - Default Theme (Dark/Light)": "Dark", "UI - Dark Theme": { "Overlay": "0.03 0.04 0.06 0.78", "Window": "0.05 0.08 0.12 0.985", "Header": "0.06 0.09 0.14 1.00", "Panel": "0.07 0.10 0.16 1.00", "PanelAlt": "0.08 0.11 0.17 1.00", "Card": "0.11 0.15 0.22 1.00", "CardAlt": "0.09 0.13 0.20 1.00", "Border": "0.16 0.21 0.31 1.00", "BorderStrong": "0.26 0.34 0.48 1.00", "Text": "0.92 0.95 0.98 1.00", "TextMuted": "0.60 0.67 0.76 1.00", "Accent": "0.45 0.66 1.00 1.00", "AccentSoft": "0.18 0.25 0.39 1.00", "AccentText": "1.00 1.00 1.00 1.00", "Success": "0.29 0.77 0.48 1.00", "SuccessSoft": "0.12 0.24 0.17 1.00", "Warning": "0.92 0.72 0.33 1.00", "WarningSoft": "0.28 0.19 0.06 1.00", "Danger": "0.92 0.42 0.42 1.00", "DangerSoft": "0.28 0.11 0.11 1.00", "Offline": "0.54 0.61 0.70 1.00", "OfflineSoft": "0.16 0.19 0.25 1.00", "Input": "0.09 0.13 0.20 1.00", "AvatarFill": "0.08 0.11 0.18 1.00" }, "UI - Light Theme": { "Overlay": "0.10 0.14 0.20 0.12", "Window": "0.87 0.90 0.94 0.985", "Header": "0.84 0.88 0.93 1.00", "Panel": "0.86 0.89 0.93 1.00", "PanelAlt": "0.83 0.87 0.92 1.00", "Card": "0.92 0.94 0.97 1.00", "CardAlt": "0.89 0.92 0.96 1.00", "Border": "0.69 0.76 0.85 1.00", "BorderStrong": "0.56 0.66 0.82 1.00", "Text": "0.16 0.20 0.25 1.00", "TextMuted": "0.41 0.48 0.58 1.00", "Accent": "0.30 0.51 0.92 1.00", "AccentSoft": "0.80 0.87 0.98 1.00", "AccentText": "1.00 1.00 1.00 1.00", "Success": "0.24 0.62 0.36 1.00", "SuccessSoft": "0.83 0.93 0.86 1.00", "Warning": "0.79 0.58 0.18 1.00", "WarningSoft": "0.94 0.90 0.80 1.00", "Danger": "0.79 0.34 0.34 1.00", "DangerSoft": "0.95 0.86 0.86 1.00", "Offline": "0.55 0.62 0.70 1.00", "OfflineSoft": "0.86 0.90 0.95 1.00", "Input": "0.96 0.97 0.99 1.00", "AvatarFill": "0.86 0.90 0.96 1.00" }, "UI - HUD Anchor Min": "0.5 0.00", "UI - HUD Anchor Max": "0.5 0.00", "UI - HUD Offset Min (px)": "-326 4", "UI - HUD Offset Max (px)": "-294 36", "UI - HUD Unread Counter Font Size": 15, "UI - HUD Unread Counter Text Color": "0.98 0.99 1.00 1.00", "UI - HUD Unread Counter Shadow Color": "0.04 0.05 0.07 0.98", "Timestamp Offset (minutes)": 0, "Notification Icon UI Layer (Overlay/Hud/Hud.Menu)": "Overlay" } Sample image from plugins using Zen Panel: Notification bell layer (v1.1.0): Overlay keeps the previous behavior. Set "Notification Icon UI Layer (Overlay/Hud/Hud.Menu)" to "Hud" to show the bell below overlay menus, or "Hud.Menu" if preferred. Oxide users should also update Carbon Aliases to the latest version.Free -
Version 2.0
107 downloads
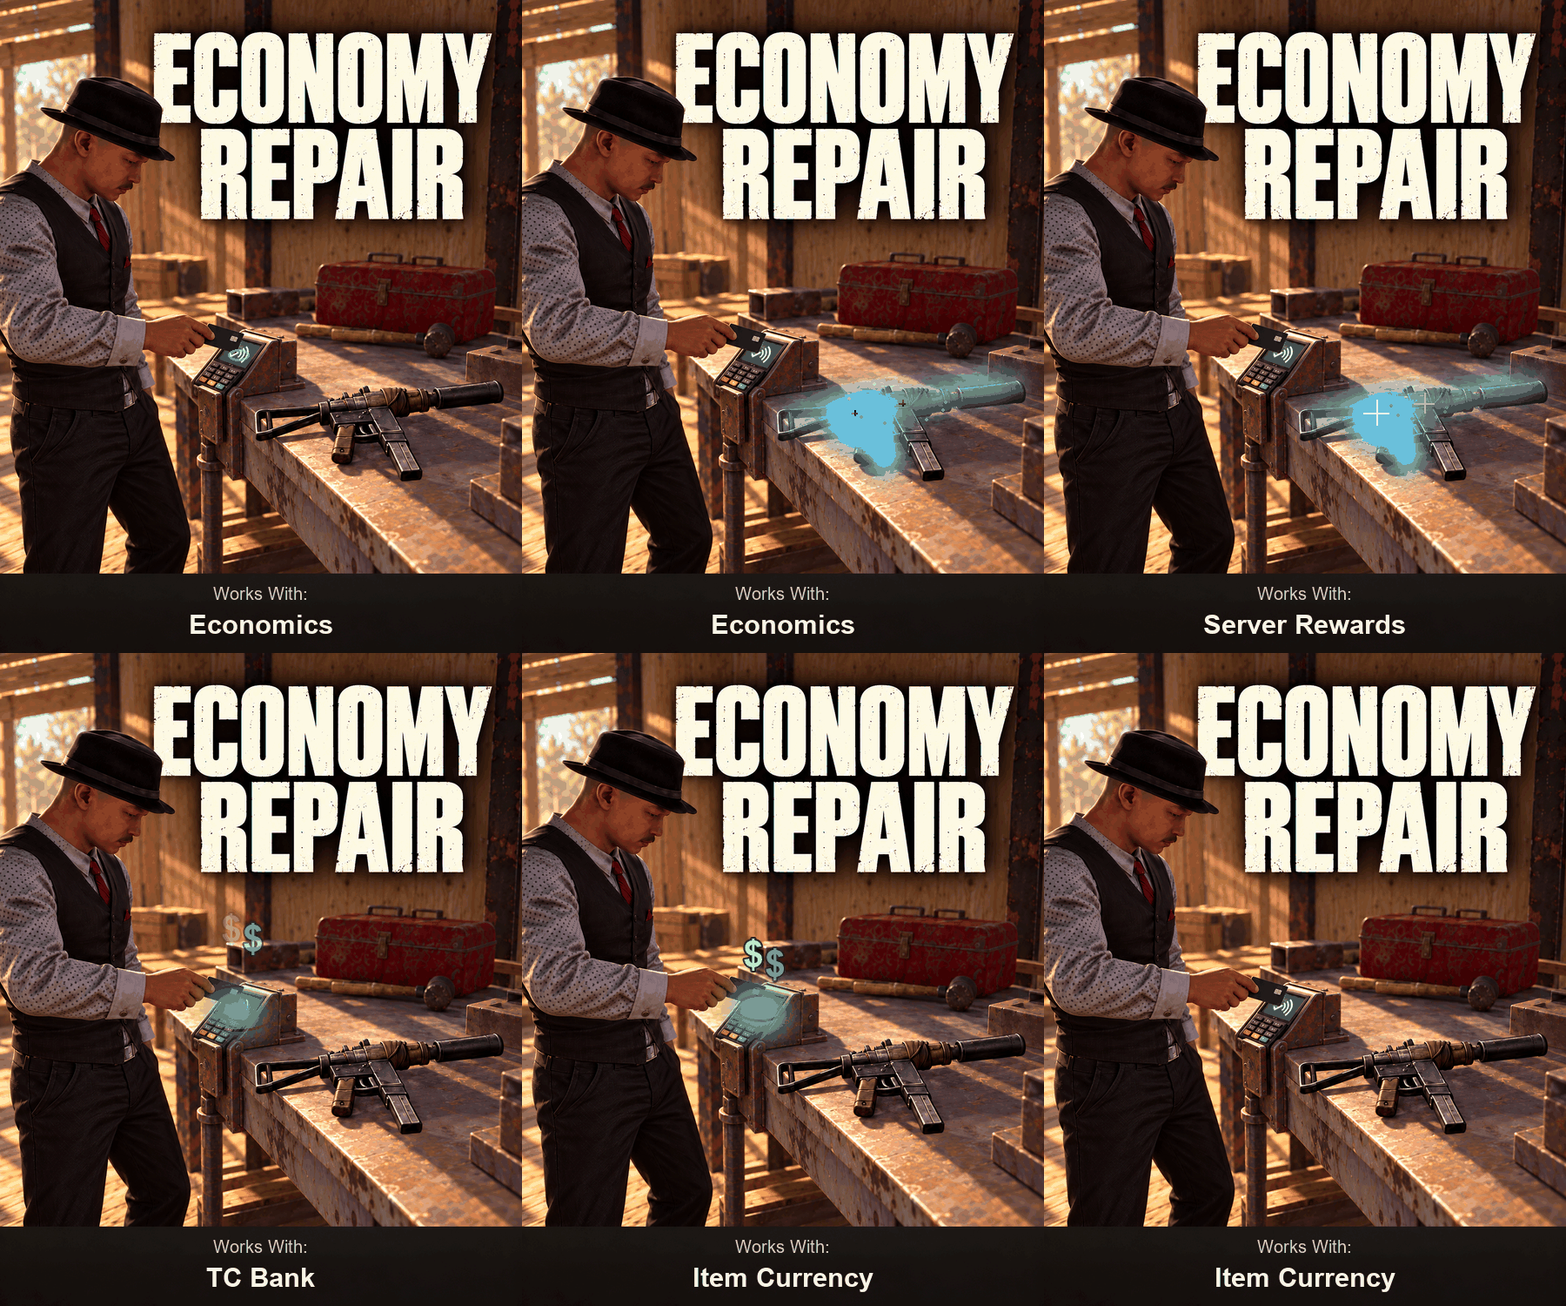
Let players repairitems with your server’s chosen currency. Economy Repair adds a compact payment option beneath the repair bench controls, using Rust’s native durability handling and vanilla repair materials to calculate the price. Features Supports Economics, ServerRewards, TCBank wallet funds, or an inventory item. Native Rust durability handling Configurable currency value for every vanilla repair resource. Compact repair bar showing the selected currency, price and a separate repair button. Configurable minimum price, VIP discounts, and item/skin blacklists. Permission, bench-access and payment checks, with refunds if a paid repair fails. Localized UI and chat messages. How it works Open a repair bench, insert a damaged item, check the price and click REPAIR. Rust’s blueprint requirements and native durability rules still apply. Currency options Choose Economics, ServerRewards, Item or TCBank in the config. Only the selected currency is used. Item currency needs no economy plugin. Set its item ID, exact skin ID and optional display name. An empty display name allows any name; a specified name is matched without case sensitivity. Main inventory, belt and clothing slots are checked. The default item is scrap. Permissions economyrepair.use - allows currency repairs. economyrepair.vip - applies the configured VIP discount. Upgrading to 2.0 The old config and all existing EconomyRepair language files are backed up and replaced automatically on first load. Manual deletion is optional. Reapply your chosen currency, custom prices, discounts, blacklists and translations after migration. Default configuration { "Currency System (Economics, ServerRewards, Item, TCBank)": "Economics", "Currency Item": { "ItemID": -932201673, "SkinID": 0, "Display Name": "" }, "Points Per Resource": 5.0, "Resource Prices": { "bone.fragments": 3.0, "charcoal": 2.0, "cloth": 5.0, "fat.animal": 5.0, "gunpowder": 5.0, "leather": 8.0, "lowgradefuel": 8.0, "metal.fragments": 3.0, "metal.refined": 20.0, "scrap": 10.0, "skull.human": 50.0, "spear.wooden": 50.0, "stones": 2.0, "wood": 2.0 }, "Minimum Repair Price": 25.0, "VIP Discount Percentage": 0.0, "Repair Blacklist": [], "Blacklisted SkinIDs": [], "Config Version": 4, "Language Version": 0 }$9.99 -
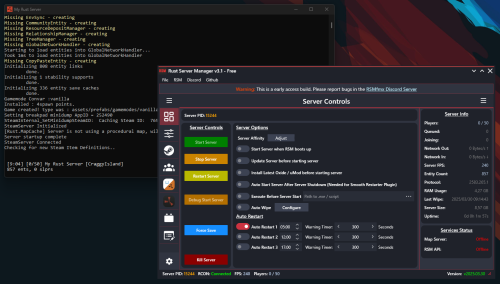
Version 2025.12.23
8,566 downloads
Rust Server Manager (RMSfmx) is a tool that allows you to create and manage dedicated Rust servers. RSMfmx was a paid tool that has recently become free and open source. Freatures: Modern Graphical Interface Server Info Panel Graphical Server Config Editor Graphical Server Installer Graphical Player Manager OxideMod / uMod Installer and Configuration CarbonMod Installer and Configuration Plugin Manager (Install, Configure and manage) Chats Logger Auto Restart Map Server (Self host custom Maps) Rest API to interface with RSM.Free- 14 comments
- 3 reviews
-
- 14
-

-

-
- #rsm
- #rust server manager
- (and 5 more)
-
Version 1.2.0
201 downloads
xPermissionManager A modern, intuitive, and powerful permission management tool for Rust servers. xPermissionManager provides a complete visual interface for managing user and group permissions directly ingame. No more console commands, guesswork, or digging through permission lists. Everything is organized, accessible, and easy to control through an straight forward UI. Whether you're adjusting a single permission, overseeing full group structures, or assigning temporary access, xPermissionManager gives server owners a fast and efficient possibility to do so. Plugin Preview (Video) Full Permission Control Grant or revoke any permission from groups or individual players. Timed Permission System Assign temporary permissions that automatically expire (e.g., 30m, 1h, 1d, 1w, custom durations). Timed Group Memberships Add players to groups for a limited time - Perfect for kits, VIP, special events or whatever. Comprehensive UI A clean and intuitive interface for browsing permissions, switching groups, managing users, and applying timed access. User & Group Browsing View all available groups, check individual player permissions, and toggle them instantly. Clear Feedback Every change is acknowledged with clear messages to help admins avoid mistakes. Language File Permission xpermissionmanager.use // Allows a player to open and use the xPermissionManager UI Chat Commands /xpm /xpmuser <name or steamID> /xpmtimed /xpmgroups /xpm [Opens the Permission Manager UI] PERMISSION OR ADMIN REQUIRED /xpmuser <name or steamID> [Opens the UI for managing a specific player’s permissions/groups] PERMISSION OR ADMIN REQUIRED /xpmtimed [Shows all active timed permissions for a player. Includes remaining duration and whether they came from a group] /xpmgroups [Shows all active timed group memberships for a player] Console Commands </> API$11.99- 2 comments
- 2 reviews
-
- 3
-

-
-
- #permission
- #manager
- (and 20 more)
-

Version 2.1.3
92,625 downloads
Convenient GUI manager for player and group permissions. Allows assignment of player permissions. (online or sleeping) Allows assignment of group permissions. Allows one-click removal of all players from a group. (group page - "Remove All") Allows adding/removing a player from groups. Supports unlimited plugins/permissions/groups Up to 60 plugins per-page. Up to 40 permissions per-page. Up to 40 user groups per-page Allows for local and sql backup and recall of all permissions or groups. Permissions. permissionsmanager.allowed - Allows players to use GUI. Plugin can be used with this permission, or by any Admin : Auth Level 2. Chat commands. /perms data - Backup and restore permissions and/or groups - local data file and/or SQL. ** /perms OR /perms player - Opens GUI player list, allowing a player to be chosen. /perms group - Opens GUI group list, allowing a group to be chosen. /perms player <playername> - Opens permissions GUI for the specified player. /perms group <groupname> - Opens permissions GUI for the specified group. Console commands. EmptyGroup <groupname> - Removes all players from the specified group. Configuration. Global. Chat - Title colour Chat - Message colour GUI - Label colour GUI - On colour GUI - Off colour GUI - AllPerPage - Sets All/None option to per-page, or per plugin. Options - GUI Transparency 0-1 Options - Plugin BlockList - ex. "playerranks,botspawn" Block list must be lower case, comma separated, no spaces, and no final comma, as above. Useful tool for picking CUI colours - RGB Decimal - Take the RGB Normalized decimal output, and remove all commas. ** Please note that with data backups : SQL saving is accumulative - Saving adds current permissions/group data to whatever was already saved. Local data file saving is not accumulative. It overwrites any existing backup with the current server permissions/groups. FAQ. Q: I'm trying to revoke permission(Y) for a player, but it says "Inherited". A: The player is in a group(X) which is also granted permission(Y). Solution: Revoke permission (Y) from group(X) or remove the player from group(X). Q: I removed a player from group(X), but they still have permission(Y). A: This is the opposite of the above. This player must have been independently granted permission(Y) at some time. Solution: Revoke permission(Y) from the player.Free- 242 comments
- 34 reviews
-
- 41
-
-
-
- #permissions
- #admin
- (and 7 more)
-

Version 1.7.5
48,135 downloads
The easiest and fastest way to build a Rust server Functions: Server Config Installer Wipe Manager Custom Map Support - Server Config: Here you can set up all the settings for your server. Server Name Server Tag Server Description Server URL Server Logo URL Map Size Map Seed Generate Maps Seed MAX Player RCON Password Server Port Query Port RCON Port App Port Game Mode Custom Map - Installer: Here you can easily install your server and mods. Install or Update your Server Verify your server files Install or Update Oxide (Detects new version) Install or Update Carbon (Detects new version) Install or Update RustEdit (for Custom Map Users) Install or Update Discord Extension (to run Discord Plugins) - Wipe Manager: Here you can easily Wipe your Server Full Wipe Blueprints Map Oxide Data Backpacks Logs Player Deaths Player Identities Player Stats Player Tokens New Map Seed on Wipe HowTo: - Start Rust Server Tool as Admin - Install Server - Make your settings and save - Start Server That's allFree- 195 comments
- 18 reviews
-
- 28
-
-
-
- #server
- #installer
- (and 7 more)
-

Version 1.5.54
6,227 downloads
Build Tools is a plugin for building in game. It makes upgrading, removing and even downgrading buildings easy. !ATTENTION! After the last update of the game, the additional slot does not work Features of Build Tools Beautiful user interface: A good-looking interface that is easy to use; Bar progress display: A progress bar shows how your upgrade is going; Upgrade of the entire building at once: Make the whole building stronger in one go; Interface customization: Set up the interface the way you like. Returning an item to remove: Removing a structure gives you its items back; Returning items with condition as in the game: Items are returned to the same condition as in the game, with the option to set their condition as a percentage; Blocked list items for remove: Choose which items can't be removed. Ability to use icons both from the game and your own Work with Clans/Friends/NoEscape Building Skins (+ automatic parsing command) Downgrade: Downgrade structures in a few clicks Edit config via in-game interface (no JSON editing required) Commands /up [1-4]: enable upgrading mode /up all: allows you to upgrade the entire building at once /remove: enable removing mode /remove all: allows you to remove the building at once /down: enable downgrading mode /down all: allows you to downgrade building at once buildtools.parse.skins: parses new building skins from the game along with their images /bskin: open settings menu Permissions buildtools.all: allows you to upgrade/remove the entire building at once buildtools.free: allows you to upgrade buildings for free buildtools.edit: allows you to enable edit mode buildtools.vision: allows you to toggle the remove mode on in vision mode Video Hooks object canDowngrade(BasePlayer player, BaseEntity entity) object canRemove(BasePlayer player, BaseEntity entity) object CanBuildToolsGiveRefund(BasePlayer player, BaseEntity entity) Web Config Editor Manage the BuildTools settings in our web config editor. You change the config in a browser form instead of editing files on the server by hand. P.S. The web config editor is open to members of the "BuildTools" group in our Discord server. Join at https://discord.gg/mevent and ask for the group. FAQ Q: Where can I see an example of a config? A: Config$21.95- 337 comments
- 19 reviews
-
- 8
-
-
-
- #building
- #foundation
- (and 28 more)
-
Version 1.3.2
258 downloads
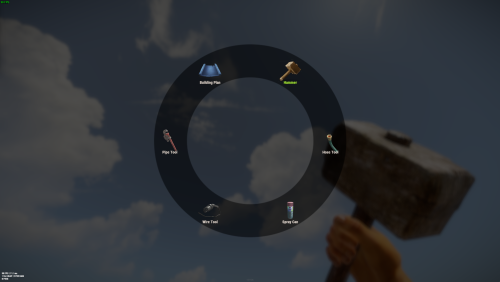
Building tools Seven tools, one belt slot Building a base means a hammer, a plan, wire, pipes, a hose, a spray can and a wallpaper tool — and a belt with nothing left in it. This is one item that becomes any of them. Hold it, hit a shortcut, a radial menu opens around your crosshair, click a tool and it's already in your hand, in the same slot. Nothing wears out, nothing takes up space, and each tool can be locked behind its own permission. 7 Tools in the wheel by default 7 Shortcuts to pick from 1 Belt slot for all of them 0 Durability ever lost ✓Radial menu at the crosshair — one shortcut, one click, tool swapped ✓A permission per tool — the wallpaper tool for VIP, the hammer for everyone ✓Any item can go in the wheel — it isn't limited to building tools ✓Closes itself when you're hit — a menu never gets you killed ✓English and Russian included — and every label in the wheel is your own text Video See it in action 01 — The wheel Open, click, build — without leaving the wall you're on The whole interaction is one shortcut and one click. No inventory, no dragging, no hunting for the right slot while your teammate holds the wall up. Seven shortcuts, pick the one that fits your hand Shift + E, Shift + left or right click, Ctrl + E, Ctrl + left or right click, or the middle mouse button. Or skip shortcuts entirely and have the wheel open the moment the tool comes into your hands. Laid out by itself Icons are spaced evenly around the circle from however many tools that player can actually see — three tools or twelve, the ring stays balanced. The tool currently in your hands is highlighted in green. The slot doesn't move Picking a tool replaces the item in the same belt position and puts it straight back in your hands. Your belt layout survives a hundred swaps unchanged. Gets out of the way on its own Take a single point of damage and the menu closes instantly. Switch to another item and it closes too. Nobody dies staring at a UI because a raider walked in. Sized to the screen One scale value shrinks or grows the whole wheel, and it can be drawn on the unscaled overlay layer so it looks the same regardless of a player's UI scale setting. 02 — The tools Your list, not a fixed one Seven building tools come set up and ready. The list itself is just items, so it holds anything you want it to. Preloaded with the full building set Hammer, building plan, wire tool, pipe tool, hose tool, spray can and wallpaper tool — the seven items that otherwise eat most of a belt. A permission on any of them Leave a tool's permission empty and everyone sees it; fill it in and only that group does. The wheel is built per player, so a default player and a VIP holding the same item get different menus. Permissions are registered for you on load. Any item ID, any skin, your own label A tool entry is an item id, an optional skin, a name shown under the icon and a permission. Add a torch, a codelock, a custom skinned hammer — anything you can name by id belongs in the wheel, under whatever text you like. Nothing in the wheel ever wears out Tools carried as part of the multi-tool lose no durability at all, so a player never loses their hammer mid-raid-repair and never has to craft a replacement. 03 — Handing it out A skinned item you can sell, gift or script The multi-tool is an ordinary building plan wearing a specific skin. That makes it trivial to distribute however your server already distributes things. Give it from chat, console or any other plugin A chat command for admins and holders of the give permission, a server console command that names a player, and — because it's just an item with a skin — a shop lot, a kit or an event reward with no integration work at all. Optional free building One switch lets anyone holding the multi-tool place structures without paying resources — built for creative and event servers. Left off by default, and it applies to every holder, so hand the tool out accordingly. Your own skin, if you have one The skin id is a config value. Swap in a workshop skin of your own and the plugin recognises it as the multi-tool from then on. Reliability Built to be left alone ✓Oxide and Carbon — on Carbon the built-in image database is used and nothing else is needed ✓Nothing is stored — the tool is a normal item, so there is no data file to corrupt and nothing to lose on a wipe ✓Clean unload — open menus are closed for every player; items already in belts keep working as ordinary items ✓Idle cost is nothing — unused hooks are unsubscribed on boot, so features you turned off don't run at all ✓Misconfiguration is called out — enable two shortcuts and the console tells you which one it used instead of failing quietly Commands & permissions Two commands, and the tool permissions you invent /give_mtGive yourself a multi-tool. Admins, or anyone with the give permission give_mt <player>Server console and RCON — give one to a named player, online or sleeping multitool.giveUse the chat command multitool.hosetoolThe one gated tool in the default config — an example you can copy onto any other tool, or delete Questions Before you buy What do I need installed?On Oxide, ImageLibrary — it's free, and the plugin says so in console if it's missing. On Carbon, nothing at all. How do players get one?However you hand out items. It's a building plan with a set skin, so a shop lot, a kit, a rank reward or the console command all work — no integration needed. Can I put non-building items in the wheel?Yes. Any item id works, with any skin and any label. The default seven are building tools because that's the pain everyone has, not because it's a limit. Can VIPs get more tools than everyone else?Yes — give those entries a permission. The wheel is assembled per player from what they're allowed to see, and the layout adjusts to however many that is. Does the menu get me killed?It closes the instant you take damage, and again if you switch off the tool. There's also a close button in the middle of the ring. Can I use a different shortcut, or none?Seven combinations are available and exactly one is active. Alternatively, switch on "open when the tool is equipped" and the wheel appears as soon as the item reaches the player's hands. Does free building apply to everyone?To everyone holding a multi-tool, yes — it's a server-wide switch, off by default, meant for creative and event servers. If you only want some players building for free, control it by who has the tool.$7.99- 29 comments
- 4 reviews
-
- 3
-
-
- #multi-tool
- #tool
- (and 2 more)
-
Version 1.6.2
99 downloads
RustVitals is a server health and performance monitoring plugin for Rust servers running Oxide/uMod. It gives admins a clean in-game dashboard to quickly check server FPS, frame time, entities, dropped items, corpses, NPCs, vehicles, turrets, locked crates, dense map areas, lag spikes, and overall server risk. RustVitals is made to help server owners spot common performance problems faster without digging through console logs or guessing what is causing lag. It also includes cleanup tools, useful recommendations, Discord webhook reports, RCON/server-console support, and optional language files. Key Features Clean in-game admin dashboard Main command: /vt ui Server FPS and frame-time monitoring Server risk score Top entity scanner High-density grid reports Dropped item and corpse cleanup Lag spike tracking Server health recommendations Live dashboard console Discord webhook reports RCON/server-console support Admin-only permission Optional language file support Permission rustvitals.admin Example: oxide.grant group admin rustvitals.admin Version RustVitals v1.6.2$9.99- 16 comments
- 1 review
-
- 1
-
-
- #performace
- #health
- (and 8 more)
-

Version 1.1.4
410 downloads
This is a simple tool to help you catch ESPer's. Unlike methods in the past requiring cheaters to fall for traps, this one will be watching without having to give them any bait! This plugin is still in "beta" and is offered at a reduced price for a limited time. Since 1.0.12, the embed now includes a radar image to show violations (red line): The above embed shows the culprit, with quick links to Steam, Battlemetrics, and ServerArmour. Along with each violation that caused the trigger, the consist of the violation id, the time it happened, and steamid and distance from the culprit. It is highly recommended to use along with ADR, although not required, but can easily eliminate false positives by having the option to watch the player from the demo. Commands /testesp - this will send a test embed to your configured webhook. Permissions espdetection.ignore Ignores specific players who are granted this permission. Config options explanation General Max distance to check The maximum to check if the player is ESPing. (default 150 outside, 100 inside) Check Interval How often should a player be checked (default 1 second) Ignore Players Idle Ignore players that haven't changed position (default 15 seconds) Only track players with active weapons Track players that have equipped weapons only. (default true) Auto Demo Record (only applicable if Auto Demo Record is installed) Record Length How long should the triggered recording be (default 10 minutes) Discord Webhook Where the logs & ADR recordings should be sent to Webhook Title Title of the embed Violations Probability % Which % probability should trigger a Discord embed and ADR recording. (default 40%) Samples How many samples should be kept in memory, to calculate the probability (default 20) Weapon Specific Configs These change characteristics of weapons Weapon Shortname Max distance to check This overrides the general setting for the weapon only Track if set to false, a player will be ignored if he has this weapon equipped. (default true) Attachment Specific Configs These change characteristics of attachments Attachment Shortname Add distance while aiming As the name suggests, it adds extra distance to the previous configs, useful for when aiming with an 8x or 16x Track if set to false, a player will be ignored if he has this weapon equipped. (default true) NOTE: if you are using ADR, a good command to use when reviewing the demos are `debug.culling 1`$25.00 -
Version 2.0.2
600 downloads
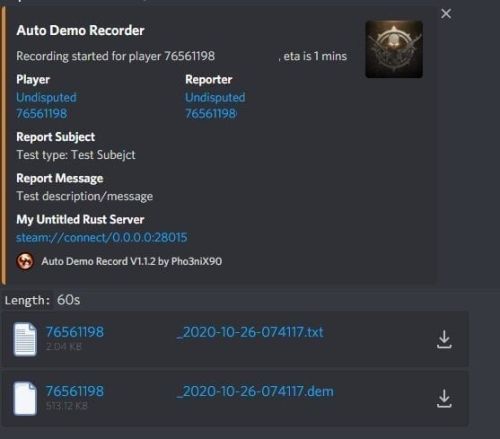
Records players automatically that have been reported X amount of times, with the ability to automatically upload the combat logs & Demo files to a discord webhook. Classic mode (default) `Rolling mode` = **Off** — same trusted behavior as earlier versions. Recording starts when a trigger fires (reports, flyhack, blacklist, API, console). No rolling buffer. v2 rolling incidents (opt-in) Enable **Rolling mode** (`AllPlayers` or `Blacklist`) to keep rotating demo chunks on disk. When a report threshold or API call opens an **incident**, the plugin bundles: - chunks from **before** the report (default 30 minutes), - continued capture **after** the report (default 15 minutes), - a **manifest** with markers and metadata, then uploads to **ServerArmour** (primary) and/or **Discord** (secondary). Existing servers upgrade safely: new config keys default to legacy behavior until you change them. Disk usage whilst recording: +- 1MB per 1 minute. Discord has an 8mb upload limit and 100mb for nitro. Chat Commands: /record - Chat: This will initiate a self-recording. Console Commands autodemorecord.record [steam64id] [minutes] - Console: Usefull to record a player on demand, or a schedule from another plugin. autodemorecord.blacklist add [steam64id] [recordingMinutes] [intervalMinutes] - Console: Add a player to the blacklist, which will record them for [recordingMinutes] every [intervalMinutes] autodemorecord.blacklist remove [steam64id] - Console: Removes a player from the blacklist. Permissions: Permission autodemorecord.record is required for a player to initiate a recording of themselves. Useful for streamers, to provide them with footage at wipe end, or tournaments. The recording length will be "Auto record for X minutes" Config explanations: "Auto record after X reports": Will start recording the player when these many reports have been received. "Only record when reports within X seconds": Only record when the number of reports above, are received in this timeframe. 0 to record always when the above value is reached. "Save/Load reports to datafile on reload": Useful when you aren't using the above config, if you do it might not be necessary to save data overhead. "Auto record for X minutes": the number of minutes the player should be recorded for. "Discord MSG Color": Color for the embed message, see here https://gist.github.com/thomasbnt/b6f455e2c7d743b796917fa3c205f812 "Discord Webhook": You discord webhook all information should be sent to. "Discord: Notify if recording is started": Should a message be sent to the discord webhook when the recording starts? "Discord: Include report with start message?": Should the player's report be added to the recording start message? "Discord: Notify if recording is stopped": Should a message be sent to the discord webhook when the recording ends? "Discord: Include report with end message?": Should the player's report be added to the recording end message? "Upload Combat Log to discord webhook?": Should the player's combat log be upload to the above discord webhook as a txt file? "Upload DEMO file to discord webhook?": Should the player's demo file be uploaded to the above discord webhook? "Split DEMO files for non nitro discord (8mb chunks)?": This will split files and upload multiple files to discord for non-nitro discord servers. If you have nitro with an upload limit of 100mb, then you can turn this off. "Discord Webhook - Self Record" All self-initiated recordings will post to this webhook, if not set it will go to the main one. "Record if FlyHacked in last X seconds" This will initiate a recording when a player rejoins the server after kicked for flyhacking. "Save recording to server?" If set to false, it will not save to the HDD, to save space. Make sure you have a webhook setup, otherwise it will still save as to not lose any demos. API: If you want to trigger a recording from your plugin, you can do the following: AutoDemoRecord.Call("API_StartRecording", BasePlayer player, string Reason, int LengthInMin); All suggestions welcomed!$19.99 -
Version 1.6.2
101 downloads
What is Owned Livestock Tracker? Made with the help of AI Owned Livestock Tracker is the ultimate administrative and performance-control utility for Rust server owners who want to manage player-owned livestock, ranching loops, and animal farms. Large-scale animal farms are notorious for causing server-side entity lag and frame drops; this plugin acts as an automated custodian to protect your server's performance while keeping players fully informed. Key Capabilities Automated Population Control: It continuously tracks animal densities around Tool Cupboard (TC) zones. If a player’s farm exceeds your configured threshold, the plugin automatically culls the excess down to a stable line, intelligently targeting the oldest entities first. Performance Protection: Instead of constantly draining server resources by scanning the map, it uses an optimized, event-driven framework that only triggers when animals are spawned or killed. Admin Dashboard HUD: Admins gain access to a sleek, fully interactive, native in-game UI menu. From this menu, you can see a paginated list of every farm on the server, who owns it, what grid it is in, and exactly how many animals are there. Targeted Moderation: Within the UI, admins can "inspect" any specific TC zone, view a list of every animal inside it, instantly kill individual animals by network ID, or wipe an entire problematic lag-source using a "Purge All" button. Discreet Admin Slaughter Logs: To prevent offline griefing or unmonitored animal slaughter, the plugin broadcasts a real-time message to active administrators and authorized moderators when an animal is killed, logging who did it and the exact map grid where it happened—completely hidden from regular players. Player-Friendly Notifications: When the automated system culls an overcrowded farm, it displays a professional, immersive full-screen warning UI to the base owner when they are online, explaining the server limit so they understand exactly why it happened without needing to open an admin support ticket. Command Directory Chat Commands /ol Permission: ownedlivestocktracker.admin / Server Admin Description: Launches the main overview administration matrix dashboard. This maps out active zones, showing coordinates, current ownership links, and aggregated livestock entities grouped under Tool Cupboards. Console Commands ownedtracker.ui.testwarning Permission: Admin Only Description: Instantly fires a sandbox version of the LivestockWarningUI modal onto your screen, simulating a population threshold violation in Grid A1 so you can inspect the design layout. ownedtracker.ui.close Description: Safely terminates the root dashboard UI and flushes active navigation state references from server memory. ownedtracker.ui.closewarning Description: Destroys the automated population overflow warning notification wrapper on the target player's screen. ownedtracker.ui.page <1 / -1> Description: Handles grid pagination navigation by shifting your dashboard list view index offset forward or backward. ownedtracker.ui.inspect <tcId> Description: Swaps view perspectives from global server zones into a localized inspection window targeting a specific Tool Cupboard's network asset ID. ownedtracker.ui.delete <netId> Description: Issues a direct server invocation to instantly cull and kill a specific tracked livestock entity by its Network ID. ownedtracker.ui.purgeuser <tcId> Description: Runs an iterative filter scan on active server entities to slaughter every matching livestock animal currently bound to that specific Tool Cupboard radius zone. Configuration & Customization Guide Upon your first launch, a configuration file will automatically be generated in your server files under oxide/config/OwnedLivestockTracker.json. Open this file to easily scale limits, adjust colors, or fine-tune entity definitions to match your server's needs: { "MaxPopulationCap": 50, "TargetCullCount": 35, "WarningPanelColor": "0.15 0.05 0.05 0.98", "MainPanelColor": "0.08 0.08 0.1 0.98", "TrackedPrefabs": [ "cow", "bull", "calf", "sheep", "lamb", "chicken", "horse", "scarecrowrowsheep", "chicken.population.item" ] } Use code with caution. Property Explanations: MaxPopulationCap (int) — The maximum number of allowed tracked animals inside a single Tool Cupboard radius zone before an automated server cleanup triggers. TargetCullCount (int) — The safe baseline target the system drops the animal population down to during an intervention. WarningPanelColor (string) — The RGBA background color format used to render the full-screen limit warning popup for players. MainPanelColor (string) — The RGBA background color layout configuration used to render the administrative overview dashboard grid. TrackedPrefabs (List) — A customized collection of lowercase prefab string targets monitored by the tracking engine. You can seamlessly add or remove custom animal mod prefabs here.Free-
- 1
-
-
- #admin
- #livestock
- (and 2 more)
-
Version 2.1.4
1,117 downloads
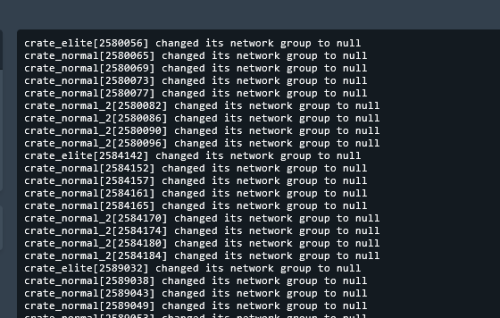
Removes 99% of Face Punches Debug Code/Spam & Removes Borked NPC/Animals From NavMesh Custom Built Log Manager Patch that Ties Into FacePunche's Log-Handler to fix Oxides system breaking it resulting in more spam then normal. Note Remove the: 'NavMeshErrorFix' plugin from umod if you use it! 'NoSunGlare' plugin from umod if you use it! 'PersonalNPC' <causes duplication msg's> disable this in config "Clear console of ‘ownerPlayer is not player’ spam" To stop the double output of logs in console for 'PersonalNPC' Patched the Following Methods 1. Base Navigator Place On Nav Mesh ( Fixed Default logic not killing the npcs/animals resulting in repeated spam ) 2. Base Navigator Validate Next Position ( Logic works fine by default but now no longer spams console each time they Delete an NPC/Animal.. ) 3. Base Entity On Invalid Position ( Logic works fine by default but now no longer spams console ) 4. Base Networkable Send Network Group Change ( Fixed it's Spam ) 6. ServerMgr Update Item Definitions ( steam Checking for new Steam Item Definitions.. spam ) HOW TO UPDATE: 1. in console type': o.unload ConsoleSpamCleaner 2. Delete cs file 3. Add New cs file 4. in console type': o.load ConsoleSpamCleaner Config Options To Filter Out Spam: Add or Remove whatever you want to filter or allow in console spam. { "Contains:": [], "Starts With:": [ "[UnityNavmesh] ", "AsyncResourceUpload", "Shader" ], "Ends With:": [] } Server Console Command to remove NULL entities in your save list spam savefix The following spam should no longer be an issue: ( Some Additional Ones Not On List Have Also Been Patched Out ) "Invalid NavAgent Position: prefab entity pos destroying", "failed to sample navmesh at position ", "changed its network group to null", "Bone error in SkeletonProperties.BuildDictionary for ", "HandleD3DDeviceLost", "ResetD3DDevice", "dev->Reset", "D3Dwindow device not lost anymore", "D3D device reset", "group < 0xfff", "Mesh can not have more than 65000 vert", "Trying to add (Layout Rebuilder for)", "Coroutine continue failure", "No texture data available to upload", "Trying to reload asset from disk that is not", "Unable to find shaders used for the terrain engine.", "Canvas element contains more than 65535 vertices", "RectTransform.set_anchorMin", "FMOD failed to initialize the output device", "Cannot create FMOD::Sound", "invalid utf-16 sequence", "missing surrogate tail", "Failed to create agent because it is not close enough to the Nav", "user-provided triangle mesh descriptor is invalid", "Releasing render texture that is set as", "AngryAnt Behave version", "alphamapResolution is clamped to the range of", "api.facepunch.com/api/public/manifest/", "Checking for new Steam Item Definitions..", "Floating point textures aren't supported on this device", "HDR Render Texture not supported, disabling HDR on reflection probe", "Image Effects are not supported on this platform", "Loading Prefab Bundle", "Missing shader in", "Missing projectileID", "Motion vectors not supported on a platform that does not support", "SwitchParent Missed", "saddletest", "The image effect Main Camera", "The image effect effect -", "The referenced script", "Unsupported encoding: 'utf8'", "Warning, null renderer for ScaleRenderer!", "[AmplifyColor]", "[AmplifyOcclusion]", "[CoverageQueries] Disabled due to unsupported", "[CustomProbe]", "[Manifest] URI IS", "[SpawnHandler] populationCounts", ", disk("$15.00- 22 comments
- 4 reviews
-
- 2
-
-
-
- #console
- #spam cleaner
- (and 15 more)
-

Version 0.1.8
538 downloads
A plugin for collecting game statistics with database support, compatible with both SQL and web API methods. This functionality empowers website owners to display the desired statistics from the database on their sites. Moreover, it offers the capability to send data via API, which proves highly beneficial in scenarios where your gaming server and database reside on separate machines and the database restricts connections beyond localhost. Please note that an instruction manual will be included in the downloaded file and it is imperative for users to read it thoroughly. Collecting(The full list is available below in the section Collected Data) : Server information; Team information; Clan information; Feedback(F7) information; Report(F7) information; Player information. Sending data through: direct MySQL; via API(POST query) to MySQL. extendedstats.admin - Provides access to command estats. { "Chat command": "estats", "Is it worth enabling GameTips for messages?": true, "Unique ID of the current server": 0, "Database upload method(Disabled, WebAPI, MySQL)": "WebAPI", "Interval in seconds at which an attempt to load changes into the database will occur": 300.0, "Is it worth logging messages to the console when uploading to the database?": true, "API - Service URL": "https://localhost/ExtendedStats/index.php", "API - Service access key": "GlBRw-elM6v-gjko3-cxSDk-Tsy7B", "API - Timeout": 5.0, "MySQL - Host": "localhost", "MySQL - Port": 3306, "MySQL - Database name": "db_playrust", "MySQL - Username": "root", "MySQL - Password": "root", "Database table name - Servers": "db_servers", "Database table name - Teams": "db_teams", "Database table name - Clans": "db_clans", "Database table name - Feedbacks": "db_feedbacks", "Database table name - Reports": "db_reports", "Database table name - Players": "db_players", "Database table name - Players Balances": "db_players_balances", "Database table name - Players Stats": "db_players_stats", "Database table name - Players Farms": "db_players_farms", "Database table name - Players Gambling": "db_players_gambling", "Database table name - Players Kills": "db_players_kills", "Database table name - Players Explosions": "db_players_explosions", "Database table name - Players Raids": "db_players_raids", "Is it worth clearing saved statistics when a wipe is detected?": true, "Is it worth clearing the database when a wipe is detected?": true, "List of statistic categories to clear when a wipe is detected. Leave empty to recreate defaults": [ "players", "teams", "clans", "feedbacks", "reports" ], "List of language keys for creating language files": [ "en" ], "Wipe ID": null, "Version": { "Major": 0, "Minor": 1, "Patch": 6 } } EN: { "CmdMain": "Available commands:\n\n<color=#D1CBCB>/estats</color> <color=#D1AB9A>upload</color> - Initialize a forced data upload to the database\n<color=#D1CBCB>/estats</color> <color=#D1AB9A>save</color> - Save data to a local file on the server\n\n--------------------------------------------------", "CmdDBNotSelected": "Database connection method not selected!", "CmdAlreadyUploading": "You can't initialize a data upload to the database because there is already an active upload!", "CmdUpload": "You have successfully started a forced data upload to the database.", "CmdSave": "Saving data to a local file on the server:\n\n<color=#D1CBCB>/estats save</color> <color=#D1AB9A>clans</color> - Save all clans to a local file on the server\n\n--------------------------------------------------", "CmdSaveNotEnough": "Not enough records to save!", "CmdSaveClans": "Successfully saved {0} clans!" } RU: { "CmdMain": "Доступные команды:\n\n<color=#D1CBCB>/estats</color> <color=#D1AB9A>upload</color> - Инициализация принудительной загрузки данных в базу данных\n<color=#D1CBCB>/estats</color> <color=#D1AB9A>save</color> - Сохранение данных в локальный файл на сервере\n\n--------------------------------------------------", "CmdDBNotSelected": "Метод подключения к базе данных не выбран!", "CmdAlreadyUploading": "Вы не можете инициализировать загрузку данных в базу данных, так как уже существует активная загрузка!", "CmdUpload": "Вы успешно начали принудительную инициализацию загрузки данных в базу.", "CmdSave": "Сохранение данных в локальный файл на сервере:\n\n<color=#D1CBCB>/estats save</color> <color=#D1AB9A>clans</color> - Сохранение все кланы в локальный файл на сервере\n\n--------------------------------------------------", "CmdSaveNotEnough": "Не достаточно записей для сохранения!", "CmdSaveClans": "Успешно сохранено {0} кланов!" } Admin commands. Permission "extendedstats.admin" required: upload - Initialize a forced data upload to the database; save - Save data to a local file on the server: clans - Save all clans to a local file on the server; Example: /estats upload /estats save clans ServerData: ServerName ServerIdentity ServerIP ServerPort QueryPort ServerDescription ServerHeader ServerURL ServerTime ServerTags GameTags MaxPlayers ServerEntities ServerFPS ServerAvgFPS ServerUptime ServerMap MapSize MapSeed FirstSave LastSave WipeID ServerVersion ServerProtocol RconPort RconPassword TeamData: TeamID TeamName CreatorID LeaderID TeamMembers ClanData: ClanID ClanName ClanNameNormalized CreatorID CreatedTime ClanLogo LogoColor Motd MotdTimestamp MotdAuthor ClanRoles ClanMembers Score FeedbackData(Since the corresponding Oxide hook has shifted, not all types of feedback are processed) : ID UserID Subject Type Message Time ReportData: ID UserID TargetID TargetName Subject Type Message Time PlayerData: Info: UserID DisplayName Flags Language GroupsList TeamID ClanID BanReason Connection: PlayedTime - requires the PlaytimeTracker/PlayTimeRewards plugins IdleTime - requires the PlaytimeTracker/PlayTimeRewards plugins Connections Ping FirstConnectionIP LastConnectionIP FirstConnectionDate LastConnectionDate Balance: Balance - requires the Economics plugin Points - requires the ServerRewards plugin BankBalance - requires the BankSystem plugin IQBalance - requires the IQEconomic plugin Experience Reputation - requires the ReputationMaster plugin Statistics: TimeAlive - updates only after the player's death TimeSleeping - updates only after the player's death DistanceWalked - updates only after the player's death DistanceRun - updates only after the player's death TimeWilderness - updates only after the player's death TimeInBase - updates only after the player's death TimeInMonument - updates only after the player's death TimeSwimming - updates only after the player's death TimeFlying - updates only after the player's death TimeBoating - updates only after the player's death TimeDriving - updates only after the player's death Wounded WoundsInflicted WoundAssisted WoundRecovered DamageInflicted DamageTaken - updates only after the player's death Healed - updates only after the player's death ShotsFired - updates only after the player's death ShotsHit RentedAptPenthouses RentedAptStandards RentedAptBasements RentedShops OutbidShops BreakInAptPenthouses BreakInAptStandards BreakInAptBasements BreakInShops HalloweenVisits XmasVisits DeepSeaVisits ExcavatorStarts HeavyFusesInserted BearTrapInflicted BearTrapSteps MineInflicted MineSteps HandcuffsApplied Handcuffed PhoneCalls PhoneCallsTimeout MissionsStarted MissionsSucceeded MissionsFailed DeployedsList MonumentsList - requires the MonumentsWatcher plugin Farming: Barrels UnderWaterCrates ShreddedEntities DetectResourceFlags GreenDoors BlueDoors RedDoors FishAttempts Guts Supplies ExcavatorSupplies TropicalSupplies Chinooks Surveys ChickensHatched ChickenEggs BeehiveXP Blueprints CraftList GatherList RecycleList BuyerPurchaseList BuyerSpentList SellerSalesList SellerRevenueList CratesList FishList Gambling: BWG_Spins BWG_WinSpins BWG_SpendScraps BWG_WinScraps Slot_Spins Slot_WinSpins Slot_SpendScraps Slot_WinScraps Poker_Games - Placeholder Poker_WinGames - Placeholder Poker_SpendScraps - Placeholder Poker_WinScraps - Placeholder BlackJ_Games BlackJ_WinGames BlackJ_StandoffGames BlackJ_SpendScraps BlackJ_WinScraps RPS_Wins RPS_Losses RPS_Draws Kills: Kills FriendlyKills Deaths Suicides Beehives Chickens FarmChickens Snakes Boars Stags Horses Wolves Bears Polarbears Panthers Tigers Crocodiles Sharks PlayerNPCs Scientists Zombies Patrols Bradleys KillVehicles: PedalBikes MotorBikes Cars RowBoats RHIBs SubmarinesSolo SubmarinesDuo Tugs MiniHelis AttackHelis ScrapHelis Balloons Trains TrainWagons TrainCabooses Snowmobiles Ballistas BatteringRams Catapults SiegeTowers HitParts KillParts KillWeapons Explosions: Rockets RocketsHV RocketsIncendiary RocketsSmoke RocketsMissile RocketsMLRS Torpedoes ExplosiveAmmo Ammo40mmExplosive Ammo40mmSmoke GrenadesF1 GrenadesMolotov GrenadesFlash GrenadesSmoke GrenadesBean SatchelCharges C4Explosives PropaneBombs FireBombs CannonBalls MortarShells MortarFragShells Raids: Cupboards Doors Windows Foundations Ceilings Walls Doorways WindowFrames Stairs Hatches ExtWoodenGates ExtWoodenWalls ExtStoneGates ExtStoneWalls ExtIceWalls ExtIceShortWalls RaidedConstructionsList RaidedDeployableConstructionsList RaidableBases$14.99 -

Version 1.2.4
217 downloads
The "MyVehicle" plugin introduces a vehicle management system that allows admins/players to spawn, de-spawn, and manage a variety of vehicles directly within the game. Leveraging a user-friendly interface, players can access this feature through permissions-based commands, ensuring control and customization. The plugin supports configuration for different vehicles, including aspects like spawn distance, fuel amount, and unique permissions for each vehicle type. It also incorporates a cool-down system to regulate vehicle spawning frequency, enhancing game-play balance. Additionally, the plugin tracks and saves data on player-spawned vehicles, ensuring a seamless gaming experience even across server restarts. The plugin is light weighted with a clean and user friendly graphical user interface (GUI). Commands: /myvehicle - Opens graphical user interface (GUI) of the vehicle spawner. /spawn <Vehicle> - (Admins only) Spawns desired vehicle /despawn - (Admins only) Despawn last spawned vehicle. mv.cspawn - Console command for shop integration. Example: "mv.cspawn Flatbed {userId}" Permissions: MyVehicle Use - Permission to use/open the GUI. MyVehicle Despawn - If you already have a vehicle spawned and you want to spawn another one of the same type, the previous will disappear. You can set which vehicles are affected by this permission in the config. MyVehicle cooldown.1m - 1 minute cool-down between spawning vehicles of the same type. MyVehicle cooldown.1h - 1 hour cool-down between spawning vehicles of the same type. MyVehicle cooldown.1d - 1 day cool-down between spawning vehicles of the same type. MyVehicle cooldown.30d - 30 day cool-down between spawning vehicles of the same type. myvehicle minicopter - Allow spawning Mini(s). myvehicle attackhelicopter - Allow spawning Attack Heli(s). myvehicle scrapheli - Allow spawning Scrap Heli(s). myvehicle baloon - Allow spawning Balloon(s). myvehicle rhib - Allow spawning RHIB(s). myvehicle horse - Allow spawning Horse(s). myvehicle tugboat - Allow spawning Tugboat(s). myvehicle subsolo - Allow spawning Solo Sub(s). myvehicle subduo - Allow spawning Duo Sub(s). myvehicle rowboat - Allow spawning Rowboat(s). myvehicle kayak - Allow spawning Kayak(s). myvehicle snowmobile - Allow spawning Snowmobile(s) and Tomaha(s). myvehicle sedan - Allow spawning Sedan(s) and Sedan Rail(s). myvehicle car2modules - Allow spawning Car(s) with 2 modules. myvehicle car3modules - Allow spawning Car(s) with 3 modules. myvehicle car4modules - Allow spawning Car(s) with 4 modules. myvehicle pedalbike - Allow spawning Pedal Bike(s). myvehicle pedaltrike - Allow spawning Pedal Trike(s). myvehicle motorbike - Allow spawning Motorbike(s). myvehicle motorbikesidecar - Allow spawning Motorbikes with Sidecars. myvehicle train - Allow spawning Locomotive(s), Workcart(s) and Caboose(s). myvehicle siegetower - Allow spawning Siege Tower(s). myvehicle catapult - Allow spawning Catapults(s). myvehicle ballista - Allow spawning Ballista(s). myvehicle batteringram - Allow spawning Battering Ram(s). myvehicle magnetcrane - Allow spawning Magnetcrane(s). myvehicle chinook - Allow spawning Chinook(s). myvehicle patrolheli - Allow calling in the Patrol Heli. myvehicle bradley - Allow spawning Bradley(s). The "Despawn Last" button will remove all spawned vehicles one by one from last to first! !!! Magnetcrane, Patrol Heli and Bradley should only be used by admins !!! Magnetcrane will explode if spawned outside Junkyard! Patrol Heli will spawn in a random location outside the map and will fly in. Bradley will open fire at player as soon as it is spawned! These vehicles ( if spawned with MyVehicle ) can also be despawned with the "Despawn Last" button from the GUI. Cars can be customized through the config. The identifiers for the modules can be obtained on https://rusthelp.com/ or https://www.corrosionhour.com Cockpit With Engine Vehicle Module: 170758448 Cockpit Vehicle Module: -1501451746 Armored Cockpit Vehicle Module: 1874610722 Engine Vehicle Module: 1559779253 Camper Vehicle Module: -1040518150 Fuel Tank Vehicle Module: 1186655046 Storage Vehicle Module: 268565518 Flatbed Vehicle Module: -1880231361 Large Flatbed Vehicle Module: -1693832478 Taxi Vehicle Module: -626174997 Rear Seats Vehicle Module: 1376065505 Passenger Vehicle Module: 895374329 Armored Passenger Vehicle Module: -1615281216 The tier of the engine parts can be set in the config. Use 1 for low, 2 for medium or 3 for high quality parts. I want to thank M&B-Studios for assisting me in putting this plugin together. I appreciate his help and recommend his work and services! Config: { "Vehicles": { "assets/content/vehicles/minicopter/minicopter.entity.prefab": { "Despawn": true, "DisplayName": "Mini Copter", "Permission": "myvehicle.minicopter", "ButtonColor": "vlgreen", "FuelAmount": 100, "SpawnDistance": 5.0, "ModuleIDs": null, "EnginePartsTier": 0 }, "assets/content/vehicles/attackhelicopter/attackhelicopter.entity.prefab": { "Despawn": true, "DisplayName": "Attack Heli", "Permission": "myvehicle.attackhelicopter", "ButtonColor": "vlgreen", "FuelAmount": 100, "SpawnDistance": 5.0, "ModuleIDs": null, "EnginePartsTier": 0 }, "assets/content/vehicles/scrap heli carrier/scraptransporthelicopter.prefab": { "Despawn": true, "DisplayName": "Scrap Heli", "Permission": "myvehicle.scrapheli", "ButtonColor": "vlgreen", "FuelAmount": 100, "SpawnDistance": 5.0, "ModuleIDs": null, "EnginePartsTier": 0 }, "assets/content/vehicles/horse/ridablehorse.prefab": { "Despawn": false, "DisplayName": "Horse", "Permission": "myvehicle.horse", "ButtonColor": "vlgreen", "FuelAmount": 0, "SpawnDistance": 5.0, "ModuleIDs": null, "EnginePartsTier": 0 }, "assets/content/vehicles/boats/rhib/rhib.prefab": { "Despawn": true, "DisplayName": "RHIB", "Permission": "myvehicle.rhib", "ButtonColor": "vlgreen", "FuelAmount": 100, "SpawnDistance": 5.0, "ModuleIDs": null, "EnginePartsTier": 0 }, "assets/content/vehicles/boats/tugboat/tugboat.prefab": { "Despawn": true, "DisplayName": "Tugboat", "Permission": "myvehicle.tugboat", "ButtonColor": "vlgreen", "FuelAmount": 100, "SpawnDistance": 15.0, "ModuleIDs": null, "EnginePartsTier": 0 }, "assets/content/vehicles/submarine/submarinesolo.entity.prefab": { "Despawn": true, "DisplayName": "Solo Sub", "Permission": "myvehicle.subsolo", "ButtonColor": "vlgreen", "FuelAmount": 100, "SpawnDistance": 5.0, "ModuleIDs": null, "EnginePartsTier": 0 }, "assets/content/vehicles/submarine/submarineduo.entity.prefab": { "Despawn": true, "DisplayName": "Duo Sub", "Permission": "myvehicle.subduo", "ButtonColor": "vlgreen", "FuelAmount": 100, "SpawnDistance": 5.0, "ModuleIDs": null, "EnginePartsTier": 0 }, "assets/content/vehicles/boats/rowboat/rowboat.prefab": { "Despawn": true, "DisplayName": "Rowboat", "Permission": "myvehicle.rowboat", "ButtonColor": "vlgreen", "FuelAmount": 100, "SpawnDistance": 5.0, "ModuleIDs": null, "EnginePartsTier": 0 }, "assets/content/vehicles/boats/kayak/kayak.prefab": { "Despawn": true, "DisplayName": "Kayak", "Permission": "myvehicle.kayak", "ButtonColor": "vlgreen", "FuelAmount": 0, "SpawnDistance": 5.0, "ModuleIDs": null, "EnginePartsTier": 0 }, "assets/content/vehicles/snowmobiles/snowmobile.prefab": { "Despawn": true, "DisplayName": "Snowmobile", "Permission": "myvehicle.snowmobile", "ButtonColor": "vlgreen", "FuelAmount": 100, "SpawnDistance": 5.0, "ModuleIDs": null, "EnginePartsTier": 0 }, "assets/content/vehicles/snowmobiles/tomahasnowmobile.prefab": { "Despawn": true, "DisplayName": "Tomaha", "Permission": "myvehicle.snowmobile", "ButtonColor": "vlgreen", "FuelAmount": 100, "SpawnDistance": 5.0, "ModuleIDs": null, "EnginePartsTier": 0 }, "assets/prefabs/deployable/hot air balloon/hotairballoon.prefab": { "Despawn": true, "DisplayName": "Balloon", "Permission": "myvehicle.baloon", "ButtonColor": "vlgreen", "FuelAmount": 100, "SpawnDistance": 10.0, "ModuleIDs": null, "EnginePartsTier": 0 }, "assets/content/vehicles/sedan_a/sedantest.entity.prefab": { "Despawn": true, "DisplayName": "Sedan", "Permission": "myvehicle.sedan", "ButtonColor": "vlgreen", "FuelAmount": 0, "SpawnDistance": 5.0, "ModuleIDs": null, "EnginePartsTier": 0 }, "assets/content/vehicles/sedan_a/sedanrail.entity.prefab": { "Despawn": true, "DisplayName": "Sedan Rail", "Permission": "myvehicle.sedan", "ButtonColor": "vlgreen", "FuelAmount": 100, "SpawnDistance": 5.0, "ModuleIDs": null, "EnginePartsTier": 0 }, "assets/content/vehicles/modularcar/car_chassis_2module.entity.prefab": { "Despawn": true, "DisplayName": "Car 2", "Permission": "myvehicle.car2modules", "ButtonColor": "vlgreen", "FuelAmount": 100, "SpawnDistance": 5.0, "ModuleIDs": [ 170758448, 268565518 ], "EnginePartsTier": 1 }, "assets/content/vehicles/modularcar/car_chassis_3module.entity.prefab": { "Despawn": true, "DisplayName": "Car 3", "Permission": "myvehicle.car3modules", "ButtonColor": "vlgreen", "FuelAmount": 100, "SpawnDistance": 5.0, "ModuleIDs": [ 170758448, -1040518150 ], "EnginePartsTier": 2 }, "assets/content/vehicles/modularcar/car_chassis_4module.entity.prefab": { "Despawn": true, "DisplayName": "Car 4", "Permission": "myvehicle.car4modules", "ButtonColor": "vlgreen", "FuelAmount": 100, "SpawnDistance": 5.0, "ModuleIDs": [ 1559779253, 170758448, 268565518, 268565518 ], "EnginePartsTier": 3 }, "assets/content/vehicles/bikes/pedalbike.prefab": { "Despawn": true, "DisplayName": "Pedal Bike", "Permission": "myvehicle.pedalbike", "ButtonColor": "vlgreen", "FuelAmount": 0, "SpawnDistance": 3.0, "ModuleIDs": null, "EnginePartsTier": 0 }, "assets/content/vehicles/bikes/pedaltrike.prefab": { "Despawn": true, "DisplayName": "Pedal Trike", "Permission": "myvehicle.pedaltrike", "ButtonColor": "vlgreen", "FuelAmount": 0, "SpawnDistance": 3.0, "ModuleIDs": null, "EnginePartsTier": 0 }, "assets/content/vehicles/bikes/motorbike.prefab": { "Despawn": true, "DisplayName": "Motorbike", "Permission": "myvehicle.motorbike", "ButtonColor": "vlgreen", "FuelAmount": 100, "SpawnDistance": 3.0, "ModuleIDs": null, "EnginePartsTier": 0 }, "assets/content/vehicles/bikes/motorbike_sidecar.prefab": { "Despawn": true, "DisplayName": "Motorbike with Sidecar", "Permission": "myvehicle.motorbikesidecar", "ButtonColor": "vlgreen", "FuelAmount": 100, "SpawnDistance": 3.0, "ModuleIDs": null, "EnginePartsTier": 0 }, "assets/content/vehicles/trains/locomotive/locomotive.entity.prefab": { "Despawn": true, "DisplayName": "Locomotive", "Permission": "myvehicle.train", "ButtonColor": "vlgreen", "FuelAmount": 100, "SpawnDistance": 15.0, "ModuleIDs": null, "EnginePartsTier": 0 }, "assets/content/vehicles/trains/workcart/workcart.entity.prefab": { "Despawn": true, "DisplayName": "Workcart", "Permission": "myvehicle.train", "ButtonColor": "vlgreen", "FuelAmount": 100, "SpawnDistance": 15.0, "ModuleIDs": null, "EnginePartsTier": 0 }, "assets/content/vehicles/trains/workcart/workcart_aboveground2.entity.prefab": { "Despawn": true, "DisplayName": "Workcart 2", "Permission": "myvehicle.train", "ButtonColor": "vlgreen", "FuelAmount": 100, "SpawnDistance": 15.0, "ModuleIDs": null, "EnginePartsTier": 0 }, "assets/content/vehicles/trains/workcart/workcart_aboveground.entity.prefab": { "Despawn": true, "DisplayName": "Workcart 3", "Permission": "myvehicle.train", "ButtonColor": "vlgreen", "FuelAmount": 100, "SpawnDistance": 15.0, "ModuleIDs": null, "EnginePartsTier": 0 }, "assets/content/vehicles/trains/caboose/traincaboose.entity.prefab": { "Despawn": true, "DisplayName": "Caboose", "Permission": "myvehicle.train", "ButtonColor": "vlgreen", "FuelAmount": 0, "SpawnDistance": 15.0, "ModuleIDs": null, "EnginePartsTier": 0 }, "assets/content/vehicles/trains/wagons/trainwagonc.entity.prefab": { "Despawn": true, "DisplayName": "Flatbed", "Permission": "myvehicle.train", "ButtonColor": "vlgreen", "FuelAmount": 0, "SpawnDistance": 15.0, "ModuleIDs": null, "EnginePartsTier": 0 }, "assets/content/vehicles/crane_magnet/magnetcrane.entity.prefab": { "Despawn": true, "DisplayName": "Magnetcrane", "Permission": "myvehicle.magnetcrane", "ButtonColor": "vlgreen", "FuelAmount": 100, "SpawnDistance": 5.0, "ModuleIDs": null, "EnginePartsTier": 0 }, "assets/content/vehicles/siegeweapons/siegetower/siegetower.entity.prefab": { "Despawn": true, "DisplayName": "Siege Tower", "Permission": "myvehicle.siegetower", "ButtonColor": "vlgreen", "FuelAmount": 0, "SpawnDistance": 10.0, "ModuleIDs": null, "EnginePartsTier": 0 }, "assets/content/vehicles/siegeweapons/catapult/catapult.entity.prefab": { "Despawn": true, "DisplayName": "Catapult", "Permission": "myvehicle.catapult", "ButtonColor": "vlgreen", "FuelAmount": 0, "SpawnDistance": 5.0, "ModuleIDs": null, "EnginePartsTier": 0 }, "assets/content/vehicles/siegeweapons/ballista/ballista.entity.prefab": { "Despawn": true, "DisplayName": "Ballista", "Permission": "myvehicle.ballista", "ButtonColor": "vlgreen", "FuelAmount": 0, "SpawnDistance": 5.0, "ModuleIDs": null, "EnginePartsTier": 0 }, "assets/content/vehicles/siegeweapons/batteringram/batteringram.entity.prefab": { "Despawn": true, "DisplayName": "Battering Ram", "Permission": "myvehicle.batteringram", "ButtonColor": "vlgreen", "FuelAmount": 100, "SpawnDistance": 10.0, "ModuleIDs": null, "EnginePartsTier": 0 }, "assets/prefabs/npc/ch47/ch47.entity.prefab": { "Despawn": true, "DisplayName": "Chinook", "Permission": "myvehicle.chinook", "ButtonColor": "vlblue", "FuelAmount": 0, "SpawnDistance": 15.0, "ModuleIDs": null, "EnginePartsTier": 0 }, "assets/prefabs/npc/patrol helicopter/patrolhelicopter.prefab": { "Despawn": true, "DisplayName": "Patrol Heli", "Permission": "myvehicle.patrolheli", "ButtonColor": "vlred", "FuelAmount": 0, "SpawnDistance": 15.0, "ModuleIDs": null, "EnginePartsTier": 0 }, "assets/prefabs/npc/m2bradley/bradleyapc.prefab": { "Despawn": true, "DisplayName": "Bradley", "Permission": "myvehicle.bradley", "ButtonColor": "vlred", "FuelAmount": 0, "SpawnDistance": 15.0, "ModuleIDs": null, "EnginePartsTier": 0 } }, "DefaultButtonColor": "vlgreen", "ScrollUPButtonColor": "yellow", "ScrollDownButtonColor": "yellow", "DespawnButtonColor": "vlorange", "CloseButtonColor": "vlred", "UIChatCommand": "myvehicle", "SpawnCommand": "spawn", "DespawnCommand": "despawn", "SpawnEffect": "assets/prefabs/missions/portal/proceduraldungeon/effects/appear.prefab", "DespawnEffect": "assets/prefabs/missions/portal/proceduraldungeon/effects/disappear.prefab", "ChatPrefix": "<color=green>[MyVehicle]</color>", "UITitle": "Vehicle Spawner" } Language EN: { "NoPermission": "You don't have permission to use this command.", "NoVehicles": "You have no spawned vehicles to despawn.", "Despawned": "Your last spawned vehicle has been despawned.", "CantFind": "Could not find your last spawned vehicle.", "NotFound": "Vehicle not found.", "Spawn": "Spawning {0}.", "WaterVehicle": "This vehicle can only be spawned in water.", "Usage": "Usage: /spawn <vehicleType>", "NoType": "Vehicle type '{0}' not found.", "NoPermissionToSpawn": "You don't have permission to spawn '{0}'.", "Cooldown": "You need to wait for {0} seconds to spawn your vehicle.", "AlreadyDestroyed": "Previously destroyed vehicle has been removed from your data." }$9.99- 19 comments
- 2 reviews
-
- 3
-
-
- #myvehicle
- #vehicle
- (and 5 more)
-

Version 2.2.1
33 downloads
Easy Map Voter is a tool for Rust server owners and administrators that makes map voting easy and intuitive. It stands out by mainly focusing on UI workflow instead of countless lines in a config. This makes the bot easy to use for even the least tech savy. Everything is saved into a database, so you only have to fill out everything once. Each poll session starts out by running the command: /startvote Thereafter you will be guided through every step in the UI. Each map voting poll prepares your community for the next wipe, by showing a countdown and date/time both before and after the voting session is finalized. Wipe schedules, Poll notifications and other server information is configured in the Rust Server Configuration Panel (UI). New Feature!: Simple/Advanced Embed Not only is the bot easy to use, but it also shows statistics from map votes, to help you understand your Rust communities map preferences. /mappreferences – View community map preferences /voter [user] – See individual voting history /votingstats – Interactive stats with top voters and recent activity Great for understanding what your players actually enjoy. "What type of map sources can be used?" Easy Map Voter lets you fetch maps in any way you would like. All maps are fetched and/or generated from Rustmaps.com: 1. Map Generation Select number of maps and map size. The bot will then generate new maps. 2. Map Filter Set a configuration through rustmaps.com and use the Map Filter to fetch already generated maps that fit your liking 3. Custom Maps Generation Generate your own custom map. Either multiple different map generations, or different versions of the same custom configuration. 4. Fetch Custom Maps by MapID If you already have a generated custom map, you can use that with the custom map link or MapID. This can also be used with bought custom maps from sites like Codefling. Upload them to rustmaps.com and use that MapID in the modal. 5. Fetch Maps by Direct Link If you are the type of dedicated Rust server owner that pre-pick maps before wipe, you can use the map links to fetch whatever map you would like. Requirements: - Python 3.12+ recommended. - A Discord application and bot token. - A Rustmaps API key. Python dependencies are listed in requirements.txt. Setup 1) Install requirements - Python 3.12+ installed and available on PATH. - Install dependencies from the project root: pip install -r requirements.txt 2) Configure your .env file DISCORD_TOKEN=your_discord_bot_token RUSTMAPS_API_KEY=your_rustmaps_api_key LOGGING_LEVEL=INFO 3) Configure config.json Open `config.json` and update the IDs and options for your server: { "discord": { "guild_id": 1234567890123456789, "prefix": "!" }, "roles": { "administration_role_id": 1234567890123456789, "vote_permission_role_id": null, "no_permission_embed": { "title": "No Permission", "description": "You don't have permission to vote. You need the required role to participate.", "image": "https://i.ibb.co/r2nn73fx/free-svg-a-red-circle-with-a-horizontal-white-bar-in-the-mi-th-769-no-entry-c-os-188041.jpg" }, "store": "https://example-shop.com", "enable_vip_voting": true, "vip_roles": [ { "role_id": 1234567890123456789, "vote_weight": 3 }, { "role_id": 1234567890123456789, "vote_weight": 2 } ] }, "appearance": { "embed_color_active": false, "embed_color": "gold" }, "voting": { "simple/advanced": "simple", "votes_per_user": 1 } } OBS. If a user has more than 1 VIP role, the bot auto defaults to the role with the highest weight 4) Discord bot permissions and intents Enable these gateway intents in the Discord Developer Portal: - Message Content Intent - Server Members Intent Recommended permissions for the bot invite: - Read Messages / View Channels - Send Messages - Embed Links - Add Reactions - Read Message History - Manage Messages Also include the applications.commands scope for slash commands. Running the bot: Run this line in the console or set it as the starting file if using a Host: python main.py Logs are written to data/logs/bot.log. For any help and support you can contact me on Discord #carl7332$15.00 -
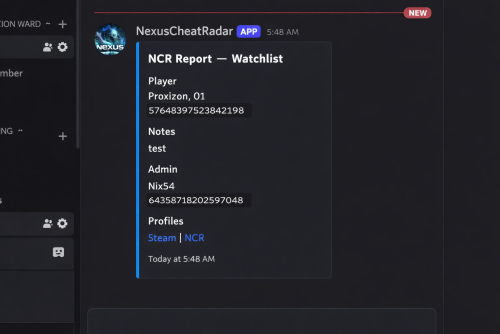
Version 1.9.7
320 downloads
DISCORD WEBSITE RCON RCON is a separate product — NCR works completely standalone without it. What it actually does No anticheat plugin can go unmonitored and be 100% accurate, they have and will always need admin verification .. as cheats get more advanced detection must adapt , it wont happen automatically but the morre advanced cheats can sometimes slide right through so we update as we find and never share what we know NCR runs quietly in the background on your server. It watches player behaviour across 9 detection categories, builds a risk profile for every player it sees, and sends a Discord alert with all the relevant info when something looks off. You get the data, you make the call. What makes it different from a normal anticheat plugin is the network layer. Every server running NCR is connected. When someone who's already been flagged or banned somewhere else joins your server, you find out immediately on join — before they've done anything. 9 behavioural detection systems running in the background Risk profiles that persist across disconnects, wipes, and server changes Cross-server intelligence — flagged players carry their history to your server Discord alerts with full context so you can make an informed call Free web portal — public player lookup + private server owner dashboard Admin report panel for submitting and managing reports in-game F7 Cheat Report intercept , so you can see with ease what players are reporting suspected cheaters remember every server is diffrent and your config must be adjusted to suit your server (there may at times be features that are set in a test setting so check thresholds and adjust as needed ) For the full cross-server experience — shared violation history, network bans, IP cross-referencing, and join intelligence — enable the Web section in config. The web portal is completely free. Detection Systems Every system can be toggled on or off individually. Tuning is always required — every server is different. What works on a 2x will not work on vanilla, and a high-pop server needs different thresholds again. The config is built with this in mind, but expect to spend some time adjusting values to your environment. ESP / Wallhack — Tracks how often a player is locking onto targets through walls and structures they can't actually see. Runs continuously, not just during fights. Aimbot — Looks for snap patterns and alignment that just don't happen with a mouse. Compares across multiple engagements before flagging anything. No-Recoil — Checks recoil compensation per weapon over sustained fire. Accounts for attachments, ping, and burst patterns so legit players don't get caught. Speed Hack — Catches movement beyond server limits. SkillTree speed bonuses, vehicle movement, and dismount frames are all handled to keep noise low. Wall Loot — Detects looting through player-built walls. Only fires when the blocking geometry is player-owned — world crates and terrain never trigger it. Freecam / Debug Cam — Catches anyone using spectator or debug camera modes while still alive in the game world. NoClip / Fly — Flags movement through solid geometry or flying without a valid surface. Teleport plugins are accounted for automatically. Strafe / Backpedal — Picks up on movement bot behaviour — perfectly timed strafes and backpedal speeds that aren't physically possible. Privilege Escalation — Watches for players trying to run admin commands they don't have access to, or attempting to grab permissions at runtime. Risk Profiles Every player gets a risk profile the first time NCR sees them. It builds up over time — each detection type contributes its own score into an overall risk level. Scores decay naturally so one old incident doesn't follow someone forever, but a pattern absolutely will. Leaving and rejoining doesn't reset anything. The profile lives on the network, not on your server. Per-category scoring with individual probability weights Scores decay over time — isolated old incidents fade Steam data pulled on every join — VAC bans, game bans, account age, library size ServerArmour cross-referenced automatically Watchlist for players you want to keep an eye on — whitelist for players you've cleared Discord Alerts When something gets flagged you get a full embed in Discord — not just "player X did something suspicious." You get the player's name, Steam ID, current risk level, exactly what was detected and at what confidence, their IP with country and VPN/proxy flags, and a link to their Steam profile. There's a button to share the violation to the network and one to dismiss it. Nothing ever goes to the public network without you clicking the button. Everything stays private to your server unless you choose to share it. You can set up a separate webhook channel for each detection type — ESP, Aimbot, No-Recoil, Speed, WallLoot, Freecam, NoClip, Strafe, Privilege, Bans, Join Reports, and Toxic Reports. NCR Web Portal Free — no extra subscription needed. Public lookup — no account needed Anyone can search a Steam ID and see that player's risk score, violation history, ban status, VAC history, account age, name aliases, and which NCR servers they've shown up on. There's a live feed showing recent bans and violations across the network as they happen. Server owner dashboard — Steam login, no passwords All your linked servers with live online/offline status Live player list — who's on your server vs. other NCR servers right now Recent violations, ban history, and IP intelligence per server Detection charts and full player lookup with network-wide history Team management — add admins and mods with their own Steam logins, granular permissions per role, fully separate from Oxide permissions To unlock the full network experience — shared history, network bans, IP cross-referencing, and join alerts for flagged players — enable the Web section in config and link your server. Set Enabled: true under Web, then grab your server key from the config file and enter it in the portal after signing in with Steam. Nexus RCON Nexus RCON Pro is a separate web-based console panel that connects to your Rust servers over RCON. It's built to work alongside NCR but is completely optional — NCR has no dependency on it and works fine without it. If you do run both together, RCON gets a dedicated NCR tab that gets detections in real time and lets you act on them — ban, dismiss, share to network — without leaving the panel. Live RCON console per server in the browser Dedicated NCR tab — real-time detections, one-click actions Player list, Permissions, ban management, plugin list Multi-server support from a single dashboard — no software to install Nexus RCON is a separate subscription. NCR works completely independently — you don't need it to use any of NCR's features. In-Game Report Panel There's a built-in admin UI for submitting and managing reports directly from inside Rust. Open it with /ncr.report or via the radar strip button. Report type selection and player search by name or Steam ID Reports logged to the network database and forwarded to your Discord There is leveled permissions control what each admin/moderator role can submit Admin Commands /ncrToggle the radar HUD overlay /ncr.lookupFull player history, risk profile, and Steam data /ncr.riskPer-category risk score breakdown /ncr.incidentsLast 8 detections on a specific player /ncr.historyFull violation history for a player /ncr.watch / .unwatchAdd or remove a player from the watchlist /ncr.watchlistView everyone currently on the watchlist /ncr.statsServer-wide detection stats and top risk scores /ncr.resetClear a player's risk score and local history /ncr.ban / .unbanIssue or lift a ban with Discord embed and network log /ncr.webshareManually push a violation to the public network /ncr.reportOpen the admin report panel /ncr.testSend a test alert to Discord ncr.link / ncr.unlinkLink or unlink your server from the web portal (console) Main permission: nexuscheatradar.admin Report panel: .report.mod .report.admin .report.kick .report.tempban .report.serverban .report.networkban Getting Started Takes about 5 minutes. Drop NexusCheatRadar.cs into oxide/plugins/ Start the server — config generates at oxide/config/NexusCheatRadar.json Add your Discord webhook URLs and Steam Web API key. Set Enabled: true under the Web section Grant the permission: oxide.grant group admin nexuscheatradar.admin Reload: oxide.reload NexusCheatRadar Go to the web portal, head to the Servers tab, and click Setting Up a New Server. Copy your server key from the config file and paste it in, then sign in with Steam — it will link to your account automatically Test your Discord: /ncr.test Works With Oxide / uMod and Carbon Rust (PC) — no required dependencies False positive handling built in for SkillTree, Backpacks, RaidableBases, Kits, KitController, ServerKits, and teleport plugins ━━━━━━━━━━━━━━━━━━━━━━━━━━━━━━━━━━━━━━━━━━━━━━━ ◈ TROUBLESHOOTING ━━━━━━━━━━━━━━━━━━━━━━━━━━━━━━━━━━━━━━━━━━━━━━━ No Discord alerts arriving? » Check webhook URLs are correctly pasted — no trailing spaces » Confirm Discord.Enabled is true in config » Make sure the detection module is enabled » Run ncr.testmode <steamid> true to simulate Too many false positives? » Raise threshold values in ESP, Aimbot, or NoRecoil config sections » Increase shot/sample count requirements before alerts fire » Whitelist high-ping players by SteamID » Enable SuppressStrafeForSkillTree if using skill tree plugins Radar or UI not showing? » Grant nexuscheatradar.admin permission via Oxide » Toggle with /ncr.radar — requires admin flag or the permission node » Verify it loaded: oxide.reload NexusCheatRadar Plugin fails to load? » Delete the config file — NCR will regenerate it cleanly on next load » Check oxide/logs for the specific error line » Confirm you're on a compatible Oxide/uMod build » Set AutoNormalizeConfigLists to true ━━━━━━━━━━━━━━━━━━━━━━━━━━━━━━━━━━━━━━━━━━━━━━━ https://nexuscheatradar-6yt.pages.dev ━━━━━━━━━━━━━━━━━━━━━━━━━━━━━━━━━━━━━━━━━━━━━━━$19.99 -
Version 1.0.0
15 downloads
Same bonus, none of the hotspot mini-game overhead. Optimizes resource gathering by removing the vanilla tree and ore hotspot minigames. Players automatically receive the maximum available bonus without needing to hit difficult to reach hotspots, while item specific bonus multipliers from tools remain fully supported without bugs. Perfect for high pop servers. This plugin does not use cheap gimmicks like the oxide hook OnTreeMarkerHit or by harmony patching the DidHitMarker. This plugin fully and completely recodes the vanilla logic to get that performance boost & remove the pesky annoying mini games from farming perfect for high pop servers! Key features Removes tree hotspot/X-marker system Removes ore shinny hotspot entity minigame Automatically applies maximum resource bonuses Preserves custom item bonus scales No hotspot entities to spawn or destroy Reduces CPU processing during harvesting Reduces hotspot-related network traffic Reduces entity churn and GC pressure Preserves tree crack sound effects Moves tree bird effects to tree death Preserves normal tree and ore behavior$10.00 -
Version 1.0.0
11 downloads
xPenaltySystem is a moderation system for Rust servers. Staff can manage online and offline players, assign warning points, apply mutes or bans, and review complete activity histories. Create penalty rules that automatically trigger at configurable point thresholds and durations. Optional Discord logging keeps every staff action recorded outside the game. Fully UI driven Manage penalties through an clean UI. Dynamic Penalty Rules Automatically trigger warnings, timed mutes, and bans at configurable point thresholds. Online & Offline Players Search, review, and moderate any recorded player. Activity History Track every penalty, reason, recipient, and responsible staff member. Discord Logging Send all administrative activity directly to Discord. Permission xpenaltysystem.admin - Required to use the penalty system Chat Commands /xps - Requires the permission | ChatCommand is configurable in the config.$19.99 -

Version 2.8.0
79 downloads
Description FileWatcher monitors your server’s config and lang JSON files and automatically reloads the affected plugin when changes are detected. This is aimed at faster iteration while developing or tuning plugins — edit JSON, save, and the plugin reloads itself. Features Config + Lang monitoring - Watches */config/*.json - Watches */lang/**.json (including subfolders) Safe reload behavior - Debounce (1s): prevents multiple reloads while a file is still being written - Reload cooldown (20s): prevents reload loops and spam - Ignore list: exclude specific plugins from being reloaded - Always ignores FileWatcher itself Stability - If the watcher throws errors, it auto-restarts itself after 5 seconds Debug mode - Optional debug output for watcher init, file changes, cooldown/debounce decisions, etc. Commands /fwstatus Shows watcher status (Config/Lang on/off) and ignored count. Admin only. Permissions No Oxide permission is used. Access is gated by player.IsAdmin. Config { "Watch config folder": true, "Watch lang folder": true, "Ignored plugins": [ "PermissionManager" // This is an example. ], "Debug mode": false } load, run, enjoy$3.55 -
Version 1.0.9
681 downloads
Death tracker is an administration tool that allows server admins to restore player items via rcon or in-game, in the event a player dies for reasons beyond their control. The plugin will detail: The location of the death (grid + coordinate). The damage type that the player took. Whether they were connected to the server or not. Who killed them (along with the userid). The date and time of the death. The players inventory, item backpack contents, and their backpack plugin contents (if they dropped). Admins can select items from the UI to see more details about the item such as the items condition, amount, ammo, armor slots and other parameters (such as buffs from ItemPerks). You can also toggle whether the item will be restored from this menu, allowing you to exclude certain items from being restored if required. In order to use the following commands in game, you must have the deathtracker.admin permission. Command: dt Use: Access the DeathTracker restore menu in-game. Command: dt.,rcon deaths <userid> Use: Returns information for each death stored for the specified player. Command: dt.rcon query <userid> <index> Use: Returns detailed information about the specified death for the player at the specified index (item lists etc). Command: dt.rcon restore <userid> <index> Use: Restores the items to the specified player from the specified index.$14.99