Search the Community
Showing results for tags 'admin'.
-

Version 1.5.0
15 downloads
The "APControl" plugin is designed for Rust game servers to manage and control various plugins based on user permissions. It allows server administrators to load and unload specific plugins for different user groups such as all players, admins, moderators, VIPs, and test users. Lets you manage plugin packs by groups — load and unload whole sets with one action, from a compact admin UI or console. Typical use: ON = PVE plugins, OFF = PVP plugins from the blacklist. Each group has two lists with mirror logic — when the main list turns off, the blacklist turns on (loads), and the other way around. Features: Create any number of named groups (display name + console id + permission) Two lists per group: Plugins — loaded on ON, unloaded on OFF Blacklist — unloaded on ON, loaded on OFF - One-click ON / OFF (optional delay in seconds) - In-game help panels explaining mirror logic - Multi-job schedule editor (enable/pause, daily HH:mm, interval minutes, GMT±N) - Modes restored automatically a short time after ```OnServerInitialized``` Commands: Chat /apcontrol — open UI (requires apcontrol.ui) Console (per group id) adminp on adminp off adminp on 300 — run after 300 seconds gamep off 60 Permissions: apcontrol.ui — open the admin UI apcontrol.use.<group> — use that group's console command (e.g. apcontrol.use.adminp) oxide.grant group admin apcontrol.ui oxide.grant group admin apcontrol.use.adminp oxide.grant group admin apcontrol.use.gamep$4.00 -
Version 0.1.4
594 downloads
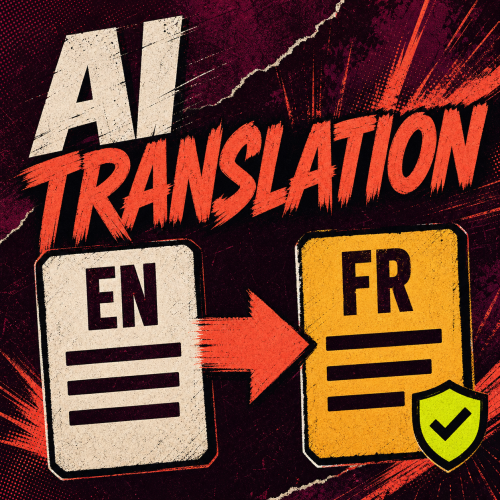
Translate your Rust plugin messages Translate a Rust plugin’s language file with a single command. Free translates from English only, one file at a time, into the language you choose. Use Pro to translate several plugins in one go. Free plugin · Oxide and Carbon · Your own OpenAI API key Open the Free configurator → MyPlugin.json translated from English into French Manual installation Put AITranslation.cs in oxide/plugins/ or carbon/plugins/. Copy plugins/AITranslation.cs. Set OpenAIToken in config/AITranslation.json after the first load and reload the plugin. Put your English source in lang/en/MyPlugin.json, then run aitfree.translateplugin MyPlugin fr in the server console. Review the result in lang/fr/MyPlugin.json. You can edit the JSON directly or use the optional PimpMyRust configurator. To review a translation before applying it from the Hub, open the plugin’s language files and choose Translate with AI. What will the API cost? Example Estimated API cost (USD) One file, one language $0.0012 Ten files, one language each $0.012 OpenAI bills for API use. These examples assume 2,000 tokens sent and 2,000 returned for each file and language, at the standard GPT-6 Luna rates of $0.10 and $0.50 per million tokens respectively. Amounts are before tax and assume no retries, extra reasoning tokens or discounts. OpenAI pricing → Configure and translate with PimpMyRust Configure AI Translation Free → Change your settings. Edit AITranslation.json directly, or use the PimpMyRust configurator to choose an OpenAI model and set usage limits. Download your settings or sync them with a connected server. Translate from the Hub. Connect your server over SFTP and RCON, and make sure AI Translation Free is running on it. You’ll need access to the Hub’s server tools. Generating a preview can incur API charges. Choose a model and response size in the configurator Free or Pro? Feature Free Pro Language files One file at a time, from English Several plugins or languages at once, with a choice of source language Review before saving Hub Hub or server console Player chat — Translation and three /ait layouts Player panel setup — PimpMyCUI 1.4.0 included with Pro Translation services OpenAI OpenAI, DeepL and others Frameworks Oxide, Carbon Oxide, Carbon With Pro, translate several plugins’ language files into several languages in one run. In Rust, players can also read chat in their own language. View AI Translation Pro on Codefling → What happens to an existing translation? Before saving the translation, the plugin checks that the file is valid JSON and that its keys and markers like {0} are still there. It backs up an existing translation before replacing it. Read through the result before using it with players. Who can run the command? Use the server console, RCON or a Rust administrator account. Other operators can run it with aitranslation.admin. Grant that permission only to people you trust to make paid API requests. The plugin sends the selected file’s text to OpenAI. Use either Free or Pro on a given server. Installation and recovery guide → · Codefling support →Free -
Version 2.1.1
125 downloads
Translate Rust chat and plugin language files In-game chat. Players can read messages in the language they choose. Plugin language files. Translate several plugins at once and review the results before saving. Oxide and Carbon · Translation service billed separately Open the PimpMyRust configurator → Glass Cards Translate several plugins at once Pick the plugins and languages. For example, translate the welcome messages, alerts and menu labels from three plugins into French and German in one run. Preview the translations before replacing the files on your server. After an update. Find new or changed messages that still need translating. One plugin file translated into French and German Let players choose their language Players type /ait to choose their language, turn translation on or off, or show the original message alongside the translation. Global chat is supported. You can also enable translation for team, clan or local chat. Pick and customize one of the three menu templates in the PimpMyRust configurator. Field Radio Compact Console What will translation cost? Your translation provider bills for usage. These estimates use GPT-6 Luna from OpenAI. Example Estimated API cost (USD) One file into one language $0.0012 Ten files into three languages each $0.036 1,000 chat messages a day, one language $0.96 / 30 days 1,000 chat messages a day, three languages $2.88 / 30 days Files. 2,000 input and 2,000 output tokens per file and language. Chat. 120 input and 40 output tokens per translation. The three-language example assumes a higher daily request limit than the default. Estimates use standard rates and exclude tax, retries and extra reasoning tokens. GPT-6 Luna pricing → Configure and translate with PimpMyRust Configure AI Translation Pro → Edit AITranslationPro.json directly or change your settings in the PimpMyRust configurator. Download your files or sync them with a connected server. Choose your translation provider, such as OpenAI, DeepL or Gemini. You can use a different provider for chat and files. Translate from the Hub. Open a plugin’s language files and choose Translate with AI. You can review the result before applying it. This requires access to the Hub’s server tools and a server connected over SFTP and RCON with Pro running. Manual installation Extract the ZIP and merge its folders into oxide/ or carbon/. Load the included PimpMyCUI 1.4.0, then AITranslationPro. Keep the manifest and three layouts together in data/PimpMyCUI/plugin-pages/aitranslationpro/. Set your provider and its API key in config/AITranslationPro.json, then reload. Grant aitranslationpro.chat.use to the groups that can use translated chat and test /ait in game. PimpMyCUI renders the player menu. Chat and file translation work without the menu. To translate a file into French and German from the server console, run aitpro.translateplugin MyPlugin fr de. You can edit the JSON directly or use the optional PimpMyRust configurator. Installation and command guide → · Codefling support →$9.98 -

Version 0.1.5
70 downloads
What is it? A nice user-friendly warning system Usage When someone is breaking rules or trolling others just warn them, you can also set a command that will be executed through server console that will get executed upon reachin certain amount of warnings (can be configured in cfg) Permissions warnmenu.use -- Gives you full control to operate the WarnMenu Chat command /warn -- Opens the WarnMenu /warn "Name/SteamID" "Warning reason" -- Warns the specified player with your reason /warnmenu.save -- Force the plugin to write the data from memory to the data file /wmessage <NameOrID | * > <message> - Shows a gametip message (Doesn't count as a warning) to specific player or to all players when you put * instead of the name Data files All Data files can be located at: \oxide\data\WarnMenu\warns There you can find all the warnings for each player Features WarnMenu features * Online Tab - In this tab you can easily select any online player that you want to warn * Search All Tab - Once you open this tab, there you can see all the players and browse in them * Find player Tab - When you click on the button you will be able to search for a specific player using his Name or SteamID Warn Types * CUI-Based - A CUI warning message will pop-up on player's screen when he gets warned * Chat-Based - A chat message will pop-up in player's chat when he gets warned Executable commands * On reaching certain amount of warnings, you can make the server execute a command on a player(configurable in cfg) F.e.: "1": "say {0} just reached 1 warning! SHAME on him!", "3": "kick {0} Kicked for reaching 3 warnings", Localization { "Syntax": "Commands:\n/report (Opens Reporter GUI)", "CUI Online": "Online Players", "CUI Player": "Player: {0}", "CUI SteamID": "SteamID64: {0}", "CUI Warnings": "Warnings: <color=#8f1919>{0}</color>", "CUI NewWarn": "New\nWarning", "CUI WarningID": "Warning ID: {0}", "CUI WarnedBy": "Warned by: {0}", "CUI Date": "Date: {0}", "CUI Reason": "Reason: \n{0}", "CUI Remove": "Remove", "CUI Close": "close", "CUI Warn": "Warn", "CUI WarnAddMenuPlayer": "Warning for\n<color=#d43939>{0}</color>", "CUI SearchAll": "Search All", "CUI SelectPlayer": "Select a player to warn:", "CUI Find": "Find player", "CUI Find2": "Select", "CUI Find3": "Find player:\n(steamID/Name)", "CUI CantFindPlayer": "Couldn't find the player\nsearching argument: {0}", "CUI FoundPlayer": "Found player: {0}", "CUI Refresh": "Refresh", "CantFindPlayer": "Couldn't find that player", "WarnMessage": "Warned: <color=#8f1919>{0}</color>\nReason: {1}", "JoinMessage": "{0} has joined with <color=#8f1919>{1}</color> warnings", "WarnReceive": "You have received a <color=#8f1919>warning</color>\nBy: {0}\nReason: {1}", "CUI WarnReceive": "<color=#8f1919>Warning</color>\nreceived", "CUI WarnReceive2": "By: {0}\nReason: {1}", "Message Syntax": "/wmessage <player|*> <message>", "No Player": "Couldn't find player with that name", "CUI WarnAddMenuClans": "Warning for clan\n<color=#d43939>{0}</color>", "CUI Clans": "Clans", "SyntaxClan": "Syntax: /warn.clan (p | g) (clan tag) (reason)", "ClansNotLoaded": "Clans plugin is not loaded!", "ClanNotFound": "Couldn't find a clan with that tag!", "ClanWarnedGlobal": "{0} clan has been warned: {1}", "CUI isGlobal": "Global announce?\n{0}", "CUI ClansNot": "Clans plugin is not loaded!" } Configuration { "Announce on join with warnings?(to admins)": true, "Execute commands on reaching count:": { "Enabled?": true, "(Format: 5 : mute {0}) where 5 is number of warns and {0} is player's id": { "5": "example.command {0}", "7": "example.command {0}", "10": "example.command {0}" } }, "Warn message settings": { "Text-based warn message?": true, "CUI-based warn message?": true, "How long until CUI message gets removed (secs)": 5.0 }, "Audio settings": { "Enable audio on warning?": true, "Audio path": "assets/content/nexus/ferry/effects/nexus-ferry-departure-horn.prefab" }, "Highlight settings": { "Enabled?": true, "Minimum amount of warns to highlight": 3 }, "wMessage settings": { "Audio path": "assets/content/nexus/ferry/effects/nexus-ferry-departure-horn.prefab", "Time before disappear": 10.0 }, "Discord (clan)": { "Webhook url": "WEBHOOK", "Enabled?": true }, "Discord (player)": { "Webhook url": "WEBHOOK", "Enabled?": true } }$10.00 -

Version 1.0.0
138 downloads
If you need assistance, contact bxcas on Discord.$999,999.00 -
Version 1.4.12
6,842 downloads
Manage your Rust server easier and more efficiently with the AdminMenu plugin. Track players, interact with them, edit their data and permissions, as well as change server convars and manage plugins. Features: Menu retains its state after closing, you won't lose everything you did before. Ability to fully translate the menu into any language. Large range of permissions for each action, will allow you to flexibly customize the admin menu for each group of administrators. Quick menu that allows you to perform quick actions Full list of players with the ability to filter by online, offline, admins and moderators. Also has a frame of different colors depending on the level of authorization. Wide range of information and actions for the selected player. Editing convars with search. Has a complete list of editable convars with descriptions for some of them. Extensive issue menu by category, with easy management of name, skin and amount (manual, +1, +100, +1000, +10000). Plugin management menu. It is possible to reload, unload or load a plugin easily and quickly. Updates occur in real time. Ability to create your own custom buttons that execute several commands Quick Start: You install the plugin in the plugins folder. Give yourself the adminmenu.fullaccess permission. Commands, use one of your choice, one for the player and one for the admin group: o.grant user [name or steamid] adminmenu.fullaccess o.grant group admin adminmenu.fullaccess Press the X button (swap seat button) or type adminmenu in the console. Enjoy Useful stuff: You can quickly open a player in the admin menu. To do this, point at the player and press X. You don't have to hover over the player exactly, you will be able to open players within a certain radius of the place you are looking at. CUSTOM BUTTONS Custom buttons are buttons that when pressed will execute commands on behalf of the administrator, commands can be several, below will be the details. At the moment, custom buttons can be created in two places: in the quick menu and in the menu when selecting a player. These places are separated in the config. Button Fields: "Execution as server" - Call the command on behalf of the server, not the administrator "Label" - Text that will be on the button, for each such inscription creates a field in the lang file, accordingly you can translate this text into several languages. "Commands" - Array of commands that will be executed on behalf of the administrator. Chat commands require a special entry, see examples. "Permission"- permission to display and use the button. You need to write the permission that will be after "adminmenu.". Example: if you enter the permission "test" the permission will be adminmenu.test "Position" - The location for the button, the first number is responsible for the row number, the second for the position within the row, starts from 0.There are limits of locations, if you have gone beyond the limit - the button will not be displayed. Common Tags: {adminUID} - administrator's id. {position} - administrator coordinates (underfoot) {view_position} - the position where the administrator is looking (can be used for spawning or something similar) {view_direction_forward} - forward view direction of the administrator {view_direction_backward} - the direction the administrator is looking backwards {view_direction_left} - direction of the administrator’s view to the left {view_direction_right} - administrator’s view direction to the right Tags for target only: {steamid}, {steamID}, {userID}, {STEAMID}, {USERID} - mean the same thing, namely the id of the selected player. {target_position} - target coordinates (underfoot) Example of commands: chat.say \"/{chat command}\" vanish ban {steamID} teleport {steamID} {adminUID} More information about the grant menu: The grant menu includes the full list of items including hidden items as well as custom items created by the CustomItemDefinitions library. The menu can be accessed from the navigation or from the menu of the selected player. When issuing itself has categories. Search works in any registry by any part of the name or short name. Has a page system at any stage. More information about the buttons in the Quick Menu: [Teleport to 0 0 0] - Teleport to coordinates 0 0 0. Requires adminmenu.quickmenu.teleportto000 permission [Teleport to Deathpoint] - Teleport to your deathpoint. Requires adminmenu.quickmenu.teleporttodeath permission [Teleport to Spawn point] - Teleport to a random spawn point. Requires adminmenu.quickmenu.teleporttospawnpoint permission [Kill Self] - Kill Self, kills even when immortal. Does not require permission. [Heal Self] - Fully heal yourself. Requires adminmenu.quickmenu.healself permission [Call Heli] - Call Helicopter to yourself (arrives in time). Requires adminmenu.quickmenu.helicall permission [Spawn Bradley] - Spawn bradley on yourself. Requires adminmenu.quickmenu.spawnbradley permission More information about the buttons in the menu of the selected player: [Teleport Self To] - Teleport yourself to the selected player. Requires adminmenu.userinfo.teleportselfto permission [Teleport To Self] - Teleport the selected player to yourself. Requires adminmenu.userinfo.teleporttoself permission [Teleport To Auth] - Teleportation to random authorization (TC). Requires adminmenu.userinfo.teleporttoauth permission [Teleport to Deathpoint] - Teleportation to a player's deathpoint. Requires adminmenu.userinfo.teleporttodeath permission [Heal] - Full healing, including metabolism. Requires adminmenu.userinfo.fullheal permission [Heal 50%] - Half healing. Requires adminmenu.userinfo.halfheal permission. [View Inventory] - View and edit player's inventory. Requires adminmenu.userinfo.viewinv permission [Strip Inventory] - Clear player's inventory. Requires adminmenu.userinfo.stripinventory permission [Unlock Blueprints] - Unlock all Blueprints. Requires adminmenu.userinfo.unlockblueprints permission [Revoke Blueprints] - Reset all Blueprints. Requires adminmenu.userinfo.revokeblueprints permission. [Kill] - Kill a player. Requires adminmenu.userinfo.kill permission [Kick] - Kick a player. Requires adminmenu.userinfo.kick permission [Ban] - Ban a player. Requires adminmenu.userinfo.ban permission More information about the buttons in the menu of the selected group: [Remove Group] - Remove group, has confirmation. Requires adminmenu.groupinfo.removegroup permission [Clone Group] - Clone group with the ability to copy users. Requires adminmenu.groupinfo.clonegroup permission Permissions: adminmenu.use - Ability to use admin menu with basic set. Open tab quick menu (each button has its own permission, without permissions is present only kill yourself button) and the list of players. adminmenu.fullaccess - Full access to all functions without the need for each permission, includes also adminmenu.use. It is recommended to give only to the main administrators. adminmenu.quickmenu.teleportto000 - Access to the button in the quick menu, teleportation to coordinates 0 0 0 0. adminmenu.quickmenu.teleporttodeath - Access to the button in the quick menu, teleportation to the point of your death. adminmenu.quickmenu.teleporttospawnpoint - Access to the button in the quick menu, teleportation to a random spawn point. adminmenu.quickmenu.healself - Access button in quickmenu, heal yourself completely. adminmenu.quickmenu.helicall - Access to the button in the quick menu, call a helicopter to yourself (arrives in time). adminmenu.quickmenu.spawnbradley - Access button in quickmenu, spawn bradley. adminmenu.userinfo.teleportselfto - Access to the button in the menu of the selected player, teleportation to the selected player. adminmenu.userinfo.teleporttoself - Access to the button in the menu of the selected player, teleport the selected player to himself. adminmenu.userinfo.teleporttoauth - Access to the button in the menu of the selected player, teleportation to random authorization (TC). adminmenu.userinfo.teleporttodeath - Access to the button in the menu of the selected player, teleportation to the place of death of the player. adminmenu.userinfo.fullheal - Access to the button in the menu of the selected player, full healing, including metabolism. adminmenu.userinfo.halfheal - Access to the button in the menu of the selected player, half healing. adminmenu.userinfo.viewinv - Access to the button in the selected player's menu, view and edit the player's inventory. adminmenu.userinfo.stripinventory - Access to the button in the menu of the selected player, clear the player's inventory. adminmenu.userinfo.unlockblueprints - Access the button in the menu of the selected player, unlock all drafts. adminmenu.userinfo.revokeblueprints - Access to the button in the menu of the selected player, reset all drafts. adminmenu.userinfo.kill - Access the button in the selected player's menu to kill the player. adminmenu.userinfo.kick - Access the button in the selected player's menu to kick the player. adminmenu.userinfo.ban - Access to the button in the menu of the selected player, ban the player. adminmenu.groupinfo.removegroup - Access to the button in the menu of the selected group, the ability to remove the group. adminmenu.groupinfo.clonegroup - Access to the button in the menu of the selected group, the ability to clone the group. adminmenu.convars - View and edit convars. adminmenu.permissionmanager - View and edit permissions in groups, player groups, create, delete and clone groups (requires additional permissions from these buttons). adminmenu.pluginmanager - Access to plugin management, reloading, unloading, loading plugins. adminmenu.give - Access to give resources, as well as yourself and the selected player.$30.00 -
Version 2.1.5
7,968 downloads
UltimateLocker - Lock Everything, Auto Lock & Auto Closing UltimateLocker - Lock Everything, Auto Lock & Auto Closing, allows you to place Code Locks/Key Lock on Vehicles, Furnaces, Weapon Racks, Turrets, Mining Quarry, Pump Jack, Motorbike, Motorbike With Sidecar, Pedal Bike, Pedal Trike, Deployable Items, Naval Deep Sea, Drawing / Signs and much more. Support for: Storage Box Pack DLC (https://rust.facepunch.com/news/shipshape#StorageBoxPackDLC) Support for: Industrial Decor Pack DLC (https://rust.facepunch.com/news/built-different#IndustrialDecorPack) Plus you can decide whether to automatically position the code locks, with many configurations and share locks with your clan/team members. You can also enable automatic closing by positioning door closers automatically or manually, change the closing delay time and decide on which entities to enable it. Place Code Lock wherever you want, Auto Lock and Auto Closing with a single plugin, 3 plugin in 1. You can decide which entities to enable Code Lock on or Door Closer. Block any entity you want, including electrical, industrial, crafting, research, farming, etc. It has commands for administrators to lock, unlock and remove Code Locks/Key Lock. Include support for new CodeLock: Flight Control Codelock and option to automatically use the Flight Control Codelock skin. IMPORTANT: Added the ability to also place Key Locks, in addition to Code Locks. Place Code Lock/Key Lock wherever you want with a single plugin: Vehicle Locks Motorbike, Motorbike With Sidecar, Pedal Bike, Pedal Trike Naval Deep Sea Storage Box Pack DLC (https://rust.facepunch.com/news/shipshape#StorageBoxPackDLC) Industrial Decor Pack DLC (https://rust.facepunch.com/news/built-different#IndustrialDecorPack) Drawing / Signs Rust item lock Windows Lock Automatic lock closing when dismount of the vehicle Code Lock support for Medieval entities: Mounted Ballista, Battering Ram, Catapult, Siege Tower, Ballista Medieval entities block usage: opening/closing doors, reloading/firing ammo, mounting, driving, pushing, pulling, etc... Furnaces, Refineries, and more Weapon Rack Lock Block any entity you want, including electrical, industrial, crafting, research, farming, etc. Farming Lock Electricity Lock / Electrical Lock Industrial Lock Construction Lock Mining Quarry, Pump Jack Items Lock Trap Lock Turrets Lock Misc Lock Fun Lock Deployable Lock And so on... VIDEO EXAMPLE Below you can see an example video on how to use the plugin. AUTO LOCK ---------------------------------------------------------------------------------------------------- AUTO CLOSER ---------------------------------------------------------------------------------------------------- AUTO CLOSER - PROXIMITY SYSTEM ---------------------------------------------------------------------------------------------------- EXAMPLES OF OPERATION/USE: Some examples of how the plugin works when there is a Code Lock/Key Lock to which you do not have access: Usage block/loot furnaces, refineries, electric furnaces, water dispensers, industrial conveyor, industrial crafter, car lift, elevator, small generator, metal shop front, dropbox, mail box, vending machine, etc... Usage block: workbench, research table, repair table, computer station, mixing table, etc... Device Identifier: If the Auto Turrets, CCTV Camera, PTZ CCTV Camera, etc..., are locked with Code Lock/Key Lock, you cannot access them remotely if you do not have access to Code lock/Key Lock, even if you know the identification number. Block use and loot of vehicles, including horses Block use and loot of vehicles, including Motorbike, Motorbike With Sidecar, Pedal Bike, Pedal Trike. Automatic lock closing when dismount of the vehicle Code Lock support for Medieval entities: Mounted Ballista, Battering Ram, Catapult, Siege Tower, Ballista Medieval entities block usage: opening/closing doors, reloading/firing ammo, mounting, driving, pushing, pulling, etc... Block use and loot of: Mining Quarry, Pump Jack. Auto Turret authorization lock, rotation, attack mode, remote control, lock to change identification ID. Locking loot and usafe of SAM Site. Lock to change camera identification ID and remote control. Block personal Quarry Mining usage and loot FARM: fertilizer container block, sowing block, harvesting/cutting plants and clone, or harvesting dead plants, composter lock, Beehive lock, Chicken Coop lock, Cooking Workbench lock, Planter Box lock, etc... Weapon rack: weapons storage and collection block, weapon reloading, weapon exchange. Blocking the insertion and removal of electrical cables and pipes from the various components. Blocking the use of electrical components: switching on/off switches, switches, buttons, changing timer duration and much more... Blocking use and frequency change of transceiver components, RF Broadcaster, RF Receiver. Blocking the use of some entertainment objects such as the piano, drums, boom box, arcade games, etc... Block fun objects such as Strobe Light, Laser Light, Sound Light, Neon Sign, etc... And much more, with new items that will be added in future releases or at your suggestion via a request for support or comment ---------------------------------------------------------------------------------------------------- AUTO LOCK: The plugin integrates an automatic positioning system for Code Lock or Key Lock. Using the /al, /autolock or /codelock command the player can manage all the settings: Sharing locks with clan/team members. Create a code lock pin and/or update all your codelock pins with 1 click. Create a Guest pin for your Code Lock and/or update all Guest pins of your code locks with 1 click. Enable the ability to use Key Locks, if you do not have Code Locks in your inventory. Streamer mode: to hide the display of the Code Lock pin on the screen. In addition, there will be many other options that can be enabled/disabled. These options will be available based on how the plugin has been configured. For example: has the ability to place the code lock on the furnaces been enabled? Then there will be the option to enable and/or disable the automatic positioning of the locks on the furnaces. And so on for all the other configurations. And many other new features and features that will arrive with the next plugin updates. ---------- AUTO CLOSING (DOOR CLOSER): The plugin integrates a system for automatic closing, of various entities. The player can change the settings through a simple and intuitive interface and apply these settings automatically or manually. Using the /ac , /autoclose or /autocloser command and by pressing the button "Auto Closing Settings" the player can manage all the settings: ---------------------------------------------------------------------------------------------------- PROXIMITY SYSTEM: The plugin integrates a system for automatic closing, of various entities. A Proximity System is available for automatic door closing. This system allows you to quickly and easily change the automatic door closing settings. There are three modes: An icon appears when you approach a door with automatic closing enabled. Using a combination of buttons. Both modes. Some example images: ---------------------------------------------------------------------------------------------------- CODE LOCK AUTO SKIN: The plugin allows you to automatically change the code lock skin, automatically switching the skin to the Flight Control Codelock skin. To use this feature, the player must own the DLC. DLC ownership check can be bypassed via configuration or permission (⚠ Only allowed on creative/test servers, otherwise you violate Facepunch’s TOS! ⚠) CONFIGURATION "Disable ownership checking on DLC/Skins. (⚠ Only allowed on creative/test servers, otherwise you violate Facepunch's TOS! ⚠) Default false": false PERMISSION ultimatelocker.bypass.dlc_skin_required - Permission to bypass DLC or Skin ownership checks. With this permission, you can use DLC or Skins you don’t own. PERMISSIONS: ultimatelocker.use - Allows you to use the plugin to place Code Locks/Key Locks. ultimatelocker.admin - Allows you to execute some commands reserved for administrators. ultimatelocker.bypass.lock_deploy_vehicle_check - Allows you to bypass these controls when deploying the lock on vehicles: Requires Building Privilege to place Code Locks Requires Building Privilege to place Code Locks in unowned vehicles Allow deployment of Code Lock in unowned vehicles ultimatelocker.bypass.force - Allows you to bypass Code Locks/Key Locks. (FOR ADMIN USE!!!) ultimatelocker.bypass.dlc_skin_required - Permission to bypass DLC or Skin ownership checks. With this permission, you can use DLC or Skins you don’t own. ultimatelocker.autolock.enabled - This role is required to be able to use the automatic positioning system of Code Lock or Key Lock. ultimatelocker.autolock.nolockrequired - With this role you do not need to have the Code Lock in your inventory, the Code Lock will be placed even if you do not have one. ultimatelocker.autoclosing.enabled - This role is required to be able to use the automatic closing system, Door Closer. COMMANDS FOR PLAYERS Commands can be typed in chat (by putting the / character in front of the command), or from console. /autolock or /codelock -- Open Auto Lock/Auto Closing settings UI. /locker -- Command to add lock manually. /closer -- Command to add door closer manually. /uncloser -- Command to remove door closer manually. /ual -- Toggle Auto Lock. Command to enable/disable auto lock. /uad -- Toggle Auto Closer. Command to enable/disable automatic closing. /ul code <code> -- Change the Code Lock code of the entity you are looking at, if you own the entity or if it belongs to a clan/team member. /ul codeall <code> -- Change the Code Lock code on all entities owned by the player. /ul ctime <time> -- Set the closing delay time (seconds) for the Door you are looking at. ---------- COMMANDS FOR ADMIN Commands can be typed in chat (by putting the / character in front of the command), or from console. To use these commands you must have the role: ultimatelocker.admin /ul unlock -- Unlock the Code Lock/Key Lock of the entity you are watching. /ul unlockall <steamID> -- Unlock all player Code Locks/Key Locks. /ul lock -- Lock the Code Lock/Key Lock of the entity you are watching. /ul lockall <steamID> -- Lock all player Code Locks/Key Locks. /ul remove -- Removes the Code Lock/Key Lock of the entity you are watching. /ul removeall <steamID> -- Removes all player Code Locks/Key Locks. /ul code <code> -- Change the Code Lock code of the entity you are looking at. Instead of <code> you must insert the new code. Must consist of 4 numbers. /ul codeall <code> <steamID> -- Change the Code Lock code on all entities owned by the player. You must pass the steamID of the player whose code you want to change instead of the <steamID>. Instead of <code> you must insert the new code. Must consist of 4 numbers. /ul show -- Shows the Code Lock code of the entity you are looking at. -------------------- NB: To use these commands you must set the configuration AllowAdminToBypassCodeLock to be set to true or have the role ultimatelocker.bypass.force. -------------------- Commands can be added or modified in the configuration file: /oxide/config/UltimateLocker.json CLAN/TEAM If the player is part of a clan/team, he can block, unlock or remove Code Locks/Key Locks placed by other teammates, if enabled in the configurations. CONFIGURATION The settings and options can be configured in the UltimateLocker under the config directory. The use of an editor and validator is recommended to avoid formatting issues and syntax errors. { "TimeZone": "Europe/London", "ChatPrefix": "UltimateLocker", "AllowAdminToBypassCodeLock (Allows admin to bypass Code Lock without using commands). Default False.)": false, "Disable ownership checking on DLC/Skins. (⚠ Only allowed on creative/test servers, otherwise you violate Facepunch's TOS! ⚠) Default false": false, "Chat Command": [ "ul", "ultimatelocker" ], "Skin Blacklist Configuration": { "Lock: Block lock for entity with this skin": [], "Door Closer: Block door closer for entity with this skin": [] }, "Proximity System": { "Show UI when player is near a door with Door Closer. Default false": false, "Show UI when pressing key. Default true": true, "Button to show UI: 1 (MMB - middle mouse button) - 2 (SHIFT + MMB) - 3 (CTRL + MMB). Default 2": 2 }, "Auto Lock Configuration": { "Chat Command": [ "al", "autolock", "codelock" ], "Toggle Auto Lock - Chat Command": "ual", "Add Lock manually - Chat Command": "locker", "Use only Key Lock. [true] to allow only Key Lock. [false] to allow both Key Lock and Code Lock. (Default: FALSE)": false, "RESYNC DEFAULT SETTINGS for all players. If set to [true], resets all player settings to the default settings configured. Once the settings are reset, the parameter will automatically be reset to false. (Default: FALSE)": false, "FORCE SHARE LOCKS WITH CLAN/TEAM MEMBERS. [true] to force all players to share locks with clan/team members. [false] to force all players to NOT share locks with clan/team members. [null] to use the player's default settings by UI. (Default: null)": null, "Auto Lock Category Configuration": { "Is automatic lock enabled on Doors enabled.": true, "Is automatic lock enabled on Windows enabled.": true, "Is automatic lock enabled on Boxes enabled.": true, "Is automatic lock enabled on Storage Container enabled.": true, "Is automatic lock enabled on Lockers enabled.": true, "Is automatic lock enabled on TC (Cupboards) enabled.": true, "Is automatic lock enabled on Vehicles enabled.": true, "Is automatic lock enabled on Medieval entity enabled.": true, "Is automatic lock enabled on Furnace enabled.": true, "Is automatic lock enabled on Vending Machine enabled.": true, "Is automatic lock enabled on Composter enabled.": true, "Is automatic lock enabled on Mixing Table enabled.": true, "Is automatic lock enabled on Planter enabled.": true, "Is automatic lock enabled on Auto Turret enabled.": true, "Is automatic lock enabled on SAM Site enabled.": true, "Is automatic lock enabled on Traps enabled.": true, "Is automatic lock enabled on Weapon Rack enabled.": true, "Is automatic lock enabled on Stash enabled.": true, "Is automatic lock enabled on Neon Sign enabled.": true, "Is automatic lock enabled on Other Custom Entities enabled.": true, "Is automatic lock enabled on Other Lockable Entities enabled.": true }, "Player default settings": { "Allow automatic lock placement by default. (Default: TRUE)": true, "Allow automatic placement of Key Locks if there are no Code Locks in the inventory. (Default: TRUE)": true, "Allow Guest Code by default. (Default: FALSE)": false, "Allow automatic Share locks with clan/team members by default. (Default: TRUE)": true, "Enable streamer mode by default. (Default: FALSE)": false, "Allow automatic lock on Doors by default. (Default: TRUE)": true, "Allow automatic lock on Boxes by default. (Default: FALSE)": false, "Allow automatic lock on Storage Container by default. (Default: FALSE)": false, "Allow automatic lock on Lockers by default. (Default: TRUE)": true, "Allow automatic lock on TC (Cupboards) by default. (Default: TRUE)": true, "Allow automatic lock on Vehicle by default. (Default: TRUE)": true, "Allow automatic lock closing when dismount of the vehicle by default. (Default: TRUE)": true, "Allow automatic lock on Medieval entity by default. (Default: FALSE)": false, "Allow automatic lock on Furnace by default. (Default: FALSE)": false, "Allow automatic lock on Vending Machine by default. (Default: FALSE)": false, "Allow automatic lock on Composter by default. (Default: FALSE)": false, "Allow automatic lock on Mixing Table by default. (Default: FALSE)": false, "Allow automatic lock on Planter by default. (Default: FALSE)": false, "Allow automatic lock on Auto Turret by default. (Default: FALSE)": false, "Allow automatic lock on SAM Site by default. (Default: FALSE)": false, "Allow automatic lock on Traps by default. (Default: FALSE)": false, "Allow automatic lock on Weapon Rack by default. (Default: TRUE)": true, "Allow automatic lock on Stash by default. (Default: FALSE)": false, "Allow automatic lock on Neon Sign by default. (Default: FALSE)": false, "Allow automatic lock on Other Lockable Entities by default. (Default: FALSE)": false, "Allow automatic lock on Other Custom Entities by default. (Default: FALSE)": false }, "Player Auto Closing default settings": { "Allow automatic closing by default. (Default: FALSE)": false, "Allow automatic closing of Door by default. (Default: FALSE)": false, "Allow automatic closing of Double Door by default. (Default: FALSE)": false, "Allow automatic closing of Window by default. (Default: FALSE)": false, "Allow automatic closing of Garage by default. (Default: FALSE)": false, "Allow automatic closing of Ladder Hatch by default. (Default: FALSE)": false, "Allow automatic closing of External Gate by default. (Default: FALSE)": false, "Allow automatic closing of Fence Gate by default. (Default: FALSE)": false, "Allow automatic closing of Legacy Wood Shelter Door by default. (Default: FALSE)": false } }, "Auto Closing Configuration": { "Chat Command": [ "ac", "autoclose", "autocloser" ], "Toggle Auto Closer - Chat Command": "uad", "Add Door Closer manually - Chat Command": "closer", "Remove Door Closer manually - Chat Command": "uncloser", "Enable automatic closing of Door. (Default: FALSE)": false, "Enable automatic closing of Double Door. (Default: FALSE)": false, "Enable automatic closing of Window. (Default: FALSE)": false, "Enable automatic closing of Garage. (Default: FALSE)": false, "Enable automatic closing of Ladder Hatch. (Default: FALSE)": false, "Enable automatic closing of External Gate. (Default: FALSE)": false, "Enable automatic closing of Fence Gate. (Default: FALSE)": false, "Enable automatic closing of Legacy Wood Shelter Door. (Default: FALSE)": false, "Minimum Closing Delay Time. (Default: 10 seconds)": 10, "Maximum Closing Delay Time. (Default: 60 seconds)": 60, "Default Closing Delay Time. (Default: 30 seconds)": 30 }, "Requires Building Privilege to place Code Locks. (Default: TRUE)": true, "Requires Building Privilege to place Code Locks in unowned vehicles. (Default: FALSE)": false, "Allow deployment of Code Lock in vehicles owned by other players. (Default: FALSE)": false, "Allow deployment of Code Lock in unowned vehicles. (Default: TRUE)": true, "Auto claim unowned vehicles when deploying locks. (Default: FALSE)": false, "Auto replace vehicle ownership when deploying locks. (Default: FALSE)": false, "Allow pushing vehicles blocked by the Code Lock (Default: TRUE)": true, "Allow pushing vehicles blocked by the Code Lock if present in your Building Privilege. (Default: TRUE)": true, "Set player as owner when placing a Mining Quarry or Pump Jack (also static). (Default: TRUE)": true, "Enable Lock": { "Vehicles": [ { "ItemName": "Minicopter", "EnableLock": true, "PrefabName": "assets/content/vehicles/minicopter/minicopter.entity.prefab", "RequiredPermission": [ "" ] }, { "ItemName": "Scrap Transport Helicopter", "EnableLock": true, "PrefabName": "assets/content/vehicles/scrap heli carrier/scraptransporthelicopter.prefab", "RequiredPermission": [ "" ] }, { "ItemName": "Attack Helicopter", "EnableLock": true, "PrefabName": "assets/content/vehicles/attackhelicopter/attackhelicopter.entity.prefab", "RequiredPermission": [ "" ] }, { "ItemName": "Armored / Hot Air Balloon", "EnableLock": true, "PrefabName": "assets/prefabs/deployable/hot air balloon/hotairballoon.prefab", "RequiredPermission": [ "" ] }, { "ItemName": "Row Boat", "EnableLock": true, "PrefabName": "assets/content/vehicles/boats/rowboat/rowboat.prefab", "RequiredPermission": [ "" ] }, { "ItemName": "RHIB", "EnableLock": true, "PrefabName": "assets/content/vehicles/boats/rhib/rhib.prefab", "RequiredPermission": [ "" ] }, { "ItemName": "Tugboat", "EnableLock": true, "PrefabName": "assets/content/vehicles/boats/tugboat/tugboat.prefab", "RequiredPermission": [ "" ] }, { "ItemName": "Submarinesolo", "EnableLock": true, "PrefabName": "assets/content/vehicles/submarine/submarinesolo.entity.prefab", "RequiredPermission": [ "" ] }, { "ItemName": "Submarine Duo", "EnableLock": true, "PrefabName": "assets/content/vehicles/submarine/submarineduo.entity.prefab", "RequiredPermission": [ "" ] }, { "ItemName": "Horse", "EnableLock": true, "PrefabName": "assets/rust.ai/nextai/testridablehorse.prefab", "RequiredPermission": [ "" ] }, { "ItemName": "Tomaha Snowmobile", "EnableLock": true, "PrefabName": "assets/content/vehicles/snowmobiles/tomahasnowmobile.prefab", "RequiredPermission": [ "" ] }, { "ItemName": "Snowmobile", "EnableLock": true, "PrefabName": "assets/content/vehicles/snowmobiles/snowmobile.prefab", "RequiredPermission": [ "" ] }, { "ItemName": "Sedan", "EnableLock": true, "PrefabName": "assets/content/vehicles/sedan_a/sedantest.entity.prefab", "RequiredPermission": [ "" ] }, { "ItemName": "2 Module Car", "EnableLock": true, "PrefabName": "assets/content/vehicles/modularcar/2module_car_spawned.entity.prefab", "RequiredPermission": [ "" ] }, { "ItemName": "3 Module Car", "EnableLock": true, "PrefabName": "assets/content/vehicles/modularcar/3module_car_spawned.entity.prefab", "RequiredPermission": [ "" ] }, { "ItemName": "4 Module Car", "EnableLock": true, "PrefabName": "assets/content/vehicles/modularcar/4module_car_spawned.entity.prefab", "RequiredPermission": [ "" ] } ], "Deployables": [ { "ItemName": "Large Furnace", "EnableLock": true, "PrefabName": "assets/prefabs/deployable/furnace.large/furnace.large.prefab", "RequiredPermission": [ "" ] }, { "ItemName": "Furnace", "EnableLock": true, "PrefabName": "assets/prefabs/deployable/furnace/furnace.prefab", "RequiredPermission": [ "" ] }, { "ItemName": "Legacy Furnace", "EnableLock": true, "PrefabName": "assets/prefabs/deployable/legacyfurnace/legacy_furnace.prefab", "RequiredPermission": [ "" ] }, { "ItemName": "Refinery", "EnableLock": true, "PrefabName": "assets/prefabs/deployable/oil refinery/refinery_small_deployed.prefab", "RequiredPermission": [ "" ] }, { "ItemName": "Electric Furnace", "EnableLock": true, "PrefabName": "assets/prefabs/deployable/playerioents/electricfurnace/electricfurnace.deployed.prefab", "RequiredPermission": [ "" ] }, { "ItemName": "Stone Fireplace", "EnableLock": true, "PrefabName": "assets/prefabs/deployable/fireplace/fireplace.deployed.prefab", "RequiredPermission": [ "" ] }, { "ItemName": "BBQ", "EnableLock": true, "PrefabName": "assets/prefabs/deployable/bbq/bbq.deployed.prefab", "RequiredPermission": [ "" ] }, { "ItemName": "Hobo Barrel", "EnableLock": true, "PrefabName": "assets/prefabs/misc/twitch/hobobarrel/hobobarrel.deployed.prefab", "RequiredPermission": [ "" ] }, { "ItemName": "Storage Barrel B", "EnableLock": true, "PrefabName": "assets/prefabs/misc/decor_dlc/storagebarrel/storage_barrel_b.prefab", "RequiredPermission": [ "" ] }, { "ItemName": "Storage Barrel C", "EnableLock": true, "PrefabName": "assets/prefabs/misc/decor_dlc/storagebarrel/storage_barrel_c.prefab", "RequiredPermission": [ "" ] }, ............ ] }, "VersionNumber": { "Major": 1, "Minor": 6, "Patch": 0 } } TimeZone: Default: Europe/London ChatPrefix: -- Chat message prefix. Skin Blacklist Configuration: Skins that are not allowed for auto-lock or auto-close can be entered here. If the entity has one of these skins, auto-lock or auto-close will not work. "Skin Blacklist Configuration": { "Lock: Block lock for entity with this skin": [], "Door Closer: Block door closer for entity with this skin": [] }, AllowAdminToBypassCodeLock (Allows admin to bypass Code Locks/Key Locks without using commands). Default FALSE. Disable ownership checking on DLC/Skins. (⚠ Only allowed on creative/test servers, otherwise you violate Facepunch’s TOS! ⚠): Disable DLC/Skin ownership check, to be used only on CREATIVE or TEST servers. Using this option on PVP or PVE servers will result in a warning or ban from the Rust server list by Facepunch. Default false Chat Command: Here you can add, edit or delete Commands can be typed in chat (by putting the / character in front of the command), or from console. Requires Building Privilege to place Code Locks: Requires Building Privilege to place Code Locks/Key Lock. Default: TRUE Requires Building Privilege to place Code Locks in unowned vehicles: Requires Building Privilege to place Code Locks/Key Lock in unowned vehicles. Default: FALSE Allow deployment of Code Lock in vehicles owned by other players: Allow deployment of Code Lock in vehicles owned by other players. Default: FALSE Allow deployment of Code Lock in unowned vehicles: Allow deployment of Code Lock in unowned vehicles. Default: TRUE Auto claim unowned vehicles when deploying locks: Auto claim unowned vehicles when deploying locks. Default FALSE Auto replace vehicle ownership when deploying locks: Auto replace vehicle ownership when deploying locks. Default FALSE Allow pushing vehicles blocked by the Code Lock: Allow pushing vehicles/horses blocked by the Code Lock. Default: TRUE Sets player as owner when placing a Mining Quarry or Pump Jack (also static): Set the player as owner of the Mining Quarry or Pump Jack placed (also those statistics). Default: TRUE Allow pushing vehicles blocked by the Code Lock if present in your Building Privilege: Allow pushing vehicles/horses blocked by the code lock if present in the player's building authorization zone. Default: TRUE Enable Lock: Here you can set which entities to enable, on which you can place a Code Lock/Key Lock. ItemName: The name of the entity EnableLock: Whether or not to enable Code Lock/Key Lock placement for this entity. RequiredPermission: Here you can specify the roles required to be able to insert a Code Lock/Key Lock in the entities enabled in the configuration. You can specify 1 or more roles, and as long as the player has at least one of these roles he can enter the Code Lock/Key Lock. Here you can specify the roles required to be able to insert a Code Lock/Key Lock in the entities enabled in the configuration. You can specify 1 or more roles, and as long as the player has at least one of these roles he can enter the Code Lock/Key Lock. When you enter a role, a server-side role will be created which must then be assigned to the player, here are some examples. "RequiredPermission”: [ "vip_1”]: In this case the ultimatelocker.vip_1 role will be created, it will be necessary to assign this role to the player to enable the insertion of the Code Lock/Key Lock in the configured entity. "RequiredPermission”: [ "user_1”, "vip_2” ]: In this case the ultimatelocker.user_1 and ultimatelocker.vip_2 roles will be created and it will be necessary to assign one of these roles to the player (or even both) to enable the insertion of the Code Lock/Key Lock in the configured entity. The role name must respect certain parameters and can only contain these alphanumeric characters: a-z A-Z 0-9 . _ – Any unsupported characters will be removed, the space character will be replaced by the _ character. AUTO LOCK - CONFIGURATION Chat Command: Here you can specify 1 or more commands to open the UI for Auto Lock settings Add Lock manually -- Chat Command: Command to add lock manually. Default /locker Use only Key Lock. [true] to allow only Key Lock. [false] to allow both Key Lock and Code Lock-- If [true] allow only Key Lock. [false] to allow both Key Lock and Code Lock. Default FALSE If set to true, only new codelocks placed will not be shared, old codelocks will remain shared (if they were shared) RESYNC DEFAULT SETTINGS for all players. If set to [true], resets all player settings to the default settings configured. Once the settings are reset, the parameter will automatically be reset to false: Default settings are applied only 1 time, when the player runs the plugin for the first time. With this option you can reset all default settings for all players, useful when you change a default setting and want it to be applied to all players. The field must be set to true and the plugin restarted, at the end of the restart all players will have the new default settings that have been configured and the parameter is reset to false, for successful reuses. Default false FORCE SHARE LOCKS WITH CLAN/TEAM MEMBERS. [true] to force all players to share locks with clan/team members. [false] to force all players to NOT share locks with clan/team members. [null] to use the player's default settings by UI: This setting allows you to choose how to handle automatic sharing of locks with clan/team members. Default null true: If set to true, locks will be automatically shared with all clan/team members. The player will not be able to change this setting from the plugin UI. false: If set to false, locks will NOT be automatically shared with all clan/team members. The player will not be able to change this setting from the plugin UI. null: If set to null, the player will be able to enable or disable automatic lock sharing with clan/team members, via the plugin UI. -------------------- Auto Lock Category Configuration: This configuration allows you to enable or disable auto-lock regardless of the enabled entities. You can enable/disable auto-lock for each category: Is automatic lock enabled on Doors enabled: Default true Is automatic lock enabled on Windows enabled: Default true Is automatic lock enabled on Boxes enabled: Default true Is automatic lock enabled on Storage Container enabled: Default true Is automatic lock enabled on Lockers enabled: Default true Is automatic lock enabled on TC (Cupboards) enabled: Default true Is automatic lock enabled on Vehicles enabled: Default true Is automatic lock enabled on Naval Deep Sea: Default true Is automatic lock enabled on Medieval entity enabled: Default true Is automatic lock enabled on Furnace enabled: Default true Is automatic lock enabled on Vending Machine enabled: Default true Is automatic lock enabled on Composter enabled: Default true Is automatic lock enabled on Mixing Table enabled: Default true Is automatic lock enabled on Planter enabled: Default true Is automatic lock enabled on Auto Turret enabled: Default true Is automatic lock enabled on SAM Site enabled: Default true Is automatic lock enabled on Traps enabled: Default true Is automatic lock enabled on Weapon Rack enabled: Default true Is automatic lock enabled on Stash enabled: Default true Is automatic lock enabled on Neon Sign enabled: Default true Is automatic lock enabled on Sign / Drawing: Default true Is automatic lock enabled on Other Custom Entities enabled: Default true Is automatic lock enabled on Other Lockable Entities enabled: Default true -------------------- Player default settings: Allow automatic …. …. by default: The settings that start with "Allow automatic …. …. by default", are the basic settings once the Auto Lock system is enabled. EXAMPLE: If you have Auto Lock enabled and have the setting "Allow automatic lock on Doors by default = true", then it will be set to automatically place the code lock /key lock on doors by default. After that the player can change this setting via the UI. This applies to all basic "allow configuration properties”. -------------------- Allow automatic lock closing when dismount of the vehicle by default.: If the vehicle has a lock, the lock will be automatically closed when you dismount the vehicle, so as to avoid leaving vehicles open and potentially stolen. Default TRUE AUTO CLOSING (DOOR CLOSER) - CONFIGURATION Add Door Closer manually -- Chat Command: Command to add door closer manually. Default /closer Remove Door Closer manually – Chat Command: Command to remove door closer manually. Default /uncloser Enable automatic closing of Door. (Default: FALSE): Enable automatic closing for Single Doors. Permission is still required: ultimatelocker.autoclosing.enabled Enable automatic closing of Double Door. (Default: FALSE): Enable automatic closing for Double Doors. Permission is still required: ultimatelocker.autoclosing.enabled Enable automatic closing of Window. (Default: FALSE): Enable automatic closing for Windows. Permission is still required: ultimatelocker.autoclosing.enabled Enable automatic closing of Garage. (Default: FALSE): Enable automatic closing for Garage. Permission is still required: ultimatelocker.autoclosing.enabled Enable automatic closing of Ladder Hatch. (Default: FALSE): Enable automatic closing for Ladder Hatch. Permission is still required: ultimatelocker.autoclosing.enabled Enable automatic closing of External Gate. (Default: FALSE): Enable automatic closing for External Gate. Permission is still required: ultimatelocker.autoclosing.enabled Enable automatic closing of Fence Gate. (Default: FALSE): Enable automatic closing for Fence Gate. Permission is still required: ultimatelocker.autoclosing.enabled Enable automatic closing of Legacy Wood Shelter Door. (Default: FALSE): Enable automatic closing for Legacy Wood Shelter Door. Permission is still required: ultimatelocker.autoclosing.enabled Minimum Closing Delay Time. (Default: 10 seconds): Minimum delay time usable for automatic closing, Door Closer. Maximum Closing Delay Time. (Default: 60 seconds): Maximum delay time that can be used for automatic closing, Door Closer. Default Closing Delay Time. (Default: 30 seconds): Default delay time for automatic closing, Door Closer. -------------------- Player Auto Closing default settings: Allow automatic closing .... .... by default: The settings that start with "Allow automatic closing .... .... by default", are the basic settings once the Auto Closing system is enabled. EXAMPLE: If you have set "Allow automatic closing of Door by default. (Default: FALSE)": true", automatic closing for doors will be applied automatically. PROXIMITY SYSTEM - CONFIGURATION Show UI when player is near a door with Door Closer: If set to true, an icon appears in the top right corner when you approach a door with auto-closing enabled. This opens a menu to change the door's auto-closing behavior via the UI. Default false Show UI when pressing key: If set to true, allows to open the UI for modifying the automatic door closing via a key combination. Default true Button to show UI: 1 (MMB - middle mouse button) - 2 (SHIFT + MMB) - 3 (CTRL + MMB): Key combinations to use to open the UI for modifying the automatic door closing. Default 2 LOCALIZATION The plugin, therefore the automatic messages and statistics, are translated into the following languages: English Italian Spanish French German Dutch Turkish Russian Ukrainian Chinese (Simplified -- zh-CN) Chinese (Traditional -- zh-TW) Translation files are located in the /oxide/lang folder, here is an example of a /oxide/lang/en/UltimateLocker.json translation file. You can add translations for other languages by adding them to the folder: /oxide/lang AVAILABLE ENTITIES VEHICLES: Minicopter, Scrap Transport Helicopter, Attack Helicopter, Armored / Hot Air Balloon, Kayak, Row Boat, RHIB, Tugboat, Submarine Solo, Submarine Duo, Horse, Tomaha Snowmobile, Snowmobile, Sedan, 2 Module Car, 3 Module Car, 4 Module Car, Motorbike, Motorbike With Sidecar, Pedal Bike, Pedal Trike, Mounted Ballista, Battering Ram, Catapult, Siege Tower, Ballista DEPLOYABLES: Wood Storage Box, Large Wood Box, Ammo Storage Box, Armor Storage Box, Charcoal Storage Box, Clothing Storage Box, Comps Storage Box, Explosives Storage Box, Food Storage Box, Guns Storage Box, Meds Storage Box, Metal Storage Box, Ore Storage Box, Scrap Storage Box, Stone Storage Box, Sulfur Storage Box, Tools Storage Box, Wood Storage Box, Large Furnace, Furnace, Legacy Furnace, Refinery, Electric Furnace, Stone Fireplace, BBQ, Hobo Barrel, Medieval Large Wood Box, Storage Barrel B, Storage Barrel C, Black Box, Abyss Horizontal Storage Tank, Abyss Vertical Storage Tank, Bamboo Barrel, Wicker Barrel, Krieg Storage Crates, Krieg Storage Barrel, Large Industrial Furnace, Industrial Electric Furnace, Industrial Auto Turret, Industrial Storage Horizontal Barrel, Industrial Storage Vertical Barrel, Industrial Garage Door, RHIB Storage, Boat Building Station, Steering Wheel, Sail, Small Boat Engine, Anchor, Cannon, Small Ramp, Wall Cabinet, Clothing Mannequin, Metal Shop Front, Dropbox, Mail Box, Vending Machine, Computer Station, Twitch Rivals Desk, Mixing Table, Composter, Small Planter Box, Large Planter Box, Minecart Planter, Bath Tub Planter, Rail Road Planter, Hitch & Trough, Small Water Catcher, Large Water Catcher, Water Barrel, Powered Water Purifier, Fluid Switch & Pump, Repair Bench, Research Table, Workbench Level 1, Workbench Level 2, Workbench Level 3, Button, Switch, Smart Switch, Timer, Small Generator, SAM Site, Auto Turret, Flame Turret, Shotgun Trap, Modular Car Lift, Snow Machine, Fogger-3000, Elevator, Mining Quarry, Pump Jack, Tall Weapon Rack, Horizontal Weapon Rack, Wide Weapon Rack, Weapon Rack Stand, Frontier Bolts Single Item Rack, Frontier Horseshoe Single Item Rack, Frontier Horns Single Item Rack, Small Stash, Chippy Arcade Game, Strobe Light, Laser Light, Sound Light, Small Neon Sign, Medium Neon Sign, Large Neon Sign, Medium Animated Neon Sign, Large Animated Neon Sign, Artist Canvas Small, Artist Canvas Large, Artist Canvas Standing, Artist Canvas XL, Artist Canvas XXL, Light-Up Frame Large, Light-Up Frame XL, Light-Up Frame XXL, Light-Up Frame Small, Light-Up Frame Standing, Ornate Frame Small, Ornate Frame Standing, Ornate Frame large, Ornate Frame XL, Ornate Frame XXL, Shutter Frame Small, Shutter Frame large, Shutter Frame XL, Shutter Frame XXL, Paintable Window, Portable Easel, Search Light, CCTV Camera, PTZ CCTV Camera, RF Broadcaster, RF Receiver, Industrial Conveyor, Industrial Crafter, Wheelbarrow Piano, Junkyard Drum Kit, Boom Box, Chinese Lantern, Chinese Lantern White, Tuna Can Lamp, Lantern, Camp Fire, Cursed Cauldron, Skull Fire Pit, Jack O Lantern Angry, Jack O Lantern Happy, Wood Shutters, Triangle Planter Box, Triangle Rail Road Planter, Single Plant Pot, Beehive, Chicken Coop, Cooking Workbench, Engineering Workbench, Hopper. NEW ENTITIES New entities will be added with future releases. If you want to request the addition of a specific entity, feel free to open a support request and it will be added to the plugin. ENTITY IMAGE PREVIEW VEHICLES: Minicopter Scrap Transport Helicopter Attack Helicopter Hot Air Balloon Armored Hot Air Balloon Kayak Row Boat RHIB Tugboat Submarine Solo Submarine Duo Horse Snowmobile Tomaha Snowmobile Sedan 2 Module Car 3 Module Car 4 Module Car Motorbike Motorbike With Sidecar Pedal Bike Pedal Trike Mounted Ballista Battering Ram Catapult Siege Tower Ballista DEPLOYABLES: Wood Storage Box Large Wood Box Ammo Storage Box Armor Storage Box Charcoal Storage Box Clothing Storage Box Comps Storage Box Explosives Storage Box Food Storage Box Guns Storage Box Meds Storage Box Metal Storage Box Ore Storage Box Scrap Storage Box Stone Storage Box Sulfur Storage Box Tools Storage Box Wood Storage Box Large Furnace Furnace Legacy Furnace Small Oil Refinery Electric Furnace Stone Fireplace Barbeque (BBQ) Hobo Barrel Storage Barrel Vertical Storage Barrel Horizontal Metal Shop Front Drop Box Abyss Horizontal Storage Tank Abyss Vertical Storage Tank Bamboo Barrel Wicker Barrel Black Box Wall Cabinet Clothing Mannequin Krieg Storage Crates Krieg Storage Barrel Large Industrial Furnace Industrial Electric Furnace Industrial Auto Turret Industrial Storage Horizontal Barrel Industrial Storage Vertical Barrel Industrial Garage Door Boat Building Station Steering Wheel Sail Small Boat Engine Anchor Cannon Small Ramp Mail Box Vending Machine Computer Station Twitch Rivals Desk Mixing Table Composter Small Planter Box Large Planter Box Minecart Planter Bath Tub Planter Rail Road Planter Hitch & Trough Triangle Planter Box Triangle Rail Road Planter Single Plant Pot Beehive Chicken Coop Cooking Workbench Engineering Workbench Hopper Small Water Catcher Large Water Catcher Water Barrel Powered Water Purifier Fluid Switch & Pump Repair Bench Research Table Workbench Level 1 Workbench Level 2 Workbench Level 3 Button Switch Smart Switch Timer Small Generator SAM Site Auto Turret Flame Turret Shotgun Trap Modular Car Lift Snow Machine Fogger-3000 Elevator Mining Quarry Pump Jack RHIB Storage Wood Shutters Medieval Large Wood Box Tall Weapon Rack Horizontal Weapon Rack Wide Weapon Rack Weapon Rack Stand Frontier Bolts Single Item Rack Frontier Horseshoe Single Item Rack Frontier Horns Single Item Rack Small Stash Chippy Arcade Game Strobe Light Laser Light Sound Light Small Neon Sign Medium Neon Sign Large Neon Sign Medium Animated Neon Sign Large Animated Neon Sign Search Light CCTV Camera PTZ CCTV Camera RF Broadcaster RF Receiver Industrial Conveyor Industrial Crafter Wheelbarrow Piano Junkyard Drum Kit Boom Box Chinese Lantern Chinese Lantern White Tuna Can Lamp Lantern Camp Fire Cursed Cauldron Skull Fire Pit Jack O Lantern Angry Jack O Lantern Happy Artist Canvas Small Artist Canvas Large Artist Canvas Standing Artist Canvas XL Artist Canvas XXL Light-Up Frame Large Light-Up Frame XL Light-Up Frame XXL Light-Up Frame Small Light-Up Frame Standing Ornate Frame Small Ornate Frame Standing Ornate Frame large Ornate Frame XL Ornate Frame XXL Shutter Frame Small Shutter Frame large Shutter Frame XL Shutter Frame XXL Paintable Window Portable Easel$10.99 -
Version 1.1.0
29 downloads
Yorixx Hub is a free admin panel for Rust: manage your players, moderate in a few clicks with a full sanction history, handle player reports, control the permissions of every plugin, and get update notices for your Yorixx plugins. FREE ADMIN PANEL Your server, one panel Open it with /yox and everything an admin needs is there: players, sanctions with a full history, player reports, permissions for every plugin, and update notices for your Yorixx plugins. Works on its own, and gets even better with the other Yorixx plugins. 100% free. Players Search: every online player, by name or Steam ID, offline players too Quick stats: players online, muted players, open reports and admin notes at a glance Group teleport: select several players, or everyone, and bring them to you in one click, perfect for events Player sheet: Steam ID, grid, connection time and every action in one place Moderation Go to and Bring: teleport to a player, or bring them to you Warn: a big warning shows up in the middle of the player's screen Mute: blocks chat and voice chat, the player sees how long is left Kick and Ban: temporary bans (10 min, 1 h, 1 day, 7 days) or permanent Sanction window: pick a ready-made reason or type your own, pick a duration, confirm History and admin notes Sanction history: every sanction saved on the player's sheet, with a colored tag, the admin and the date Reliable: sanctions can't be deleted from the panel Admin notes: write notes on any player, shared with the whole staff Player reports /report: players report someone in one command, online admins are told right away Full context: who reported who, why, when and where Handled, not deleted: handled reports stay in the history with the admin's name Per player: open the full report history of any player from their sheet Permissions for every plugin Every plugin: not only Yorixx, with a search bar Groups or players: grant or revoke for any group or a single player, Grant all and Revoke all in one click Clear: see when a player has a permission through a group For your Yorixx plugins Plugins: every Yorixx plugin installed, opened in one click Update alerts: automatic checks, a chat message for admins, changelog and download link Shared settings: one accent color and one Discord webhook for every Yorixx plugin And also Journal: admin actions and Yorixx plugin events, to see what happened while you were away Test mode: a fake player to try every action safely before going live In game: every setting editable in game, nothing to edit by hand Commands /yox: Open the hub (the command can be renamed) /yox players and /yox reports: Open these tabs directly /report <player> <reason>: For players, to report someone (can be renamed or turned off) Permissions yorixxhub.admin: Open the hub, see players, notes and reports yorixxhub.moderate: Teleport, warn, mute, kick and ban Rust admins have every permission by default. Network use To show update notices and the Discover tab, the hub reads a public catalog file (a plain JSON list of Yorixx plugins, versions and changelogs) from pastebin.com, at startup and every 6 hours by default. It only downloads that file: no server, player or usage data is ever sent. You can turn it off in the settings (Updates tab), or point it to your own URL. Plugin logos and cards are images hosted on imgur.com, loaded by the players' game client like any Rust UI image. Configuration Everything below can also be edited in game. { "General: Chat command": "yox", "General: Chat prefix": "<color=#A45BC7>[Yorixx]</color>", "Shared: Use one accent color for every Yorixx plugin": false, "Shared: Accent color (hex)": "#A45BC7", "Shared: Discord webhook used by plugins that have none": "", "Updates: Check for updates": true, "Updates: Check every X hours": 6, "Updates: Tell admins when they connect": true, "Updates: Show plugins you don't have yet": true, "Updates: Catalog URL": "https://pastebin.com/raw/rdNwxCzn", "Journal: Entries kept": 200, "UI: Show credit": true, "General: Debug logs": false } Support English and French included. Questions or ideas: join our Discord.Free-
- 1
-

-
- #hub permissions
- #manager
- (and 4 more)
-

Version 1.0.1
7 downloads
Death Recap shows players a clean panel when they die: killer, weapon, distance, health left, gear, body hit map, damage timeline and rivalry score, plus admin tools to review kills. DEATH RECAP · FIGHT REVIEW · ADMIN TOOL Know exactly how you died A clean recap opens the moment you die: who killed you, with what, from how far, where you got hit and how much health they had left. No more how did I lose that fight? And for admins, a powerful tool to review fights and spot suspicious kills. 12 things shown on death 5 deaths kept in history 1 click to review a kill 0 dependencies Killer, weapon, distance: with attachments, health left and the killer's gear Body hit map: head, torso, arms and legs light up with the hits taken Damage timeline: every hit in order, headshots in red Rivalry score: you 2 · them 5, this wipe Admin kill review: check any player's victims in one click, plus Discord logs Every detail of the fight The killer Name, weapon with its attachments, distance, health left (or also dead if you traded), and their gear: helmet, chest plate, kilt. You finally understand why your bullets did so little. Body hit map Each body part gets brighter the more bullets it took, with the number of hits. The fight in numbers Hits taken, headshots, damage dealt back to the killer, fight duration and damage per attacker when several enemies shot you. Damage timeline and hit list Every hit in order with its timing (+0.4s, +1.2s...) and body part. Bleeding is credited to the player who caused it, so you never see unknown damage. Rivalry score If the same player keeps killing you, the recap shows the score between you this wipe. Not only PvP Optional recap for scientists, helicopter, Bradley, turrets, traps, animals, fall, radiation, cold, drowning... (off by default). Comfortable, never in the way Death history: the last 5 deaths by default, with arrows to browse them Your choice: turn off the automatic recap and open it with /recap instead (optional) Your last kill: /recap kill: You killed X, 4 hits, 2 headshots, or automatic if you enable it Settle the cheating reports /recap view <player> See the last recap of any player. /recap kills <player> See a player's last victims (10 by default) with weapon, distance, hits, headshots and time. Click a victim to open the full recap of that kill. Discord log Optional post for every PvP death, with weapon, distance, hits, headshots, damage and the killer's gear. Fully configurable Show or hide each element if you want to keep some mystery, panel position (right, left, center), display duration, accent color. Every setting in game, English and French included, and it plugs into the free Yorixx Hub. /recap: Open your last death recaps /recap auto: Turn the automatic recap on or off /recap kill: Short summary of your last kill /recap admin: Open the settings panel /recap view <player>: See a player's last recap /recap kills <player>: See a player's last victims /recap test [pvp|npc|fall|kills]: Preview the panels with test data deathrecap.info: Plugin status (console) Player commands accept a name or a SteamID. The chat command can be renamed in the settings. Permissions deathrecap.admin: Settings panel, /recap view and /recap kills deathrecap.use: See the recap (only if Require permission to see the recap is on) 1. Create the webhook In your Discord channel settings: Integrations, Webhooks, New Webhook, then Copy Webhook URL. 2. Paste it in the plugin In game: /recap admin, Discord tab, click Webhook URL, paste with Ctrl + V, press Enter, turn Post PvP deaths ON and Save. Keep your webhook URL private, and use a staff-only channel: busy servers post a lot. Network use Death Recap only contacts Discord, and only if you paste a webhook URL and turn PvP death posts on. No analytics, no tracking, no license check. Configuration Everything below can also be edited in game. { "General: Enabled": true, "General: Chat command": "recap", "General: Require permission to see the recap": false, "General: Show automatically on death": true, "General: Hide after X seconds (0 = until respawn)": 0, "General: Fight memory (seconds)": 30, "General: Send a short recap to the killer automatically": false, "General: Recap for deaths not caused by players (traps, animals, fall, suicide...)": false, "General: Deaths kept in history per player": 5, "General: Players can turn off the automatic recap": true, "General: Debug logs": false, "Display: Show killer health": true, "Display: Show distance": true, "Display: Show weapon": true, "Display: Show weapon attachments": true, "Display: Show damage dealt to the killer": true, "Display: Show hit list": true, "Display: Max rows in hit list": 5, "Display: Show killer gear": true, "Display: Show rivalry score (kills between you and the killer this wipe)": true, "Display: Show body hit map": true, "Display: Show damage per attacker": true, "Display: Show damage timeline": true, "Admin: Victims kept per player for /recap kills": 10, "Discord: Post PvP deaths": false, "Discord: Webhook URL": "https://discord.com/api/webhooks/...", "UI: Accent color (hex)": "#A45BC7", "UI: Position (right, left, center)": "right", "UI: Show credit": true, "Config version": { "Major": 1, "Minor": 0, "Patch": 0 } } Support Questions, bugs or ideas: join our Discord.$12.99 -

Version 1.0.0
10 downloads
Spectate is an advanced administration tool that makes player monitoring fast and convenient. Start spectating any active player by name or Steam ID, switch between valid targets with the arrow keys, and view the current player's name and Steam ID in a clean on-screen panel. Features - Spectate players by partial name, Steam ID - Switch targets using the **Left** and **Right** keys - Displays the target's name and Steam ID - Automatically skips dead, sleeping, disconnected, and vanished players - Stops safely when the target disconnects - English and Russian localization included - Optional **Vanish** integration for status checks and direct spectate voice relay - When an administrator speaks in voice chat while spectating, the player being watched can hear them directly - Optional player notifications when an administrator starts or stops spectating them. This feature is disabled by default and can be enabled in `oxide/config/Spectate.json` Installation 1. Upload `Spectate.cs` to `oxide/plugins`. 2. Grant the required permission to your admin group. oxide.grant group admin spectate.use Permission `spectate.use` - Allows an administrator to use all spectate commands. Commands - `/spec <Part of name or Steam ID>` - Start spectating a player - `/stop` - Stop spectating and respawn While spectating, use the **A/D** keys to change targets. The **Vanish** plugin is optional and is only required for its related integration features.$10.00 -
Version 1.1.2
183 downloads
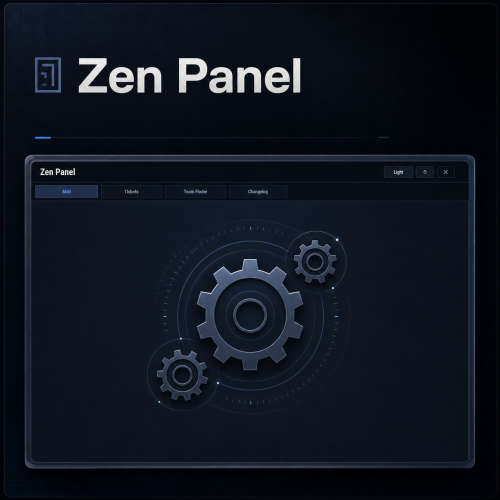
Zen Panel is my modular UI framework/API, designed to power an ecosystem of UI plugins through one shared panel and common functions. It provides the main interface, centralized theme and layout handling, notification support, image utilities, and a clean integration surface for my utility plugins like Zen Mail, Zen Tickets, Zen Team Finder, and more. This plugin servers as a dependency and has no real function on it's own. Carbon Aliases by thepitereq is required only if your server uses the Oxide modding framework (Carbon users do not need to install Carbon Aliases) Zen Panel comes with it's own configuration where you can specify which Zen plugin tabs to display and their order. You can also modify the themes to your liking and configure the timestamp if you wish to offset it (in minutes) from your server time. You can configure the position and size of the HUD notification bell using a chat command (opens a basic repositioning tool) Permissions: zenpanel.admin - Lets you use the /notif_iconpos command to resize/reposition the HUD notification bell Chat commands: /notif_iconpos - Opens and uses the HUD bell position/size editor Default Config: { "UI - Tabs In Order (omit to hide)": [ "mail", "tickets", "teamfinder", "changelog" ], "Notification Icon Image URL (HUD bell)": "https://i.ibb.co/FkBKbkVc/bell.png", "UI - Default Theme (Dark/Light)": "Dark", "UI - Dark Theme": { "Overlay": "0.03 0.04 0.06 0.78", "Window": "0.05 0.08 0.12 0.985", "Header": "0.06 0.09 0.14 1.00", "Panel": "0.07 0.10 0.16 1.00", "PanelAlt": "0.08 0.11 0.17 1.00", "Card": "0.11 0.15 0.22 1.00", "CardAlt": "0.09 0.13 0.20 1.00", "Border": "0.16 0.21 0.31 1.00", "BorderStrong": "0.26 0.34 0.48 1.00", "Text": "0.92 0.95 0.98 1.00", "TextMuted": "0.60 0.67 0.76 1.00", "Accent": "0.45 0.66 1.00 1.00", "AccentSoft": "0.18 0.25 0.39 1.00", "AccentText": "1.00 1.00 1.00 1.00", "Success": "0.29 0.77 0.48 1.00", "SuccessSoft": "0.12 0.24 0.17 1.00", "Warning": "0.92 0.72 0.33 1.00", "WarningSoft": "0.28 0.19 0.06 1.00", "Danger": "0.92 0.42 0.42 1.00", "DangerSoft": "0.28 0.11 0.11 1.00", "Offline": "0.54 0.61 0.70 1.00", "OfflineSoft": "0.16 0.19 0.25 1.00", "Input": "0.09 0.13 0.20 1.00", "AvatarFill": "0.08 0.11 0.18 1.00" }, "UI - Light Theme": { "Overlay": "0.10 0.14 0.20 0.12", "Window": "0.87 0.90 0.94 0.985", "Header": "0.84 0.88 0.93 1.00", "Panel": "0.86 0.89 0.93 1.00", "PanelAlt": "0.83 0.87 0.92 1.00", "Card": "0.92 0.94 0.97 1.00", "CardAlt": "0.89 0.92 0.96 1.00", "Border": "0.69 0.76 0.85 1.00", "BorderStrong": "0.56 0.66 0.82 1.00", "Text": "0.16 0.20 0.25 1.00", "TextMuted": "0.41 0.48 0.58 1.00", "Accent": "0.30 0.51 0.92 1.00", "AccentSoft": "0.80 0.87 0.98 1.00", "AccentText": "1.00 1.00 1.00 1.00", "Success": "0.24 0.62 0.36 1.00", "SuccessSoft": "0.83 0.93 0.86 1.00", "Warning": "0.79 0.58 0.18 1.00", "WarningSoft": "0.94 0.90 0.80 1.00", "Danger": "0.79 0.34 0.34 1.00", "DangerSoft": "0.95 0.86 0.86 1.00", "Offline": "0.55 0.62 0.70 1.00", "OfflineSoft": "0.86 0.90 0.95 1.00", "Input": "0.96 0.97 0.99 1.00", "AvatarFill": "0.86 0.90 0.96 1.00" }, "UI - HUD Anchor Min": "0.5 0.00", "UI - HUD Anchor Max": "0.5 0.00", "UI - HUD Offset Min (px)": "-326 4", "UI - HUD Offset Max (px)": "-294 36", "UI - HUD Unread Counter Font Size": 15, "UI - HUD Unread Counter Text Color": "0.98 0.99 1.00 1.00", "UI - HUD Unread Counter Shadow Color": "0.04 0.05 0.07 0.98", "Timestamp Offset (minutes)": 0, "Notification Icon UI Layer (Overlay/Hud/Hud.Menu)": "Overlay" } Sample image from plugins using Zen Panel: Notification bell layer (v1.1.0): Overlay keeps the previous behavior. Set "Notification Icon UI Layer (Overlay/Hud/Hud.Menu)" to "Hud" to show the bell below overlay menus, or "Hud.Menu" if preferred. Oxide users should also update Carbon Aliases to the latest version.Free -

Version 1.0.0
9 downloads
[ ✓ ] Works on any host. The zip includes a small installer plugin: run crashext.install once and restart. [ ✓ ] Plant Spawn Controller lets you decide how much grows on your map. Hemp, corn, pumpkins, potatoes, wheat, every berry colour, mushrooms, flowers, the stone, metal, sulfur, wood and HQM pickups, and the wood piles, dead logs and driftwood: each group gets its own density and its own respawn speed, so you can have twice the berries and half the logs with two drags. It doesn't replace Rust's spawning. It tunes the vanilla populations and lets vanilla do the spawning, so plants keep appearing where they always do, and unloading the plugin puts every vanilla value back. Nothing is written to your server.cfg. Everything happens in one admin window: pick a preset, drag a slider, weight hemp against corn, scale it all with your player count, give wipe day a boost, refill a group right now or trim the extras, and ping the nearest plants on your map. Works on Oxide and Carbon Needs CrashExtensions (included) 6 groups, 28 vanilla populations Presets, player curve, wipe boost Jump to: Features · Screenshots · Trailer · Commands · Permissions · Install · Configuration · Test server · FAQ Features Six groups. Crops (hemp, corn, pumpkin, potato, wheat), Berries (five colours, normal and jungle), Mushrooms, Flowers (sunflower, rose, orchid), Pickups (stone, metal, sulfur, wood, HQM) and Stumps & logs (wood piles, dead logs, driftwood). Density per group. From 0x to 5x of vanilla. 0 empties a group, 3x triples it. Respawn speed per group. From 0.25x to 10x, so picked plants come back slower or faster. Weights inside a group. Give hemp more of the Crops share, or make yellow berries rare. The group total stays where the density puts it. Hard cap. A max alive per group, so a high density never runs away on a big map. Player curve. 2 to 5 points on players online: more plants when the server is empty, fewer when it's full, or the other way round. Each group opts in. Wipe boost. An extra multiplier for the first hours after a wipe, on the groups you pick. Presets. Vanilla, Farming, Survival, Cooking, Barren, 2X and Low pop, one click each. Great with cooking plugins that need lots of berries and mushrooms. Refill now. Fills a group up to its new target in small steps, and pauses when the server FPS drops. Trim. Removes the extras over the target, never within 60 m of a player and never inside building privilege. It asks for a second click before it runs. Live counts. Alive and target per group and per population, the mix of each kind, and how many entities you are adding over vanilla. Map markers. /plants show crops pings the nearest plants of a group on your map for 30 seconds. Clean restore. Unload or reload and every vanilla value is back. A group you switch off goes back to vanilla too. Plays nice. Built to run next to Ore Spawn Controller and the other Spawn Controllers, and it warns you if another spawn plugin is loaded. Light on the server. One small update every 30 seconds, refill and trim spread over frames, and the admin pictures only go to admins. Screenshots Every screen below is Plant Spawn Controller running in Rust. OVERVIEW: every group, the entity budget and the presets GROUPS: density, respawn and a weight per crop Berries at x2 with the live mix of every colour CURVE: drag the points, pick the groups, set the wipe boost SETTINGS: updates, markers, refill and trim, safety Type an exact value Trim asks for a second click /plants show crops: the nearest crops on your map Trailer The Plant Spawn Controller trailer (click to play, 55 seconds) Commands Chat: /plants - open the admin window. /plants show <group> - ping the nearest plants of a group on your map (groups: crops, berries, mushrooms, flowers, pickups, logs). /plants hide - clear the markers. /plants help - list the commands. Console (server console, RCON or an admin in F1): psc.preset <id> - apply a preset: vanilla, farming, survival, cooking, barren, 2x, lowpop. psc.set <group> <density|respawn|cap|curve|enabled|boost> <value> - change one value of a group, like psc.set berries density 2. psc.set <group> weight <kind> <value> - change one weight, like psc.set crops weight hemp 1.5. psc.refill [group|all] - fill toward the target now. psc.trim [group|all] - remove the extras over the target. psc.report - alive, target and vanilla numbers for every group and population. Permissions plantspawncontroller.admin - the window, every button in it and the console commands. plantspawncontroller.show - /plants show and /plants hide without the rest (admins have them already). oxide.grant user YOUR_STEAM_ID plantspawncontroller.admin oxide.grant user YOUR_STEAM_ID plantspawncontroller.show Install Install the extension, once per server. Stop the server, copy Oxide.Ext.CrashExtensions.dll into RustDedicated_Data/Managed (Carbon: carbon/extensions) and start it again. The console prints Loaded extension CrashExtensions with its version. An older copy of the DLL is simply overwritten: it's one shared file for all our plugins. Install the plugin. Copy PlantSpawnController.cs into oxide/plugins (Carbon: carbon/plugins). It compiles on its own and creates its config. Grant the permission above and type /plants. Host doesn't allow DLL uploads? Put CrashExtInstaller.cs from the zip in your plugins folder and run crashext.install once in the server console: it downloads the extension from GitHub, checks it and puts it in place. Restart once and you're done. Configuration Everything lives in oxide/config/PlantSpawnController.json, and the window sets all of it in game. Changes apply and save the moment you make them. Config sections (click to expand) Test server Available on our test server. Type /plants in chat to open the window and play with the sliders, presets and map markers. The test server puts its settings back on its own from time to time. client.connect 91.229.114.54:28015 FAQ Q: Does it replace Rust's plant spawning? A: No. Vanilla still does all the spawning, in the same places. The plugin only changes how many of each population vanilla aims for and how fast it brings them back. Q: What happens when I unload it? A: Every vanilla value goes back the moment it unloads. Plants that already exist stay until they're picked, and vanilla keeps the map at its normal numbers from there. Q: I raised a group. Why isn't the map full yet? A: Vanilla fills toward the new target over time. Press REFILL NOW to get there right away, in small steps that pause when the server FPS drops. Q: I lowered a group. Do the extras disappear? A: Not by themselves. Press TRIM EXTRA twice (the second click confirms) and it removes the extras far from players and outside bases. Q: Does it touch ore nodes? A: No. The Pickups group is the small stone, metal and sulfur pickups on the ground, not ore nodes. Ore nodes belong to Ore Spawn Controller. Q: Why does the stone pickup count read 0 during Halloween? A: That's vanilla: during Halloween the stone pickup population spawns stone, metal, sulfur, wood and bone evenly, so the plain stone row can read low. Your density and weights still apply. Q: Can I run it with other spawn plugins? A: It's made to run next to the other Spawn Controllers. If SpawnControl, ServerPopulation or PopulationControl is loaded it warns you in the console, because two plugins changing the same populations will fight. Q: Does it work on Carbon? A: Yes. The extension goes into carbon/extensions instead of RustDedicated_Data/Managed, and the plugin into carbon/plugins. Q: How do I translate it? A: English is built in. Edit oxide/lang/en/PlantSpawnController.json, or copy it into another language folder and translate its values: each player reads their own game language. Q: My config file broke. Will it get overwritten? A: Never. A config that isn't valid JSON is copied aside, left untouched, and the plugin waits for you to fix it and reload. Q: Does it contact any outside service? A: Only to download its pictures (about 50 small images) once from the Venux CDN, cdn.crashplugins.space, and only admins receive them. Nothing about your server or your players is sent. You don't need ImageLibrary. Q: Can other plugins read it? A: Yes: GetMultiplier(group), GetAlive(group) and the hook OnPlantSpawnControllerApplied(string group, float multiplier). The Spawn Controller family Plant Spawn Controller is the first of a family that tunes Rust's world populations the same way, each with the same window: Ore Spawn Controller - your own ore grid: spacing per ore, odds per biome, population scaling. Out now. Tree Spawn Controller - forests, palms, cactus and bushes per biome. Coming soon. Loot Spawn Controller - roadside barrels, junkpiles, shore crates and dive sites. Coming soon. Animal Spawn Controller - predators, game, livestock and critters, with a safe wipe start. Coming soon. Vehicle Spawn Controller - minicopters, boats, cars, horses and trains, with late air. Coming soon. They share one engine, take turns so they never refill at the same time, and you can run any mix of them. Want all of them? The Spawn Controller Bundle (all five plus Ore Spawn Controller) is on venuxplugins.com. Questions, ideas or bug reports? Use the Support tab of this file or join our Discord.$9.99 -
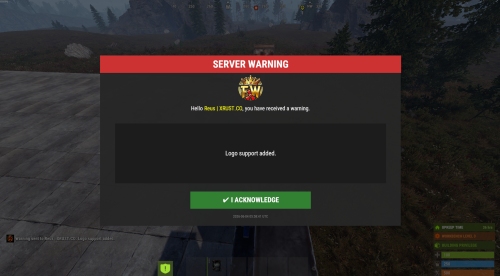
Version 1.0.2
451 downloads
AdminWarn is designed for situations where players clearly violate server rules or require a direct and serious warning. With the latest update, an optional popup warning mode has been added alongside the mandatory acknowledgment GUI. This allows admins to send clean, non-intrusive messages displayed at the top of the screen. News: To avoid disrupting gameplay (such as PvP), you can use: /warnpopup <SteamID> <message> /warnpopupall <message> The core purpose of AdminWarn remains unchanged: forcing players to acknowledge warnings. Each mandatory warning includes a single confirmation button, ensuring the player has read and accepted it. Acknowledgment events are tracked via Discord webhook logs, including whether the warning was confirmed while the player was online or after reconnecting. AdminWarn is built for manual use only. It is not an automated warning system. All warnings are intentionally sent by admins using commands. At the same time, the system works intelligently in the background: - Warnings sent to offline players are stored and automatically shown when they next join, even days later. - For online players, warnings remain active until acknowledged, then are automatically cleared. - All data is fully wipe-aware and automatically cleaned on server wipes. Each warning includes built-in in-game sound effects. No external or custom audio files are used. This is not a chat message. Warnings are delivered as visual UI elements that require acknowledgment or appear as optional popup notifications. Even if a player closes the game, mandatory warnings will reappear on the next login until confirmed. No movement restrictions are applied. Warnings can be sent via: - RCON - Server console - In-game admin console (F1) Performance: AdminWarn is built with an optimized and efficient code structure, making its presence virtually unnoticeable on the server. It runs smoothly during long uptimes and maintains stable hook memory and performance values under normal server conditions. Wipe Behavior: - Restarts: Data preserved (approved warnings are auto-deleted for data optimization) - Server wipe: All warning data automatically cleared - No manual cleanup needed (Most of the time, it is not necessary) Commands Chat & Rcon: Note: Player names are not unique and may include different alphabets or special characters. To avoid ambiguity, using Steam64ID is strongly recommended when sending warnings. warn <SteamID> <message> warn <PlayerName> <message> warn <SteamID1>,<SteamID2>,<SteamID3> <message> warn <Name1>,<Name2>,<Name3> <message> warnall <message> warnpopup <SteamID> <message> warnpopup <PlayerName> <message> warnpopup <SteamID1>,<SteamID2>,<SteamID3> <message> warnpopup <Name1>,<Name2>,<Name3> <message> warnpopupall <message> Permissions Oxide/Carbon oxide.grant group admin adminwarn.admin c.grant group admin adminwarn.admin Discord Webhook Logging - Player name/steamid and SteamURL - Warning message / Timestamp - Read status (online/after reconnect) - Logs warning sending - Logs individual warning acknowledgements Config: { "Warning sound": "assets/prefabs/building/wall.frame.shopfront/effects/metal_transaction_complete.prefab", "Clear data on wipe": true, "Discord Webhook URL": "https://support.discord.com/hc/en-us/articles/228383668-Intro-to-Webhooks", "Discord Log Enabled": true, "Log Global Warnings (warnall)": true, "Log Warning Sent (single + multi)": true, "Show Date in GUI": true, "Show logo in warning GUI": true, "Logo size (px) — local image should be a square PNG, recommended 75-120": 90, "Use local images (false = use Web URL below)": true, "Web image URL for logo (128x128 transparent PNG recommended, used only when Use local images is false)": "", "Popup duration (seconds)": 10 }$13.99- 8 comments
- 1 review
-
- 1
-

-
- #admin
- #admin tools
- (and 47 more)
-
Version 2.2.8
4,608 downloads
Admin Map is an innovative plugin for the game of Rust, designed to make server administration easier and improve the quality of the gaming experience. Focused on optimization and functionality, this plugin provides admins with the tools to effectively control players, minimizing the negative impact on the server and other participants. Main features: Interactive map with players: Admin Map provides server admins with a detailed and user-friendly map showing the positions of all players. This allows admins to easily monitor player activity and movements, and quickly detect suspicious activity. Large variety of different admin map layers: - Marker, - Text , (It's still there, but it no longer looks the same due to the Facepunch update on August 6.) - Sleeper, - TC, - Stash, - Sleeping Bag Quick Commands on Players: The plugin allows admins to perform quick actions on players directly from the map. Send messages, punish or help players in real time, minimizing reaction time and increasing interaction efficiency. Minimal server load: One of the key features of Admin Map is its low server load. All processing takes place solely on the client side, which means that the plugin will not slow down the server or create additional delays for players. This makes it an ideal choice even for servers with high traffic. Ease of use: The plugin's intuitive user interface provides admins with easy access to functionality. Navigating the map, sending commands and monitoring players is done with minimal effort, making server administration easy. Customization: Admin Map provides admins with the option to customize the functionality to suit their needs. Scanning area, available commands, buttons, permissions and other options. Support in RUST+: You will be able to view players online on the map directly in your phone without going to the server! Admin Map is an innovative solution that combines convenience, functionality and optimization. It provides administrators with tools to effectively manage players without negatively impacting gameplay and other server participants. The Admin Map plugin is an essential asset for any Rust server administrator looking to create a comfortable and safe gaming environment. Permissions: adminmap.allow - for use adminmap and hardcore bypass adminmap.<button perm> - any permissions specified in the button settings adminmap.teleport2marker - teleportation by marker via CTRL+RMB adminmap.invis - hide player from the player map adminmap.rust+ - enable rust+ admin map adminmap.rust+.invis - hide from rust+ admin map (recommended in case of giving the map to players) Commands: /amap - show sidebar /amap off - disable everything and hide the sidebar Color designations on the cupboards map: Default Config: { "Auto show sidebar panel": true, "Open the admin menu instead of the action menu": false, "Text Map Settings": { "Font size": 8.0, "Use color generation for teams?": true, "Color for team": "ffaf4d", "Color for solo player": "9bd92f", "Color for sleeper": "404040" }, "Command Buttons": [ { "Permission (adminmap.<perm>)": "", "Label": "TP", "Command": "teleport {steamid}", "Color": "1 1 1 1" }, { "Permission (adminmap.<perm>)": "", "Label": "TP2ME", "Command": "teleport {steamid} {admin.steamid}", "Color": "1 1 1 1" }, { "Permission (adminmap.<perm>)": "", "Label": "INV", "Command": "/viewinv {username}", "Color": "1 1 1 1" }, { "Permission (adminmap.<perm>)": "", "Label": "SPECTATE", "Command": "spectate {steamid}", "Color": "1 1 1 1" }, { "Permission (adminmap.<perm>)": "", "Label": "KILL", "Command": "kill {steamid}", "Color": "0.9 0.1 0.25 1" }, { "Permission (adminmap.<perm>)": "", "Label": "KICK", "Command": "kick {steamid}", "Color": "0.9 0.1 0.25 1" }, { "Permission (adminmap.<perm>)": "", "Label": "SHOW\nTEAMMATES", "Command": "adminmap.cmd show_player_teammates {steamid}", "Color": "1 1 1 1" }, { "Permission (adminmap.<perm>)": "", "Label": "SHOW\nPRIVLIDGES", "Command": "adminmap.cmd show_player_privlidges {steamid}", "Color": "1 1 1 1" }, { "Permission (adminmap.<perm>)": "", "Label": "SHOW\nSLEEPING\nBAGS", "Command": "adminmap.cmd show_player_sleepingbags {steamid}", "Color": "1 1 1 1" }, { "Permission (adminmap.<perm>)": "", "Label": "SHOW\nSTASHES", "Command": "adminmap.cmd show_player_stashes {steamid}", "Color": "1 1 1 1" } ] } Button Library: Give item to player for AdminMenu by k1lly0u | Minimum required version 1.0.1 { "Permission (adminmap.<perm>)": "", "Label": "GIVE", "Command": "adminmenu.callback {steamid}.4;adminmenu.callback {steamid}.4", "Color": "1 1 1 1" } Permanent ban { "Permission (adminmap.<perm>)": "", "Label": "BAN", "Command": "ban {steamid}", "Color": "1 0 0 1" } View backpack (for Backpack Pro) { "Permission (adminmap.<perm>)": "", "Label": "Backpack", "Command": "/b {steamid}", "Color": "1 1 1 1" } View backpack (for Backpacks plugin from uMod) { "Permission (adminmap.<perm>)": "", "Label": "Backpack", "Command": "viewbackpack {steamid}", "Color": "1 1 1 1" } Spectate { "Permission (adminmap.<perm>)": "", "Label": "SPECTATE", "Command": "spectate {steamid}", "Color": "1 1 1 1" } If you want to add buttons here, message me on my discord server$20.00 -
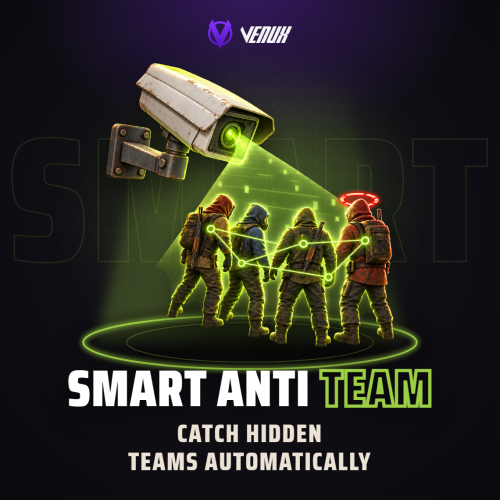
Version 3.0.0
174 downloads
[ ✓ ] Works on any host. [ ✓ ] The plugin needs the free CrashExtensions library. Can't upload DLLs on your host? No problem: the zip includes a small installer plugin. Drop it in your plugins folder, run crashext.install, restart once, and you're done. Smart Anti Team catches players who team past your group limit. Code locks, cupboards, turrets, shared vehicles, revives, team accepts, kills and raids done side by side, time spent together: every one of them adds weight to the pair of players it caught, and the heaviest pairs sit at the top of one admin window. When a pair goes past your ban threshold, Smart Anti Team can ban them for you, or their whole linked team, natively or through BattleMetrics. Out of the box it only watches and alerts: auto-ban stays off until you turn it on, so you can look at the weights first. Version 3.0 brings a new admin window with six tabs, a live alert popup for admins, every setting editable in game, and BattleMetrics intelligence on top of your own evidence: prior bans, co-play hours, new accounts, notes, flags and an evidence note on every ban. Works on Oxide and Carbon Needs CrashExtensions (included) 13 in-game signals, 4 from BattleMetrics Auto-ban off until you turn it on Jump to: Features · Screenshots · Trailer · How the score works · Commands · Permissions · Install · Configuration · External services · Test server · FAQ Features For admins One window, six tabs. OVERVIEW, PAIRS, PLAYERS, ALERTS, REPORTS and SETTINGS, opened with /sat. Overview. The most suspicious pairs by weight, pairs tracked, pairs over the threshold, auto-bans this wipe, the last 24 hours of alerts, live alerts and every detector's switch. Pair detail. Both players with their SteamID and session time, the pair weight against your ban threshold, the linked team and its size, every piece of in-game evidence with its count and weight, and the BattleMetrics intel next to it. Act from the pair. NOTE, FLAG, DEMO, TEMP BAN and BAN PAIR (or BAN TEAM OF N) buttons at the bottom of the pair. A ban you can check first. The ban window lists every linked player with a tick, checks the weight again, and lets you pick 10 minutes, 7 days, 30 days or permanent, a native ban and an evidence note. Player profiles. Search any player by name or SteamID: their pairs, their team, BattleMetrics co-play, ban history, flags and notes, and a box to add a note for your BattleMetrics org. Alert log. Every alert of the wipe with its time, type, pair, map grid, detail and weight, filtered by type or name, with VIEW PAIR on each row. F7 reports. Reported players with their count of distinct reporters, each report with the words that mention teaming highlighted, the alert threshold and your trigger words, editable in place. Live alert popup. When an alert fires, online admins get a small card with the pair and its weight (one every 15 seconds at most). Type /sat within a minute and the window opens on that pair. Steam avatars. Real Steam pictures in the Players tab, off by default (letter circles until you turn it on). For server owners Pair weight scoring. Every detector adds its weight to the pair it caught. You pick each weight, whether it stacks on repeats, whether it posts to Discord and whether it records a demo. Your group limit. Teammates count as friendly only while their team is within your limit (3 by default), so a team over the limit builds evidence like anyone else. Clanmates count as friendly when you run Clans. Auto-ban at your threshold. Off by default. When a pair reaches the threshold (1.0 by default) it bans the pair, or the whole linked team with "Ban the whole linked team" on. Admins are never banned while "Admins are never banned" is on. Temp bans for teams over the limit. Off by default. A team that stays over the limit for a few minutes (3 by default) gets a native timed ban (10 minutes by default) with your kick message. BattleMetrics bans. With your token, bans go on your BattleMetrics ban list, org-wide, with new alts added automatically. Ban Sync (on by default) makes every BattleMetrics ban a game ban too. BattleMetrics intelligence. Prior bans, co-play hours on your org, new accounts and shared identifiers (beta) add their own weight. Evidence notes on every ban, a "Suspected teaming" flag past a weight you pick (no ban), and an UNBAN button for the plugin's own bans (off by default). Discord. Separate webhooks for alerts, pair reports, auto-bans, temp bans and F7 reports, with role pings for each. Empty webhooks send nothing, and webhook URLs are never shown back in the window. Settings in game. Detectors, weights, ban rules, temp bans, BattleMetrics and Discord, all in the SETTINGS tab. Changes are live right away; SAVE CHANGES writes them to the config and DISCARD throws them away. Two permissions. smartantiteam.admin to watch and ban, smartantiteam.settings for the people you trust with the config. Works with Clans and AutoDemoRecord, both optional. For developers OnGroupViolation hook. Called for every player in a violation, with the player's SteamID, the violation type and its weight. See the FAQ. Screenshots Every screen below is Smart Anti Team running in Rust. Overview: the most suspicious pairs, live alerts and every detector A pair: in-game evidence and BattleMetrics intel Ban the linked team: tick who goes, pick the length A player: co-play, ban history, notes and flags The alert log of the wipe, filtered by type F7 reports, trigger words and the alert threshold Settings: every detector, its weight and the ban rules Settings: temp bans and the ban texts Settings: your BattleMetrics token and intelligence Settings: Discord webhooks, role pings and demos The live alert popup admins get in game Trailer The Smart Anti Team trailer (click to play) How the score works Every detector adds weight to a pair. Out of the box: Code Lock 0.5, Team Kill 0.5, Team Raid 0.5, Team Accept 0.4, Shared Vehicle 0.3, Turret 0.3, Relationship Alert 0.2, Cupboard 0.1, Revive 0.1, Steam friends 0.5, proximity time 0.3, proximity kills 0.3, and same IP 0.8 (off by default). What they catch. The same code lock, cupboard or turret shared by more players than your limit, kills made near each other but never on each other, rockets on the same base, a shared vehicle, a revive, a team join, two players marking each other friendly in contacts, and 15 minutes spent within 20 m of each other. Repeats can stack. A detector set to stack adds its weight again on every repeat; otherwise it counts once per pair. BattleMetrics adds its own signals once you add a token: co-play on your org (0.3 from 10 hours in the last 28 days), a prior ban whose reason contains "team" (0.5), a new account on this server (0.1 under 2 hours) and shared identifiers (beta, 0.4). The threshold bans. At 1.0 by default, with auto-ban on, the pair is banned, or every player of their linked team. The ban window shows exactly who that is before you confirm one by hand. F7 reports point, they do not weigh. A report never adds weight on its own; past your threshold of distinct reporters (3 by default) it alerts you and points you at the pairs to check. Team over the limit. With temp bans on, a team that stays over the limit for 3 minutes is kicked with a 10 minute ban. Admin teams are exempt while "Admins are never banned" is on. Commands /sat - open the admin window. /prox <player1> <player2> - how long two players spent near each other, and their kills together. /alerts <player1> <player2> - the alerts stored for a pair. /teamscore <player1> <player2> - the pair's full score, signal by signal. <player> is a name or a SteamID of an online player. All four need smartantiteam.admin (or admin). The window's buttons run a console command called smartantiteam.ui; the server checks your permission on every click, so do not bind or script it. Permissions smartantiteam.admin - open /sat, see pairs, players, alerts and reports, ban from the window and get the live alert popup. Server admins have it anyway. smartantiteam.settings - change settings (the SETTINGS tab and the report trigger words), clear the alert log and use the UNBAN button. Owners (auth level 2) can do this without it. A typical setup: oxide.grant user YOUR_STEAM_ID smartantiteam.admin oxide.grant user YOUR_STEAM_ID smartantiteam.settings oxide.grant group admin smartantiteam.admin Install Install the extension, once per server. Stop the server, copy Oxide.Ext.CrashExtensions.dll into RustDedicated_Data/Managed (Carbon: carbon/extensions) and start it again. The console prints Loaded extension CrashExtensions with its version. An older copy of the DLL is simply overwritten: it is one shared file for all our plugins. Install the plugin. Copy SmartAntiTeam.cs into oxide/plugins (Carbon: carbon/plugins). It compiles on its own and writes its config to oxide/config/SmartAntiTeam.json. Grant the permissions above and type /sat. Look at the weights in SETTINGS, then turn auto-ban on when you are happy with them. Host does not allow DLL uploads? The zip has CrashExtInstaller.cs. Upload it next to the plugin and run crashext.install once in the server console: it downloads the extension from GitHub, checks its exact size and sha256 and puts it in place (on Oxide it loads right away, on Carbon it asks for one restart). It makes no web request until you run that command and never checks for updates. Plugin does not compile? The extension is missing or too old: Smart Anti Team needs CrashExtensions 1.12.12, the copy in the zip. Check the folder and restart again. Updating from 2.x? Your config is upgraded in place and the old file is kept as SmartAntiTeam.json.v2.bak. The new BattleMetrics flags and shared identifiers start off on an upgrade, evidence notes start on. Ban Sync is now on by default. Configuration Everything lives in oxide/config/SmartAntiTeam.json, and the SETTINGS tab edits the main parts in game. Config sections (click to expand) External services Smart Anti Team only talks to a service you set up, plus our CDN for its pictures: cdn.crashplugins.space - the window's pictures (icons, buttons and the like), downloaded once at load and kept by your server. Nothing is sent but the request. api.battlemetrics.com - only with your token. Bans, revokes, evidence notes, flags, player lookups and the token check. It sends your token, the SteamIDs involved, the ban or note text, and your server's address to find it on BattleMetrics. api.steampowered.com - only with your Steam Web API key: the Steam friends check, with a player's SteamID. discord.com - only the webhooks you set: player names, SteamIDs, alert details and profile links. steamcommunity.com - only with "Steam avatars" on (off by default): a shown player's public SteamID, then the picture from Steam's image CDN. CrashExtInstaller (optional, in the zip). Only when you run crashext.install: one download of the extension DLL from GitHub (github.com/crashcs/crashextensions), checked by size and sha256. No update checks, no other request. Test server Available on the new Meowcraft test server. The /sat window is for admins, so ask in our Discord if you want a look at it there. client.connect 91.229.114.54:28015 FAQ Q: Does it ban anyone on its own right after I install it? A: No. Auto-ban is off until you turn it on in SETTINGS > BANS (or EnableAutoBan in the config). Until then you get alerts and scores only. Q: Do I need BattleMetrics? A: No. Without a token the plugin bans natively and never talks to BattleMetrics. With one you get bans on your ban list, Ban Sync, evidence notes, the suspect flag and the extra signals. BattleMetrics needs an RCON subscription for its API. Q: How do I connect BattleMetrics? A: Make a token at battlemetrics.com/developers with access to bans, player notes, player flags, co-play and players, paste it in /sat > SETTINGS > BATTLEMETRICS > API TOKEN and SAVE CHANGES. The panel shows CONNECTED and how many requests you have left. If your organization has no default ban list, the console prints your lists: copy one id into BanlistID and reload. Q: Will my admins get banned? A: Not while "Admins are never banned" is on (the default). Admin teams are also left out of the temp bans. Q: Do F7 reports ban people? A: No. Reports never add weight on their own. Past your threshold of distinct reporters they alert you and point you at that player's pairs. Q: I run 2.x. What changes when I update? A: Your config is upgraded in place and the old file is kept as SmartAntiTeam.json.v2.bak. You get the new window, the popup and in-game settings. Ban Sync is now on by default, so a BattleMetrics ban is also a game ban: turn it off in SETTINGS > BATTLEMETRICS if you only want the ban on BattleMetrics. Q: Does it work on Carbon? A: Yes. The extension goes into carbon/extensions instead of RustDedicated_Data/Managed, and the plugin into carbon/plugins. Q: How do I translate it? A: The texts are in English. Edit oxide/lang/en/SmartAntiTeam.json, or copy it into another language folder (oxide/lang/es, oxide/lang/ru...) and translate the values. Q: Does it contact any outside service? A: Only our CDN for its pictures, plus the services you set up yourself: BattleMetrics with a token, Steam with an API key or the avatar switch, and your Discord webhooks. The full list is in External services. Q: Can other plugins react to a violation? A: Yes. Smart Anti Team calls void OnGroupViolation(ulong steamId, string violationType, float weight) for each player in a violation. Questions, ideas or bug reports? Use the Support tab of this file or join our Discord.$24.99 -
Version 1.2.0
201 downloads
xPermissionManager A modern, intuitive, and powerful permission management tool for Rust servers. xPermissionManager provides a complete visual interface for managing user and group permissions directly ingame. No more console commands, guesswork, or digging through permission lists. Everything is organized, accessible, and easy to control through an straight forward UI. Whether you're adjusting a single permission, overseeing full group structures, or assigning temporary access, xPermissionManager gives server owners a fast and efficient possibility to do so. Plugin Preview (Video) Full Permission Control Grant or revoke any permission from groups or individual players. Timed Permission System Assign temporary permissions that automatically expire (e.g., 30m, 1h, 1d, 1w, custom durations). Timed Group Memberships Add players to groups for a limited time - Perfect for kits, VIP, special events or whatever. Comprehensive UI A clean and intuitive interface for browsing permissions, switching groups, managing users, and applying timed access. User & Group Browsing View all available groups, check individual player permissions, and toggle them instantly. Clear Feedback Every change is acknowledged with clear messages to help admins avoid mistakes. Language File Permission xpermissionmanager.use // Allows a player to open and use the xPermissionManager UI Chat Commands /xpm /xpmuser <name or steamID> /xpmtimed /xpmgroups /xpm [Opens the Permission Manager UI] PERMISSION OR ADMIN REQUIRED /xpmuser <name or steamID> [Opens the UI for managing a specific player’s permissions/groups] PERMISSION OR ADMIN REQUIRED /xpmtimed [Shows all active timed permissions for a player. Includes remaining duration and whether they came from a group] /xpmgroups [Shows all active timed group memberships for a player] Console Commands </> API$11.99- 2 comments
- 2 reviews
-
- 3
-
-
-
- #permission
- #manager
- (and 20 more)
-

Version 2.1.3
92,626 downloads
Convenient GUI manager for player and group permissions. Allows assignment of player permissions. (online or sleeping) Allows assignment of group permissions. Allows one-click removal of all players from a group. (group page - "Remove All") Allows adding/removing a player from groups. Supports unlimited plugins/permissions/groups Up to 60 plugins per-page. Up to 40 permissions per-page. Up to 40 user groups per-page Allows for local and sql backup and recall of all permissions or groups. Permissions. permissionsmanager.allowed - Allows players to use GUI. Plugin can be used with this permission, or by any Admin : Auth Level 2. Chat commands. /perms data - Backup and restore permissions and/or groups - local data file and/or SQL. ** /perms OR /perms player - Opens GUI player list, allowing a player to be chosen. /perms group - Opens GUI group list, allowing a group to be chosen. /perms player <playername> - Opens permissions GUI for the specified player. /perms group <groupname> - Opens permissions GUI for the specified group. Console commands. EmptyGroup <groupname> - Removes all players from the specified group. Configuration. Global. Chat - Title colour Chat - Message colour GUI - Label colour GUI - On colour GUI - Off colour GUI - AllPerPage - Sets All/None option to per-page, or per plugin. Options - GUI Transparency 0-1 Options - Plugin BlockList - ex. "playerranks,botspawn" Block list must be lower case, comma separated, no spaces, and no final comma, as above. Useful tool for picking CUI colours - RGB Decimal - Take the RGB Normalized decimal output, and remove all commas. ** Please note that with data backups : SQL saving is accumulative - Saving adds current permissions/group data to whatever was already saved. Local data file saving is not accumulative. It overwrites any existing backup with the current server permissions/groups. FAQ. Q: I'm trying to revoke permission(Y) for a player, but it says "Inherited". A: The player is in a group(X) which is also granted permission(Y). Solution: Revoke permission (Y) from group(X) or remove the player from group(X). Q: I removed a player from group(X), but they still have permission(Y). A: This is the opposite of the above. This player must have been independently granted permission(Y) at some time. Solution: Revoke permission(Y) from the player.Free- 242 comments
- 34 reviews
-
- 41
-
-

-
- #permissions
- #admin
- (and 7 more)
-
Version 1.0.0
61 downloads
Relay: a free Discord bot for your Rust server, in one file Relay connects your Rust server to your Discord and gives your players a real in-game panel. Drop one .cs file in your plugins folder, give it a bot token, and you get the chat bridge, account linking, VIP, moderation, logs, stats, coins and community tools. Turn off any part you don't want in the config. Everything is set up from a visual editor (type !setup in Discord the first time, !editor after that), so you don't have to edit JSON by hand. === SUPPORT === Ask on this page. Relay is free. If it helps your server, you can support it at https://ko-fi.com/ghostfw === WHAT YOU GET === CORE (always on) - Chat bridge between the game and a Discord channel (both ways; players can hide the Discord chat) - Account linking (/link in game, code by private message) with an optional first-link reward - Player profile in Discord (!profile) as one picture: VIP bar (the highest level first, one color per level, full at 30 days), in game or not, score, kills and time played (all time), coins - Live status message (players, FPS, next wipe), join/leave feed - Discord roles synced with game groups, role panel with buttons - Custom messages: timers, daily messages, "when something happens" and custom commands - Slash commands, command aliases, prefix of your choice - Visual editor (!editor): every option, message and color, with preview. Also changes the bot's name and photo - Quick setup: on the first-steps page the editor lists every role, category and channel the bot can make, already in order (for example a private staff category and a log category). Keep a suggestion, rename it, pick one you already have, or leave it out. Then export: the bot creates everything and connects it for you - Every text the bot writes can be changed or hidden in the editor (Texts page): for example remove a line from !coins or change the !vip text - !help in tabs: player commands (one section per module), your own commands, staff commands - English, Portuguese and Russian included; add any language with the lang files IN-GAME PANEL (/panel or a key bind) - My profile (stats), Notices (ticket answers, reviewed reports, prizes, with an unread counter), Coins and shop, Community, Ranking (players and clans), Players, Server info, Discord link, Settings (language, Discord chat on/off, Discord alerts), Help, Staff tools - Title and colors are configurable (Look page of the editor) - Command answers come in a small colored box: green = done, red = error, yellow = warning (can be turned off on the Look page) VIP - Timed VIP levels for any store or command: /vip window, HUD, chat tag, expiry warnings - One VIP level runs at a time, the highest first: buy VIP+ while you have VIP and your VIP days wait (paused) until VIP+ ends - !vip (or !shop) in Discord: your VIP days per level and your store link (set in the editor) - Discord roles and private messages, boost rewards, gifts, streaks, free trial - VIP codes for giveaways, partners and streamers (/redeem) ADMIN - Kick, ban, mute (also in Discord), warnings and staff notes, from the game, the console and Discord - Tickets in private Discord channels; reports (/report, F7) open a ticket for the staff (several reports about the same player go to the same ticket) - Restart with countdown, maintenance mode, announcements - Error alerts and plugin control from Discord, Rust update alert, new account checks FEED - Logs to Discord channels: connections, chat, kills, raids, building, admin commands, teams, rare items - Personal Discord alerts by private message (raid, offline death, decay, cupboard, queue), chosen with !alerts or in the panel - Staff chat between game and Discord, private voice channels for team or clan - Wipe announcements and an automatic map vote X days before the wipe (fixed or random seeds; !mapvote.force starts it now), with the chosen map announced when it ends - Log channels can be created for you (one option in the editor) STATS - Kills, K/D, headshots, longest kill, streaks, time played, farm, raids, PvE, events - Rankings for the wipe, the week and all time; clan and team rankings - Weekly and end-of-wipe results posted to Discord, with image cards - Teams from Discord: !team.create, !team.invite, !team.leave COMMUNITY - Coins for playing, daily streaks and voting; VIP shop (!coins shows your balance and the shop); daily jackpot - Giveaways, suggestions (posted to a Discord channel, staff answers with buttons) - Coin rewards for the best players and clans of the week and the wipe === SETUP === About 10 minutes, no JSON editing. 1. Put Relay.cs in oxide/plugins (or carbon/plugins). The console says "No bot token yet". 2. Create the bot: discord.com/developers/applications > New Application > Bot > Reset Token > copy the token. Never share it. 3. In the server console: relay.token <your token> Relay turns on the "Server Members" and "Message Content" intents by itself. If the console says it couldn't, turn them on in the same Bot page. 4. The console shows an invite link (relay.invite shows it again). Open it and add the bot to your Discord server. 5. In any channel of your Discord, type !setup (owner, Administrator or Manage Server). The bot sends you the editor file by private message. No message? Turn on Direct Messages for your Discord server (server name > Privacy Settings) and type !setup again. 6. Open the file, choose Quick setup and look at the list of roles, categories and channels (keep, rename, pick one you already have, or leave out). Change anything else you want, then Export. 7. Send the exported file back to the bot in the same private chat. It creates what you chose and connects everything. 8. Link your own account: type /link in game, then !link in Discord; the bot messages you privately, send it the code. /panel opens the in-game panel. Later: !editor opens the editor again with your current settings, !editor undo goes back to before the last change, relay.status shows if everything is working. Main console commands: relay.token, relay.status, relay.invite, relay.reconnect, relay.find, relay.unlink, vip.add / vip.info / vip.list, coins.give / coins.info, jackpot.info. Main game commands: /panel, /link, /vip, /redeem, /report, /ticket, /stats, /top, /coins, /vipshop, /jackpot, /voteclaim, /suggest, /alerts. All commands can be renamed in the editor. === PERMISSIONS === relay.admin.kick, relay.admin.ban, relay.admin.mute, relay.admin.warn, relay.admin.note, relay.admin.info, relay.admin.players, relay.admin.reports, relay.admin.say, relay.admin.restart, relay.admin.maintenance, relay.admin.maintenance.join, relay.admin.immune, relay.admin.bypass: staff tools relay.vip.admin: manage VIP from the game relay.feed.staffchat: staff chat relay.panel.teleport: teleport buttons in the panel Discord staff is set by Discord roles in the editor. === EXTERNAL SERVICES === Relay contacts these services only for the features that use them: - Discord API (always): the bot connection, messages, roles, channels and images. - Steam (steamcommunity.com): player avatars for the image cards. Steam Web API only if you enter your own key (new account and ban checks). - api.steamcmd.net: the "Rust update released" alert (can be turned off). - ip-api.com: only if you turn on "show the country" in the connection log (off by default). It sends the player's IP. - rustmaps.com: only if you enter a RustMaps API key (map image in the wipe announcement). - Vote sites (such as rust-servers.net): only if you set them up for vote rewards. No data is sent anywhere else. No license checks, no telemetry. === COMPATIBILITY === Oxide and Carbon (tested on both). Optional: Clans (for clan rankings; teams are used without it), BetterChat (VIP chat tag). For developers: an API and hooks (OnRelay...) to add Discord commands, profile pages and events from your own plugins. Made with AI assistance, then tested in-game and with automated tests on both Oxide and Carbon.Free -
Version 1.3.1
618 downloads
Our Discord Manage players, permissions and plugins from inside the game PowerfulAdmin is an admin panel you open inside Rust. Fifteen pages in the sidebar cover players, items, permissions, plugins, the live console, ConVars, a working server map and your own buttons. Four more tools work out in the world, on whatever you are looking at. Every page and every action has a permission of its own, so a junior moderator can use only what you grant. The panel is translated into seven languages Tip /padmin opens it. After that it is point and click, or a key you bound yourself New in 1.3.0: six things this version adds Items page Hand out items without opening a player card. Search the whole list, filter by category, pin favorites, fill a cart and give it to one player or to several at once. The i button opens an item's reference card: shortname and ID, stack size, the crafting recipe with workbench and craft time, and what it breaks down into in the green, yellow and red recycler Map clusters Markers that sit close together merge into one icon with a count and split apart again as you zoom in. Any cluster opens a list of what is inside, vehicles, shops and events included. A row selects the player, opens the object menu or teleports you. If you want every marker on its own, the Clusters switch next to the zoom buttons turns merging off Permissions page Search by a plugin's name and you get all of its permissions. A click on a plugin block's header folds it away. Every group shows how many players are in it, and the count opens the member list Seven languages German, Spaninh, French, Brazilian Portuguese and Simplified Chinese join English and Russian. With LangAPI installed, item names and descriptions follow each admin's game language too Update check A Check Updates button on the Plugins page runs the UpdateChecker plugin. A plugin with a newer version shows the old and new version on its card, and a click on the card opens the update link Heal and Vanish Heal has a Full mode: one click revives a wounded player, restores full health and refills food and water. Vanish has an optional switch that also turns noclip off when you leave Vanish The sidebar: fifteen pages, plus add-on sections The panel reopens on the page you left. Add-ons appear in the same sidebar, use the same permission system and follow the theme the admin picked Main Tools Management Add-ons Dashboard Vanish Permissions Bans (DLC) Live console ESP Logs Freeze (DLC) Players Server map Plugins Whitelist (DLC) Items Binds ConVars Quick buttons Appearance Settings Your own sections can go here too, through the API described at the bottom of this page Out in the world: tools that work on what you look at A lot of moderation happens in front of a base, a player or a locked crate. Four tools work right there, and none of them needs anything installed on the admin's client Vanish Vanish takes you out of networking, colliders, entity queries and the game's own AI target list. NPCs stop shooting and forget you were standing there. Radiation, cold, wetness, hunger, thirst and drowning stop affecting you, and Vanish puts everything back as it was when you switch it off. A silhouette for other admins, auto vanish on connect, opening locks and turning noclip on with Vanish are all optional, and each has a permission. Another switch, Turn off noclip with vanish, turns noclip off when you leave Vanish Admin hammer Hold a hammer, look at anything, and the HUD reads out the owner, position, health, upkeep, power, who is authorized, the code lock codes and what is in the container. Hold E to pick an action from the radial menu, then Shift+LMB runs it: delete, delete with gibs, delete the whole linked structure, edit the container contents, or on a hackable crate unlock it now and set its timer to any value you type Inspect Look at a player and act on them without typing a name. E opens their inventory, RMB opens their full card. An on-screen hint shows which key does what Server ESP The server draws it with the engine's own debug draw and sends it only to admins who hold the permission. Players and sleepers carry their name, HP and held item. Loot, boxes, cupboards, bags, traps, stashes, NPCs, scientists, turrets and vehicles each get their own colour. You set the radius, the opacity and the text size, and enemy, team and admin are coloured apart The player card: one card per player, awake or asleep The Players page is a searchable, paginated list of everyone the server has seen. The card holds the SteamID, live status, current session and total playtime, total Rust hours from the Steam API, groups, first and last seen, the balance if you run an economy plugin, and the IP behind a permission of its own. The actions sit below Heal Kill Strip Kick Ban Freeze Mute Teleport Inventory Spectate Give Blueprints Modifiers Vitals Permissions Notes Show on map Each of these has its own permission. Note Give works as a cart. Search the item list, stack up what you want, edit any quantity by clicking the number, then send the lot. The Items page has the same cart outside the card and can give to several players at once. Heal has a Full mode: one click revives a wounded player, restores full health, clears bleeding, poison, radiation and wetness and refills food, water and oxygen. Vitals reads the real limits off the prefab, so a raised max HP or a frozen metabolism survives death, respawn, reconnect and wipe The map, drawn inside the panel The map covers the island and the Deep Sea, with zoom. Each layer has its own switch, so the map shows only what you turn on Layers The layers are players, sleepers, cupboards, bags, stashes, cars, horses, air, shops, events and map notes. Cars, boats, submarines, trains, horses and player helicopters each have their own icon and an arrow showing where they are heading. The cargo ship, the cargo plane and the chinook are on the map with the rest Clusters Markers that sit close together merge into one icon with a count badge, so a crowded base or a busy spawn is not a pile of overlapping dots. Players, sleepers, notes, cupboards, bags, stashes, vehicles, shops and events all cluster, and the groups split apart as you zoom in. A click on any cluster opens a list of up to ten rows plus an "and N more" line. A row selects the player, opens the object menu or teleports you to the note. Rows for cars, horses, air, shops and events show the layer, the prefab or shop name, the owner if there is one and the grid square. With the map teleport permission a click on such a row takes you there. Without it the panel dims those rows. The badge gets an accent outline when the player you picked, their teammate or something that player owns is inside. Every clickable marker has a click area of at least 28 by 28 pixels, however small the icon. The Clusters switch next to the zoom buttons turns merging off and draws every marker on its own. It is on by default, and each admin's choice is saved Click an object Cupboards, bags and stashes open a menu that names the owners and shows their Steam avatars. From there you can teleport to it, open its inventory from where you are standing, or destroy it behind a confirmation. Each of the three actions has a separate permission, so a moderator can be allowed to look without being allowed to delete Heat PVP and raid heat build up from real kills and from explosive damage that landed, over a time window you set. The map shows where players are fighting and raiding right now Side panel Next to the map there is a player search and a card for whoever you picked, with the same actions as the full player card. Hold Shift and place a map note to teleport straight to it Server control: console, permissions, plugins, ConVars and logs Live console The console shows server output as it happens, filtered by category, with a command line and history. It can be switched off entirely for everyone in Settings Permissions The page lists every permission on the server, grouped under the plugin that owns it. Toggle per user or per group, create and delete groups, set a parent group, and search across thousands of entries. Search by a plugin's name to get all of its permissions, and fold any plugin block away with a click on its header. Each group shows how many players are in it. The count opens the member list with avatars, online status and a name filter, where a click on a member opens their card and the cross takes them out of the group. PowerfulAdmin's own permissions can be locked so nobody edits them from inside the panel Plugins Load, unload and reload anything on the server, then open its config and language files as a form and edit them without touching the filesystem. Editing is a separate permission from reloading, so an admin can restart a plugin without being able to rewrite it. With the UpdateChecker plugin installed, Check Updates puts the old and new version on the card of every plugin that has an update, and a click on that card opens the link to copy ConVars Edit server ConVars, grouped and searchable. The panel keeps them in its own cfg file and applies them again on boot, so your values survive a restart Logs The log records commands, chat, joins, leaves, errors and warnings, colour coded and capped at a number you choose. Companion plugins write into the same log through the API. Make it yours: buttons, binds, themes, storage and Discord Quick buttons Quick buttons turn your own console commands into buttons, each with an icon, a colour, an optional confirmation and a permission of its own. You decide where a button shows up: the player card, the map, the dashboard or the floating widget Binds The Binds page has ready bind lines for the panel, Vanish, god mode, noclip, ESP, the hammer, inspect and the map. Type the key you want, select the generated line, Ctrl+C, paste into F1. One key toggles both ways Appearance Each admin picks one of three themes: Rust, Midnight or Plum. Fonts are picked per slot, the window can be dragged, and the ESP text size is adjustable. Fonts without Cyrillic are marked in the picker Notifications Panel messages go through Notify or NCP if you have either installed, or through chat, or you can turn them off. You pick the provider in Settings and the add-ons follow it Storage SQLite is the default and needs no setup. MySQL is there for networks that share data between servers, JSON for people who prefer files. Moving between them is one click in Settings and the data comes along Discord An optional companion plugin ships in the same archive. It has a two way chat relay, feeds for bans, actions and errors, a bot with a live status line, and roles that decide who may run commands from Discord. You set it up in game, without editing a config file Permissions: twenty eight for pages and features You can give a trial moderator only Vanish and the player card, and give a head admin all of them. The panel greys out what an admin cannot reach instead of hiding it, so nobody has to guess why a page is missing Permission What it does powerfuladmin.use Open the panel at all powerfuladmin.players Player page and player cards powerfuladmin.items Items page powerfuladmin.map Map page powerfuladmin.map.teleport Teleport to an object on the map powerfuladmin.map.loot Open an object's inventory from the map powerfuladmin.map.remove Destroy an object from the map powerfuladmin.esp ESP page and the overlay itself powerfuladmin.vanish Vanish powerfuladmin.vanish.unlock Open locked doors and boxes while vanished powerfuladmin.hammer Admin hammer powerfuladmin.hammer.codes See code lock codes in the hammer HUD powerfuladmin.hammer.loot Edit container contents with the hammer powerfuladmin.plugins Plugin page, load and reload powerfuladmin.plugins.edit Edit plugin configs and language files powerfuladmin.economy See a player's balance powerfuladmin.economy.edit Change a player's balance powerfuladmin.console Live console page powerfuladmin.perms Permission manager powerfuladmin.logs Logs page powerfuladmin.convars ConVar editor powerfuladmin.quickbuttons Create and edit quick buttons powerfuladmin.settings Settings, storage and Discord powerfuladmin.godmode God mode toggle powerfuladmin.noclip Noclip toggle powerfuladmin.viewip Reveal player IP addresses powerfuladmin.candisablevitals Choose which status badges (Vanish, ESP, God, Noclip) show in your HUD powerfuladmin.countableondashboard Counts toward the admins online figure Tip On top of that, every action in the player card carries powerfuladmin.player.NAME, and every quick button you create carries powerfuladmin.quickbtn.NAME. You do not have to grant them one by one on day one: pa.setup <steamid or name> in the server console hands a player the whole set at once Commands: one in chat, three in console These four are the only commands, and the console ones are mainly there for key binds Command What it does /padmin Open the panel pa.open <page> Open the panel straight on a page, for example pa.open map pa.toggle <feature> Flip vanish, god, noclip, ESP, hammer or inspect. Called without a value it toggles, so one key does both directions pa.setup <steamid|name> Grant the full permission set to a player, once, on install Install Put the plugin into your plugins folder. It loads and writes a clean config on its own. Oxide and Carbon both work Run pa.setup with your name or steamid once in the server console Type /padmin in game to open the panel Optional, later, in Settings: switch to MySQL, connect Discord, add a Steam API key for Rust hours, and copy your binds out of the Binds page Optional, any time: install LangAPI for item names in each admin's game language, or UpdateChecker for the Check Updates button. The panel finds them on its own. Without LangAPI item names stay in English, and without UpdateChecker the button tells you it is missing Add-ons: Bans, Buttons, Freeze and Whitelist, sold separately Three companion plugins drop into the sidebar and share the card, the permissions and the storage backend Note Everything above this section works without them. PowerfulBans It keeps timed and permanent bans in its own database, with reason templates, per role duration caps, ban history and login enforcement. It also runs on its own, without the panel. PowerfulFreeze Freeze a player where they stand while you talk to them, from the card, the map or the world, with live countdowns and three freeze modes. PowerfulWhitelist Whitelisting for closed servers, with JSON, SQLite or MySQL storage and standalone commands of its own. Before you buy: common questions Will it lag my server? It is designed to keep the load low. Objects are pooled and buffers reused, only the element that changed repaints instead of the whole panel, saves are debounced, state is cached behind signatures, and ESP, inspect and the map run on intervals you can tune. None of it runs for an admin who is not using it Can a junior moderator abuse it? Only within the permissions you give them. Every page has a permission, every action in the player card has one, every quick button you make has one, and the plugin's own permissions can be locked so they cannot be edited from inside the panel Do I need a database? No. SQLite is the default and needs no configuration. MySQL is there for networks that want shared data, JSON for people who like plain files, and moving between them is one click in Settings Do I have to set up Discord or a Steam API key? Neither. Discord is optional and configured in game when you want it. The Steam key only fills in the total Rust hours figure on player cards. Without it that one line reads n/a and nothing else changes Can I manage players who are offline? Yes. Teleport to a sleeper, heal them, strip them, edit the inventory, mute, change permissions. Only the actions that need a live connection are disabled while a player is away What language does it speak? Seven: English, Russian, German, Spanish, French, Brazilian Portuguese and Simplified Chinese. Each admin sees the panel in their own game language. Every string lives in a language file, so adding another locale is a translation rather than a code change, and you can do it from inside the panel. With LangAPI installed, item names follow the admin's language as well I write plugins. Can I hook into it? Yes, and the section below shows how For developers: your plugin, inside the panel Any plugin can register its own sidebar section and draw inside the panel, in the player's language and in whichever theme the admin picked. Bans, Freeze and Whitelist are built on this same public API, so every release of those add-ons uses it [PluginReference] private Plugin PowerfulAdmin; var definition = new Dictionary<string, object> { ["id"] = "mystats", ["icon"] = "assets/icons/star.png", ["category"] = "nav.cat.tools", ["permission"] = "myplugin.view", ["title"] = (Func<BasePlayer, string>)(p => "My Stats"), ["hint"] = (Func<BasePlayer, string>)(p => "Kills, deaths, playtime"), ["open"] = (Action<BasePlayer>)OpenSection, ["cardRows"] = (Func<string, List<string[]>>)CardRows, ["settings"] = (Action<BasePlayer, CuiElementContainer, string, int>)DrawSettings, ["settingsHeight"] = (Func<BasePlayer, int>)(p => 180), ["popupActions"] = new Dictionary<string, Action<BasePlayer, ulong, string>> { ["ban"] = OnBan } }; PowerfulAdmin.Call("API_AddSection", definition); Only id is required. Every other key is optional, and the permission is registered for you if no plugin has claimed it yet. Read API_SectionContext on every render to get the parent layer, the body size, the padding, the player's language and the full theme palette, because the admin can switch themes while your page is open Method What it does API_AddSection(def) Register or replace a section API_RemoveSection(id) Unregister, call it in Unload API_OpenSection(player, id) Send a player to your section API_SectionContext(player) Geometry, language and palette for rendering API_ReopenPanel(player) Reopen the panel where it was API_RefreshPlayerCard(steamId) Repaint a player card after your data changes API_RefreshSettings(player) Repaint the settings page after saving a value API_Notify(player, message, isError) Notify through the admin's chosen provider API_Log(message, category) Write a line into the Logs page API_KnownPlayers() Every player the server has seen API_RustHours(steamId) Total Rust playtime from the Steam API, cached Support, updates and feature requests Send bug reports and feature requests to the LR Development Discord$39.99- 14 comments
- 14 reviews
-
- 6
-
-
-
- #admin
- #adminpanel
- (and 15 more)
-

Version 1.2.1
106 downloads
Allows you to restrict certain commands and actions for admins, monitor their activities, and prevent admin abuse. Features Command Blocking: Prevents specified commands from being executed by certain admins. Action Blocking: Disables interactions like looting, building, or interacting with vehicles, cupboards, and more. Team Management: Manage the admins team and their permissions. Anti-Abuse: Detects abusive behavior with configurable actions such as kick or ban. Action Logging: Logs movements and interactions. Permissions adminrestrictions.limitactions - limit the admin actions. adminrestrictions.ignore - ignores a specific admin. Configuration Note: Anti-Abuse will disable damage and teleport the player back to his previous location upon detection.$19.99- 6 comments
-
- 2
-
-
- #admin
- #restrictions
- (and 14 more)
-
Version 1.1.7
133 downloads
WelcomePlus is a lightweight, community-driven plugin developed to make your server feel welcoming with personalised greeting messages that actually matter. Features Rank-Based Welcome Messages - Customisable messages based on player permissions Playtime Tracking - Track total playtime and current session time Interactive GUI - Modern interface accessible via /wp or /welcomeplus Multi-Language Support - English and Spanish included, easy to add more Admin Tools - Player lookup, statistics, and data management Opt-Out System - Players can disable automatic welcome messages Command Aliases - Fully configurable command aliases External Language Files - Easy translation management via JSON files Separate Welcome Messages File - Edit welcome messages independently from language files Permissions welcomeplus.use - Required to receive welcome messages (if enabled in config) welcomeplus.vip - VIP rank permission welcomeplus.admin - Admin rank permission welcomeplus.owner - Owner rank permission Custom Rank Permissions: Define your own ranks and permissions via the config file's `CustomRankPermissions` block. Installation & Setup 1. Download and drop WelcomePlus.cs into your oxide/plugins/ folder 2. Download and place the lang/ folder in oxide/lang/WelcomePlus/ 3. (Optional) Place WelcomePlus_WelcomeMessages.json in oxide/data/ for custom welcome messages 4. Restart your server or run oxide.reload WelcomePlus 5. Configure ranks and permissions in the generated config file (optional) 6. Customise welcome messages in WelcomePlus_WelcomeMessages.json (optional) That's all - the plugin works out of the box with sensible defaults! Quick Start Commands Players: /wp - Open main menu /playtime or /pt - View your playtime /session - View current session /playtimeleaderboard or /ptl - View top 10 players Admins: /wp stats - Plugin statistics /wp reset <player> - Reset player data /wp defaults or /wp resetconfig - Reset config and welcome messages to defaults /playtime <player> - View any player's stats Configuration The plugin generates a config file at oxide/config/WelcomePlus.json with all settings. Key options: Custom Rank Permissions - Define rank labels and their permissions UI/Text Toggle - Choose between GUI panels or chat messages Welcome Settings - Enable/disable first-time and returning player messages Command Aliases - Customise all command aliases Welcome Messages File - Edit welcome messages in `oxide/data/WelcomePlus_WelcomeMessages.json` Reset to Defaults - `/wp defaults` command resets config and welcome messages to defaults Welcome Messages File Welcome messages are stored in oxide/data/WelcomePlus_WelcomeMessages.json (automatically created on first run). This file contains all rank-specific welcome messages and is separate from language files for easier editing. File Structure: FirstTime - Messages for first-time players (by rank) WelcomeBack - Messages for returning players (by rank) Supports multiple messages per rank (randomly selected) Supports placeholders: {name}, {rank}, {total}, {session} Language Files Language files are in oxide/lang/WelcomePlus/: en.json - English (default) es.json - Spanish To add more languages, create new JSON files (e.g., fr.json) following the same structure. Note: Language files contain UI text and system messages. Welcome messages are primarily stored in the welcome messages file, with language files as fallback. Custom Ranks Define custom ranks in the config: "CustomRankPermissions": { "default": "", "vip": "welcomeplus.vip", "mod": "welcomeplus.mod", "batman": "welcomeplus.batman", "admin": "welcomeplus.admin", "owner": "welcomeplus.owner" } Priority System: Rank priority is determined by config order (first entry = highest priority) If a player has multiple permissions, the rank appearing first in config wins Example: If "staff" appears before "mod" and player has both, "staff" messages are used Automatic Permission Registration: Permissions from CustomRankPermissions are automatically registered No code changes needed - just add to config and reload Then add rank-specific messages to WelcomePlus_WelcomeMessages.json: Add rank key to FirstTime section for first-time messages Add rank key to WelcomeBack section for returning player messages Messages fall back to language files if not found in welcome messages file Support Discord: @olvrdncnsctt For detailed documentation, see README.txt. For version history, see WelcomePlusChangelog.txt. README.txt WelcomePlusChangelog.txtFree -
Version 1.6.2
99 downloads
RustVitals is a server health and performance monitoring plugin for Rust servers running Oxide/uMod. It gives admins a clean in-game dashboard to quickly check server FPS, frame time, entities, dropped items, corpses, NPCs, vehicles, turrets, locked crates, dense map areas, lag spikes, and overall server risk. RustVitals is made to help server owners spot common performance problems faster without digging through console logs or guessing what is causing lag. It also includes cleanup tools, useful recommendations, Discord webhook reports, RCON/server-console support, and optional language files. Key Features Clean in-game admin dashboard Main command: /vt ui Server FPS and frame-time monitoring Server risk score Top entity scanner High-density grid reports Dropped item and corpse cleanup Lag spike tracking Server health recommendations Live dashboard console Discord webhook reports RCON/server-console support Admin-only permission Optional language file support Permission rustvitals.admin Example: oxide.grant group admin rustvitals.admin Version RustVitals v1.6.2$9.99- 16 comments
- 1 review
-
- 1
-
-
- #performace
- #health
- (and 8 more)
-
Version 3.0.0
196 downloads
Video : Features : - Randomized loot respawn intervals, configurable for each monument. Example: { "Monuments": { "ferry terminal": { "Allowed Groups": [ "red", "blue", "green", "crate", "barrel", "elite", "diesel", "loot_barrel" ], "Respawn Max Time": 600, "Respawn Min Time": 300 }, "fishing village": { "Allowed Groups": [ "red", "blue", "green", "crate", "barrel", "elite", "diesel", "loot_barrel" ], "Respawn Max Time": 600, "Respawn Min Time": 300 } } } - Default respawn time is set between 30-60 minutes but can be fully adjusted through the configuration. - Automatically removes monuments that no longer exist after a server wipe, keeping the configuration clean and up-to-date. Supported Crates [ Not only the containers shown below , almost every container in the game is now supported! ]: Supported Monuments : All Game Monuments Additional Settings : { "General": { "Enable When Player Dont Finish Looting Containers Will Drop Loot On Ground": true } }$19.99 -

Version 3.2.1
410 downloads
Auto Ban / Report Ban – Premium Edition AI Report Intelligence for Rust Servers AutoBan Enhanced is a premium Rust moderation plugin built for server owners who want smarter report handling, cleaner admin tools, Discord alerts, and fewer false bans. Most report plugins blindly count reports. AutoBan does not. AutoBan analyzes reports like a case file. It checks credibility, duplicate reports, rage-report behavior, toxicity, cheating keywords, reporter weight, unique reporters, and repeated cheating patterns before action is taken. Use it as a manual review assistant, Discord alert system, or fully automated report-to-ban workflow. Key Features AI Operated Surveillance Player reports can be scanned by an AI agent based on your configuration. AutoBan reviews report history, detects patterns, and recommends the best action based on customizable rules of your creation. Use AI for review-only alerts, Discord notifications, or automatic banning. -------------------------------------------------------------------------------------------------------------------------- AutoBan can be configured to the rules of your server. ( USEFUL FOR PVP & PVE SERVERS ) -------------------------------------------------------------------------------------------------------------------------- AI Case Review Instead of judging one report at a time, AutoBan can send the full body of evidence as a case file. Example case signals: 8 total reports 6 unique reporters 5 mention ESP 4 mention silent aim 3 mention impossible recoil Reports span multiple days Duplicate and rage signals are low AutoBan then returns a clear recommendation: Ignore Watch TempBan PermanentBan No AI Required AutoBan also includes built-in heuristic scoring for servers that do not want to use an API key. The fallback system can still detect: Duplicate reports Spam reports Rage reports Toxic reports Cheating keywords Low-detail complaints Multiple unique reporters Repeated report patterns Automatic Weighted Banning Players can be automatically banned once they reach a configurable weighted report threshold. Trusted players, moderators, or admins can have higher report weight for faster action. Example: Normal Player: x1 Trusted Player: x2 Moderator: x3 Playtime Requirement NEW Players must have a minimum amount of playtime before submitting reports. Default: 2 hours This helps prevent abuse from fresh accounts and throwaway players. Mass Reporting Protection Includes cooldowns, per-hour limits, received-report limits, and unique reporter tracking to prevent abuse of the reporting system. Full F7 Integration Captures and processes in-game F7 reports with optional keyword scanning for valid report reasons. Player-Friendly Reporting System Players can submit reports through chat commands or use a guided reason menu for cleaner and more consistent reports. Customizable Ban Durations Supports human-readable ban times such as: 30m 4h 7d permanent Ban History & Report Logs Admins can view current reports, detailed player history, ban history, and structured audit logs. Progressive Punishments Optionally configure warnings, mutes, temporary bans, or permanent bans at different thresholds. Discord Integration with Embeds Sends clean Discord embeds for reports, AI reviews, watch cases, admin actions, and bans. Discord embeds can include: Reporter Target Report reason Sentiment category Confidence Credibility Toxicity Effective score AI recommendation Evidence summary Timestamp Ban expiration Ignored Players & Permissions Protect admins, moderators, staff, VIPs, and whitelisted users from automated bans. Export & Data Storage Export reports to JSON for backups, review, or external logging. Granular Permissions Fine-grained control over who can report, view reports, ban, unban, reset reports, view bans, or audit actions. Moderation Presets Use one command to choose a moderation style: /AB.preset Balanced Available presets: Manual – keeps your custom config untouched Conservative – safest for large public servers Balanced – recommended default Aggressive – faster action for high-pop or high-risk servers ReviewOnly – never auto-ban, only alert admins Usage: Chat Commands /report <username> – start a report and show the reason menu if no reason is given. /report <username> <reason> – report a player with a reason directly. /reportreason <number> – pick a reason from the guided report menu. /AB.case <player> – view a full case summary for a player. /AB.sentiment <player> – view sentiment analysis for a player’s reports. /AB.sentimenthistory <player> – view sentiment history for a player. /AB.sentimentstats – view global sentiment and report stats. /AB.sentimentreload – reload sentiment settings. /AB.preset <Manual|Conservative|Balanced|Aggressive|ReviewOnly> – apply a moderation preset. /AB.viewreports – view all current reports. /AB.history <player> – view detailed report history for a player. /AB.auditlog [N] – view the last N admin/audit actions. /AB.showbans – view all bans. /AB.unban <userid> – unban a player. /AB.resetreports <userid> – reset reports for a player. /AB.exportreports – export reports to a JSON datastore. 🛠 Console Commands AB.getreports – list all reports in console. AB.getbans – list all bans in console. AB.resetreportsConsole <userid> – reset reports through console. AB.ban <userid> <reason> – manually ban a player. AB.unban <userid> – manually unban a player. AB.testreports <reporterID> <targetID> <Type> <Reason> – submit a test report for debugging. Oxide / Carbon Permissions AutoBan.report – allow reporting through F7. AutoBan.chatreport – allow reporting through chat. AutoBan.viewreports – view all reports. AutoBan.ignore – player is immune to automatic bans. AutoBan.ban – manually ban players. AutoBan.unban – manually unban players. AutoBan.viewbans – view all bans. AutoBan.resetreports – reset player reports. AutoBan.trusted – trusted weighted reporter. Example: counts x2. AutoBan.mod – moderator weighted reporter. Example: counts x3. Example Admin Output ==== AutoBan Case: Cheater123 ==== Risk: HIGH | Effective Score: 5.4/5 | Raw: 7 Preset: Balanced | AI: On | AutoBan From AI: False Reports: 8 | Unique Reporters: 6 | Processed: 8 Legit: 5 | Possible: 1 | Rage: 1 | Toxic: 1 | Duplicate: 0 AI: TempBan | Confidence 94% | Credibility 91% | Toxicity 5% AI Reason: Multiple unique players reported consistent ESP behavior over several hours. Example Config { "MaxReportsToBan": 5, "BanDuration": "72h", "BanReasonTemplate": "You have been reported too many times and have been banned for precautionary measures. An admin will review this suspension soon.", "MinPlaytimeToReportMinutes": 120, "ValidReasons": [ "cheating", "cheats", "hacks", "aimbot", "hacking", "esp", "teaming", "racism", "griefing", "walling", "doorcamping", "spawn killing" ], "ValidReportTypes": [ "cheat", "abusive", "name", "spam" ], "ScanF7Type": true, "BroadcastBanToChat": true, "IgnoredPlayers": { "76561198000000000": "Admin" }, "AdminBroadcastTimer": 820, "SendBansToViewersOnTimer": false, "SendReportsToUrl": false, "ReportsUrl": "http://example.com", "SendReportsToDiscord": false, "SendBansToDiscord": false, "SendAIResultsToDiscord": true, "DiscordReportsWebhook": "http://example.com", "DiscordBansWebhook": "http://example.com", "UseDiscordEmbeds": true, "MaxSubmitPerHour": 2, "MaxReceivePerHour": 5, "CooldownMinutesSamePair": 10, "WeightedPermissions": { "AutoBan.trusted": 2, "AutoBan.mod": 3 }, "MaxChatLinesPerPage": 8, "Preset": "Balanced", "UseHeuristicScoring": true, "UseHeuristicBeforeAI": true, "HeuristicMinimumCredibility": 55, "HighRiskAlertScore": 4, "HeuristicCheatKeywords": [ "cheat", "hacks", "hacking", "aimbot", "esp", "wallhack", "walling", "silent aim", "silentaim", "no recoil", "recoil", "flyhack", "flying", "noclip", "speedhack", "script", "macro", "exploit", "despawn", "loot despawn", "instant loot", "eac" ], "HeuristicRageKeywords": [ "killed me", "he killed me", "trash", "camping", "camper", "doorcamp", "roofcamp", "admin abuse", "mad", "salty", "because he killed" ], "HeuristicToxicKeywords": [ "idiot", "stupid", "loser", "trash", "garbage", "clown", "dog", "retard", "kys", "kill yourself" ], "HeuristicSpamKeywords": [ "asdf", "aaaa", "????", "!!!!", "lol", "lmao" ], "AIEnabled": false, "AIProvider": "OpenRouter", "AIEndpoint": "https://openrouter.ai/api/v1/chat/completions", "APIKey": "", "Model": "poolside/laguna-xs-2.1:free", "AutoBanFromAI": false, "MinimumAIConfidence": 90, "MinimumReportsForAI": 3, "AIRequestCooldownMinutes": 5, "RequireAISentimentForAutoBan": false, "MinimumAICredibility": 70, "MaximumAIToxicity": 80, "MaxAIHistoryPerPlayer": 25 } Best For PvP servers High-pop servers Modded Rust servers Community servers Servers with limited staff coverage Servers dealing with constant cheating accusations Owners who want automation without blindly trusting raw report counts Bottom Line AutoBan Enhanced helps server owners catch real threats faster while protecting players from false bans caused by spam, revenge reports, duplicate reports, and emotional complaints. It is not just an auto-ban plugin. It is a report intelligence system for Rust servers.$25.00 -

Version 1.0.0
16 downloads
Note After purchase, please send me a private message (PM) on Codefling. I will reply with your one-time invite code for the AP Burden cabinet. AP Burden — find which Oxide / Carbon plugins eat your server frame time. In-game metrics plus a Windows desktop app (AP Burden Monitor) over WebRCON. Optional BurdenProfiler extension for deeper per-hook analysis of the collected data. Features Measures plugin / hook load in readable metrics (ms/sec, %, top plugins) In-game UI & chat + console reports Configurable sample interval, exclusions, alerts, snapshots BurdenProfiler extension (Oxide / Carbon) — dig into hooks and deep-profile a specific plugin hook when you need more detail than overview metrics AP Burden Monitor (Windows) — live plugin table, FPS / players / entities, search, detail charts Auto-updates for Monitor from the license server Oxide & Carbon packages included Requirements - Rust server with Oxide or Carbon - WebRCON enabled (IP, RCON port, password) - Windows 10/11 for the Monitor app - Google Authenticator (or any TOTP app) for the customer cabinet (2FA) - Full server restart after installing the BurdenProfiler extension After purchase 1. You will receive a private message with a one-time invite code and a link to the customer cabinet. 2. Open the link → enter the invite code → create nickname + password → set up 2FA. 3. In the cabinet: download Monitor and copy your license key. 4. Install Monitor → paste the key → activate → connect via WebRCON. Important: download the installer only from the cabinet. Keep the invite code message until registration is finished (the invite code works once). Optional Link Discord in the cabinet to recover your password later via bot DM. 2FA is never bypassed. Permissions appluginburden.use Open the in-game `/burden` UI appluginburden.admin Admin actions in the plugin UI / admin features Server owners (IsAdmin) can use the tools without these permissions. Console commands require auth (RCON / server console). Commands / Chat /burden Open the burden UI (requires appluginburden.use or admin) |$15.00-
- 1
-
-
- #rust plugin
- #admin
- (and 9 more)