Search the Community
Showing results for tags 'storage'.
-
Version 1.0.8
64 downloads
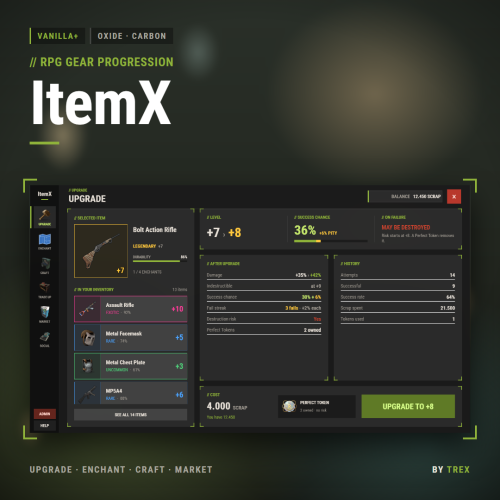
ITEMX ItemX is an RPG-style gear progression plugin for Rust. Players upgrade weapons and armor level by level, roll enchantments, complete armor sets, craft tokens, salvage old gear into shards, trade up unwanted items and sell their best pieces on a player market. Levels run from +1 to +10 by default, and you can raise the cap as high as +100 or lock it lower, per item or server-wide. Everything players touch lives in one modern, tabbed UI. Most of the setup is done in-game from the Admin Dashboard, with no config editing needed; the deeper systems (set bonuses, salvage, announcements, Discord, VIP, wipes) are clean, documented config sections. Works on Oxide and Carbon with no required dependencies. In-Game Admin Dashboard Manage the progression system from an in-game UI (/iu_admin, permission itemx.admin): Modules: turn Upgrade, Enchant, Crafting, Trade Up, Market and Social on or off, and set the plugin language. Tab permissions: choose which permission opens each tab. Items: add an item by typing its shortname, remove items, and set display name, type (weapon/armor), max level, quality score and skin IDs for +9 and +10. Upgrade: base cost, cost per level, payment method, success chance per level, rarity names per level, destruction and indestructible thresholds, with a live preview of the odds. Enchants: costs, payment, minimum level, and every bonus (name, description, value range, rarity, allowed item types). Trade Up and Market: chances, weights, listing limits, price range, currency. Crafting: the three tokens (item, skin, display name, description, amount) and their recipes. Commands: rename every chat command. Modular Permission System Every tab has its own permission (itemx.upgrade, itemx.enchant, itemx.craft, itemx.tradeup, itemx.market, itemx.general), so you decide exactly who gets which feature. A tab with an empty permission is admin only. VIP perks come from separate permissions you define. — Core Features — Item Upgrade System +1 to +10 by default; Global Max Level and per-item Max Level go up to +100. Success chance per level, scrap cost that grows per level. Pay with any item (scrap by default), Economics or ServerRewards. Pity: every failed attempt adds a bonus to that item's next try (2% per fail, up to 20% by default), reset on success. Risk you control: from +8 a failed upgrade can destroy the item; +9 and up are indestructible; other fails cost 1-2 levels, low levels keep theirs. The UI always shows which rule the roll will use. +9 and +10 multipliers (1.5x and 2.0x damage/protection by default) and their own skin IDs. Upgraded armor reduces combat damage (capped, 60% by default); upgraded gear loses durability slower and never breaks from the indestructible level. Weapon levels boost damage to players and NPCs only, unless you allow building damage. Level rarity names (Common, Uncommon, Rare, Legendary, Mythic, Exotic ... Absolute at +100), shown in the item's name. Weapon & Armor Roster 56 items out of the box: 47 weapons (rifles, SMGs, shotguns, pistols, bows and crossbows, rocket launchers, M249, HMLMG, minigun, flamethrower, grenade and homing launchers, blowpipe, speargun, salvaged sword and more) and 9 armor pieces (metal facemask and chest plate, road sign jacket and kilt, riot, coffee can and bucket helmets, wood armor). Add any other item by shortname from the Admin Dashboard. Every listed item works with Upgrade, Enchant, Salvage, Trade Up and the Market. Enchantment System Enchant slots open at +6, +8 and +10; a 4th slot is unlocked with a Slot Token. 5 rarity tiers: Common, Uncommon, Rare, Epic, Legendary, with configurable roll weights. Lock a bonus to keep it, reroll the rest, and upgrade a bonus to the next rarity with Bonus Tokens. Weapon enchants: Inferno Strike (burn), Frostbite (freeze), Toxic Aura (radiation), Blast Master (explosion damage), Armor Breaker, Beast Slayer (animals), Guard Killer (NPCs), Warrior's Edge (players), Ammo Saver, Aqua Curse (soaks the target). Armor enchants: Phoenix Shield, Thermal Ward, Blast Resistance, Toxic Guard, Iron Skin, Desert Cloak, Timber Master (wood), Rock Breaker (stone and ore), Junk Collector (scrap). Damage-over-time effects are dealt by the real attacker, so TruePVE and zone plugins still apply. Every bonus is editable: name, description, value range, rarity, allowed item types. Set Bonuses Wear 2 or 3 armor pieces with enchants from the same family for extra effects. 6 default sets: Fire Ward, Frost Ward, Hazmat, Ironclad, Gatherer, Blastproof. Effects include protection, damage immunity, gather bonus, bleeding reduction, radiation regen, double barrel scrap and an explosion "last stand". Fully configurable: build your own sets from these effects. Crafting Tokens Perfect Token: a guaranteed upgrade (used only when the chance is below 100%, and only when the player turns it on). Bonus Token: raises an enchant's rarity. Slot Token: unlocks the 4th enchant slot. Custom recipes per token: items, Economics or ServerRewards points. Tokens are skinned items with your own skin, name, description and image. Salvage Salvage upgraded items into Bonus, Perfect and Slot shards based on their level. 10 shards craft 1 token (configurable). Confirmation step, and safe against double clicks. Trade Up Combine five +1 to +8 items into one new item. Result level comes from the average level and item quality (Quality Score x durability), then rolls Worse / Same / Better / Much Better (15/20/55/10% by default). The result gets enchants based on its level. Deposited items and unclaimed results are saved and survive reloads, restarts and crashes. Marketplace & Social Sell upgraded items to other players for scrap, any item, Economics or ServerRewards. Search by name, level or rarity, filters and pages. Per-player listing limit and min/max price; sellers claim their earnings in the UI. Player profiles with sales stats and 1-5 star ratings. Direct messages between players. Announcements & Discord Big upgrades, destroyed items and Legendary enchants can show a toast to everyone, post a chat line and play an effect. Each player reads announcements in their own language. Discord webhook posts for the same events, plus optional admin command logging. VIP Profiles Any number of VIP permissions, each with an upgrade chance bonus, cost multiplier and extra market listings. Default itemx.vip: +5% chance, 10% cheaper, +2 listings. Wipes & Data Safety Map wipes are detected automatically, even if they happened while ItemX was unloaded. Choose what happens to item levels and enchants: keep, wipe, or pay players shards for them. Separate options for market listings, unclaimed money and shards. 3 rolling daily backups of the data file; a broken data file is never overwritten. Saves are debounced (30 s, 2 s after item hand-overs) and always run on server save and unload. — What you can change in the config — (oxide/config/ItemX.json; new keys are added automatically on update) General Plugin Language: "auto" (each player's own language) or a fixed language code. Debug Logging. Upgrade Settings Base Upgrade Cost, Cost Increase Per Level, Payment Method, Cost Item Shortname, Cost Item Skin ID. Success Chance Per Level (0.0 - 1.0). Destroy Item On Fail From Level 8+, Destruction Risk Threshold Level, Indestructible Bonus Threshold Level. Weapon Damage / Armor Protection Multiplier Per Level, Level 9 / Level 10 Damage and Protection Multiplier, Durability Multiplier Per Level. Global Max Level, Level Rarity Mapping. Pity Bonus Per Failed Attempt (%), Pity Max Bonus (%). Max Armor Damage Reduction (%), Upgraded Weapons Affect Building And Deployable Damage. Upgradeable Items Per item: Display Name, Item Type (weapon/armor), Max Level, Skin ID Level 9, Skin ID Level 10, Item Quality Score. Enchant Settings Roll Cost, Reroll Cost, Payment Method, Payment Item, Min Level for Enchant. Available Bonuses (Type, Name, Description, MinValue, MaxValue, Rarity, AllowedItemTypes), Rarity Weights. Max Elemental Protection (%), Damage Over Time Ticks, Damage Over Time Per Tick, Max Damage Over Time Effects (server-wide). Bonus / Slot token item, skin, name, description, amount, image URLs, Bonus Upgrade Token Base Cost and Cost Per Rank, craft materials for each token. Perfect Upgrade Item Settings Token item, skin, display name, description, amount per craft. Enchant Sets Name, Color, Enchant Types, 2 Pieces and 3 Pieces effects (Effect, Target, Value, Text). Salvage Settings Enabled, Min Item Level, Bonus Shards Per Level, Perfect / Slot Shards From Level, Shards Per Token. TradeUp Settings Worse / Same / Better / Much Better Level Chance (%), Min Enchantments per level band, Average Level Weight, Average Quality Weight. Marketplace Settings Max Listings Per Player, Max / Min Listing Price, Payment Method, Currency Item Shortname, Currency Item Skin ID, Currency Display Name. Announcements Announce Upgrade Success From Level, Announce Upgrade Success / Destroyed Items / Legendary Enchants, Show Toast To Everyone, Show Chat Line To Everyone, Toast Seconds, effect prefab lists per event. Discord Webhook URL, Post Upgrade Success / Destroyed Items / Legendary Enchants / Admin Commands. Wipe Settings Item Levels And Enchants On Map Wipe (keep / wipe / tokens), Wipe Market Listings, Wipe Unclaimed Market Currency, Wipe Shards. VIP Profiles Permission -> Upgrade Chance Bonus (%), Cost Multiplier, Extra Market Listings. Access Tab Permissions, Command Settings (every chat command name), and an Enabled switch for each module. — Languages — 10 languages included, and each player sees ItemX in their own game language: English, Romanian, German, Spanish, French, Italian, Japanese, Brazilian Portuguese, Russian, Simplified Chinese. — Commands — Chat (default names, all renameable): /itemx - help in chat /upgrade - Upgrade /enchant - Enchant /craft - Craft tokens and salvage /tradeup - Trade Up /market - Market /social or /messages - profiles and messages /iteminfo - item inspector /iu_admin - Admin Dashboard /itemx price <amount> - set your sell price Admin console (server console, RCON, or F1 with itemx.admin; every use is logged): itemx.give <player> <shortname> <level> [enchants] - give an upgraded item, optionally with chosen enchants itemx.setlevel <player> <level> - set the level of the held item itemx.givetoken <player> <perfect/bonus/slot> [amount] - give tokens itemx.giveshards <player or steamid> <bonus/perfect/slot> <amount> - add or remove shards, works offline itemx.wipe <items/market/all> - manual reset Bindable: itemx.openupgrade, itemx.openenchant, itemx.opencraft, itemx.opentradeup, itemx.marketplace, itemx.backtomessages, itemx.openinfo. — Permissions — itemx.admin - Admin Dashboard, admin commands, every tab itemx.upgrade - Upgrade tab itemx.enchant - Enchant tab and Set Bonuses itemx.craft - Craft tab (tokens and salvage) itemx.tradeup - Trade Up tab itemx.market - Market tab itemx.general - Social tab itemx.vip - default VIP profile — API for Developers — Call with ItemX.Call("Name", args). Getters never create data. By item: int API_GetLevel(Item item) bool API_IsUpgradeable(Item item) Dictionary<string, object> API_GetUpgradeData(Item item) CurrentLevel, UpgradeAttempts, SuccessfulUpgrades, FailedUpgrades, FailStreak, TotalScrapUsed (null = none) Dictionary<string, object> API_GetEnchantData(Item item) ActiveSlots, Bonuses (SlotIndex, BonusType, DisplayName, Value, Rarity, IsLocked, IsActive) (null = none) bool API_SetLevel(Item item, int level) Shards (type = bonus / perfect / slot): int API_GetShards(ulong playerId, string type) bool API_AddShards(ulong playerId, string type, int amount) By item UID (searches online and sleeping players): bool IsItemUpgradeable(ulong itemUID) int GetItemUpgradeLevel(ulong itemUID) Dictionary<string, object> GetItemUpgradeData(ulong itemUID) Dictionary<string, object> GetItemEnchantData(ulong itemUID) bool SetItemUpgradeLevel(ulong itemUID, int level) — Hooks — object CanItemXUpgrade(BasePlayer player, Item item, int from, int to) - return non-null to cancel, before anything is paid void OnItemXUpgrade(BasePlayer player, Item item, int from, int to, bool success) - to = -1 when the item was destroyed void OnItemXEnchant(BasePlayer player, Item item, int slot, string type, string rarity, float value) object CanItemXSalvage(BasePlayer player, Item item) - return non-null to cancel void OnItemXSalvage(BasePlayer player, Item item, int level, int bonusShards, int perfectShards, int slotShards) void OnItemXTradeUp(BasePlayer player, string shortname, int level)$14.99 -

Version 1.2.0
424 downloads
About Battle Pass Reborn A modern battle pass system for Rust that adds progression, missions, and rewards to your server. Players complete a wide variety of tasks — from PvP and farming to building and crafting — and earn experience (XP) to unlock unique rewards at each level. The plugin is fully customizable and integrates seamlessly with your server’s economy and other popular plugins. The plugin also supports a Premium Battle Pass, giving players access to exclusive rewards and accelerated progression. This not only increases player engagement but can also generate additional revenue for server owners through premium access sales. Key Features Fully customizable progression system — levels, XP, and rewards for completing missions. Configurable mission types — PvP, events, farming, crafting, and many other activities. Premium Battle Pass — exclusive rewards and faster progression for premium users. Flexible integration — works with server economy and other popular plugins. Increased player engagement — encourages activity and retention between wipes. Modern and polished UI/UX — intuitive interface for viewing levels, missions, and rewards. Commands /bp — opens the Battle Pass interface for the player (can be changed in the plugin config). /giveexp {steamid} {quantity} - adds the specified amount of XP to a player. /removeexp {steamid} {quantity} - removes the specified amount of XP from a player. /resetprogressall - resets the progress of all players on the server. /resetprogress {steamid} - resets the progress of a specific player. Mission Types Missions are loaded from a preset file (e.g., DefaultMissions.json) and can be customized with event types, conditions (e.g., item shortnames), target counts, and difficulties. XP rewards scale by difficulty (configurable: Easy=10, Medium=25, Hard=50). extract: Gather/extract a resource (e.g., wood, stone). craft: Craft specific items. pickup: Pick up items (e.g., from ground or collectibles). loot: Loot a container (e.g., crates, barrels). kill: Kill entities (players, animals, scientists, helicopters, bradleys). build: Build structures. quest: Complete quests (from other plugins). growup: Grow and harvest plants. upgrade: Upgrade building blocks (e.g., wood to stone). fishcatch: Catch fish. heal: Use healing items (e.g., syringes). mlrsrocketfire: Fire MLRS rockets. itemuse: Use/consume items (e.g., food, medical). cardswipe: Swipe keycards. purchasing: Purchase items from NPCs/vending machines. hit_area (Head, Chest, Stomach, Arm, Hand, Leg, Foot): Hit specific body parts on players. kill_with_weapon: Kill using a specific weapon. recycling: Recycle items. gambling: Win in gambling (e.g., slots, wheels, cards; tracks deposits, wins, profits). enter_zone: Enter specific zones (via ZoneManager or similar). events: The plugin awards progress/XP in supported events. In mission presets you can specify conditions like "RaidableBase_Easy", "SpaceEvent", "ArmoredTrainEvent" etc. Event Points Integration Supported events: Air Event Arctic Base Event Armored Train Event Boss Monster Caravan Event Convoy Event Dungeon Event Ferry Terminal Event (FerryEvent) Flying Cargo Event Gas Station Event GunGame Event Harbor Event Junkyard Event Paintball Event Plant Event (PowerPlantEvent) Raidable Bases Event (with difficulty modes: Easy, Medium, Hard, Expert, Nightmare) Satellite Dish Event (SatDishEvent) Shipwreck Event Space Event Sputnik Event Supermarket Event (MarketEvent) Survival Arena Event Triangulation Event Tugboat Pirates Event (Tugboat) Water Event Abandoned Base Event Airfield Event Reward Types Item Commands Configuration Main settings — BattlePassReborn.json Mission settings — DefaultMissions.json Level and reward settings — LevelsList.json UI Settings — UI.json$30.00- 19 comments
- 3 reviews
-
- 5
-

-
- #battlepass
- #battle pass
- (and 27 more)
-
Version 0.1.3.2
457 downloads
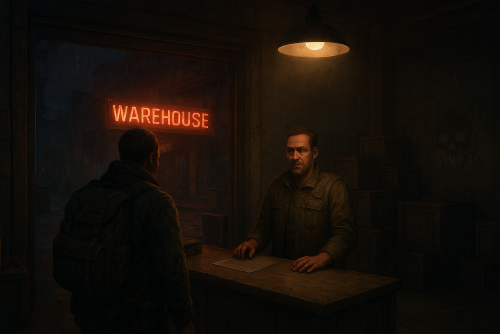
A multifunctional warehouse system for managing item storage and automated giveaways. Presence of unique dialogues with warehouse keeper that mimic vanilla-style interactions; The ability to create an unlimited number of custom permissions; The ability to configure permissions individually, allowing flexible customization for any preferences; The ability to limit the total number of available storages; The ability to adjust the number of slots for each individual storage; The ability to restrict which items can be stored; The ability to store food items with a configurable spoilage rate(fridge ability) ; Warehouse keepers with automatic spawning in all vanilla safe zones, as well as support for custom spawn points; The ability to customize the appearance of each warehouse keeper; The ability to restrict warehouse access to mission completion(in progress) or payment; The ability to configure a daily storage rent fee calculated based on the number of slots; The ability to apply an extra fine when attempting to renew an expired storage; The ability to automatically move all items from fully expired storages to the giveaway warehouse; The ability to host daily item giveaways(if items are available) ; The ability to preview items from the upcoming giveaway; The ability to define a forbidden item list for the giveaway warehouse; The ability to automatically move all items from players who die in safe zones(offline) to the giveaway warehouse; The ability to transfer dropped items(when disappear) to the giveaway warehouse; The ability to transfer items from a player's warehouse when the player is banned; The ability to transfer items from a player's body when the player is banned; The ability to transfer items from all of a player's storages when the player is banned; The ability to artificially fill the giveaway warehouse if it contains too few items; The ability to fill the giveaway warehouse by transferring items from all existing lootable boxes; The ability to notify players right before a giveaway starts. { "Chat command": "wh", "Is it worth enabling GameTips for messages?": true, "List of language keys for creating language files": [ "en" ], "Date display format": "MM/dd/yyyy hh:mm tt", "Price to skip mission": 200.0, "Storage purchase price": 100.0, "Storage slot purchase price": 50.0, "Storage slot daily rental fee": 10.0, "Interval in seconds for checking rent expiration": 600.0, "Number of hours before the rent expires during which renewal becomes available. A value of 0 disables the limit": 5, "Available slot options for new storage purchase": [ 1, 6, 18, 48 ], "List of warehouse permissions": [ { "Permission Name": "warehouse.default", "Limit of available storages. A value of 0 disables the limit": 1, "Limit on the number of slots per storage": 6, "Price multiplier for purchasing a storage": 1.0, "Price multiplier for purchasing a storage slot": 1.0, "Price multiplier for storage slot rental": 1.0, "Price multiplier for storage rental in case of delay": 1.5, "Food spoilage multiplier": 1.0, "List of forbidden items to storage": [ "blood" ] }, { "Permission Name": "warehouse.vip", "Limit of available storages. A value of 0 disables the limit": 2, "Limit on the number of slots per storage": 24, "Price multiplier for purchasing a storage": 0.9, "Price multiplier for purchasing a storage slot": 0.9, "Price multiplier for storage slot rental": 0.9, "Price multiplier for storage rental in case of delay": 1.4, "Food spoilage multiplier": 0.5, "List of forbidden items to storage": [ "blood" ] }, { "Permission Name": "realpve.vip", "Limit of available storages. A value of 0 disables the limit": 3, "Limit on the number of slots per storage": 48, "Price multiplier for purchasing a storage": 0.8, "Price multiplier for purchasing a storage slot": 0.8, "Price multiplier for storage slot rental": 0.8, "Price multiplier for storage rental in case of delay": 1.3, "Food spoilage multiplier": 0.0, "List of forbidden items to storage": [ "blood" ] } ], "Wipe ID": null, "Version": { "Major": 0, "Minor": 1, "Patch": 3 } } EN: { "CmdEconomicsNotEnough": "Not enough funds!", "CmdMain": "Available warehouse commands:\n\n<color=#D1CBCB>/wh</color> <color=#D1AB9A>keeper</color> - Manage warehouse keepers\n<color=#D1CBCB>/wh</color> <color=#D1AB9A>giveaway</color> - Manage item giveaways\n\n--------------------------------------------------", "CmdKeeperMain": "Manage warehouse keepers:\n\n<color=#D1CBCB>/wh keeper</color> <color=#D1AB9A>spawn *name*(optional)</color> - Spawn a Keeper at your position\n<color=#D1CBCB>/wh keeper</color> <color=#D1AB9A>kill</color> - Remove the Keeper you are looking at\n<color=#D1CBCB>/wh keeper</color> <color=#D1AB9A>name *name*</color> - Change the name of the Keeper you are looking at\n<color=#D1CBCB>/wh keeper</color> <color=#D1AB9A>wear</color> - Copy your items to the keeper\n\n--------------------------------------------------", "CmdKeeperNotFound": "Warehouse Keeper not found! You need to be looking directly at them.", "CmdKeeperSpawned": "Warehouse Keeper successfully spawned!", "CmdKeeperKilled": "Warehouse Keeper successfully killed!", "CmdKeeperNamed": "Warehouse Keeper's name successfully changed!", "CmdKeeperWearCopied": "Your outfit was successfully copied to the Warehouse Keeper!", "CmdGiveawayMain": "Manage item giveaways:\n\n<color=#D1CBCB>/wh giveaway</color> <color=#D1AB9A>start</color> - Force start the giveaway\n<color=#D1CBCB>/wh giveaway</color> <color=#D1AB9A>skip</color> - Force stop the active giveaway\n<color=#D1CBCB>/wh giveaway</color> <color=#D1AB9A>set \"HH:mm\"</color> - Set a new daily giveaway time\n<color=#D1CBCB>/wh giveaway</color> <color=#D1AB9A>fill *amount*(optional)</color> - Force fill the giveaway with random items\n<color=#D1CBCB>/wh giveaway</color> <color=#D1AB9A>clear</color> - Force clear all items from the giveaway storage\n\n--------------------------------------------------", "CmdGiveawayAlreadyActive": "You can't perform this action because a giveaway is already active!", "CmdGiveawayNotActive": "You can't perform this action because no giveaway is currently active!", "CmdGiveawaySetFailed": "Failed to set '{0}' as the new giveaway time. Correct format: HH:mm, e.g. 20:00.", "CmdGiveawaySet": "The value '{0}' has been successfully set as the new giveaway time!", "CmdGiveawayFillStart": "You have successfully started forcibly filling the giveaway storage with {0} random items!", "CmdGiveawayFillFinish": "The giveaway storage has been successfully filled with {0} random items in {1} seconds!", "CmdGiveawayClear": "The giveaway storage has been successfully cleared of all items!", "DialogueNotAllowed": "You do not have permission to access the storage!", "DialogueStranger": "Stranger", "DialogueBtnExit": "I don't think I'm interested. Farewell.", "DialogueInitialMain": "Hello! Have we met before? I don't recall seeing you around here...\nHow can I help you?", "DialogueInitialBtnIntroduction": "My name is {0}. And you? What do you do?", "DialogueInitialBtnExit": "Just passing by. Looking around.", "DialogueIntroductionMain": "My name is {0}, I'm with the Keepers Guild. We're a small group, but present in every safe zone.\nOur job is to ensure the safety of belongings that their owners can no longer protect. We guarantee complete security, you can store absolutely anything with us. Of course, this is a paid service.\n\n{1}, you say? Never heard of you...\nUnfortunately, we don't work with strangers. You can't really rely on them.", "DialogueIntroductionBtnGetMission": "I have some items for storage. How can I prove I'm trustworthy?", "DialogueGetMissionMain": "Hmm... Let me think...\nYou know, there is something.\nWe maintain close ties with the Guild of Wandering Merchants and I have a letter I haven't been able to deliver to them. They usually stop by the water towers.\n\nI could entrust it to you. What do you say?", "DialogueGetMissionBtnStart": "Perfect, I was heading that way anyway. I'm ready to help.", "DialogueGetMissionBtnPay": "I'd love to help, but this task seems too complicated for me.\nHow about I offer ${0} as a goodwill gesture instead?", "DialogueMissionStartedMain": "{0}, good to see you again!\nHow's the task I gave you coming along?", "DialogueMissionStartedBtnCancel": "Sorry, but I can no longer continue your task.", "DialogueMissionStartedBtnExit": "I'm still working on it.", "DialogueMissionCanceledMain": "I'm sorry you couldn't complete my task...", "DialogueMissionCanceledBtnGetMission": "I'm sorry too, but I'd like to prove my reliability once again.", "DialogueMissionCompletedMain": "{0}, you did a great job! I couldn't have managed without you.\nHow can I help you?", "DialogueMissionPayedMain": "${0}?\nHa, now we're speaking the same language.\nHow can I help you?", "DialogueDefaultMain": "Greetings, {0}! Long time no see. How can I help you?", "DialogueDefaultBtnForbiddenList": "I'd like to know which items are forbidden from being stored.", "DialogueDefaultBtnStorageList": "I'd like to check my storage.", "DialogueDefaultBtnGiveaway": "I'd like to know about item giveaways.", "DialogueForbiddenListMain": "Here's a list of items you're unfortunately not allowed to store:\n\n{0}", "DialogueStorageListMain": "Would you like to open one of your storages or acquire a new one?", "DialogueStorageListBtnStorageBuy": "Get new storage.", "DialogueStorageListBtnOpenStorage": "Open '{0}' with {1} slot(s).", "DialogueStorageListBtnBack": "Maybe next time.", "DialogueStorageBuyMain": "Great! Which purchase method would you prefer?\n\nThe price to purchase storage: ${0}\nThe price to purchase one slot: ${1}\nDaily maintenance fee per slot: ${2}\n\nKeep in mind that the size of any storage can be adjusted at any time, from 1 to 48 slots.", "DialogueStorageBuyOutLimit": "It looks like you've already used up your available storage limit.", "DialogueStorageBuyBtnBuy": "Purchase storage with {0} slot(s) for ${1}.", "DialogueStorageBuyBtnBack": "Maybe next time.", "DialogueGiveawayMain": "We regularly hold giveaways of unwanted and lost items.\n\nUsually, these include:\n- items from storages with expired rent\n- items left behind by players who left the game in a safe zone\n- items lost during battles\n\nThe next giveaway is scheduled for {0}(UTC), in {1}!\nHowever, the giveaway may start earlier if the number of items exceeds {2}.\nMake sure to come, you might get lucky and grab something valuable!", "DialogueGiveawayMainActive": "We regularly hold giveaways of unwanted and lost items.\n\nUsually, these include:\n- items from storages with expired rent\n- items left behind by players who left the game in a safe zone\n- items lost during battles\n\nThe giveaway is in full swing! If you don't want to miss out, hurry to {0}({1})!", "DialogueGiveawayBtnShow": "I'd like to know what items will be in the upcoming giveaway.", "DialogueGiveawayBtnBack": "Maybe next time.", "GiveawayStorageName": "Giveaway Storage", "GiveawayNotEnoughPlayers": "Unfortunately, there weren't enough players online for the giveaway. Don't miss the next giveaway, which will take place in {0}(UTC)!", "GiveawayNotEnoughItems": "Unfortunately, there weren't enough items collected for the giveaway. Don't miss the next giveaway, which will take place in {0}(UTC)!", "GiveawayStartAnnounce": "The item giveaway should start soon!\nEveryone, hurry to {0}({1})! Only {2} seconds left!", "GiveawayPauseAnnounce": "{0} items have been successfully given away! But that's not all! We still have more items left, we'll continue in {1} seconds!", "GiveawayEndAnnounce": "The item giveaway has ended! Over {0} items were given away! Don't miss the next giveaway, which will take place in {1}(UTC)!", "UiStorageUntil": "Until: {0}(UTC)", "UiStorageExpired": "Rent expired", "UiStorageNote": "Slot purchase price: ${1}.\nDaily rent per slot: ${2}.\nCurrent daily rent cost: ${3}.", "UiStorageNoteRestricted": "<b>Note:</b> You can only pay rent up to {0}h before it expires.\nSlot purchase price: ${1}, daily rent per slot: ${2}.\nCurrent daily rent cost: ${3}.", "UiStorageRental": "Pay Rent", "UiStorageRentPayed": "You have successfully paid the storage rent!", "UiStorageSlotsOcupied": "You can't reduce the number of slots because one of the reduced slots contains an item!", "UiStorageSlotsAdjusted": "The number of slots has been changed from {0} to {1}!" } RU: { "CmdEconomicsNotEnough": "Не достаточно средств!", "CmdMain": "Доступные команды хранилища:\n\n<color=#D1CBCB>/wh</color> <color=#D1AB9A>keeper</color> - Управление хранителями хранилища\n<color=#D1CBCB>/wh</color> <color=#D1AB9A>giveaway</color> - Управление раздачей вещей\n\n--------------------------------------------------", "CmdKeeperMain": "Управление хранителями хранилища:\n\n<color=#D1CBCB>/wh keeper</color> <color=#D1AB9A>spawn *имя*(опционально)</color> - Создать хранителя на вашей позиции\n<color=#D1CBCB>/wh keeper</color> <color=#D1AB9A>kill</color> - Удалить хранителя, на которого вы смотрите\n<color=#D1CBCB>/wh keeper</color> <color=#D1AB9A>name *имя*</color> - Изменить имя хранителя, на которого вы смотрите\n<color=#D1CBCB>/wh keeper</color> <color=#D1AB9A>wear</color> - Скопировать ваши вещи на хранителя\n\n--------------------------------------------------", "CmdKeeperNotFound": "Хранитель хранилища не найден! Вам необходимо смотреть прямо на него.", "CmdKeeperSpawned": "Хранитель хранилища успешно создан!", "CmdKeeperKilled": "Хранитель хранилища успешно удалён!", "CmdKeeperNamed": "Имя хранителя хранилища успешно изменено!", "CmdKeeperWearCopied": "Ваша одежда была успешно скопирована на хранителя!", "CmdGiveawayMain": "Управление раздачей вещей:\n\n<color=#D1CBCB>/wh giveaway</color> <color=#D1AB9A>start</color> - Принудительно начать раздачу\n<color=#D1CBCB>/wh giveaway</color> <color=#D1AB9A>skip</color> - Принудительно остановить активную раздачу\n<color=#D1CBCB>/wh giveaway</color> <color=#D1AB9A>set \"HH:mm\"</color> - Установить новое время ежедневной раздачи\n<color=#D1CBCB>/wh giveaway</color> <color=#D1AB9A>fill *количество*(опционально)</color> - Принудительно заполнить раздачу случайными вещами\n<color=#D1CBCB>/wh giveaway</color> <color=#D1AB9A>clear</color> - Принудительно очистить раздачу от всех вещей\n\n--------------------------------------------------", "CmdGiveawayAlreadyActive": "Вы не можете выполнить это действие, так как уже идет активная раздача предметов!", "CmdGiveawayNotActive": "Вы не можете выполнить это действие, так как раздача предметов не активна!", "CmdGiveawaySetFailed": "Не удалось установить '{0}' в качестве нового времени для раздачи. Правильный формат: HH:mm, пример 20:00.", "CmdGiveawaySet": "Значение '{0}' успешно установлено в качестве нового времени для раздачи!", "CmdGiveawayFillStart": "Вы успешно начали принудительное заполнение хранилища для раздач {0} случайными предметами!", "CmdGiveawayFillFinish": "Хранилище для раздач успешно заполнено {0} случайными предметами за {1} секунд!", "CmdGiveawayClear": "Хранилище для раздач успешно очищено от всех предметов!", "DialogueNotAllowed": "У вас недостаточно прав для использования хранилища!", "DialogueStranger": "Незнакомец", "DialogueBtnExit": "Думаю, мне это неинтересно. Прощайте.", "DialogueInitialMain": "Привет! Мы раньше встречались? Что-то не припоминаю, чтобы видел вас здесь...\nЧем могу помочь?", "DialogueInitialBtnIntroduction": "Меня зовут {0}. А вы кто? Чем занимаетесь?", "DialogueInitialBtnExit": "Я просто прохожу мимо. Осматриваюсь.", "DialogueIntroductionMain": "Меня зовут {0}, я из Гильдии Хранителей. Нас немного, но мы есть в каждой безопасной зоне.\nНаша задача — обеспечивать сохранность вещей, которые их владельцы не в силах защитить самостоятельно. Мы гарантируем полную безопасность, у нас можно оставить абсолютно любые предметы. Разумеется, это платная услуга.\n\n{1}, говорите? Никогда о вас не слышал...\nК сожалению, мы не работаем с незнакомцами. На таких нельзя полагаться.", "DialogueIntroductionBtnGetMission": "У меня есть несколько вещей для хранения. Как я могу доказать свою надёжность?", "DialogueGetMissionMain": "Хм... Дайте-ка подумать... Знаете, есть одно дельце.\nМы поддерживаем тесные связи с Гильдией странствующих торговцев, и у меня есть письмо, которое я никак не могу им передать. Они обычно останавливаются на водокачках.\nЯ мог бы поручить это вам. Что скажете?", "DialogueGetMissionBtnStart": "Отлично, мне как раз по пути. Я готов помочь.", "DialogueGetMissionBtnPay": "Я бы с радостью помог, но это для меня слишком сложное задание.\nКак насчёт {0}$ от меня, так сказать, в знак доброй воли?", "DialogueMissionStartedMain": "{0}, рад вас снова видеть!\nКак продвигается выполнение моего поручения?", "DialogueMissionStartedBtnCancel": "Извините, но я больше не могу продолжать выполнение вашего задания.", "DialogueMissionStartedBtnExit": "Я всё ещё работаю над этим.", "DialogueMissionCanceledMain": "Мне жаль, что вы не смогли выполнить моё поручение...", "DialogueMissionCanceledBtnGetMission": "Мне тоже жаль, но я хотел бы ещё раз доказать свою надёжность.", "DialogueMissionCompletedMain": "{0}, ты просто молодец! Без тебя я бы точно не справился.\nЧем могу быть полезен?", "DialogueMissionPayedMain": "{0}$? Ха, теперь мы говорим на одном языке.\nЧем могу быть полезен?", "DialogueDefaultMain": "Приветствую, {0}! Давненько не виделись. Чем могу быть полезен?", "DialogueDefaultBtnForbiddenList": "Я бы хотел узнать, какие вещи запрещено сдавать на хранение.", "DialogueDefaultBtnStorageList": "Я бы хотел заглянуть в своё хранилище.", "DialogueDefaultBtnGiveaway": "Я бы хотел узнать о раздаче вещей.", "DialogueForbiddenListMain": "Вот список вещей, которые, к сожалению, вам нельзя сдавать на хранение:\n\n{0}", "DialogueStorageListMain": "Хотите открыть одно из ваших хранилищ или оформить новое?", "DialogueStorageListBtnStorageBuy": "Оформить новое хранилище.", "DialogueStorageListBtnOpenStorage": "Открыть '{0}' на {1} слот(ов).", "DialogueStorageListBtnBack": "Пожалуй, в другой раз.", "DialogueStorageBuyMain": "Прекрасно! Какой способ покупки вас интересует?\n\nСтоимость покупки хранилища: {0}$\nСтоимость покупки одного слота: {1}$\nЕжедневная плата за обслуживание одного слота: {2}$\n\nУчтите, что объём любого хранилища можно изменять в любое время, от 1 до 48 слотов.", "DialogueStorageBuyOutLimit": "Похоже, вы уже использовали весь доступный лимит хранилищ.", "DialogueStorageBuyBtnBuy": "Приобрести хранилище на {0} слот(ов) за {1}$.", "DialogueStorageBuyBtnBack": "Пожалуй, в другой раз.", "DialogueGiveawayMain": "У нас регулярно проходят раздачи ненужного и потерянного имущества.\n\nОбычно это:\n- предметы из хранилищ, за которые не была вовремя оплачена аренда\n- предметы, оставшиеся у игроков, покинувших игру в безопасной зоне\n- утраченные во время боёв предметы\n\nСледующая раздача намечена на {0}(UTC), до раздачи осталось {1}!\nОднако раздача может начаться и раньше, если количество предметов превысит {2}.\nОбязательно приходите, возможно, вам повезёт урвать что-нибудь ценное!", "DialogueGiveawayMainActive": "У нас регулярно проходят раздачи ненужного и потерянного имущества.\n\nОбычно это:\n- предметы из хранилищ, за которые не была вовремя оплачена аренда\n- предметы, оставшиеся у игроков, покинувших игру в безопасной зоне\n- утраченные во время боёв предметы\n\nРаздача в самом разгаре! Если не хотите пропустить, срочно приходите в {0}({1})!", "DialogueGiveawayBtnShow": "Я бы хотел узнать, какие вещи будут в грядущей раздаче.", "DialogueGiveawayBtnBack": "Пожалуй, в другой раз.", "GiveawayStorageName": "Хранилище раздачи", "GiveawayNotEnoughPlayers": "К сожалению, для раздачи не набралось достаточного количества онлайн игроков. Не упустите следующую раздачу, которая будет в {0}(UTC)!", "GiveawayNotEnoughItems": "К сожалению, для раздачи не набралось достаточного количества предметов. Не упустите следующую раздачу, которая будет в {0}(UTC)!", "GiveawayStartAnnounce": "Раздача вещей должна скоро начаться!\nВсем срочно в {0}({1})! До начала осталось {2} секунд!", "GiveawayPauseAnnounce": "Было успешно роздано {0} вещей! Но это ещё не всё! У нас остались ещё вещи, продолжим через {1} секунд!", "GiveawayEndAnnounce": "Раздача вещей завершена! В раздаче было свыше {0} предметов! Не упустите следующую раздачу, которая будет в {1}(UTC)!", "UiStorageUntil": "До: {0}(UTC)", "UiStorageExpired": "Аренда просрочена", "UiStorageNote": "Покупка слота: {1}$.\nЕжедневная аренда за слот: {2}$.\nТекущая стоимость ежедневной аренды: {3}$.", "UiStorageNoteRestricted": "<b>Примечание:</b> продлить аренду можно только за {0}ч до её истечения.\nПокупка слота: {1}$, ежедневная аренда за слот: {2}$.\nТекущая стоимость ежедневной аренды: {3}$.", "UiStorageRental": "Оплатить аренду", "UiStorageRentPayed": "Вы успешно продлили аренду хранилища!", "UiStorageSlotsOcupied": "Вы не можете уменьшить количество слотов, так как один из уменьшенных слотов содержит предмет!", "UiStorageSlotsAdjusted": "Количество слотов было изменено с {0} до {1}!" } To access the commands, you must have the "warehouse.admin" permission. keeper - Manage warehouse keepers: spawn *name*(optional) - Spawn a Keeper at your position; kill - Remove the Keeper you are looking at; name *name* - Change the name of the Keeper you are looking at; wear - Copy your items to the keeper. giveaway - Manage item giveaways: start - Force start the giveaway; skip - Force stop the active giveaway; set "HH:mm" - Set a new daily giveaway time; fill *amount*(optional) - Force fill the giveaway with random items; clear - Force clear all items from the giveaway storage. Example: /wh keeper spawn "Custom Keeper" /wh giveaway start /wh giveaway set "21:30" /wh giveaway fill 124 Warehouse can only be accessed through Keepers. By default, they are located in all safe zones, but you can also add them anywhere else on the map. The configuration file is located in: *SERVER*\oxide\data\Warehouse\KeepersConfig.json { "List of custom spawn positions for Keeper NPCs": [], "List of spawn offsets in monuments for Keeper NPCs": { "compound": { "DisplayName": "Warehouse Keeper", "Force use as a giveaway source. If no sources are available, one will be chosen at random": true, "Position X": -19.28, "Position Y": 0.81, "Position Z": 2.25, "Rotation X": 0.0, "Rotation Y": -0.97, "Rotation Z": 0.02, "Rotation W": -0.25, "The main inventory item": { "ShortName": "spear.cny", "SkinID": 0 }, "The belt inventory item": { "ShortName": "botabag", "SkinID": 0 }, "The wear inventory items": [ { "ShortName": "hazmatsuit.frontier", "SkinID": 0 } ] }, "bandit_town": { "DisplayName": "Warehouse Keeper", "Force use as a giveaway source. If no sources are available, one will be chosen at random": true, "Position X": 11.75, "Position Y": 1.91, "Position Z": -41.14, "Rotation X": 0.08, "Rotation Y": -0.1, "Rotation Z": 0.0, "Rotation W": 1.0, "The main inventory item": { "ShortName": "spear.cny", "SkinID": 0 }, "The belt inventory item": { "ShortName": "botabag", "SkinID": 0 }, "The wear inventory items": [ { "ShortName": "hazmatsuit.frontier", "SkinID": 0 } ] }, "fishing_village_a": { "DisplayName": "Warehouse Keeper", "Force use as a giveaway source. If no sources are available, one will be chosen at random": false, "Position X": -26.76, "Position Y": 2.13, "Position Z": -20.55, "Rotation X": 0.04, "Rotation Y": 0.01, "Rotation Z": 0.0, "Rotation W": 1.0, "The main inventory item": { "ShortName": "spear.cny", "SkinID": 0 }, "The belt inventory item": { "ShortName": "botabag", "SkinID": 0 }, "The wear inventory items": [ { "ShortName": "hazmatsuit.frontier", "SkinID": 0 } ] }, "fishing_village_b": { "DisplayName": "Warehouse Keeper", "Force use as a giveaway source. If no sources are available, one will be chosen at random": false, "Position X": -10.16, "Position Y": 2.02, "Position Z": 20.73, "Rotation X": 0.05, "Rotation Y": -0.85, "Rotation Z": 0.08, "Rotation W": 0.51, "The main inventory item": { "ShortName": "spear.cny", "SkinID": 0 }, "The belt inventory item": { "ShortName": "botabag", "SkinID": 0 }, "The wear inventory items": [ { "ShortName": "hazmatsuit.frontier", "SkinID": 0 } ] }, "fishing_village_c": { "DisplayName": "Warehouse Keeper", "Force use as a giveaway source. If no sources are available, one will be chosen at random": false, "Position X": -3.0, "Position Y": 2.06, "Position Z": 11.47, "Rotation X": 0.06, "Rotation Y": 0.03, "Rotation Z": 0.0, "Rotation W": 1.0, "The main inventory item": { "ShortName": "spear.cny", "SkinID": 0 }, "The belt inventory item": { "ShortName": "botabag", "SkinID": 0 }, "The wear inventory items": [ { "ShortName": "hazmatsuit.frontier", "SkinID": 0 } ] }, "stables_a": { "DisplayName": "Warehouse Keeper", "Force use as a giveaway source. If no sources are available, one will be chosen at random": false, "Position X": 2.47, "Position Y": 3.04, "Position Z": -14.16, "Rotation X": 0.0, "Rotation Y": -0.97, "Rotation Z": 0.02, "Rotation W": -0.25, "The main inventory item": { "ShortName": "spear.cny", "SkinID": 0 }, "The belt inventory item": { "ShortName": "botabag", "SkinID": 0 }, "The wear inventory items": [ { "ShortName": "hazmatsuit.frontier", "SkinID": 0 } ] }, "stables_b": { "DisplayName": "Warehouse Keeper", "Force use as a giveaway source. If no sources are available, one will be chosen at random": false, "Position X": 2.79, "Position Y": 3.0, "Position Z": 29.68, "Rotation X": -0.02, "Rotation Y": -0.73, "Rotation Z": 0.02, "Rotation W": -0.69, "The main inventory item": { "ShortName": "spear.cny", "SkinID": 0 }, "The belt inventory item": { "ShortName": "botabag", "SkinID": 0 }, "The wear inventory items": [ { "ShortName": "hazmatsuit.frontier", "SkinID": 0 } ] } }, "Version": { "Major": 0, "Minor": 1, "Patch": 0 } } The plugin supports item giveaways. Items list can be sourced from expired warehouses, banned players, and buried items. Administrators can also artificially populate giveaways by adding random items manually. The configuration file is located in: *SERVER*\oxide\data\Warehouse\GiveawayConfig.json { "Daily giveaway time. Format: HH:mm": "20:00", "Minimum number of players online required to start the giveaway. A value of 0 disables the limit": 0, "Forced giveaway start upon reaching the specified amount. Note: when there are a large number of items, the server may experience lag.": 480, "Minimum number of items required for the giveaway to take place. A value of 0 disables the limit": 0, "Time in seconds(1–600) before the giveaway starts to notify players": 300.0, "Number of items dropped per second": 16, "Is it worth moving lost items(BuriedItems) to the giveaway?": true, "Is it worth moving items from a player's warehouse to the giveaway when they are banned?": true, "Is it worth moving items from a player's body to the giveaway when they are banned?": true, "Is it worth moving items from a player's storage boxes to the giveaway when they are banned?": true, "List of forbidden items for giveaways": [ "blood" ], "Version": { "Major": 0, "Minor": 1, "Patch": 0 } }$24.99 -
Version 2.1.5
7,968 downloads
UltimateLocker - Lock Everything, Auto Lock & Auto Closing UltimateLocker - Lock Everything, Auto Lock & Auto Closing, allows you to place Code Locks/Key Lock on Vehicles, Furnaces, Weapon Racks, Turrets, Mining Quarry, Pump Jack, Motorbike, Motorbike With Sidecar, Pedal Bike, Pedal Trike, Deployable Items, Naval Deep Sea, Drawing / Signs and much more. Support for: Storage Box Pack DLC (https://rust.facepunch.com/news/shipshape#StorageBoxPackDLC) Support for: Industrial Decor Pack DLC (https://rust.facepunch.com/news/built-different#IndustrialDecorPack) Plus you can decide whether to automatically position the code locks, with many configurations and share locks with your clan/team members. You can also enable automatic closing by positioning door closers automatically or manually, change the closing delay time and decide on which entities to enable it. Place Code Lock wherever you want, Auto Lock and Auto Closing with a single plugin, 3 plugin in 1. You can decide which entities to enable Code Lock on or Door Closer. Block any entity you want, including electrical, industrial, crafting, research, farming, etc. It has commands for administrators to lock, unlock and remove Code Locks/Key Lock. Include support for new CodeLock: Flight Control Codelock and option to automatically use the Flight Control Codelock skin. IMPORTANT: Added the ability to also place Key Locks, in addition to Code Locks. Place Code Lock/Key Lock wherever you want with a single plugin: Vehicle Locks Motorbike, Motorbike With Sidecar, Pedal Bike, Pedal Trike Naval Deep Sea Storage Box Pack DLC (https://rust.facepunch.com/news/shipshape#StorageBoxPackDLC) Industrial Decor Pack DLC (https://rust.facepunch.com/news/built-different#IndustrialDecorPack) Drawing / Signs Rust item lock Windows Lock Automatic lock closing when dismount of the vehicle Code Lock support for Medieval entities: Mounted Ballista, Battering Ram, Catapult, Siege Tower, Ballista Medieval entities block usage: opening/closing doors, reloading/firing ammo, mounting, driving, pushing, pulling, etc... Furnaces, Refineries, and more Weapon Rack Lock Block any entity you want, including electrical, industrial, crafting, research, farming, etc. Farming Lock Electricity Lock / Electrical Lock Industrial Lock Construction Lock Mining Quarry, Pump Jack Items Lock Trap Lock Turrets Lock Misc Lock Fun Lock Deployable Lock And so on... VIDEO EXAMPLE Below you can see an example video on how to use the plugin. AUTO LOCK ---------------------------------------------------------------------------------------------------- AUTO CLOSER ---------------------------------------------------------------------------------------------------- AUTO CLOSER - PROXIMITY SYSTEM ---------------------------------------------------------------------------------------------------- EXAMPLES OF OPERATION/USE: Some examples of how the plugin works when there is a Code Lock/Key Lock to which you do not have access: Usage block/loot furnaces, refineries, electric furnaces, water dispensers, industrial conveyor, industrial crafter, car lift, elevator, small generator, metal shop front, dropbox, mail box, vending machine, etc... Usage block: workbench, research table, repair table, computer station, mixing table, etc... Device Identifier: If the Auto Turrets, CCTV Camera, PTZ CCTV Camera, etc..., are locked with Code Lock/Key Lock, you cannot access them remotely if you do not have access to Code lock/Key Lock, even if you know the identification number. Block use and loot of vehicles, including horses Block use and loot of vehicles, including Motorbike, Motorbike With Sidecar, Pedal Bike, Pedal Trike. Automatic lock closing when dismount of the vehicle Code Lock support for Medieval entities: Mounted Ballista, Battering Ram, Catapult, Siege Tower, Ballista Medieval entities block usage: opening/closing doors, reloading/firing ammo, mounting, driving, pushing, pulling, etc... Block use and loot of: Mining Quarry, Pump Jack. Auto Turret authorization lock, rotation, attack mode, remote control, lock to change identification ID. Locking loot and usafe of SAM Site. Lock to change camera identification ID and remote control. Block personal Quarry Mining usage and loot FARM: fertilizer container block, sowing block, harvesting/cutting plants and clone, or harvesting dead plants, composter lock, Beehive lock, Chicken Coop lock, Cooking Workbench lock, Planter Box lock, etc... Weapon rack: weapons storage and collection block, weapon reloading, weapon exchange. Blocking the insertion and removal of electrical cables and pipes from the various components. Blocking the use of electrical components: switching on/off switches, switches, buttons, changing timer duration and much more... Blocking use and frequency change of transceiver components, RF Broadcaster, RF Receiver. Blocking the use of some entertainment objects such as the piano, drums, boom box, arcade games, etc... Block fun objects such as Strobe Light, Laser Light, Sound Light, Neon Sign, etc... And much more, with new items that will be added in future releases or at your suggestion via a request for support or comment ---------------------------------------------------------------------------------------------------- AUTO LOCK: The plugin integrates an automatic positioning system for Code Lock or Key Lock. Using the /al, /autolock or /codelock command the player can manage all the settings: Sharing locks with clan/team members. Create a code lock pin and/or update all your codelock pins with 1 click. Create a Guest pin for your Code Lock and/or update all Guest pins of your code locks with 1 click. Enable the ability to use Key Locks, if you do not have Code Locks in your inventory. Streamer mode: to hide the display of the Code Lock pin on the screen. In addition, there will be many other options that can be enabled/disabled. These options will be available based on how the plugin has been configured. For example: has the ability to place the code lock on the furnaces been enabled? Then there will be the option to enable and/or disable the automatic positioning of the locks on the furnaces. And so on for all the other configurations. And many other new features and features that will arrive with the next plugin updates. ---------- AUTO CLOSING (DOOR CLOSER): The plugin integrates a system for automatic closing, of various entities. The player can change the settings through a simple and intuitive interface and apply these settings automatically or manually. Using the /ac , /autoclose or /autocloser command and by pressing the button "Auto Closing Settings" the player can manage all the settings: ---------------------------------------------------------------------------------------------------- PROXIMITY SYSTEM: The plugin integrates a system for automatic closing, of various entities. A Proximity System is available for automatic door closing. This system allows you to quickly and easily change the automatic door closing settings. There are three modes: An icon appears when you approach a door with automatic closing enabled. Using a combination of buttons. Both modes. Some example images: ---------------------------------------------------------------------------------------------------- CODE LOCK AUTO SKIN: The plugin allows you to automatically change the code lock skin, automatically switching the skin to the Flight Control Codelock skin. To use this feature, the player must own the DLC. DLC ownership check can be bypassed via configuration or permission (⚠ Only allowed on creative/test servers, otherwise you violate Facepunch’s TOS! ⚠) CONFIGURATION "Disable ownership checking on DLC/Skins. (⚠ Only allowed on creative/test servers, otherwise you violate Facepunch's TOS! ⚠) Default false": false PERMISSION ultimatelocker.bypass.dlc_skin_required - Permission to bypass DLC or Skin ownership checks. With this permission, you can use DLC or Skins you don’t own. PERMISSIONS: ultimatelocker.use - Allows you to use the plugin to place Code Locks/Key Locks. ultimatelocker.admin - Allows you to execute some commands reserved for administrators. ultimatelocker.bypass.lock_deploy_vehicle_check - Allows you to bypass these controls when deploying the lock on vehicles: Requires Building Privilege to place Code Locks Requires Building Privilege to place Code Locks in unowned vehicles Allow deployment of Code Lock in unowned vehicles ultimatelocker.bypass.force - Allows you to bypass Code Locks/Key Locks. (FOR ADMIN USE!!!) ultimatelocker.bypass.dlc_skin_required - Permission to bypass DLC or Skin ownership checks. With this permission, you can use DLC or Skins you don’t own. ultimatelocker.autolock.enabled - This role is required to be able to use the automatic positioning system of Code Lock or Key Lock. ultimatelocker.autolock.nolockrequired - With this role you do not need to have the Code Lock in your inventory, the Code Lock will be placed even if you do not have one. ultimatelocker.autoclosing.enabled - This role is required to be able to use the automatic closing system, Door Closer. COMMANDS FOR PLAYERS Commands can be typed in chat (by putting the / character in front of the command), or from console. /autolock or /codelock -- Open Auto Lock/Auto Closing settings UI. /locker -- Command to add lock manually. /closer -- Command to add door closer manually. /uncloser -- Command to remove door closer manually. /ual -- Toggle Auto Lock. Command to enable/disable auto lock. /uad -- Toggle Auto Closer. Command to enable/disable automatic closing. /ul code <code> -- Change the Code Lock code of the entity you are looking at, if you own the entity or if it belongs to a clan/team member. /ul codeall <code> -- Change the Code Lock code on all entities owned by the player. /ul ctime <time> -- Set the closing delay time (seconds) for the Door you are looking at. ---------- COMMANDS FOR ADMIN Commands can be typed in chat (by putting the / character in front of the command), or from console. To use these commands you must have the role: ultimatelocker.admin /ul unlock -- Unlock the Code Lock/Key Lock of the entity you are watching. /ul unlockall <steamID> -- Unlock all player Code Locks/Key Locks. /ul lock -- Lock the Code Lock/Key Lock of the entity you are watching. /ul lockall <steamID> -- Lock all player Code Locks/Key Locks. /ul remove -- Removes the Code Lock/Key Lock of the entity you are watching. /ul removeall <steamID> -- Removes all player Code Locks/Key Locks. /ul code <code> -- Change the Code Lock code of the entity you are looking at. Instead of <code> you must insert the new code. Must consist of 4 numbers. /ul codeall <code> <steamID> -- Change the Code Lock code on all entities owned by the player. You must pass the steamID of the player whose code you want to change instead of the <steamID>. Instead of <code> you must insert the new code. Must consist of 4 numbers. /ul show -- Shows the Code Lock code of the entity you are looking at. -------------------- NB: To use these commands you must set the configuration AllowAdminToBypassCodeLock to be set to true or have the role ultimatelocker.bypass.force. -------------------- Commands can be added or modified in the configuration file: /oxide/config/UltimateLocker.json CLAN/TEAM If the player is part of a clan/team, he can block, unlock or remove Code Locks/Key Locks placed by other teammates, if enabled in the configurations. CONFIGURATION The settings and options can be configured in the UltimateLocker under the config directory. The use of an editor and validator is recommended to avoid formatting issues and syntax errors. { "TimeZone": "Europe/London", "ChatPrefix": "UltimateLocker", "AllowAdminToBypassCodeLock (Allows admin to bypass Code Lock without using commands). Default False.)": false, "Disable ownership checking on DLC/Skins. (⚠ Only allowed on creative/test servers, otherwise you violate Facepunch's TOS! ⚠) Default false": false, "Chat Command": [ "ul", "ultimatelocker" ], "Skin Blacklist Configuration": { "Lock: Block lock for entity with this skin": [], "Door Closer: Block door closer for entity with this skin": [] }, "Proximity System": { "Show UI when player is near a door with Door Closer. Default false": false, "Show UI when pressing key. Default true": true, "Button to show UI: 1 (MMB - middle mouse button) - 2 (SHIFT + MMB) - 3 (CTRL + MMB). Default 2": 2 }, "Auto Lock Configuration": { "Chat Command": [ "al", "autolock", "codelock" ], "Toggle Auto Lock - Chat Command": "ual", "Add Lock manually - Chat Command": "locker", "Use only Key Lock. [true] to allow only Key Lock. [false] to allow both Key Lock and Code Lock. (Default: FALSE)": false, "RESYNC DEFAULT SETTINGS for all players. If set to [true], resets all player settings to the default settings configured. Once the settings are reset, the parameter will automatically be reset to false. (Default: FALSE)": false, "FORCE SHARE LOCKS WITH CLAN/TEAM MEMBERS. [true] to force all players to share locks with clan/team members. [false] to force all players to NOT share locks with clan/team members. [null] to use the player's default settings by UI. (Default: null)": null, "Auto Lock Category Configuration": { "Is automatic lock enabled on Doors enabled.": true, "Is automatic lock enabled on Windows enabled.": true, "Is automatic lock enabled on Boxes enabled.": true, "Is automatic lock enabled on Storage Container enabled.": true, "Is automatic lock enabled on Lockers enabled.": true, "Is automatic lock enabled on TC (Cupboards) enabled.": true, "Is automatic lock enabled on Vehicles enabled.": true, "Is automatic lock enabled on Medieval entity enabled.": true, "Is automatic lock enabled on Furnace enabled.": true, "Is automatic lock enabled on Vending Machine enabled.": true, "Is automatic lock enabled on Composter enabled.": true, "Is automatic lock enabled on Mixing Table enabled.": true, "Is automatic lock enabled on Planter enabled.": true, "Is automatic lock enabled on Auto Turret enabled.": true, "Is automatic lock enabled on SAM Site enabled.": true, "Is automatic lock enabled on Traps enabled.": true, "Is automatic lock enabled on Weapon Rack enabled.": true, "Is automatic lock enabled on Stash enabled.": true, "Is automatic lock enabled on Neon Sign enabled.": true, "Is automatic lock enabled on Other Custom Entities enabled.": true, "Is automatic lock enabled on Other Lockable Entities enabled.": true }, "Player default settings": { "Allow automatic lock placement by default. (Default: TRUE)": true, "Allow automatic placement of Key Locks if there are no Code Locks in the inventory. (Default: TRUE)": true, "Allow Guest Code by default. (Default: FALSE)": false, "Allow automatic Share locks with clan/team members by default. (Default: TRUE)": true, "Enable streamer mode by default. (Default: FALSE)": false, "Allow automatic lock on Doors by default. (Default: TRUE)": true, "Allow automatic lock on Boxes by default. (Default: FALSE)": false, "Allow automatic lock on Storage Container by default. (Default: FALSE)": false, "Allow automatic lock on Lockers by default. (Default: TRUE)": true, "Allow automatic lock on TC (Cupboards) by default. (Default: TRUE)": true, "Allow automatic lock on Vehicle by default. (Default: TRUE)": true, "Allow automatic lock closing when dismount of the vehicle by default. (Default: TRUE)": true, "Allow automatic lock on Medieval entity by default. (Default: FALSE)": false, "Allow automatic lock on Furnace by default. (Default: FALSE)": false, "Allow automatic lock on Vending Machine by default. (Default: FALSE)": false, "Allow automatic lock on Composter by default. (Default: FALSE)": false, "Allow automatic lock on Mixing Table by default. (Default: FALSE)": false, "Allow automatic lock on Planter by default. (Default: FALSE)": false, "Allow automatic lock on Auto Turret by default. (Default: FALSE)": false, "Allow automatic lock on SAM Site by default. (Default: FALSE)": false, "Allow automatic lock on Traps by default. (Default: FALSE)": false, "Allow automatic lock on Weapon Rack by default. (Default: TRUE)": true, "Allow automatic lock on Stash by default. (Default: FALSE)": false, "Allow automatic lock on Neon Sign by default. (Default: FALSE)": false, "Allow automatic lock on Other Lockable Entities by default. (Default: FALSE)": false, "Allow automatic lock on Other Custom Entities by default. (Default: FALSE)": false }, "Player Auto Closing default settings": { "Allow automatic closing by default. (Default: FALSE)": false, "Allow automatic closing of Door by default. (Default: FALSE)": false, "Allow automatic closing of Double Door by default. (Default: FALSE)": false, "Allow automatic closing of Window by default. (Default: FALSE)": false, "Allow automatic closing of Garage by default. (Default: FALSE)": false, "Allow automatic closing of Ladder Hatch by default. (Default: FALSE)": false, "Allow automatic closing of External Gate by default. (Default: FALSE)": false, "Allow automatic closing of Fence Gate by default. (Default: FALSE)": false, "Allow automatic closing of Legacy Wood Shelter Door by default. (Default: FALSE)": false } }, "Auto Closing Configuration": { "Chat Command": [ "ac", "autoclose", "autocloser" ], "Toggle Auto Closer - Chat Command": "uad", "Add Door Closer manually - Chat Command": "closer", "Remove Door Closer manually - Chat Command": "uncloser", "Enable automatic closing of Door. (Default: FALSE)": false, "Enable automatic closing of Double Door. (Default: FALSE)": false, "Enable automatic closing of Window. (Default: FALSE)": false, "Enable automatic closing of Garage. (Default: FALSE)": false, "Enable automatic closing of Ladder Hatch. (Default: FALSE)": false, "Enable automatic closing of External Gate. (Default: FALSE)": false, "Enable automatic closing of Fence Gate. (Default: FALSE)": false, "Enable automatic closing of Legacy Wood Shelter Door. (Default: FALSE)": false, "Minimum Closing Delay Time. (Default: 10 seconds)": 10, "Maximum Closing Delay Time. (Default: 60 seconds)": 60, "Default Closing Delay Time. (Default: 30 seconds)": 30 }, "Requires Building Privilege to place Code Locks. (Default: TRUE)": true, "Requires Building Privilege to place Code Locks in unowned vehicles. (Default: FALSE)": false, "Allow deployment of Code Lock in vehicles owned by other players. (Default: FALSE)": false, "Allow deployment of Code Lock in unowned vehicles. (Default: TRUE)": true, "Auto claim unowned vehicles when deploying locks. (Default: FALSE)": false, "Auto replace vehicle ownership when deploying locks. (Default: FALSE)": false, "Allow pushing vehicles blocked by the Code Lock (Default: TRUE)": true, "Allow pushing vehicles blocked by the Code Lock if present in your Building Privilege. (Default: TRUE)": true, "Set player as owner when placing a Mining Quarry or Pump Jack (also static). (Default: TRUE)": true, "Enable Lock": { "Vehicles": [ { "ItemName": "Minicopter", "EnableLock": true, "PrefabName": "assets/content/vehicles/minicopter/minicopter.entity.prefab", "RequiredPermission": [ "" ] }, { "ItemName": "Scrap Transport Helicopter", "EnableLock": true, "PrefabName": "assets/content/vehicles/scrap heli carrier/scraptransporthelicopter.prefab", "RequiredPermission": [ "" ] }, { "ItemName": "Attack Helicopter", "EnableLock": true, "PrefabName": "assets/content/vehicles/attackhelicopter/attackhelicopter.entity.prefab", "RequiredPermission": [ "" ] }, { "ItemName": "Armored / Hot Air Balloon", "EnableLock": true, "PrefabName": "assets/prefabs/deployable/hot air balloon/hotairballoon.prefab", "RequiredPermission": [ "" ] }, { "ItemName": "Row Boat", "EnableLock": true, "PrefabName": "assets/content/vehicles/boats/rowboat/rowboat.prefab", "RequiredPermission": [ "" ] }, { "ItemName": "RHIB", "EnableLock": true, "PrefabName": "assets/content/vehicles/boats/rhib/rhib.prefab", "RequiredPermission": [ "" ] }, { "ItemName": "Tugboat", "EnableLock": true, "PrefabName": "assets/content/vehicles/boats/tugboat/tugboat.prefab", "RequiredPermission": [ "" ] }, { "ItemName": "Submarinesolo", "EnableLock": true, "PrefabName": "assets/content/vehicles/submarine/submarinesolo.entity.prefab", "RequiredPermission": [ "" ] }, { "ItemName": "Submarine Duo", "EnableLock": true, "PrefabName": "assets/content/vehicles/submarine/submarineduo.entity.prefab", "RequiredPermission": [ "" ] }, { "ItemName": "Horse", "EnableLock": true, "PrefabName": "assets/rust.ai/nextai/testridablehorse.prefab", "RequiredPermission": [ "" ] }, { "ItemName": "Tomaha Snowmobile", "EnableLock": true, "PrefabName": "assets/content/vehicles/snowmobiles/tomahasnowmobile.prefab", "RequiredPermission": [ "" ] }, { "ItemName": "Snowmobile", "EnableLock": true, "PrefabName": "assets/content/vehicles/snowmobiles/snowmobile.prefab", "RequiredPermission": [ "" ] }, { "ItemName": "Sedan", "EnableLock": true, "PrefabName": "assets/content/vehicles/sedan_a/sedantest.entity.prefab", "RequiredPermission": [ "" ] }, { "ItemName": "2 Module Car", "EnableLock": true, "PrefabName": "assets/content/vehicles/modularcar/2module_car_spawned.entity.prefab", "RequiredPermission": [ "" ] }, { "ItemName": "3 Module Car", "EnableLock": true, "PrefabName": "assets/content/vehicles/modularcar/3module_car_spawned.entity.prefab", "RequiredPermission": [ "" ] }, { "ItemName": "4 Module Car", "EnableLock": true, "PrefabName": "assets/content/vehicles/modularcar/4module_car_spawned.entity.prefab", "RequiredPermission": [ "" ] } ], "Deployables": [ { "ItemName": "Large Furnace", "EnableLock": true, "PrefabName": "assets/prefabs/deployable/furnace.large/furnace.large.prefab", "RequiredPermission": [ "" ] }, { "ItemName": "Furnace", "EnableLock": true, "PrefabName": "assets/prefabs/deployable/furnace/furnace.prefab", "RequiredPermission": [ "" ] }, { "ItemName": "Legacy Furnace", "EnableLock": true, "PrefabName": "assets/prefabs/deployable/legacyfurnace/legacy_furnace.prefab", "RequiredPermission": [ "" ] }, { "ItemName": "Refinery", "EnableLock": true, "PrefabName": "assets/prefabs/deployable/oil refinery/refinery_small_deployed.prefab", "RequiredPermission": [ "" ] }, { "ItemName": "Electric Furnace", "EnableLock": true, "PrefabName": "assets/prefabs/deployable/playerioents/electricfurnace/electricfurnace.deployed.prefab", "RequiredPermission": [ "" ] }, { "ItemName": "Stone Fireplace", "EnableLock": true, "PrefabName": "assets/prefabs/deployable/fireplace/fireplace.deployed.prefab", "RequiredPermission": [ "" ] }, { "ItemName": "BBQ", "EnableLock": true, "PrefabName": "assets/prefabs/deployable/bbq/bbq.deployed.prefab", "RequiredPermission": [ "" ] }, { "ItemName": "Hobo Barrel", "EnableLock": true, "PrefabName": "assets/prefabs/misc/twitch/hobobarrel/hobobarrel.deployed.prefab", "RequiredPermission": [ "" ] }, { "ItemName": "Storage Barrel B", "EnableLock": true, "PrefabName": "assets/prefabs/misc/decor_dlc/storagebarrel/storage_barrel_b.prefab", "RequiredPermission": [ "" ] }, { "ItemName": "Storage Barrel C", "EnableLock": true, "PrefabName": "assets/prefabs/misc/decor_dlc/storagebarrel/storage_barrel_c.prefab", "RequiredPermission": [ "" ] }, ............ ] }, "VersionNumber": { "Major": 1, "Minor": 6, "Patch": 0 } } TimeZone: Default: Europe/London ChatPrefix: -- Chat message prefix. Skin Blacklist Configuration: Skins that are not allowed for auto-lock or auto-close can be entered here. If the entity has one of these skins, auto-lock or auto-close will not work. "Skin Blacklist Configuration": { "Lock: Block lock for entity with this skin": [], "Door Closer: Block door closer for entity with this skin": [] }, AllowAdminToBypassCodeLock (Allows admin to bypass Code Locks/Key Locks without using commands). Default FALSE. Disable ownership checking on DLC/Skins. (⚠ Only allowed on creative/test servers, otherwise you violate Facepunch’s TOS! ⚠): Disable DLC/Skin ownership check, to be used only on CREATIVE or TEST servers. Using this option on PVP or PVE servers will result in a warning or ban from the Rust server list by Facepunch. Default false Chat Command: Here you can add, edit or delete Commands can be typed in chat (by putting the / character in front of the command), or from console. Requires Building Privilege to place Code Locks: Requires Building Privilege to place Code Locks/Key Lock. Default: TRUE Requires Building Privilege to place Code Locks in unowned vehicles: Requires Building Privilege to place Code Locks/Key Lock in unowned vehicles. Default: FALSE Allow deployment of Code Lock in vehicles owned by other players: Allow deployment of Code Lock in vehicles owned by other players. Default: FALSE Allow deployment of Code Lock in unowned vehicles: Allow deployment of Code Lock in unowned vehicles. Default: TRUE Auto claim unowned vehicles when deploying locks: Auto claim unowned vehicles when deploying locks. Default FALSE Auto replace vehicle ownership when deploying locks: Auto replace vehicle ownership when deploying locks. Default FALSE Allow pushing vehicles blocked by the Code Lock: Allow pushing vehicles/horses blocked by the Code Lock. Default: TRUE Sets player as owner when placing a Mining Quarry or Pump Jack (also static): Set the player as owner of the Mining Quarry or Pump Jack placed (also those statistics). Default: TRUE Allow pushing vehicles blocked by the Code Lock if present in your Building Privilege: Allow pushing vehicles/horses blocked by the code lock if present in the player's building authorization zone. Default: TRUE Enable Lock: Here you can set which entities to enable, on which you can place a Code Lock/Key Lock. ItemName: The name of the entity EnableLock: Whether or not to enable Code Lock/Key Lock placement for this entity. RequiredPermission: Here you can specify the roles required to be able to insert a Code Lock/Key Lock in the entities enabled in the configuration. You can specify 1 or more roles, and as long as the player has at least one of these roles he can enter the Code Lock/Key Lock. Here you can specify the roles required to be able to insert a Code Lock/Key Lock in the entities enabled in the configuration. You can specify 1 or more roles, and as long as the player has at least one of these roles he can enter the Code Lock/Key Lock. When you enter a role, a server-side role will be created which must then be assigned to the player, here are some examples. "RequiredPermission”: [ "vip_1”]: In this case the ultimatelocker.vip_1 role will be created, it will be necessary to assign this role to the player to enable the insertion of the Code Lock/Key Lock in the configured entity. "RequiredPermission”: [ "user_1”, "vip_2” ]: In this case the ultimatelocker.user_1 and ultimatelocker.vip_2 roles will be created and it will be necessary to assign one of these roles to the player (or even both) to enable the insertion of the Code Lock/Key Lock in the configured entity. The role name must respect certain parameters and can only contain these alphanumeric characters: a-z A-Z 0-9 . _ – Any unsupported characters will be removed, the space character will be replaced by the _ character. AUTO LOCK - CONFIGURATION Chat Command: Here you can specify 1 or more commands to open the UI for Auto Lock settings Add Lock manually -- Chat Command: Command to add lock manually. Default /locker Use only Key Lock. [true] to allow only Key Lock. [false] to allow both Key Lock and Code Lock-- If [true] allow only Key Lock. [false] to allow both Key Lock and Code Lock. Default FALSE If set to true, only new codelocks placed will not be shared, old codelocks will remain shared (if they were shared) RESYNC DEFAULT SETTINGS for all players. If set to [true], resets all player settings to the default settings configured. Once the settings are reset, the parameter will automatically be reset to false: Default settings are applied only 1 time, when the player runs the plugin for the first time. With this option you can reset all default settings for all players, useful when you change a default setting and want it to be applied to all players. The field must be set to true and the plugin restarted, at the end of the restart all players will have the new default settings that have been configured and the parameter is reset to false, for successful reuses. Default false FORCE SHARE LOCKS WITH CLAN/TEAM MEMBERS. [true] to force all players to share locks with clan/team members. [false] to force all players to NOT share locks with clan/team members. [null] to use the player's default settings by UI: This setting allows you to choose how to handle automatic sharing of locks with clan/team members. Default null true: If set to true, locks will be automatically shared with all clan/team members. The player will not be able to change this setting from the plugin UI. false: If set to false, locks will NOT be automatically shared with all clan/team members. The player will not be able to change this setting from the plugin UI. null: If set to null, the player will be able to enable or disable automatic lock sharing with clan/team members, via the plugin UI. -------------------- Auto Lock Category Configuration: This configuration allows you to enable or disable auto-lock regardless of the enabled entities. You can enable/disable auto-lock for each category: Is automatic lock enabled on Doors enabled: Default true Is automatic lock enabled on Windows enabled: Default true Is automatic lock enabled on Boxes enabled: Default true Is automatic lock enabled on Storage Container enabled: Default true Is automatic lock enabled on Lockers enabled: Default true Is automatic lock enabled on TC (Cupboards) enabled: Default true Is automatic lock enabled on Vehicles enabled: Default true Is automatic lock enabled on Naval Deep Sea: Default true Is automatic lock enabled on Medieval entity enabled: Default true Is automatic lock enabled on Furnace enabled: Default true Is automatic lock enabled on Vending Machine enabled: Default true Is automatic lock enabled on Composter enabled: Default true Is automatic lock enabled on Mixing Table enabled: Default true Is automatic lock enabled on Planter enabled: Default true Is automatic lock enabled on Auto Turret enabled: Default true Is automatic lock enabled on SAM Site enabled: Default true Is automatic lock enabled on Traps enabled: Default true Is automatic lock enabled on Weapon Rack enabled: Default true Is automatic lock enabled on Stash enabled: Default true Is automatic lock enabled on Neon Sign enabled: Default true Is automatic lock enabled on Sign / Drawing: Default true Is automatic lock enabled on Other Custom Entities enabled: Default true Is automatic lock enabled on Other Lockable Entities enabled: Default true -------------------- Player default settings: Allow automatic …. …. by default: The settings that start with "Allow automatic …. …. by default", are the basic settings once the Auto Lock system is enabled. EXAMPLE: If you have Auto Lock enabled and have the setting "Allow automatic lock on Doors by default = true", then it will be set to automatically place the code lock /key lock on doors by default. After that the player can change this setting via the UI. This applies to all basic "allow configuration properties”. -------------------- Allow automatic lock closing when dismount of the vehicle by default.: If the vehicle has a lock, the lock will be automatically closed when you dismount the vehicle, so as to avoid leaving vehicles open and potentially stolen. Default TRUE AUTO CLOSING (DOOR CLOSER) - CONFIGURATION Add Door Closer manually -- Chat Command: Command to add door closer manually. Default /closer Remove Door Closer manually – Chat Command: Command to remove door closer manually. Default /uncloser Enable automatic closing of Door. (Default: FALSE): Enable automatic closing for Single Doors. Permission is still required: ultimatelocker.autoclosing.enabled Enable automatic closing of Double Door. (Default: FALSE): Enable automatic closing for Double Doors. Permission is still required: ultimatelocker.autoclosing.enabled Enable automatic closing of Window. (Default: FALSE): Enable automatic closing for Windows. Permission is still required: ultimatelocker.autoclosing.enabled Enable automatic closing of Garage. (Default: FALSE): Enable automatic closing for Garage. Permission is still required: ultimatelocker.autoclosing.enabled Enable automatic closing of Ladder Hatch. (Default: FALSE): Enable automatic closing for Ladder Hatch. Permission is still required: ultimatelocker.autoclosing.enabled Enable automatic closing of External Gate. (Default: FALSE): Enable automatic closing for External Gate. Permission is still required: ultimatelocker.autoclosing.enabled Enable automatic closing of Fence Gate. (Default: FALSE): Enable automatic closing for Fence Gate. Permission is still required: ultimatelocker.autoclosing.enabled Enable automatic closing of Legacy Wood Shelter Door. (Default: FALSE): Enable automatic closing for Legacy Wood Shelter Door. Permission is still required: ultimatelocker.autoclosing.enabled Minimum Closing Delay Time. (Default: 10 seconds): Minimum delay time usable for automatic closing, Door Closer. Maximum Closing Delay Time. (Default: 60 seconds): Maximum delay time that can be used for automatic closing, Door Closer. Default Closing Delay Time. (Default: 30 seconds): Default delay time for automatic closing, Door Closer. -------------------- Player Auto Closing default settings: Allow automatic closing .... .... by default: The settings that start with "Allow automatic closing .... .... by default", are the basic settings once the Auto Closing system is enabled. EXAMPLE: If you have set "Allow automatic closing of Door by default. (Default: FALSE)": true", automatic closing for doors will be applied automatically. PROXIMITY SYSTEM - CONFIGURATION Show UI when player is near a door with Door Closer: If set to true, an icon appears in the top right corner when you approach a door with auto-closing enabled. This opens a menu to change the door's auto-closing behavior via the UI. Default false Show UI when pressing key: If set to true, allows to open the UI for modifying the automatic door closing via a key combination. Default true Button to show UI: 1 (MMB - middle mouse button) - 2 (SHIFT + MMB) - 3 (CTRL + MMB): Key combinations to use to open the UI for modifying the automatic door closing. Default 2 LOCALIZATION The plugin, therefore the automatic messages and statistics, are translated into the following languages: English Italian Spanish French German Dutch Turkish Russian Ukrainian Chinese (Simplified -- zh-CN) Chinese (Traditional -- zh-TW) Translation files are located in the /oxide/lang folder, here is an example of a /oxide/lang/en/UltimateLocker.json translation file. You can add translations for other languages by adding them to the folder: /oxide/lang AVAILABLE ENTITIES VEHICLES: Minicopter, Scrap Transport Helicopter, Attack Helicopter, Armored / Hot Air Balloon, Kayak, Row Boat, RHIB, Tugboat, Submarine Solo, Submarine Duo, Horse, Tomaha Snowmobile, Snowmobile, Sedan, 2 Module Car, 3 Module Car, 4 Module Car, Motorbike, Motorbike With Sidecar, Pedal Bike, Pedal Trike, Mounted Ballista, Battering Ram, Catapult, Siege Tower, Ballista DEPLOYABLES: Wood Storage Box, Large Wood Box, Ammo Storage Box, Armor Storage Box, Charcoal Storage Box, Clothing Storage Box, Comps Storage Box, Explosives Storage Box, Food Storage Box, Guns Storage Box, Meds Storage Box, Metal Storage Box, Ore Storage Box, Scrap Storage Box, Stone Storage Box, Sulfur Storage Box, Tools Storage Box, Wood Storage Box, Large Furnace, Furnace, Legacy Furnace, Refinery, Electric Furnace, Stone Fireplace, BBQ, Hobo Barrel, Medieval Large Wood Box, Storage Barrel B, Storage Barrel C, Black Box, Abyss Horizontal Storage Tank, Abyss Vertical Storage Tank, Bamboo Barrel, Wicker Barrel, Krieg Storage Crates, Krieg Storage Barrel, Large Industrial Furnace, Industrial Electric Furnace, Industrial Auto Turret, Industrial Storage Horizontal Barrel, Industrial Storage Vertical Barrel, Industrial Garage Door, RHIB Storage, Boat Building Station, Steering Wheel, Sail, Small Boat Engine, Anchor, Cannon, Small Ramp, Wall Cabinet, Clothing Mannequin, Metal Shop Front, Dropbox, Mail Box, Vending Machine, Computer Station, Twitch Rivals Desk, Mixing Table, Composter, Small Planter Box, Large Planter Box, Minecart Planter, Bath Tub Planter, Rail Road Planter, Hitch & Trough, Small Water Catcher, Large Water Catcher, Water Barrel, Powered Water Purifier, Fluid Switch & Pump, Repair Bench, Research Table, Workbench Level 1, Workbench Level 2, Workbench Level 3, Button, Switch, Smart Switch, Timer, Small Generator, SAM Site, Auto Turret, Flame Turret, Shotgun Trap, Modular Car Lift, Snow Machine, Fogger-3000, Elevator, Mining Quarry, Pump Jack, Tall Weapon Rack, Horizontal Weapon Rack, Wide Weapon Rack, Weapon Rack Stand, Frontier Bolts Single Item Rack, Frontier Horseshoe Single Item Rack, Frontier Horns Single Item Rack, Small Stash, Chippy Arcade Game, Strobe Light, Laser Light, Sound Light, Small Neon Sign, Medium Neon Sign, Large Neon Sign, Medium Animated Neon Sign, Large Animated Neon Sign, Artist Canvas Small, Artist Canvas Large, Artist Canvas Standing, Artist Canvas XL, Artist Canvas XXL, Light-Up Frame Large, Light-Up Frame XL, Light-Up Frame XXL, Light-Up Frame Small, Light-Up Frame Standing, Ornate Frame Small, Ornate Frame Standing, Ornate Frame large, Ornate Frame XL, Ornate Frame XXL, Shutter Frame Small, Shutter Frame large, Shutter Frame XL, Shutter Frame XXL, Paintable Window, Portable Easel, Search Light, CCTV Camera, PTZ CCTV Camera, RF Broadcaster, RF Receiver, Industrial Conveyor, Industrial Crafter, Wheelbarrow Piano, Junkyard Drum Kit, Boom Box, Chinese Lantern, Chinese Lantern White, Tuna Can Lamp, Lantern, Camp Fire, Cursed Cauldron, Skull Fire Pit, Jack O Lantern Angry, Jack O Lantern Happy, Wood Shutters, Triangle Planter Box, Triangle Rail Road Planter, Single Plant Pot, Beehive, Chicken Coop, Cooking Workbench, Engineering Workbench, Hopper. NEW ENTITIES New entities will be added with future releases. If you want to request the addition of a specific entity, feel free to open a support request and it will be added to the plugin. ENTITY IMAGE PREVIEW VEHICLES: Minicopter Scrap Transport Helicopter Attack Helicopter Hot Air Balloon Armored Hot Air Balloon Kayak Row Boat RHIB Tugboat Submarine Solo Submarine Duo Horse Snowmobile Tomaha Snowmobile Sedan 2 Module Car 3 Module Car 4 Module Car Motorbike Motorbike With Sidecar Pedal Bike Pedal Trike Mounted Ballista Battering Ram Catapult Siege Tower Ballista DEPLOYABLES: Wood Storage Box Large Wood Box Ammo Storage Box Armor Storage Box Charcoal Storage Box Clothing Storage Box Comps Storage Box Explosives Storage Box Food Storage Box Guns Storage Box Meds Storage Box Metal Storage Box Ore Storage Box Scrap Storage Box Stone Storage Box Sulfur Storage Box Tools Storage Box Wood Storage Box Large Furnace Furnace Legacy Furnace Small Oil Refinery Electric Furnace Stone Fireplace Barbeque (BBQ) Hobo Barrel Storage Barrel Vertical Storage Barrel Horizontal Metal Shop Front Drop Box Abyss Horizontal Storage Tank Abyss Vertical Storage Tank Bamboo Barrel Wicker Barrel Black Box Wall Cabinet Clothing Mannequin Krieg Storage Crates Krieg Storage Barrel Large Industrial Furnace Industrial Electric Furnace Industrial Auto Turret Industrial Storage Horizontal Barrel Industrial Storage Vertical Barrel Industrial Garage Door Boat Building Station Steering Wheel Sail Small Boat Engine Anchor Cannon Small Ramp Mail Box Vending Machine Computer Station Twitch Rivals Desk Mixing Table Composter Small Planter Box Large Planter Box Minecart Planter Bath Tub Planter Rail Road Planter Hitch & Trough Triangle Planter Box Triangle Rail Road Planter Single Plant Pot Beehive Chicken Coop Cooking Workbench Engineering Workbench Hopper Small Water Catcher Large Water Catcher Water Barrel Powered Water Purifier Fluid Switch & Pump Repair Bench Research Table Workbench Level 1 Workbench Level 2 Workbench Level 3 Button Switch Smart Switch Timer Small Generator SAM Site Auto Turret Flame Turret Shotgun Trap Modular Car Lift Snow Machine Fogger-3000 Elevator Mining Quarry Pump Jack RHIB Storage Wood Shutters Medieval Large Wood Box Tall Weapon Rack Horizontal Weapon Rack Wide Weapon Rack Weapon Rack Stand Frontier Bolts Single Item Rack Frontier Horseshoe Single Item Rack Frontier Horns Single Item Rack Small Stash Chippy Arcade Game Strobe Light Laser Light Sound Light Small Neon Sign Medium Neon Sign Large Neon Sign Medium Animated Neon Sign Large Animated Neon Sign Search Light CCTV Camera PTZ CCTV Camera RF Broadcaster RF Receiver Industrial Conveyor Industrial Crafter Wheelbarrow Piano Junkyard Drum Kit Boom Box Chinese Lantern Chinese Lantern White Tuna Can Lamp Lantern Camp Fire Cursed Cauldron Skull Fire Pit Jack O Lantern Angry Jack O Lantern Happy Artist Canvas Small Artist Canvas Large Artist Canvas Standing Artist Canvas XL Artist Canvas XXL Light-Up Frame Large Light-Up Frame XL Light-Up Frame XXL Light-Up Frame Small Light-Up Frame Standing Ornate Frame Small Ornate Frame Standing Ornate Frame large Ornate Frame XL Ornate Frame XXL Shutter Frame Small Shutter Frame large Shutter Frame XL Shutter Frame XXL Paintable Window Portable Easel$10.99 -
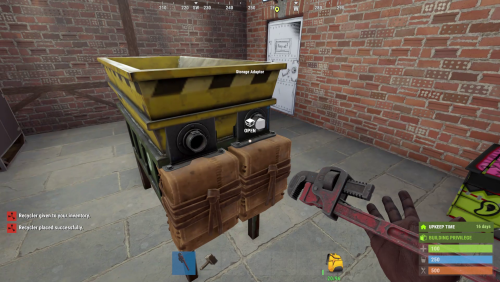
Version 1.9.22
4,508 downloads
Industrial Recycler | Automated Recycling for Rust Put recycling to work inside your players' bases. Connect storage, feed in recyclable items and send the materials back into your industrial network. Industrial Recycler gives your players a recycling line they can build into their base, with automatic item transfers, dedicated input and output storage, and control over processing speed and efficiency. The same plugin also includes standard placeable recyclers, personal virtual recycling and an in-game purchase menu. Offer convenient recycling to your community, then choose the costs, access rules and group benefits that fit your server. Industrial automation · 48-slot input + 48-slot output · Standard and virtual recyclers · Configurable speed and efficiency · In-game purchases Watch Industrial Recycler in action Build a recycling line into the base An industrial recycler comes with dedicated input and output containers and storage adapters for Rust's industrial piping system. Feed the input. Add recyclable items manually or connect the input adapter to your industrial network. Let it process. The plugin transfers items into the recycler and starts recycling automatically. Collect the materials. Recycled output goes into the attached output container, ready to be moved through your network. Each attached container has 48 item slots, giving the setup room for incoming items and outgoing materials. Players can leave the inventory screen and let the placed industrial recycler handle the work. Useful handling is built in: the industrial recycler unloads ammunition and removes weapon attachments into output storage before recycling the weapon. Items without a recycling blueprint are routed from input toward output storage. Three ways to offer recycling Recycler type Player experience Best fit Industrial A placed recycler with automatic transfers, input/output storage and industrial adapters Players building automated bases Standard A familiar recycler that players place and operate manually Convenient recycling at home Virtual A personal recycler opened with /irec or /virtualrec Command-based convenience for permitted groups Standard recyclers also support tugboat placement. Industrial recyclers are placed on supported building surfaces. An owner with the appropriate permission can upgrade a standard recycler using /upgraderecycler, adding the industrial storage and adapters to the existing recycler. Give resources another purpose Let players work toward their own recycler through the built-in shop. /buyrecycler opens the standard recycler purchase screen; /buyindustrialrecycler opens the industrial option. Set a different cost for each type using one or several in-game items. Charge Scrap alone, or combine it with materials such as Metal Fragments, Sheet Metal and High Quality Metal. The menu shows the requirements before the player confirms the purchase. Purchase permissions are separate, so you can offer one type to everyone and reserve another for a chosen group. Purchase limits count both placed recyclers and matching recycler items in the player's inventory. The screenshots show example settings and layouts. Purchase costs and storage appearance are configurable. Build group benefits around features players use Choose how recycling changes as players gain access to different permission groups: Processing speed: four configurable cycle-duration tiers for placed recyclers. Recycling efficiency: four configurable efficiency tiers for placed recyclers. Virtual recycling settings: dedicated speed and efficiency tiers for virtual use. Ownership limits: separate standard and industrial limits for regular players, VIP1 and VIP2. For example, give a group access to virtual recycling, allow another group to own more industrial recyclers, or assign a shorter recycling cycle. You choose the values and permissions; the plugin applies the recycler owner's settings. Fit the setup to the base Choose between two adapter layouts and configure attached storage to be visible or hidden. Players with the layout permission can switch arrangements after disconnecting the pipes. Inventory navigation buttons let players move between the recycler, input and output containers. You can also adjust the main recycler UI position and configure distinct item skins for standard and industrial recyclers. For shared bases, restrict access to the owner or allow Rust teammates and friends. Friend access uses the optional Friends plugin. Permitted players with access can pick up a recycler using a hammer. Keep virtual convenience under control Virtual recycling has its own permission and checks the player's situation before opening. Use is blocked while swimming, falling or flying, mounted, or in the supported cargo ship, hot air balloon and elevator checks. With the optional NoEscape integration, you can also block virtual recycling during raid block or combat block. The virtual recycler is a temporary session: items left inside are dropped at the player when the session closes. Use a placed industrial recycler for an ongoing automated setup. Before you buy Are other plugins required? No additional plugin is required for the core features. Friends and NoEscape are optional integrations. Connecting to an industrial network uses Rust's industrial components. Can purchases use Economics or ServerRewards? The built-in shop uses configured in-game item costs. It does not include a balance integration with Economics or ServerRewards. Does a standard recycler include automation? The standard version is manually operated. The industrial version adds the attached storage, adapters and automatic transfers. The permission-controlled upgrade command converts an owned standard recycler. Can I change speed without changing efficiency? Yes. Speed and efficiency use separate permissions and configuration values. Dedicated virtual permissions let you tune virtual use as well. What happens when a recycler is picked up or destroyed? Remaining contents are dropped into the world. Hammer pickup returns a recycler item to the player; dropping a recycler item on destruction is a separate configuration option, disabled by default. Which languages are included? Default messages are included in English, Brazilian Portuguese, German and Spanish. Setup and reference Getting started on Oxide Place IndustrialRecycler.cs in oxide/plugins and let it load. Review oxide/config/IndustrialRecycler.json, including purchase costs, ownership limits and access settings. Grant the permissions for the features you want to offer. To let the default group buy both recycler types, run these commands in the server console: oxide.grant group default industrialrecycler.buystandard oxide.grant group default industrialrecycler.buyindustrial Reload the plugin after configuration changes with oxide.reload IndustrialRecycler. Use /buyindustrialrecycler to purchase an item, place it on a supported building surface, and connect the input and output adapters to your industrial setup. For a purchase-only setup, use the purchase permissions. industrialrecycler.give also allows free recycler grants to yourself or another player; it is not required to buy or place a purchased recycler. Player commands Default chat command Action Permission /buyrecycler Open the standard purchase menu industrialrecycler.buystandard /buyindustrialrecycler Open the industrial purchase menu industrialrecycler.buyindustrial /irec or /virtualrec Open a personal virtual recycler industrialrecycler.virtual /upgraderecycler Upgrade an owned standard recycler within reach industrialrecycler.give /togglerecycler Switch the viewed industrial recycler's adapter layout; disconnect its pipes first industrialrecycler.toggle /industrialrecycler [player] Give an industrial recycler without purchase cost industrialrecycler.give /standardrecycler [player] Give a standard recycler without purchase cost industrialrecycler.give /giveindustrialrecycler and /givestandardrecycler are additional default chat aliases. Purchase, give and virtual command aliases are configurable. The upgrade command does not charge the industrial purchase cost. Console and RCON commands giveindustrialrecycler STEAM_ID givestandardrecycler STEAM_ID These commands give a recycler item to an online player without charging a purchase cost. Player-issued console use requires industrialrecycler.admin; server console and RCON can issue them directly. Permissions and tier settings Permission Purpose industrialrecycler.pickup Hammer pickup, subject to access checks industrialrecycler.toggle Switch adapter layout industrialrecycler.vip Apply VIP1 ownership limits industrialrecycler.vip2 Apply VIP2 ownership limits industrialrecycler.admin Unlimited ownership limit, owner-access bypass and player-console give access; other feature permissions remain separate Tier Placed speed permission Virtual speed permission Default cycle duration 1 industrialrecycler.speed1 industrialrecycler.virtualspeed1 4 seconds 2 industrialrecycler.speed2 industrialrecycler.virtualspeed2 3 seconds 3 industrialrecycler.speed3 industrialrecycler.virtualspeed3 2 seconds 4 industrialrecycler.speed4 industrialrecycler.virtualspeed4 1 second Tier Placed efficiency permission Virtual efficiency permission Default efficiency setting 1 industrialrecycler.efficiency1 industrialrecycler.virtualefficiency1 0.50 2 industrialrecycler.efficiency2 industrialrecycler.virtualefficiency2 0.60 3 industrialrecycler.efficiency3 industrialrecycler.virtualefficiency3 0.70 4 industrialrecycler.efficiency4 industrialrecycler.virtualefficiency4 0.80 All listed tier values are configurable. Higher-numbered permissions take priority within each family. Virtual speed permissions take precedence; if none is assigned, the plugin checks regular speed permissions and uses the corresponding virtual duration. Virtual efficiency uses its own permission family. The plugin's efficiency fallback is 0.60 when no matching efficiency permission is assigned. Tier 1's default 0.50 is lower than that fallback, so choose your values deliberately when designing group benefits. Cycle duration describes a recycling cycle, not the time to empty a full input container. Default ownership limits are 1 standard and 1 industrial recycler for regular players, 2 of each for VIP1 and 3 of each for VIP2. These limits are configurable; VIP2 takes precedence over VIP1. Optional integrations Plugin Adds Friends Friend access to owned recyclers when enabled NoEscape Raid-block and combat-block checks before opening a virtual recycler Give your players a base upgrade they can put to work every day. Add automated industrial recycling, convenient personal access and group settings you control with Industrial Recycler.$23.99- 73 comments
- 11 reviews
-
- 8
-
-

-
- #recycler
- #industrial
- (and 9 more)
-
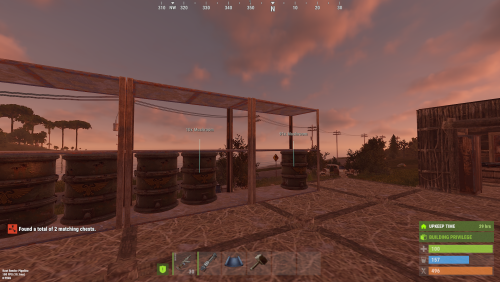
Version 0.0.1
41 downloads
Chest Finder lets players find items in storage containers within their TC-authorized base. Matching containers are marked for the searching player, with item names and quantities shown. Use /finditem <item> to search by an item name or part of a name. Searches are case-insensitive and match exact names, prefixes, and partial names. Features Markers are visible only to the player who searched. Markers show matching item names and total quantities per container. Searches are limited to the same building as the authorized TC. Previous markers are replaced when a new search starts. Search cooldown. Maximum marked containers. Setup Place ChestFinder.cs in carbon/plugins. Grant the chestfinder.use permission to the desired users or groups. Load the plugin. Its configuration file is created automatically (ChestFinder.json). The configuration includes search distance, marker duration, cooldown, minimum search length, marker limit, height, scale, color, and opacity. Tested on Carbon.Free -
Version 1.0.34
44,367 downloads
Introducing portable 3 x 3 bases in a box - that you can carry in your inventory! Deploy them and open them to go inside - to store, craft, smelt, grow, party... live. Expand and maintain the upkeep to protect from raiders. Pick them up and deploy somewhere else. Think outside of the box... and inside too! Questions? Support? Join the discord: https://discord.nikhub.dev WATCH THE TUTORIAL BY SRTBULL! AS FEATURED BY SHADOWFRAX! (around 0:55 mark) Just like the TARDIS from Doctor Who, they're bigger on the inside! In the "real" Rust world, an entire 9x9x9 metre large (over 25000 cubic foot) Pocket Dimension fits neatly inside of a Small Wooden Box. You can skin that box any way you like to camouflage or disguise it - whatever the player's Workshop Skins / server skin plugins allow. Players can convert existing buildings into Pocket Dimensions easily with one button in the Tool Cupboard's UI. Or if that's too much of an effort, entire, fresh, ready-to-be-moved-in Copy Paste files can be sold as boxes with your own, custom defined skin - this is entirely optional and requires Copy Paste, more on that in the dedicated section below. Whether to allow either approach is entirely up to your configuration. By default, the configuration allows raiding the Pocket Dimensions in several different ways - but if you're planning on running this plugin on a PVE server and you don't want any of that, there's many configuration options that can be adjusted to enhance your server experience. Both styles of servers have their own dedicated sections on this page - just read below. Make sure you maintain the integrity of your Pocket Dimension! If any of the external structures (wall/doorway) of the Pocket Dimension building either 1) decays 2) is raided 3) is removed by an admin/plugin, or 4) the box housing the dimension itself gets destroyed, the Dimension will Collapse, teleporting all players inside of it, and dropping all contents of storage containers, turrets, the Tool Cupboard, and anything else that can store any items, to the location where the box is/was last deployed. Easy come, easy go! You can pick the Pocket Dimension boxes up and move them somewhere else at any time, and everything will still be there. You can even deploy Pocket Dimensions inside Pocket Dimensions inside Pocket Dimensions... a box-ception! By default, the configuration does not allow picking up boxes with players inside of them, but you can toggle this setting. Quick Start As an admin: make sure you grant your groups/players appropriate permissions from the list below. Make sure Copy Paste, No Escape and Server Rewards / Economics are loaded in and configured properly, if you're planning on utilising any of the extended capabilities. More on the support for those plugins below. That also goes for any potentially compatible plugins that dispense/support skinned box templates from the config, like Kits or Shop by Mevent, or Copy Paste - based plugins, like Raidable Bases. As a player: make a 3 x 3 x 3 cube that meets the validity requirements (more on that below) - if you have the proper permission and the appropriate amount of required currency, open the Tool Cupboard and press the pink "Convert to Pocket Dimension" button. If built correctly, you will now receive a box containing that entire cube inside. Alternatively, deploy a new Small Wooden Box skinned with a skin ID mentioned in the config that references a valid Copy Paste template - no construction by players necessary, but still possible. This plugin comes with several pre-built, already known to be valid Pocket Dimensions, ready to be enjoyed by your players. Permissions (Oxide.Grant user YourName [permission name starting with pocketdimensions.]) This plugin utilises the plain Oxide permission system. For a quick setup on a typical server, grant yourself the pocketdimensions.admin permission, and grant the default group in Oxide the pocketdimensions.player.all permission. pocketdimensions.admin - this permission is required to execute the admin commands mentioned in the section Admin Commands just below this section. pocketdimensions.player.all - this permission is the quick-start equivalent of giving all 4 permissions mentioned below. Don't grant this if you want a more customised permission setup. For example, if you don't want to allow respawning inside and converting by players, and you only want to allow deployment/pickup and entering/exiting, use the combination of the 4 permissions below. pocketdimensions.deploy.pickup - holders of this permission can deploy and pick up Pocket Dimension boxes, be it already existing ones and fresh ones based on skin ID/Copy Paste file combo in your config. Of course, this takes into account building block/other conditions, too. pocketdimensions.player.enter.exit - holders of this permission can enter Pocket Dimensions by opening their boxes, and exit them by interacting with their portals. If a player doesn't have that permission, they will be informed upon opening/interaction, and barred from traversing in/out. pocketdimensions.player.convert - holders of this permission can create new Pocket Dimensions by converting an existing building from its Tool Cupboard's UI - as long as they have the required amount of currency (certain required item / Server Rewards / Economics), and the building itself meets the structural requirements. Players without this permission won't even see the conversion button in the UI. pocketdimensions.player.respawn - holders of this permission can respawn on bags, beds and towels deployed inside Pocket Dimensions. If a player doesn't have that permission, and a bag is deployed by them (or someone else bags them in) inside a Pocket Dimension, the players will not see that bag on their Death Screen as a possible respawn location. Admin Commands (require the pocketdimensions.admin permission) These commands can be executed both from console and the chat - in case of chat, they must be prefixed with a forward slash ( / ), and in case of console, no forward slash. /pd.check Come close to a TC and look directly at it, then issue this command from the chat or F1 console. It will perform the validity check without actually converting anything. If any problems are found, it will tell you exactly what's wrong. Useful for making your own Copy Paste templates. /pd.convert Come close to a TC and look directly at it, then issue this command from the chat or F1 console. It will first perform the validity check. If any problems are found, it will tell you exactly what's wrong. Then, if no problems are found, it will convert the building into a Pocket Dimension and you will receive it as a deployable Small Wooden Box item. /pd.lostnfound When a Pocket Dimension Item despawns, is recycled, is placed in a container that gets destroyed, or is otherwise removed from the world, the Dimension that it represents will be marked as "lost". This special marking will NOT happen as long as the Item still exists in a container (including players' inventories) somewhere in the World. Pocket Dimensions marked as "lost" can then be reclaimed as a newly created Item tied to the building by an admin, deployed and inspected, and given back to the rightful owner... or Collapsed by the admin, if the admin has a hunch that the player "lost" their dimension on purpose so nobody would be able to access anything while the player was offline. Using this command will either give you ALL newly reclaimed box items (so make sure you have room in your inventory), or it will tell you there's nothing in the lost-and-found to be reclaimed. /pd.givebox [skin ID or Copy Paste filename] [optionally: player partial name / full steam ID] Use this command to create a Small Wooden Box item, skinned with a special skin mentioned in your config, and then given to a player. A new Pocket Dimension based on the Copy Paste template will be created inside of that box the first time it's deployed somewhere. This command requires Copy Paste to be installed to work properly, and a properly set up Skin ID - to - Copy Paste filename entries in your config. The filenames mentioned must exist in your Copy Paste data folder, too. Use the first parameter to identify the template mentioned in your Copy Paste section of the config either by its skin ID or its Copy Paste file name. Multiple skin IDs can lead to the same Copy Paste filename, so if you're identifying the template by filename, the skin ID of the first entry in your config that leads to this file name will be picked as the skin of the newly created and given box. If the optional second parameter is not provided, it will be assumed a freshly skinned box should be given to the player executing this command - typically an admin. This command can be used by plugins that support executing commands with the STEAM ID or player name parameter. /pd.emergencycleanup Use this as a last resort to completely get rid of ALL Pocket Dimensions entities on the server for whatever reason. This is a very experimental plugin after all and things COULD go wrong... This includes all the Pocket Dimension buildings, their contents, loot inside of them, and the boxes containing Pocket Dimensions deployed in the world. If a dimension was not deployed as a box, but held as an Item in a container, those items will NOT be removed, but when deployed, the player will be informed that its associated Pocket Dimension was raided or decayed away. USE WITH CAUTION, THIS COMMAND CANNOT BE UNDONE. Those are all the admin commands so far. There's no player commands, as I consider them to be the last resort option when there's just no other elegant way of player input/interaction. What makes buildings "valid" candidates to be used as a Pocket Dimension? Not every building is viable to be converted. Generally speaking, a 3 x 3 x 3 cube with exactly 1 external single doorway anywhere on the side must be constructed - and nothing else on the outside (apart from the potential exception for Solar Panels / Wind Turbines on the roof, if your config allows them). The building blocks can be of any tier or a mix of tiers - from Twig to Armoured. It doesn't matter what's inside of the cube, only the outer "shell" matters. Once converted into a Pocket Dimension, players can build/expand/demolish inside just like they would with regular bases. To be more specific, when a check for the validity of a building is made, the following criteria are tested for, and the answer to each consecutive question must be "yes" before the test proceeds to the next question - if the answer is "no", the player will be informed of the reason: Does the building have exactly 9 square foundations overall? Does the building have exactly 9 square floors overall (presumably, for the ceilings)? Does the building have at least 1 single doorway overall? Does the building have at least 35 normal walls overall? Are the 9 square foundations all at the same level? For each of the 9 square foundations, does it have a matching square floor for ceiling, exactly 9 metres above it? Is the building's middle foundation NOT marked as belonging to a Pocket Dimension already? Does the building have either a normal wall (or a single doorway, but only one) all 4 sides, and not a wall frame, window frame, or a missing building block, to make the shell "air-tight" and prevent players from falling out of the Dimension into the void? Does the building have exactly 1 single doorway - no more, no less - on the external shell? Is the only external doorway currently "empty", i.e. no doors / vending machines are deployed there at this moment? If the config doesn't allow Solar Panels / Wind Turbines placed on the ceiling, is the building free of those potentially forbidden structures? Are all the electrical/water entities inside of the 3 x 3 x 3 cube free of any wire/hose connections to entities outside of that cube? (if Solar Panels / Wind Turbines are allowed in your config, those entities get a special pass at this stage of the check) Is the building free of ANY entities "sticking out" from the 3 x 3 x 3 cube - for instance roofs, honeycombs, porches, SAM sites, stairs etc, or Solar Panels / Windmills if your config does not allow them? If the answer to all those questions is a resounding "yes" - don't worry, it's the plugin's job to ask and answer those, not you! - the building is considered valid and as such can be converted into a Pocket Dimension! You will be informed of the result, whether it was successful or not. Raiding Pocket Dimensions (only applies to the default PVP-enabled settings) This is the default behaviour on a fresh configuration. If you're planning on running this plugin on a PVE server (player vs. environment, i.e. no raiding/hurting between human players themselves), you can skip this section and go straight to the Recommended PVE Settings section below. There are two main ways of raiding a Pocket Dimension: From the inside, by damaging the building structures belonging to the external shell - either the wall or the doorway housing the exit portal From the outside, by damaging the deployed Pocket Dimension box. By default, no locks can be placed on boxes containing Pocket Dimensions, to allow players raiding from the inside, too - but this setting can be toggled if you only want players to raid the boxes in the boring way. Of course, anything INSIDE of the Pocket Dimension can - and should - be locked! When raiding from the outside, on default configuration, the dimensional box will take 2% (1/50) of the damage it would normally take if it were just a regular Small Wooden Box. In other words, on default configuration, it takes about 7-8 C4 charges to make the dimension inside of it Collapse (so more or less as much as an Armoured-tier foundation). Just like with regular vanilla building raids, the same strategies (or combinations of those) can be applied here, too: The Deep - get in, take the goods, get out, leave, say GG to the building owner, who gets to keep their Pocket Dimension. The quintessence of sportsmanship in Rust raiding. The Grief - get in, take the goods (or not), make the building unusable till it eventually decays (and the dimension Collapses), leave. Highly malicious, but sometimes the only option... The Yoink - get in, take the goods, re-seal the entrance, and claim the dimension as now yours. You might want to move its box to another location though. The End - get in, and immediately start damaging one of the external blocks of the shell (typically the doorway housing the exit portal, or a wall next to it - or even both!). As soon as one of the external shell elements is gone (or is "ent killed" by an admin, or removed with a plugin), the entire dimension Collapses. More on dimensional Collapses in the section below. Recommended PVE Settings (only applies to default PVE-enabled settings) This will require adjusting some config settings and reloading the plugin. If you're planning on running this plugin on a PVP server (player vs. player, i.e. raiding/hurting between human players allowed), go back to the Raiding Pocket Dimensions section above - most default settings should work fine in the majority of scenarios. To find out what each of these recommended settings does, check out the Configuration section below for details. "DimensionalBoxesSubtractItemConditionWhenPickingUp": 0.0, "DimensionalBoxesAllowLockingWithLocks": true, "DimensionalBoxesAllowDamage": false, "DimensionaBoxesDamageResistanceDivisor": 50.0, "DimensionalBoxesAlwaysHaveStability": true, "DimensionalBoxesCheckForPlayersInsideWhenPickingUp": false, "DimensionalBoxesCheckBuildingBlockOutsideWhenEnteringDimension": true, "DimensionalBoxesCheckTCAuthInsideWhenEnteringDimension": false, "DimensionalBoxesCheckTCAuthInsideWhenPickingUp": false, "DimensionalPocketsAllowSolarAndWindmill": true, "DimensionalPocketsTrapImmunityAfterTeleport": 5.0, "DimensionalPocketsExteriorBlocksAllowNonDecayDamage": false, "DimensionalPocketsActualAltitudeMin": 3200.0, "DimensionalPocketsActualAltitudeMax": 3900.0, "DimensionaPocketsAllowVendingMachineBroadcast": true, "EffectPlayerTeleportAppear": "assets/prefabs/missions/portal/proceduraldungeon/effects/appear.prefab", "EffectPlayerTeleportDisappear": "assets/prefabs/missions/portal/proceduraldungeon/effects/disappear.prefab", "EffectsPlayerTeleportEnable": true, Collapse of a Pocket Dimension All good things eventually come to an end. "Collapse" in this context means that a certain Pocket Dimension and all its associated entities get destroyed and in the end, it's as if the Pocket Dimension never existed at all - save for all the juicy loot dropped from it. This can happen when... The box containing a Pocket Dimension gets "ent killed" by an admin/plugin, or gets damaged to the point of destruction One of the external shell structures inside of the Pocket Dimension (wall/external doorway) gets "ent killed" by an admin plugin, or decays/gets damaged to the point of destruction The exit portal housed in the external doorway gets "ent killed" by an admin/plugin Under normal circumstances, on a typical PVP server, you only expect the Pocket Dimensions to Collapse when they decay away, are raided, or purposefully removed by an admin (by "ent killing" the box or the external shell structure). If the Dimensions suddenly disappear with no apparent reason, it probably comes from another plugin's functionality, for example Abandoned Bases - but that's a completely expected outcome in this case: the Pocket Dimensions should behave as much as normal bases on the server as possible! On the topic of Abandoned Bases, if you use that plugin, you should definitely NOT allow locks on boxes containing Pocket Dimensions - otherwise the now-unlocked abandoned Pocket Dimension won't be accessible, as the box itself will not count as a base, and it will stay locked! During the Collapse, the last known position of the box associated with the Dimension will serve as the nexus point, where... All players inside of the dimension, asleep or online, alive or as dead bodies or bodybags, will be teleported to the nexus point, unharmed All entities that have an inventory, i.e. something stored inside of them - TC, boxes, turrets, traps, lockers etc - will drop their grey loot bags at the nexus points, as if all those entities were raided at the same time All building blocks and other structures will die, crumbling with gibs at the nexus point If the collapsing Dimension also contains Pocket Dimensions inside of it, and so on (A.K.A. box-ception), the entire "tree" collapses as well, at the root. That way, the best way to raid is always at the Dimension deployed directly in the world (the first one in the "box-ception" sequence), because it involved the least materials and effort. Works great with CopyPaste (and any plugin utilising it, like Raidable Bases) This plugin is fully compatible with Copy Paste and includes it as an optional dependency: i.e. Copy Paste is not needed for Pocket Dimensions to operate, but can potentially enhance the player's experience with extra capabilities. It's strongly recommended. Both the uMod version and the custom patched version distributed to work with Raidable Bases will work. As an admin, you can /copy and /paste a building and either convert it straight away (either with a command or in the Tool Cupboard UI), or just check if it's a valid candidate to be converted - more on validity below. You can also define some Skin IDs as special in the plugin configuration: when boxes with those particular skins are spawned for the first time (either being deployed by players, spawned/pasted by other plugins - Copy Paste itself or plugins utilising it, like Raidable Bases, or entirely separate plugins ), whatever Copy Paste filename you define, this box will be instantly made into a Pocket Dimension containing everything from the building that was copied under that name. And after that, the box can be re-skinned without any issues, too. You can also use the /pd.give command to give individual fresh Pocket Dimensions to players, by name or steam ID (look in the section Admin Commands above) from the server / F1 console or the chat - it's made in a way that shop/kit plugins relying on custom commands can utilise those easily. Useful if you don't want your players to convert their own buildings. Pocket Dimensions plugin even comes with a few predefined templates for those, so you can see how to set up your own. Just issue the /pd.give command without any arguments to get the list. If you want them to work properly, make sure you install the latest version of Copy Paste, and also upload the included Copy Paste files to the proper folder on your server. Compatible with Server Rewards / Economics Converting a valid building to a pocket dimension should NOT be free - and it isn't. By default, players need to deposit 500 Scrap into the TC - or have that amount ready in their inventory, both will work. You can adjust the amount and the shortname of the currency item in your config to your liking. You can even make it so that not only the shortname of this currency item is checked, but also its skin - useful if you have plugins that come with custom items. But you can also use Server Rewards or Economics as potential currencies, too! Check out the Configuration section above for more details. For this, either Server Rewards or Economics must be installed, depending on which one you want to use. Additionally, boxes with skin IDs mentioned in your config (leading to Copy Paste templates) can be sold in the Server Rewards shop, so it works both ways. Compatibility with No Escape If you don't use the No Escape plugin on your server, you can skip this section. Pocket Dimensions are just regular bases in many regards, so damaging any entities belonging to them will impose a Raid Block, and attacking any players inside will impose a Combat Block. Both of these count as an Escape Block. If this plugin detects that a player is Escape Blocked, several optional restrictions can be enabled/disabled in the Pocket Dimension config, to change how this Escape Block affects the gameplay for affected players: Entering Pocket Dimensions Exiting Pocket Dimensions Deploying Pocket Dimension Items into Boxes Picking up Pocket Dimension Boxes into Items Compatibility with other plugins Any plugin capable of issuing /utilising skinned items / spawning skinned Small Wooden Boxes, should work with Pocket Dimensions right out of the box (pun not intended). If there are any that have issues, please don't hesitate to let me know. Configuration (oxide/config/PocketDimensions.json) Below is a rundown of all the config values (and their defaults) that, combined with player permissions, will affect the gameplay on your server. Everything apart from the advanced stuff (like positioning/styling of the TC UI Button, or the CopyPaste templates) is explained in this section: "DimensionalBoxesSubtractItemConditionWhenPickingUp": 0.0, It would be highly inconvenient to be forced to constantly fix your Pocket Dimension box pretty much every time you pick it up, so this value will determine how much condition (in the range of 0.0 to 1.0, representing 0% to 100%) will be lost - and by default, it's 0.0, so the box will only lose condition when damaged. Set it to higher values (but never more than 1.0) to discourage players from moving their boxes too much, too effortlessly. "DimensionalBoxesAllowLockingWithLocks": false, Self-explanatory. By default, if a Key Lock or a Code Lock is placed on a Pocket Dimension box (be it automatically, with plugins, or manually, by players), the lock will just fall to the ground. It's to give the raiding players an opportunity to do the arguably HARDER option for raiding (statistically speaking) a dimension - from the inside. Set this to true to disable this behaviour and allow locks. "DimensionalBoxesAllowDamage": true, By default, boxes containing Pocket Dimensions will take damage - this enables the arguably easier raiding option, to raid from the outside, by destroying the box. How much damage is taken depends on the ResistanceDivisor value defined below. Set this to false if you want to make deployed Pocket Dimensions indestructible from the outside, by not letting players damage the box that contains it. "DimensionaBoxesDamageResistanceDivisor": 50.0, This value will determine how much stronger a Dimensional box is compared to its regular Small Wooden Box counterpart. For example, the default value of 50 means that it takes 50 times less damage, i.e 2% (1 divided over 50). Increase and decrease this value to make raiding from the outside harder or easier, accordingly. "DimensionalBoxesAlwaysHaveStability": true, This setting is true by default and it means that if a floor/foundation that the Dimensional box is placed on is suddenly destroyed, the box itself will remain floating in the air, instead of being destroyed along with it. It basically treats all boxes with Pocket Dimensions as if they were always placed directly on indestructible terrain. Of course, this never applies to Dimensions that are collapsing - no child Dimension in a "box-ception" sequence will ever remain floating "in Narnia". Set this to false if you want to make raiding the Dimensions from the outside easier if a box is not placed directly on actual terrain. "DimensionalBoxesCheckForPlayersInsideWhenPickingUp": true, If a player is inside of a Pocket Dimension and its box was just picked up, the player inside is now stuck, until the box gets re-deployed somewhere else. On the other hand... entire 30-man teams could be "smuggled" this way, all tucked quietly inside! Thus, by default, you cannot pick up pocket dimensions with players inside, and it's also not recommended to allow players to respawn inside, either, for the same reason. Set this to false if you really know what you're doing. "DimensionalBoxesCheckBuildingBlockOutsideWhenEnteringDimension": false, In vanilla Rust, if a box is unlocked, it can be opened, even if the player attempting it is not authorised on the TC. As such, this value is set to false, so that even if you're not authorised on the TC, you can still enter inside of a Dimensional Box. Set this value to true if you want that extra layer of security, in lieu of having a lock on the box that contains a Dimension. "DimensionalBoxesCheckTCAuthInsideWhenEnteringDimension": false, This setting, on the other hand, makes sure that an authorization on the TC is needed INSIDE of the pocket dimension itself (if there's one present at that point). For the same reason as above, it's set to false, but if you're feeling extra EXTRA paranoid, feel free to set it to false, and the only players that will be able to enter a Pocket Dimension were those originally authed on the TC before it as converted - and others bagged in later, but this requires the pocketdimensions.player.respawn permission, too. "DimensionalBoxesCheckTCAuthInsideWhenPickingUp": false, Similar to above, but related to picking up the Dimensional Box - of course, all the other checks for picking up are tested for, too (like building block outside). By default, this value is set to false, but if you want, you can toggle it to true, so that the only way to pick up a pocket dimension is to be authorised on its TC inside. "DimensionalPocketsAllowSolarAndWindmill": false, Allowing pretty much unlimited AND unchallenged electrical power inside of a Pocket Dimension can have several consequences for gameplay - and as such the default is false. Also, when the wires connection to the Solar/Wind generators on the roof are severed, the only way to restore them is with an intervention of an admin using "noclip". If you don't want your players to rely on fuel generators when inside of a Pocket Dimension, set this to true. "DimensionalPocketsAllowTestGenerators": true, Similar to the setting above, just dealing with Test Generators (either the static one, static invisible one, or deployable one). Normally those cannot be obtained by regular players (unless admins/plugins are involveds), and as such, this setting is true. If you have plugins/kits that make it possible for players to get them/spawn them, you should set it to false. "DimensionalPocketsTrapImmunityAfterTeleport": 1.5, When you enter an unknown Pocket Dimension, you never know if a shotgun trap or a turret are placed aiming right at the entry portal. Similarly, when you're inside of a Pocket Dimension, you don't know what's going on outside, so you can never be sure if somebody hasn't placed a trap aiming at the box containing the Dimension. Because of that, the default cooldown to be targeted by auto-traps right after a player enters/exits a pocket dimension is set to 1.5 seconds. Make it longer or shorter as you please, just not negative, and preferably no longer than 60 seconds. "DimensionalPocketsExteriorBlocksAllowNonDecayDamage": true, This effectively enables Collapsing an entire Pocket Dimension by attacking one of its external shell blocks (wall/doorway) from the inside - and as such, it's set to true. If you want to make the entire external shell impervious to damage (other than decay damage), set this to false. "DimensionalPocketsActualAltitudeMin": 3200.0, So here's the trick: in reality, the actual Pocket Dimension buildings exist at a randomly picked position on the map, but high up in the sky, and players are physically teleported to and from them - so it creates an illusion of being in a completely secluded place outside of "normal reality", where you can't even hear anything happening on the actual map. Similar to how Halloween Portals work. This setting defines the minimum random altitude at which Pocket Dimensions will physically reside for the duration of the wipe - by default, 3200 metres (3.2 kilometres, or roughly 2 miles). Adjust it if you have any other plugins that spawn things high up in the sky. IT'S NOT RECOMMENDED TO SET IT TO LOWER THAN 1000 - PLAYERS INSIDE MIGHT THEN HEAR THINGS HAPPENING ON THE ACTUAL MAP, LIKE C4, SUPPLY PLANES, HELI ETC. "DimensionalPocketsActualAltitudeMax": 3900.0, Similar to the setting above, this defines the maximum altitude. Both settings, together, effectively create a cuboid space high up in the sky, where Pocket Dimensions are expected to actually physically reside, at randomly picked locations. By default, this value is set to 3900.0, and there's a very good reason for that: AT EXACTLY 4000 METRES OF ALTITUDE, ALL PLAYERS WILL INSTANTLY DIE, INCLUDING ADMINS IN GOD MODE, AND THIS IS VANILLA RUST BEHAVIOUR. AS SUCH, IT IS NOT RECOMMENDED TO SET THIS VALUE TO HIGHER THAN DEFAULT. "DimensionaPocketsAllowVendingMachineBroadcast": false, While on the topic of maintaining an illusion - allowing players to effectively broadcast the location of their Pocket Dimension on the map would definitely break that illusion, so this value is false by default. Players who try to enable broadcasting in the Vending Machines deployed inside Pocket Dimensions will receive a warning instead, and the broadcast won't be enabled. Set this to true if you honestly couldn't care less about a visual detail like that. "DimensionalPocketsRespawningInsideRequiresDeployment": true, A safeguard against players trying to respawn inside bags/beds/towelrs in dimensions that are not currently deployed, to prevent the players from being effectively stuck inside (until they respawn somewhere else, at least, or until the box is re-deployed on the outside). "DimensionalPocketsTeleportingInsideRequiresDeployment": true, Similar to the setting above, but rather than dealing with respawning inside sleeping bags, this will prevent players from teleporting into a pocket dimension that is currently not deployed (works for any type of warp/teleport plugin). NOTE: Admins who are currently in noclip are allowed to teleport as they please, this is only checked for regular players. "DimensionalPocketsMaxInceptionDepth": 10, If you want to limit the amount of dimensions inside of dimensions inside of dimensions etc, this is the setting for you. If you change this value mid-wipe, only newly deployed boxes will be checked to see if they stay within the limit, and it won't affect already existing dimension trees. "DimensionalPocketsLocationMinTemperature": 15.0, When a new random location for a pocket dimension is checked, this setting will ensure that the biome-based temperature at 12PM (noon) will always be larger than this value. Decrease this value if you want a cooler climate. "DimensionalPocketsLocationMaxTemperature": 32.0, Similar to the setting above, this will put the upper limit on the biome-based temperature at 12PM (noon) when a new random location for a Pocket Dimension is considered. Increase this value if you don't mind a hotter climate. "EffectPlayerTeleportAppear": "assets/prefabs/missions/portal/proceduraldungeon/effects/appear.prefab", This is a purely cosmetic setting. When a player enters or exits a Pocket Dimension, it counts as a teleport. An audio-visual effect of your choosing will be played at the player's new location when that happens. By default, it's the same one used for the Halloween Dungeon. You can use most prefab effect on this list, just filter by "effect" in the "Search" box. "EffectPlayerTeleportDisappear": "assets/prefabs/missions/portal/proceduraldungeon/effects/disappear.prefab", The counterpart of the setting above - it just creates an effect at the old position of the player that's being teleported. And similarly, it's an effect from the Halloween Dungeon. Check out the prefab list I linked above if you want to use a different effect. You can use the Play FX plugin to test all the ones you can find in-game first, before you commit. "EffectsPlayerTeleportEnable": true, Effects can be loud and attract attention. Maybe you don't want. By default, the teleport effects are enabled, but if you set this setting's value to false, no special effects will be played while players are entering or exiting. "CheckEscapeBlockWhenEnteringDimensions": true, If you have No Escape installed, this will prevent players that are Escape Blocked from entering Pocket dimensions, like the name suggests. By default it's true. Feel free to change it to false if you believe that players raiding from the outside should still be able to enter inside. "CheckEscapeBlockWhenExitingDimensions": true, Again, if you don't have No Escape installed, ignore this setting and the next two after that. Similar to above, just when exiting the dimensions. Players will be informed that they cannot exit or enter dimensions for the reason of being Escape Blocked. Change the default value to false if you feel like the Escape Block should not matter for exiting. "CheckEscapeBlockWhenDeployingDimensions": true, No Escape specific setting number 3. You get it by now: if this setting is true (and it IS by default), Escape Blocked players won't be able to deploy any Pocket Dimension Items into their Box form that can be entered. Change the default "true" value to false if you consider this restriction to be too tight. "CheckEscapeBlockWhenPickingUpDimensions": true, And the last setting that's applicable to No Escape - it's the reverse of the one above. By default, players with an Escape Block imposed on them cannot pick up boxes with Pocket Dimensions inside. Change this to false if you beg to differ. "ForbiddenCommandsInsideDimensions": ["tp","warp","back","home","tpr","tpa","kit"], This blacklist contains the default chat and console commands that players without the admin permission will NOT be able run, while they themselves are within the Pocket Dimension layer altitude range. You can add or remove your own sets of commands (do not include the forward slash). "ForbiddenCommandsCheckingEnabled": true, If you set this to false, this will disable relying on the blacklist above, and any command will be permitted inside a Pocket Dimension to be executed by any player. "ConversionCostCurrencyUsed": "CustomItemAmount", By default, conversion from a normal base to a Pocket Dimension costs a certain physical Item that exists in Rust, and that setting is reflected by the value of "CustomItemAmount". If you instead prefer Server Rewards / Economics to be used to pay for conversion, set this value to "ServerRewards" or "Economics", respectively. You can even set this to "NoCost" - and the conversion will be free for the player (but the base will still need to be built correctly and maintained). "ConversionCostAmount": 500, 500 scrap to convert sounds like a moderate amount. 500 RP, or ¤500 however, do not - so you can adjust this amount to be higher or lower however you like,depending on your currency used. Only integers larger than 0 are accepted. "ConversionCostCustomItemShortname": "scrap", What else but "scrap" by default - the universal currency. Of course, if you picked Server Rewards or Economics instead, this setting won't matter in the slightest. Whatever valid item shortname from the approved list you pick, this is what players will be charged for conversion. Since not everything can be put in the TC, it will also check the player's inventory for that item. "ConversionCostCustomItemOverrideName": null, Again, this only applies to the "CustomItemAmount" option. If you want to use a completely custom item, for example, one registered by another plugin, that has a different icon/behaviour, those items often have a custom name. If this value is null (with no quotes) or empty (just the "" quotes), the Item's definition name translated to the client's language will be used. "ConversionCostCustomItemSkinID": 0, And finally: if you only want to accept certain skinned variants of an item - again, useful for plugins with custom items like Water Bases - set the default value of 0 to any valid item ID available on the Steam Workshop. This setting will also be ignored if your currency is not set to "CustomItemAmount". There's a few more settings, but these are all the most important ones that will shape your unique server experience. Translation support (oxide/lang/en/PocketDimensions.json) Almost every string the players see, including the text displaying in the chat and the GUI, can be edited. Just load the plugin and let it generate the file - after you edit it, reload the plugin. Hooks/API (for plugin developers) You can call these through Interface.CallHook() as well, if you don't want to add a [PluginReference] //get an array of BasePortal entities that are assigned to Dimensional Pockets // - or null if none are present var portalArray = PocketDimensions?.CallHook("GetDimensionalPortals") as BasePortal[]; //get an array of BuildingManager.Building instances that are assigned to Dimensional Pockets // - or null if none are present var pocketArray = PocketDimensions?.CallHook("GetDimensionalPockets") as BuildingManager.Building[]; //get an array of StorageContainer entities that are assigned to Dimensional Pockets // - or null if none are present var boxArray = PocketDimensions?.CallHook("GetDimensionalBoxes") as StorageContainer[]; //pass a BasePortal entity and get a boolean true if it's assigned to a Dimensional Pocket // - or false if it's not var isDimensionalPortal = PocketDimensions?.CallHook("CheckIsDimensionalBox", basePortal).Equals(true); //pass a BuildingManager.Building instance and get a boolean true if it's assigned to a Dimensional Pocket // - or false if it's not var isDimensionalPocket = PocketDimensions?.CallHook("CheckIsDimensionalPocket", building).Equals(true); //pass a StorageContainer entity and get a boolean true if it's assigned to a Dimensional Pocket //- or false if it's not var isDimensionalBox = PocketDimensions?.CallHook("CheckIsDimensionalBox", storageContainer).Equals(true); //pass a BuildingBlock entity and get a boolean true if it's assigned to a Dimensional Pocket SPECIFICALLY as a Shell Block // - or false if it's not var isDimensionalShellBlock = PocketDimensions?.CallHook("CheckIsDimensionalShellBlock", buildingBlock).Equals(true); //pass a DecayEntity entity and get a boolean true if inside a DimensionalPocket Building // - or false if it's not var doesBelongToDimensionalPocket = PocketDimensions?.CallHook("CheckBelongsToDimensionalPocket", decayEntity).Equals(true); //pass a global::Item instance and get a boolean true if it's assigned to a Dimensional Pocket // - or false if it's not. //You must also specify whether you're looking for "fresh", unopened dimensions in that item OR an already existing dimensions. //If you want to check both cases, you must do two separate checks, passing a different boolean (true when looking for fresh, //false when not) as the second (counting from 0th) argument. var isDimensionalItem = PocketDimensions?.CallHook("CheckIsDimensionalItem", item, lookingForFresh).Equals(true);$24.99- 39 comments
- 11 reviews
-
- 7
-
-
-
- #dimensions
- (and 11 more)
-
Version 2.1.11
2,187 downloads
Stacks gives you control over how items pile up on your server. Set a custom stack size for any item, multiply stacks inside specific containers, and give your VIPs bigger stacks through permissions. You edit all of it from an in-game panel, so you never open a JSON file. Most stack plugins hand every player the same limits. Stacks was one of the first to make stacks permission-based, and it is still one of the very few that does it. Set a multiplier or an exact stack size per permission, so a default player and a VIP carry different amounts of the same item. You can take it all the way down to a single item for a single rank. It patches the game's stack limit directly. Overstacked items keep their amount when moved, split, or dropped, with no dupes and no lost loot. The same file runs on both Oxide and Carbon. Features of Stacks Set a custom stack size for any item across the whole server Multiply stack sizes inside specific containers (boxes, furnaces, fridges, and more) Per-permission stack multipliers for VIP ranks, like stacks.vip at x2 and stacks.vip2 at x5 Per-permission stack sizes when you want an exact number instead of a multiplier Per-item, per-permission sizes, so one rank gets 50000 sulfur and another gets 25000 Per-container, per-permission multipliers, like a bigger wooden box for top donors Edit items, containers, and settings from an in-game panel instead of editing JSON Category tabs and a search box to find any item fast Overstack control to stop or allow overstacked items moving into the player inventory Splits oversized stacks when they hit the ground instead of dropping one giant floating pile Block list for items and skins you never want re-stacked Edit a container's multiplier by hitting it with a hammer FurnaceSplitter compatibility Five built-in languages: English, Russian, Chinese, German, and French Commands /stacks: open the in-game editor (requires stacks.admin) /stacks setstack [shortname] [size]: set a custom stack size for an item /stacks sethandstack [size]: set a custom stack size for the item in your hand stacks.manage stack set [shortname] [size]: set a stack size from the server console stacks.manage stack get [shortname]: read a stack size from the server console (use get all for every item) Permissions stacks.admin: open the editor and use the stack commands stacks.vip: example VIP tier (x2 stacks by default; rename or add your own in the config) stacks.vip2: example VIP tier (x5 stacks by default) Any permission you put in the config (multipliers, stack sizes, per-item and per-container overrides) is registered automatically on load. Visual editor Type /stacks in-game and you get a panel with three tabs: ITEMS for per-item stack sizes, CONTAINERS for per-container multipliers, and SETTINGS for everything else. Pick an item or container, change a value, save. You never edit a config or data file by hand. TEST SERVER Join our test server and try the features yourself. Copy the IP address below to connect. connect 155.103.86.38:28015 Web Config Editor Manage the Stacks settings in our web config editor. You change the config in a browser form instead of editing files on the server by hand. P.S. The web config editor is open to members of the "Stacks" group in our Discord server. Join at https://discord.gg/mevent and ask for the group. FAQ Q: Menus open without images and the console shows "IMAGE LIBRARY IS NOT INSTALLED." How to fix? A: On Oxide the icons are downloaded through ImageLibrary (Carbon has its own image database and does not need it). Install it, confirm it loads with o.plugins, restart the server, and check the console for ImageLibrary errors. Q: Where can I edit item names or add my language? A: Open the lang file at oxide/lang/en/Stacks.json (or carbon/lang/en/Stacks.json) and edit the text there. Drop in a new language file the same way.$19.95- 80 comments
- 14 reviews
-
- 6
-
-
-

-
- #stacks
- #chest stacks
- (and 10 more)
-
Version 1.0.6
323 downloads
Combined Storage lets players connect multiple storage containers so they function as one large inventory. Includes automatic item sorting, search functionality, and filtering to keep storage clean and efficient. Readme Link - Click Here for Instruction and Documentation Highly recommend reading the FAQ section! All Your Items - In One Place Link multiple containers so they all share a single organized inventory. Automatic Sorting Items are automatically sorted as they are inserted, no manual effort required. Search Functionality Quickly find any item across all linked containers using a fast, built-in search bar. Simple Setup Simply press Link in a container to hook it up with the rest of them in your base. Unique View for Each Player Each player sees their own automatically sorted and filtered view of the shared inventory based on their preferences, without affecting anyone else.$24.99- 19 comments
- 4 reviews
-
- 4
-
-
- #inventory
- #storage
- (and 20 more)
-
Version 1.2.1
88 downloads
EnderChest is a Minecraft-inspired QOL storage plugin for Rust featuring a custom crafting system, the EnderCrystal multi-tiered range extension system (using custom prefabs), and an intuitive UI complete with helpful popups and messages. VIDEO WILL BE UPDATED$20.00 -

Version 1.1.4
76 downloads
The AttachmentMotorBike plugin is an essential tool for Rust servers, adding significant functionalities and enhancements to motorcycles and bicycles within the game. Below is a detailed description of what the plugin does and how it can improve the player experience: Main Features Motorbike Storage: The plugin allows adding storage boxes to motorcycles, providing additional space for storing items. This is done by creating small wooden boxes that attach to the bike, enabling players to transport more resources and items efficiently. Bicycle Storage: Bicycles, have built-in storage capabilities. This allows players to carry items directly in the bicycle’s storage space without needing additional attachments. This feature enhances the utility of bicycles for transporting goods and resources around the map. Accessories and Comfort: Players can enjoy the addition of "Pookie" decorations to motorcycles and bicycles. These decorations not only enhance the visual appearance of the vehicles but also provide a significant benefit: when a player is mounted on a motorbike or bicycle, they receive 100% comfort, improving their gameplay experience. Lights for Bicycles: The plugin allows adding a light to pedal bikes and tricycles. These lights improve visibility at night, providing greater safety and comfort for players. The lights turn on automatically when the player mounts the bicycle. Customizable Configuration: The plugin includes a detailed configuration that allows customization of aspects such as the skin ID of the boxes, the addition of Pookie decorations, the addition of lights to bicycles, and the possibility of storage dropping when the vehicle is destroyed. This allows administrators to tailor the functionalities to the preferences of their community. { "Box Skin ID": 3229179255, "Add Pookie Decoration": true, "Add Light to Pedal Bikes": true, "Drop Storage Loot On Death": true } Gameplay Improvement: Adding storage to motorcycles and bycicles enhances the carrying capacity of players, making them more self-sufficient and efficient in their tasks. Pookie decorations not only beautify the vehicles but also provide 100% comfort to players, improving their well-being and gameplay experience. Lights on bicycles increase visibility and safety at night, allowing players to move around with greater ease. Customization and Control: Administrators have full control over which features to enable and how to customize them according to the needs and preferences of their player community. Automation and Ease of Use: The plugin automatically handles the creation and configuration of accessories, reducing manual workload and allowing players to enjoy these enhancements seamlessly.$4.99 -
Version 1.1.6
797 downloads
UItemSort UItemSort - this plugin allows the player to sort, and stack items in boxes and inventory. Plugin config variables "Use button images?": false, "Send plugin messages/reply?": true, "Sort button color.": "0.968627453 0.921568632 0.882352948 0.2", "Take similar button color.": "0.968627453 0.921568632 0.882352948 0.2", "Take all button color.": "0.968627453 0.921568632 0.882352948 0.2", "Sort image.": "https://i.imgur.com/uEiuf3N.png", "Similar image.": "https://i.imgur.com/3PkbAH8.png", "Take/Put all.": "https://i.imgur.com/beKBAl3.png", "Allow only containers with owners?": false, "All containers allowed?": false, "Black list if all allowed else this is white list.": [ "assets/prefabs/deployable/woodenbox/woodbox_deployed.prefab", "assets/prefabs/deployable/large wood storage/box.wooden.large.prefab", ] Plugin lang "UILootSimilar": "Same items, that you already own, were looted! (if exist)", "UILootAll": "You've looted everything you could!", "UISort": "Items were successfully sorted!", "UIPutSimilar": "You've put same items that are in a storage! (if exist)", "UIPutAll": "You've put all the items you could!", "UIBtnSort": "Sort", "UIBtnTakeSimilar": "Take Similar", "UIBtnTakeAll": "Take All", "UIBtnPutSimilar": "Put Similar", "UIBtnPutAll": "Put All" Permissions: uitemsort.use - allows to see and use sorting buttons. uitemsort.ignore - prevents from using sorting buttons if player has 'uitemsort.use' permission. Contacts: Need help or custom plugin for your server? Contact me using Discord: metangerine ---------------------------------------------------------------------- Video how plugin works:$9.99 -
Version 1.1.3
196 downloads
HeliStorageUpgraderZ plugin preview Automatically add storages to 3 types of helicopters after spawn. Increase your storage options on Helicopters, which is very useful during Raid! Config: { "Enable plugin?": true, "Spawned storages count for ScrapTransportHelicoper: (0-18) / 0 = disable": 18, "Spawned storages count for Minicopter: (0-4) / 0 = disable": 4, "Spawned storages count for AttackHelicopter: (0-8) / 0 = disable": 8, "Need permission to spawn? (spawn only owners helicopter = true | global spawn = false)": true } Permission HeliStorageUpgraderZ.Use - Containers only appear on the helicopters of players with the right I guarantee the functionality of the plugin as described. However, I cannot take responsibility for conflicts or issues arising from incompatibility with third-party plugins or themes. Please take this into account before purchasing. I will list all known compatibility details in the product description.$5.00 -
Version 1.10.9
1,800 downloads
Features Allows players to store items in portable bags Allows limiting the number of bags players can use at once Allows placing bags into storage containers, with limits Allows placing bags inside other bags, with limits Allows restricting which items can go inside bags Allows players to upgrade bags linearly Allows using Economics and Server Rewards for purchasing bag upgrades Allows players to recycle bags Allows items to be pulled into bags automatically Allows unlimited types of bags to be defined, each with different appearance, capacity and rules Allows players to open and switch bags quickly via a UI Allows players to create custom key binds to open and close bags Allows creating bags that are preloaded with items from Kits Allows bags to be placed in wearable slots, including the backpack slot Allows a visual backpack to be displayed while the player is wearing a bag Quick start Give yourself a bag Grant the bagofholding.givebag permission to an administrator role. For example, run the command o.grant group admin bagofholding.givebag. Give yourself a bag with the command boh.givebag <player> generic.small (replace <player> with your in-game name). By default, this bag has 18 slots, and can hold any type of item, but it cannot hold other bags (unless those other bags are empty). Click on the bag in your inventory and click the "Open Bag" button. This will display the bag container in the loot panel, allowing you to place items into the bag. Upgrade the bag Grant the bagofholding.upgrade.generic.small permission to an appropriate role. For example, run the command o.grant group default bagofholding.upgrade.generic.small. Open the bag. Click the "Upgrade" button. Click the "Purchase upgrade" button (costs 300 scrap by default). This will upgrade the bag capacity to 24 slots, and it will change the bag's appearance. Note: Every bag has a separate permission which determines whether players can upgrade that specific type of bag. If you intend to allow players to upgrade bags, you will have to grant quite a few different permissions. We suggest using a permissions manager UI plugin for this. Enable gather mode Set Gather mode -> Enabled to true in the config. Reload the plugin. Open the bag. Click the "Gather: Off" button so that it changes to "Gather: On". This will show a flame icon on the bag, indicating that it is in gather mode. Drop and pick up an item. You will see the item get pulled into the bag automatically. Add bags to loot tables Note: If you are using a dedicated loot plugin to add bags to loot tables, this built-in feature might not work. For best results, configure your dedicated loot plugin to spawn bags instead. Set Loot spawns -> Enabled to true in the config. For testing, set the spawn chance for one type of bag to 100.0 for the assets/bundled/prefabs/radtown/crate_normal.prefab container prefab. Reload the plugin. Spawn some containers to confirm that they can spawn bags in them. For example, run the command spawn crate_normal in the client F1 console while aiming at the ground, and look for a bag in the container. If none of the loot containers are spawning with a bag in them, then you are probably using a loot plugin which is conflicting, in which case you may need to configure loot spawns in your dedicated loot plugin. Once you have confirmed that this feature is working on your server, configure the spawn chances to your liking. Once you have configured the spawn chances to your liking, you can use the bagofholding.spawnloot command to spawn bags into existing loot containers according to the config. You can also remove all bags from loot containers using the bagofholding.clearloot command if you accidentally added too many. Realistic backpacks If you want to allow backpacks to be usable only in the backpack slot, along with a 3D visual backpack model, proceed with the following steps. Set Wearable bags -> Allow wearing bags in the backpack slot to true in the config. This allows players to equip a bag in the backpack slot. Set Visual backpack -> Display while a bag is worn in the backpack slot to true in the config. This causes the visual backpack model to appear when the player is wearing a bag in the backpack slot. Set Player wearable bag limits -> Enabled to true in the config. This causes the player wearable inventory to have different bag limits than the rest of the player inventory. Set Player wearable bag limits -> Default limits -> Max total bags to 1 in the config. This allows players to wear at most one non-empty bag. Technically, this number could be set higher and it wouldn't matter, as long as you don't permit bags to be worn in other slots, since there is only one backpack slot. Set Player bag limits -> Default limits -> Max total bags to 0 in the config. This prevents players from placing non-empty bags in their main/belt inventory. Reload the plugin. Change bag theme By default, bags use fantasy-themed skins. Alternatively, you may choose leather-themed or tactical-themed skins. You may also choose between colored chevron icons (default) and colored circle icons which are larger and therefore easier to see. Bag skins can be directly changed in the config, but for first time users, this plugin provides multiple commands to help you edit the config in bulk. To change the bag theme, run the command boh.settheme <theme>. For example, boh.settheme tactical_chevrons. This command will update the skin IDs in the config and update existing bags in your server to the appropriate theme. Available themes are: fantasy_chevrons, fantasy_circles,leather_chevrons,leather_circles, tactical_chevrons, tactical_circles. This command works best when using a freshly generated config. If you have significantly altered the config (i.e., changed the number of bags per category), then you may have to use a lower level command such as boh.setskins, or manually update the config. In addition to the skins assigned to the preset themes which include 6 variations (no icon, light blue, green, yellow, orange, blue), there are 5 additional colors available (gray, white, black, red, pink). See the "Alternative bag skins" section for a list of all 400+ skins. Additionally, you can create your own skins and add them to the configuration. Some servers provide multiple themes at once, allowing players to use whichever style they prefer. To do this, you first need to define the alternative themes in the config. To add alternative themes, you can run the command boh.addtheme <theme>. Note: The fantasy_chevrons, leather_chevrons and tactical_chevrons themes are already included in the default config (as of v1.9.0), so you don't need to run this command if those are the only themes you care about, unless you are using a config from a prior version. Once the config is updated, you will then have to provide the alternative skins to your players somehow, such as via kits, vending machines, shop plugins, crafting plugins, loot plugins, etc. The boh.givebag command has an optional parameter to designate which skin to apply, which some servers use for integration with custom shops. In addition to changing bag skins, you may also want to change the skin displayed on the belt icon via UI settings -> Belt button -> Display skin ID in the configuration. For reference, the default generic.small bag skins are 2824115881 (fantasy), 2831029422 (leather), and 2828573095 (tactical). How it works How players obtain bags Bags are simply skinned large halloween loot bags (short name: halloween.lootbag.large, item ID: 479292118). Any plugin that can create skinned items can be used to make bags available on your server. For example, bags can be distributed via kits, vending machines (via Custom Vending Setup), shop plugins, crafting plugins, loot plugins (e.g., Alpha Loot), and more. The plugin also has native support for adding bags to loot containers, and provides the command boh.givebag <player> <profile> <amount> for use by admins or plugins. How players open bags Players can open bags multiple ways. "Open Bag" button: When a player clicks on a bag item, they will see the "Open Bag" button appear next to the "Drop" button. Clicking the "Open Bag" button will open the bag container on the right side of the inventory, the same as opening a storage container. Extra belt button: Players with a bag in their inventory will see a bag button next to their belt. Clicking that button will open the first bag in their inventory (via the bag.open command). Requires "UI settings" -> "Belt button" -> "Enabled": true in the config. This is enabled by default. Subsequent presses of that button will cycle through the remaining bags in the player's inventory. Custom key binds: Players may bind commands such as bag.open, bag.next, and bag.prev to keys for quick access. See the "Commands" section for a complete list of available commands and how they function. Tip: Players can also move items into a bag without even opening it, by simply dragging and dropping items directly onto the bag. Bag limits As a balancing mechanism, you can limit how many bags a given player or container can use at once. Empty bags can be placed almost anywhere, but bags with contents will count toward a limit. When that limit is reached, empty bags in the same container will become locked and unable to receive items. The default configuration of the plugin allows players to use up to 3 bags at a time in their inventory, with 0 bags in their backpack (Backpacks plugin on uMod), and 0 bags in storage containers. To configure bag limits for player inventories, see Player bag limits in the config. To configure bag limits for Backpacks, see Backpack bag limits in the config. To configure bag limits for storage containers, see Default container bag limits and Container bag limits by prefab in the config. If desired, you can assign bag limits according to player permission. Bag upgrades Each bag profile may define an upgrade target, dictating which bag profile it can be upgraded to. While a player is looting a bag, if they have permission to upgrade that bag, they will see an "Upgrade" button. Clicking that button will display the cost, as well as what the bag will be upgraded to, allowing the player to confirm the purchase if they have sufficient funds. Tip: One immersive upgrade technique is to set the upgrade cost to another instance of the same bag, to make it so players have to combine bags together to produce a better bag. Bag recycling Each bag profile may define a set of ingredients that it will recycle into when processed by a recycler. Each bag can recycle into as many ingredients as you want, each with an optional skin ID. Tip: One immersive recycling technique is to configure larger bags to recycle into smaller bags (possibly multiple). This technique can be used to allow players to effectively reverse bag upgrades, as well as to split larger bags into smaller bags that the player can then upgrade independently. Wearable bags To free up main inventory space, you can enable players to carry bags in their wearable inventory slots. To enable, see Wearable bags in the config. Note: Wearing a bag will only display the visual backpack if the visual backpack is also enabled. Visual backpack To increase immersion, you can display a visual backpack while a player is wearing a bag. To enable, see Visual backpack in the config. Gather mode To optimize player looting, players can enable gather mode for each bag. While gather mode is enabled, any item that gets added to the bag's parent container will automatically be moved into the bag if possible. For example, if you have a Food & Medical bag in your inventory, and that bag is in gather mode, picking up a food or medical item (or moving such an item from a container to your inventory) will automatically move that item into the bag if there is space. Notes: Gather mode can be enabled by setting Gather mode -> Enabled to true in the config Bags which have gather mode enabled will display a flame icon to easily identify them Throwing a bag onto the ground will automatically toggle off gather mode Gather mode only moves newly added item stacks, so existing item stacks will be ignored, even when replenished When multiple bags are in gather mode, the plugin will attempt to add items to bags according to their order in the container When nesting bags and enabling gather mode at multiple levels, new items will recursively be moved to child bags until they cannot be moved further Kit bags A kit bag is a type of bag that only allows players to remove items from the bag, but not add items. Kit bags are intended to be used as a mechanism to give players multiple items at once, without requiring that the player initially have the inventory space to hold all the items, since the player only needs to be able to hold the bag itself. Also, for convenience, once a kit bag has been emptied, the bag will automatically delete itself since it is no longer useful at that point (since players cannot place items in it). How to redeem a kit as a bag: If you have already created a kit via the Rust Kits plugin on uMod, you can give that kit to a player as a bag. That means the player will receive a bag item that is filled with the contents of that kit. To give a player a kit as a bag, simply run the command boh.givekitbag <player> kitbag.red.locked <kit>, where <player> should be replaced with a player name or steam ID, and <kit> should be replaced with the name of the kit. You may replace kitbag.red.locked with the name of a different locked kit bag if you want. Note: If running this command as a player (as opposed to in the server console or via another plugin), ensure you first have the bagofholding.givekitbag permission (caution: only grant that permission to trusted administrators). Tip: If you want to allow players to store items in a bag that is redeemed this way, then simply use a bag profile which has the "Allow player item input" config option set to true. How to add a kit bag to a kit: The Rust Kits plugin on uMod supports bags with items in them. If you want to allow players to redeem kits that contain bags with items in them, simply create a bag, add the items you want, then create a kit from your inventory. Note: Players will not be able to see the contents of the bag from the Kits UI, so it will be a mystery to the player until they have redeemed the kit, though the Kits plugin might be updated in the future to allow inspecting bag contents. If you want to add a bag to a kit, but don't want to allow players to use the bag as storage, follow the below steps create a kit bag. Give yourself an unlocked kit bag with the command boh.givebag <player> kitbag.red.unlocked, where <player> should be replaced with your user name or steam ID. Place items in the bag. Ensure you have the bagofholding.upgrade.kitbag.red.unlocked permission. Note: If you gave yourself a different color bag, the permission you must grant will be different. Caution: Only grant that permission to administrators who will be creating kits. Use the "Upgrade" feature to transform the bag into a kitbag.red.locked bag, which makes it so players can no longer add items to the bag. Use the Kits plugin to create or update the kit from your inventory. If you want to edit the bag contents, but don't want to do it from scratch, follow the below steps. Redeem the kit. Ensure you have the bagofholding.upgrade.kitbag.red.locked permission. Note: If this is a different color bag, the permission you must grant will be different. Caution: Only grant that permission to administrators who will be creating kits. Use the "Upgrade" feature to transform the bag into a kitbag.red.unlocked bag. Update the items in the bag. Use the "Upgrade" feature to transform the bag back into a kitbag.red.locked bag, which makes it so players can no longer add items to the bag. Use the Kits plugin to update the kit from your inventory. Permissions Admin permissions bagofholding.manageloot -- Allows running the commands boh.spawnloot and boh.clearloot. bagofholding.stats -- Allows running the command boh.stats. bagofholding.listbags -- Allows running the command boh.listbags. bagofholding.listcontainers -- Allows running the command boh.listcontainers. bagofholding.config -- Allows running the commands boh.setskins, boh.addskins, boh.settheme and boh.addtheme. bagofholding.givebag -- Allows running the command boh.givebag <player> <bag profile> <amount>. bagofholding.givekitbag -- Allows running the command boh.givekitbag <player> <bag profile> <kit name>. Limit permissions Depending on how you have configured the plugin, there will be additional permissions following the pattern bagofholding.limit.<type>.<suffix>, one for each limit permission profile. The plugin comes with the following limit profiles by default. bagofholding.limit.player.unlimited -- Allows the player to store unlimited bags in their inventory. bagofholding.limit.wearable.unlimited -- Allows the player to wear unlimited bags. This permission, and other bagofholding.limit.wearable.* permissions won't exist unless you enable Player wearable bag limits in the config. Otherwise, the wearable container will share bag limits with the rest of the player inventory. bagofholding.limit.backpack.unlimited -- Allows the player to store unlimited bags in their backpack (Backpacks plugin on uMod). bagofholding.limit.container.unlimited -- Allows the player to store unlimited bags in storage containers that they deploy. You can define additional limit profiles in the Player bag limits, Player wearable bag limits, Backpack bag limits, Default container bag limits and Container bag limits by prefab sections of the config. Note: When adding container bag limits by prefab, the permission will look like bagofholding.limit.container.<short_prefab_name>.<suffix>. Upgrade permissions Each bag profile that is configured with a valid upgrade target will generate a permission following the pattern bagofholding.upgrade.<profile>. Granting that permission allows players to upgrade that type of bag. For example, the bagofholding.upgrade.generic.small permission allows players to upgrade generic.small bags to generic.medium bags. We suggest using a permissions manager UI plugin to discover and grant bag upgrade permissions. Commands This plugin provides both chat and console commands using the same syntax. When using a command in chat, prefix it with a forward slash: /. Admin / server commands boh.spawnloot -- Spawns loot in loot containers throughout the map. Intended for first-time setup, since enabling loot spawns in the config will only add bags to loot containers that spawn while the plugin is loaded. boh.clearloot -- Removes bags from all loot containers. Intended for first-time setup in conjunction with the boh.spawnloot command. boh.stats -- Prints an overview of how many bags are present on the server. Note: Some bags may not show up in the results if another plugin has deleted them and backed up their data on disk (for example, bags inside player Backpacks if the player is not connected or has not opened their Backpack during this play session). boh.listbags <filter> -- Prints a table view in console, showing all of the bag profiles defined in the config, matching the keyword filter if provided. Requires the bagofholding.listbags permission. boh.listcontainers -- Prints all container prefabs in the game. Requires the bagofholding.listcontainers permission. boh.setskins <category> <skin1> <skin2> <skin3> <skin4> <skin5> <skin6> <skin7> -- Updates the primary skin of all bag profiles in the specified category. The exact number of skins you supply must match the number of bags in the specified category. For example, if there are 7 bag profiles in the generic category (one for each size), then you can use this command with 7 distinct skins to update the config for all of those bag profiles at once. The first bag profile will be given the first skin, the second bag profile will be given the second skin, and so on. In addition to updating the config for you, this will change all the currently known bags on the server, which have the affected bag profiles, to use the specified skins, saving you the trouble of having to recreate the bags. This command will ensure that the specified skins are made the primary skins of the affected bag profiles. boh.addskins <category> <skin1> <skin2> <skin3> <skin4> <skin5> <skin6> <skin7> -- Adds the specified skins as secondary skins to all bag profiles in the specified category. The first bag profile will be given the first skin, the second profile will be given the second skin, and so on. Similar to the boh.setskins command, this will update the config, but will not update the skins of existing bags on your server. boh.settheme <theme> -- Updates the primary skin of the preset bag categories (bagofholding, generic, armor_clothing, food_medical, items_construction, resources_components, weapons_tools) to the specified theme. Valid themes: fantasy_chevrons, fantasy_circles,leather_chevrons,leather_circles, tactical_chevrons, tactical_circles. Note: If the config has significantly changed (i.e., if any of the preset bag categories no longer have exactly 7 bag profiles), this command will not work, but you can alternatively use boh.setskins or manually update the config. boh.addtheme -- Like boh.settheme, but instead of changing the primary skin of the affected bag profiles, this will only add the specified theme as secondary skins. boh.givebag <player> <bag profile> <amount> <skin index> -- Creates a stack of bags and gives it to the specified player. Requires the bagofholding.givebag permission. If the bag has multiple skins defined, you can specify which one via the skin-index argument. For example, boh.givebag Somebody generic.small 1 3 to give one bag with the 3rd skin applied. The amount and skin index parameters are optional, both defaulting to 1. boh.givekitbag <player> <bag profile> <kit name> -- Creates a bag, populates it with the specified kit (from the Kits plugin on uMod), then gives it to the specified player. Requires the bagofholding.givekitbag permission. Player commands bag.open -- Depending on the context, this command will either open the first unlocked bag in your inventory, open the next bag in your inventory, or close your inventory if no more bags are found. bag.next -- Like bag.open, but will continuously cycle bags rather than closing your inventory when no more bags are found. bag.prev -- Like bag.next, but will start at the end of your inventory, and will cycle bags in reverse order. Configuration The settings and options can be configured in the BagOfHolding file under the config directory. The use of an editor and validator is recommended to avoid formatting issues and syntax errors. General settings Wearable bags -- Determines whether players can place bags in their wearable inventory slots. Disabled by default. Enabling this will incur a very minor performance cost. Allow wearing bags in the backpack slot (true or false) -- Determines whether players can wear bags in the backpack/parachute slot. Default: false. Allow wearing bags in non-backpack slots (true or false) -- Determines whether players can wear bags in non-backpack slots. Default: false. Visual backpack -- Determines whether the visual backpack will be displayed on players while wearing a bag. Enabling this will incur a minor performance cost. Display while a bag is worn in the backpack slot (true or false) -- Determines whether the visual backpack will be enabled while the player is wearing a bag in their backpack slot. Default: false. You should set Wearable bags -> Allow wearing bags in the backpack slot to the same value that you set here. Display while a bag is worn in a non-backpack slot (true or false) -- Determines whether the visual backpack will be enabled while the player is wearing a bag in a non-backpack slot. Default: false. You should set Wearable bags -> Allow wearing bags in non-backpack slots to the same value that you set here. Gather mode Enabled (true or false) -- Determines whether players can toggle gather mode on bags. While gather mode is enabled for a given bag, any item that gets added to the bag's parent container will automatically be moved into the bag if possible. Default: false. Enable stack improvements (true or false) -- Determines whether the plugin will attempt to auto stack bags when dropping them onto each other in the player inventory (as long as the destination bag is not currently open). Default: true. Setting to false will improve performance. Note that dropping a bag with contents onto an empty bag will never stack them; the empty bag must be dropped onto the bag that has contents. Dropped bag item settings Dropped bag item settings -- Determines the behavior of dropped bag items. Enable dropped bag buoyancy (true or false) -- Determines whether dropped bag items will float in water. Default: true. Enable opening dropped bags while at bag limit (true or false) -- Determines whether attempting to pick up a bag will actually open the bag instead, if the player cannot carry the bag due to their current bag limits. Default: true. Auto equip dropped bags while at bag limit (true or false) -- Determines whether attempting to pick up a bag will attempt to equip it in a wearable slot instead, if the player cannot carry the bag in their main inventory due to their current bag limits. Default true. This feature only applies while bags are configured to be wearable. Minimum despawn time (seconds) -- Determines the minimum time (in seconds) before a dropped bag item will despawn. This option also affects the despawn time of dropped backpacks that contain bag items. Note: The despawn time of bags will also take into account the despawn time of items within them. Default: 1800 (30 minutes). UI settings UI settings Belt button -- Determines the display of the button next to the player's belt. By default, the button appears on the right side of the belt. The button will only appear if you have at least one bag in your inventory. Clicking the button will open the first bag in your inventory via the bag.open command. Enabled (true or false) -- Determines whether the belt button is displayed. Default: true. Only show while bags are worn (true or false) -- Determines whether bags must be worn in order to display the belt button. OffsetX -- Determines where the belt button is displayed, relative to the bottom center of the screen. Set to 185.0 to place the button on the right side of the belt. Set to -263.0 to place the button on the left side of the belt. Default: 185.0. Display skin ID -- Determines the skin ID displayed on the belt button. Default: 2824115881 (the fantasy style generic.small bag). Loot interface -- Determines the display of the loot panel while the player has a bag open. Enable back button (true or false) -- Determines whether a back button is displayed when the player is looting a bag that is inside another container. Clicking the back button will switch the loot interface to the bag's parent container. Default: true. Bag selector -- Determines the display of the bag selector. While looting a bag, the bag selector will display an icon for each lootable bag in the bag's parent container, allowing for 1-click access to other bags. The bag selector also displays a vertical progress bar to indicate how full each bag is. The bag selector automatically resizes depending on how many bags need to be displayed. The default settings allow a maximum of 10 bags to be displayed. Enabled (true or false) -- Determines whether the bag selector is displayed. Default: true. Max width -- Determines how much space the bag selector can use. By default, it can take up to 5 inventory slots worth of space, but that may cause the "LOOT" text to overlap the bag selector for players using non-English languages. If your players are seeing overlap, consider reducing this value. Default: 310.0. Min bag size -- Determines the minimum size (height and width) of each bag displayed in the bag selector. When many bags are displayed, each bag icon will be no smaller than this value. Default: 29.0. Max bag size -- Determines the maximum size (height and width) of each bag displayed in the bag selector. When few bags are displayed, each bag icon will be no larger than this value. Default: 58.0. Effects Effects Open effect -- Determines the effect played when a player opens a bag. Only the player that opens the bag will witness this effect, so it will not give away their location. Default: "assets/prefabs/deployable/small stash/effects/small-stash-deploy.prefab". Set to "" to disable the effect. Disabling effects will improve performance. Upgrade effect -- Determines the effect played when a player upgrades a bag. Only the player that upgrades the bag will witness this effect, so it will not give away their location. Default: "assets/prefabs/misc/halloween/lootbag/effects/silver_open.prefab". Set to "" to disable the effect. Disabling effects will improve performance. Loot spawns Loot spawns -- Determines which loot containers bags may spawn in. This feature is disabled by default. As an alternative to using this feature, you might want to use a dedicated loot plugin to spawn bags, by designating that the loot plugin should spawn a large halloween loot bag (short name: halloween.lootbag.large, item ID: 479292118) with an appropriate skin ID from the Bag profiles section of the config. Enabled (true or false) -- Determines whether this plugin will attempt to add bags to loot containers. Default: false. Bag spawn chance percent by prefab -- Determines the probability (0.0 to 100.0 percent) of bags spawning in loot containers, according to the prefab of the loot container. For each type of loot container, you may define the spawn chance for each bag profile. To see which container prefabs this can accept, run the command boh.listcontainers (requires the bagofholding.listcontainers permission). Bag limits Player bag limits -- Determines how many non-empty bags that players can hold in their inventory at once. This applies to the entire player inventory, including the wearable container, unless Player wearable bag limits is enabled, in which case limits for the wearable container is configured separately. Default limits -- These limits apply to all players, except those who have been granted a permission from Bag limits by permission. Max total bags -- See below. Max bags by category name -- See below. Bag limits by permission -- List of bag limits which override the defaults. Permission suffix -- Determines the permission generated, following the pattern bagofholding.limit.player.<suffix>. For example: bagofholding.limit.player.unlimited. You may define unlimited bag limit profiles, but at most one will be assigned to each player. Limit profiles toward the end of the list have highest priority. Max total bags -- See below. Max bags by category name -- See below. Player wearable bag limits -- Determines how many non-empty bags that players can wear. Enabled -- Determines whether wearable limits are separate from Player bag limits. While true, limits defined in this section apply to the wearable container, and limits defined in Player bag limits apply only to the rest of the player inventory. While false, limits defined in this section have no effect. Default limits -- These limits apply to all players, except those who have been granted a permission from Bag limits by permission. Max total bags -- See below. Max bags by category name -- See below. Bag limits by permission -- List of bag limits which override the defaults. Permission suffix -- Determines the permission generated, following the pattern bagofholding.limit.wearable.<suffix>. For example: bagofholding.limit.wearable.unlimited. You may define unlimited bag limit profiles, but at most one will be assigned to each player. Limit profiles toward the end of the list have highest priority. Max total bags -- See below. Max bags by category name -- See below. Vanilla backpack bag limits -- Determines how many non-empty bags that vanilla backpacks can hold (while equipped or while dropped on the ground). Enabled -- Determines whether vanilla backpack bag limits are determined by this section or by Default container bag limits -> Default limits. While true, limits defined in this section apply to vanilla backpacks. While false, limits defined in this section have no effect, and vanilla backpacks will follow the rules defined for default container limits. Default limits -- These limits apply to all backpacks. There is not currently a way to override this for players with permission. Max total bags -- See below. Max bags by category name -- See below. Backpack bag limits -- Determines how many non-empty bags that players can hold in their backpack at once (Backpacks plugin on uMod). Default limits -- These limits apply to all players, except those who have been granted a permission from Bag limits by permission. Max total bags -- See below. Max bags by category name -- See below. Bag limits by permission -- List of bag limits which override the defaults. Permission suffix -- Determines the permission generated, following the pattern bagofholding.limit.backpack.<suffix>. For example: bagofholding.limit.backpack.unlimited. You may define unlimited bag limit profiles, but at most one will be assigned to each player. Limit profiles toward the end of the list have highest priority. Max total bags -- See below. Max bags by category name -- See below. Default container bag limits -- Determines how many non-empty bags can be placed into storage containers. Can be overriden for specific container prefabs via Container bag limits by prefab. Default limits -- These limits apply to all storage containers, except those owned by players who have been granted a permission from Bag limits by permission. Max total bags -- See below. Max bags by category name -- See below. Bag limits by permission -- List of bag limits which override the defaults. Permission suffix -- Determines the permission generated, following the pattern bagofholding.limit.container.<suffix>. For example: bagofholding.limit.container.unlimited. You may define unlimited bag limit profiles, but at most one will be assigned to each player. Limit profiles toward the end of the list have highest priority. Max total bags -- See below. Max bags by category name -- See below. Container bag limits by prefab -- Determines how many non-empty bags can be placed into storage containers, by container prefab, superseding Default container bag limits. See below for an example. [full_prefab_path] -- For each prefab you want to define limits, you will need to define a new subsection with the full prefab path, then declare the bag limit definition under that section. Default limits -- These limits apply to all storage containers with this prefab, except for those owned by players who have been granted a permission from Bag limits by permission. Max total bags -- See below. Max bags by category name -- See below. Bag limits by permission -- List of bag limits which override the defaults for this prefab. Permission suffix -- Determines the permission generated, following the pattern bagofholding.limit.container.<short_prefab_name>.<suffix>. For example: bagofholding.limit.container.locker.deployed.unlimited. You may define unlimited bag limit profiles, but at most one will be assigned to each player. Limit profiles toward the end of the list have highest priority. Max total bags -- See below. Max bags by category name -- See below. Every bag limit profile has the following options. Max total bags -- Determines how many total non-empty bags (of any category) are allowed. Max bags by category name -- Determines how many non-empty bags of each category are allowed. This references the optional Category name property of each bag profile. For example, if you set this to { "resources_components": 2 }, players will be able to hold at most 2 Resources & Components bags. Example Container bag limits by prefab: "Container bag limits by prefab": { "assets/prefabs/deployable/locker/locker.deployed.prefab": { "Default limits": { "Max total bags": 0, "Max bags by category name": {} }, "Bag limits by permission": [ { "Permission suffix": "unlimited", "Max total bags": -1, "Max bags by category name": {} } ] } }, Bag content rulesets Bag content rulesets -- This section allows you to determine which items can be placed inside bags. It also allows you to define limits for bags inside bags. Each bag profile can refer to a content ruleset that you define in this section, to determine what is allowed in that type of bag. This design allows you to define a ruleset once, and reference it in many bag profiles. Name -- The name of the ruleset. Once you have defined this ruleset, you can assign it a specific bag profile by going to the Bag profiles section of the config and setting the Contents ruleset option to this ruleset name. Allowed item categories -- Determines which categories of items are allowed to be placed into bags that use this ruleset. Allowed values: All, Ammunition, Attire, Common, Component, Construction, Electrical, Favourite, Food, Fun, Items, Medical, Misc, Resources, Search, Tool, Traps, Weapon. Any item within allowed categories may be forcibly disallowed by specifying its short name in Disallowed item short names, or by specifying its skin ID in Disallowed skin IDs. Disallowed item categories -- Determines which categories of items are disallowed from being placed into bags that use this ruleset. This option is useful if you want to allow most categories, with explicit denial of specific categories. Note: For this option to work, you'll also need to set Allowed item categories to ["All"]. Any item disallowed this way can be forcibly allowed by specifying its short name in Allowed item short names, or by specifying its skin ID in Allowed skin IDs. Allowed item short names -- Determines which items are allowed to be placed into bags that use this ruleset, in addition to the categories specified in Allowed item categories. Any item allowed this way can be forcibly allowed by specifying its skin ID in Disallowed skin IDs. Disallowed item short names -- Determines which item short names are disallowed from being placed into bags that use this ruleset. Any item disallowed this way can be forcibly allowed if its skin ID is specified in Allowed skin IDs. Allowed skin IDs -- Determines which skin IDs are allowed to be placed into bags that use this ruleset. By default, all skin IDs are allowed, as long as the item is allowed via Allowed item categories or Allowed item short names. This option is useful for allowing specific skins of specific items that are not otherwise allowed. For example, if you want a specific bag to only be able to hold other bags (and no other items), simply set this option to the list of bag skin IDs, and leave all of the other options blank. Disallowed skin IDs -- Determines which skin IDs are disallowed from being placed into bags that use this ruleset. This option is useful for disallowing specific skins of specific items that are otherwise allowed via Allowed item categories or Allowed item short names. Bag limits -- Determines how many non-empty bags can fit inside this bag. Max total bags -- See the section on bag limits. Max bags by category name -- See the section on bag limits. Order of precedence: Disallowed skin IDs > Allowed skin IDs > Disallowed item short names > Allowed item short names > Disallowed item categories > Allowed item categories. Bag profiles Bag profiles -- This section defines every type of bag. For an item to function as a bag, it must be a large halloween loot bag (short name: halloween.lootbag.large, item ID: 479292118) with a skin ID from this section. Name -- The short name of the bag. This must be unique. The bag profile name is used by various features of the plugin, including bag limits, bag upgrades, upgrade permissions, loot spawns, the bagofholding.givebag command, developer hooks, and the developer API. Skin IDs -- Determines the skin IDs associated with this bag profile. Any halloween.lootbag.large item that has one of these skin IDs will be considered a bag controlled by this plugin and will use this profile. You can associate as many skin IDs per bag profile as you want. By default, most bag profiles will have three skins in the config, for fantasy, leather and tactical themes, in that order. Defining multiple skin IDs allows you to provide multiple themes of bags to players, letting them choose which they prefer, as long as you provide players with a means to get the alternative skins. The first skin ID is considered the primary skin ID, and will be used when creating a bag for loot spawns, when giving a bag via the boh.givebag command (unless the skin index parameter is supplied), and when other plugins create bags via API methods. When a bag is upgraded, if the target bag profile has multiple skin IDs defined, the new skin ID will be selected according to the order in the list of skin IDs. For example, if the bag's current profile lists three skin IDs, and the current skin is second, then the upgraded bag will use the second skin ID in the target profile. If there is no corresponding skin in the same position in the target profile (e.g., 3rd skin on current profile, but the target has only 2 skins), then the first skin will be selected. Capacity -- Determines how many container slots this bag will have. Maximum: 48. Display name -- Determines the display name of the bag item. This shows at the top of the screen when a bag item is selected in your inventory. Category name -- Determines the bag category. Other sections of the config will refer to this name to define bag limits. This should not be confused with item categories, which are used to define content rulesets. Contents ruleset -- Determines which items are allowed inside this bag. This must refer to the name of a ruleset defined in the Bag content rulesets section of the config. Allow player item input (true or false) -- Determines whether players can place items into this bag. Setting to false is useful if you want to provide a player with a bag full of items, as a sort of temporary container. This feature is intended primarily for "kit bags". Upgrade -- Determines which bag profile this bag can be upgraded to, as well as the items required to purchase the upgrade. To -- The name of the target bag profile. Cost -- The cost to purchase the upgrade. Item short name -- The short name of the currency item. Default: "scrap". Item skin ID -- The skin ID of the currency item. Set to 0 to accept any skin. Default: 0. Amount -- The amount of currency required to purchase the upgrade. Use Economics (true or false) -- Set to true to require Economics currency instead of item currency. Default: false. Use Server Rewards (true or false) -- Set to true to require Server Rewards currency instead of item currency. Default: false. Enable food spoiling --(true or false) Determines whether food items inside the bag will spoil over time. Default: true. Setting this to false will prevent food items from spoiling in the bag or within nested bags. Recyclable -- Determines whether the bag can be recycled, as well as which items it will recycle into. Enabled (true or false) -- Determines whether the bag can be recycled. Default: false. Setting to false for every bag will improve performance by disabling recycling hooks. Ingredients -- List of items that will be produced by recycling the bag. Item short name -- The short name of the ingredient item. Default: "scrap". Item skin ID -- The skin ID of the ingredient item. Default: 0. Amount -- The amount of the ingredient item to produce. Item display name -- The display name of the ingredient item. Localization The default messages are in the BagOfHolding file under the lang/en directory. To add support for another language, create a new language folder (e.g. de for German) if not already created, copy the default language file to the new folder and then customize the messages. Frequently asked questions (FAQ) Q: How do I configure this plugin with Alpha Loot? The built-in Loot spawns feature of this plugin is compatible with popular loot plugins such as Better Loot and Alpha Loot. Alpha Loot users also have the option of spawning bags directly via the Alpha Loot plugin. To do so, use the Alpha Loot Editor to add skinned large halloween loot bags to the loot table (short name: halloween.lootbag.large, item ID: 479292118). Tutorial: https://www.youtube.com/watch?v=54A77rQ0Ld8. Caution: Make sure that the bag skin IDs you configure to spawn via Alpha Loot are assigned to bag profiles in the Bag of Holding config. If you configure a particular skin ID in the loot table that does not correspond to a bag profile, then those bags will function as just normal halloween loot bags. Q: How do I make players spawn with bags? One way is via the Auto Kits feature of the Rust Kits plugin on uMod. Other plugins that allow you to manage default loadouts for players should also work, as long as they support skinned items. Q: Can bags be placed inside other bags? Yes, but by default, only the bagofholding bag profile can contain other bags, and it cannot contain other bagofholding bags. You can fine tune this behavior in the configuration. Q: Can this plugin replace Backpack plugins? Yes, for the majority of use cases. If you are using a Backpack plugin for the sole purpose of allowing players to carry more items (with backpacks dropping on death), then you can simply switch to using bags instead. The main difference is that Backpacks allow players to spawn with additional storage, which players cannot lose, whereas players must acquire bags to use additional storage, and players can lose or trade that storage capacity. If you are currently allowing players to keep their Backpack items on death, bags cannot replace that use case, but bags can enhance that use case since you can configure certain bags to be allowed in Backpacks to effectively increase the Backpack storage capacity. Q: Is this plugin compatible with Backpack plugins? Yes, this plugin has native support for the Backpacks plugin on uMod. By default, only empty bags can be placed inside Backpacks, but you can configure that behavior under the Backpack bag limits. Q: Can bags have more than 7 upgrade stages? Yes, you can have as many upgrade stages as you want. By default, each bag category has 7 stages (one for each row of capacity), but it's possible to have 48 bag stages per bag category (one for each slot of capacity). The simplest way to add more stages is to create additional bag profiles that reuse the existing skins but have different capacity. For example, you can define "Small Bag (13)" with 13 capacity and "Small Bag (14)" with 14 capacity, both with skin ID 2824115881. Q: How can I change bag icons? See the Default bags section below for instructions on changing the bag icons to other presets created by our development team. If you want to create your own bag icons, simply upload them to the Steam workshop as you would any Rust skin, then assign the corresponding workshop/skin ID to a bag profile in the Bag Profiles section of the config. Q: Can I configure bag upgrades to require multiple items? No. Currently, bag upgrades can only be configured to require a single type of item. Q: Where is this plugin's data file? This plugin doesn't use nor need a data file in its current design. This plugin utilizes a vanilla Rust capability to store items inside other items, similar to how attachments are placed inside weapons. Plugin compatibility / troubleshooting During initial development of this plugin, many plugin compatibility issues were identified and fixed. Some themes of compatibility issues were systematically eliminated, never to be seen again. However, some conflicts may remain undiscovered. If you encounter a new compatibility issue, please report it to the maintainers of both plugins so that we can work out a solution. This section also provides tips on how you can mitigate various plugin conflicts. Hook conflict with OnItemSplit The simplest way to mitigate this issue is by disabling stacking of the halloween.lootbag.large item. You can also avoid this issue by ensuring each bag profile uses a unique skin ID. Hook conflict with CanStackItem The simplest way to mitigate this issue is by disabling stacking of the halloween.lootbag.large item. Tips for maintainers of other plugins: Don't allow stacking when the item being moved is not empty Don't allow stacking two items whose containers have different capacity Hook conflict with CanCombineDroppedItem The simplest way to mitigate this issue is by disabling stacking of the halloween.lootbag.large item. Hook conflict with CanMoveItem This can happen in two possible situations: When quick-looting an item from a bag into your inventory. If this is when you see the conflict, you will have to contact us to troubleshoot further. When dropping a bag onto another bag. If this is when you see the conflict, the simplest way to mitigate this issue is by disabling stacking of the halloween.lootbag.large item. You can also mitigate this issue by setting Enable stack improvements to false in the config. Hook conflict with CanBeRecycled or OnItemRecycle The simplest way to mitigate this issue is by disabling recycling on all bag profiles. The belt icon overlaps with other plugin icons To mitigate this issue, you can either disable the belt icon or reposition it in the config. Opening a bag spawns loot There are two likely possibilities. The bag had a skin ID that is not configured in the plugin. One way this can happen is if you use another plugin to acquire bags, and the skin ID you configured in that plugin isn't assigned to any bag profiles in the Bag of Holding config. If this is the case, please reconfigure either plugin so that they refer to the same skin ID. You have a loot plugin which is using the OnItemAction hook to override the behavior of opening halloween.lootbag.large items. There is little that you can do to mitigate this. Please suggest to the maintainer of the loot plugin that they add a check to ignore halloween loot bags that are skinned. Opening a bag inside a special container just closes the container This probably means that the plugin that controls the special container immediately deleted the container when it was closed. In this case, the plugin that manages that container will need to implement changes to allow that container to persist after closed. Pressing the back button inside a bag just closes the bag This probably means that the bag has been placed inside a special container which the plugin doesn't know how to open. It could be due to a miss in this plugin, but more likely, that container is a special type of container controlled by another plugin (such as a Backpack or Bank). In this case, we will have to develop a solution to enable compatibility. Quick Sort UI overlaps bag selector UI The simplest way to mitigate this issue is by reducing the max bag size to 6 rows (36 slots). Alternatively, you can update the Quick Sort plugin's configuration to reposition or resize the UI. We are also planning to introduce an option to reposition the bag selector to the right side of the loot panel in a future update. Weapons/deployables placed in bags eventually become unusable This may happen if you are using an incompatible item cleaner or entity cleaner plugin. Most likely, the cleaner plugin doesn't know to account for situations where items are deeply nested. It should be easy for the cleaner plugin's maintainer to fix this issue. After attending an event, items inside bags are missing or changed This can happen if the plugin which manages the event temporarily replaces the player's items and restores the items when the player leaves the event. This issue usually manifests as items losing their skins and contents (e.g., weapons losing attachments, water jugs losing water). To resolve, the maintainer of the event plugin will need to update that plugin to recursively save items to infinite depth. If the developer needs help, they can look at the code of other plugins such as Backpacks, Kits, and Restore Upon Death. After placing a bag inside a special container, items inside the bag are missing or changed This may happen if the plugin which manages the special container tries to save the items in a custom way, such as via a data file. This issue usually manifests as items losing their skins and losing contents (e.g., weapons losing attachments, water jugs losing water). To resolve, the maintainer of the container plugin (e.g., Bank, Backpacks, Extra Pockets feature of Skill Tree) will need to update that plugin to recursively save items to infinite depth. If the developer needs help, they can look at the code of other plugins such as Backpacks, Kits, and Restore Upon Death. Default bags The default configuration provides many bag profiles, detailed below. See this workshop collection to find hundreds of bag skins created specifically for this plugin. Armor & Clothing Bags Name Skin ID Capacity Display Name Upgrades to Upgrade cost Recycle output armor_clothing.xxsmall 2824111863 6 XXSmall Armor & Clothing Bag armor_clothing.xsmall 100 Scrap 100 Scrap armor_clothing.xsmall 2824114542 12 XSmall Armor & Clothing Bag armor_clothing.small 200 Scrap 200 Scrap armor_clothing.small 2824116781 18 Small Armor & Clothing Bag armor_clothing.medium 300 Scrap 300 Scrap armor_clothing.medium 2824118678 24 Medium Armor & Clothing Bag armor_clothing.large 400 Scrap 400 Scrap armor_clothing.large 2824120619 30 Large Armor & Clothing Bag armor_clothing.xlarge 500 Scrap 500 Scrap armor_clothing.xlarge 2824122747 36 XLarge Armor & Clothing Bag armor_clothing.xxlarge 600 Scrap 600 Scrap armor_clothing.xxlarge 2824124690 42 XXLarge Armor & Clothing Bag generic.xxlarge 900 Scrap 900 Scrap Food & Medical Bags Name Skin ID Capacity Display Name Upgrades to Upgrade cost Recycle output food_medical.xxsmall 2824111462 6 XXSmall Food & Medical Bag food_medical.xsmall 100 Scrap 100 Scrap food_medical.xsmall 2824114220 12 XSmall Food & Medical Bag food_medical.small 200 Scrap 200 Scrap food_medical.small 2824116431 18 Small Food & Medical Bag food_medical.medium 300 Scrap 300 Scrap food_medical.medium 2824118433 24 Medium Food & Medical Bag food_medical.large 400 Scrap 400 Scrap food_medical.large 2824120423 30 Large Food & Medical Bag food_medical.xlarge 500 Scrap 500 Scrap food_medical.xlarge 2824122439 36 XLarge Food & Medical Bag food_medical.xxlarge 600 Scrap 600 Scrap food_medical.xxlarge 2824124459 42 XXLarge Food & Medical Bag generic.xxlarge 900 Scrap 900 Scrap Items & Construction Bags Name Skin ID Capacity Display Name Upgrades to Upgrade cost Recycle output items_construction.xxsmall 2824113019 6 XXSmall Items & Construction Bag items_construction.xsmall 100 Scrap 100 Scrap items_construction.xsmall 2824115483 12 XSmall Items & Construction Bag items_construction.small 200 Scrap 200 Scrap items_construction.small 2824117546 18 Small Items & Construction Bag items_construction.medium 300 Scrap 300 Scrap items_construction.medium 2824119338 24 Medium Items & Construction Bag items_construction.large 400 Scrap 400 Scrap items_construction.large 2824121607 30 Large Items & Construction Bag items_construction.xlarge 500 Scrap 500 Scrap items_construction.xlarge 2824123520 36 XLarge Items & Construction Bag items_construction.xxlarge 600 Scrap 600 Scrap items_construction.xxlarge 2824125425 42 XXLarge Items & Construction Bag generic.xxlarge 900 Scrap 900 Scrap Resources & Components Bags Name Skin ID Capacity Display Name Upgrades to Upgrade cost Recycle output resources_components.xxsmall 2824112139 6 XXSmall Resources & Components Bag resources_components.xsmall 100 Scrap 100 Scrap resources_components.xsmall 2824114807 12 XSmall Resources & Components Bag resources_components.small 200 Scrap 200 Scrap resources_components.small 2824117061 18 Small Resources & Components Bag resources_components.medium 300 Scrap 300 Scrap resources_components.medium 2824118878 24 Medium Resources & Components Bag resources_components.large 400 Scrap 400 Scrap resources_components.large 2824121055 30 Large Resources & Components Bag resources_components.xlarge 500 Scrap 500 Scrap resources_components.xlarge 2824123001 36 XLarge Resources & Components Bag resources_components.xxlarge 600 Scrap 600 Scrap resources_components.xxlarge 2824124960 42 XXLarge Resources & Components Bag generic.xxlarge 900 Scrap 900 Scrap Weapons & Tools Bags Name Skin ID Capacity Display Name Upgrades to Upgrade cost Recycle output weapons_tools.xxsmall 2824110902 6 XXSmall Weapons & Tools Bag weapons_tools.xsmall 100 Scrap 100 Scrap weapons_tools.xsmall 2824113791 12 XSmall Weapons & Tools Bag weapons_tools.small 200 Scrap 200 Scrap weapons_tools.small 2824116147 18 Small Weapons & Tools Bag weapons_tools.medium 300 Scrap 300 Scrap weapons_tools.medium 2824118115 24 Medium Weapons & Tools Bag weapons_tools.large 400 Scrap 400 Scrap weapons_tools.large 2824120210 30 Large Weapons & Tools Bag weapons_tools.xlarge 500 Scrap 500 Scrap weapons_tools.xlarge 2824122197 36 XLarge Weapons & Tools Bag weapons_tools.xxlarge 600 Scrap 600 Scrap weapons_tools.xxlarge 2824124162 42 XXLarge Weapons & Tools Bag generic.xxlarge 900 Scrap 900 Scrap Generic Bags Name Skin ID Capacity Display Name Upgrades to Upgrade cost Recycle output generic.xxsmall 2824110403 6 XXSmall Bag generic.xsmall 100 Scrap 100 Scrap generic.xsmall 2824113497 12 XSmall Bag generic.small 200 Scrap 200 Scrap generic.small 2824115881 18 Small Bag generic.medium 300 Scrap 300 Scrap generic.medium 2824117824 24 Medium Bag generic.large 400 Scrap 400 Scrap generic.large 2824119889 30 Large Bag generic.xlarge 500 Scrap 500 Scrap generic.xlarge 2824121905 36 XLarge Bag generic.xxlarge 600 Scrap 600 Scrap generic.xxlarge 2824123811 42 XXLarge Bag bagofholding 3000 Scrap 1500 Scrap Bag Of Holding The Bag of Holding is the ultimate bag. It can hold all items, including 6 other bags. Name Skin ID Capacity Display Name Recycle output bagofholding 2824136143 48 Bag of Holding 1500 Scrap Kit bags All kits bags accept all items and have 42 capacity. Kit bags also upgrade in a circular fashion, making it easy for admins to edit them. Name Skin ID Display Name Upgrades to kitbag.red.unlocked 2830974120 Kit Bag (Editable) kitbag.red.locked kitbag.red.locked 2830952942 Kit Bag kitbag.red.unlocked kitbag.orange.unlocked 2830974662 Kit Bag (Editable) kitbag.orange.locked kitbag.orange.locked 2830963984 Kit Bag kitbag.orange.unlocked kitbag.yellow.unlocked 2830975150 Kit Bag (Editable) kitbag.yellow.locked kitbag.yellow.locked 2830964495 Kit Bag kitbag.yellow.unlocked kitbag.green.unlocked 2830975690 Kit Bag (Editable) kitbag.green.locked kitbag.green.locked 2830965006 Kit Bag kitbag.green.unlocked kitbag.cyan.unlocked 2830976173 Kit Bag (Editable) kitbag.cyan.locked kitbag.cyan.locked 2830965451 Kit Bag kitbag.cyan.unlocked kitbag.blue.unlocked 2830976481 Kit Bag (Editable) kitbag.blue.locked kitbag.blue.locked 2830965789 Kit Bag kitbag.blue.unlocked Alternative bag skins By default, the bag profiles in the config use the fantasy style skins. If you want to change them to the leather or tactical style skins, you can use the boh.setskins command to edit the config in bulk. For example, to change the generic bag set to use tactical style skins, run the command boh.setskins generic 2828559961 2828562701 2828573095 2828576548 2828579661 2828582369 2828585532. Fantasy bag skins As of v1.9.0, you can apply the fantasy theme by running the command boh.settheme fantasy_chevrons. The old way is to run all of the following commands. boh.setskins bagofholding 2824136143 boh.setskins generic 2824110403 2824113497 2824115881 2824117824 2824119889 2824121905 2824123811 boh.setskins armor_clothing 2824111863 2824114542 2824116781 2824118678 2824120619 2824122747 2824124690 boh.setskins food_medical 2824111462 2824114220 2824116431 2824118433 2824120423 2824122439 2824124459 boh.setskins items_construction 2824113019 2824115483 2824117546 2824119338 2824121607 2824123520 2824125425 boh.setskins resources_components 2824112139 2824114807 2824117061 2824118878 2824121055 2824123001 2824124960 boh.setskins weapons_tools 2824110902 2824113791 2824116147 2824118115 2824120210 2824122197 2824124162 Additionally, you should set UI settings -> Belt button -> Display skin ID to one of the fantasy skins such as 2824115881. Here are all the fantasy skin sequences, in case you want to use other icons or colors. Fantasy plain: 2824110403 2824113497 2824115881 2824117824 2824119889 2824121905 2824123811 Fantasy gray chevrons: 2828128662 2828134240 2828137909 2828146246 2828148357 2828150051 2828152784 Fantasy white chevrons: 2828128323 2828133931 2828137681 2828146038 2828148160 2828149845 2828152530 Fantasy black chevrons: 2828128041 2828133673 2828137257 2828145823 2828148006 2828149681 2828152306 Fantasy red chevrons: 2828127703 2828133308 2828136874 2828145607 2828147808 2828149504 2828152062 Fantasy yellow chevrons: 2824113019 2824115483 2824117546 2824119338 2824121607 2824123520 2824125425 Fantasy pink chevrons: 2824112653 2824115134 2824117246 2824119088 2824121332 2824123291 2824125171 Fantasy orange chevrons: 2824112139 2824114807 2824117061 2824118878 2824121055 2824123001 2824124960 Fantasy light blue chevrons: 2824111863 2824114542 2824116781 2824118678 2824120619 2824122747 2824124690 Fantasy green chevrons: 2824111462 2824114220 2824116431 2824118433 2824120423 2824122439 2824124459 Fantasy blue chevrons: 2824110902 2824113791 2824116147 2824118115 2824120210 2824122197 2824124162 Fantasy gray circles: 2828493103 2828497364 2828501735 2828506499 2828509849 2828514060 2828517736 Fantasy white circles: 2828493673 2828498179 2828502089 2828506819 2828510161 2828514392 2828518167 Fantasy black circles: 2828494015 2828498546 2828502435 2828507169 2828510478 2828514709 2828518812 Fantasy red circles: 2828494496 2828498987 2828502735 2828507528 2828510830 2828515098 2828515098 Fantasy yellow circles: 2828494894 2828499337 2828503050 2828507851 2828511170 2828515395 2828519489 Fantasy pink circles: 2828495354 2828499673 2828503432 2828508323 2828511498 2828515725 2828519798 Fantasy orange circles: 2828495777 2828500070 2828503778 2828508555 2828511912 2828516131 2828520212 Fantasy light blue circles: 2828496161 2828500606 2828504060 2828508821 2828512403 2828516540 2828520492 Fantasy green circles: 2828496570 2828500962 2828504356 2828509103 2828512690 2828516933 2828520819 Fantasy blue circles: 2828496949 2828501318 2828504627 2828509404 2828513595 2828517346 2828521099 Leather bag skins As of v1.9.0, you can apply the leather theme by running the command boh.settheme leather_chevrons. The old way is to run all of the following commands. boh.setskins bagofholding 2860178102 boh.setskins generic 2831018252 2831025047 2831029422 2831036209 2831041769 2831047418 2831052354 boh.setskins armor_clothing 2831016990 2831023499 2831028259 2831032725 2831040190 2831046214 2831050372 boh.setskins food_medical 2831017392 2831023974 2831028588 2831033068 2831040759 2831046638 2831050826 boh.setskins items_construction 2831015836 2831021553 2831027189 2831031578 2831038734 2831044485 2831049142 boh.setskins resources_components 2831016651 2831023019 2831027874 2831032305 2831039657 2831045812 2831049942 boh.setskins weapons_tools 2831017759 2831024390 2831028922 2831033383 2831041231 2831047014 2831051442 Additionally, you should set UI settings -> Belt button -> Display skin ID to one of the leather skins such as 2831029422. Here are all the leather style skin sequences, in case you want to use other icons or colors. Leather plain: 2831018252 2831025047 2831029422 2831036209 2831041769 2831047418 2831052354 Leather gray chevrons: 2831013773 2831019060 2831025741 2831029969 2831036925 2831042295 2831047827 Leather white chevrons: 2831014482 2831019741 2831026169 2831030357 2831037360 2831042761 2831048137 Leather black chevrons: 2831015051 2831020041 2831026487 2831030777 2831037873 2831043219 2831048450 Leather red chevrons: 2831015444 2831020436 2831026854 2831031160 2831038330 2831043696 2831048702 Leather yellow chevrons: 2831015836 2831021553 2831027189 2831031578 2831038734 2831044485 2831049142 Leather pink chevrons: 2831016234 2831022032 2831027551 2831031924 2831039240 2831045338 2831049495 Leather orange chevrons: 2831016651 2831023019 2831027874 2831032305 2831039657 2831045812 2831049942 Leather light blue chevrons: 2831016990 2831023499 2831028259 2831032725 2831040190 2831046214 2831050372 Leather green chevrons: 2831017392 2831023974 2831028588 2831033068 2831040759 2831046638 2831050826 Leather blue chevrons: 2831017759 2831024390 2831028922 2831033383 2831041231 2831047014 2831051442 Leather gray circles: 2831053189 2831057140 2831060554 2831063925 2831066897 2831070017 2831082280 Leather white circles: 2831053670 2831057586 2831060848 2831064201 2831067178 2831071006 2831082963 Leather black circles: 2831054069 2831057911 2831061109 2831064444 2831067379 2831072147 2831084280 Leather red circles: 2831054490 2831058281 2831061382 2831064726 2831067561 2831073121 2831084887 Leather yellow circles: 2831054841 2831058559 2831061614 2831065014 2831067781 2831073592 2831085402 Leather pink circles: 2831055215 2831058892 2831061919 2831065349 2831068032 2831073925 2831085778 Leather orange circles: 2831055582 2831059194 2831062274 2831065681 2831068304 2831074420 2831087653 Leather light blue circles: 2831055919 2831059491 2831062555 2831066018 2831068615 2831076575 2831088591 Leather green circles: 2831056306 2831059795 2831062808 2831066320 2831068905 2831078713 2831088956 Leather blue circles: 2831056740 2831060200 2831063168 2831066588 2831069218 2831079950 2831089185 Tactical bag skins As of v1.9.0, you can apply the tactical theme by running the command boh.settheme tactical_chevrons. The old way is to run all of the following commands. boh.setskins bagofholding 2828612528 boh.setskins generic 2828559961 2828562701 2828573095 2828576548 2828579661 2828582369 2828585532 boh.setskins armor_clothing 2828558763 2828562098 2828571752 2828575986 2828579117 2828581616 2828584535 boh.setskins food_medical 2828559062 2828562247 2828572006 2828576133 2828579288 2828581907 2828584822 boh.setskins items_construction 2828557975 2828561492 2828570571 2828574809 2828578159 2828580887 2828583748 boh.setskins resources_components 2828558453 2828561930 2828571212 2828575734 2828578707 2828581409 2828584212 boh.setskins weapons_tools 2828559313 2828562454 2828572778 2828576369 2828579499 2828582142 2828585357 Additionally, you should set UI settings -> Belt button -> Display skin ID to one of the tactical skins such as 2828573095. Here are all the tactical style skin sequences, in case you want to use other icons or colors. Tactical plain: 2828559961 2828562701 2828573095 2828576548 2828579661 2828582369 2828585532 Tactical gray chevrons: 2828556434 2828560310 2828563014 2828573659 2828577253 2828580012 2828582671 Tactical white chevrons: 2828557125 2828560646 2828563283 2828573927 2828577583 2828580260 2828582975 Tactical black chevrons: 2828557433 2828560923 2828563544 2828574322 2828577810 2828580491 2828583268 Tactical red chevrons: 2828557692 2828561221 2828570104 2828574605 2828578000 2828580701 2828583514 Tactical yellow chevrons: 2828557975 2828561492 2828570571 2828574809 2828578159 2828580887 2828583748 Tactical pink chevrons: 2828558240 2828561757 2828570867 2828575078 2828578530 2828581157 2828583990 Tactical orange chevrons: 2828558453 2828561930 2828571212 2828575734 2828578707 2828581409 2828584212 Tactical light blue chevrons: 2828558763 2828562098 2828571752 2828575986 2828579117 2828581616 2828584535 Tactical green chevrons: 2828559062 2828562247 2828572006 2828576133 2828579288 2828581907 2828584822 Tactical blue chevrons: 2828559313 2828562454 2828572778 2828576369 2828579499 2828582142 2828585357 Tactical gray circles: 2828590059 2828592435 2828596053 2828598607 2828600574 2828602840 2828605402 Tactical white circles: 2828590364 2828592713 2828596309 2828598848 2828600805 2828603043 2828605787 Tactical black circles: 2828590658 2828592930 2828596615 2828599070 2828601043 2828603298 2828605999 Tactical red circles: 2828590870 2828593147 2828596818 2828599291 2828601240 2828603494 2828606193 Tactical yellow circles: 2828591083 2828593355 2828597034 2828599512 2828601444 2828603677 2828606367 Tactical pink circles: 2828591226 2828593626 2828597285 2828599643 2828601590 2828603900 2828606490 Tactical orange circles: 2828591389 2828594143 2828597493 2828599829 2828601859 2828604283 2828606662 Tactical light blue circles: 2828591603 2828594846 2828597739 2828600017 2828602079 2828604553 2828606893 Tactical green circles: 2828591817 2828595022 2828598019 2828600169 2828602304 2828604782 2828607054 Tactical blue circles: 2828592115 2828595430 2828598248 2828600324 2828602571 2828605041 2828607208 Developer API API_GetApi Dictionary<string, object> API_GetApi() Returns a dictionary where each key is a delegate for an API method. The purpose of this API is for high-performance scenarios where you don't want the overhead of calling the Bag of Holding via Oxide. Instead, your plugin should call Bag of Holding once (when Bag of Holding loads), cache the API, and invoke specific API methods via delegates whenever needed. Example: // Get the API. Ideally you should cache this. You should also re-cache this when Bag of Holding reloads. var api = BagOfHolding.Call("API_GetApi") as Dictionary<string, object>; // Get the API function you want. Ideally you should cache this too. The names are the same as documented below, but without the "API_" prefix. var isBagFunction = api["IsBag"] as Func<Item, bool>; // Call the API function. This call doesn't go through Oxide, so it saves CPU cycles, and allows you to avoid heap allocations when passing value types (e.g., when passing numbers). var isBag = isBagFunction(item); API_IsBag bool API_IsBag(Item item) Returns true if the item is a bag, else returns false. API_IsLootingBag bool API_IsLootingBag(BasePlayer player) Returns true if the player is looting a bag, else returns false. Note: If you call this immediately after the OnLootEntity Oxide hook is called, this will return false, because the plugin has to inspect the ItemContainers that the player is looting (basePlayer.inventory.loot.containers) which are populated after the OnLootEntity hook call has finished (that is where the Oxide hook is placed, and the plugin follows that pattern when explicitly calling OnLootEntity). Therefore, if you wish to detect whether a player has just opened a bag via the OnLootEntity hook, you should run your logic on the next frame (e.g., using NextTick). You may avoid calling this API entirely by simply verifying that the basePlayer.inventory.loot.containers list has only one container, and that it has a parentItem. If both of those criteria are met, the player is looting some sort of item, not necessary from this plugin, but that should be close enough. Note that this logic still needs to be in NextTick for the aforementioned reason. API_GetBagProfileName string API_GetBagProfileName(Item item) Returns the profile name of the bag (not the display name), else returns null if the item is not a bag. If you want the display name, simply read item.name. API_OpenBag bool API_OpenBag(BasePlayer player, Item item) Attempts to make the player open the bag Returns true if the item is a valid lootable bag (not a locked bag), and if not blocked by a plugin via the OnBagOpen hook Returns false if the item was not a valid lootable bag, or if blocked by a plugin via the OnBagOpen hook API_CreateBag Item API_CreateBag(string profileName, int amount = 1) Creates a bag using the specified profile name, with specified stack amount Returns the bag Item if successful Returns null if the specified profile name or stack amount is invalid Note: Bags can also be created using ItemManager.CreateByName("halloween.lootbag.large", amount, skinId) if the skin ID is known API_CreateKitBag Item API_CreateKitBag(string profileName, string kitName, BasePlayer initiator = null) Creates a bag using the specified profile name, and populates it with the specified kit Returns the bag Item if successful Returns null if the specified profile name or kit name is invalid If any kit items do not fit in the bag, they will be given to the BasePlayer initiator if provided, else deleted. API_ChangeBagProfile bool API_ChangeBagProfile(Item item, string profileName, BasePlayer initiator = null) Updates the bag item to the specified profile Returns true if the item is a valid bag, and if the specified profile name is valid Returns false if the item is not a valid bag, or if specified profile name is invalid If the target profile has less capacity than the current profile... Overflowing items will attempt to be compacted into the bag by moving them to earlier slots If compaction fails, the remaining items will be given to the BasePlayer initiator if provided If the BasePlayer initiator is not provided, the bag capacity will be increased to fit the overflowing items Caution: If the item is a stack of bags, it will change the profile for all of the bags in the stack Caution: Changing the profile of a bag that is already inside a container may cause the container to exceed configured bag limits API_UpgradeBag bool API_UpgradeBag(Item item, BasePlayer initiator = null) Updates the bag item to the profile designated as the upgrade target in the config Returns true if the item is a valid bag, and if the bag profile has a valid upgrade target in the config Returns false if the item is not a valid bag, or if the bag profile does not have a valid upgrade target in the config If the target profile has less capacity than the current profile... Overflowing items will attempt to be compacted into the bag by moving them to earlier slots If compaction fails, the remaining items will be given to the BasePlayer initiator if provided If the BasePlayer initiator is not provided, the bag capacity will be increased to fit the overflowing items Caution: If the item is a stack of bags, it will upgrade all of the bags in the stack Caution: Upgrading a bag that is already inside a container may cause the container to exceed configured bag limits Developer hooks OnBagOpen object OnBagOpen(Item item, BasePlayer player) Called when a player attempts to open a bag Returning false will prevent the bag from being opened Returning null will result in the default behavior OnBagOpened void OnBagOpened(Item item, BasePlayer player) Called after a player has started looting a bag No return behavior OnBagClosed void OnBagClosed(Item item, BasePlayer player) Called after a player has stopped looting a bag No return behavior OnBagUpgrade object OnBagUpgrade(Item item, string newProfileName, BasePlayer initiator) Called when a player or a plugin attempts to upgrade a bag Returning false will prevent the bag from being upgraded Returning null will result in the default behavior Note: The BasePlayer argument will be null if the upgrade was not initiated by a player. OnBagUpgraded void OnBagUpgraded(Item item, string newProfileName, BasePlayer initiator) Called after a bag has been upgraded to the profile designated in the config No return behavior Note: The BasePlayer argument will be null if the upgrade was not initiated by a player OnBagProfileChanged void OnBagProfileChanged(Item item, string newProfileName) Called after a bag's profile has been changed No return behavior$19.99 -

Version 1.0.6
161 downloads
Global Storage Pro creates storage for your players that can be access from any global storage container. Containers will automatically spawn at safe-zone monuments, allowing players to safely store their items. The plugin will create an instance of storage for each player that loots the box, allowing for multiple players to loot the same global storage chest to manage their own instances of storage. Monument spawns: Automatically spawns containers at safe zone monuments. These can be repositioned using the gs.setpos command. Map specific spawns: Use the gs.addloc command to create a spawn point for a container that will be based on the map name. Anytime the map with a valid name is loaded, a container will spawn at the specified location. Placeholder spawns: Using RustEdit, placeholder entities can be deployed at specific locations to create automatic spawns for your custom monuments. Deployable containers: Players can be given deployable containers to setup in their bases that access the storage network. Comprehensive white/black list: Have full control over what items can be added to GlobalStoragePro containers based on skin, name, shortname and text fields. Permission based slots and deployments: You can create any number of permissions that will provide more or less storage slots, and deployments of containers. Administrative tool: Access the contents of any players global storage in-game using the gs.view command. Persistent wipe settings: Allow contents of containers to persist between wipes. Command: gs.givestorage <target> <amount> Type: Console Permission: globalstoragepro.admin (or can be run by the server with no perms) Description: Gives the target player a deployable global storage item. Command: gs.setpos Type: Chat Permission: globalstoragepro.admin Description: Sets the spawn location for the nearest monument (or monument marker for custom monuments) Command: gs.addloc Type: Chat Permission: globalstoragepro.admin Description: Adds a spawn location for a global storage chest. The name of the map is captured and put into the config along with the location for future spawns. Command: gs.openplayerinventory <userid> Type: Chat Permission: globalstoragepro.admin Description: Opens the storage container for the specified userid. Command: gs.view Type: Chat Permission: globalstoragepro.admin Description: Provides a list of all containers that have contents to the admin, who can then select one to view its contents. // Adds an item to the target players global storage container void TryAddItemToGlobalStorage(BasePlayer player, Item item, bool notify)$14.99 -
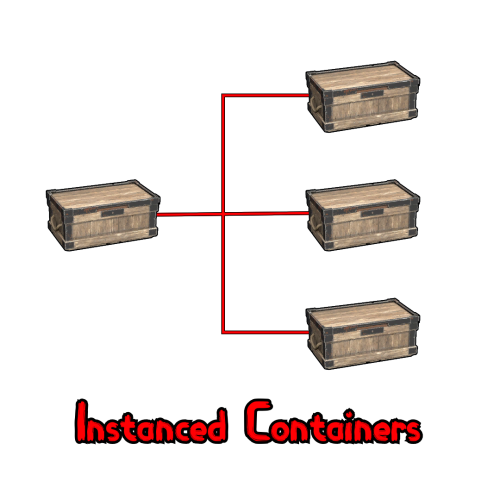
Version 1.0.18
387 downloads
Are you sick of your base being cluttered by countless items and having nowhere to store them? Have you had to build an extra wing on your base entirely for storage? Look no further, Instanced Containers has you covered! Instanced containers is a plugin that allows for players to create multiple containers inside of 1 container, saving them a significant amount of space in their base. It supports small/large wooden boxes and coffins by default, but can be used for any container by adjusting the config. The plugins has 3 user based permissions included: instancedcontainers.use - will allow the user to create instances of a container (3 instances per container by default). instancedcontainers.free - bypasses the cost for creating an instance of a container. You can also create your own permission groups through the config and add your own instance limits. Example: "vip": 6 would create a permission called instancedcontainers.vip and give players with the permission access to add 6 instances per container.$15.00- 60 comments
- 5 reviews
-
- 5
-
-
-
- #storage
- #containers
- (and 4 more)
-
Version 1.0.3
19 downloads
xScrapBag xScrapBag adds a virtual scrap storage system to your Rust server, allowing players to automatically store, manage, and transfer scrap without clogging their inventory. Features Automatic Scrap Storage Scrap picked up by players is automatically stored in their Scrap Bag Optional player chat notification when scrap is stored Prevents scrap from filling inventory slots Manual Deposit & Withdraw Deposit scrap from inventory into the Scrap Bag Withdraw stored scrap back into inventory Player-to-Player Scrap Transfer Transfer stored scrap to other online players via UI Persistent Data Storage Scrap balances are saved automatically Death Handling Option to reset stored scrap on death Or keep scrap safe after death - your choice. Plugin Preview Chat Commands /scrapbag /xsb /* Both chat commands will open the scrapbag UI */ Permission xscrapbag.use Config { "PermissionUse": "xscrapbag.use", "ResetStoredScrapOnDeath": false, "StoreScrapAutomatically": true, "StoreScrapAutomaticallyPlayerMessage": true }$9.99 -

Version 1.3.5
255 downloads
Reduce the decay damage by tick; Upgrade the authorizations limit; Upgrade the building grade limit; Upgrade the storage capacity of the cupboard; Unlock some deployable items; Upgrade the stack size limit of the cupboard; Set a default building grade for the server; Modify the default decay; Keep the cupboard attributes when remove; Make your server fun ^u^ The plugin has a unique permission, which allows the player to use the cupboard upgrade: tclevels.use F.A.Q How many items can be blocked? and which? You can block unlimited items and all items must be deployable or they will not be blocked. Which area will be checked when I place my cupboard? The entire privilege area will be checked. But you can also disable checks in the configuration file. Could it cause conflict with any plugin? Yes, but i am providing an API for the plugin so that other developers can integrate with it, so if there is a conflict, just go to the developer's plugin support and ask them to integrate it. Also if it is possible for me to integrate it from my plugin, i will do so without any problem.$20.00 -
Version 1.0.0
91 downloads
Modifies the containers acceptance rules optionally for players with permissions. Permissions containerrules.use - Use the plugin. Configuration { "Global Settings": { "Notify Player when container rules are applied": true, "Use Tip Notifications instead of Chat Messages": true }, "Chat Settings": { "Chat Prefix": "<color=#00EDED>[ContainerRules]</color>: ", "Icon SteamID": 0 }, "Container Rules": { "cupboard.tool.deployed": { "Enabled": true, "Allowed Categories (Names - Empty = Accept All)": [ "Resources" ], "Blocked Categories (Names)": [], "Allowed Shortnames (Empty = Accept All)": [], "Blocked Shortnames": [], "Requires Permission": true }, "cupboard.tool.retro.deployed": { "Enabled": true, "Allowed Categories (Names - Empty = Accept All)": [ "Resources" ], "Blocked Categories (Names)": [], "Allowed Shortnames (Empty = Accept All)": [], "Blocked Shortnames": [], "Requires Permission": true }, "cupboard.tool.shockbyte.deployed": { "Enabled": true, "Allowed Categories (Names - Empty = Accept All)": [ "Resources" ], "Blocked Categories (Names)": [], "Allowed Shortnames (Empty = Accept All)": [], "Blocked Shortnames": [], "Requires Permission": true }, "fridge.deployed": { "Enabled": true, "Allowed Categories (Names - Empty = Accept All)": [ "Food" ], "Blocked Categories (Names)": [], "Allowed Shortnames (Empty = Accept All)": [], "Blocked Shortnames": [], "Requires Permission": true } } }Free -
Version 1.2.4
1,972 downloads
RUST Plugin Test Server TEST MY PLUGINS THERE! connect play.thepitereq.ovh:28050 Redeem Storage API enables you to consolidate all your plugin item sources into a single inventory. This means you can condense multiple storage containers into one and eliminate the need for free space in your inventory. Please note that this plugin doesn't have any standalone functionality; it requires another plugin that utilizes this API. Move your all plugin item rewards/outputs to one storage. You can create multiple custom redeem inventories. Each storage have their own data file, so it's easy to clear only certain inventories on wipes. RUST themed UI. Supports almost infinite amount of items. void AddItem(ulong userId, string name, Item item, bool popUp = false) - Moves the previously created item to the desired redeem inventory of the player. createredeemitem <storageName> <userId> <shortname> [amount] [skinId] [itemName] [popup (true/false)] - Console command for generating redeem items, optional way rather than using an API. { "Redeem Commands": [ "redeem", "red" ], "PopUp API Preset": "Legacy", "Redeem Storage Item Reminder (in seconds, 0 to disable)": 600, "Redeem Inventories": { "default": { "Default Redeem Inventory (only one)": true, "PopUp Message (configurable in lang file)": false, "Redeem Only In Safezone": true, "Redeem Only If Authed": true, "Allow When No Cupboard (works is option above is true)": false, "Drop Overflow Items Onto Ground (true = drop, false = delete)": true }, "shop": { "Default Redeem Inventory (only one)": false, "PopUp Message (configurable in lang file)": true, "Redeem Only In Safezone": false, "Redeem Only If Authed": false, "Allow When No Cupboard (works is option above is true)": false, "Drop Overflow Items Onto Ground (true = drop, false = delete)": true } } }Free -
Version 1.0.1
689 downloads
Minicopter Storage - The plugin adds a small customizable storage to all minicopters. All storages are stored after server restart. The plugin does not consume many server resources. #Configuration: { "Storage Prefab": "assets/prefabs/deployable/hot air balloon/subents/hab_storage.prefab", "Panel Name": "generic_resizable", "Inventory Capacity": 10, "Configuration version": { "Major": 1, "Minor": 0, "Patch": 0 } }Free -
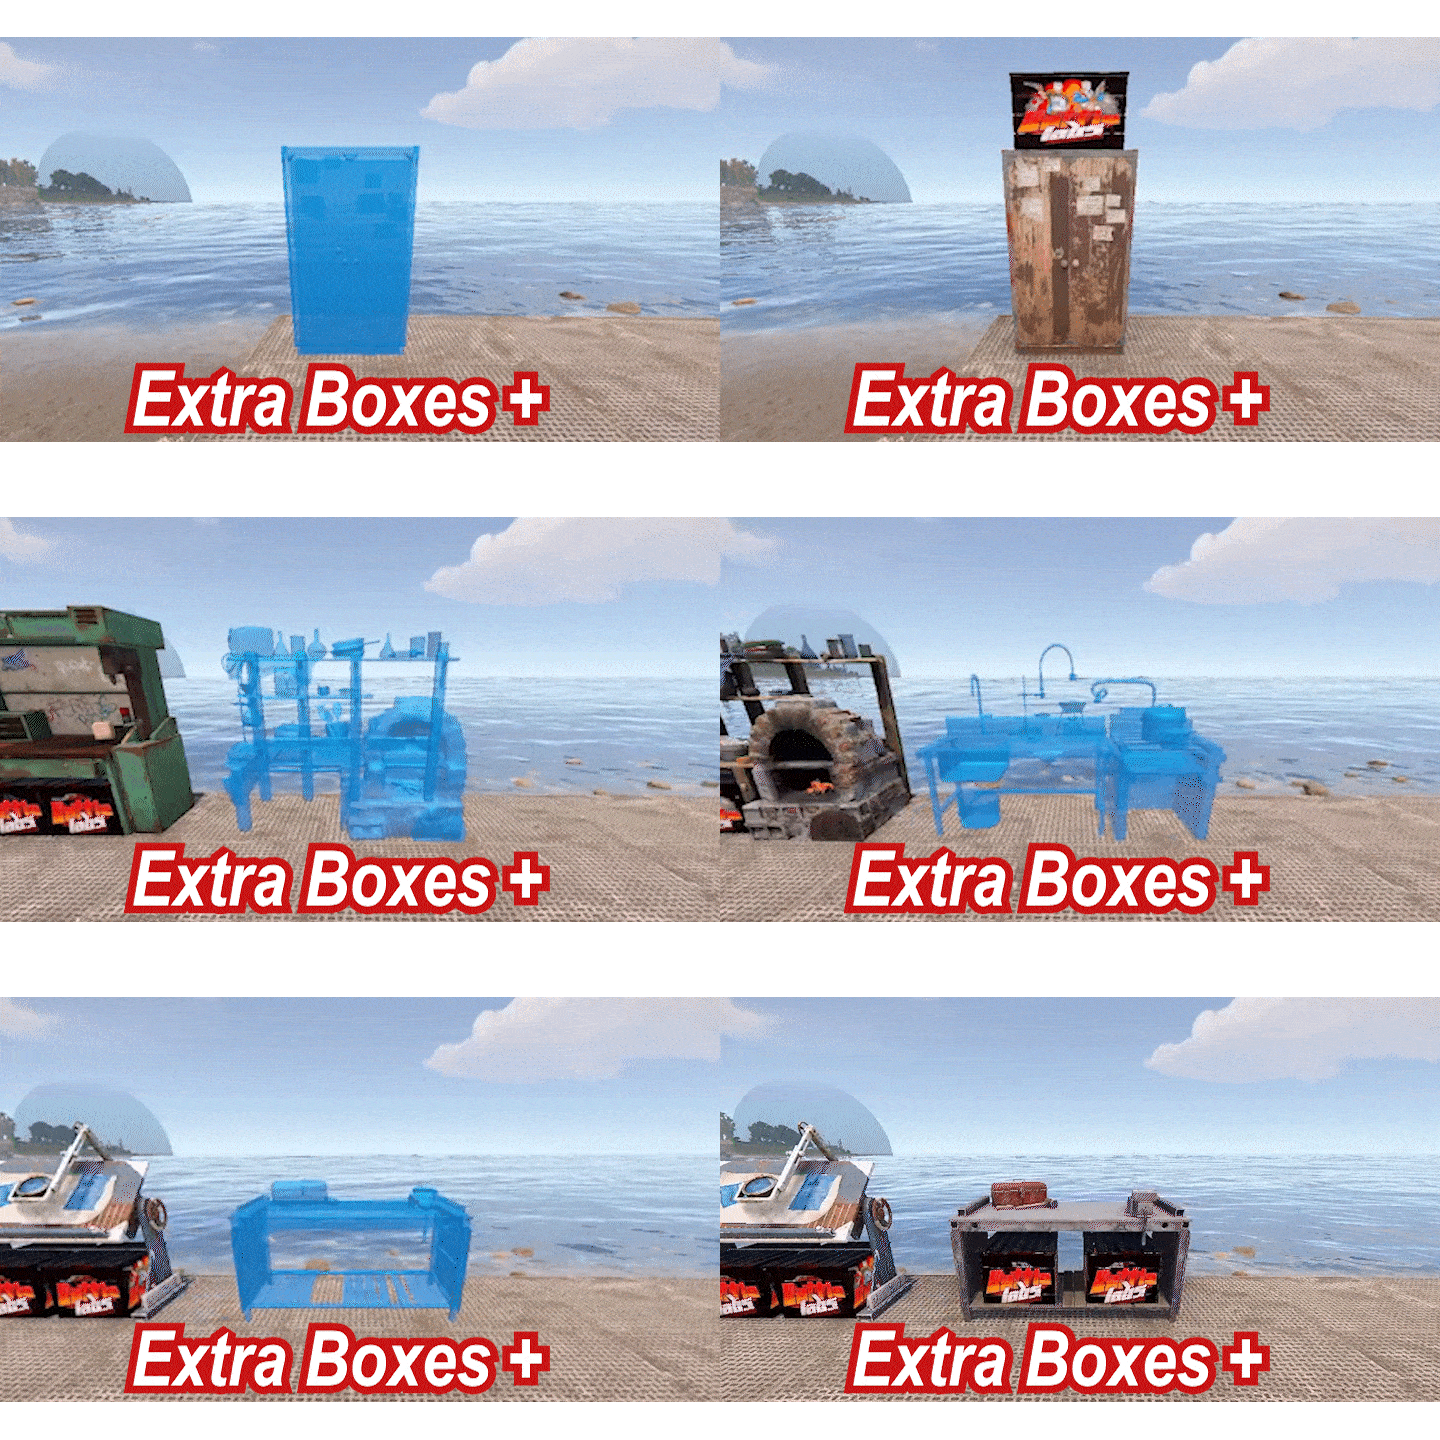
Version 2.0.3
202 downloads
Overview ExtraBoxesPlus is a Rust plugin that automatically spawns additional storage options (wooden boxes) on top of tool cupboards, workbenches and more! when they are placed. It also provides configuration options to spawn a Pookie Bear on tool cupboards and manage wooden box behavior across different workbench tiers. The boxes are conveniently placed to maximize storage capacity and space efficiency. Features • Automatic wooden box spawning on workbenches, repair benches, mixing tables, research tables, cooking workbenches, and BBQs • Tool cupboard enhancement with wooden box storage • Pookie bear comfort system with permission-based radius (12m, 20m, or 35m) • Only authorized players on tool cupboards receive pookie bear comfort • Custom skin support for all spawned boxes • Boxes cannot be picked up separately (protection system) • Prevents deployable pickup when boxes contain items • Automatic pookie bear updates when permissions change • Performance optimized with batched processing Quick start Basic Setup (All Players): oxide.grant group default extraboxesplus.use.workbench oxide.grant group default extraboxesplus.use.repairbench oxide.grant group default extraboxesplus.use.mixingtable oxide.grant group default extraboxesplus.use.researchtable oxide.grant group default extraboxesplus.use.cookingworkbench oxide.grant group default extraboxesplus.use.bbq oxide.grant group default extraboxesplus.use.toolcupboard oxide.grant group default extraboxesplus.use.pookie VIP Setup: oxide.grant group vip extraboxesplus.use.all oxide.grant group vip extraboxesplus.pookie.plus VIP + Setup: oxide.grant group premium extraboxesplus.use.all oxide.grant group premium extraboxesplus.pookie.extra Permissions This plugin uses the permission system. To assign a permission, use oxide.grant <user or group> <name or steam id> <permission>. To remove a permission, use oxide.revoke <user or group> <name or steam id> <permission>. extraboxesplus.use.all -- Grants access to ALL plugin features, overrides all specific permissions. extraboxesplus.use.workbench -- Required to spawn boxes on Workbench Level 1, 2, and 3. extraboxesplus.use.repairbench -- Required to spawn boxes on Repair Bench. extraboxesplus.use.mixingtable -- Required to spawn boxes on Mixing Table. extraboxesplus.use.researchtable -- Required to spawn boxes on Research Table. extraboxesplus.use.cookingworkbench -- Required to spawn boxes on Cooking Workbench. extraboxesplus.use.bbq -- Required to spawn boxes on BBQ. extraboxesplus.use.toolcupboard -- Required to spawn boxes on Tool Cupboards. extraboxesplus.use.pookie -- Required for basic pookie bear functionality (12m comfort radius). extraboxesplus.pookie.plus -- Provides enhanced pookie bear comfort (20m radius). Requires base pookie permission. extraboxesplus.pookie.extra -- Provides maximum pookie bear comfort (35m radius). Requires base pookie permission. Note: Pookie bear permissions are hierarchical. Players need the base pookie permission for any pookie functionality. The system automatically uses the highest permission among all authorized players on a tool cupboard. Configuration ExtraBoxesPlus comes with several configuration options that allow you to tailor the plugin's behavior to your server's needs: { "ConfigVersion": "2.0.1", "PermissionMigrationVersion": "2.0.1", "PookieBearSettings": { "DefaultRadius": 12.0, "PermissionBasedRadius": { "extraboxesplus.pookie.plus": 20.0, "extraboxesplus.pookie.extra": 35.0 } }, "WorkbenchSettings": { "EnableByTier": { "Workbench Level 1": true, "Workbench Level 2": true, "Workbench Level 3": true } }, "DeployableSettings": { "EnableForDeployables": { "Repair Bench": true, "Mixing Table": true, "Research Table": true, "Cooking Workbench": true, "BBQ": true } }, "SkinSettings": { "EnableCustomSkins": true, "SkinIDs": { "Tool Cupboard": 3306209184, "Workbench Level 1": 3306209184, "Workbench Level 2": 3306209184, "Workbench Level 3": 3306209184, "Repair Bench": 3306209184, "Mixing Table": 3306209184, "Research Table": 3306209184, "Cooking Workbench": 3306209184, "BBQ": 3306209184 } } } Configuration Sections Explained: PookieBearSettings: DefaultRadius: 12.0 - Sets the base comfort radius in meters for players with basic pookie permission - This applies to players with extraboxesplus.use.pookie permission - Range: 1.0 to 50.0 meters (50m is hardcoded maximum for server stability) PermissionBasedRadius: extraboxesplus.pookie.plus: 20.0 - Comfort radius for players with enhanced pookie permission - Overrides DefaultRadius when player has this permission extraboxesplus.pookie.extra: 35.0 - Comfort radius for players with premium pookie permission - Highest tier, overrides all other radius settings - Maximum recommended for server performance WorkbenchSettings: EnableByTier: "Workbench Level 1": true - Set to false to disable boxes on Tier 1 workbenches - Useful for progression-based servers "Workbench Level 2": true - Set to false to disable boxes on Tier 2 workbenches - Independent control from other tiers "Workbench Level 3": true - Set to false to disable boxes on Tier 3 workbenches - Highest tier workbench control DeployableSettings: EnableForDeployables: "Repair Bench": true - Set to false to disable boxes on repair benches - Spawns 2 boxes when enabled "Mixing Table": true - Set to false to disable boxes on mixing tables - Spawns 2 boxes when enabled "Research Table": true - Set to false to disable boxes on research tables - Spawns 2 boxes when enabled "Cooking Workbench": true - Set to false to disable boxes on cooking workbenches - Spawns 1 box when enabled "BBQ": true - Set to false to disable boxes on BBQs - Spawns 1 box when enabled SkinSettings: EnableCustomSkins: true - Master toggle for custom skins on all spawned boxes - Set to false to use default Rust wooden box appearance - Must reload plugin after changing this setting SkinIDs: - Steam Workshop skin ID for boxes spawned on tool cupboards - Set to 0 to use default wooden box skin - Must be a valid Steam Workshop item ID Configuration Tips: - Backup your config before making changes - Use oxide.reload ExtraBoxesPlus after config changes - Test skin IDs on a development server first - Lower pookie bear radius for better server performance - Disable specific deployables if causing conflicts with other plugins Notes Legacy Permission Migration: extraboxesplus.use → Grants all individual deployable permissions: • extraboxesplus.use.workbench • extraboxesplus.use.repairbench • extraboxesplus.use.mixingtable • extraboxesplus.use.researchtable • extraboxesplus.use.cookingworkbench • extraboxesplus.use.bbq • extraboxesplus.use.toolcupboard • extraboxesplus.use.pookie Legacy Config Migration: - Your old config file will be automatically converted - All your existing settings will be preserved - Pookie bear system now requires permissions (see PERMISSIONS section) - The old "EnablePookieBearOnToolCupboard" setting is replaced by the permission system - Server console will show migration progress messages$4.99- 28 comments
- 5 reviews
-
- 5
-
-
-

-
- #toolcupboard
- #workbench
- (and 7 more)
-
Version 1.0.4
55 downloads
BetterHoppersPlus is a Rust plugin that enhances hopper functionality by adjusting item pickup ranges based on player permissions. It provides VIP-tier range adjustments, dynamic speed scaling for longer ranges, intelligent item handling to prevent conflicts between overlapping hoppers, and automatic permission monitoring to ensure ranges stay current with player privileges. Features • Permission-based hopper range adjustment (5m to 20m pickup radius) • VIP tier system with progressively larger ranges • Dynamic speed scaling - items move faster at longer distances • Intelligent closest-hopper detection to prevent item conflicts • Real-time permission change monitoring and updates • Scheduled hopper range verification every 5 minutes • Performance optimized with batched processing • Admin reload command for configuration changes • Automatic restoration of original values on plugin unload Quick start Basic Setup (All Players): oxide.grant group default hopperrangeplus.use VIP Tier 1 Setup: oxide.grant group vip1 hopperrangeplus.vip1 VIP Tier 2 Setup: oxide.grant group vip2 hopperrangeplus.vip2 VIP Tier 3 Setup: oxide.grant group vip3 hopperrangeplus.vip3 Admin Setup: oxide.grant group admin hopperrangeplus.admin Permissions This plugin uses the permission system. To assign a permission, use oxide.grant <user or group> <name or steam id> <permission>. To remove a permission, use oxide.revoke <user or group> <name or steam id> <permission>. hopperrangeplus.use -- Basic hopper range enhancement (5m pickup radius). hopperrangeplus.vip1 -- VIP Tier 1 hopper range (8m pickup radius). hopperrangeplus.vip2 -- VIP Tier 2 hopper range (12m pickup radius). hopperrangeplus.vip3 -- VIP Tier 3 hopper range (16m pickup radius). hopperrangeplus.admin -- Administrator hopper range (20m pickup radius). Configuration BetterHoppersPlus comes with several configuration options that allow you to tailor the plugin's behavior to your server's needs: { "DefaultSettings": { "HopperRange": 5.0, "SpeedMultiplier": 1.5, "AdminRange": 20.0 }, "VIPSettings": { "VIP1Range": 8.0, "VIP2Range": 12.0, "VIP3Range": 16.0 } } Configuration Sections Explained: DefaultSettings: HopperRange: 5.0 - Range: 1.0 to 50.0 meters (recommended: 3.0 to 10.0 for balance) SpeedMultiplier: 1.5 - Range: 0.5 to 5.0 (recommended: 1.0 to 2.0 for optimal performance) - Set to 1.0 to disable speed modifications AdminRange: 20.0 - Range: 1.0 to 50.0 meters (recommended: 15.0 to 25.0 maximum) VIPSettings: VIP1Range: 8.0 - Range: 1.0 to 50.0 meters (recommended: 6.0 to 10.0) VIP2Range: 12.0 - Range: 1.0 to 50.0 meters (recommended: 10.0 to 15.0) VIP3Range: 16.0 - Range: 1.0 to 50.0 meters (recommended: 14.0 to 18.0) Dynamic Speed System: The plugin automatically adjusts item movement speed based on distance from the hopper: Close Range (0-30% of pickup radius): - Items move at 1.5x base speed - Maintains vanilla feel for nearby items Medium Range (30-70% of pickup radius): - Speed scales from 3.5x to 6x base speed - Smooth acceleration for medium distances Far Range (70-100% of pickup radius): - Speed scales from 6x to 9x base speed - Maximum speed for items at range edges - Prevents items from moving too slowly Final speed calculation: BaseSpeed × DynamicMultiplier × SpeedMultiplier Closest Hopper Logic: When multiple hoppers have overlapping ranges: - System calculates which hopper is closest to each item - Temporarily disables farther hoppers to prevent conflicts - Uses 0.5 unit tolerance to prevent constant switching - Ensures items always go to the most appropriate hopper Notes Troubleshooting: - If hoppers don't update after permission changes, wait up to 5 minutes for scheduled update - Use /hrr_reload to force immediate configuration application - Check server console for any error messages - Ensure permission hierarchy is correctly configured - Verify hopper ownership matches player with permissions$4.99 -
Version 1.2.0
44 downloads
The problem: Let's be honest: each of us found himself in a situation with too much storage containers and without any knowledge on where to find which item. Sure, you could just add some storage adaptors and pipes to your boxes but then you'll need to configurate each conveyor and care about splitting, routing and combining multiple pipes with multiple conveyors. Finally set up, the items - configured in the conveyor filters - will just be thrown into the next free slot and it will still be a big mess. Chest slot config gets you rid of this problem by sorting each item into the slot it belongs in, either by using an industrial conveyor system or by manually moving items into boxes. Save your (vip) players a ton of work and time they otherwise would waste on searching for items in boxes. Features: - Assign an item definition for each slot in small and large wooden boxes - Automatic sorting when attached to an industrial conveyor system - Manual sorting when right clicking, drag'n'dropping or hover looting items from your inventory - Display an overlay for the assigned item definition on each slot - Open the configuration by holding a configurable item or hold the secondary fire button while opening a chest - Quick select item definitions from categories - Search for item definitions by name - Removing and overwriting assigned item definitions - View-Only mode for players that should not be able to change the configuration Attention: Items will be sorted into the first slot with a matching item definition assigned OR with no item definition assigned. Since an unconfigured slot will accept every item, the inserted items will be dropped into it even if there's a slot with the correct item definition assigned AFTER the unconfigured slot. This logic does apply when storing items manually AND using a conveyor system. Permissions: ChestSlotConfig.use Player can open and use the full slot configuration. ChestSlotConfig.viewOnly Player can only view the assigned item definitions but not change them. Roadmap / Planned features: - Full UI rewrite: Yes I know the UI is flickering and looks awful. I'm a developer, not a designer - "Clear all" button: Removes all assigned item definitions. - "Move box" feature: Destroy a box and place it somewhere else without loosing the slot configuration. Just use the plugin "Telekinesis by WhiteThunder", move the box and reattach the storage adaptor. He did a great work with this plugin. - "Block slot" feature: Blocks a slot entirely so that no item will be sorted into. Useful for later assignment. - "Copy and paste" feature: Let's you copy and paste the configuration for a whole box (of the same type). - "Assign slot range" feature: Let's you assign a range of slot instead of having to click every single slot when assigning the same item definition. - Adding more storage containers: Tool cupboards, lockers etc. - "Favourite" feature: Let's you mark item definitions as favourite to let you find/access them faster. - Translation of item definition names: Currently only english is supported since the server does not know which language the clients use. Maybe I will use the "Rust Translation API by Arainrr". - "Assigned slot first" feature: Items will fill up slots with a matching item definition assigned to it first, even if there are free/unconfigured slots BEFORE matching slots. Known issues / bugs: - Conveyors not working when placing storage adaptors with "Ubertool by k1lly0u" (chaos code): Not a bug with my plugin only, just an information: if you place storage adaptors while "Ubertool" is active, the adaptor will snap to the boxes but will now connect logically. The conveyor will not transport items until you remove the adaptor and place it again with disabled "Ubertool"$29.99- 2 comments
- 1 review
-
- 2
-
-
- #conveyor
- #industrial
- (and 8 more)
-
Version 1.0.3
9 downloads
A Medieval Storage House!! This prefab comes with some loot too!$8.00