
Search the Community
Showing results for tags 'gui'.
-

Version 1.1.3
157 downloads
The "F1 Item Menu" plugin lets players open a menu with a command, pick Rust items and add them to their inventory. The menu has a search field and page navigation for browsing the items. Command: /f1menu: opens the F1 item menu, where the player selects items and adds them to their inventory. Permissions: f1itemmenu.f1: required to use the /f1menu command. How to use the plugin: 1. To open the menu, the player enters the /f1menu command, provided they have the f1itemmenu.f1 permission. 2. In the menu, the player can search for items by entering a search term and clicking "Search." 3. The player can navigate through the available items by clicking the arrow buttons (< and >) to go to the previous or next page. 4. After selecting an item, the player is presented with another menu to specify the quantity of the chosen item. 5. The player can then choose the desired quantity (1, 10, 100, 1000, 10000) and click "Close" to exit the menu. 6. The selected item is automatically added to the player's inventory. { "Enable Discord Webhook": true, "Webhook URL": "", "Username": "Rust Server", "Avatar URL": "", "Discord Message Format": "Player **{playerName}** has taken **{quantity}** of **{itemName}**." } Web Config Editor Manage the F1ItemMenu settings in our web config editor. You change the config in a browser form instead of editing files on the server by hand. P.S. The web config editor is open to members of the "F1ItemMenu" group in our Discord server. Join at https://discord.gg/mevent and ask for the group.$15.95- 5 comments
- 2 reviews
-
- 1
-

-
- #spawnitems
- #f1console
- (and 3 more)
-
Version 2.16.0
2,231 downloads
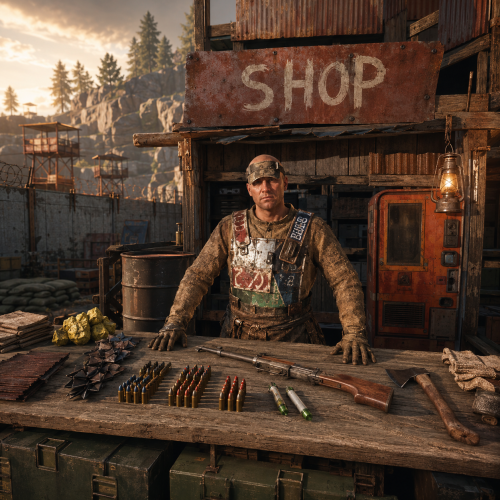
NPC traders & shops Build a trader where you stand — the whole shop, in-game Walk to a spot, type one command, and a named NPC vendor is standing there wearing your outfit. Everything after that — every lot, price, skin, stock counter and wipe limit — is edited by looking at him and clicking. No JSON, no reloads, no restart. Pin him to a monument and he finds the same corner on every new map. 17 Fields per lot 3 Economy plugins supported 99 Lots per single purchase 1 Required dependency — zero on Carbon ✓The whole shop is built in-game — add, reorder, copy and delete lots by clicking ✓Traders pinned to monuments — the same vendor at the same spot after every wipe ✓Stock that refills on a timer — and survives a restart at the count it was on ✓Traders that react to players — gestures and voice lines on approach, purchase and idle ✓Sell items, currency or commands — kits and ranks are just another lot ✓On the map like a vending machine — players see the vendor and what he sells Video See it in action 01 — The trader A vendor that belongs to your map Not a wooden box with a UI on it — a standing NPC with a name, an outfit and a place in the world. Spawned where you stand, dressed like you One command drops a trader at your feet, facing where you face, wearing a copy of your clothes and holding whatever is in your hands. Change your own outfit later and one button re-copies it onto him — another button hands the set back to you. Pinned to a monument, not to coordinates Spawn him inside Bandit Camp, Outpost or any monument and his position is stored relative to it. Next wipe, on a completely different map, he stands in exactly the same corner of that monument — no repositioning, no re-spawning. Visible on the map, with his stock Toggle the vending marker and the trader shows up on the map under his display name, with his item-for-item lots listed on the map screen — exactly like a vending machine, so players know where to go and what for. Locked to a group, if you want Give a trader a permission and only that group can open him — with your own refusal message instead of the default one. A VIP-only black market is one field. Bulletproof, literally Traders can't be shot, damaged, targeted by NPCs or destroyed, and they aren't written into the map save — so they never duplicate, never leave corpses and never end up as debris in your save file. 02 — Gestures and voice A trader who notices you He waves when you walk up, thanks you for a purchase and shrugs when your pockets are empty — with his own voice, if you give him one. Greets a player who comes closer Set a radius in meters and the trader reacts the moment somebody steps inside it — once per approach, not once per second. Walk away and come back and he greets you again. A reaction for every moment of the trade Walking up, opening the shop, buying a lot, coming up short on resources, closing the menu, and an idle line every N seconds while nobody is around. Each one carries a gesture, a voice line, or both. Random variants, weighted the way you want Every reaction holds a list of variants and one is picked by weight, so the same trader never greets two players in exactly the same way. Set a weight to zero to park a variant without deleting it. Voice lines are your own .ogg files Drop the files into oxide/data/NPCShop/sounds and write the file name in the config. Cut a long file where the phrase ends with a playback duration, and set the volume per trader. The speaker itself is invisible — players hear a voice coming from the vendor, not from a boombox at his feet. Heard by everyone, or by one player only A voice line can be global, so everybody around the trader hears it, or personal — delivered to the player who triggered it and to nobody else. Handy for greetings on a crowded Outpost. Every gesture the game has Wave, thumbs up, shrug, point, the dances — the npcshop.gestures console command prints the exact list your Rust build accepts, and an unknown name is reported at load instead of failing silently. 03 — Lots and pricing Any price for anything A lot is three item slots — what's sold, what it costs, and an optional second cost. Each slot can be a real item, a skinned item, or your server currency. Two-item prices Charge 500 metal and 20 scrap for one lot. Turn the second slot off with a single value when you don't need it. Currency in either direction Flip a slot to money and the lot is priced in ServerRewards, Economics or IQEconomic. Flip the sale slot to money instead and the trader buys from players — a scrap-to-cash buyback counter, same editor, no second plugin. Skins, custom names, custom icons Every slot takes a skin ID, so a skinned item is a different product with a different price. Override the display name, point the icon at any image URL, and attach a description of up to 2500 characters that players open with an info button. Buy in bulk without spam-clicking A per-lot multiplier from 1 to 99 with plus, minus and a typed field. It clamps itself to what the player can actually afford, what's left in stock and what their wipe limit allows, so the number on screen is always a purchase that will go through. Oversized results are split into proper stacks. Permission discounts Map any permission to a percentage. Discounted players see an OFF badge on the price and pay less on both price slots; stacked groups resolve to the single best discount. Copy a lot, or a whole shop Copy one lot or every lot at once, walk to another trader and paste. Reorder with arrows, delete with one click, and hit preview to see the shop exactly as a player will before you close it. 04 — Stock and limits Scarcity you can schedule An unlimited shop is a vending machine with extra steps. Two independent systems keep a trader from flooding your wipe. Stock that ticks back up Per lot: a maximum stock, a refill interval in seconds and how much comes back each interval. Sell out and the button turns grey with OUT OF STOCK until it recovers. Ten rockets an hour, and the first player there gets them. Per-player wipe limits A separate cap on how many of a lot each player may buy for the whole wipe, counted per skin. One VIP kit per person per wipe, enforced without a second plugin and reset automatically on the next map. Counts survive a reboot Remaining stock, refill timers and everyone's wipe counters are written on every server save and on unload. A restart doesn't hand out a fresh batch of rockets. 05 — Beyond items Sell anything a command can do Kits, ranks, teleports, cars, raid bases — if another plugin exposes a command, it's a lot. Run it now, or wrap it as a gift Put a command on a lot and choose: fire it the moment the purchase clears, or hand the player a wrapped present they can save, carry and unwrap whenever they want — the command runs on unwrap. Give it a name and an icon and it looks like a real product in their inventory. %steamid% is substituted for you. A command on the trader himself Fire a command every time a player opens a given trader — a greeting in chat, a quest check, a log line. Also keyed by Steam ID. Item search that finds things The item picker searches display names and shortnames as you type and shows icons, so filling a shop doesn't mean keeping a shortname list open on your second monitor. Reliability Built to be left alone ✓Oxide and Carbon — on Carbon the built-in image database is used and no extra plugin is needed at all ✓Nothing is written into the map save — traders are recreated from config on boot, so they can't duplicate or survive as junk entities ✓Clean unload — every trader is removed, open interfaces are closed for all players and stock is saved first ✓One editor at a time — while an admin has a shop open it's locked for everyone else, so two people can't overwrite each other's lots ✓A missing monument disables its trader with a console warning instead of dropping him into the ocean ✓Optional 1-second buy cooldown against double-clicks and click macros Commands Three admin commands, none for players All three require the npcshop.admin permission. Players never type anything — they walk up to the trader and press use. Command names are configurable. /settraderSpawn a trader at your position, in your clothes /remtraderLook at a trader and delete him /newtraderposLook at a trader to select him, walk to the new spot, then /newtraderpos update. cancel aborts, and /newtraderpos <display name> moves a trader by name from anywhere npcshop.adminSpawn, edit, move and remove traders npcshop.vip15% discount by default — rename it, change the number, or add as many discount tiers as you like Hooks & API For plugin developers void OnNPCShopItemBuy(BasePlayer player, Item saleItem, Item priceItem, Item additionalPriceItem) Fired after a successful item-for-item purchase, with the final amounts already multiplied and discounted. additionalPriceItem is null when the lot has no second price. Currency purchases don't raise it — track those through your economy plugin. Questions Before you buy What do I need installed?On Oxide, ImageLibrary — it's free and the plugin tells you in console if it's missing. On Carbon, nothing. MonumentFinder is optional and only needed for monument-pinned traders. An economy plugin (ServerRewards, Economics or IQEconomic) is optional and only needed for money prices; the right one is detected automatically. Do my traders survive a wipe?Yes. Traders, lots and prices live in the config, so they come back on the new map. Monument-pinned ones land in the right place automatically; free-standing ones keep their world coordinates and may need one /newtraderpos if the terrain changed. Stock counters and per-player wipe limits reset on a new map, which is the point of them. Can players sell things to the trader?Yes, in both forms. Item-for-item barter is what a lot does by default, and setting the sale slot to money turns the lot into a buyback: the player hands over items and gets currency. Can I sell a kit, a rank or a teleport?Anything that has a command. Either it runs immediately on purchase, or the player receives a named, custom-iconed present that runs it when unwrapped — which also makes the purchase tradeable between players. How many traders and lots can I have?No limit on either. The shop interface scrolls, and lots are reordered with arrow buttons. Why don't all my lots show on the map marker?The marker is a real vending-machine listing, and Rust's own format can only express one item for one item. Lots priced in currency, or with a second price item, are hidden from the marker — they work normally in the shop itself. Can I run different shops for different groups?Yes. Each trader takes its own permission and its own refusal message, so a VIP trader can stand next to the public one and simply refuse everyone else. Do I ever have to edit the config file?Only for server-wide settings: discount tiers, the currency icon, the buy cooldown, and a trader's access permission or greeting command. Everything about the goods themselves — lots, prices, skins, names, icons, stock, limits, descriptions — is done in-game.$18.99 -
Version 1.1.23
550 downloads
WTrading is a highly optimized and feature-packed trading system designed to make item exchanges seamless and efficient. Players can trade from anywhere on the map using Rust's built-in shopfront loot menu, providing a polished and intuitive interface. Server owners have full control with extensive configuration options, including trade restrictions, custom fees, logging, and third-party integrations to fine-tune the trading experience. The system is built for flexibility and security, ensuring safe transactions with anti-exploit measures and detailed logging. The optional Discord integration allows administrators to monitor trades in real time, review logs, and issue trade bans directly from Discord, streamlining server management without requiring in-game access. Whether you're running a roleplay economy or a survival-focused server, WTrading delivers a powerful and customisable solution for player-to-player trading. Features Easy and and simple setup. UI based player list with searching. On-screen notifications and sound effects. Fixed and dynamic trade fees based on distance via Economics or Server Rewards. Temporary and permanent trade banning system. Built-in Discord integration with external moderation functionality. Group specific trade cooldowns. Daily limits per group. Trade slot limits and visual indicators. Usage and bypass permissions. Item blacklisting. Configurable distance restrictions. Several toggleable trade restrictions. Many in-depth third party plugin integrations. Configurable UI positioning and visibility. In-depth developer interface. Full localisation support. Toggleable file or console based logging. Commands /trade {target} - Sends a trade request to the target. /trade accept [target] - Accepts the most recent trade request, or the target player's request if specified. /trade decline [target] - Declines the most recent trade request, or the target player's request if specified. /trade cancel - Cancels your ongoing trade. /trade ban {target} {time} - Trade bans the target player for the given length which can be set using the following format: 1h 30m 5s. /trade unban {target} - Removes the trade ban from the target player. Integrations WTrading includes a vast set of integrations with existing plugins that can be found for free on UMod: Server Rewards by k1lly0u - Take fees for sending trade requests which can scale based on distance. Economics by MrBlue - Take fees for sending trade requests which can scale based on distance. Clans by k1lly0u - Reduce cooldowns, fees and disable daily trade limits for trades between clan members. No Escape by Calytic - Prevent raid blocked or combat blocked players from trading. UI Notify by Mevent - Receive on-screen notifications that fit the style of your server when a trade request is received. NTeleportation by nivex - Target players in commands easier by using the same Temp ID as NTeleportation. Block Users by ViolationHandler - Prevent players from sending trade requests to people who've blocked them. Ignore by MisterPixie - Allow players to ignore inbound requests from specific people. AFK API by 2CHEVSKII - Prevent confusion from unanswered trade requests sent to AFK people. Monument Finder - Prevent players from trading within monuments. Permissions wtrading.use - Allows the player to use trade related commands wtrading.cooldown_bypass - Any player with this permission will bypass the trade cooldown. wtrading.daily_limit_bypass - Any player with this permission will bypass the daily trade limit for their group. wtrading.block_bypass - Any player with this permission will bypass user blocking restrictions. wtrading.ban - Allows the player to issue trade bans with /trade ban {player}. wtrading.ban_immune - Any player with this permission will be immune to trade bans. wtrading.unban - Allows the player to remove trade bans with /trade ban {player}. Installation Download the latest version of WTrading. Open the zip file using the archive extraction tool of your choice. Drag and Drop WTrading.cs into oxide/plugins/. (Optional) For those that wish to use the Discord integration, copy WTradingDiscord.cs into the same folder. Generate the configuration files by running the server with the plugin installed. Configure the files located in oxide/config/, refer to the Configuration section for more information on the options available. Reload the plugin using the commands oxide.reload WTrading, and oxide.reload WTradingDiscordif you are using the Discord integration. Configuration The following configuration files are available, refer to the inline comments for further explanation: WTrading.json WTradingDiscord.json This configuration file is for users of the Discord integration only. Developer Hooks WTrading features a range of hooks that developers can use to modify the behaviour of the plugin: Localisation Localising WTrading is simple, if you would like to translate the plugin into your own language follow these steps: Go to the oxide/lang/ folder of your server after installing the plugin. Copy the English translation from ./en/WTrading.json and paste it into a folder with your language code (for example fr for French). Open the file and change all of the phrases to your language of choice. Credits sky - Help with testing and the video demonstration. Plugin.Merge by dassjosh - Singlehandedly making Oxide plugin development bearable. Admin Tools by ViolationHandler.exe - Inspiration for the image generation functionality of the Discord integration.$11.99 -
Version 5.1.0
2,591 downloads
[ ✓ ] Works on any host. [ ✓ ] The plugin needs the free CrashExtensions library. Can't upload DLLs on your host? No problem: the zip includes a small installer plugin. Drop it in your plugins folder, run crashext.install, restart once, and you're done. AutoRestart restarts your Rust server on a schedule and makes sure nobody is caught by surprise. Pick the restart times in your own time zone, skip them on wipe days, and every player is warned on the channels you choose: a notification panel, the game's own toast, chat, a sound, the vanilla restart banner and a row in the vitals stack. The admin window is one window with eight tabs across the top: Overview, Schedule, Alerts, Appearance, Voting, Rewards, Discord and Advanced. Every tab slides in as you open it. A draft only saves when you press Save, Preview on screen puts the real panel and countdown strip on your HUD so you can drag them where you want, and two admins can work at the same time. Players can vote to delay a restart that comes at a bad time, and the players who come back afterwards can claim a reward in items, Economics or ServerRewards. Your Discord hears about it too: a countdown, the final restart and the server coming back online, each one an embed you design. Works on Oxide and Carbon Needs CrashExtensions 1.12.9 or newer (included) Six alert channels, each on its own switch Seven languages built in Jump to: Features · How it plays · Screenshots · Trailer · Admin window · Commands · Permissions · Install · Configuration · Test server · FAQ · API Features For players Warnings in their language. Seven languages are built in: English, Spanish, Italian, Russian, Ukrainian, French and Brazilian Portuguese. Each player sees the alerts in their own. The last minute on screen. The notification panel counts the final minute down by itself, and an optional countdown strip shows MM:SS and a progress line from a trigger time you choose. A say in the timing. When a restart is close, a vote panel lets players vote to delay or to continue. If enough of them agree, the restart waits. Late joiners see it too. Players who connect or respawn during a countdown get the strip, the vote panel and the last-minute panel straight away. A reward for coming back. Players who reconnect within the claim window get their items, Economics money or ServerRewards points. Always know when. /restart shows when the next restart is. For server owners Restart times in your time zone. As many a day as you want, in UTC or any zone you set (Asia/Tokyo, Europe/Berlin, UTC+9...), daylight saving included. Every time players see is shown in that zone. Wipe days skip them on their own cycle: weekly, every 2 or 3 weeks, the 1st to 4th, or the last of the month. Restart in... A one-off restart from the window, chat or RCON. Cancelling it brings your schedule straight back. Warning times you set. Chips for the game and for Discord, set apart. The defaults are 30, 15, 10, 5, 3, 2 and 1 minutes in game, and 30, 15, 10, 5 and 1 on Discord. A player count guard. A scheduled restart is skipped while more players than your limit are online. A restart you start yourself always goes ahead. Your panel, your look. A notification panel with one of 137 game icons, colours with opacity, a solid or gradient background, a border, your own title and message. Five position presets, or drag it anywhere. Discord. A webhook with three embeds (countdown, final restart, server online), a live Discord style preview while you edit them, and a test button. Animations on one switch. Slides and fades everywhere, or none at all. Safe config. Values out of range are repaired on load, and a broken file is left untouched. The window saves only what its own section holds. An optional update check. Restart the server when a new Oxide build is out. It is off by default. For developers Hooks and a status call. OnRestartScheduled, OnRestartWarning, OnRestartInitiated and OnRestartCancelled, plus GetRestartStatus for the pending restart. See the API. Console and RCON. autorestart status, cancel, now and set <time> work from the console, RCON and your own tools. How it plays Warnings. At every warning time you set, players get the alerts on your channels: the toast, the chat line, the sound and the panel. The vote. Five minutes before the restart, the vote panel opens for 30 seconds. If 60% of the players vote to delay, with at least 3 players online, the restart waits 50 minutes and then runs a new 15 minute countdown. The strip. Once the time is inside its trigger (30 minutes by default), the countdown strip stays on screen with MM:SS and a progress line. The final minute. The panel counts the last minute down on its own, so every player sees the seconds. The restart. Players get a plain message to reconnect in 3 to 5 minutes. The server saves, shuts down cleanly and quits, and your host starts it again. Back online. The server online embed goes to Discord if you turned it on. Players who reconnect within the claim window (5 minutes by default) get their rewards: money at connect, items when they wake. Screenshots Every screen below is AutoRestart running in Rust. The Overview: the next restart, the alert channels and the features at a glance The final minute, as players see it Alerts: every channel and warning time Schedule: restart times and wipe days Appearance: the panel, its size and its position Voting: the share, the window and the delay Rewards: items, Economics and ServerRewards Discord: webhook, message and embeds Advanced: the update check, the reload and the animations Trailer The AutoRestart 5.0 trailer (click to play, 57 seconds) In-Game Admin Window No file editing needed. /restart config opens every setting in one window. Each section is a draft: an unsaved section shows a dot on its tab, Save applies only the section you are on, and closing with unsaved changes asks first. Overview - a live clock to the next restart, what is on at a glance, today's restart times, and Restart in..., Cancel restart and Reload schedule. Schedule - restart times and wipe days. Alerts - the channels, the in-game and Discord warning times and the player count guard. Appearance - the notification panel, its text, the countdown strip, the toast style and the background (solid or gradient), with Preview on screen. Voting - the share, the vote window, the delay and the chat command. Rewards - the claim window, Economics, ServerRewards and an item list. Discord - webhook, bot, message and the three embeds, with a live preview. Advanced - the update check, the animations switch and the reload button. Commands Players /restart - when the next restart is /restart status - detailed restart info /restart help - the command list /vote delay, /vote continue - vote on a restart in progress (the command name is set in the Voting section) Admin /restart config - the admin window /restart set <time> or /restart <time> - restart in 30s, 5m, 1h or a plain number of seconds. Write 5m, not 5 minutes. /restart cancel - cancel the running restart. A scheduled one skips to the next slot /restart now - restart right away /restart reload - reload the schedule and forget the skipped slots Console and RCON autorestart, autorestart status, autorestart cancel, autorestart now and autorestart set <time> (or just autorestart <time>) autorestart.testdiscord - send a test message to your webhook autorestart.forceonline - post the server online embed now Permissions autorestart.use - /restart, /restart status and /restart help for players. Grant it to your default group if you want everyone to see when the next restart is. autorestart.admin - the admin window and every command that changes something. Staff only. Voting and rewards need no permission: every online player can vote and claim. oxide.grant group admin autorestart.admin oxide.grant group default autorestart.use Install Install the extension, once per server. Stop the server, copy Oxide.Ext.CrashExtensions.dll into RustDedicated_Data/Managed (Carbon: carbon/extensions) and start it again. The console prints Loaded extension CrashExtensions with its version. The extension is one shared file for all our plugins, so an older copy is simply overwritten. Host does not allow DLL uploads? Copy CrashExtInstaller.cs (in the zip) into oxide/plugins instead and run crashext.install once in the server console. Install the plugin. Copy AutoRestart.cs into oxide/plugins (Carbon: carbon/plugins). It compiles on its own and creates its config, data and language files. Grant the permissions and add your restart times. Give yourself autorestart.admin, open /restart config and add your times in Schedule. A new install has no restart times. The game toast, chat and sound alerts start on. The notification panel, the countdown strip, Discord and rewards wait until you turn them on. Plugin does not compile? The extension is missing or too old: check the folder and restart again. On a hosting panel, upload the DLL with the file manager or SFTP while the server is stopped. Updating from 4.0.0, 4.0.1 or 4.0.2? Install the extension (step 1) if it is not 1.12.9 or newer yet, then replace AutoRestart.cs. Your config, rewards and Discord state load as they are. Before the first start the plugin keeps your old config as AutoRestart.json.v<old version>.bak, and the default look moves to the 5.0 style only while it still holds the old default. Updating from 3.x? Replace AutoRestart.cs and install the extension (step 1). Your config, the pending reconnect rewards and the Discord state carry over, and old values migrate on load. Image Library and Player DLCAPI are no longer needed, and the autorestart.vote permission is gone because voting is open to everyone. Back up your config first. Configuration Everything lives in oxide/config/AutoRestart.json, and the admin window edits all of it. Claimed rewards and the last "server online" message are kept in oxide/data, and the texts in oxide/lang/<language>/AutoRestart.json. Config sections (click to expand) Test server Available on the new Meowcraft test server. Type /restart in chat to see the restart status there. Restarts are turned off on this test server. client.connect 91.229.114.54:28015 FAQ Q: I run AutoRestart 4.x. What changes when I update? A: Install the extension, then replace AutoRestart.cs. Your config, rewards and Discord state load as they are, in the new window. Time values are stricter: write 5m, not 5 minutes. A Discord webhook must be the plain https://discord.com/api/webhooks/<id>/<token> form, and the default message content is empty. Q: Does it start the server again after the restart? A: AutoRestart saves and shuts the server down cleanly, and your host brings it back. Tested on Pterodactyl and Wisp. On a Windows machine, make sure your .bat starts the server again when it exits. Q: What is the extension for, and what if I do not want one? A: AutoRestart draws its interface with the Oxide.Ext.CrashExtensions extension. The DLL is in the zip, and if your host does not allow DLL uploads, CrashExtInstaller.cs (also in the zip) installs it with one console command, crashext.install. If you would rather not run an extension, stay on 3.9.3: it does not need it and keeps working as before. Q: Does it work on Carbon? A: Yes. The DLL goes into carbon/extensions instead of RustDedicated_Data/Managed, then restart once. Everything else is the same. Q: I am on 3.x. Do I lose my settings? A: No. Your config, the pending reconnect rewards and the Discord state carry over, and old values migrate on load. Q: Can players stop a restart? A: They can vote to delay it. Voting opens 5 minutes before the restart and stays open for 30 seconds. When 60% of the players agree, with at least 3 players online, the restart waits 50 minutes and then runs a new 15 minute countdown. Every number is in the config, and voting can be turned off. Q: What does Cancel do? A: On a restart you set with Restart in..., it removes it and brings your schedule back at once. On a scheduled restart, it skips that slot (and any earlier one) and arms the next. Reload schedule forgets the skips. Q: Can I skip a restart while the server is busy? A: Yes. Turn on the player count guard and a scheduled restart is skipped while more players than your limit are online. A restart you start yourself always goes ahead. Q: Do I need Economics or ServerRewards? A: Only to pay rewards in money or points. Item rewards need nothing else. Q: Does it contact any outside service? A: Only what you turn on. The plugin downloads the pictures it draws (about 80 small icons and images) once from cdn.crashplugins.space, which your server then caches. The Oxide update check and the Discord webhook are off by default. CrashExtInstaller downloads the extension from GitHub only when you run crashext.install, and never checks for updates. Q: Can I translate it? A: Seven languages are built in and each player sees their own. For another one, copy oxide/lang/en/AutoRestart.json into your language folder and translate it. Q: How heavy is it? A: Built and load tested for 500+ player servers. Every animation can be turned off with one switch. API / Hooks void OnRestartScheduled(int seconds, bool isCustom) void OnRestartWarning(int secondsLeft) void OnRestartInitiated() void OnRestartCancelled(string reason, int secondsRemaining) Read the pending restart from any plugin: [PluginReference] private Plugin AutoRestart; var status = AutoRestart?.Call("GetRestartStatus") as Dictionary<string, object>; // HasRestart is always there. With a restart pending you also get IsDelay, IsCustom, // SecondsRemaining, RestartTime and FormattedTime. Questions, ideas or bug reports? Use the Support tab of this file or join our Discord.$15.99- 113 comments
- 9 reviews
-
- 5
-
-

-
- #restart
- #rustplugin
- (and 19 more)
-
Version 2.0.15
11,697 downloads
Clans gives your players one menu for everything a clan does: create it, invite people, hand out roles, make alliances, set gather quotas and clan skins, and check where the clan sits in the top. If you run ServerPanel, the menu opens inside it as its own category and matches your template, V1, V2 or V4. Without ServerPanel it opens fullscreen, in the Old Style or the New Rust look. Clans also takes over Rust's own clan system. The F1 clan menu, the clan chat tab, clan names on the map and Rust+ all show Clans data, and in-game clan score events count toward your clan rating. Players get one clan, not two that disagree with each other. Clan leaders build their own ranks. A role has a name, a color and twelve rights, from inviting and kicking to changing the avatar or toggling ally friendly fire, so a big clan can run itself without handing everyone leader rights. Data lives in JSON, Protobuf or MySQL, and one console command moves it between them. Updating from 1.x keeps your settings: old moderators become roles and the page settings move into the new menu. Features of Clans Five menu layouts: ServerPanel V1, V2 and V4, picked from your ServerPanel template on its own, plus two fullscreen styles, Old Style and New Rust. Every layout is a template file in data/Clans/Templates, where positions, colors and sizes can be changed Clan roles: leaders create roles with their own name and color and pick the rights: invite, kick, promote, demote, alliances, avatar, description, tag color, gather rates, skins, friendly fire and ally friendly fire Rust's clan system runs on Clans: the F1 clan menu, the clan chat tab, clan names on the map and Rust+, with in-game clan score events counting toward the rating Alliances: send, accept, cancel and revoke alliances, with a separate friendly fire switch for allies Friendly fire: per clan, with turret protection for clan mates as an option Gather rates: the clan sets how much of each resource every member has to bring in, and the menu shows how far each member got Clan skins: one set of skins for the whole clan, so you can tell your own people from the enemy at a glance Clan identity: avatar, tag color and a description, each behind its own role right Clan and player tops: pages with a page number field; the columns and the stat tiles on the About Clan page and in profiles are set in the config, each can be turned off or put behind a permission Player and clan profiles: open them from the member lists and the top tables Your menu, your pages: reorder, rename, hide or lock menu categories and pages behind permissions Paid actions: charge for creating, joining, leaving, kicking, disbanding, setting skins or the avatar, and for invites, through any economy plugin or with items Tag rules: minimum and maximum length, a blocked words list and an allowed characters filter. Errors show right in the Create a clan window Clan and alliance chat, with BetterChat support Clans Discord companion plugin: clan events and clan chat go to Discord through webhooks, and clan leaders can set their own webhook Storage: JSON, Protobuf or MySQL, and clans.convertstorage moves everything to another type Cleanup: purge inactive clans, and wipe clans, players or invites on a new map, each on its own switch Built for big servers: the top is rebuilt in small steps, data is written only when something changed, and the menu template is prepared in the background at startup Performance Clans is built for big servers. Statistics, friendly fire checks and turret targeting run without allocating memory on every call, the clan and player top is rebuilt in small steps instead of one long freeze, and data is written to storage only when something changed. Showcase Fullscreen: Old Style Fullscreen: New Rust ServerPanel V1 ServerPanel V2 ServerPanel V4 What makes it different Clan roles: a name, a color and twelve rights per role Rust's own clan menu shows the same clan Clan events and chat in Discord Commands Players (the /clan and /clans names can be changed in the config): /clan: open the clan menu /clan create <tag>: create a clan /clan disband: disband your clan /clan leave: leave your clan /clan join: open your invites /clan invite <name/steamid>, /clan withdraw <name/steamid>: invite a player, cancel an invite /clan kick <name/steamid>: kick a member /clan promote <name/steamid>, /clan demote <name/steamid>: move a member up or down a role /clan allyinvite <tag>, allywithdraw, allyaccept, allycancel, allyrevoke <tag>: manage alliances /clan ff, /clan allyff (also /cff, /aff toggle friendly fire for the clan and for allies /clan description <text>, /clan tagcolor <hex>: set the description and the tag color /clan discord: set the clan's Discord webhook (Clans Discord) /cinfo <tag>: information about a clan /c, /cchat: clan chat; /a, /achat: alliance chat Admins: clans.manage (needs clans.admin) list, listex: all clans, with members and online status in listex show [name/userId]: one clan and its members msg [clanTag] [message]: send a message to a clan create [name/userId] [clanTag], rename [oldTag] [newTag], disband [clanTag] invite, join, kick, owner, promote, demote [clanTag] [name/userId] Console: clans.convertstorage <JSON|Protobuf|MySQL>: move all player and clan data to another storage type clans.refreshtop: rebuild the clan and player top now clans.refreshskins: reload the skins players can pick for clan skins clans.reborn.convert (Clans Converter) reads the data file of Clans Reborn (data/Clans.json) and makes clans from it clans.umod.convert (Clans Converter) does the same for the uMod Clans plugin (data/clan_data.json) clans.convert.olddata (Clans Converter) moves player settings from the data of Clans 1.x, such as friendly fire and clan skins clans.import.playerdatabase [field] (Clans Converter) brings player data over from the PlayerDatabase plugin. The field name defaults to Clans, and PlayerDatabase has to be loaded Permissions clans.admin: the clans.manage command clans.cancreate, clans.canjoin, clans.canleave, clans.candisband, clans.cankick, clans.canskins: each is checked only when its switch is on in the "Permission Settings" section of the config Menu categories, pages, top columns, stat tiles, clan skins and the avatar change can each take a permission name of your own. The plugin registers it on load. Web Config Editor Manage the Clans settings in our web config editor. Every section of the config has its own form, so you set up roles, pages, top columns, paid actions and storage in the browser instead of editing the JSON file by hand. P.S. The web config editor is open to members of the "Clans" group in our Discord server. Join at https://discord.gg/mevent and ask for the group. Video TEST SERVER Join our test server and try all the features yourself! Copy the IP address below to start playing. connect 155.103.86.38:28015 FAQ Q: What are the files in the download, and which ones do I need? A: The archive has three plugin files, and only Clans.cs is required. It is the plugin itself, with the menu, roles, alliances, gather rates, skins, tops and storage, and it runs fine without the other two. ClansDiscord.cs is optional: it posts clan events and clan chat to Discord webhooks, so skip it if you do not use Discord. To use it, put your server webhook into "Admin webhook URL". Every event has its own switch and color, and team chat is off by default. Clan leaders can add their own webhook with the DISCORD button or /clan discord, and you can limit that to a permission and to the hosts you allow. ClansConverter.cs is optional and needed once, only when you move clan data from another plugin: install it, run the matching command from the server console or RCON (they do not work from the in-game F1 console), check that your clans came over, then delete the file. The commands are listed under Console above. If you start from scratch, you do not need it. Q: How do I add Clans to ServerPanel? A: In ServerPanel, create a category with Type: Plugin, Plugin Name: Clans, Plugin Hook: API_OpenPlugin. Clans reads your ServerPanel template and picks the matching layout: t1 and t1_1 give V1, t2 and t3 give V2, t4 gives V4. While that category exists, /clan opens it. To force a layout, set "UI Pattern" in the config to V1, V2, V4 or Fullscreen instead of Auto. Q: Which storage type should I pick? A: JSON is the default and works out of the box. Protobuf is faster and smaller on disk for big servers. MySQL lets several servers share clan data. You can switch any time with clans.convertstorage. Q: I am updating from Clans 1.x. What happens to my data? A: Clans and settings carry over. Old moderator settings and member colors become clan roles, and the page settings move into the new menu categories. The interface settings moved from the config to the template files in data/Clans/Templates. If you used PlayerDatabase, run clans.import.playerdatabase from Clans Converter once. Q: Does Clans work with my other plugins? A: Clans has the same API as other popular clans plugins, so plugins that support clans work with it too. Q: How do I show the clan top on the screen? A: Install Clans Top. Q: Which other plugins do I need? A: ImageLibrary on Oxide, for avatars and icons. Carbon has the image module built in. Q: Where do I edit the text, or add my own language? A: oxide/lang/en/Clans.json (or carbon/lang/en/). Copy it to lang/<code>/Clans.json and translate the values. English and Russian are included. Q: Where can I see an example of the config? A: Config Hooks void OnClanCreate(string tag) void OnClanCreated(IClan clan, ulong leaderId) void OnClanUpdate(string tag) void OnClanDestroy(string tag) void OnClanDisbanded(string tag, List<ulong> memberUserIDs) void OnClanRenamed(string oldTag, string newTag) void OnClanLeaderChanged(ulong newLeader, ulong oldLeader, string tag) void OnClanMemberJoined(ulong userId, string tag) void OnClanMemberLeft(ulong userId, string tag) void OnClanMemberGone(ulong userId, string tag) void OnClanMemberKicked(ulong userId, ulong actorId, string tag) void OnClanMemberPromoted(ulong userId, ulong actorId, string tag, string role) void OnClanMemberDemoted(ulong userId, ulong actorId, string tag, string role) void OnClanInvite(ulong inviterId, ulong targetId, string tag) void OnClanInviteRejected(ulong userId, string tag) void OnClanInviteWithdrawn(ulong inviterId, ulong targetId, string tag) void OnClanAllianceInvite(string tag, string targetTag, ulong actorId) void OnClanAllianceAccepted(string tag, string targetTag, ulong actorId) void OnClanAllianceInviteRejected(string tag, string targetTag, ulong actorId) void OnClanAllianceInviteWithdrawn(string tag, string targetTag, ulong actorId) void OnClanAllianceRevoked(string tag, string targetTag, ulong actorId) void OnClanChat(BasePlayer player, string message, string tag) void OnClanTopUpdated() Questions, ideas and bug reports go to our Discord.$45.95 -
Version 2.3.11
7,156 downloads
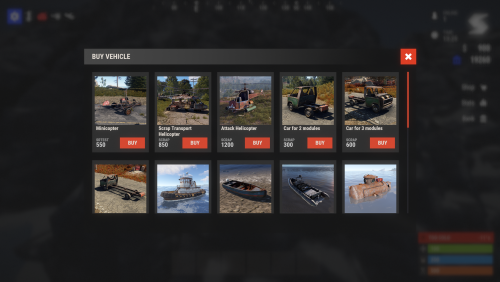
With the VehicleBuy plugin, players who have the permission use the /vehiclebuy command to open an interface for buying vehicles. They can pay with Items, Economics or Server Rewards. A Buy Cooldown keeps purchases balanced. After buying a vehicle, players get a skinned crate for land vehicles or a lifebuoy for water vehicles, which they can keep in their inventory. Features of VehicleBuy User-Friendly Interface: Buy vehicles through a simple GUI. Flexible Payment Methods: Several payment options to choose from. Customizable Settings: Administrators can adjust prices and fees as needed. Convenient Vehicle Recall: The /callback command brings your vehicle back. Easy Re-packaging: Re-package vehicles using the /pickup command or by hitting them with a hammer. Commands /vehiclebuy: Open the vehicle purchase interface (for players) /callback "VehicleName": Retrieve your purchased vehicle /pickup: Re-package your vehicle or hit it three times with a hammer Admin Command: (VehicleName.add SteamID): Spawn vehicles directly into players' inventories vehiclebuy.template [fullscreen/inmenu]: Customize your UI templates with options for fullscreen or in-menu displays (only server console) Permissions vehiclebuy.use: Allows players to use the /vehiclebuy command and access the vehicle purchase interface. vehiclebuy.free: Lets players get vehicles for free, without paying. vehiclebuy.pickup: Permits players to use the /pickup command to re-package their vehicles. vehiclebuy.recall: Allows players to use the /callback command to retrieve their vehicles. Video Overview old overview: Test Server Try the plugin on our test server. Copy the IP address below to connect. connect 155.103.86.38:28015 Web Config Editor Manage the VehicleBuy settings in our web config editor. You change the config in a browser form instead of editing files on the server by hand. P.S. The web config editor is open to members of the "VehicleBuy" group in our Discord server. Join at https://discord.gg/mevent and ask for the group. FAQ Q: Where can I see an example of a config? A: Config Q: How do I add VehicleBuy to the ServerPanel menu? A: Follow these steps: 1. Open ServerPanel menu in-game and click "+ADD CATEGORY" button 2. Set these exact parameters: Type: Plugin Plugin Name: VehicleBuy Plugin Hook: API_OpenPlugin 3. Click "SAVE" button to create the category Note: If VehicleBuy doesn't appear in ServerPanel menu, make sure both plugins are loaded and you typed the parameters exactly as shown above. Q: I'm using the KazuraVehicles plugin and VehicleBuy doesn't work / throws errors. What should I do? A: IMPORTANT: if you're using KazuraVehicles, you MUST enable a special dependency inside VehicleBuy, otherwise it will NOT work. 1) Open the plugin file Plugins/VehicleBuy/VehicleBuy.cs (or oxide/plugins/VehicleBuy.cs on your server). 2) At the very top of the file, find this line: // #Requires: KaruzaVehiclesCommon 3) Change it EXACTLY to this, just remove the # after //: // Requires: KaruzaVehiclesCommon 4) Save the file and reload the plugin with o.reload VehicleBuy (Oxide) or c.reload VehicleBuy (Carbon). If you skip ANY of these 4 steps, VehicleBuy + KazuraVehicles will NOT work correctly. Do all 4.$21.95 -
Version 2.9.9993
19,545 downloads
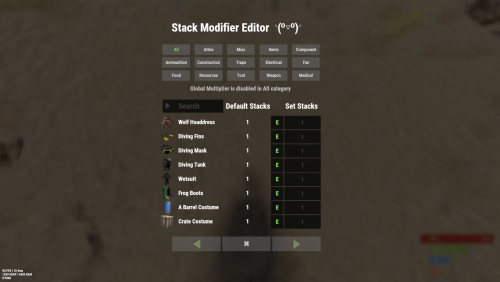
Stack Modifier is a performance-focused plugin that enhances and refines item stacking behavior in Rust. Includes a built in GUI Editor for quick and easy setup of stack sizes! This plugin uses harmony for the best performance! Features Includes GUI Editor - Blocks Player movements while using GUI Editor Including Keybinds! Adds NEW Stacking Support for the following. STACKING TAG support, crafted, spawned, picked-up, etc. Repair Bench, broken item stacks, spam repair! Melee Weapon throwing! Item Condition Merging! Stacks of Items not breaking one 1 in the stack breaks. liquids ( like bota bags etc ) Stacking of Fuel Containers (hats, tools, etc.) Stacking of Guns Weapon Attachments Stacking of Skins Works with SkinBox plugins Supports stacking armor slot armors Supports Genetic Stacking Supports Food Spoil stacking Stacking of Custom Items Stacking of Custom Items with Custom Display Names Stacking of Key Cards without losing the stack when swiping Stacking Candy Cane Club without losing the stack while lick Support for modified presents for unwrapping Limits wearable clothing items to stack sizes of 1! ( on the player wear container only ) Limits weapon attachments to stack sizes of 1! ( On the weapon its self! so you can have bigger stacks! ) The largest possible value in C# is 2,147,483,647 Which means anything over this stack-size will break the plugin Patches All Industrial Conveyor stack issues! ( Yes custom items no problems! ) -- THIS IS NOW IT"S OWN PLUGIN AS AN ADDON. 4-2-2025 Patches Stacks being lost when stacked items break! Like mining! Etc Patches Stacks being lost when Melee weapons are thrown! Like spear! Etc STACK MODIFIER INDUSTRIAL ADDON: Known Conflicts RoadBradley & HeliSignals Are doing item creations wrong and setting the item.name field as vanilla item display names thus breaking stack support. ( don't set a vanilla display name only set them if its custom names as the fix ) Conveyor Stacks Not needed & conflicts, stack-modifier already does this & has config settings for it. Davids Shop UI ( recently changed how his default data files are createdfor items ) ( you need to generate a new Items.json file and re-do custom items / pricing inside it to fix stack bugs with old data files ) Magic Coin uses some of the same hooks set up config in it correctly to not conflict Custom Skin Stack Fix not needed this handles it properly Stack Size Controller cannot have 2 of the same plugins basically Extra Loot causes a stacking bug when a reboot occurs with skinned items preventing old skinned items from stacking with new skinned items IndustrialCustomSkinsFix not needed stack-modifier has the same patch in it. IQAlcoholFarm by BadMandarin/Mercury is not supported & will cause stack bugs / problems ( could be supported with an author update, but current version is not supported ) ItemPerks by imthenewguy Causes stack bugs/problems just by having this plugin on your server due to harmony patching done inside it + repair logic is bugged. Item creation is also not handled properly resulting in duplication issues with Conveyor movements nothing can be done about that. ( plugin requires a full rewrite for proper support & repairs. ) Custom Item Definitions causes stack bugs/problems and I am not going to support a plugin that heavily modifies vanilla game items in that way its simply far too much work to try and support. I'd have to import almost half of that plugins code just for mine to accurately handle stack logic for it & for plugins that use that plugin. Plugins that do not handle Item Creation Correctly: ( Which break stacks ) Custom Item Drops by Machine ( Always sets the vanilla display name when its supposed to be null for vanilla items ) XP System by fastburst ( Always sets the vanilla display name when its supposed to be null for vanilla items ) Copy Paste ( Items created by copy paste its self will not stack since item creation is not handled properly ) This list will be constantly updated as devs fix their code accordingly & new ones are discovered to be flawed. Getting Started - Click Either Link to play video Video One Video Two Permissions stackmodifier.admin - Allows players access to the UI Editor. Chat Commands /stackmodifier -- Opens Editor UI, Must enable config option "Enable UI Editor": true /stackmodifier.reset ( is also console cmd ) -- Requires stackmodifier.admin perm ( resets stack-sizes ) /resetvenders -- Requires being an admin, only resets facepunches messed-up vendors, not all /stackmodifiercolor <inputpanel|inputtext|text|transparent> <color> <alpha|ex, 0.98> Example /stackmodifiercolor inputpanel #207086 0.25 UI Editor Commands set 8 -- Inside a categories Search Bar, type set and a value and it will apply it to the whole category, reset -- Inside a categories Search Bar type reset hit the enter key or click out of the field and it resets it. multiply -- Inside a categorie use the Search Bar & type multiply and a value and it will apply it to the whole category. if you reset or set, re-click the Category Tab to refresh it before making more changes! Otherwise you will have to do your first edit twice for it to start working again UI Editor Without Images? * At the top of the config you will see the following setting set to true save and reload. "Disable Images for UI Editor": false, < Disables images and allows full use Having Problems? * Warning this plugin is not compatible with custom-skins-stacks-fix plugin since this already handles everything. * If you already have a plugin that modifies the rust stack sizes you will first need to remove that plugin. * Then you simply load Stack Modifier onto your server open the config and start editing the Modified values to your new stack-size amounts! * When you are done simply save and reload the plugin! ( oxide. reload StackModifier ) * Alternatively you can utilize the built-in UI Editor and not ever need to touch the config! * Admins - Auth level 2 will always be ignored. * This plugin is not compatible with BetterVanish, I only support Vanish from umod. How to revert to vanilla? * Run the reset command while having the stackmodifier.admin perm or Unload Stack Modifier, delete the config, and restart your server. * It will reset the config back to vanilla settings allowing you to start over. API Hooks Interface.CallHook("OnStackSizeUpdated"); //called after the plugin updates the stack sizes on server reboots & when reloading the plugin. //It's also still called right after the UI editor is closed from modifying. //Inside the oxide hook I use called OnItemAddedToContainer theirs a hook of mine, if called mine will not touch it or fix the stacks. //if (Interface.CallHook("OnIgnoreStackSize", player, item) != null) return; OnIgnoreStackSize has been retiered it is now replaced with an ignore permission called: stackmodifier.ignore.wearable.stack-size ## Configuration { "Custom Made Stack-Modifier Feature Additions": { "Maximum difference in seconds that two items with Spoil Timers can have and still be stackable: 3600f < Default = 1-Hour difference": 3600.0, "Disable Auto Item Condition Merges When Stacked (Feature Toggle)": false }, "Vanilla Rust Bug/Exploit Stack Patches": { "Disable Weapon Attachment stack fix (Recommended false)": false, "Disable Wearable Clothes fix (Recommended false)": false, "Disable Ammo/Fuel duplication fix (Recommended false)": false, "Disable VendingMachine Ammo Fix (Recommended false)": false }, "GUI Settings": { "Enable UI Editor": true, "Sets editor command": "stackmodifier", "Sets reset command for both console & chat": "stackmodifier.reset", "Disable Images / Toggles off Images for UI Editor": false, "Sets Default Category to open": "All", "Colors": { "InputPanel": { "Color": "#0E0E10FA" }, "TextColor": { "Color": "#FFFFFF" }, "Transparency": { "Color": "#0E0E10F2" }, "DescriptionText": { "Color": "#FFFFFF80" }, "NewInputColor": { "Color": "#FFA805FF" }, "ButtonGreen": { "Color": "#A0FF70CC" }, "ButtonGreenText": { "Color": "#9AB36D6E" }, "ButtonGrey": { "Color": "#BFBFBF4D" }, "ButtonGreyText": { "Color": "#BFBFBFFF" }, "Enable": { "Color": "#738D45" }, "Disable": { "Color": "#CD412B" } } }, "Category Stack Multipliers": { "Attire": 1, "Misc": 1, "Items": 1, "Ammunition": 1, "Construction": 1, "Component": 1, "Traps": 1, "Electrical": 1, "Fun": 1, "Food": 1, "Resources": 1, "Tool": 1, "Weapon": 1, "Medical": 1 }, "Stack Categories": { "Attire": { "hat.wolf": { "DisplayName": "Wolf Headdress", "Modified": 10 }, "horse.shoes.basic": { "DisplayName": "Basic Horse Shoes", "Modified": 10 } }, "Misc": { "fogmachine": { "DisplayName": "Fogger-3000", "Modified": 10 }, "sickle": { "DisplayName": "Sickle", "Modified": 10 } }, "Items": { "kayak": { "DisplayName": "Kayak", "Modified": 10 }, "map": { "DisplayName": "Paper Map", "Modified": 10 } }, "Ammunition": { "ammo.grenadelauncher.buckshot": { "DisplayName": "40mm Shotgun Round", "Modified": 20 }, "ammo.rocket.sam": { "DisplayName": "SAM Ammo", "Modified": 10 } }, "Construction": { "door.double.hinged.metal": { "DisplayName": "Sheet Metal Double Door", "Modified": 10 }, "building.planner": { "DisplayName": "Building Plan", "Modified": 10 } }, "Component": { "bleach": { "DisplayName": "Bleach", "Modified": 2 }, "vehicle.module": { "DisplayName": "Generic vehicle module", "Modified": 10 } }, "Traps": { "trap.bear": { "DisplayName": "Snap Trap", "Modified": 30 }, "samsite": { "DisplayName": "SAM Site", "Modified": 10 } }, "Electrical": { "ceilinglight": { "DisplayName": "Ceiling Light", "Modified": 10 }, "wiretool": { "DisplayName": "Wire Tool", "Modified": 100 } }, "Fun": { "firework.boomer.blue": { "DisplayName": "Blue Boomer", "Modified": 200 }, "telephone": { "DisplayName": "Telephone", "Modified": 10 } }, "Food": { "apple": { "DisplayName": "Apple", "Modified": 100 }, "woodtea.pure": { "DisplayName": "Pure Wood Tea", "Modified": 100 } }, "Resources": { "skull.human": { "DisplayName": "Human Skull", "Modified": 10 }, "wood": { "DisplayName": "Wood", "Modified": 10 } }, "Tool": { "tool.instant_camera": { "DisplayName": "Instant Camera", "Modified": 10 }, "bucket.water": { "DisplayName": "Water Bucket", "Modified": 10 } }, "Weapon": { "gun.water": { "DisplayName": "Water Gun", "Modified": 10 }, "spear.wooden": { "DisplayName": "Wooden Spear", "Modified": 10 } }, "Medical": { "blood": { "DisplayName": "Blood", "Modified": 100 }, "bandage": { "DisplayName": "Bandage", "Modified": 30 } } } }$24.99- 208 comments
- 23 reviews
-
- 25
-
-

-
-

-
- #stacks
- #rust stacks
- (and 21 more)
-
Version 1.0.4
31 downloads
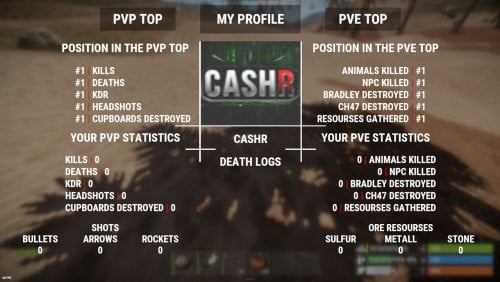
CStats - statistics for your server that does not require any intervention from administrators, such as config settings and other things, is made in a unique style and does not load your server! This plugin also implements the idea of the player's death logs, that is, the player can see the profile of the player who killed him.$10.00- 2 comments
- 1 review
-
- 5
-
-
-
- #rust
- #information
- (and 5 more)
-

Version 2.3.5
902 downloads
Weapons Turbo Bigger magazines. Faster reloads. Eight VIP tiers you control in-game. Give your Rust players a combat perk they can feel every time they reload. Weapons Turbo lets you set magazine capacity and enable fast reload separately for each supported weapon across 8 permission-based VIP tiers. Build a simple supporter perk or a full progression of weapon benefits. Open the admin panel, choose a tier, find a weapon, and set the capacity and reload option that fit your server. Make each VIP tier worth choosing Create distinct rewards: give each tier its own magazine capacities and fast reload settings. Balance weapon by weapon: increase rifle capacity while keeping other weapons closer to their standard settings. Separate the perks: offer larger magazines without fast reload, or enable fast reload while keeping standard capacity. Choose who gets access: assign tiers through Oxide permissions to individual players or groups. For example, you could configure an Assault Rifle with 40 rounds for VIP1, 50 for VIP2, and 60 plus fast reload for VIP3, then build additional tiers up to VIP8. These are example settings, not included presets. You choose the values and reload options for your server. Configure your weapons without leaving the game The admin UI brings weapon settings into one searchable panel: Switch between VIP1–VIP8. Search for weapons instead of scrolling through a long configuration file. Identify weapons by their item icons and names. Enter a magazine capacity for the selected weapon and tier. Toggle fast reload independently for each weapon and tier. Save changes through the panel. Open it with /turboweapons. Access requires turboweapons.admin. More control over your server's combat Automatic weapon discovery: generates configuration entries for supported weapons found on your server at startup, adding missing entries as needed. Ammo is still required: fast reload uses compatible ammunition available to the player. Attachment support: magazine-capacity attachment multipliers are included in the final capacity calculation. SkillTree integration: accounts for the Extended_Mag buff when calculating capacity. Event options: includes settings to skip weapon modifications for participants detected in SurvivalArena and Trials events. Built-in translations: English, Portuguese (Brazil), Spanish, Russian, and German messages. Note No required companion plugins. Weapon icons use Rust's built-in item icons, so ImageLibrary is not required. The integrations listed below are optional. Optional integrations Plugin Integration SkillTree Includes the Extended_Mag buff in magazine capacity calculations. ItemRetriever Can locate and consume reload ammunition through its API when inventory ammunition is insufficient. SurvivalArena Option to skip modifications for detected event participants. Trials Option to skip modifications for detected event participants. LangAPI Additional weapon-name localization. Notify Optional notification integration; chat messages are used as a fallback. Setup and reference Before you buy Build your VIP weapon perks around your server's balance—with eight tiers and an in-game panel to manage them.$18.99 -

Version 1.0.0
7 downloads
Informant lets players spend scrap or any item you choose to buy vague intel about rich bases, active groups, lone players and ongoing raids, with three precision levels and built-in anti-abuse rules. INTEL BROKER · SCRAP SINK · PVP Sell rumors, not coordinates Informant adds a shady intel broker to your server. Players spend scrap (or any item you choose) to learn roughly where the loot, the farmers, the lone wanderers and the raids are. The intel is deliberately vague: it creates tension and fights without ever handing out exact positions for free. Perfect for quiet servers that need more action, and for admins who want a scrap sink players actually enjoy. 4 types of intel 3 precision levels 50+ items scored in bases 0 dependencies Rich bases, groups, lone players, raids: four kinds of intel, each with its own price and cooldown Vague on purpose: from the biome to the exact grid square, the more precise, the more expensive Fair play built in: never your team, friends or clan, new players protected, no offline raid intel Clean player panel: pick, see the price, buy in one click Every setting in game: a full admin panel, no config file to touch Four kinds of intel Rich base Points to one of the richest bases on the map, scored on its loot (C4, rockets, weapons, components...) and its setup (level 3 workbench, turrets, electricity, armored walls). Picked at random among the N richest, so it's never always the same base. Active group A group of players currently out farming together. Lone target A player alone, far from their own base. Ongoing raid A spot where explosives were recently used. Three precision levels Low: only the biome: somewhere in the snow Medium: a 3x3 grid area around the target High: the exact grid square Each level has its own price multiplier, and you can add a chance of false intel to keep everyone on their toes. Tension, not abuse Never your own people: team, Friends and Clans are always excluded No offline raids: bases need an owner online (optional) New players protected: for their first hours on the server Limited sales: each target can only be sold a few times per hour Immune players: admins and the immune permission are never targeted No charge for nothing: players only pay if the informant finds something The target gets a warning A few seconds after someone buys intel about them: You get the feeling someone has been asking questions about you... Everything in game Full admin panel Every single setting editable with /intel admin, organized in tabs, with a default value button on every line. Changes apply only when you save. Control when it runs Active hours, disabled for X hours after wipe, minimum players online, cooldowns and daily limits per intel type. VIP and currency A VIP permission with a discount and shorter cooldowns. Any item can be the currency, scrap by default. Logs, test mode, Yorixx Hub Purchase log file, a test mode to try everything alone, and it plugs into the free Yorixx Hub (shared color, update alerts). English and French included. /intel: Open the informant /intel <base|group|lone|raid> [low|medium|high]: Buy intel straight from the chat /intel admin: Open the admin panel informant.info: Plugin status (console) The chat command can be renamed in the settings. Permissions informant.admin: Open the admin panel informant.use: Use the informant (only if Require permission to use is on) informant.vip: VIP discount and reduced cooldown informant.immune: Can never be targeted Optional dependencies Friends: friends are never targeted Clans: clan members are never targeted Network use Informant makes no web requests at all: no Discord, no analytics, no tracking, no license check. Configuration Everything below can also be edited in game. { "General: Enabled": true, "General: Chat command": "intel", "General: Chat prefix": "<color=#A45BC7>[Informant]</color>", "General: Currency item (shortname)": "scrap", "General: Require permission to use": false, "General: Play sound on purchase": true, "General: Active from hour (0-23)": 0, "General: Active until hour (0-24, same as start = always)": 0, "General: Disabled for X hours after wipe": 0, "General: Minimum players online": 1, "General: Log purchases to file": true, "General: Debug logs": false, "General: Test mode (admins can target themselves)": false, "Rich base": { "Enabled": true, "Price": 150, "Cooldown per player (seconds)": 900, "Daily limit per player (0 = unlimited)": 5 }, "Rich base: Minimum loot score": 800.0, "Rich base: Pick randomly among the N richest": 5, "Rich base: Scan interval (seconds)": 300, "Rich base: Require an owner online": true, "Rich base: Default points for unlisted items": 0.0, "Rich base: Loot weights (item shortname: points per unit)": { "explosive.timed": 150.0, "explosive.satchel": 30.0, "ammo.rocket.basic": 60.0, "ammo.rocket.hv": 30.0, "explosives": 12.0, "gunpowder": 0.3, "sulfur": 0.1, "sulfur.ore": 0.05, "metal.refined": 1.0, "rifle.ak": 60.0, "rifle.lr300": 60.0, "rifle.bolt": 50.0, "lmg.m249": 100.0, "smg.mp5": 30.0, "metal.facemask": 25.0, "metal.plate.torso": 25.0, "ammo.rifle": 0.5, "scrap": 0.2, "rifle.semiauto": 20.0, "smg.thompson": 20.0, "smg.2": 15.0, "rifle.l96": 70.0, "rifle.m39": 45.0, "hmlmg": 90.0, "shotgun.spas12": 25.0, "pistol.python": 15.0, "rocket.launcher": 50.0, "multiplegrenadelauncher": 60.0, "ammo.rocket.fire": 40.0, "ammo.rifle.hv": 1.0, "ammo.rifle.explosive": 2.0, "ammo.rifle.incendiary": 1.0, "ammo.grenadelauncher.he": 15.0, "grenade.f1": 3.0, "heavy.plate.helmet": 20.0, "heavy.plate.jacket": 30.0, "heavy.plate.pants": 20.0, "roadsign.jacket": 8.0, "roadsign.kilt": 6.0, "coffeecan.helmet": 4.0, "techparts": 8.0, "riflebody": 25.0, "smgbody": 10.0, "semibody": 8.0, "metalspring": 6.0, "cctv.camera": 20.0, "targeting.computer": 25.0, "gears": 2.0, "metalpipe": 2.0, "sheetmetal": 1.0, "roadsigns": 1.0, "lowgradefuel": 0.05, "diesel_barrel": 5.0 }, "Base bonus: Workbench level 3": 150.0, "Base bonus: Per turret or trap": 40.0, "Base bonus: Per battery, solar panel or wind turbine": 10.0, "Base bonus: Per large furnace or refinery": 30.0, "Base bonus: Per metal building block": 1.0, "Base bonus: Per armored building block": 3.0, "Base bonus: Per authorized player on the TC": 20.0, "Active group": { "Enabled": true, "Price": 100, "Cooldown per player (seconds)": 600, "Daily limit per player (0 = unlimited)": 10 }, "Active group: Minimum players": 3, "Active group: Radius (meters)": 50.0, "Lone target": { "Enabled": true, "Price": 75, "Cooldown per player (seconds)": 600, "Daily limit per player (0 = unlimited)": 10 }, "Lone target: No other player within (meters)": 100.0, "Lone target: Minimum distance from own base (meters)": 150.0, "Ongoing raid": { "Enabled": true, "Price": 50, "Cooldown per player (seconds)": 300, "Daily limit per player (0 = unlimited)": 0 }, "Ongoing raid: Memory (minutes)": 10, "Ongoing raid: Minimum explosives": 3, "Ongoing raid: Radius (meters)": 80.0, "Precision: Low enabled": true, "Precision: Low price multiplier": 0.5, "Precision: Medium enabled": true, "Precision: Medium price multiplier": 1.0, "Precision: High enabled": true, "Precision: High price multiplier": 2.0, "Precision: Default (low, medium, high)": "medium", "Precision: Chance of false intel (%)": 0.0, "Protection: Exclude own team": true, "Protection: Exclude friends (Friends plugin)": true, "Protection: Exclude clan members (Clans plugin)": true, "Protection: Exclude admins as targets": true, "Protection: Ignore players in safe zones": true, "Protection: New players protected for X hours": 2, "Protection: Max times a target can be sold per hour": 2, "Warning: Warn the target": true, "Warning: Delay before warning (seconds)": 30, "VIP: Price discount (%)": 25, "VIP: Cooldown multiplier": 0.5, "Player UI: Enabled": true, "Player UI: Accent color (hex)": "#A45BC7", "Player UI: Show credit": true, "Config version": { "Major": 1, "Minor": 0, "Patch": 0 } } Support Questions, bugs or ideas: join our Discord.$12.99 -

Version 1.0.0
6 downloads
Wipe Pass is a battle pass and server goals plugin for Rust: personal free and premium levels, daily and wipe challenges, community objectives with milestones, rankings and rotating seasons, all edited in game. BATTLE PASS · SERVER GOALS · SEASONS Keep your server alive all wipe long Most servers are packed on wipe day and empty three days later. Wipe Pass gives your players a reason to log in every day: new challenges each morning, a pass to finish before the end of the wipe, rewards to claim, a ranking to climb and server goals that unlock boosts for everyone. Everything is edited in game with a visual editor. No DLL, no web editor, no JSON to touch. 6 seasons included 2 in 1 battle pass + server goals 24 challenges included 0 DLL or dependency A personal battle pass: free and premium levels, chests to choose, real Rust items Server goals for the whole community: milestones that unlock items, boosts and commands Daily and wipe challenges: new ones every day, with a GIVE button for donations Balanced for your wipe schedule: weekly, every 2 weeks or monthly, finished just before the end Free custom seasons: we build a season for your server on request Just a .cs file: works on every host, no DLL, no restart Rewards players actually claim 20 levels by default, unlimited if you want more. A free track and premium levels shown as golden tiles with a crown. Real items or anything custom Rewards are real Rust items, or console commands for kits, ranks, economy or anything your server uses. Chests with a choice On chest levels the player picks 1 of 3 categories (for example Resources, Survival or Gear). The rarity grows with the level: common, rare, epic, legendary. Claimed by hand, never lost Rewards wait behind an open padlock until the player claims them, or uses CLAIM ALL. Records across wipes Players keep their record: ★ 3 passes completed shows in the pass and in the ranking. A reason to log in every morning 3 daily challenges per player: new every day, mixed genres so the same type never repeats Wipe challenges: the same set for the whole server, all wipe long Every playstyle: gather, kill players, scientists, animals, heli and Bradley, hack crates, barrels, craft, fish, donate Change 1 challenge per day: if a player doesn't like one Streak bonus: +10% challenge XP per day in a row, up to +30%, adjustable The whole server works together Objectives everyone contributes to: farm 50 000 sulfur, down 30 helicopters, donate 15 000 scrap. As the server progresses, milestones unlock rewards. Milestones at your percentages 25%, 50%, 75%, 100% or any other step. Each one can give items, a gather boost for everyone, server commands and a chat announcement. Choose who gets each milestone Everyone, contributors only, or the top 10. Late players can still claim everyone milestones after a few hours of play. Top 3 contributors Rewarded when the quest is completed, with a contributor ranking players love to climb. Nobody gets left behind Catch-up bonus: players far behind the server average earn more XP until they catch up XP events: double XP for 24 h with one click, or automatically every weekend Next reward reminder: Only 230 XP left to unlock SMG (level 18), right when they log in Pop-ups and banners: Rust blue bar or Wipe Pass box, placed above the health bars and following their height A podium worth climbing A real podium with gold, silver and bronze, each player's level and XP, and a card that tells every player exactly how far the next place is: +340 XP to pass #11. A second ranking shows the server contribution. Sell it your way Premium is a simple permission, wipepass.premium. Give it to your VIP group, or sell it on your store: the console command wipepass.premium <player> <days> runs from Tebex, PayNow or any store, and the plugin removes it when it expires, even offline. Every setting one click away Setup assistant On first launch: wipe schedule, season, color. Done in a minute. Health check Tells you in plain words if the pass can't be finished, if a challenge targets an item that doesn't exist, or if nobody has premium, with a FIX button. Visual editors Pass levels, chests, challenges with an item picker and a suggested XP, server goals, milestones and top 3. Titles write themselves. Players tab Search a player, see their level and challenges, give XP, set a level, give or remove premium, reset their pass. Stats, backups and modes Completion rate on every challenge, duplicate in one click, automatic backups with undo, simple and advanced modes, 8 accent colors. 6 seasons included, more over time Classic, Classic II, Classic III: vanilla friendly, same balance, different rewards Raid Season, Farm and Build, Warpath: themed seasons for different servers Preview before applying: see the full reward track of any season Automatic rotation: each wipe or each month, in order or at random Save your own: turn your setup into a season and reuse it A season made for your server Every buyer can ask for custom seasons, for free. Join our Discord and describe the general balance you want: Your rates: vanilla, x2, x5 or more Your playstyle: more PvP, more farming, more raiding How generous: rewards at the start and at the end of the pass Your wipe schedule: weekly, every 2 weeks or monthly No need to list every item: we build a balanced season around your description and send you the file. /pass: Open Wipe Pass: server goals, pass, ranking, history /pass admin: Open the editor /pass settings: Open the settings panel wipepass.givexp <player> <amount>: Give pass XP wipepass.removexp <player> <amount>: Remove pass XP wipepass.setlevel <player> <level>: Move a player to a level wipepass.reset <player>: Reset a player's pass wipepass.premium <player> [days]: Give premium (permanent without days) wipepass.unpremium <player>: Remove premium wipepass.new: Start a new wipe quest now wipepass.info: Plugin status Player commands accept a name or a SteamID and work on offline players. The chat command can be renamed in the settings. Permissions wipepass.admin: Open the editor and the settings wipepass.premium: Unlock the premium levels Discord Optional webhook posts for milestones, quest completion, players who finish the pass, new wipes and XP events. Paste your webhook URL in the settings, no bot needed. Nothing is sent to Discord until you paste a webhook URL and turn it on. Network use Wipe Pass only contacts Discord, and only if you set up a webhook. Interface images are hosted on imgur.com and loaded by the players' game client like any Rust UI image. No analytics, no tracking, no license check. For developers WipePass?.Call("API_AddXp", player, 100); // give pass XP WipePass?.Call("API_GetLevel", player.userID); // current level WipePass?.Call("API_IsPremium", player.userID); // premium or not // Hooks void OnWipePassLevelUp(BasePlayer player, int level) void OnWipePassRewardClaimed(BasePlayer player, int level) void OnWipePassChallengeDone(BasePlayer player, string challengeId) Configuration Everything below can also be edited in game. Levels, rewards, chests, challenges, server objectives, milestones and seasons are edited in the in-game editor (/pass admin) and saved in the config and in oxide/data/WipePass/Seasons. { "General: Enabled": true, "General: Chat command": "pass", "General: Chat prefix": "<color=#A45BC7>[Wipe Pass]</color>", "General: Debug logs": false, "General: Chat icon (SteamID of an account with the Wipe Pass logo as avatar, 0 = default)": 0, "Editor: Advanced mode": false, "Pass: Players can change 1 daily challenge per day": true, "Pass: Catch-up bonus for late players": true, "Pass: Catch-up max multiplier": 2.0, "Pass: Streak bonus per day in a row (%)": 10, "Pass: Streak bonus max (%)": 30, "XP event: Multiplier": 2.0, "XP event: Every weekend (Friday 18:00 to Sunday night, server time)": false, "Editor: Setup assistant done": false, "Quest: Server objectives enabled": true, "Quest: Start a new quest automatically on wipe": true, "Quest: Objectives per quest": 6, "Quest: Pick objectives at random": true, "Quest: Goal multiplier": 1.0, "Quest: Wipe length in days (for the countdown)": 7, "Quest: Wipe schedule (weekly, biweekly, monthly)": "weekly", "Quest: Late players can claim past \"everyone\" milestones after X hours played (0 = never)": 3, "Pass: Personal battle pass enabled": true, "Pass: XP per contribution point": 0.5, "Pass: Max XP per day from playing (challenges not included, 0 = no limit)": 200, "Pass: Daily challenges per player": 3, "Pass: Wipe challenges (same for everyone)": 6, "Pass: Reset the pass when a new quest starts": true, "Pass: Premium label shown to players": "VIP rank", "Seasons: Current season": "classic", "Seasons: Auto rotation (off, wipe, monthly)": "off", "Seasons: Random order": false, "Seasons: Reset player passes when the season changes": true, "Top: Reward the top contributors when the quest is completed": true, "Notify: Show the contribution HUD": true, "Notify: HUD duration (seconds)": 6, "Notify: Milestone banner": true, "Notify: Milestone sound": true, "Notify: Announce when an objective is completed": true, "Notify: Pop-ups for rewards and challenges": true, "Notify: Pop-up style (rust = Rust blue bar at the bottom, custom = Wipe Pass box on the right)": "rust", "Notify: Also show server announcements in the Rust blue bar": true, "Notify: Box position (bottom = just above the health bars, top = top right corner)": "bottom", "Discord: Enabled": false, "Discord: Webhook URL": "https://discord.com/api/webhooks/...", "Discord: Post when a player completes the pass": true, "Discord: Post when a new wipe starts": true, "UI: Accent color (hex)": "#A45BC7", "UI: Show credit": true } Languages and support English and French included, every text is in the language files. Questions, bugs or a custom season request: join our Discord.$24.99 -
Version 1.0.2
451 downloads
AdminWarn is designed for situations where players clearly violate server rules or require a direct and serious warning. With the latest update, an optional popup warning mode has been added alongside the mandatory acknowledgment GUI. This allows admins to send clean, non-intrusive messages displayed at the top of the screen. News: To avoid disrupting gameplay (such as PvP), you can use: /warnpopup <SteamID> <message> /warnpopupall <message> The core purpose of AdminWarn remains unchanged: forcing players to acknowledge warnings. Each mandatory warning includes a single confirmation button, ensuring the player has read and accepted it. Acknowledgment events are tracked via Discord webhook logs, including whether the warning was confirmed while the player was online or after reconnecting. AdminWarn is built for manual use only. It is not an automated warning system. All warnings are intentionally sent by admins using commands. At the same time, the system works intelligently in the background: - Warnings sent to offline players are stored and automatically shown when they next join, even days later. - For online players, warnings remain active until acknowledged, then are automatically cleared. - All data is fully wipe-aware and automatically cleaned on server wipes. Each warning includes built-in in-game sound effects. No external or custom audio files are used. This is not a chat message. Warnings are delivered as visual UI elements that require acknowledgment or appear as optional popup notifications. Even if a player closes the game, mandatory warnings will reappear on the next login until confirmed. No movement restrictions are applied. Warnings can be sent via: - RCON - Server console - In-game admin console (F1) Performance: AdminWarn is built with an optimized and efficient code structure, making its presence virtually unnoticeable on the server. It runs smoothly during long uptimes and maintains stable hook memory and performance values under normal server conditions. Wipe Behavior: - Restarts: Data preserved (approved warnings are auto-deleted for data optimization) - Server wipe: All warning data automatically cleared - No manual cleanup needed (Most of the time, it is not necessary) Commands Chat & Rcon: Note: Player names are not unique and may include different alphabets or special characters. To avoid ambiguity, using Steam64ID is strongly recommended when sending warnings. warn <SteamID> <message> warn <PlayerName> <message> warn <SteamID1>,<SteamID2>,<SteamID3> <message> warn <Name1>,<Name2>,<Name3> <message> warnall <message> warnpopup <SteamID> <message> warnpopup <PlayerName> <message> warnpopup <SteamID1>,<SteamID2>,<SteamID3> <message> warnpopup <Name1>,<Name2>,<Name3> <message> warnpopupall <message> Permissions Oxide/Carbon oxide.grant group admin adminwarn.admin c.grant group admin adminwarn.admin Discord Webhook Logging - Player name/steamid and SteamURL - Warning message / Timestamp - Read status (online/after reconnect) - Logs warning sending - Logs individual warning acknowledgements Config: { "Warning sound": "assets/prefabs/building/wall.frame.shopfront/effects/metal_transaction_complete.prefab", "Clear data on wipe": true, "Discord Webhook URL": "https://support.discord.com/hc/en-us/articles/228383668-Intro-to-Webhooks", "Discord Log Enabled": true, "Log Global Warnings (warnall)": true, "Log Warning Sent (single + multi)": true, "Show Date in GUI": true, "Show logo in warning GUI": true, "Logo size (px) — local image should be a square PNG, recommended 75-120": 90, "Use local images (false = use Web URL below)": true, "Web image URL for logo (128x128 transparent PNG recommended, used only when Use local images is false)": "", "Popup duration (seconds)": 10 }$13.99- 8 comments
- 1 review
-
- 1
-
-
- #admin
- #admin tools
- (and 47 more)
-
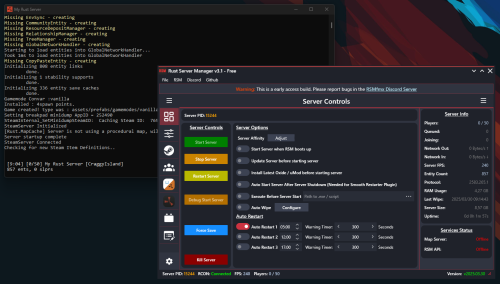
Version 2025.12.23
8,565 downloads
Rust Server Manager (RMSfmx) is a tool that allows you to create and manage dedicated Rust servers. RSMfmx was a paid tool that has recently become free and open source. Freatures: Modern Graphical Interface Server Info Panel Graphical Server Config Editor Graphical Server Installer Graphical Player Manager OxideMod / uMod Installer and Configuration CarbonMod Installer and Configuration Plugin Manager (Install, Configure and manage) Chats Logger Auto Restart Map Server (Self host custom Maps) Rest API to interface with RSM.Free- 14 comments
- 3 reviews
-
- 14
-
-
-
- #rsm
- #rust server manager
- (and 5 more)
-

Version 2.1.3
92,623 downloads
Convenient GUI manager for player and group permissions. Allows assignment of player permissions. (online or sleeping) Allows assignment of group permissions. Allows one-click removal of all players from a group. (group page - "Remove All") Allows adding/removing a player from groups. Supports unlimited plugins/permissions/groups Up to 60 plugins per-page. Up to 40 permissions per-page. Up to 40 user groups per-page Allows for local and sql backup and recall of all permissions or groups. Permissions. permissionsmanager.allowed - Allows players to use GUI. Plugin can be used with this permission, or by any Admin : Auth Level 2. Chat commands. /perms data - Backup and restore permissions and/or groups - local data file and/or SQL. ** /perms OR /perms player - Opens GUI player list, allowing a player to be chosen. /perms group - Opens GUI group list, allowing a group to be chosen. /perms player <playername> - Opens permissions GUI for the specified player. /perms group <groupname> - Opens permissions GUI for the specified group. Console commands. EmptyGroup <groupname> - Removes all players from the specified group. Configuration. Global. Chat - Title colour Chat - Message colour GUI - Label colour GUI - On colour GUI - Off colour GUI - AllPerPage - Sets All/None option to per-page, or per plugin. Options - GUI Transparency 0-1 Options - Plugin BlockList - ex. "playerranks,botspawn" Block list must be lower case, comma separated, no spaces, and no final comma, as above. Useful tool for picking CUI colours - RGB Decimal - Take the RGB Normalized decimal output, and remove all commas. ** Please note that with data backups : SQL saving is accumulative - Saving adds current permissions/group data to whatever was already saved. Local data file saving is not accumulative. It overwrites any existing backup with the current server permissions/groups. FAQ. Q: I'm trying to revoke permission(Y) for a player, but it says "Inherited". A: The player is in a group(X) which is also granted permission(Y). Solution: Revoke permission (Y) from group(X) or remove the player from group(X). Q: I removed a player from group(X), but they still have permission(Y). A: This is the opposite of the above. This player must have been independently granted permission(Y) at some time. Solution: Revoke permission(Y) from the player.Free- 242 comments
- 34 reviews
-
- 41
-
-
-
- #permissions
- #admin
- (and 7 more)
-

Version 2.6.9
22,838 downloads
A highly customizable Shop that you configure in game. Use NPCs as shopkeepers and add, edit, or remove items right from the game interface. Features of Shop Beautiful user interface with multiple templates (Fullscreen, In-Menu V1/V2/V4) Shopping Basket: add multiple items to cart and purchase them all at once Search functionality: search for items by name across all categories Pagination: browse items page by page Discount system (by permissions) with per-item custom discounts Automatic shop filling (+ the plugin has support for the ItemCostCalculator plugin) Selling items (players can sell items to the store and receive money for it) Sell containers configuration: choose which containers (main, belt) players can sell from Blocked skins: prevent selling of specific item skins High performance with optimized item loading Adding/editing/removing items IN GAME with visual editor Supports NPC shops (HumanNPC integration) Supports Custom Vending Machines Supports NoEscape plugin integration Supports Duel/Duelist: blocks shop access during duels Convert from ServerRewards Favorite items system: players can mark items as favorites Buy Again feature: quick repurchase of previously bought items By default, the plugin has English, Russian and Chinese translations LangAPI integration for custom translations Transfer money between players directly in the plugin (including offline players option) Shop allows you to use multiple economy plugins at once (players can choose what they want to pay with) For each item, you can choose which payment methods are available and how much they will cost, based on the selected method Cooldown system: per-item buy/sell cooldowns with per-permission overrides Wipe cooldown: block items for purchase/sale after server wipe Respawn cooldown: block purchase/sale for a set time after respawn Buy/Sell limits: lifetime and daily limits per permission Max buy/sell amount: limit items per transaction Force buy: fast purchase without confirmation dialogs Plant genes configuration for plant items Weapon configuration: spawn weapons with ammo and attachments Content system: configure container contents (liquid, weapon mods, etc.) Customizable UI: full color customization and formatting options Offline Image Mode: use local images instead of downloading from internet Image loading on login: preload images when players connect Console and file logging of shop activity ServerPanel integration: add Shop to the ServerPanel menu Notify/UINotify integration for notifications Auto-wipe settings: automatically reset cooldowns, limits, and player data on wipe Discord Logging: track all purchases, sales, and transfers in your Discord server through webhooks with customizable embeds API methods for other plugins to interact with Shop Commands shop: open the shop interface shop.install: starts the shop installation shop.refill <recovery_rate>: refill the shop recoveryRate: A value between 0 and 1 that determines the multiplier for the cost of selling items. For example, shop.refill 0.5 means that items will have a sale cost of 50% of their purchase cost. shop.convert.sr [clear]: convert items from ServerRewards to Shop. The clear option clears Shop items before converting shop.setvm [categories: cat1 cat2 ...]: add a custom VM to the config shop.setnpc [categories: cat1 cat2 ...]: add an NPC to the config shop.remove all: console command that removes all items and categories from the plugin shop.remove item [category name/all]: console command that removes an item (or all items) shop.remove category [category name/all]: console command that removes a category (or all categories) shop.fill.icc [all/buy/sell]: console command that updates item prices in the store using ItemCostCalculator. all updates both Price and SellPrice, buy updates Price, sell updates SellPrice shop.convert.from.1.2.26: converts Shop plugin version 1.2.26 to version 1.3.0+ shop.reset: resets store data, including templates, configurations, and items. shop.reset template: resets the store interface template data. shop.reset config: resets store configuration data. shop.reset items: resets store items data. shop.reset full: completely resets all store data (templates, configurations and items). shop.manage: manages the Shop plugin. shop.manage economy list: displays a list of all available economic systems in the plugin. shop.manage economy set <economy_ID> <name>: sets the economic system by plugin ID and name. The command updates that economic system on the server and saves the change to the configuration. FOR EXAMPLE: shop.manage economy set 0 Economics: sets the main economy plugin to "Economics". shop.manage economy set 1 ServerRewards: sets the additional economy system with ID 1 to "ServerRewards". shop.wipe: manually trigger wipe (resets cooldowns, limits, and player data) shop.change: change item category (used in editor) shop.item: console command for item actions Permissions shop.setvm: for the "shop.setvm" command shop.setnpc: for the "shop.setnpc" command shop.free: for free item purchases shop.admin: admin permission shop.bypass.dlc: allows bypassing Facepunch ToS item restrictions (WARNING: your server may be banned for this) API Methods The Shop plugin provides API methods for other plugins to interact with it: API_OpenPlugin(BasePlayer player): opens the shop UI for a player. Returns empty string if failed, or UI data if successful. API_GetShopPlayerSelectedEconomy(ulong playerID): returns the economy ID (0 = main, 1+ = additional) that the player has selected for shopping. Note: Other plugins can call these methods using Shop.Call("API_MethodName", ...) syntax. Sort Types None Name Amount PriceDecrease PriceIncrease Category Types None: normal category for items Favorite: category for favorite items Hidden: hidden category, available only in NPC stores or Vending Machines Video P.S. Video of the old version, video for the V2+ version is now in development Showcase Full screen Templates Template OLD STYLE Template NEW RUST In-Menu Templates Template V1 (V1.1) Template V1 (V1.1) with BASKET Template V2 Template V2 with BASKET Template V4 Template V4 with BASKET Installer Editor Web Config Editor Manage the Shop settings in our web config editor. You change the config in a browser form instead of editing files on the server by hand. P.S. The web config editor is open to members of the "Shop" group in our Discord server. Join at https://discord.gg/mevent and ask for the group. Discord Logging Track all shop activity via Discord webhooks: purchases, sales, and money transfers. TEST SERVER Join our test server and try all the features yourself! Copy the IP address below to start playing. connect 155.103.86.38:28015 FAQ Q: I get the message "The plugin does not work correctly, contact the administrator!". What should I do? A: It means the plugin is not installed. To install it, use the "/shop.install" command. You need the "shop.admin" permission for this command. Q: Where can I see an example of a config? A: Config Q: How to use BankSystem to store the economy A: "Economy": { "Type (Plugin/Item)": "Plugin", "Plugin name": "BankSystem", "Balance add hook": "Deposit", "Balance remove hook": "Withdraw", "Balance show hook": "Balance", "ShortName": "", "Display Name (empty - default)": "", "Skin": 0, "Lang Key (for Title)": "LangTitle", "Lang Key (for Balance)": "BalanceTitle" }, Q: How to use ServerRewards to store the economy A: "Economy": { "Type (Plugin/Item)": "Plugin", "Plugin name": "ServerRewards", "Balance add hook": "AddPoints", "Balance remove hook": "TakePoints", "Balance show hook": "CheckPoints", "ShortName": "", "Display Name (empty - default)": "", "Skin": 0, "Lang Key (for Title)": "LangTitle", "Lang Key (for Balance)": "BalanceTitle" }, Q: How to use Economics to store the economy A: "Economy": { "Type (Plugin/Item)": "Plugin", "Plugin name": "Economics", "Balance add hook": "Deposit", "Balance remove hook": "Withdraw", "Balance show hook": "Balance", "ShortName": "", "Display Name (empty - default)": "", "Skin": 0, "Lang Key (for Title)": "LangTitle", "Lang Key (for Balance)": "BalanceTitle" }, Q: How to use IQEconomic to store the economy A: "Economy": { "Type (Plugin/Item)": "Plugin", "Plugin name": "IQEconomic", "Balance add hook": "API_SET_BALANCE", "Balance remove hook": "API_GET_BALANCE", "Balance show hook": "API_REMOVE_BALANCE", "ShortName": "", "Display Name (empty - default)": "", "Skin": 0, "Lang Key (for Title)": "LangTitle", "Lang Key (for Balance)": "BalanceTitle" }, Q: How to use scrap to pay for items A: "Economy": { "Type (Plugin/Item)": "Item", "Plugin name": "", "Balance add hook": "", "Balance remove hook": "", "Balance show hook": "", "ShortName": "scrap", "Display Name (empty - default)": "", "Skin": 0, "Lang Key (for Title)": "LangTitle", "Lang Key (for Balance)": "BalanceTitle" }, Q: How to add KIT as shop item A: https://pastebin.com/4szBQCgz Q: How to add Command as shop item A: https://pastebin.com/bcCkzBEL Q: How do I make a weapon spawn with ammo in it? A: Configure the "Weapon" section in the item config: "Weapon": { "Enabled": true, "Ammo Type": "ammo.rifle.explosive", "Ammo Amount": 128 } Q: How do I make items spawn some content (liquid, weapon modifications)? A: Configure the "Content" section in the item config: "Content": { "Enabled": true, "Contents": [ { "ShortName": "weapon.mod.lasersight", "Condition": 100.0, "Amount": 1, "Position": -1 } ] }, Q: How to turn off the sell feature? A: Turn off "Enable item selling?" in the config, or in the item settings in game. "Enable item selling?": false, Q: How to use the ItemCostCalculator with Shop? A: Use the "shop.refill" command (it refills the Shop). Q: What should be the size of images for item icons? A: Item icons are usually 512x512 pixels, but any square image works. Q: I get the error "UI is unavailable for player. Reason: Menu UI is not initialized". How to fix it? A: This error occurs when the interface template is not installed or configured. Follow these steps: 1. Reset the template using the command: shop.reset template (use only template to avoid data loss). 2. Install the interface via shop.install in the game (to visually select a template) or through the console. Note: You need the shop.admin permission to execute these commands. Q: How do I add Shop to the ServerPanel menu? A: Follow these steps: 1. Open ServerPanel menu in-game and click "+ADD CATEGORY" button 2. Set these exact parameters: Type: Plugin Plugin Name: Shop Plugin Hook: API_OpenPlugin 3. Click "SAVE" button to create the category 4. Reset Shop template and install it: Type in console: shop.reset template (IMPORTANT: use only "template"!) Then type: shop.install Note: If Shop doesn't appear in ServerPanel menu, make sure both plugins are loaded and you typed the parameters exactly as shown above. Q: I see black images with Rust logo or get error 429 when loading images. What should I do? A: This happens when images fail to download from the internet. The Shop plugin passes images to ImageLibrary but does not download them itself. Error 429 usually comes from rate limits on image hosting services like Imgur (see HTTP 429 documentation for more details). To fix it, enable Offline Image Mode so the plugin uses local images: Enable the mode in config: Open "oxide/config/Shop.json" (or "carbon/config/Shop.json" for Carbon) Set "Enable Offline Image Mode": true Set up the images: Create folder "TheMevent" in "oxide/data" (or "carbon/data" for Carbon) Download PluginsStorage (click "CODE" → "Download ZIP") Extract the ZIP and copy all contents to the "TheMevent" folder Reload the plugin: Type o.reload Shop (Oxide) or c.reload Shop (Carbon) Note: If you want to add your own custom images, place them in the "TheMevent" folder and reference them with the "TheMevent/" prefix. For example: "TheMevent/Icon1.png", "TheMevent/MyCustomIcon.jpg", etc. Q: What placeholders are available for commands and what do they do? A: Shop commands support these placeholders. They are replaced when a player buys a command item: %steamid%: replaced with the player's Steam ID (e.g., "76561198000000000") %username%: replaced with the player's display name (e.g., "PlayerName") %player.x%: replaced with the player's X coordinate position %player.y%: replaced with the player's Y coordinate position %player.z%: replaced with the player's Z coordinate position Example usage in shop commands: "Command (%steamid%)": "say Welcome %username%!|teleport %steamid% %player.x% %player.y% %player.z%" Note: Separate multiple commands with the "|" character. They run in order when the item is purchased. Q: How to set different prices for different currencies (RP and balance)? A: Each item can have its own price for each currency. Edit the file oxide/data/Shop/Shops/Default.json and find the item you want to modify. In the "Currencies" section, set different prices for each economy: "Currencies": { "Enabled": true, "Currencies": { "0": {"Price": 1000}, "1": {"Price": 500} } } This means players pay 1000 from their main balance (Economics) or 500 RP from their ServerRewards balance. Economy ID 0 = main economy, ID 1 = ServerRewards. Q: How to create a shop using HumanNPC plugin and set specific categories? A: To create a shop with HumanNPC, follow these steps: Create an NPC using HumanNPC plugin Get the NPC ID (you can find it in the HumanNPC config or use the command humannpc.list) Use the Shop command to add the NPC: shop.setnpc [categories: cat1 cat2 ...] Example: shop.setnpc categories: Weapon Ammunition Tools: adds the NPC with Weapon, Ammunition, and Tools categories shop.setnpc categories: *: adds the NPC with all available categories Note: You need the shop.setnpc permission to use this command. Make sure both HumanNPC and Shop plugins are loaded on your server. Q: How to add Custom Vending Machines to Shop plugin? A: To add Custom Vending Machines to Shop, follow these steps: Place a Custom Vending Machine in your world Look at the vending machine and use the command: shop.setvm [categories: cat1 cat2 ...] Example: shop.setvm categories: Weapon Ammunition: adds the vending machine with Weapon and Ammunition categories shop.setvm categories: *: adds the vending machine with all available categories Note: You need the shop.setvm permission to use this command. The vending machine will be automatically added to the Shop configuration. Q: How does the Shopping Basket feature work? A: Players put several items into the basket, check what they picked, and buy everything at once. The basket shows the total cost, and players can remove items before checkout. The basket has to be enabled in the template settings. Q: How does the Search functionality work? A: Players search for items by name across all enabled categories. Type in the search box and the shop shows the matching items. Search respects permission settings and can be enabled/disabled in the template configuration. Q: What are the wipe and respawn blocks? A: These are time-based restrictions: Wipe block: Blocks items from being bought/sold for a specified time after a server wipe. Use it to stop players from buying powerful items right after a wipe. Configure in config: "Wipe Block": true and "Wipe Cooldown": 3600 (seconds). Respawn block: Blocks buying and selling for a specified time after the player respawns. Helps prevent abuse. Configure in config: "Respawn Block": true and "Respawn Cooldown": 60 (seconds). Q: How do Daily and Lifetime Limits work? A: Limits control how many times players can buy/sell items: Lifetime Limits: Total number of times a player can buy/sell an item across their entire account. Set to 0 for unlimited. Daily Limits: Maximum number of times per day a player can buy/sell an item. Resets daily. Set to 0 for unlimited. Limits are per-permission, so you can set different limits for VIP players, regular players, etc. The plugin uses the highest limit among all permissions the player has. Q: What is the "Buy Again" feature? A: Buy Again lets players quickly rebuy items they bought before. It shows a history button in the shop UI (if enabled) and requires a permission. To enable, set "Buy Again Settings": {"Enabled": true, "Permission": "shop.buyagain"} in the config. Q: How do I configure blocked skins for selling? A: You can prevent players from selling specific item skins. In the config, add entries to "Blocked skins for sell": "Blocked skins for sell": { "rifle.ak": [52, 25], "pistol.m92": [100, 200] } Q: How do I configure which containers players can sell from? A: In the config, set "Settings available containers for selling item": "Settings available containers for selling item": { "Enabled": true, "Available Containers (main, belt, wear)": ["main", "belt"] } Available container names: "main" (inventory), "belt" (hotbar), "wear" (clothing), etc. Q: What are Auto-Wipe Settings? A: Auto-Wipe Settings automatically reset certain data when you run the shop.wipe command. Configure in config: "Auto-Wipe Settings": { "Cooldown": true, "Players": true, "Limits": true } Cooldown: Resets all item cooldowns Players: Resets all player data (favorites, economy selection, etc.) Limits: Resets all buy/sell limits Q: How do I customize price formatting? A: In the config, set "Formatting Settings" to control how prices are displayed: "Formatting Settings": { "Buy Price Format": "G", "Sell Price Format": "G", "Shopping Bag Cost Format": "G", "Balance Format": "G" } Format options: "G" (general), "N" (number with separators), "C" (currency), "F" (fixed-point), etc. See .NET number formatting for all options. Q: How do I enable transfers to offline players? A: In the config, set "Allow money transfers to offline players?": true. By default, this is disabled for security reasons. Q: How do I configure Duel/Duelist integration? A: To block shop access during duels, set "Blocking the opening in duels?": true in the config. Make sure you have the Duel or Duelist plugin loaded. Q: What do all shop item settings mean and how should I configure them? A: Here are the most important item fields and what they do. Type: what this entry does: Item (gives an in-game item), Command (runs server commands), Plugin (calls another plugin hook), Kit (gives a kit). ID: unique numeric ID of the item inside Shop. Used internally (for logs, favorites, editor); normally you don’t change it manually. Image: custom UI icon key. If empty, Shop will try to use the item icon found by ShortName. Permission: Oxide/Carbon permission required to see and use this item. Leave empty to make the item available to everyone, or set e.g. shop.vip for VIP‑only items. Title: custom title shown in the UI. If empty, the plugin will try to use DisplayName, then the in‑game display name of the item, or fall back to an empty string. Description: additional text shown in the item window. Optional, purely visual. Command (%steamid%): used when Type = Command. The plugin will execute this command on the server. You can use placeholders like %steamid%, %username%, %player.x%, %player.y%, %player.z%. Each purchase can run multiple commands (split internally by |). Kit: kit name for Type = Kit. The plugin will give a kit with this name when the player buys the item. Plugin: used for Type = Plugin. Contains plugin name, hook name and amount. When the item is purchased, the specified hook will be called in the target plugin. DisplayName (empty - default): overrides the in‑game item name shown to the player (for Type = Item). If empty, the plugin uses the original item display name (optionally via Lang API). ShortName: shortname of the item (e.g. rifle.ak). This is required for Type = Item; it is used to find ItemDefinition, icon, stack size, etc. Skin: workshop skin ID for the item. Only used when Type = Item. Is Blueprint: if enabled, Shop will give the item as a blueprint instead of the regular item. Amount: how many items are given/sold per one purchase. For blueprints this is how many separate blueprint items are created. Enable item buying? (CanBuy if disabled, the item cannot be bought (only sold, if selling is enabled). Price: default purchase price. Can be overridden per‑economy in Currencies. If a currency is configured for buying, its price will be used instead of this value. Enable item selling? (CanSell if disabled, players cannot sell this item back to the shop. Sell Price: default sell price. Can also be overridden in Currencies for selling. Buy Cooldown / Sell Cooldown: base cooldown in seconds between purchases/sales of this item. Can be overridden by per‑permission cooldowns below. Buy Cooldowns / Sell Cooldowns: per‑permission cooldowns. Keys are permission names (e.g. shop.vip), values are cooldown seconds. The plugin uses the lowest cooldown among permissions that the player has. Use custom discount?: if enabled, the item will use its own Discount map instead of the global discount configuration. Discount (%): per‑permission discount percentages for this item (only if custom discount is enabled). The highest discount from permissions that the player has will be applied. Sell Limits / Buy Limits: global lifetime limits per permission. A value of 0 means "no limit". The plugin selects the highest limit among permissions the player has. Daily Buy Limits / Daily Sell Limits: per‑day limits (reset by the plugin’s daily logic). 0 means "no daily limit". Max Buy Amount / Max Sell Amount: maximum number of items that can be bought/sold in a single transaction (0 disables this limit). Force Buy: if enabled, the item will use fast purchase flow (without extra confirmation windows, depending on UI settings). Prohibit splitting item into stacks?: if enabled, the plugin will try to give the item in a single stack instead of splitting it into multiple stacks, when possible. Purchase/Sale block duration after wipe: time (in seconds) after a wipe during which this item cannot be bought/sold. Useful for limiting powerful items early in the wipe. Localization: per‑language messages for the item title. If enabled and a translation exists for the player’s language, it will override the normal title. Content: configuration of contents for containers (e.g. boxes, weapons with attachments, etc.). You can add inner items (shortname, amount, condition, position). Weapon: additional settings for weapons (ammo type, ammo amount, etc.). Applied when the item is created. Genes: plant gene configuration. If enabled, the plugin will set specified genes on the created item. Currencies: per‑economy price configuration. You can set different prices for each enabled economy plugin (by economy ID) for both buying and selling. If a currency is configured and enabled for the player’s selected economy, its price takes priority over the default Price/Sell Price. Q: What do shop category settings mean and how should I configure them? A: Categories group your shop items and control how they are shown, sorted and filtered for players. Enabled: turns this category on or off. If disabled, the category and all its items will not appear in the shop UI at all. Category Type: controls special behavior of the category: None: a normal category that shows the items you added to Items. Favorite: a virtual category that shows each player’s favorite items (based on their own favorites list). Items here are taken from other categories the player marked as favorite. Hidden: a hidden category. It is stored in data and can be used for management, but is not shown in the normal category list in UI. Title: the name of the category displayed in the UI. If Localization is enabled and contains a translation for the player’s language, that localized text will be shown instead of this value. Permission: permission required to see and use this category. If you leave it empty, all players can see the category (subject to item‑level rules). If you set e.g. shop.category.vip, only players with that permission will see this category in the shop. Sort Type: how items inside the category are sorted: None: items are shown in the order they are stored/edited. Name: items are sorted alphabetically by their PublicTitle (what the player sees). Amount: items are sorted by Amount (stack size) in ascending order. PriceIncrease: items are sorted by price from cheaper to more expensive. PriceDecrease: items are sorted by price from more expensive to cheaper. Sorting is applied every time the category items are requested. Items: the list of ShopItem entries that belong to this category. For normal categories (Type = None/Hidden) this is what will be displayed in the item grid. For Favorite categories this list is not used for display. The plugin uses the player’s favorites instead. Localization: optional localized title for the category. When enabled, the plugin will try to show a translated title based on the player’s language. If no translation is found, it falls back to the Title field. How visibility and filtering work: when the shop builds a category: For normal categories, only items that are available for the player (permission, currencies, buy/sell rules, etc.) are included. Skip/take pagination is applied on top of that filtered list to show items page by page. For favorite categories, the plugin takes the player’s favorite items, applies sorting, and displays them in this special category. Reordering categories and items: categories and items can be moved up/down (or left/right) in the in‑game editor. This changes the order in which categories are shown in the UI and the default order of items when Sort Type = None. Q: How do I enable and use ADMIN MODE? A: ADMIN MODE is a visual in-game editor that lets you manage your shop without editing files by hand. Step 1: Enable ADMIN MODE Ensure you have the shop.admin permission Open shop with /shop command Click the "ADMIN MODE" button in the header (shows "■" when active) Step 2: Create/Edit Categories To create a new category: With ADMIN MODE enabled, click the "+" button in categories list Fill in category details (Title, Enabled, Type, Permission, Sort Type) Click "SAVE" To edit an existing category: Click the "Edit" button (pencil icon) next to the category Modify settings Click "SAVE" or "CANCEL" Step 3: Create/Edit Items To create a new item: Open the target category Click "+ADD ITEM" button Select item from the selection panel Configure all item properties (price, amount, permissions, etc.) Click "SAVE" To edit an existing item: Click the "Edit" button on the item Modify properties Click "SAVE" or "CANCEL" Additional ADMIN MODE Features: Use ↑↓ arrows to reorder categories Use ←→ arrows to reorder items within categories Use "DELETE" button in editor to remove categories/items All changes save automatically, so you don't need to edit files by hand Q: Where are shop files stored and what do they contain? A: Shop plugin data is organized in the following structure: Configuration (oxide/config/Shop.json or carbon/config/Shop.json) Plugin settings (permissions, commands, economy configuration) Notification settings Discord logging configuration Global plugin options Shop Data (oxide/data/Shop/Shops/Default.json or carbon/data/Shop/Shops/Default.json) This is the main shop inventory file All categories and their settings All items with prices, permissions, cooldowns, limits Item configurations (weapons, content, currencies, etc.) Edited through ADMIN MODE or manually UI Template (oxide/data/Shop/UI.json or carbon/data/Shop/UI.json) Interface template configuration Colors, sizes, positions Display settings Reset with: shop.reset template then shop.install Player Data (oxide/data/Shop/Players/ or carbon/data/Shop/Players/) Individual player files (one per player)$29.95 -

Version 1.0.3
170 downloads
Plugin Description: Whitelist plugin for Rust servers with a GUI for adding players to the whitelist and removing them, as long as they have been on your server before. The plugin can also send a notification to your Discord server when a player is added to or removed from the whitelist. Key Features: - Intuitive GUI: Add or remove players with one button press. - Whitelist by SteamID: Add users to the whitelist directly from the GUI. - Toggle On/Off: Enable or disable the whitelist with one click in the UI. - Automatic Activation/Deactivation: The whitelist can turn on and off by itself at the times you set. - Discord Notifications: Get a notification on your Discord server whenever a player is added to or removed from the whitelist. You turn this on or off in the plugin's configuration. - Configurable Whitelist Messages: You can change the whitelist messages in the plugin's configuration. Permissions: whitelist.add: Add players to the whitelist. whitelist.remove: Remove players from the whitelist. whitelist.admin: Full access to whitelist management. whitelist.enable: Activates the whitelist. whitelist.disable: Deactivates the whitelist. whitelist.ui: Use the graphical user interface (UI). Commands: Chat Commands: /whitelist: Opens the graphical user interface (GUI). The whitelist.ui permission is required. Manage your player list from the GUI, enable or disable the whitelist when you need to, and turn on Discord notifications if you want them. { "Enable 'add' discord message?": true, "Enable 'remove' discord message?": true, "Discord webhook (for added to whitelist players)": "webhook", "Discord webhook (for removed from whitelist players)": "webhook", "Kick message": "You are not on this server's whitelist" } Web Config Editor Manage the Whitelist settings in our web config editor. You change the config in a browser form instead of editing files on the server by hand. P.S. The web config editor is open to members of the "Whitelist" group in our Discord server. Join at https://discord.gg/mevent and ask for the group.$21.95- 6 comments
- 3 reviews
-
- 3
-
-
-
- #whitelist
- #gui
- (and 1 more)
-

Version 1.2.12
1,533 downloads
The HUD Info Panel System is a customizable HUD for your Rust server that players can adjust to their liking. It shows server stats and running events in a clean, simple design, and other plugins can connect to it through the API. There are enough settings to fit any play style. Features of HUD Info Panel System Fully customizable HUD panels with drag-and-drop positioning Real-time tracking of 24+ server events and entities Built-in economics display (supports Economics/ServerRewards) Custom button system with image/command binding Dynamic event icons with color customization Multi-anchor positioning (UpperLeft/UpperRight) Automatic panel hiding system Optimized for performance Showcase Commands /panel hide - hide panel /panel show - show panel Permissions The plugin registers permissions for different features and settings. Players need the matching permission to use a given customization option. Panel Anchors UpperLeft UpperRight API Other plugins can report the status of a custom event through an API method. Here is an example call from another plugin: public class EmptyPlugin : RustPlugin { [PluginReference] private Plugin PanelSystem; private void OnServerInitialized() { EventChangeStatus("UserNotify", true); } private void Unload() { EventChangeStatus("UserNotify", false); } private void EventChangeStatus(string key, bool spawned) { PanelSystem.Call("OnEventChangeStatus", key, spawned); } } And the corresponding configuration in PanelSystem: { "Enabled": true, "Image": "https://i.imgur.com/asflpJe.png", "Permission": "", "Type": 7, "Panel Settings": { "Enabled": true, "Permission": "", "Switch": true, "Color": true, "Size": true }, "Size Settings": { "Sizes": [ { "Size": 25.0, "Lang Key": "sizeBig", "Permission": "" }, { "Size": 20.0, "Lang Key": "sizeMedium", "Permission": "" }, { "Size": 15.0, "Lang Key": "sizeSmall", "Permission": "" } ], "Default Size (index)": 0 }, "Color Settings": { "Default Active Color ID": 0, "Default Inactive Color ID": 2 }, "Key (MUST BE UNIQUE)": "UserNotify" } Available Panel Types The HUD Info Panel System has these panel types for server stats and events: Online Sleepers Time CH47 Helicopter Bradley Airdrop Economics Custom CargoShip Button WipeBlock Convoy ArmoredTrain Sputnik SpaceEvent AirEvent ArcticBaseEvent GasStationEvent ShipwreckEvent HarborEvent JunkyardEvent SatDishEvent WaterEvent PowerPlantEvent KillBoss TravellingVendor Caravan DungeonEvents Web Config Editor Manage the PanelSystem settings in our web config editor. You change the config in a browser form instead of editing files on the server by hand. P.S. The web config editor is open to members of the "PanelSystem" group in our Discord server. Join at https://discord.gg/mevent and ask for the group. FAQ Q: How do I make the buttons hide when I click on the logo? A: In the logo settings, specify the command to hide the buttons (panelsystem.buttons). Example: https://pastebin.com/Ksggh718$21.95 -
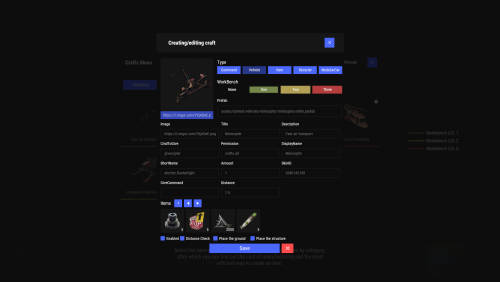
Version 2.10.42
2,110 downloads
A crafting system for items, cars, vehicles, recyclers and more. Commands craft open interface crafts.setwb [categories: cat1 cat2 ...] set new custom workbench Permissions You can set permission in config, for example: "Permission (ex: crafts.use)": "crafts.use", crafts.setworkbench: lets you use the "crafts.setwb" command (set custom workbenches) Craft Types Command Vehicle Item Recycler ModularCar How to install a custom workbench 1. Spawn the workbench (for example, in RustEdit or a plugin) 2. In the game, go to him and use the command "crafts.setwb" and specify the necessary categories. Example: /crafts.setwb Misc 3. Go to config (oxide/config/Crafts.json) and configure this workbench (use SafeZone, workbench level, etc.) VIDEO Web Config Editor Manage the Crafts settings in our web config editor. You change the config in a browser form instead of editing files on the server by hand. P.S. The web config editor is open to members of the "Crafts" group in our Discord server. Join at https://discord.gg/mevent and ask for the group. FAQ Q: Where can I see an example of a config? A: Config$19.95 -

Version 1.0.17
169 downloads
Adds a coin flipping mini game to your server. Players can try their luck against a bot or a real player. Commands flip - open interface Permissions coinflipping.use - open interface coinflipping.players - play against players coinflipping.npcs - play against npcs coinflipping.createroom - create a room Config { "Commands": [ "flip" ], "Work with Notify?": true, "Economy": { "Type (Plugin/Item)": "Plugin", "Plugin name": "Economics", "Balance add hook": "Deposit", "Balance remove hook": "Withdraw", "Balance show hook": "Balance", "ShortName": "scrap", "Display Name (empty - default)": "", "Skin": 0 }, "Interface": { "Show coin in header?": true, "Coin Image": "https://i.imgur.com/GBVGvQa.png" }, "Values for Bot Game": [ 100, 200, 300 ], "Min Bet for Bot Game": 100, "Min Bet for Player Game": 100, "Permissions Settings": { "Opening the interface": "coinflipping.use", "Playing against players": "coinflipping.players", "Playing against NPCs": "coinflipping.npcs", "Creating a room": "coinflipping.createroom" } } Web Config Editor Manage the CoinFlipping settings in our web config editor. You change the config in a browser form instead of editing files on the server by hand. P.S. The web config editor is open to members of the "CoinFlipping" group in our Discord server. Join at https://discord.gg/mevent and ask for the group.$19.95 -
Version 1.0.0
61 downloads
Relay: a free Discord bot for your Rust server, in one file Relay connects your Rust server to your Discord and gives your players a real in-game panel. Drop one .cs file in your plugins folder, give it a bot token, and you get the chat bridge, account linking, VIP, moderation, logs, stats, coins and community tools. Turn off any part you don't want in the config. Everything is set up from a visual editor (type !setup in Discord the first time, !editor after that), so you don't have to edit JSON by hand. === SUPPORT === Ask on this page. Relay is free. If it helps your server, you can support it at https://ko-fi.com/ghostfw === WHAT YOU GET === CORE (always on) - Chat bridge between the game and a Discord channel (both ways; players can hide the Discord chat) - Account linking (/link in game, code by private message) with an optional first-link reward - Player profile in Discord (!profile) as one picture: VIP bar (the highest level first, one color per level, full at 30 days), in game or not, score, kills and time played (all time), coins - Live status message (players, FPS, next wipe), join/leave feed - Discord roles synced with game groups, role panel with buttons - Custom messages: timers, daily messages, "when something happens" and custom commands - Slash commands, command aliases, prefix of your choice - Visual editor (!editor): every option, message and color, with preview. Also changes the bot's name and photo - Quick setup: on the first-steps page the editor lists every role, category and channel the bot can make, already in order (for example a private staff category and a log category). Keep a suggestion, rename it, pick one you already have, or leave it out. Then export: the bot creates everything and connects it for you - Every text the bot writes can be changed or hidden in the editor (Texts page): for example remove a line from !coins or change the !vip text - !help in tabs: player commands (one section per module), your own commands, staff commands - English, Portuguese and Russian included; add any language with the lang files IN-GAME PANEL (/panel or a key bind) - My profile (stats), Notices (ticket answers, reviewed reports, prizes, with an unread counter), Coins and shop, Community, Ranking (players and clans), Players, Server info, Discord link, Settings (language, Discord chat on/off, Discord alerts), Help, Staff tools - Title and colors are configurable (Look page of the editor) - Command answers come in a small colored box: green = done, red = error, yellow = warning (can be turned off on the Look page) VIP - Timed VIP levels for any store or command: /vip window, HUD, chat tag, expiry warnings - One VIP level runs at a time, the highest first: buy VIP+ while you have VIP and your VIP days wait (paused) until VIP+ ends - !vip (or !shop) in Discord: your VIP days per level and your store link (set in the editor) - Discord roles and private messages, boost rewards, gifts, streaks, free trial - VIP codes for giveaways, partners and streamers (/redeem) ADMIN - Kick, ban, mute (also in Discord), warnings and staff notes, from the game, the console and Discord - Tickets in private Discord channels; reports (/report, F7) open a ticket for the staff (several reports about the same player go to the same ticket) - Restart with countdown, maintenance mode, announcements - Error alerts and plugin control from Discord, Rust update alert, new account checks FEED - Logs to Discord channels: connections, chat, kills, raids, building, admin commands, teams, rare items - Personal Discord alerts by private message (raid, offline death, decay, cupboard, queue), chosen with !alerts or in the panel - Staff chat between game and Discord, private voice channels for team or clan - Wipe announcements and an automatic map vote X days before the wipe (fixed or random seeds; !mapvote.force starts it now), with the chosen map announced when it ends - Log channels can be created for you (one option in the editor) STATS - Kills, K/D, headshots, longest kill, streaks, time played, farm, raids, PvE, events - Rankings for the wipe, the week and all time; clan and team rankings - Weekly and end-of-wipe results posted to Discord, with image cards - Teams from Discord: !team.create, !team.invite, !team.leave COMMUNITY - Coins for playing, daily streaks and voting; VIP shop (!coins shows your balance and the shop); daily jackpot - Giveaways, suggestions (posted to a Discord channel, staff answers with buttons) - Coin rewards for the best players and clans of the week and the wipe === SETUP === About 10 minutes, no JSON editing. 1. Put Relay.cs in oxide/plugins (or carbon/plugins). The console says "No bot token yet". 2. Create the bot: discord.com/developers/applications > New Application > Bot > Reset Token > copy the token. Never share it. 3. In the server console: relay.token <your token> Relay turns on the "Server Members" and "Message Content" intents by itself. If the console says it couldn't, turn them on in the same Bot page. 4. The console shows an invite link (relay.invite shows it again). Open it and add the bot to your Discord server. 5. In any channel of your Discord, type !setup (owner, Administrator or Manage Server). The bot sends you the editor file by private message. No message? Turn on Direct Messages for your Discord server (server name > Privacy Settings) and type !setup again. 6. Open the file, choose Quick setup and look at the list of roles, categories and channels (keep, rename, pick one you already have, or leave out). Change anything else you want, then Export. 7. Send the exported file back to the bot in the same private chat. It creates what you chose and connects everything. 8. Link your own account: type /link in game, then !link in Discord; the bot messages you privately, send it the code. /panel opens the in-game panel. Later: !editor opens the editor again with your current settings, !editor undo goes back to before the last change, relay.status shows if everything is working. Main console commands: relay.token, relay.status, relay.invite, relay.reconnect, relay.find, relay.unlink, vip.add / vip.info / vip.list, coins.give / coins.info, jackpot.info. Main game commands: /panel, /link, /vip, /redeem, /report, /ticket, /stats, /top, /coins, /vipshop, /jackpot, /voteclaim, /suggest, /alerts. All commands can be renamed in the editor. === PERMISSIONS === relay.admin.kick, relay.admin.ban, relay.admin.mute, relay.admin.warn, relay.admin.note, relay.admin.info, relay.admin.players, relay.admin.reports, relay.admin.say, relay.admin.restart, relay.admin.maintenance, relay.admin.maintenance.join, relay.admin.immune, relay.admin.bypass: staff tools relay.vip.admin: manage VIP from the game relay.feed.staffchat: staff chat relay.panel.teleport: teleport buttons in the panel Discord staff is set by Discord roles in the editor. === EXTERNAL SERVICES === Relay contacts these services only for the features that use them: - Discord API (always): the bot connection, messages, roles, channels and images. - Steam (steamcommunity.com): player avatars for the image cards. Steam Web API only if you enter your own key (new account and ban checks). - api.steamcmd.net: the "Rust update released" alert (can be turned off). - ip-api.com: only if you turn on "show the country" in the connection log (off by default). It sends the player's IP. - rustmaps.com: only if you enter a RustMaps API key (map image in the wipe announcement). - Vote sites (such as rust-servers.net): only if you set them up for vote rewards. No data is sent anywhere else. No license checks, no telemetry. === COMPATIBILITY === Oxide and Carbon (tested on both). Optional: Clans (for clan rankings; teams are used without it), BetterChat (VIP chat tag). For developers: an API and hooks (OnRelay...) to add Discord commands, profile pages and events from your own plugins. Made with AI assistance, then tested in-game and with automated tests on both Oxide and Carbon.Free -
Version 1.6.2
887 downloads
Cupboard authorization Authorize once — the whole base follows In vanilla, the tool cupboard grants exactly one thing: the right to build. Your team still needs the code for every door, still has to be added to every turret by hand, and still keeps all of it after they walk away. This plugin makes the cupboard list mean what players already assume it means — turrets, SAM sites, locks, chests and furnaces all follow it, and every one of them revokes the moment a name comes off. 9 Permissions, one per feature 7 Settings in the in-game menu 8 Container types gated out of the box 0 Dependencies ✓Turrets follow the cupboard — existing ones the moment you authorize, new ones the moment they are placed ✓Locks open without the code — and changing that code doesn't lock your team back out ✓Chests and furnaces gated by the cupboard — a stranger who walks into an open base loots nothing ✓Teams and clans, both directions — join and you are in everywhere, leave and you are out of everything ✓Nine separate permissions — ship one feature at a time, or exclude a whole group from the plugin 01 — Access One list, four kinds of access The cupboard's authorized list becomes the single source of truth for the base. Each of the four behaviours below is its own switch and its own permission, so you can take just the ones you want. Turrets and SAM sites Authorize a player on the cupboard and every AutoTurret around it adds them. Place a new turret and it comes online already holding the full list — nobody stands there clicking through names. SAM sites hold fire on a helicopter whose pilot is authorized on the cupboard. Locks, without handing out the code Authorized players open code locks and key locks on the base directly. The lock's owner has to be on the same cupboard, so a lock placed by an outsider stays shut. And when the owner sets a new code, everyone on the cupboard is re-added as a guest in the same instant — changing your code no longer means re-telling six people what it is. Containers that check the cupboard Boxes, lockers, fridges, dropboxes, stashes, composters and coffins are gated by the cupboard out of the box — eight prefabs, and the list is yours to edit, so quarry hoppers or any other container can join it. Furnaces are a separate switch and cover every oven on the map with no list to maintain. Revocation that actually revokes Take one name off the cupboard and that player is pulled out of the surrounding turrets and out of every lock's guest list at the same time. Clear the whole cupboard list and the turrets drop back to their owner alone and the guest lists are wiped. 02 — Groups Teams and clans keep themselves in sync The usual routine — recruit someone, then run around the base authorizing them on four cupboards — disappears. So does the part everyone forgets: taking it all back afterwards. Joining authorizes you everywhere Accept a team invite and you are added to every cupboard where a teammate is already authorized — and to the turrets and locks around them. Authorize yourself on a new cupboard and the rest of the team comes with you in the same tick. Clans are treated the same way If a Clans plugin is installed, clan membership counts exactly like a Rust team: a new member is authorized where their clan already is, a member who is removed loses it, and a disbanded clan clears out completely. No clan plugin, no problem — nothing here is a dependency. Leaving takes it all back Leave, get kicked, or watch the team disband, and the access goes with it — cupboards, turrets, lock guest lists. On a cupboard the leaver owns, it is the former teammates who are removed instead. The owner never loses their own base. 03 — Building The ten-minute demolish window, removed Misplacing a wall and having to wait out a decay timer is the oldest complaint in the game. One switch ends it — without handing your base to whoever walks in with a hammer. Your own parts, demolishable forever Blocks you placed stay demolishable for as long as they stand, not for ten minutes. It applies to what is already on the map, not just to what you build next. And nobody else's Demolishing is restricted to whoever placed the block. A teammate cannot take down your walls, which is the reason most servers refuse to touch this setting at all. The switch is live — flip it in the menu and the whole map changes with it, no restart. 04 — Limits Caps on how far a base can spread Making authorization powerful is only half of it. The other half is deciding how many people get to hold that power, and finding out when someone tries for more. A hard cap per cupboard Eight by default, typed straight into the menu. It holds against every route in — pressing authorize, being assigned by the owner, or arriving through a team. When a team is too large to fit, the player is told by name who was left out and where the count stopped. A separate cap per turret AutoTurrets get their own number, so a base that runs twenty turrets cannot quietly turn into a twenty-name access list. Manual authorization on a full turret is refused too. Or no friend authorization at all One config switch takes the cupboard's own assign button out of play, for solo-only and duo servers where sharing a base is the thing you are trying to prevent. Discord tells you when someone tries Paste a webhook URL and every attempt to push a cupboard past its cap arrives as an embed: who tried, whose cupboard it was, both Steam profiles linked, a ready teleportpos command for the exact spot and the server name. Rate-limited to one message per player every five seconds, so a determined clicker cannot flood the channel. Reliability Safe to install mid-wipe ✓Existing bases are caught up on load — every cupboard on the map is read at startup and its authorized players are pushed into the turrets and locks around it. Nobody has to re-authorize anyone ✓Every setting applies live — the menu writes to the config and the change takes effect on the spot, including the demolish rule ✓The settings menu is permission-gated end to end — the console command behind it re-checks on every click, so a player who guesses the command name changes nothing ✓Features that are off cost nothing — turning off turret handling unsubscribes the SAM hook entirely instead of leaving it running ✓No dependencies — runs on Oxide and Carbon, uses a Clans plugin if one is there and never asks for it Commands One command, nine permissions Players never type anything. Every permission is registered for you on load. /tssettingsOpen the settings menu — cupboard capacity and six switches, no config file tcauth.useOpen the settings menu and change the settings tcauth.auth.useGets authorized automatically with their team or clan tcauth.turret.useAdded to AutoTurrets, and SAM sites hold fire on their helicopter tcauth.lock.useOpens code locks and key locks on the base without the code tcauth.chest.useRestricted to containers on cupboards they are authorized on tcauth.furnace.useRestricted to furnaces on cupboards they are authorized on tcauth.removebp.useCan demolish the building parts they placed at any time tcauth.bypassTreated as holding every permission at once, and ignores both capacity caps tcauth.ignoreThe plugin skips this player entirely — vanilla rules, no bonuses, no restrictions Questions Before you buy Everything is switched on, but my team isn't being authorized. What am I missing?The permission. Team members need tcauth.auth.use before the plugin will touch them — grant it to the default group and it works for everyone. The sync then fires on two events: someone accepting a team invite, and someone authorizing on a cupboard. Do I grant tcauth.chest.use, or take it away?Grant it to the players you want restricted. Chest and furnace are the two permissions that limit rather than give — a player without them loots any container on any base, exactly like vanilla. A player is on my cupboard but the code lock still asks for the code.Three things have to line up: the player holds tcauth.lock.use, the person who placed the lock is authorized on the same cupboard, and the lock is within 18.5 m of it when the authorization happens. That last one matters on sprawling compounds — a gate far from the cupboard is not picked up. If I change my code, does my team get locked out?No. Setting a new main code re-adds everyone authorized on the cupboard to that lock's guest list in the same action. Guest codes are left alone. Someone left my team. Do they keep the access?No — leaving, being kicked and the team disbanding all revoke it: off the cupboards, out of the turrets, out of the lock guest lists. Clan removals behave the same. Access is only kept where another authorized player is still their teammate. Can I add containers that aren't in the default list?Yes. The list is short prefab names in the config — eight are shipped, and anything that is a storage container can be added, quarry and pumpjack hoppers included. Furnaces need no list at all: one switch covers every oven. Can I stop players from authorizing their friends entirely?Yes, one config switch removes the cupboard's assign button. That is separate from the capacity number, so you can also just set the cap to 1. What happens if I unload the plugin?The restrictions stop immediately — containers, furnaces and SAM behaviour go back to vanilla on the spot. Access already written onto entities stays, because Rust stores it there and not in the plugin: names already added to a turret or a lock's guest list remain until they are removed in game. Building parts stay demolishable for their owner until the next server restart.$11.99 -
Version 2.5.1
1,335 downloads
Smelting & cooking control Quick smelt as a rank, not a server setting Speed, output and fuel burn are set per permission and per cooker — a large furnace behaves one way for your default group and another for VIP, and the furnaces standing in monuments get a tier of their own. Grant a rank and the ovens that player already placed change on the spot, still burning. Everything is edited from an in-game menu. 8 Cookers supported out of the box 9 Settings per cooker, per rank 3 Tiers preconfigured, unlimited more 0 Dependencies ✓Speed, output and fuel burn — three independent multipliers per cooker ✓Ranks apply instantly — existing ovens switch tier the moment the permission lands ✓Cooking with no fuel at all — including electric furnaces with no power ✓A separate tier for ownerless ovens — monument furnaces don't inherit anyone's rank ✓One-click reorganize button inside the oven — load it, fuel it exactly, empty it ✓A live line telling you when it's done — and whether the fuel or the output space runs out first ✓Ovens that feed themselves — wood in from the boxes next to them, metal out into the same boxes 01 — Tiers A furnace that knows who placed it Every oven is matched to its owner's permission when it spawns, so the same building looks identical and behaves differently depending on who built it. Per rank, per cooker Not one blanket smelt rate. A rank sets its own numbers for the small furnace, the large furnace, the electric furnace, the refinery, campfires, the BBQ, the hobo barrel and the fireplace — eight cookers, nine settings each, per tier. Grant a rank, the ovens change immediately Permissions and groups are watched live. Sell VIP at 2am and the furnaces that player left burning speed up right then — no relog, no re-placing, no server restart. Revoke it and they drop back just as fast. Ownerless ovens get their own tier Furnaces and campfires that came with the map or with an event have no owner and therefore no rank. A dedicated static tier covers exactly those, so a monument furnace can stay at 1x while your players' ovens run at 4x — or the other way around. 02 — The dials Three multipliers that don't overlap Speed, yield and fuel are separate problems, so they're separate numbers. Combine them into anything from a slightly generous furnace to one that never needs wood. Quick smelt Scales how fast the oven ticks. At 4x an ore stack finishes in a quarter of the time — and everything else about the oven, including charcoal, stays proportional. Output, with fractions that aren't thrown away More metal out of the same ore. Set 1.5x and the leftover halves are carried over and paid out as whole items later, so a fractional multiplier really is 1.5x over a stack instead of quietly rounding down to 1x on every tick. Fuel burn Make wood last twice as long, or twice as short. Independent of speed, so a fast furnace doesn't have to be a hungry one. Or no fuel at all One toggle and the oven runs empty — put ore in, take metal out, no wood involved. Electric furnaces get the same treatment and cook without being wired to anything, which is the version people actually ask for. And a multiplier for one resource High quality ore can smelt at half speed while everything else runs at four times, or give double metal without touching the rest of the economy. Any shortname goes into Multipliers for a single raw item with its own speed and yield, multiplied on top of the tier. 03 — Reorganize One button instead of thirty drag-and-drops A small icon appears inside the oven interface for ranks you enable it for. Pressing it does the whole loading routine at once. Fills, fuels and empties in one press Ore goes from your inventory into the oven, finished output comes back out to you, and the wood is trimmed to exactly what this batch needs — the surplus is handed straight back rather than sitting there burning. The fuel maths accounts for your rank The amount of wood it leaves is calculated from that oven's real smelting speed and temperature, so a VIP furnace running at 4x isn't loaded with four times the wood it will actually burn. 04 — Hands off Ovens that run themselves Three switches per rank, per cooker. Turn them on for VIP and their base stops being a queue of furnaces waiting to be poked. A line that says when it's done Open an oven and it tells you the time left in green. It turns yellow and counts down to the moment the wood runs out, or to the moment the output slots fill up, whichever comes first. If the oven is already stuck it says so in red instead of pretending it's working. Wood in, metal out, without the player An oven out of fuel takes what it needs from a box standing next to it, and finished bars and charcoal go back into a box instead of clogging the output. It only touches boxes belonging to the same owner, only what the current batch needs, and only inside the radius you set. Off when there's nothing left to smelt The last ore turns into metal and the furnace shuts down instead of burning through the rest of the stack. Pull the ore out mid-batch and it stops the same second. 05 — Setup Configured by looking at things Three chat commands and a menu. The config file exists, but you shouldn't need to open it. Menu: rank, then cooker, then numbers Pick a permission, pick a cooker, set three values and six toggles. Every change is saved and pushed to every matching oven on the map right away — including the ones currently burning. Any cooker, including modded ones Look at an oven that isn't in the list and add it with a command — it appears under every tier with its in-game name, ready to configure. Custom furnaces from other plugins work the same way, as long as they're built on the game's own oven type. Reliability Built to be left alone ✓No dependencies — nothing to install alongside it ✓Unloads back to vanilla without a restart — burning ovens are restarted on plain game rules and carry on cooking ✓Charcoal and byproducts behave exactly as vanilla — the game's own byproduct rules are kept, including the charcoal rate of each oven ✓Other plugins keep working — the standard fuel-consumption hooks are still called, so anything listening to them isn't cut out ✓Multipliers can't be set to zero — a typo can't freeze every furnace on the server ✓Destroyed ovens are forgotten immediately — no growing table of dead entities Commands & permissions Three admin commands, none for players All three require setupfurnaces.use; admins have access anyway. Players never type anything. /fsetupOpen the setup menu /faddLook at a cooker to add it to every tier /fremoveLook at a cooker to drop it from the list setupfurnaces.useAccess to the setup menu and commands setupfurnaces.staticThe tier for ovens with no owner. Never grant this one to a player setupfurnaces.defaultVanilla speed, with the reorganize button and no-fuel cooking on setupfurnaces.vip4x smelt speed on every cooker. Rename it, retune it, or add more tiers Questions Before you buy Does a player have to re-place their furnaces after getting VIP?No. Granting or revoking a permission, and adding or removing someone from a group, re-applies the tier to every oven that player owns, right then. What about furnaces in monuments and event ovens?They have no owner, so they use the static tier, which you configure separately. Don't grant that permission to anyone — it exists to describe ownerless ovens, not people. A player has two tiers. Which one applies?The one further down the config list, so keep your tiers in ascending order and the top rank last. Is 1.5x output actually 1.5x, or does it round down?It's actually 1.5x. Fractions left over from each tick are carried and paid out once they add up to a whole item, so fractional multipliers aren't silently lost. Which boxes will an oven pull fuel from?Only boxes with the same owner as the oven, only inside the radius you set in the config, and only the amount the current batch actually needs. Someone else's box next door is never touched. Can an electric furnace run without electricity?Yes, with the no-fuel toggle on for that tier and that cooker. What happens to ovens if I unload the plugin?Everything burning is restarted on vanilla rules and keeps cooking. No restart needed, nothing stuck on. Will it conflict with another smelting plugin?Two plugins both rewriting smelting will fight, as always — run one. Plugins that only listen to fuel consumption are fine: those hooks are still fired.$14.99- 125 comments
- 5 reviews
-
- 5
-
-
-
- #furnace
- #quick smelt
- (and 17 more)
-
Version 2.0.1
181 downloads
Zones and areas Draw a zone where you stand — and let every plugin see it A safe area at the trader, an arena with damage on, a poisoned crater that drains health: you make each one in game, watch it as a sphere around you, and drag the radius until it fits. Other plugins read the same zones through a ZoneManager compatible API, so your event plugin knows exactly when a player walks in. 28 API methods 7 Zone hooks 11 Chat commands 0 Dependencies ✓Resize a zone while looking at it — the sphere follows every step you take ✓Three ready templates — safe, arena and event, one click each ✓Six effects inside a zone — healing, damage, radiation, speed, warmth, full stomach ✓Drop in for ZoneManager — same hook and method names, plugins work as they are ✓Nothing to edit by hand — menu, chat commands and live preview, config stays untouched 01 — Making zones Stand there, name it, done Walk to the spot, type one command or press one button, and the zone exists. No coordinates typed by hand, no server restart, no guessing what a radius of eighty actually covers. Edit it in the world A sphere is drawn around the zone with its name and current size. Buttons under it change the radius in steps of one and ten, drop the centre where you stand, save or roll back. Only you see it, and cancel restores the size and position you started with. The zone drawn around you while you change its radius, with the enter message players see Templates instead of seven fields Safe, arena and event come preconfigured. One button in the menu creates a zone from a template where you stand, and an existing zone takes a template with a single command. Templates live in the config, so your own presets sit next to them. A list that stays usable at thirty zones Search by name, type or id. Sort by name, type, radius or distance from you. Every row shows the type and the size and carries a teleport button, so checking a zone on the far side of the map takes one click. Every zone with its type and size, search, sorting and a teleport button on each row Copy what already works A tuned arena becomes the next arena with one command: the copy lands at your feet with every flag and effect carried over, ready to be renamed. 02 — What a zone does Rules and effects that hold inside the border Each zone decides who may hurt whom, and what happens to everyone standing in it. Both parts are switches in the same screen, applied the moment you press them. Damage rules per zone Players, player structures, NPCs and the patrol helicopter, four independent switches. A safe area at the trader and an arena two hundred metres away can hold opposite rules on the same map. Six effects on everyone inside Health per second, positive or negative · radiation · movement speed · bonus maximum health · warmth · hunger and thirst held full. A healing camp, a snow shelter, a radioactive pit or a sprint arena is one zone and no extra plugin. Admins in god mode are left alone. Players see where they are The zone type sits on screen in your colour, and entering or leaving pops a message you write yourself. Zones can also be drawn as a visible dome and marked on the map, both optional per zone. Overlapping zones behave Walk out of a small zone inside a bigger one and the plugin shows the one you are still standing in, instead of telling you that you left for the open world. One screen per zone: damage rules on top, effects underneath, applied the moment you press them 03 — For other plugins A ZoneManager replacement, not another island Hooks and methods carry the names ZoneManager uses, so a plugin written for it works here without waiting for its author. Zones are addressed by a readable id you choose, for example event_arena, instead of a random number. Events you can listen to OnEnterZone · OnExitZone · OnEntityEnterZone · OnEntityExitZone · OnZoneCreated · OnZoneUpdated · OnZoneErased Ask a zone anything Who is inside right now, players and entities separately, is this position or this player in a zone, which zones cover a point, name, type, radius, location and the whole field list. Twenty eight methods in total, with no allocation variants for the ones called every tick. Zones that clean themselves up An event plugin can raise a temporary zone for the length of a fight. It never touches the config and disappears the moment that plugin unloads, so a crashed event leaves no arena behind. Hooks Every id that crosses the API is a string: the readable id from the zone field Zone ID for other plugins, or the zone number when that field is empty. Both forms are accepted by every method. OnEnterZone (string zoneId, BasePlayer player) A real player walked in. OnExitZone (string zoneId, BasePlayer player) And walked out. OnEntityEnterZone (string zoneId, BaseEntity entity) An NPC, a vehicle or a dropped item entered. Players never come through here. OnEntityExitZone (string zoneId, BaseEntity entity) It left. OnZoneCreated (string zoneId) A zone was made, from the menu or through the API. OnZoneUpdated (string zoneId) A field or a flag changed. Editing never fires fake enter and exit events. OnZoneErased (string zoneId) The zone is gone. Ask a zone GetZoneIDs () → string[] Every zone id. GetZoneIDsNoAlloc(List<string> list) fills your own list instead of allocating. CheckZoneID (string zoneId) → object The id of the zone when it exists, null otherwise. The cheapest way to test an id. GetZoneName (string zoneId) → object The name, null when there is no such zone. GetZoneType (string zoneId) → object The type label, null when there is no such zone. GetZoneRadius (string zoneId) → object Radius in metres as a float, null when there is no such zone. GetZoneLocation (string zoneId) → Vector3 Centre of the zone, Vector3.zero when it does not exist. ZoneFieldList (string zoneId) → Dictionary<string, string> Every field of the zone as text: ID, name, type, color, radius, location, visible and the flags. Null when there is no such zone. ZoneFieldListRaw () → List<string> The names of the fields and flags a zone has, for building your own editor. IsPositionInZone (string zoneId, Vector3 position) → bool Is the point inside that zone. IsPositionInAnyZone (Vector3 position) → bool Is the point inside any zone at all. GetZonesAtPosition (Vector3 position, List<string> results) Adds the id of every zone covering the point to your list. GetPlayersInZone (string zoneId) → List<BasePlayer> Players inside right now, as a fresh list. GetPlayersInZoneNoAlloc(string zoneId, List<BasePlayer> list) fills yours. GetEntitiesInZone (string zoneId) → List<BaseEntity> NPCs, vehicles and dropped items inside. GetEntitiesInZoneNoAlloc(string zoneId, List<BaseEntity> list) fills yours. IsPlayerInZone (string zoneId, BasePlayer player) → bool Is the player inside right now. IsEntityInZone (string zoneId, BaseEntity entity) → bool Is the entity inside right now. GetPlayerZoneIDs (BasePlayer player) → string[] Every zone the player is standing in. GetEntityZoneIDs (BaseEntity entity) → string[] Every zone the entity is in. Flags Flag names are candamageplayers, candamagestructures, candamagenpc, candamagehelicopter and visible. Case does not matter. An unknown name writes a warning to the console and reads as false. HasFlag (string zoneId, string flag) → bool Is the flag on for that zone. PositionHasFlag (Vector3 position, string flag) → bool True when any zone covering the point has the flag on. PlayerHasFlag (BasePlayer player, string flag) → bool True when any zone the player stands in has the flag on. AddFlag (string zoneId, string flag) → bool Turns the flag on, saves a permanent zone to the config and fires OnZoneUpdated. RemoveFlag (string zoneId, string flag) → bool Turns it off the same way. Create and remove args is a flat list of field and value pairs: name, type, color, radius, visible and any of the flags. Booleans take true, false, 1 or 0. An unknown field or a radius that is not a number is skipped with a warning, the rest of the call still applies. CreateOrUpdateZone (string zoneId, string[] args, Vector3 position = default) → bool Creates the zone when the id is new and updates it otherwise, then writes it to the config. A readable id becomes the zone id other plugins see, a number becomes its zone number. The position moves the centre when given. CreateOrUpdateTemporaryZone (Plugin owner, string zoneId, string[] args, Vector3 position = default) → bool The same zone, but it lives in memory only: never written to the config and erased the moment the owner plugin unloads. Another plugin cannot update it, the call returns false. EraseZone (string zoneId) → bool Deletes the zone, false when there is none. Reliability Safe on a live server ✓Zones survive restarts and plugin reloads, and everyone standing inside is picked up again ✓Unloading removes every dome, marker and interface, leaving the map vanilla ✓Editing a zone does not fire fake enter and exit events at the plugins listening to it ✓The menu is behind a permission, so a random player cannot delete your safe zone ✓Detects TruePVE and steps aside instead of fighting it over damage ✓Works on Oxide and Carbon, no dependencies Commands Everything from chat /zmOpen the zone menu /zm create <name> [radius]New zone where you stand /zm edit <zone>Resize and move it in the world /zm radius <zone> <value>Set the radius by number /zm move <zone>Move the centre to you /zm copy <zone> [name]Copy it to your position /zm apply <zone> <template>Put a template on a zone /zm templatesList the presets /zm listAll zones with size and headcount /zm hereWhich zones cover your position /zm tp <zone>Teleport to a zone /zm remove <zone>Delete it A zone is addressed by its number, by the readable id you gave it for other plugins, or simply by its name. Permission managezone.useOpens the menu and the commands, admins have it by default Questions Before you buy Will my plugin that needs ZoneManager work with this? If it talks to zones through the usual hooks and methods, yes. The names are the same, so pointing it at ManageZone is enough. Only zones you create here exist, ZoneManager data is not imported. Do I need TruePVE or anything else? No. The plugin has no dependencies. If TruePVE is installed, ManageZone leaves damage decisions to it instead of overriding them. Are the zones round only? Yes, a zone is a sphere with a centre and a radius. Overlapping zones are handled correctly, so a large area with a smaller one inside works. What happens if I remove the plugin? Domes, map markers and the interface go away with it and the map is vanilla again. Your zones stay in the config, so putting the plugin back restores them. Can a moderator manage zones without full admin rights? Yes, grant managezone.use to the group and the menu opens for them. Does it work on Carbon? Yes, the same file runs on Oxide and Carbon.$12.99 -

Version 1.6.13
1,500 downloads
Gather & loot rates Rates that belong to the player, not to the server Server-wide multipliers give everyone the same wipe. This plugin attaches rates to permissions instead: a default tier, a VIP tier, as many tiers as you sell. Every gather source is covered — nodes, quarries, the excavator, the metal detector, farming, tea, even NPC corpses — and every loot container is multiplied per item category, or per exact item. All of it edited in a UI, applied the moment you type the number. 14 Item categories, each with its own rate 7 Production sources with their own multiplier 4 Fields on every per-item override 0 Dependencies ✓Unlimited permission tiers — a different wipe for every rank you sell ✓Every source, not just trees and nodes — quarries, excavator, metal detector, farming, tea, NPC corpses ✓Guaranteed drops per item — "always 5 scrap, 10% chance of 20" without touching a loot table ✓Loot and junk pile respawn speed — separately, live, no map restart ✓Edited in-game — type a number, it's live and saved 01 — Tiers One server, as many rate sets as you sell A tier is a permission plus a full set of rates. Two come preconfigured — a 2x/3x default and a 3x/5x VIP — and you add as many as your shop needs. No permission, no change Players outside every tier play vanilla rates, untouched. Nothing is applied server-wide, so you can run the plugin on a 1x server and sell 2x as a rank. Stack tiers, or don't By default a player with several tiers gets one of them. Flip a single switch and every rate they hold is summed instead — so a booster permission can add on top of a rank rather than replace it. Everything from one screen Page through your tiers with two arrows. Global rates, every production source, all 14 categories and the per-item list are on the same screen, each an input field. Type a value and it's active and written to the config — no reload, no o.reload, no file editing. 02 — Loot Containers that pay what you decide Barrels, crates, elite crates, hackable crates, supply drops — anything with loot in it goes through a global rate multiplied by the rate of that item's category. 14 categories, 14 dials Triple the components but leave weapons alone. Halve ammunition while resources stay at 5x. Weapons, construction, items, resources, attire, tools, medical, food, ammunition, traps, misc, components, electrical and fun each carry their own multiplier on top of the global one. NPC corpses count the killer Scientists, tunnel dwellers and every other NPC drop loot scaled to the rates of whoever killed them — tracked from the kill to the corpse, so a VIP's kill pays VIP rates even if someone else opens the body. Shot open or opened by hand Barrels broken with a rock and crates opened normally both go through the same multipliers, credited to the player who did it — and each container is processed exactly once, never twice. Respawn speed, live Two multipliers — one for junk piles, one for crates and barrels — and the world's spawn timers are rebuilt the moment you change them. No wipe, no restart, and the vanilla values are put back when the plugin unloads. An exclusion list for the things you don't touch Name a container prefab and it stays vanilla — useful for event crates and custom loot that another plugin already fills. 03 — Gathering Every way a player earns a resource Most rate plugins stop at trees and ore. This one follows the resource wherever it comes from, and gives the slow, expensive sources their own multiplier on top. Nodes, trees and the finishing bonus Every hit, the bonus for finishing a node, and the leftovers that spill when it breaks — all three are scaled, so the numbers stay consistent instead of the bonus quietly staying at 1x. Quarries and the excavator pay their operator A mining quarry, a survey-charge pump jack and the Giant Excavator each have their own production multiplier — and the output is scaled by the rates of the player who switched it on, not by a server-wide number. Jackhammer, chainsaw and the metal detector Power tools get a multiplier of their own, so you can make them worth their fuel — or deliberately not. Metal-detector digs are boosted too, which almost nothing else covers. Tea strength as a rate The tea multiplier scales the effect value of the tea itself, not the number of leaves. A VIP's ore tea simply works harder than everyone else's. Farming and hand-picked resources Harvested plants and everything picked up off the ground — hemp, mushrooms, corn, wood piles — run through the same rates as everything else. 04 — Per item One item out of step with the rest Category rates handle the broad strokes. When a single item needs its own rule, it overrides everything above it. Its own multiplier, ignoring everything else Run resources at 10x and keep sulfur at 2x. An item with an override takes its own number and nothing else — no compounding surprises. Guaranteed amounts with a jackpot chance For loot, set a minimum and a maximum with a percentage chance for the big one. Every barrel gives exactly 5 scrap, and 10% of them give 20 — a flat, predictable economy you can actually price your shop against. Added by clicking an icon The picker filters by all 15 categories and searches display names and shortnames as you type. Click an item to add it, type its rate under the icon, click the red cross to drop it. Long lists paginate at 29 per page. Reliability Built to be left alone ✓No dependencies — nothing to install alongside it ✓Vanilla respawn timings are restored on unload — the plugin remembers what they were before it touched them ✓Every UI change is written to the config immediately — a crash can't lose the tier you just built ✓A bad shortname tells you in chat instead of failing silently or throwing errors into console ✓Respawn boosting is opt-in — off by default, with the safe range stated in the config Command & permissions One command, and the tiers you invent The command name and the setup permission are both configurable. Admins have access regardless. /rsOpen the rate editor gatherlootmultiplier.setupAccess to the editor gatherlootmultiplier.defaultPreconfigured tier — 2x loot, 3x gather gatherlootmultiplier.vipPreconfigured tier — 3x loot, 5x gather. Rename both, or add ten more Questions Before you buy What happens to players with no permission?Nothing at all — they get vanilla rates. That's the point: grant the default tier to the default group for a server-wide rate, or keep it for ranks only. A player has two tiers. Which one wins?The one further down the config list — so keep your tiers in ascending order and the highest rank ends up last. Alternatively, turn on rate summing and every tier they hold is added together instead. Do I have to restart or reload after changing a rate?No. Values from the UI take effect immediately and are saved to the config as you type them. Even loot respawn timing is rebuilt live. Whose rates apply to a quarry or the excavator?The player who switched it on. A VIP's quarry produces at VIP rates while it runs. Can I make a resource drop a fixed amount instead of a multiplied one?Yes, for loot: give the item a minimum, an optional maximum and a chance for the maximum. The multiplier is then ignored for that item and the amount is rolled between the two. Is faster loot respawn safe for my server?It's off by default and it scales the game's own spawn timings rather than spawning extra entities. Stay near the suggested values — extremely low numbers mean more entities alive at once, which costs frames on any server. Will it fight with my other loot plugin?Add that plugin's container prefabs to the ignore list and they pass through untouched.$14.99- 59 comments
- 5 reviews
-
- 2
-
-
- #gather rate
- #loot multiplier
- (and 17 more)
-

Version 1.3.2
393 downloads
Crafting rules Every craftable item, on your terms One crafting speed for everyone, a workbench ladder you can't touch, and a tech tree that hands out everything eventually. Servers that want tiered craft speed, a banned weapon, or an item nobody is allowed to research end up stacking three plugins to get there. This is one file that owns crafting from end to end — speed by permission group, and seven switches on every item in the game. 7 Switches on every craftable item 3 Routes to a blueprint, each closable 2 Speed tiers shipped, add as many as you like 0 Dependencies ✓Craft speed per permission group — name the permission, name the multiplier, it is registered for you ✓Workbench tier per item — raise it, lower it, or take the bench requirement off entirely ✓Research table, blueprint paper and tech tree — three separate switches, because players will try all three ✓A blocked tech tree node doesn't have to wall off the branch — the plugin unlocks around it and charges the right scrap ✓Every craftable item is listed for you — an icon grid with search, no shortname hunting 01 — Speed Faster crafting as something you sell Craft speed is one of the few perks players will actually pay for, and the only one that costs a server nothing to give. Here it is a two-column list: permission on the left, multiplier on the right. As many tiers as your shop has Two come configured — 1.5× for everyone and 3× for VIP — but the list is yours. Write craftcontroller.bronze, .silver, .gold with the numbers you want and the plugin registers every one of them on load. Nothing to declare anywhere else. Worked out per craft, not per session The multiplier is resolved the moment a craft starts, from the item's own base time. Grant a permission mid-wipe and the next thing that player queues is already faster — no relog, no reload. 02 — Items Seven switches on anything with a recipe On first load every craftable item in the game is written into the config with its vanilla values, so there is no list to build and no shortname to look up. Open the menu, click the icon, change what you need. Move an item up or down the bench ladder The plugin takes the workbench requirement off the engine and enforces its own, which is what lets you go both ways: put an AK behind tier 3, or let players craft a tier-2 item with no bench at all by setting it to zero. A player who tries too early gets a game tip naming the tier they need. Block an item outright One toggle and the recipe is closed — caught on both the inventory craft and the crafter itself, so there is no second path in. The player gets a message instead of a silent failure, and it is in the language file like everything else. A default skin, applied on the way out Give an item a skin ID and everything crafted comes out wearing it, held entity included, so it looks right in hand and not just in the inventory. A player who deliberately picked a skin keeps theirs — the default only fills the gap. 03 — Research Closing a door means closing all three There are three ways to learn something in Rust, and blocking one is worth nothing on its own. Each gets its own switch, so you can leave a route open on purpose — researchable from a found blueprint, but never from the tech tree. The table and the paper One switch covers both the research table and studying a blueprint that dropped in loot — the two routes players reach for first, and the pair that plugins usually forget to close together. The tech tree, node by node Mark a node blocked and it cannot be unlocked at the workbench, with a notice on screen and in chat rather than a dead button. And what happens to everything behind it This is the part most plugins get wrong. Block a node in the middle of a branch and you have accidentally banned the whole branch. A second switch decides which you meant: seal the path, or let players through it. Let them through and the plugin rebuilds the unlock itself — it works out which nodes are still needed, prices them in scrap at the correct tier including tax, takes the payment, unlocks them, and tells other plugins it happened through the standard hook so your logging and reward plugins still see it. Reliability Puts the game back ✓Vanilla values are saved before anything is touched — every recipe's original time and bench level go into a data file on first load, and that file is the reference point from then on ✓Unload restores every recipe — times and bench levels are written back from that file and the client is told to go back to normal crafting, so removing the plugin is not a wipe-day job ✓Joining players are handled properly — if someone is still loading their snapshot the plugin waits and retries instead of firing into the void and leaving them with the wrong crafting rules ✓Edits apply live — change a bench level or a block in the menu and it is in force before you close it, on a server full of people ✓Four messages, all translatable — and no dependencies to install alongside it Commands One command, and the tiers you invent Players never type anything — the rules apply to them through the vanilla crafting menu. /craftcontroleOpen the item grid — search, pick an icon, edit its seven settings craftcontroller.useOpen the editor. Server admins have it without being granted anything craftcontroller.default1.5× craft speed as shipped — rename it or change the number craftcontroller.vip3× as shipped, and the template for every extra tier you add Questions Before you buy The workbench labels disappear from the crafting menu. Is that expected?Yes, and it is the trade for being able to move items between tiers at all. Those coloured “requires workbench X” lines are drawn by the client straight from the recipe, so the requirement has to come off the recipe before the plugin can enforce a different one. The rule itself still holds — a player crafting too early is stopped and told which tier they need — but the label is gone until they try. If untouched tier labels matter more to you than per-item tiers, this plugin is the wrong trade. A player is in two speed groups. Which multiplier applies?The last one they match in the config file, not the largest. Write the list slowest first and fastest last and the answer is always the one you want. Do I have to know item shortnames?No. Every craftable item writes itself into the config on the first load with its vanilla values, and the in-game grid shows real item icons with a search box above them. Shortnames are there if you prefer editing the file, but nothing requires it. Can players still find a banned item as a blueprint in loot?The blueprint can still drop, but studying it is refused if you closed that route, and blocking the craft closes it even for a player who learned the item before you installed the plugin. If I block one tech tree node, do I lose everything past it?Only if you want to. That is a separate switch on the same item — leave it off and players unlock straight through the blocked node to what is behind it, paying the correct scrap for the nodes they actually get. Can I let players craft without standing at a workbench?Set an item's bench level to 0 and it crafts anywhere. Do it for everything and you have a no-workbench server without a second plugin. What happens if I remove the plugin later?Every recipe is written back to the values captured before it ever changed anything, and connected players are switched back to normal crafting on the spot. Blueprints players unlocked while it was running stay unlocked — those live in the game's own save, not in the plugin.$8.49