
Search the Community
Showing results for tags 'workbench'.
Found 25 results
-

Version 2.4.11
249 downloads
If you use Oxide, Carbon Aliases if required ! Else ignore this. TechTree is a complete custom techtree system for Rust servers. It can replace the vanilla workbench tech tree, or it can be used as a custom progression layer opened near a workbench. The goal is simple: give server owners a clean in-game way to control progression without spending their life editing giant JSON files by hand. You can keep a mostly vanilla progression, build something fully custom, or mix both: vanilla nodes, custom branches, permissions, rewards, custom prices, custom currencies. Replaces the vanilla workbench tech tree by default. Optional mode where players open the tree with R near a workbench. Supports Workbench Level 1, Level 2, Level 3, and Engineering. Includes an in-game CUI editor for admins. Lets you add, modify, move, and remove nodes directly in game. Supports custom node prices and custom currency items. Supports item icons and custom URL images. Supports localized node names and descriptions. Supports node rewards: ConsoleCommand, ChatCommand, and Economics. Supports branch permissions for restricted progression paths. Supports free unlock and instant unlock permissions. Can recover vanilla nodes after Rust updates. Can freeze a tree so Facepunch updates do not modify your custom layout. Includes a theme editor with palette and node style settings. Provides hooks and API methods for other plugins. Players use TechTree from a workbench. If vanilla replacement is enabled, opening the workbench tech tree opens TechTree instead. If vanilla replacement is disabled, players stand near a workbench and press R to open the TechTree UI. Available tree tabs depend on the workbench: Level 1 workbench: Level 1 tree Level 2 workbench: Level 1 and Level 2 trees Level 3 workbench: Level 1, Level 2, and Level 3 trees Engineering workbench: Engineering tree Nodes clearly show their state: locked, unlockable, unlocked, or restricted by permission. When a player selects a node, the right panel shows the cost, currency, required path cost when relevant, and unlock action. Admins can switch from player mode to edit mode directly from the TechTree UI. The editor works with a draft session: Changes are previewed immediately. Nothing is permanently written until you press Save. Closing or cancelling edit mode discards unsaved edits. Admins can: Add a node on an empty grid cell. Modify an existing node. Remove a node. Move nodes on the grid. Set parent nodes. Set a branch permission. Change item icon or URL image. Set name and description. Set price and currency. Add rewards. Edit the grid size. Reset a tree to vanilla. Recover missing vanilla nodes. Exclude vanilla nodes from a frozen/custom tree. Edit and save themes. This means you can build or adjust a progression tree without leaving the server. TechTree supports local images for node icons. You can place your image files inside the TechTree Images folder and select them directly from the editor. Local images support folders and subfolders, so you can organize icons by category, for example: In the editor, paths are handled relative to the Images folder. Example: is used as: A reload action is available to refresh the image database after adding, removing, or reorganizing image files. This updates the available local images without requiring a full plugin reload. Local images are supported on Carbon and Oxide. On first load, TechTree creates its default data from Rust's vanilla workbench tech trees. Quick difference between vanilla nodes and custom nodes: Vanilla nodes Vanilla nodes come from Rust's original Facepunch tech tree. They have a vanilla ID, which allows TechTree to recognize them later. Because they are linked to Rust's vanilla data, TechTree can synchronize them, recover them, update missing vanilla entries after Rust changes, or exclude them when you intentionally remove them. You can still fully edit vanilla nodes. You can move them, change their price, change their currency, adjust their unlock path, add permissions, add rewards, or remove them from the tree. Use vanilla nodes when you want to keep the familiar Rust progression but customize how it behaves on your server. Custom nodes Custom nodes are created by you inside the TechTree editor. They do not come from Rust's vanilla tree and they do not have a vanilla ID. Because they are fully plugin-side nodes, vanilla synchronization does not restore, recover, or replace them. They belong only to your custom TechTree data. Custom nodes can use the same kind of options as vanilla nodes: price, currency, parents, permissions, rewards, commands, image, name, and description. A custom node can even reproduce a vanilla unlock if you really want to build it that way, although this is usually not the main reason to use them. Custom nodes are mostly useful when you want to create progression that does not exist in the default Rust tech tree, such as custom items, plugin rewards, special server progression, profession branches, VIP paths, economy rewards, command unlocks, or server-specific content. You can mix both types in the same tree. For example, you can keep most vanilla nodes, remove a few unwanted vanilla unlocks, then add custom nodes with rewards or branch permissions. The important rule: Only vanilla nodes need vanilla exclusion logic. If you remove a custom node, it is simply removed from your custom data. If you remove a vanilla node and want it to stay removed, you must exclude it correctly so vanilla synchronization does not bring it back later. There are three important controls: Auto Vanilla Synchronization Useful when you want to keep a tree close to vanilla. Missing vanilla nodes can be imported and conflicts can be handled automatically. Excluded Vanilla IDs Marks vanilla nodes that were intentionally removed from a custom/frozen tree. Disable Future Vanilla Imports Freezes the current workbench tree. Future vanilla additions will not be imported automatically. Important: Exclude from vanilla sync must be used together with Disable Future Vanilla Imports. If Disable Future Vanilla Imports is not enabled, vanilla synchronization can import removed vanilla nodes again later. Safe workflow: Open the TechTree at the correct workbench. Switch to Edit Mode. Open Excluded Nodes. Enable Disable Future Vanilla Imports. Select the vanilla node you want to remove. Click Modify. Enable Exclude from vanilla sync. Confirm. Select the same node again. Click Remove. Press Save. For a fully custom tree: Open Edit Mode. Open Excluded Nodes. Enable Disable Future Vanilla Imports. Click Exclude All. Remove the vanilla nodes you do not want. Build your custom tree. Save. If you want to keep receiving future Facepunch additions, keep Auto Vanilla Synchronization enabled and avoid permanently removing vanilla nodes. The config option "Use Permissions ?" enables TechTree permission checks. This includes the global permissions listed below and the custom branch permissions set on nodes. When "Use Permissions ?" is false: Players can open TechTree without techtree.use. techtree.unlock.free does not apply. techtree.unlock.instant does not apply. Branch permissions are not enforced. When "Use Permissions ?" is true: Players need techtree.use to open TechTree. Players with techtree.unlock.free unlock nodes for free. Players with techtree.unlock.instant skip the unlock timer. Branch permissions are enforced when a node has a custom permission set. Registered global permissions: techtree.use Allows the player to open/use TechTree when "Use Permissions ?" is enabled. techtree.unlock.free Allows the player to unlock nodes for free when "Use Permissions ?" is enabled. techtree.unlock.instant Allows the player to unlock nodes instantly when "Use Permissions ?" is enabled. Branch permissions are custom node permissions. They are not the same thing as techtree.use, techtree.unlock.free, or techtree.unlock.instant, but they still require "Use Permissions ?" to be enabled. A branch permission is a custom permission typed directly on a node in the editor. If a player does not have that permission, the node and its child branch are locked for that player. Example: Recommended workflow: Open the TechTree editor. Select the first node of the restricted branch. Click Modify. Enter your custom permission in the Permission field. Confirm. Save. Grant the permission to the correct player or group. Good examples: Common mistake: Typing the permission in the node editor but never granting it. In that case, the branch stays locked for everyone. Rewards are executed when a player unlocks a node. You can add multiple rewards to the same node. Reward types: ConsoleCommand Runs a server command from the server console. Use this for server/admin actions such as granting permissions, giving items, or running plugin commands. Examples: ChatCommand Runs a command from the player's client. Use this only when the command should be executed by the player. Example: Economics Deposits money into the player's Economics balance. Example value: Important: Most reward actions should use ConsoleCommand. If a command needs server authority, do not use ChatCommand. The playerID placeholder is automatically replaced with the unlocking player's Steam ID. Default configuration: { "Settings": { "Wipe Player Data at Wipe": true, "Time For Unlock Node": 1.0, "Selected Theme": "Default", "Use Permissions ?": false, "Use Economics ?": false, "Replace tree vanilla ? Open with [R] if false": true } } Config notes: Wipe Player Data at Wipe Deletes TechTree player unlock data on a new save. Time For Unlock Node Unlock progress duration in seconds. Selected Theme Active theme loaded from Themes.json. Use Permissions ? Enables the global TechTree permission checks. Use Economics ? The config value exists, but Economics integration is handled through the Economics reward type. Replace tree vanilla ? Open with [R] if false When true, TechTree replaces the vanilla workbench tech tree. When false, players open it with R near a workbench. TechTree creates separate data files for each workbench tree: Player progression is saved separately per player and per workbench. TechTree includes API methods and hooks for other plugins. API methods: API_GetPlayerData(BasePlayer player) // Returns: Dictionary<string, object> Return format: { "workbench": { "Workbench_1": [123, 456], "Workbench_2": [789], "Workbench_3": [], "Engineering": [] } } API_SetPlayerData(BasePlayer player, Dictionary<string, object> apiData) // Returns: bool The plugin cleans invalid node IDs before saving. API_ClearPlayerWorkbenchData(BasePlayer player, Workbench workbench) // Returns: bool Clears the player's TechTree data only for the workbench category matching the provided Workbench. API_ClearPlayerData(BasePlayer player) // Returns: bool Clears all TechTree unlock data for that player. Example API usage: [PluginReference] Plugin TechTree; var playerData = TechTree?.Call("API_GetPlayerData", player) as Dictionary<string, object>; if (playerData != null) { var workbenchData = playerData["workbench"] as Dictionary<string, object>; } Node dictionary format used by hooks: { "id": 123456, "vanillaId": 84, "price": 250, "parents": [111111], "isVanilla": true, "currency": { "itemId": -932201673, "skinId": 0 } } Tree dictionary format: { "workbench": Workbench, "nodes": [ nodeDictionary, nodeDictionary, ... ] } Plugin hooks: // Called before a node is unlocked. OnNodeUnlock(Workbench workbench, Dictionary<string, object> node, BasePlayer player) // Return false to block the unlock. // Return null or true to allow it. // Alternative hook format with the full tree dictionary. OnNodeUnlock(BasePlayer player, Dictionary<string, object> node, Dictionary<string, object> tree) // Return false to block the unlock. // Return null or true to allow it. // Called after a node has been unlocked. OnNodeUnlocked(Workbench workbench, Dictionary<string, object> node, BasePlayer player) // Called after multiple nodes were unlocked through a path unlock. OnPathNodeUnlocked(Workbench workbench, List<object> nodes, BasePlayer player) // The nodes list contains node dictionaries. Example hook: private object OnNodeUnlock(Workbench workbench, Dictionary<string, object> node, BasePlayer player) { int nodeId = Convert.ToInt32(node["id"]); if (nodeId == 123456 && !permission.UserHasPermission(player.UserIDString, "myplugin.allow")) { player.ChatMessage("You cannot unlock this node yet."); return false; } return null; } Example after-unlock hook: private void OnNodeUnlocked(Workbench workbench, Dictionary<string, object> node, BasePlayer player) { int nodeId = Convert.ToInt32(node["id"]); Puts($"{player.displayName} unlocked TechTree node {nodeId}"); } Vanilla-compatible hooks are also called for vanilla nodes where possible: OnTechTreeNodeUnlock(Workbench workbench, TechTreeData.NodeInstance node, BasePlayer player) OnTechTreeNodeUnlocked(Workbench workbench, TechTreeData.NodeInstance node, BasePlayer player, List<ItemDefinition> unlockedItems) More detail : https://github.com/Gdkenni/TechTree-Doc Place TechTree.cs in your server plugins folder. Make sure the file is named exactly TechTree.cs. Load the plugin. Let it generate the config and data files. Open a workbench in game. As an admin, switch to edit mode. Customize the tree. Press Save. Always press Save after editing. Back up oxide/data/TechTree before major progression changes. If you remove vanilla nodes, use Disable Future Vanilla Imports first. If a branch permission locks everyone out, check that the permission was granted. If techtree.use blocks players, check that "Use Permissions ?" is enabled and the permission was granted. Use ConsoleCommand for most rewards. Use ChatCommand only for commands that should be executed by the player. If upgrading from very old versions (before v2), older data files may not be compatible with the revamped system. TechTree is built for servers that want progression to feel intentional. You can keep the familiar Rust workbench flow while changing how players unlock items, what path they follow, what they pay, and what they receive along the way. It works well for: Modded progression servers. Economy servers. Roleplay servers with professions. VIP or group-based branches. Servers that want to reorganize, delay, or remove vanilla unlocks. Send me a private message on Codefling. Send me a message on Discord: gd.kenni$14.99 -
Version 2.0.6
4,751 downloads
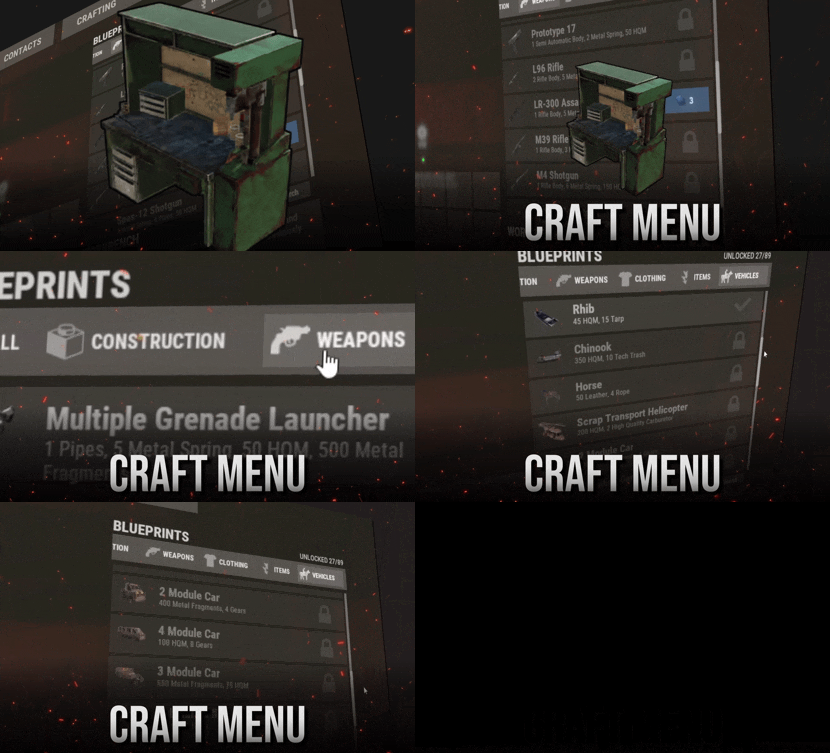
DISCORD · SUPPORT & CUSTOM REQUESTS RustPlugins ● 1,200 members Bug reports, setup questions, or custom development? Reach out to us on Discord. Join Discord Features Your own blueprints, right at the workbench. Players research and craft custom items in a menu that looks like Rust's own crafting screen. That includes uncraftable vanilla items, skinned custom items, vehicles, and deployables. Feels like vanilla Players open a workbench and the menu is there, with categories, search, and a crafting queue they can reorder. Players never need to type a command. Any item, any recipe For each blueprint you set the name, icon, skin, category, tier, research cost, ingredients, craft time, and craft limit. Ingredients can be skinned custom items. Web editor, no JSON Build blueprints in the browser and copy the share code. Run one command in game and the server downloads the config and applies it. You don't need to restart or reload. One-click import Running Portable Vehicles or Place Anything? Pick their items from a list and they become blueprints with the right skin and tier. Click an item again to remove it. Getting Started Up and running in four steps 1 Install Drop CraftMenu.cs into your plugins folder. The config comes with a set of normally uncraftable items, so the menu works right away. 2 Grant the permission DON'T SKIP Players without this permission see the normal workbench. oxide.grant group default craftmenu.use 3 Open a workbench Players see blueprints for that bench's tier and every tier below it. Higher-tier blueprints are marked TIER REQUIRED. 4 Research, then craft Players research each blueprint once. By default it costs scrap at tier 1, basic fragments at tier 2, and advanced fragments at tier 3. Optional plugins: Image Library lets you use image URLs for icons, and Rust Translation API shows ingredient names in each player's language. Permissions Who can do what craftmenu.use Shows the menu at workbenches. Every player who should use CraftMenu needs it. craftmenu.import Opens the Portable Vehicles and Place Anything import menu. Admins have it automatically. craftmenu.config Imports and exports the config with share codes. Admins have it automatically. craftmenu.<category> Lets the player craft from one category, for example craftmenu.vehicles. These only exist when category permissions are turned on. Commands For admins only Players never need these. Tags show where each command works. CONFIG & IMPORT /craftmenu import CHAT Opens the import menu for Portable Vehicles and Place Anything items. /craftmenu export CHAT Shows your current config in a copyable field so you can paste it into the web editor. craftmenu config <code> CHAT CONSOLE Downloads a config from the web editor and applies it immediately. PLAYER BLUEPRINTS craftmenu_admin wipeall CHAT CONSOLE Removes every player's unlocked blueprints. In chat, use /craftmenu wipeall. craftmenu_admin wipe <steamid> CHAT CONSOLE Removes one player's unlocked blueprints. In chat, use /craftmenu wipe. craftmenu_admin unlock <steamid> CHAT CONSOLE Unlocks every blueprint for one player. In chat, use /craftmenu unlock. Configuration Main settings worth knowing Wipe Blueprints at Map Wipe Resets all research on a new map. Off by default. Maximum items in queue How many timed crafts one player can queue at once. The default is 10. Default maximum amount per craft The highest amount per craft. The default is 99, and each blueprint can override it. Categories The category tabs and their icons. Icons can be Rust asset paths, or URLs when Image Library is on. Permissions required for each category Puts each category behind its own permission. Use it for VIP-only items. Admins ignore research and craft costs Lets admins test new blueprints without collecting the resources. Translate resource item names Shows ingredient names in each player's language. Requires Rust Translation API. Sound Effects Plays click and craft sounds in the menu. On by default. FAQ Frequently asked questions Q. Players open a workbench but the menu doesn't show. Why? They're missing craftmenu.use. Grant it to the default group. The menu also stays hidden on the workbench upgrade screen, which is expected. Q. How do I edit blueprints without touching JSON? Use the web editor at tools.rustplugins.net/craftmenu and copy the share code. Then run /craftmenu config <code> in game. To keep editing your live config, run /craftmenu export first and paste the result into the editor. Q. How do I give an item a custom icon? Icons come from skin IDs. Upload your image as a Workshop skin with SkinUploader.zip, then put the skin ID on the blueprint. The crafted item gets that skin too. Q. Can custom items be crafting ingredients? Yes. In the blueprint's resources, use the item's skin ID instead of a shortname. CraftMenu then only accepts items with that exact skin. Q. How do craft times work? A blueprint with a craft time of 0 crafts instantly. Anything above 0 goes into a queue that works like Rust's own: players can cancel jobs or move them to the front. A player's queue is cleared when they die or disconnect. Q. Can I make some items VIP only? Yes. Put them in their own category, turn on category permissions, and grant craftmenu.<category> to your VIP group. Other players still see the items but can't craft them. Q. Do unlocked blueprints carry over between wipes? By default, yes. Turn on Wipe Blueprints at Map Wipe to reset them with each new map. You can also wipe them manually with craftmenu_admin wipeall. Have more questions? Reach out to us on Discord if you need support or have a custom request.$17.99 -

Version 1.3.2
393 downloads
Crafting rules Every craftable item, on your terms One crafting speed for everyone, a workbench ladder you can't touch, and a tech tree that hands out everything eventually. Servers that want tiered craft speed, a banned weapon, or an item nobody is allowed to research end up stacking three plugins to get there. This is one file that owns crafting from end to end — speed by permission group, and seven switches on every item in the game. 7 Switches on every craftable item 3 Routes to a blueprint, each closable 2 Speed tiers shipped, add as many as you like 0 Dependencies ✓Craft speed per permission group — name the permission, name the multiplier, it is registered for you ✓Workbench tier per item — raise it, lower it, or take the bench requirement off entirely ✓Research table, blueprint paper and tech tree — three separate switches, because players will try all three ✓A blocked tech tree node doesn't have to wall off the branch — the plugin unlocks around it and charges the right scrap ✓Every craftable item is listed for you — an icon grid with search, no shortname hunting 01 — Speed Faster crafting as something you sell Craft speed is one of the few perks players will actually pay for, and the only one that costs a server nothing to give. Here it is a two-column list: permission on the left, multiplier on the right. As many tiers as your shop has Two come configured — 1.5× for everyone and 3× for VIP — but the list is yours. Write craftcontroller.bronze, .silver, .gold with the numbers you want and the plugin registers every one of them on load. Nothing to declare anywhere else. Worked out per craft, not per session The multiplier is resolved the moment a craft starts, from the item's own base time. Grant a permission mid-wipe and the next thing that player queues is already faster — no relog, no reload. 02 — Items Seven switches on anything with a recipe On first load every craftable item in the game is written into the config with its vanilla values, so there is no list to build and no shortname to look up. Open the menu, click the icon, change what you need. Move an item up or down the bench ladder The plugin takes the workbench requirement off the engine and enforces its own, which is what lets you go both ways: put an AK behind tier 3, or let players craft a tier-2 item with no bench at all by setting it to zero. A player who tries too early gets a game tip naming the tier they need. Block an item outright One toggle and the recipe is closed — caught on both the inventory craft and the crafter itself, so there is no second path in. The player gets a message instead of a silent failure, and it is in the language file like everything else. A default skin, applied on the way out Give an item a skin ID and everything crafted comes out wearing it, held entity included, so it looks right in hand and not just in the inventory. A player who deliberately picked a skin keeps theirs — the default only fills the gap. 03 — Research Closing a door means closing all three There are three ways to learn something in Rust, and blocking one is worth nothing on its own. Each gets its own switch, so you can leave a route open on purpose — researchable from a found blueprint, but never from the tech tree. The table and the paper One switch covers both the research table and studying a blueprint that dropped in loot — the two routes players reach for first, and the pair that plugins usually forget to close together. The tech tree, node by node Mark a node blocked and it cannot be unlocked at the workbench, with a notice on screen and in chat rather than a dead button. And what happens to everything behind it This is the part most plugins get wrong. Block a node in the middle of a branch and you have accidentally banned the whole branch. A second switch decides which you meant: seal the path, or let players through it. Let them through and the plugin rebuilds the unlock itself — it works out which nodes are still needed, prices them in scrap at the correct tier including tax, takes the payment, unlocks them, and tells other plugins it happened through the standard hook so your logging and reward plugins still see it. Reliability Puts the game back ✓Vanilla values are saved before anything is touched — every recipe's original time and bench level go into a data file on first load, and that file is the reference point from then on ✓Unload restores every recipe — times and bench levels are written back from that file and the client is told to go back to normal crafting, so removing the plugin is not a wipe-day job ✓Joining players are handled properly — if someone is still loading their snapshot the plugin waits and retries instead of firing into the void and leaving them with the wrong crafting rules ✓Edits apply live — change a bench level or a block in the menu and it is in force before you close it, on a server full of people ✓Four messages, all translatable — and no dependencies to install alongside it Commands One command, and the tiers you invent Players never type anything — the rules apply to them through the vanilla crafting menu. /craftcontroleOpen the item grid — search, pick an icon, edit its seven settings craftcontroller.useOpen the editor. Server admins have it without being granted anything craftcontroller.default1.5× craft speed as shipped — rename it or change the number craftcontroller.vip3× as shipped, and the template for every extra tier you add Questions Before you buy The workbench labels disappear from the crafting menu. Is that expected?Yes, and it is the trade for being able to move items between tiers at all. Those coloured “requires workbench X” lines are drawn by the client straight from the recipe, so the requirement has to come off the recipe before the plugin can enforce a different one. The rule itself still holds — a player crafting too early is stopped and told which tier they need — but the label is gone until they try. If untouched tier labels matter more to you than per-item tiers, this plugin is the wrong trade. A player is in two speed groups. Which multiplier applies?The last one they match in the config file, not the largest. Write the list slowest first and fastest last and the answer is always the one you want. Do I have to know item shortnames?No. Every craftable item writes itself into the config on the first load with its vanilla values, and the in-game grid shows real item icons with a search box above them. Shortnames are there if you prefer editing the file, but nothing requires it. Can players still find a banned item as a blueprint in loot?The blueprint can still drop, but studying it is refused if you closed that route, and blocking the craft closes it even for a player who learned the item before you installed the plugin. If I block one tech tree node, do I lose everything past it?Only if you want to. That is a separate switch on the same item — leave it off and players unlock straight through the blocked node to what is behind it, paying the correct scrap for the nodes they actually get. Can I let players craft without standing at a workbench?Set an item's bench level to 0 and it crafts anywhere. Do it for everything and you have a no-workbench server without a second plugin. What happens if I remove the plugin later?Every recipe is written back to the values captured before it ever changed anything, and connected players are switched back to normal crafting on the spot. Blueprints players unlocked while it was running stay unlocked — those live in the game's own save, not in the plugin.$8.49 -

Version 1.2.2
369 downloads
What is it? Revolutionize your crafting experience with the Smart Workbench! Say goodbye to the repetitive clicking and hello to convenience and efficiency. This enhancement takes ordinary workbenches to the next level by simplifying research and repairs. Let your players focus on the fun, not the clicking; make their adventures smoother, faster and more enjoyable. Usage * Research all remaining blueprints with just one click - no more tedious individual unlocks! * Seamlessly access a Virtual Repair Bench or Research Table directly from the workbench. It's the ultimate quality-of-life improvement for any Rust server. Command /sw -- Opens UI menu (if player has workbench level 1+) Permissions smartworkbench.use -- Gives user permission to see and use the Smart Workbench Features Virtual Repair Bench Virtual Research Table Research All button Supported plugins: Server Rewards Economics (UI before Rust update) (UI after Rust update) Configuration { "Research All currency": "scrap", "Rate (Based on scrap)": 1.0, "Type of money (1 = default currency, 2 = Server Reward points, 3 = Economics cash)": 1, "Notify player when their item gets dropped from Smart repair/research table": true } Localization { "SWResearch": "RESEARCH ALL\n{0}\n{1}", "NoResources": "Not enough resources", "Success": "Successfully learned BPs from WB lvl {0}", "AlreadyKnow": "You already know everything from this workbench", "SRPoints": "Points", "Economics": "Cash", "SWResearchTable": "RESEARCH TABLE", "SWRepairTable": "REPAIR TABLE", "SWRange": "You must be close to a Workbench!", "SWT1": "Tier 1", "SWT2": "Tier 2", "SWT3": "Tier 3", "SWLvl": "Workbench level is not high enough!", "NotifyDrop": "Item/s have been dropped on the ground." }$10.00- 29 comments
- 2 reviews
-
- 3
-

-

-
- #smart
- #workbench
- (and 8 more)
-
Version 1.2.20
247 downloads
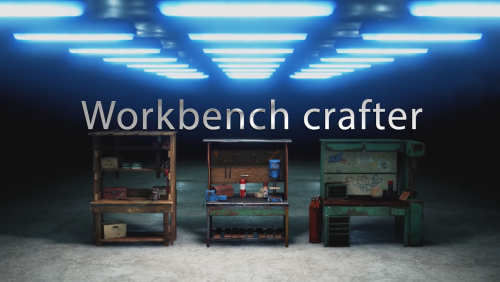
Workbench crafter is a new crafting system, instead of the current way of staying AFK next to workbench waiting for the craft to finish now you can leave that task to the workbench and go to PVP with your teammates. Depends on: Image Library Features: Craft panel has easy to use GUI and perfectly blends with Rust native UI. Crafting task & storage saved when server restart and will finish craft upon server startup. When destroying Workbench all the loot will be dropped. Allow craft menu access in building privilege only. Open craft menu anywhere. Auto Craft items. Link loot boxes with workbench for an easy way to craft. A permission and Chat command to open UI instead of pressing "E" to open the craft menu anywhere. Permissions Permission use: WorkbenchCrafter.use. Permission no crafting time: WorkbenchCrafter.nocraftingtime. Permission use anywhere: WorkbenchCrafter.useAnywhere. Update 1.2.12 Update 1.1.5 Video Config { "Permission use": "WorkbenchCrafter.use", "Permission no crafting time": "WorkbenchCrafter.nocraftingtime", "Permission use anywhere": "WorkbenchCrafter.useAnywhere", "Settings": { "GUI color": "0.6 0.6 0.6 0.3", "GUI color (when using /workbench command)": "0 0 0 0.9", "Allow craft menu access in building privilege only (true or false)": true, "Don't allow using /workbench when building blocked (true or false)": true, "Crafting time multiplier": 1.0, "Storage slots(0 no limit)": 0, "Default stack size": true, "Custom stack size": 1.0, "Maximum items crafting in queue": 8, "Include default blueprints": false } }$16.50- 26 comments
- 2 reviews
-
- 2
-
-
- #plugin
- #workbench
- (and 6 more)
-
Version 1.8.17
656 downloads
Transform your Rust server's storage experience with intelligent automation, overflow chains, and PvP-safe raid protection. Why SmartSorter? For Players: Stop manually sorting hundreds of items after raids, monuments and roams Never lose loot to overflowing boxes again Create custom filter categories for your skinned gear sets Set up once, automate forever For Server Owners: Reduce player frustration and improve retention Performance-optimized for high-pop servers PvP-friendly with raid/combat blocking Admin-defined custom item categories for skinned items Zero dependencies - works out of the box What Makes It Unique? Drop Box Automation Mark any container as a "Drop Box" - toss items in and watch them automatically route to nearby filtered containers. No manual sorting needed. Sorting Chains (Overflow System) Link unlimited containers together. When one fills up, items automatically overflow to the next in the chain. Perfect for massive loot rooms. Custom Item Categories Admins define custom categories for skinned items like "Raid Gear", "VIP Kits", or "Event Loot". Players filter containers by these categories just like vanilla ones. Category definitions persist across wipes while templates let players reapply setups instantly. Raid & Combat Protection Full integration with RaidBlock, NoEscape, and CombatBlock - prevent sorting abuse during raids with granular control over what gets disabled. Essential for PvP servers. Defense Auto-Fill One-click filling of turrets, SAM sites, flame turrets, and shotgun traps. Set your preferred ammo/fuel amounts once and forget it. Smart Template System Save filter configurations as templates, load them onto any container, and share setups across your base in seconds. Core Features Automatic Sorting Drop Box system for hands-free organization Category and item-specific filters (granular control) Custom item categories for skinned items (admin-defined) Works with 50+ container types Intelligent handling of furnaces, refineries, recyclers, and vending machines Smart routing with sorting chains Manual Control Tools Send Near - Distribute inventory to nearby filtered containers within radius Send to Box - Fill the specific container you're looting Dump All - Empty your entire inventory instantly Loot All - Grab everything from a container (supports backpacks!) In-Container Sort - Organize by name or category with one click Inventory and backpack Sorting Sorting Chains (Overflow System) Link unlimited containers for automatic overflow routing Visual chain inspection with in-game colored lines and spheres Cycle detection prevents infinite loops Per-player chain ownership Configurable visualization duration and appearance Custom Item Categories 🏷 Admins create categories via /sscustomcat (e.g. "Custom Currency", "Custom Fuel", "Event Items") Add specific skinned items by skin ID and display name Players access custom categories through the "Custom" button in the filter panel Toggle entire categories or individual items on/off Custom button reflects active state (green when filtering, gray when inactive) Category definitions stored in config and persist across wipes Per-container selections included in template save/load Defense Management Auto-fill Auto Turrets, SAM Sites, Flame Turrets, Shotgun Traps Customizable ammo/fuel amounts per defense type Radius-based batch filling Automatic weapon mounting for turrets Per-player preferences saved Raid & Combat Protection Integrates with RaidBlock, NoEscape, and CombatBlock Granular control - disable specific features during raids/combat Optional chat notifications when actions are blocked Essential for PvP servers - prevents sorting abuse Template System Save filter configurations by name Load templates onto any container instantly Share setups between boxes Per-player template ownership with admin override Easy template management (delete, rename) Player Preferences Toggle auto-opening of filter panels (/ssautofilters) Minimize UI to compact button mode Per-player defense ammo/fuel settings Settings persist across sessions Visual Interface Dynamic context-aware UI (changes based on container type) Built-in help system with full-color image guides Fully customizable layouts, colors, and button positions Responsive design adapts to 1-column or 2-column layout ImageLibrary support for item icons Technical Specifications Supported Containers (50+) Storage boxes, large boxes, coffins, barrels, fridges, lockers, tool cupboards, vending machines, furnaces (all types), refineries, recyclers, BBQs, campfires, lanterns, mannequins, drop boxes, wall cabinets, beehives, chicken coops, composters, cauldrons, stashes, and all defense entities. Performance Optimized Configurable processing intervals Batch processing limits (MaxDirtyBoxesPerTick) Optimization mode for high-population servers Efficient memory pooling throughout Automatic cleanup of deleted container data Framework Compatible Full support for uMod/Oxide Native Carbon framework support No external dependencies required Works out of the box Safety Features Wall-check system (prevent looting through walls) Building privilege requirement Configurable item blacklist/whitelist Automatic cleanup of old container data (configurable grace period) Permission-based access control Configuration Highlights 1000+ Customization Options UI Customization: Every color, position, size, and text label Button Layouts: 4 preset layouts (Default, DropBox, Awaiting, HasChain) Timing: Sort delays, cooldowns, debounce intervals Distances: Default radius, visualization settings Category Overrides: Reclassify any item into any category Custom Items: Define skinned item categories with skin ID and display name Furnace/Refinery: Custom fuel and smeltable item lists Support & Updates Documentation: Built-in visual help system Active Development: Regular updates and improvements Bug Reports: Fast response on CodeFling Feature Requests: Always welcome What's Included Plugin file (.cs) Default configuration Built-in help system with images Full permissions setup 50+ container support Custom item categories system Raid/combat block integration Template system Performance optimization Extensive customization options Perfect For: Large Base Builders - Automate loot rooms with chains PvP Servers - Raid block integration prevents abuse High-Pop Servers - Performance optimized Casual Servers - Quality of life improvement Modded Servers - Works with custom items PLAYER COMMANDS /ss or /smartsorter Opens the visual help guide UI /sshelp Opens the visual help guide UI (same as /ss) /sscommands Shows a list of all available chat commands /sstoggle Shows or hides the SmartSorter UI completely /ssremovechains Removes ALL sorting chains you own /ssautofilters [on|off] Toggles whether the filters panel auto-opens when looting filtered containers /ssrefresh Refreshes the UI if it gets stuck or doesn't display properly /ssshowchains Visually displays your sorting chains for 15 seconds using colored lines and spheres /ssdefense Opens the defense configuration panel to set ammo/fuel amounts for turrets and traps ADMIN COMMANDS /sscustomcat Opens the custom item category admin UI /ssdebug on|off Enables or disables debug logging in console /ssreloadconfig Reloads the configuration file from disk /ssclearfilters <containerID> Clears all filters on a specific container by NetworkID /ssconfig [setting] [value] Opens the config UI, or sets a specific config value ━━━━━━━━━━━━━━━━━━━━━━━━━━━━━━━━━ smartsorter.use - Required for all features smartsorter.admin - Admin commands and config access ━━━━━━━━━━━━━━━━━━━━━━━━━━━━━━━━━ DEPENDENCIES None required. Optional ImageLibrary support for enhanced item icons. ━━━━━━━━━━━━━━━━━━━━━━━━━━━━━━━━━ Give your players the gift of time. Install Smart Sorter today.$24.99- 143 comments
- 6 reviews
-
- 2
-
-
- #sorting
- #auto-sort
- (and 67 more)
-

Version 1.0.0
33 downloads
Description Minecraft Entities replaces standard Rust deployables with fully functional Minecraft-style versions while preserving all vanilla game mechanics. Players receive special custom items that automatically transform into Minecraft blocks when placed. Although the appearance is completely changed, every object keeps its original functionality. Furnaces smelt ore, electric furnaces require power, workbenches unlock crafting, and large boxes function as normal storage containers. Currently supported entities: Minecraft Furnace Minecraft Electric Furnace Minecraft Workbench Level 1 Minecraft Workbench Level 2 Minecraft Workbench Level 3 Minecraft Large Wooden Box Features Fully functional Minecraft-style entities. Preserves all vanilla Rust mechanics. Automatically replaces custom items with Minecraft entities after placement. Dynamic front texture for active furnaces. Correct health and damage handling. Automatic restoration after server restart. Pickup support. Easy configuration. Configuration Example configuration: Config Example Chat Commands Use the following chat commands to obtain Minecraft entities: /giveminecraftitem minecraft_furnace <amount> /giveminecraftitem minecraft_electric_furnace <amount> /giveminecraftitem minecraft_first_workbench <amount> /giveminecraftitem minecraft_second_workbench <amount> /giveminecraftitem minecraft_third_workbench <amount> /giveminecraftitem minecraft_big_chest <amount> Replace <amount> with the desired quantity (for example: 1, 5, 10). TELEGRAM CHANNEL$9.99 -
Version 2.0.2
108 downloads
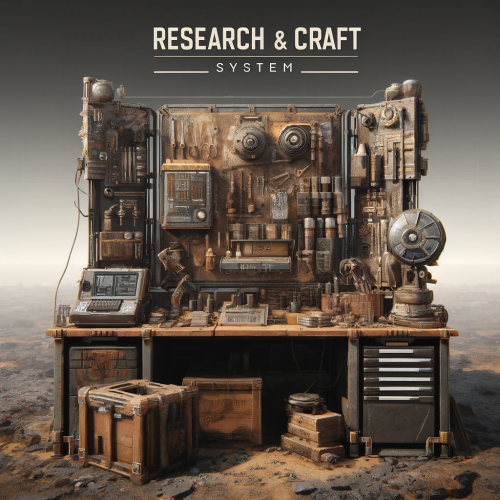
This plugin allows admins to control all about researching and crafting. With all default items ,and with custom ones! So what you chose to be researchable that players will be able to research and craft ,for prices what you chose . And with other options like Craft time, Wb Level , Display Name, Description, Category, Quantity. Researching is true research table ,crafting UI is similar to default rust crafting UI . You can block default crafting ,block researching in wb ,block tech tree ... You can combine what you will block what not ,. You can use it in full potential with research and craft UI ,with your own prices and stats ,blocking all default crafts/researchs! Or you will just use it for custom cost of research ,and default craft by rust , its all about you ! Best explanation is true config file : "Block Default Crafts": true/false, // You are able to block completely default craft system, so players can only craft items true plugin UI. "Block WB Tech Tree": true/false, // You are able to block completely researching true TechTree. "Block ResearchTable Research": true/false, // You are able to block completely default research true research table , so players can only research items true plugin UI . "Play Sound On Research Success": true, "Research Success Sound Asset": "assets/prefabs/deployable/research table/effects/research-success.prefab", "Play Sound On Research Fail": true, "Research Fail Sound Asset": "assets/prefabs/deployable/research table/effects/research-fail.prefab", //This is default config for one item ,but you will get all items in config with their default values. //As you can see rifle.ak is loaded with his default properties. "Items": { "rifle.ak": { //Shortname "0": { //SkinID "AllSkins": true, // if true ,player will be able to research rifle.ak no matter of his skin of item, if you put false ,then it will check for skinID of item(if you add custom items with same shortname ,then use false) "IsResearched": false, //if false, item will not be researched by default ,if true it will be researched ,so player will be able to craft it without reasrching it . "IsResearchable": true, //if true ,palyers can research this item , if false item is not researchable. "DisplayName": null, // if null default name of item will be , you can give custom name to item example: "mygun" . "Description": null, // if null it will be default description of item ,,you can use custom description ,example "this gun is best gun" . "ResearchCost": [ // price for research item ,you can add up to 4 items total ,you can use default rust items ,and custom ones . { "Shortname": "scrap", "Amount": 500, "SkinID": 0, "DisplayName": null } ], "RequiredCraftWBLevel": 3, // what workbench level item needs for craft ,0 is no workbench level "CraftTime": 45.0, // this is default craft time ,you can change it ,in seconds . "CraftCost": [ // price for craft item ,you can add up to 8 items total ,you can use default rust items ,and custom ones . { "Shortname": "metal.refined", "Amount": 50, "SkinID": 0, "DisplayName": null }, { "Shortname": "wood", "Amount": 200, "SkinID": 0, "DisplayName": null }, { "Shortname": "riflebody", "Amount": 1, "SkinID": 0, "DisplayName": null }, { "Shortname": "metalspring", "Amount": 4, "SkinID": 0, "DisplayName": null } ], "Category": "Weapon", // category of item ,where item will be placed in what tab,you can change this also ,to some custom ones or what ever name you like ! "CraftOutputQuantity": 1 // this is default output quantity of item (when you craft lowgradefuel you get for 1 craft 4 lowgrade) ,you can change output . } }, On first loading of plugin you will get in config all items ,with their default properties : Default items what are researched by default in game ,will be researched (lets say Sleeping Bag,Hammer,etc), items what are by default researchable they will be researchable (with their scrap cost), Those items will also have default craft prices , required workbench level ,time for craft ,craft quantity ,category. So it will be easy for you to change what you need to change for items. Categorie tabs are in config file : "Categories": [ "FAVORITES", "CUSTOM", "WEAPON", "ATTIRE", "TOOL", "MEDICAL", "AMMUNITION", "RESOURCES", // you can change all categories how you like ,,you can remove some ,add more ,rename them . "ITEMS", //if you rename category lets say "WEAPON" to "guns" dont forget to change on items also category ,so they can be placed in that new "gun" categorie . "COMPONENT", "CONSTRUCTION", "ELECTRICAL", "FOOD", "TRAPS", "MISC", "FUN" ], "Favorite Category Name": "Favorites", // this is core name for favorite items ,when change this be sure that you have in Categories that name what you put for favorite tab . Commands : Chat command : /q (configurable) - open craft ui . Console command : bind <key> craft.openui - in F1 players can bind <key> so they can open Craft UI with key (keyboard button) so they dont need to type shat command. Console command : wipe_research_data - wipe player researched items. Console command : wipe_favorite_data - wipe players favorite items. Permissions: "craftsystem.research" - without this perm player cant see UI for research. "craftsystem.craft" - without this perm player cant open Craft Ui . Data : you will see in data what player researched ,and his favorites . LangFile - you are able to change text ,on something else that you like ,on some different language . How to add custom or skined item : "box.repair.bench": { // this is default item "0": { // without SkinID "AllSkins": false, // We have here false ,so it will look for Shortname and SkinId "IsResearched": true, // Its researched. "IsResearchable": false, "DisplayName": null, "Description": null, "ResearchCost": [ { "Shortname": "scrap", "Amount": 10, "SkinID": 0, "DisplayName": null } ], "RequiredCraftWBLevel": 1, "CraftTime": 30.0, "CraftCost": [ { "Shortname": "metal.fragments", "Amount": 125, "SkinID": 0, "DisplayName": null } ], "Category": "Items", "CraftOutputQuantity": 1 } "1594245394": { // Here we add SkinID. We added SkinId to shortname what belongs to that custom item . "AllSkins": false, // We have here false ,so it will look for Shortname and SkinId "IsResearched": false, // Not researched , "IsResearchable": true, // But its researchable . "DisplayName": "Recycler", // we use custom name for item. "Description": "With this i can recycle home", // we use custom description for item. "ResearchCost": [ { "Shortname": "scrap", // some cost for research . "Amount": 1000, "SkinID": 0, "DisplayName": null }, { "Shortname": "gears", "Amount": 50, "SkinID": 0, "DisplayName": null } ], "RequiredCraftWBLevel": 3, // we need to be at level 3 workbench to craft it. "CraftTime": 60.0, // 60 sec craft time . "CraftCost": [ // craft cost. { "Shortname": "metal.fragments", "Amount": 2500, "SkinID": 0, "DisplayName": null }, { "Shortname": "rifle.ak", "Amount": 1, "SkinID": 2585539626, "DisplayName": null } ], "Category": "Custom", // we changed category to custom ,so recycler will be in custom tab . "CraftOutputQuantity": 1 // quantity is 1 ,we will get 1 recy per craft } }, For any questions fell free to join my discord channel !$20.00 -

Version 1.0.1
54 downloads
This plugin adds a ton of functionality to the server for working with quarries. You can create charges of any type, with any resources. And the improved quarry system will allow players to extract them. Features Extraction of any default game resources/items. Placement of quarries anywhere: close to each other and other structures. Connection of quarries to industrial pipes. Interaction with popular plugins. Pleasant and user-friendly interface. Installed quarries will continue to mine the specified resources even if the plugin is unloaded. Supported plugins Backpacks - plugin can take and give items in an additional backpack. ItemRetriever - plugin can take crafting ingredients from all containers that are connected to the player (including inventory, game backpack, Backpacks plugin, and any other plugin that uses ItemRetriever as Suppliers). Friends, Clans - plugin is used to identify friendly players. Permissions The plugin has immutable and generated permissions. The immutable ones include: charges._admin – "Give yourself" button, command to give charges, ignoring permissions for crafting charges and quarries, access to turn on/off quarries for all players. charges._water – ignore the depth of the explosion of charges in water. charges._wrongplace – return the charge if it is thrown in an unsuitable place, even if the specific charge is specified in the settings => Return the charge if it is exploded in the incorrect place? = false charges._ignorecraterchance – ignores the chance of spawn crater of any charge (for the owner of this permission it is equal to 100%). charges._ignoreresourcechance – ignores the chance of finding a resource in any charge hole (it becomes equal to 100% for all resources). charges._mining – access to crafting Mining Quarry. charges._pump – access to crafting Pump Jack. The generated permissions are created by the plugin itself, here's how it works: charges.chargename - chargename is the name of the charge from the Charge permission field. Commands Only one command is present in the plugin. This command can be used both in chat (charges._admin permission is required) and in the server console. givecharge name 5 steamid/nickname name - charge name from the field Charge permission. 5 – how many charges need to be given out. steamid/nickname – steamid or nickname of your choice. All arguments of this command are required. General settings Allow panel scaling when the interface is scaled? – if this setting is enabled, the panel will be resized depending on the game interface scale (setting "user interface scale"). If the setting is disabled, the panel will always be the same size, regardless of the player interface scale. Notify friends within the charge's explosion radius of the resources being mined? – if your friends are standing close to you when the charge explodes, they will also receive a notification about the explosion and its results. Quarries settings Only friends can turn on/off quarries? – only you and your friends (from Rust Teams, Clans, Friends, etc.) will be able to turn quarry on/off. Simplified quarry installation mode (increased server load) – the game developers have severely restricted the placement of objects near quarry. Because of this, quarry must be located at a considerable distance from each other, making them more difficult to defend. This setting allows you to ignore this restriction. Therefore, even when the quarry is highlighted in red during installation, you can simply click the left mouse button and the quarry will be installed in the place you are looking at and in the same form as it was on the construction plan. Of course, with this method, there are many checks for the presence of foreign objects in the quarry installation area. Add storage adapters to quarries? - as you know, the game features an Industrial Pipes system that allows you to automatically move resources between different containers. Unfortunately, the developers did not implement the ability to connect these pipes to quarries. Therefore, this setting adds Storage Adapters to each of the quarry's storage. However, nothing can be built within the quarry's area of influence (which is quite large and invisible), and as a result, the Pipe Tool cannot be used. Therefore, a Hammer is used to lay pipes. PIPE CONNECTION. First, you need to hit the quarry Storage Adapter with the Hammer, and most importantly, hit the input/output port to which you want to connect the pipe. That is, if you want to extract resources from this quarry, you need to hit the output connector with a Hammer, and if you want to add resources, you need to hit the input connector. After you have done this, the chat will display information about how much time is left to connect the pipe to the corresponding Industrial device. Therefore, you need to approach such a device and simply tap the desired connector with a Hammer. After these actions, the pipe will be installed. You can also connect quarries in series i.e., one after the other, just like regular containers. PIPE DISCONNECTION. There are two ways to remove a pipe. If the other end of the pipe is connected to an Industrial device outside the quarry's range, you can simply disconnect the pipe in it with the Pipe Tool. If the pipe from the quarry is connected to another quarry, you need to take a Hammer and hit it on the connector of the quarry Storage Adapter, which should be disconnected. After these actions, the pipe will be disconnected. Charges settings Charge name – charge name displayed in the panel and on the crafted charge. Charge permission – a unique name for a charge, used in permissions and when giving out charges with the admin command. Charge skinId – ID of the image uploaded to the Steam workshop. Which quarry to use? [Mining, Pump] – this setting affects which quarry can be placed on the hole after the charge explodes. Crater spawning chance [0-100] – this parameter is only responsible for the chance of a hole appearing after an explosion. Maximum water depth at which the charge will work [advice <= 0.8] – you can allow players to explode charges underwater. This setting determines how deep charges can explode underwater. The default value of 0.8 is approximately knee-deep for the player. Return the charge if it is exploded in the incorrect place? – if the player explodes the charge in an unsuitable place, such as on rocks, building blocks or something similar, the charge will not explode and will remain at the site of the explosion (it can be picked up and used again). If you set the value to false, the charge will disappear after the explosion and the player will have to craft it again. Allow charge explosion if no permission? – if set to true, any player can explode this charge. If set to false, only those who have permission for this charge can explode it. Is permission required to craft a charge? – the charge craft will only be available to players who have permission for this charge. Crafting ingredients Ingredient name (empty - default) – the name is only used for display in the panel. Ingredients are selected from the player's inventory based on the combination of shortname + skinid (the item name is not taken into account). Extractable resources Resource name (empty - default) – by analogy with the setting Ingredient name (empty - default). Chance of a resource in the crater [0-100] – the chance of finding this resource in the crater when the charge explodes. Please note that before calculating this chance, the chance of the charge exploding is calculated (Crater spawning chance [0-100] setting). And if the charge explodes into nothing, then the current setting will not be used. Plugin Config Example of plugin configuration in English: Example of plugin configuration in Russian: If you need Russian config, open it (Charges.cs) before loading the plugin, and at the top set the variable "isRus = true". Then save and upload this file to your server.$35.00 -
Version 1.3.5
690 downloads
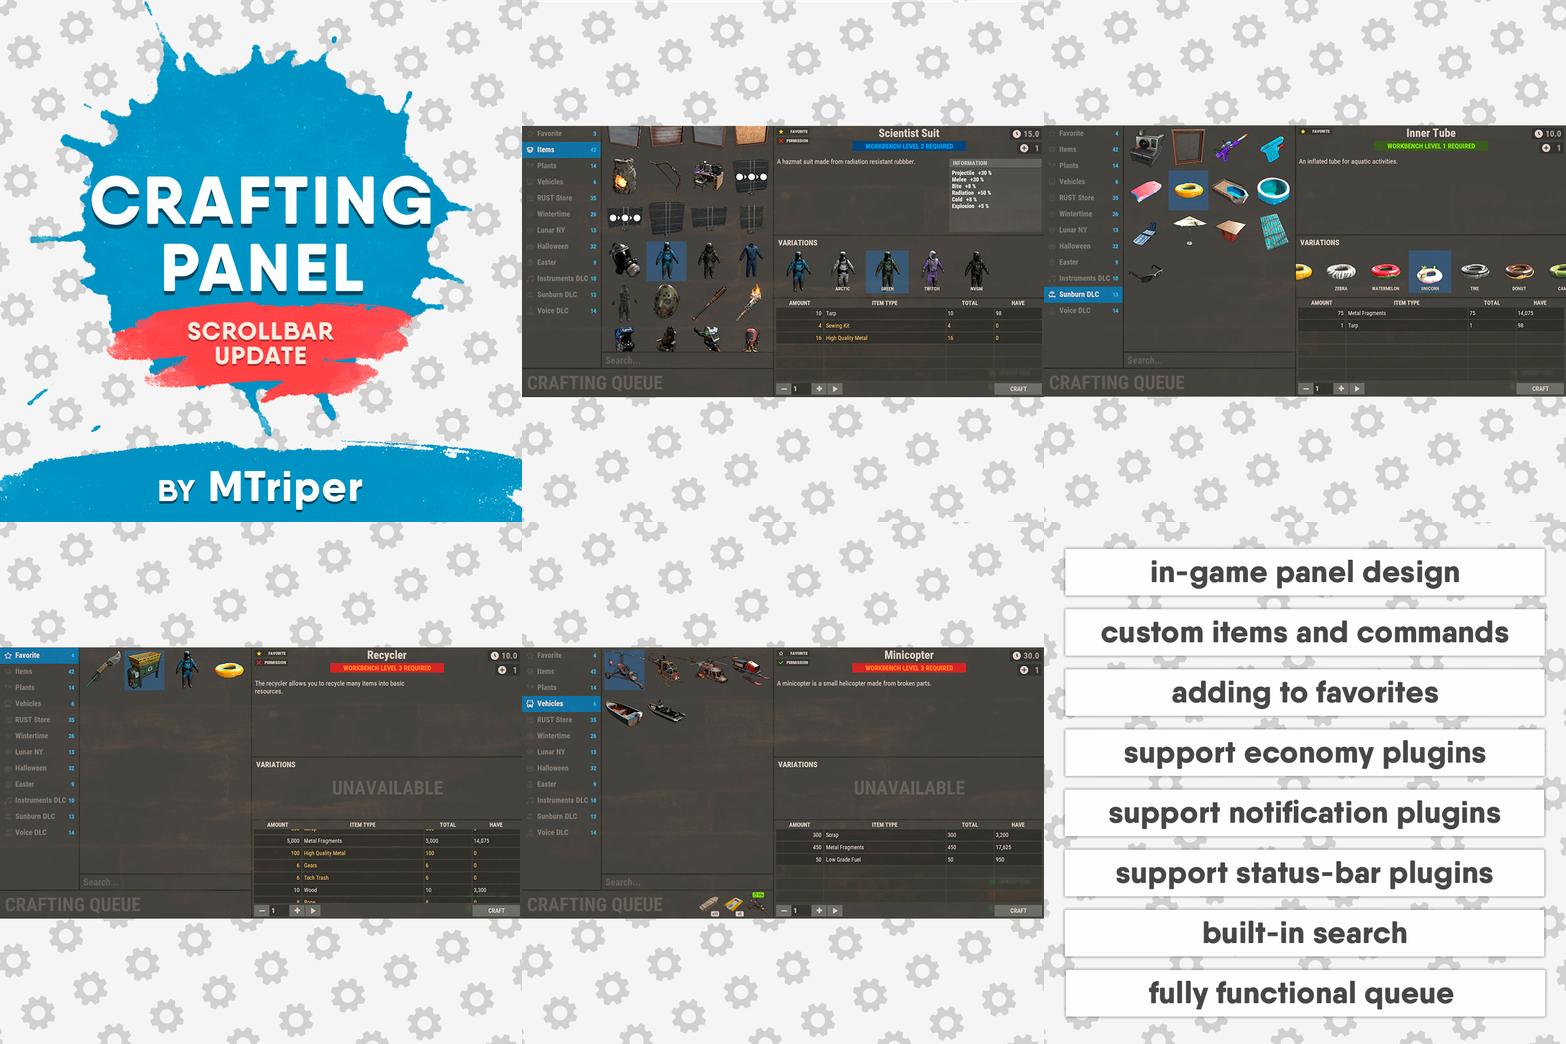
This plugin provides a beautiful and convenient crafting panel for your server. Its design and mechanics are as similar as possible to the in-game Rust crafting panel. Add crafting of any custom items, commands, permissions and anything else you like. Features The design is ~90% similar to the design of Rust's in-game crafting panel. Support for any custom items and commands. Ability to unlock all DLC items in the in-game crafting menu. The plugin only registers permissions for items that you have specified to it. Thus, preventing the creation of a large number of permissions. Customizable sound effects, notifications in the status bar on the right, and text notifications in popular plugins. The plugin can take and give out items from inventory, game backpack and Backpacks plugin, depending on the fullness of any of them. Ability to add item variations (just look at the screenshots). Supports work with skill plugins. Supports work with economy plugins. The player can choose whether to craft or buy an item. Add items to favorites, built-in search, fully functional queue and more. Scrollbar support. Ability to use item crafting cooldown. *All the sections and items shown in the screenshots are an example of configuring the plugin. You will need to create sections yourself and add items there. Supported plugins: SkillTree - allows you to use bonuses such as: Craft_Speed, Craft_Refund, Craft_Duplicate. Also allows you to give bonuses when crafting and take away when crafting is canceled. Backpacks - plugin can take and give items in an additional backpack. ItemRetriever - plugin can take crafting ingredients from all containers that are connected to the player (including inventory, game backpack, Backpacks plugin, and any other plugin that uses ItemRetriever as Suppliers). Player DLC API - plugin allows you to check whether an item or skin belongs to a specific player. ZLevelsRemastered - allows you to use the craft speed bonus. Economics, ServerRewards, IQEconomic - these plugins are used to purchase items with the currency of these plugins. Notify, GUIAnnouncements, NCP - these plugins are used to display notifications. SimpleStatus, AdvancedStatus - these plugins are used to display notifications in the status bar at the bottom right of the screen. Permissions The plugin has immutable and generated permissions. The immutable ones include: craftingpanel._use – is responsible for opening the panel. If there is no permission, the panel will not open. craftingpanel._admin – give this permission only to administrators. It adds an additional "Give yourself" button to get items from the panel for free. This permission is also needed to use the givecraft command (about it below). craftingpanel._instant – all player crafts will be instant. craftingpanel._death – crafting queue will not be reset when the player dies. craftingpanel._disconnect – when a player leaves the server, the craft queue will not be reset. craftingpanel._economics – allows you to purchase items for the currency of the selected economy plugin. If the player does not have permission, the cost panel will still be displayed, but the player will not be able to make a purchase. craftingpanel._workbench - allows you to reduce crafting time by having a workbench of a higher level than necessary for crafting. craftingpanel._bonuses – allows the player to access the crafting bonuses from the "Crafting bonuses" section. craftingpanel._unlockdlc - if a player has this permission, he can craft all DLC items in the in-game crafting menu. If you revoke this permission, all DLC items will become unavailable again. craftingpanel._nocooldown - allows you to disable the cooldown of all items. The generated permissions are created by the plugin itself, here's how it works: craftingpanel.section.vehicles- this is permission for the "vehicles" section. craftingpanel.vehicles.minicopter - this is permission for the item "minicopter" in the "vehicles" section. craftingpanel.vehicles.snowmobile.tomaha - this is permission for the item "snowmobile" in the "vehicles" section and in "tomaha" variation. Commands givecraft steamid/nickname section item 5 skin steamid/nickname – steamid or nickname of your choice. section – section name from the Section permission [required] field. item – item name from the Item permission [required] field. 5 – how much of the current item to give out (craft multiplier). skin - name of the item from the Ingredients section, Item permission [required] fields. All arguments of this command are required. If your item has an empty "Variations" section or you want a default item, specify "default" in place of skin. resetcooldowns steamid/nickname section item - resets the cooldown of a specific item from a specific player. resetcooldowns steamid/nickname - resets the cooldown of all items from a specific player. resetcooldowns all section item - resets the cooldown of a specific item for all players resetcooldowns all - resets the cooldown of all items from all players steamid/nickname – steamid or nickname of your choice. section – section name from the Section permission [required] field. item – item name from the Item permission [required] field. General settings Allow panel scaling when the interface is scaled? - if this setting is enabled, the craft panel will be resized depending on the game interface scale (setting "user interface scale"). If the setting is disabled, the panel will always be the same size, regardless of the player interface scale. Remember the last selected section and item? - plugin will remember the last selected section, item and variation the next time the panel is opened by the player. Enable multilingual mode? – if your server has players from different countries, this mode allows you to customize translation for other languages. When you enable this mode, the plugin will write all the data that needs to be translated to the lang - file. These include: section names, item names, item descriptions, item properties, item variation names, and ingredient names. The lang - file consists of a pair: key - value. The key is a unique name, with the help of which the plugin understands what phrase to use. Section translation: section.*section permission* – key template for section name translation. For example: "section.favorite": "Favorite" – Favorite section. Translation of item information: *section permission*.*item permission*.name – key template for item name translation. For example: "sunburn.innertube.name": "Inner Tube" – item name. *section permission*.*item permission*.description – key template for item description translation. For example: "sunburn.innertube.description": " Inflatable lap for water fun." – item description. *section permission*.*item permission*.properties – key template for item properties translation. For example: "sunburn.innertube.properties ": "Any properties ..." – item properties. *section permission*.*item permission*.variations.*variation permission* – key template for variation name translation. For example: "sunburn.innertube.variations.zebra": "ZEBRA" – variation name. Translation of ingredient names: *ingredient shortname *.*ingredient skinId* - key template for ingredient name translation. For example: "wood.0": "Wood" – ingredient name. Use the PlayerDLCAPI plugin to check whether items and skins belong to the player? – The plugin will check each item and skin in the panel for belonging to the player (i.e. whether they are in his Steam inventory). Allow work with the Backpacks plugin? – plugin can take and give items in an additional backpack (Backpacks by WhiteThunder). Allow work with the ItemRetriever plugin? – this plugin provides advanced functionality for interacting with player containers: If the ItemRetriever plugin is enabled, the CraftingPanel will take crafting ingredients from all containers that are connected to the player (including inventory, game backpack, Backpacks plugin, and any other plugin that uses ItemRetriever as Suppliers). If the ItemRetriever plugin is disabled, the CraftingPanel will take items with the next priority (if the item is not found, it goes to the next container): Backpacks plugin (if enabled) -> game backpack -> inventory. The CraftingPanel plugin is fully in charge of giving out items (since ItemRetriever only allows you to take items from the player), it gives out items with the next priority (if the container is full, it moves on to the next one): inventory -> game backpack -> Backpacks plugin (if enabled) -> drop item. Reset cooldown on crafting items for all players during the wipe? - the plugin will reset all cooldowns when the server is wiped. Delete player data from the Data file if they have not logged into the server for so many days – this setting is added to prevent the plugin from keeping in memory the settings of all players who have ever visited your server. Effect at the start/end/canceling – game effects that will be played at the start of crafting/completion of crafting/cancellation of crafting (effects list, plugin for playing effects). Specify a plugin to work with the economy – specify one plugin from the list or leave the field empty to disable work with economy. Crafting bonuses This section allows you to customize crafting bonuses when using one of the supported plugins. Each of these plugins has its own settings. Amount of experience will depend on crafting time? – if this setting is disabled, then the given/taken experience will be the same (which are specified in the settings above). If this setting is enabled, the experience will be calculated using the following formula: calculated experience = crafting time * experience from the settings above. It should be taken into account that to calculate the experience for a crafted item, the full crafting time is taken (which is specified in the item's setting), and to calculate the experience for crafting cancellation, the time left to create the item is taken. The ZLevelsRemastered plugin does not have a full-fledged api for interaction with crafting bonuses, so the work with it is not fully implemented (no rewards are given in economy plugins, permission of this plugin is not taken into account, etc.). Notification settings Notification type (Chat, GameTips, Notify, GUIAnnouncements) – if this section is enabled, you must specify the type/plugin to notify the player of different warnings. Chat – notification to regular chat. GameTips – notification in the in-game Rust tooltips (blue or red at the bottom of the screen). Notify – notification in the Notify plugin by Mevent. GUIAnnouncements – notification in the GUIAnnouncements plugin by JoeSheep. Just below that are the customization fields for the specific type of notification. Game Status Settings Game status is a notification that is shown at the bottom right of the screen (like in-game crafting). The plugin can show 3 types of game status: Current craft – it's the blue panel with the gear. It is displayed while the crafting process is in progress. Giving item – it's the green panel with the down arrow. It is displayed when a player is given a craft item. Dropping item – it's the red panel with the cross. It is displayed when the items given by the plugin do not fit in the inventory and drop out near the player. Crafting Panel working with Rust's in-game status and two plugins (SimpleStatus, AdvancedStatus) that have slightly advanced features. Rust – is the in-game status built into the game. It does not require any additional plugins, but it cannot show the Current craft (blue panel with a gear). SimpleStatus – this plugin displays customizable statuses. It can show Current craft and Giving item. But cannot display Dropping item due to limitations in its operation. AdvancedStatus - this plugin displays customizable statuses. It works with all of the above status types. Section settings Section name – the displayed section name on the menu button. Section permission [required] – be sure to fill in these fields and make sure they are all unique. Because it is by this field that the plugin understands which section it is currently working with. If you specify "favorite" here, the plugin will use this section to display the player's favorite items (don't add items to it, the plugin will delete them anyway). Register this permission? – if enabled, the plugin will register a permission with the above name. In this case this section will be shown only to those players who have this permission. Section item settings Item name [required] – required field. The name of the item is displayed only in this plugin. If you need to create an item with the same name, you will find this setting below. Item permission [required] – required field. Make sure that each item in the section has a unique field. Because by this field the plugin understands which item in the current section it is currently working with. Register this permission? - if enabled, the plugin will register permission with the above name. Keep in mind that the current item will still be shown to all players, but they will not be able to craft it (this is also notified by the icon on the top left of the information section). Item description – item description, is not passed to the item when crafting, only displayed in the panel of this plugin. Item properties – if the item has some characteristics (e.g., damage, radiation protection, etc.) you can specify them here. This data is displayed in a separate panel in the information section of the item. Item shortname – if you are using the command as a craft result, leave this field empty. Check this item with the PlayerDLCAPI plugin? - this setting disables the verification of the item by the Player DLC API plugin. Create an item with the default name (true) or the above name (false)? – if true, the plugin will create an item with the default game name (which refers to the current shortname), otherwise it will set the name from the Item name field. Item skinId – if the item is custom, specify the required skinId, otherwise set it to 0. Item image [optional] – if as a result of craft, you have to execute some command, you can specify a link to a picture related to this command. Console commands executed after crafting (%steamid%, %username%, %amount%) [optional] – if you need to execute some commands as a result of crafting, you can list them with commas in this field. In the command you can specify %steamid% and %username%, the plugin will replace them with the data of the current player. The plugin can also replace %amount% with the amount per craft (next setting). If the command gives some custom game item and you know its shortname and skinid you can specify them in the fields above. This way you don't need to additionally save the image of this item to the hosting and specify its link. Amount per craft – number of items given out per craft. Max craft multiplier - maximum allowable craft multiplier. The craft multiplier (selected by the player in the Ingredients section) is how many times an item will be dispensed or how many times commands will be executed. If Amount per craft = 3, and the player chose multiplier = 2, he will receive 2 * 3 = 6 items. Crafting time [sec] – time to craft the item. It can be set to 0, then the item will be crafted instantly. Show notification in game status (if they are enabled)? – if a command from another plugin is used to give a custom item and that plugin displays game status, duplication of game statuses may occur. Therefore, it is possible to disable the display of game status for a particular item. Keep in mind that this only disables the Giving item status. Apply craft bonuses (if they are enabled)? – allows you to apply craft bonuses (from the "Crafting bonuses" section) to this item. Crafting cost in the economy plugin [0 - disable] – the value of the current item in your economy server currency. The customization works if you specified one of the supported economy plugins at the beginning. Item Variation settings In the in-game Rust crafting panel this section is called Skins, here it is called Variations. This is done because here it can include not only skins, but any items or commands related to the parent item. For example, you have several modular car presets, with different types of modules, but they are all related to modular cars. Therefore, you can specify them in one item - "Modular car". The settings in this section are similar to the parent item, except for the crafting ingredients. They will be the same as the parent item. Item Ingredient settings Resource name [required] – required field. Is used to display the name of the ingredient in the plugin panel (it is not taken into account when taking ingredients from the player). When canceling the craft, the plugin can set this ingredient to the specified name, you will find this setting below. Use this resource in ingredients? – enables or disables this resource for use in ingredients. Resource shortname [required] – required field. Shortname of the item that the plugin will look for from the player for crafting. Resource skinId – if it's a custom item, give its skinId, otherwise set it to 0. Return an item with the default name (true) or the above name (false)? – when the craft is canceled, if true, the plugin will create an ingredient with the default game name (which refers to the current shortname), otherwise it will set the name from the Resource name field. Plugin Config Example of plugin configuration in English: Example of plugin configuration in Russian. If you need Russian config, open it (CraftingPanel.cs) before loading the plugin, and at the top set the variable "isRus = true". Then save and upload this file to your server$30.00- 146 comments
- 2 reviews
-
- 8
-
-
-
- #craft
- #craft menu
- (and 17 more)
-

Version 1.0.1
12 downloads
Do you think the a workbench upgrade is too strong or too weak? You think workbenches should spawn with some upgrades by default? This plugin lets you change how strong each of the workbench upgrades are and what loadout they spawn with. Features: Change the strength of 8 different workbench upgrages, ranging from: - added crafting speed - added hp - scrap cost multiplier fpr prototyping (see config for more) Specify what upgrades a workbench spawns with. - Have them spawn with all upgrades - Have the spawn with the once you want Permissions: Permissions are generated bases one the loadouts of the config file. e.g. Creates permission WorkbechTeacker.vip for loadout vip. Loadouts: Players will be given the loadout depending on their permission (lowest loadout in the config file takes priority). If a player has not permission they get the default loadout. Players can't abuse it as spawnend upgrades will be deleted when trying to take them out the workbench. Default Config: When first loaded the config will look like this. { "Monument workbench loadout": "", "Loadouts": { "default": { "SpawnUpgrades": [], "Settings": {} } } } You can change the default loadout and create new loadouts. see example below Example Config File: 3 Loadouts: default, double, vip Default: spawns with 3 specified upgrades and uses vanilla values for all upgrades Double: spawns with no upgrades, but all upgrades inserted will be doubled in strength VIP: spawns with all upgrades, uses vanilla values expect to specified ones. Monuments will spawn with the 'double' loadout. Possible SpawnUpgrades: All, Range, Accelerated, Defensive, Efficiency, Prototype, Reinforced, Salvage, Surplus, RecycleBin, Comfort { "Monument workbench loadout": "double", "Loadouts": { "default": { "SpawnUpgrades": [ "Range", "Surplus", "Reinforced" ], "Settings": {} }, "double": { "SpawnUpgrades": [], "Settings": { "Accelerated.SpeedBonusPerItem": 0.5, "Accelerated.MaxSpeedMultiplier": 0.5, "Defensive.BonusSlots": 2, "Efficiency.BonusChance": 0.2, "Prototype.CostMultiplier": 1.0, "Prototype.FailChance": 0.05, "Range.RangeMultiplier": 4.0, "RecycleBin.MaxRefundFraction": 0.2, "Reinforced.HealthBonus": 1000.0, "Reinforced.ExplosiveResistance": 0.4, "Salvage.CostReduction": 0.4 } }, "vip": { "SpawnUpgrades": [ "All" ], "Settings": { "Reinforced.HealthBonus": 2000.0, "Reinforced.ExplosiveResistance": 0.5 } } } }$7.99- 3 comments
-
- 1
-
-
- #workbench
- #workbenchupgrade
- (and 1 more)
-
Version 1.0.4
963 downloads
Removes the tech tree from workbenches, replacing it with the research table menu. hardcoreworkbench.use - Allows the player to use the workbench menu Information Use workbench menu - use the standard workbench menu to open the research table. Remove need for workbench - removes the need for a workbench when crafting items. Time to research item - changes the research time of the item. Add vehicles parts vending machine - Add a vending machine for vehicle parts in the Outpost. Use permission to open workbench - Use permission to open workbench menu. Configuration { "Use workbench menu | Use the workbench menu": true, "Remove need for workbench | Remove need for workbench in the workbench": false, "Time to research item | Time to research item": 10.0, "Add vehicles parts vending machine | Add vehicles parts vending machine": true, "Use permission open workbench | Open workbench with the following permissions": false }Free- 12 comments
- 1 review
-
- 3
-
-
- #techtree
- #workbench
- (and 1 more)
-
Version 2.0.1
956 downloads
Simply provide all players with permission constant Work Bench Level 3 access, while also supporting the ability to refill items. Permission and Config You must provide players with this permission: BetterNoWorkbench.on for them to gain access. The config is one simple choice for you to decide if you want the default level to be 1, 2 or 3, by default it's level 3. Support and More Checkout my discord server here.$4.99- 16 comments
-
- 5
-
-

-

-
- #christmas sale
- #workbench
- (and 2 more)
-
Version 1.0.1
48 downloads
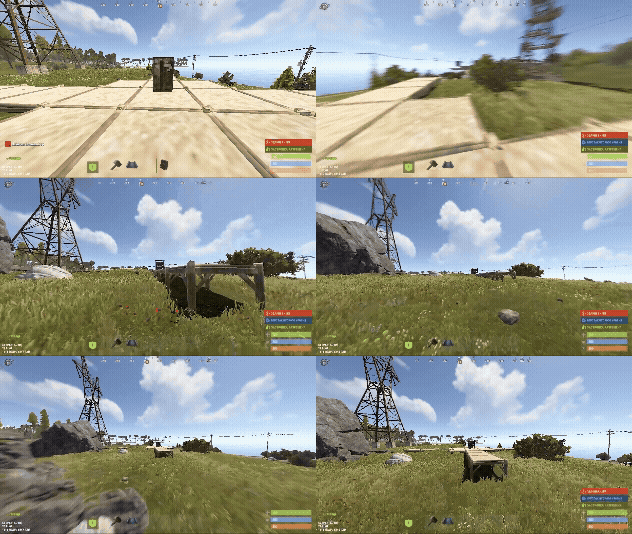
The plugin provides access to the workbench throughout the entire construction area. Oxide/Carbon compatible Permission - buildingworkbench.allow$5.00- 10 comments
-
- 4
-

-
-
- #buildingworkbench
- #workbench
- (and 2 more)
-
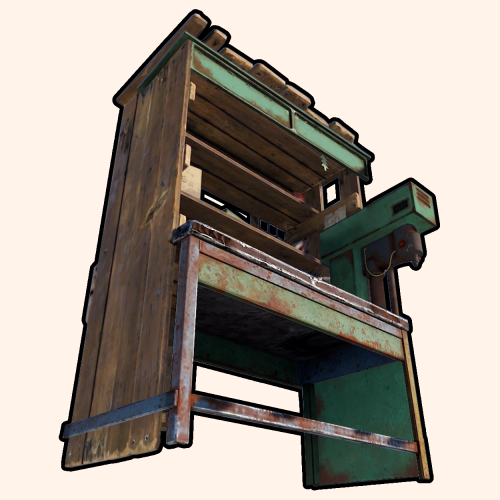
Version 1.2.2
424 downloads
Portable workbench provides you and your population a satisfying addition to the server(s) you're hosting! With high levels of customization, this plugin allows you to access any levels of workbenches from any spot on the map for an amount of time— relative to groups players are in. FEATURES Highly customizable and simple-to-use system for admins and/or regular players. Use /workbench 1-3 (by default, can modify in the config) to start accessing a workbench. Craft bench-leveled items from anywhere in the game world! Intuitive config system, allowing custom chat icon and phrases. Option of requiring players to have placed the level of workbench somewhere they're willing to access. PERMISSIONS PortableWorkbench.use1: Allows you and the players to "wirelessly" access level 1 workbenches. PortableWorkbench.use2: Allows you and the players to "wirelessly" access level 2 workbenches. PortableWorkbench.use3: Allows you and the players to "wirelessly" access level 3 workbenches. RULES (NOESCAPE INTEGRATION) Can('t) use while building blocked. Can('t) use while combat blocked. Can('t) use while raid blocked. COMMANDS (CONFIGURABLE) Following commands are chat and console commands. workbench 1-3: Allows access to specified workbench - if there's no input, it auto-selects level 1 workbench. CONFIG$4.99 -
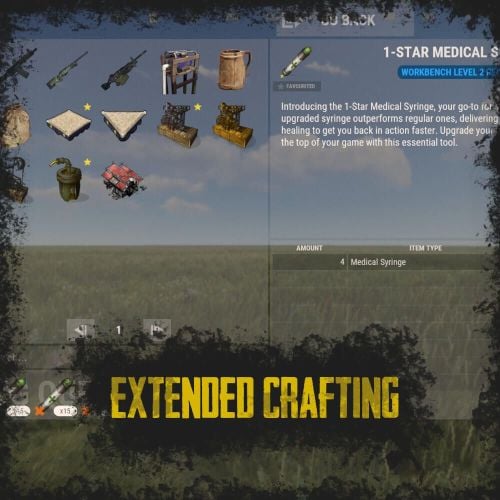
Version 1.1.0
280 downloads
RUST Plugin Test Server TEST MY PLUGINS THERE! connect play.thepitereq.ovh:28050 Extended Crafting creates another look-like RUST Crafting menu where you can create an infinite amount of custom crafting recipes. It fully supports custom item creation and a few additional systems like daily crafts, cooldowns and support for crafting plugins. Almost exact RUST UI design with few required add-ons (new features, rust UI limitations) Fully customizable layout, categories and items. Written with performance in mind. Mark your favorite crafts. Sectional UI updates and live UI updates (crafting queue, time, etc.) Support for crafting speed-up plugins. (ZLevelsRemastered, SkillTree) Ability to enable Status display. (Requires Simple Status Plugin) Crafting cooldowns, daily limits, and per-wipe limits. Huge possibilities with permission configuration for VIP players. extendedcrafting.admin - Gives admin options. Few options still need to be enabled in config in order to use them, like GIVE option. There are more permissions possible, but they are modified and created by user, so won't list them here. All user commands are configurable on top of the config. By default, it's /craft. Run Commands On Craft You can create crafts that run the CONSOLE command when they are finished. Here you can find a full list of variables that can be added there. {userId} - Will be replaced with steamId of user. {userName} - Will be replaced with nickname of user. {userPosX} - Coordinate X of user. {userPosY} - Coordinate Y of user. {userPosZ} - Coordinate Z of user. void OnCustomItemCraft(BasePlayer player, string category, string itemKey, int craftAmount) Configuration from the video preview. Contains many craft recipes that require plugins that are paid, or unavailable. Recommend using only the test/preview configuration. ExtendedCrafting.json { "Commands": [ "c", "craft" ], "UI And Command Delay Between Actions (performance option, in seconds)": 0.1, "Clear Wipe Cooldowns On Wipe": true, "Enable Crafting Statistics": true, "Drop Queued Crafting Items To Ground On Death": true, "Format Crafting Time To Minutes (will round values)": false, "Enable Admin Give (click recipe with SPRINT button, required permission extendedcrafting.admin)": true, "Enable Logging": true, "Enable Crafting Status Indicator (Requires SimpleStatus Plugin)": false, "New Day Check Interval (in seconds, used for per-day limits, 0 to disable)": 600, "Max Queued Craftings": 10, "Workbench Bonus Higher By 1 Than Required Time Multiplier (0 to disable)": 0.5, "Workbench Bonus Higher By 2 Than Required Time Multiplier (0 to disable)": 0.25, "Workbench Bonus Higher By 3 Than Required Time Multiplier (0 to disable)": 0.0, "Used Craft Time Divider Plugin (see website documentation for plugin IDs, 0 to disable)": 0, "Skill Tree Bonuses - Enable Craft Speed": false, "Skill Tree Bonuses - Enable Craft Duplicate": false, "Crafting Time Multiplier Modify Permissions (for all craftings, from best to worst)": { "extendedcrafting.crafttime.admin": 0.1, "extendedcrafting.crafttime.vip": 0.5 }, "Max Craft Amount Per Task": 100000, "WARNING! Categories can't have spaces in their names!": "Each category name have their translation in language file in /lang/en/ExtendedCrafting.json!", "Craftings - Categories and Items": { "FirstTestCat": { "Icon - Item Shortname or URL or Sprite Directory": "", "Icon - Use Normalized Colour And Style (For Shortname and URL)": true, "Required Permission": "", "Crafting Time Multiplier Modify Permissions (for whole category, from best to worst)": { "extendedcrafting.crafttime.test.1": 0.25, "extendedcrafting.crafttime.test.2": 0.75 }, "Display Blacklist Permissions (need to have all)": [ "extendedcrafting.hideme.test.1", "extendedcrafting.hideme.test.2" ], "WARNING! Item recipe key values must be unique and have no spaces!": "They are only key values for config and better performance. They are not visible anywhere!", "Item Recipes": { "TestItem_1": { "Item Details": { "Shortname": "metal.refined", "Skin ID": 0, "Amount": 2, "Custom Name": "" }, "Commands Ran On Craft": [ "say Player {userName} crafted test item!", "say Player {userName} crafted item and his ID is {userId}." ], "Craft Requirements": { "Disable Craft Plugin Time Bonus": false, "Workbench Level Required": 1, "Crafting Time (in seconds, 0 - insta-craft)": 5, "Crafting Cooldown (in seconds, 0 - disable cooldown)": 0.0, "Max Craft Amount Per Task Override (0 to disable)": 0, "Crafting Time Modify Permissions (per crafting recipe, from best to worst)": {}, "Max Daily Crafts (0 to disable)": 0, "Max Daily Crafts Permissions (per crafting recipe, from best to worst)": {}, "Max Per-Wipe Crafts (0 to disable)": 0, "Max Per-Wipe Crafts Permissions (per crafting recipe, from best to worst)": {}, "Required Items (max 8 visible)": [ { "Shortname": "gunpowder", "Skin ID": 0, "Amount": 10, "Custom Name": "" }, { "Shortname": "wood", "Skin ID": 0, "Amount": 1, "Custom Name": "" }, { "Shortname": "metal.fragments", "Skin ID": 0, "Amount": 1, "Custom Name": "" }, { "Shortname": "sulfur.ore", "Skin ID": 0, "Amount": 5, "Custom Name": "" } ] }, "Custom Icon URL": "", "Required Permission": "", "Blacklist Permission": "", "Display As Locked With Missing Permission": true }, "TestItem_2": { "Item Details": { "Shortname": "halloween.lootbag.large", "Skin ID": 0, "Amount": 1, "Custom Name": "Ultra Lootbag" }, "Commands Ran On Craft": [], "Craft Requirements": { "Disable Craft Plugin Time Bonus": false, "Workbench Level Required": 1, "Crafting Time (in seconds, 0 - insta-craft)": 5, "Crafting Cooldown (in seconds, 0 - disable cooldown)": 0.0, "Max Craft Amount Per Task Override (0 to disable)": 0, "Crafting Time Modify Permissions (per crafting recipe, from best to worst)": {}, "Max Daily Crafts (0 to disable)": 0, "Max Daily Crafts Permissions (per crafting recipe, from best to worst)": {}, "Max Per-Wipe Crafts (0 to disable)": 0, "Max Per-Wipe Crafts Permissions (per crafting recipe, from best to worst)": {}, "Required Items (max 8 visible)": [ { "Shortname": "metal.refined", "Skin ID": 0, "Amount": 50, "Custom Name": "" }, { "Shortname": "techparts", "Skin ID": 0, "Amount": 3, "Custom Name": "" }, { "Shortname": "cloth", "Skin ID": 0, "Amount": 100, "Custom Name": "" } ] }, "Custom Icon URL": "", "Required Permission": "", "Blacklist Permission": "", "Display As Locked With Missing Permission": true } } }, "SecondTestCat": { "Icon - Item Shortname or URL or Sprite Directory": "", "Icon - Use Normalized Colour And Style (For Shortname and URL)": true, "Required Permission": "", "Crafting Time Multiplier Modify Permissions (for whole category, from best to worst)": {}, "Display Blacklist Permissions (need to have all)": [], "WARNING! Item recipe key values must be unique and have no spaces!": "They are only key values for config and better performance. They are not visible anywhere!", "Item Recipes": { "AnotherItem_1": { "Item Details": { "Shortname": "wood", "Skin ID": 0, "Amount": 1000, "Custom Name": "" }, "Commands Ran On Craft": [], "Craft Requirements": { "Disable Craft Plugin Time Bonus": false, "Workbench Level Required": 3, "Crafting Time (in seconds, 0 - insta-craft)": 60, "Crafting Cooldown (in seconds, 0 - disable cooldown)": 0.0, "Max Craft Amount Per Task Override (0 to disable)": 0, "Crafting Time Modify Permissions (per crafting recipe, from best to worst)": {}, "Max Daily Crafts (0 to disable)": 0, "Max Daily Crafts Permissions (per crafting recipe, from best to worst)": {}, "Max Per-Wipe Crafts (0 to disable)": 0, "Max Per-Wipe Crafts Permissions (per crafting recipe, from best to worst)": {}, "Required Items (max 8 visible)": [ { "Shortname": "charcoal", "Skin ID": 0, "Amount": 1000, "Custom Name": "" } ] }, "Custom Icon URL": "", "Required Permission": "", "Blacklist Permission": "", "Display As Locked With Missing Permission": true }, "AnotherItem_2": { "Item Details": { "Shortname": "lmg.m249", "Skin ID": 0, "Amount": 1, "Custom Name": "" }, "Commands Ran On Craft": [], "Craft Requirements": { "Disable Craft Plugin Time Bonus": false, "Workbench Level Required": 3, "Crafting Time (in seconds, 0 - insta-craft)": 180, "Crafting Cooldown (in seconds, 0 - disable cooldown)": 0.0, "Max Craft Amount Per Task Override (0 to disable)": 0, "Crafting Time Modify Permissions (per crafting recipe, from best to worst)": {}, "Max Daily Crafts (0 to disable)": 0, "Max Daily Crafts Permissions (per crafting recipe, from best to worst)": {}, "Max Per-Wipe Crafts (0 to disable)": 0, "Max Per-Wipe Crafts Permissions (per crafting recipe, from best to worst)": {}, "Required Items (max 8 visible)": [ { "Shortname": "metal.refined", "Skin ID": 0, "Amount": 500, "Custom Name": "" }, { "Shortname": "techparts", "Skin ID": 0, "Amount": 20, "Custom Name": "" }, { "Shortname": "scrap", "Skin ID": 0, "Amount": 5000, "Custom Name": "" } ] }, "Custom Icon URL": "", "Required Permission": "", "Blacklist Permission": "", "Display As Locked With Missing Permission": true } } } } }$25.00 -

Version 1.2.2
15 downloads
TechTreeTax – Wipe-Scaled Tech Tree & Research Taxes Early wipe scrap should hurt. Late wipe it should feel normal. TechTreeTax adds a dynamic scrap tax to the tech tree and research table, scaling automatically with the days since wipe. Prices start brutal and smoothly relax over time, keeping early progression slow and meaningful without punishing late joiners. You get clear UI, chat messages, and full control from config – including manual wipe time and external sync with RustWipeInfoPlus. Key Features Dynamic tech tree tax Scrap cost is multiplied based on days since wipe. Fully configurable start %, end %, and duration in days. Uses vanilla tech tree prices as the base (optional). Dynamic research table tax Same system for research table scrap cost. Separate curve for research vs tech tree if you want different scaling. Wipe-aware scaling Reads wipe age from RustWipeInfoPlus (optional). If RustWipeInfoPlus is not installed or disabled, you can: Use a manual wipe start timestamp in the config, or Let TechTreeTax auto-detect new map/seed/size and start from there. Player-facing UI and messages Top-screen HUD bar showing: Base price Tax amount Final price (base + tax = total) Connect message: “Taxes are currently X% (Day Y of the wipe).” Proximity message when entering a workbench area. All text is configurable through the plugin’s language file. Smart unlock handling When unlocking via tech tree: Checks total scrap needed (base + tax). If not enough scrap → denies unlock and shows red cost HUD. If enough scrap → takes the scrap and prints a summary: You paid {total} scrap (base {base}, tax {tax}) for {item}. Same flow for research table. Permissions and bypass Allow staff or VIP to bypass the tax. Enable/disable bypass permission in the config. Admin permission for config/testing commands. Clean config & data Separate sections for: General settings UI layout/colors Wipe scaling (tech tree + research) Notifications External wipe source (RustWipeInfoPlus / manual) Data stored in a dedicated data file: Last map, seed, size WipeStartUnix (used to compute days since wipe) Vanilla price cache stored in its own data file; auto-rebuilt when needed. Why Use TechTreeTax? Makes early wipe slow, harsh and meaningful without editing every item. Automatically relaxes the grind as the wipe ages. Gives clear, visual feedback so players understand why something is expensive. Plays nicely with wipe tracking plugins via RustWipeInfoPlus or manual config. Any questions or suggestions! Feel free to reach out$9.99 -

Version 2.0.3
202 downloads
Overview ExtraBoxesPlus is a Rust plugin that automatically spawns additional storage options (wooden boxes) on top of tool cupboards, workbenches and more! when they are placed. It also provides configuration options to spawn a Pookie Bear on tool cupboards and manage wooden box behavior across different workbench tiers. The boxes are conveniently placed to maximize storage capacity and space efficiency. Features • Automatic wooden box spawning on workbenches, repair benches, mixing tables, research tables, cooking workbenches, and BBQs • Tool cupboard enhancement with wooden box storage • Pookie bear comfort system with permission-based radius (12m, 20m, or 35m) • Only authorized players on tool cupboards receive pookie bear comfort • Custom skin support for all spawned boxes • Boxes cannot be picked up separately (protection system) • Prevents deployable pickup when boxes contain items • Automatic pookie bear updates when permissions change • Performance optimized with batched processing Quick start Basic Setup (All Players): oxide.grant group default extraboxesplus.use.workbench oxide.grant group default extraboxesplus.use.repairbench oxide.grant group default extraboxesplus.use.mixingtable oxide.grant group default extraboxesplus.use.researchtable oxide.grant group default extraboxesplus.use.cookingworkbench oxide.grant group default extraboxesplus.use.bbq oxide.grant group default extraboxesplus.use.toolcupboard oxide.grant group default extraboxesplus.use.pookie VIP Setup: oxide.grant group vip extraboxesplus.use.all oxide.grant group vip extraboxesplus.pookie.plus VIP + Setup: oxide.grant group premium extraboxesplus.use.all oxide.grant group premium extraboxesplus.pookie.extra Permissions This plugin uses the permission system. To assign a permission, use oxide.grant <user or group> <name or steam id> <permission>. To remove a permission, use oxide.revoke <user or group> <name or steam id> <permission>. extraboxesplus.use.all -- Grants access to ALL plugin features, overrides all specific permissions. extraboxesplus.use.workbench -- Required to spawn boxes on Workbench Level 1, 2, and 3. extraboxesplus.use.repairbench -- Required to spawn boxes on Repair Bench. extraboxesplus.use.mixingtable -- Required to spawn boxes on Mixing Table. extraboxesplus.use.researchtable -- Required to spawn boxes on Research Table. extraboxesplus.use.cookingworkbench -- Required to spawn boxes on Cooking Workbench. extraboxesplus.use.bbq -- Required to spawn boxes on BBQ. extraboxesplus.use.toolcupboard -- Required to spawn boxes on Tool Cupboards. extraboxesplus.use.pookie -- Required for basic pookie bear functionality (12m comfort radius). extraboxesplus.pookie.plus -- Provides enhanced pookie bear comfort (20m radius). Requires base pookie permission. extraboxesplus.pookie.extra -- Provides maximum pookie bear comfort (35m radius). Requires base pookie permission. Note: Pookie bear permissions are hierarchical. Players need the base pookie permission for any pookie functionality. The system automatically uses the highest permission among all authorized players on a tool cupboard. Configuration ExtraBoxesPlus comes with several configuration options that allow you to tailor the plugin's behavior to your server's needs: { "ConfigVersion": "2.0.1", "PermissionMigrationVersion": "2.0.1", "PookieBearSettings": { "DefaultRadius": 12.0, "PermissionBasedRadius": { "extraboxesplus.pookie.plus": 20.0, "extraboxesplus.pookie.extra": 35.0 } }, "WorkbenchSettings": { "EnableByTier": { "Workbench Level 1": true, "Workbench Level 2": true, "Workbench Level 3": true } }, "DeployableSettings": { "EnableForDeployables": { "Repair Bench": true, "Mixing Table": true, "Research Table": true, "Cooking Workbench": true, "BBQ": true } }, "SkinSettings": { "EnableCustomSkins": true, "SkinIDs": { "Tool Cupboard": 3306209184, "Workbench Level 1": 3306209184, "Workbench Level 2": 3306209184, "Workbench Level 3": 3306209184, "Repair Bench": 3306209184, "Mixing Table": 3306209184, "Research Table": 3306209184, "Cooking Workbench": 3306209184, "BBQ": 3306209184 } } } Configuration Sections Explained: PookieBearSettings: DefaultRadius: 12.0 - Sets the base comfort radius in meters for players with basic pookie permission - This applies to players with extraboxesplus.use.pookie permission - Range: 1.0 to 50.0 meters (50m is hardcoded maximum for server stability) PermissionBasedRadius: extraboxesplus.pookie.plus: 20.0 - Comfort radius for players with enhanced pookie permission - Overrides DefaultRadius when player has this permission extraboxesplus.pookie.extra: 35.0 - Comfort radius for players with premium pookie permission - Highest tier, overrides all other radius settings - Maximum recommended for server performance WorkbenchSettings: EnableByTier: "Workbench Level 1": true - Set to false to disable boxes on Tier 1 workbenches - Useful for progression-based servers "Workbench Level 2": true - Set to false to disable boxes on Tier 2 workbenches - Independent control from other tiers "Workbench Level 3": true - Set to false to disable boxes on Tier 3 workbenches - Highest tier workbench control DeployableSettings: EnableForDeployables: "Repair Bench": true - Set to false to disable boxes on repair benches - Spawns 2 boxes when enabled "Mixing Table": true - Set to false to disable boxes on mixing tables - Spawns 2 boxes when enabled "Research Table": true - Set to false to disable boxes on research tables - Spawns 2 boxes when enabled "Cooking Workbench": true - Set to false to disable boxes on cooking workbenches - Spawns 1 box when enabled "BBQ": true - Set to false to disable boxes on BBQs - Spawns 1 box when enabled SkinSettings: EnableCustomSkins: true - Master toggle for custom skins on all spawned boxes - Set to false to use default Rust wooden box appearance - Must reload plugin after changing this setting SkinIDs: - Steam Workshop skin ID for boxes spawned on tool cupboards - Set to 0 to use default wooden box skin - Must be a valid Steam Workshop item ID Configuration Tips: - Backup your config before making changes - Use oxide.reload ExtraBoxesPlus after config changes - Test skin IDs on a development server first - Lower pookie bear radius for better server performance - Disable specific deployables if causing conflicts with other plugins Notes Legacy Permission Migration: extraboxesplus.use → Grants all individual deployable permissions: • extraboxesplus.use.workbench • extraboxesplus.use.repairbench • extraboxesplus.use.mixingtable • extraboxesplus.use.researchtable • extraboxesplus.use.cookingworkbench • extraboxesplus.use.bbq • extraboxesplus.use.toolcupboard • extraboxesplus.use.pookie Legacy Config Migration: - Your old config file will be automatically converted - All your existing settings will be preserved - Pookie bear system now requires permissions (see PERMISSIONS section) - The old "EnablePookieBearOnToolCupboard" setting is replaced by the permission system - Server console will show migration progress messages$4.99- 28 comments
- 5 reviews
-
- 5
-
-
-
-
- #toolcupboard
- #workbench
- (and 7 more)
-
Version 1.3.3
62 downloads
I've disabled sales of this product here moving forward.$9.99- 13 comments
- 2 reviews
-
- 3
-
-
-
- #deployables
- #plugin
- (and 23 more)
-
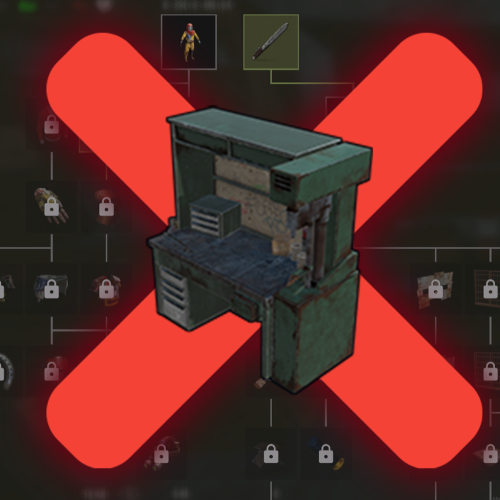
Version 1.0.1
822 downloads
Making researching through workbenches impossible by simply disallowing the workbench to be opened so players are forced to find the item they want to learn first. Features : Blocks opening the workbench panel. Can have bypass set for each workbench tier wb1 wb2 wb3 or all through permissions Crafting functions as normal. Get a popup notification with info (gametip) when blocked. Simple config just for prefix and chaticon. Permissions : wbresearchblock.bypas : To allow bypassing all workbench tiers and it can be used for researching as normal wbresearchblock.usewb1 : To allow bypassing the block for workbench1 wbresearchblock.usewb2: To allow bypassing the block for workbench2 wbresearchblock.usewb3: To allow bypassing the block for workbench3 Commands : /wbrblock : Shows the info you define through language file why the workbenches are blocked and any other info it might suit the needs. Configuration { "Main config": { "Chat Steam64ID": 0, "Chat Prefix": "[<color=green>WBR</color><color=yellow>Block</color>] " } } Localisation : English language file included to use a different language just make a new file in the language folder. { "ChatInfo": "Researching through Workbenches is blocked you can still research some items through the research table!", "NoPermission": "Research through workbench is blocked!\nCheck <color=green>/wbrblock</color> for more information!" }Free- 6 comments
-
- 5
-
-
-
- #block research
- #rust
- (and 3 more)
-
Version 1.0.3
1,720 downloads
Features Allows players to craft items without workbench. Usage - Copy the downloaded DLL file into server/HarmonyMods folder Support - If you need help or If you have any issues or suggestions you can contact me by joining my discord server: https://discord.gg/efVKDG6z6F or by adding me on discord: Farkas#6006Free -
Version 1.0.1
16 downloads
MaLais - Your friendly and best price Gas Station! A new "modern" Gas Station with a working carlift (players need to put a fuse in). Great for replacing the old Rusty Gas Station! Loot: Oil and normal barrels Basic crate Tool Box Food crate Tech parts crate Normal crate Military crate Greencard Spawner Also this Building have a working carlift (players need to put in a fuse in). There is also: Workbench Tier 1 Repair Bench Recycler$9.99 -
Version 1.0.1
21 downloads
MaLais - Your great and fresh Supermarket! A new "modern" Supermarket. Great for replacing the old Rusty Supermarket! Loot: Barrels Basic crate Tool Box Food crate Fuel crate Vehicle parts crate Normal crate Military crate Green card spawner This Building comes also with a Workbench Tier 1, Repair bench and a Recycler.$9.99 -
Version 1.1
245 downloads
Midpoint is a small monument (one PvE and one ) that can be placed near roads. Convenient for new players that just joined your server and do not have teleportation rights or just simply wish to enjoy the company of others in safety around a fire pit. There are 3 vending machines, a slot machine, big furnace, small refinery, workbench 1 and 2, recycler, research table and repair bench. PVE does not require a safe zone and comes with Reactivetarget for target practice, good for some fun. PVP includes safe zone mechanism. No build was added to both pve and pvp monument. No peacekeeprs added, you can add them in either in RustEdit or in game. The package consists of two versions of the monument, specifically designed to cater to the needs of both PVE and PVP servers. I have made the item free of charge for anyone to download. (item no longer supported)Free -
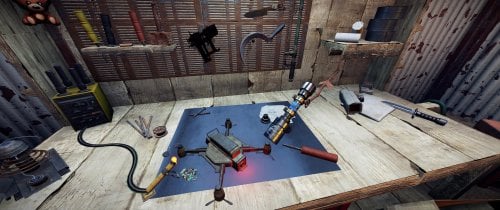
Version 1.0.0
816 downloads
A non-interactive wooden workbench, useable for any kind of workshop setup. This workbench is just a decorative object. I wasn ´t able to place a functional workbench inside of it (rescaling of interactive object ´s won ´t work), without that it would be seen. Maybe there will be an updated version with a real workbench inside in the future. Also available at: https://rust-custom-designs.biz/Free