Search the Community
Showing results for tags 'community'.
Found 22 results
-
Version 1.0.1
30 downloads
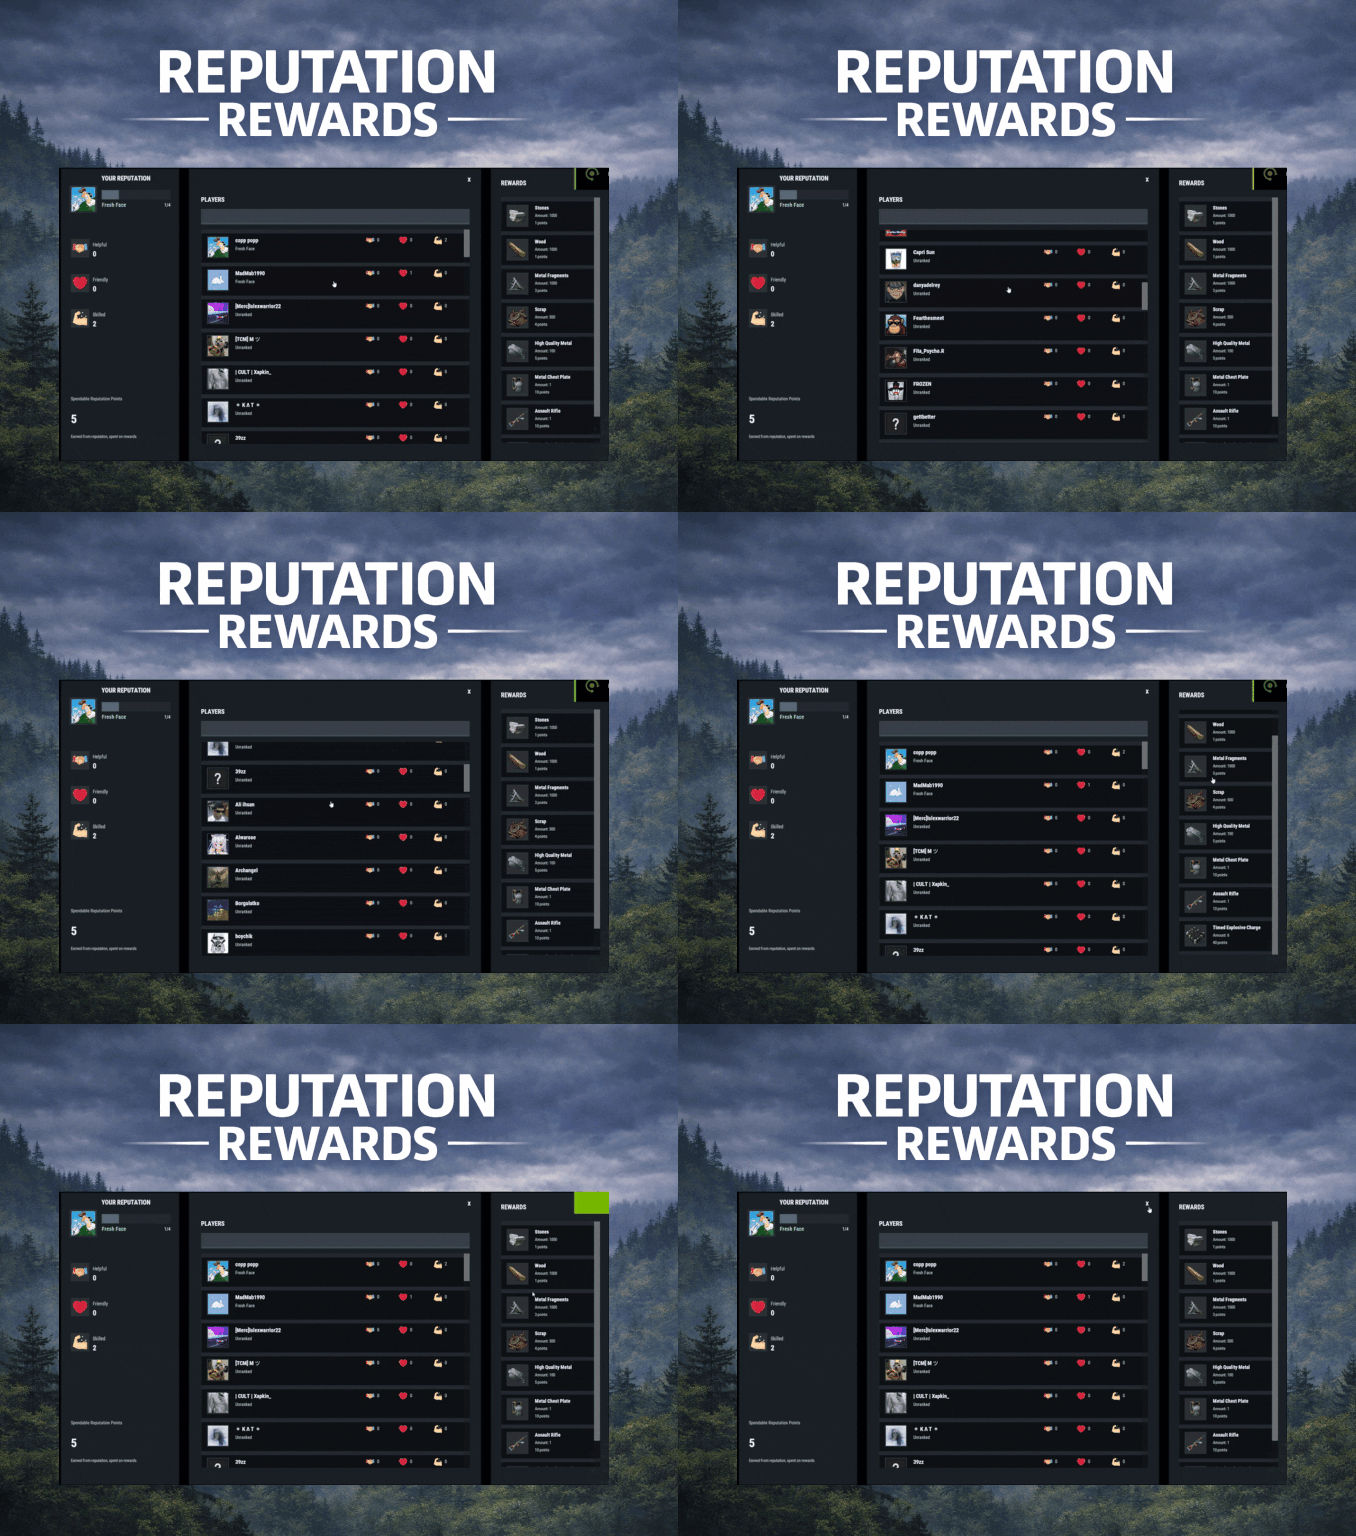
ReputationRewards is built to encourage positive community behaviors by adding an in-game reputation system to your Rust server with a clean 3-column UI, built-in reward shop, and rank progression. Players can reward each other for being Helpful, Friendly, or Skilled, earning spendable reputation points that can be redeemed instantly for configured items. As players gain reputation, they climb ranks and can trigger configurable server commands on rank-up for additional rewards or other triggers (kits, mail, permissions, VIP perks, etc.). Key features In-game UI One command opens a polished reputation interface. Three-column layout: Your Reputation (rep totals, rank, progress bar, spendable points) Players List (searchable, sorted by total rep) Built in Rewards Shop Three reputation categories Helpful Friendly Skilled These can easily be renamed to something else via the Lang files. Anti-abuse limits (configurable) Per-target cooldown: limit how often someone can rep the same player. Total giving limit per window: cap how many reps a player can give during a configurable time window (default 24h). Spendable reputation points Configurable points awarded to: The target (for receiving rep) The giver (for giving rep) Points are spent in the built in reward shop. Built-in reward shop Configure any Rust item shortname + amount + optional skin + optional custom display name. Players select quantity and see the total cost before purchase. Rank system with automatic rewards Define unlimited ranks with a required total reputation threshold. Run server commands on rank-up (supports placeholders like %steamid%). Compatible with all plugins that can trigger a console command against a player, such as my Mail System Visual feedback FX plays when rep is received. FX plays on rank-up to make progression feel rewarding. Integrations BetterChat: If you wish to display player's reputation rank next to their chat name ImageLibrary (recommended): for image loading reliability. Configuration highlights Set cooldown time per target player Set total give limit window (seconds) + max reps per window Configure how many spendable points are earned per rep (giver and target) Configure wipe behavior on new save (rep/rank and/or spendable points) Define ranks and rank-up commands Define reward shop items and pricing Customize UI colors + icon URLs __________________________________ Commands (configurable): /rep or /reputation - Opens the reputation UI __________________________________ Sample/Default Config: { "Commands to open UI": [ "rep", "reputation" ], "How often can a player give rep to the same player": 86400, "How often to reset player's total rep give limit": 86400, "Max reputation gives per total window (per player)": 5, "Spendable points awarded to TARGET per rep received": 2, "Spendable points awarded to GIVER per rep given": 1, "Wipe reputation + rank on new save?": false, "Wipe spendable points on new save?": false, "Ranks / Levels": [ { "Rank Name": "Fresh Face", "Points Required (total rep)": 1, "Commands On Reach (optional)": [ "mail.send %steamid% \"Rank Up: Fresh Face!\" \"Welcome to the community! Here are some starting supplies to help you settle in.\" -img 0 -item wood 1000 0 -item stones 1000 0" ] }, { "Rank Name": "Promising Sapling", "Points Required (total rep)": 5, "Commands On Reach (optional)": [ "mail.send %steamid% \"Rank Up: Promising Sapling!\" \"You're showing great potential! Here are some resources to help you grow.\" -img 0 -item sulfur.ore 1000 0 -item metal.ore 1000 0" ] }, { "Rank Name": "Positive Force", "Points Required (total rep)": 10, "Commands On Reach (optional)": [ "mail.send %steamid% \"Rank Up: Positive Force!\" \"Your positive impact is being felt! Here are some refined materials for your efforts.\" -img 0 -item sulfur 1000 0 -item metal.fragments 1000 0" ] }, { "Rank Name": "Reliable Member", "Points Required (total rep)": 20, "Commands On Reach (optional)": [ "mail.send %steamid% \"Rank Up: Reliable Member!\" \"Your reliability has been noticed! Here are some higher quality materials for your continued contributions.\" -img 0 -item hq.metal.ore 1000 0 -item lowgradefuel 1000 0" ] }, { "Rank Name": "Community Pillar", "Points Required (total rep)": 35, "Commands On Reach (optional)": [ "mail.send %steamid% \"Rank Up: Community Pillar!\" \"You've become a pillar of our community! Here are some valuable processed materials.\" -img 0 -item metal.refined 1000 0 -item charcoal 1000 0" ] }, { "Rank Name": "Guiding Presence", "Points Required (total rep)": 55, "Commands On Reach (optional)": [ "mail.send %steamid% \"Rank Up: Guiding Presence!\" \"Your guidance helps others find their way! Here are materials for advanced crafting.\" -img 0 -item scrap 1000 0 -item gunpowder 1000 0" ] }, { "Rank Name": "Foundation Stone", "Points Required (total rep)": 80, "Commands On Reach (optional)": [ "mail.send %steamid% \"Rank Up: Foundation Stone!\" \"You are a foundational part of our community! Here are some advanced munitions for your dedication.\" -img 0 -item ammo.rifle.hv 500 0 -item ammo.rifle.explosive 500 0" ] }, { "Rank Name": "The Beloved", "Points Required (total rep)": 110, "Commands On Reach (optional)": [ "mail.send %steamid% \"Rank Up: The Beloved!\" \"You are the heart and soul of our community! Here are powerful munitions for a true leader.\" -img 0 -item ammo.rocket.basic 12 0 -item ammo.rocket.hv 12 0" ] } ], "Enable Title In BetterChat (optional, requires BetterChat)": false, "BetterChat Title Format ({0} will place the rank name)": "<color=yellow>{0}</color>", "Rewards": [ { "Shortname": "wood", "Amount": 1000, "SkinId": 0, "DisplayName (blank = default)": "", "Cost (points)": 1 }, { "Shortname": "stones", "Amount": 1000, "SkinId": 0, "DisplayName (blank = default)": "", "Cost (points)": 1 }, { "Shortname": "metal.fragments", "Amount": 1000, "SkinId": 0, "DisplayName (blank = default)": "", "Cost (points)": 3 }, { "Shortname": "metal.refined", "Amount": 100, "SkinId": 0, "DisplayName (blank = default)": "", "Cost (points)": 5 }, { "Shortname": "scrap", "Amount": 500, "SkinId": 0, "DisplayName (blank = default)": "", "Cost (points)": 4 }, { "Shortname": "rifle.ak", "Amount": 1, "SkinId": 0, "DisplayName (blank = default)": "", "Cost (points)": 10 }, { "Shortname": "metal.plate.torso", "Amount": 1, "SkinId": 0, "DisplayName (blank = default)": "", "Cost (points)": 10 }, { "Shortname": "explosive.timed", "Amount": 6, "SkinId": 0, "DisplayName (blank = default)": "", "Cost (points)": 40 } ], "Colors": { "Overlay Background (dim)": "0 0 0 0.35", "Main Panel Background": "0.12 0.14 0.16 0.95", "Inner Panel Background": "0.15 0.17 0.20 0.96", "Modal Frame (border)": "0.06 0.07 0.08 0.98", "Modal Background": "0.10 0.12 0.14 0.995", "Row Background": "0.10 0.12 0.14 0.92", "Row Hover Background": "0.16 0.18 0.21 0.95", "Row Pressed Background": "0.14 0.16 0.19 0.95", "Row Border": "0.06 0.07 0.08 0.98", "Text - Title": "0.95 0.96 0.97 1", "Text - Main": "0.88 0.90 0.92 1", "Text - Sub": "0.72 0.76 0.80 1", "Text - Dark": "0.10 0.10 0.10 1", "Button Background": "0.28 0.32 0.36 1", "Button Hover Background": "0.34 0.39 0.44 1", "Button Pressed Background": "0.31 0.35 0.40 1", "Accent Button Background": "0.36 0.40 0.46 1", "Input Field Background": "0.22 0.25 0.29 1", "Input Field Border Strip": "0.55 0.58 0.62 0.25", "Avatar Backing Plate/Border": "0.18 0.20 0.22 0.98", "Rank Progress Fill Color": "0.36 0.40 0.46 1", "Rank Title Text Color": "0.55 0.90 0.70 1", "Scrollbar Handle": "0.45 0.46 0.47 0.95", "Scrollbar Track": "0.10 0.10 0.10 0.35", "Scrollbar Highlight": "0.55 0.56 0.57 0.98", "Scrollbar Pressed": "0.62 0.63 0.64 0.98", "Positive Text Accent": "0.55 0.90 0.70 1", "Negative Text Accent": "0.90 0.55 0.55 1" }, "Images": { "Helpful Icon URL": "https://i.ibb.co/Y7CFpTLV/handshake.png", "Friendly Icon URL": "https://i.ibb.co/7dsJFVN5/heart-1.png", "Skilled Icon URL": "https://i.ibb.co/3QTJJgt/muscle.png" }, "Use ImageLibrary (recommended)": true }$5.00 -
Version 1.1.7
133 downloads
WelcomePlus is a lightweight, community-driven plugin developed to make your server feel welcoming with personalised greeting messages that actually matter. Features Rank-Based Welcome Messages - Customisable messages based on player permissions Playtime Tracking - Track total playtime and current session time Interactive GUI - Modern interface accessible via /wp or /welcomeplus Multi-Language Support - English and Spanish included, easy to add more Admin Tools - Player lookup, statistics, and data management Opt-Out System - Players can disable automatic welcome messages Command Aliases - Fully configurable command aliases External Language Files - Easy translation management via JSON files Separate Welcome Messages File - Edit welcome messages independently from language files Permissions welcomeplus.use - Required to receive welcome messages (if enabled in config) welcomeplus.vip - VIP rank permission welcomeplus.admin - Admin rank permission welcomeplus.owner - Owner rank permission Custom Rank Permissions: Define your own ranks and permissions via the config file's `CustomRankPermissions` block. Installation & Setup 1. Download and drop WelcomePlus.cs into your oxide/plugins/ folder 2. Download and place the lang/ folder in oxide/lang/WelcomePlus/ 3. (Optional) Place WelcomePlus_WelcomeMessages.json in oxide/data/ for custom welcome messages 4. Restart your server or run oxide.reload WelcomePlus 5. Configure ranks and permissions in the generated config file (optional) 6. Customise welcome messages in WelcomePlus_WelcomeMessages.json (optional) That's all - the plugin works out of the box with sensible defaults! Quick Start Commands Players: /wp - Open main menu /playtime or /pt - View your playtime /session - View current session /playtimeleaderboard or /ptl - View top 10 players Admins: /wp stats - Plugin statistics /wp reset <player> - Reset player data /wp defaults or /wp resetconfig - Reset config and welcome messages to defaults /playtime <player> - View any player's stats Configuration The plugin generates a config file at oxide/config/WelcomePlus.json with all settings. Key options: Custom Rank Permissions - Define rank labels and their permissions UI/Text Toggle - Choose between GUI panels or chat messages Welcome Settings - Enable/disable first-time and returning player messages Command Aliases - Customise all command aliases Welcome Messages File - Edit welcome messages in `oxide/data/WelcomePlus_WelcomeMessages.json` Reset to Defaults - `/wp defaults` command resets config and welcome messages to defaults Welcome Messages File Welcome messages are stored in oxide/data/WelcomePlus_WelcomeMessages.json (automatically created on first run). This file contains all rank-specific welcome messages and is separate from language files for easier editing. File Structure: FirstTime - Messages for first-time players (by rank) WelcomeBack - Messages for returning players (by rank) Supports multiple messages per rank (randomly selected) Supports placeholders: {name}, {rank}, {total}, {session} Language Files Language files are in oxide/lang/WelcomePlus/: en.json - English (default) es.json - Spanish To add more languages, create new JSON files (e.g., fr.json) following the same structure. Note: Language files contain UI text and system messages. Welcome messages are primarily stored in the welcome messages file, with language files as fallback. Custom Ranks Define custom ranks in the config: "CustomRankPermissions": { "default": "", "vip": "welcomeplus.vip", "mod": "welcomeplus.mod", "batman": "welcomeplus.batman", "admin": "welcomeplus.admin", "owner": "welcomeplus.owner" } Priority System: Rank priority is determined by config order (first entry = highest priority) If a player has multiple permissions, the rank appearing first in config wins Example: If "staff" appears before "mod" and player has both, "staff" messages are used Automatic Permission Registration: Permissions from CustomRankPermissions are automatically registered No code changes needed - just add to config and reload Then add rank-specific messages to WelcomePlus_WelcomeMessages.json: Add rank key to FirstTime section for first-time messages Add rank key to WelcomeBack section for returning player messages Messages fall back to language files if not found in welcome messages file Support Discord: @olvrdncnsctt For detailed documentation, see README.txt. For version history, see WelcomePlusChangelog.txt. README.txt WelcomePlusChangelog.txtFree -

Version 3.1
336 downloads
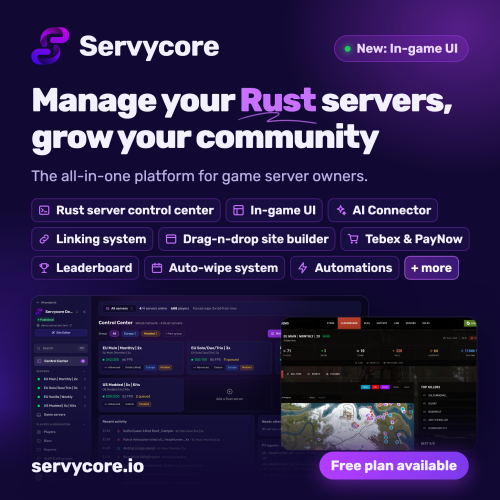
Start free on servycore.io · Live demo · Discord Servycore is the all-in-one platform for game server owners. Run your Rust servers from one panel, build your community website with drag and drop, and reward the players who link Discord, Steam or Twitch. Start on the Free plan. See Servycore in action (73 s) Rust Control Center. Your whole network live in one place: web RCON console, in-game chat, player profiles, bans enforced before connection, F7 reports, combat log, Discord alerts and a kill feed. Your moderators get the tools, never the RCON password. Wipe day on autopilot. The Auto-wipe system follows Facepunch's forced wipe, warns your players in game and on Discord, sets the new map and restarts the server. Automations handle restarts, the chat filter, VIP trials and vote rewards, and your uMod and Codefling plugins install and update in one click. In-game UI. Your players type /info, /store or /kit and your server opens in game: wipes, account linking, rules, your servers, your Tebex or PayNow store, kits with cooldowns, the leaderboard and your own pages, in your colours with your logo. You design it in your browser and publish it live; it runs with the free Servycore In-game UI plugin on Oxide or Carbon. In every plan, the Free one too. AI Connector (MCP). Connect Claude, ChatGPT, Cursor or any MCP assistant and manage your servers by talking to it, with your rights and nothing more. It asks before anything your players can see. How it works Your community website. A drag-and-drop page builder with 15+ content blocks and 3 themes (Outpost looks like the Rust menus), custom pages, a blog, support tickets, the Rust leaderboard and your Tebex or PayNow integration. Custom domain and custom CSS from Basic. See the live demo Linking system. Players link Discord, Steam and Twitch once, and your linking commands reward them in game on every server. Missed rewards are given when they join, and regular verification unlinks inactive members. Everything included. Almost every feature is in every plan, the Free one too. No add-ons to buy. Made for Rust, ready for your other games. ARK, Counter-Strike, Garry's Mod, 7 Days to Die and Pterodactyl servers get the website, the linking system and server commands. Pricing. Free, Basic (€5/month) and Pro (€10/month): plans differ mostly by their limits. The In-game UI is in every plan. Need more than Pro? Contact us on Discord. Trusted by Rust communities for 5+ years. Servycore is the new name of Social Link: same team, same support, many more tools. Everything Servycore does for your Rust server Rust admin panel: Web RCON console, live player list and in-game chat, player profiles with linked accounts, Steam account and VAC bans, network bans enforced before connection, F7 reports, combat log and a live staff map. Auto wipe: Wipe schedules that follow Facepunch's forced wipe, map or full wipes, a new map seed, an in-game countdown, the restart and the Discord wipe announcement, all automatic. In-game UI: A /info welcome panel and server info menu, a kits menu with cooldowns, your store, rules, wipe calendar, account linking and leaderboard pages, designed in your browser and published live. Plugins and permissions: uMod and Codefling plugin installs and updates, a config editor, Oxide and Carbon groups and permissions, timed VIP and in-game staff roles. Community website: A drag and drop website builder with themes, custom pages, a blog, support tickets, your Tebex or PayNow store integration and a custom domain. Linking system: Discord, Steam and Twitch account linking with Discord roles, Steam group and Twitch follower or subscriber checks, and in-game rewards on every server. Rust leaderboard: Kills, K/D, raids, resources, playtime and a heatmap for every wipe, on your website. Integrations: Discord notifications and kill feed, a REST API, signed webhooks, the AI Connector (MCP), and Pterodactyl, Pelican, WISP and AMP host access. Website: servycore.io Live demo: demo.slink.gg Discord: discord.servycore.io Documentation: servycore.io/knowledgebaseFree -
Version 1.0.0
62 downloads
A complete in-game giveaway system for Rust servers (Oxide/uMod & Carbon compatible). Admins start giveaways with any Rust item or with a free-text custom prize (e.g. a Minicopter). Players enter via chat command or a clickable in-game UI button - no need to alt-tab or check Discord. Features a suspenseful countdown before the winner is drawn, a claim system instead of instant payout, a multilingual chat interface (English/German/Russian) and personal sound feedback for every player. FEATURES Join via chat or button: Players type /giveaway join or click an in-game UI button - both work at the same time Any item: Any Rust item by shortname, including amount and optional skin ID Custom prizes: Give away anything that is not an item (vehicles, ranks, kits, real-life rewards...) by simply typing the prize text. When the winner claims it, all online admins are notified so the prize can be handed out manually Live UI: Every player sees their own panel with the item icon (via ImageLibrary), prize, participant count and countdown, refreshing automatically Suspenseful countdown: Once time runs out, a short "drumroll" countdown plays in chat (3...2...1...) before the winner is announced Claim system: The winner does not receive the prize automatically - they must claim it within a configurable time window (default 5 minutes) using /giveaway claim. If unclaimed in time, the reward is forfeited Participant limit (optional): Set a maximum number of entrants per giveaway Admin participant list: Admins can view a private list of all current entrants at any time Personal sound: When a giveaway starts, every player individually hears a short notification sound (not a world sound - only audible to that player's own client) Multi-language: All chat and UI messages are available in English (default), German and Russian, and automatically match each player's own client language Fully configurable: Duration, participant limit, claim time, sound, UI position/size/colors/font sizes - everything adjustable via the config file Item icons (optional): With the free plugin ImageLibrary installed, the UI automatically displays the actual icon of the item being given away DEPENDENCIES Optional: ImageLibrary https://umod.org/plugins/image-library - required for displaying the item icon in the UI. Without it, the plugin works completely normally, just without the icon. COMMANDS All commands are available via /giveaway or the short form /gw. /giveaway start <item_shortname> <amount> [duration_seconds] [skin_id] - Starts a new giveaway with a Rust item - Permission: giveaways.admin /giveaway custom [duration_seconds] <prize text> - Starts a giveaway with a free-text prize that is not an item - Permission: giveaways.admin /giveaway cancel (alias: stop) - Cancels the running giveaway - Permission: giveaways.admin /giveaway join - Enters the running giveaway - any player /giveaway claim - Claims the won reward (after winning) - any player /giveaway list (alias: participants) - Shows a private list of all current entrants, visible only to the admin - Permission: giveaways.admin Examples: /giveaway start rifle.ak 1 90 - starts a 90-second giveaway for an assault rifle /giveaway custom 90 Minicopter - starts a 90-second giveaway for a Minicopter (handed out manually by an admin) PERMISSIONS giveaways.admin - Allows starting/cancelling giveaways, viewing the participant list and receiving the claim notice for custom prizes oxide.grant group admin giveaways.admin LANGUAGES English (en) - default German (de) Russian (ru)Free -
Version 1.0.1
86 downloads
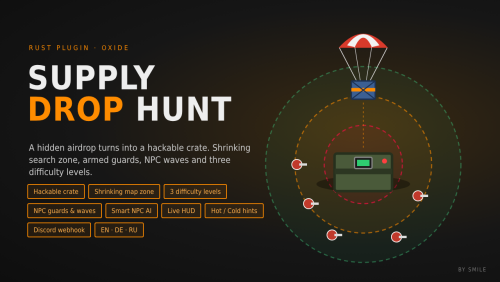
A special supply drop falls somewhere on the map. Only a shrinking circle shows roughly where it is. When it lands, it turns into a hackable crate. Armed NPCs guard it, and as soon as someone starts hacking, more NPCs arrive to defend it. Supply Drop Hunt turns a regular airdrop into a server-wide hunt. It works on PvE and PvP servers, needs no other plugins, and you can configure nearly everything. Features Hidden drop location. The drop lands at a random valid spot. It never lands in water, on monuments, on cliffs, on steep slopes or close to player bases. Shrinking search zone. A circle on the map marks the search area. The drop is somewhere inside it, but never exactly in the middle. The zone shrinks in phases, and each new circle sits inside the previous one. Hackable crate. The drop parachutes down and turns into a hackable crate when it lands. It can't be looted while it is still falling. When a player starts hacking, it is announced in chat and on Discord. The event can't time out while the crate is being hacked. If you prefer, you can switch back to a classic supply drop. Three difficulty levels. Easy, Normal and Hard can spawn at any time, picked at random by chance weight. Each level has its own: circle color hack time loot table NPC guards NPC waves NPC guards and waves. Armed NPCs spawn around the drop. When hacking starts, extra NPC waves arrive to defend the crate. Each group has its own amount, health, name, weapons (one picked at random per NPC), armor and belt items. Built-in NPC AI. No navmesh is needed. The NPCs patrol around the crate and chase players. The hacker is always their first target. They shoot in bursts with spread and don't shoot through walls. They ignore players in noclip, vanish or safe zones. Accuracy, burst size, fire rate, speed and ranges are all configurable. The default Rust AI (navmesh) can be used instead. Live HUD.** Shows the current zone phase, the hack countdown and when the crate is unlocked. Hot/cold hints. Players can type /hunt to get a hint about how close they are (HOT, WARM, COOL or COLD) and whether they are inside the zone. The hint has a cooldown. Custom loot per level. You set the items, amounts, chances and skin IDs, plus the minimum and maximum number of stacks per drop. Automatic events. Events start at a random interval when enough players are online. Admins can also start them manually, optionally with a fixed difficulty. Discord webhook. The plugin posts when an event starts (including the difficulty), when hacking starts, when the drop is found, and when it expires or is destroyed. Messages can be in one language or several languages in a single message. Fully translated. English, German and Russian are included. Each player sees chat and HUD in their own language. Clean and lightweight. The crate, map markers and NPCs are never written to the save file. Everything is removed when the plugin unloads. The plugin does almost nothing between events. How it works A supply drop parachutes down at a random location, and the difficulty is announced. The search zone shrinks every X seconds. With the default config it goes 400 m → 240 m → 80 m. The drop lands and turns into a hackable crate, guarded by NPCs. A player starts hacking. This is announced, and NPC waves start arriving. Once the crate is unlocked, the first player to loot it wins. The win is announced in chat and on Discord. If nobody finds the crate in time, it vanishes. Commands | Command | Description | /hunt - Get a hot/cold hint and see whether you are inside the search zone (with cooldown) | Admins (requires supplydrophunt.admin or admin status) Command /sdh start [level] | Start an event right away, optionally with a fixed level (for example /sdh start hard /sdh stop | Stop the running event and remove the crate, markers and NPCs | /sdh status | Show the phase, zone, the real crate grid, the time left, how many NPCs are alive, the difficulty and the hack state /sdh tp | Teleport to the crate (or to its landing spot while it is still falling) Console / RCON Command | Description supplydrophunt.start [level] | Start an event, optionally with a fixed level supplydrophunt.stop | Stop the running event You can rename both chat commands in the config if they clash with another plugin. Permissions supplydrophunt.admin | Allows the admin commands (server admins have this automatically) oxide.grant group admin supplydrophunt.adminFree -
Version 1.6.0
239 downloads
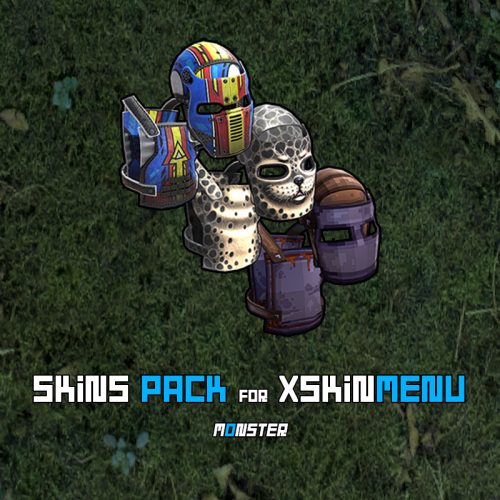
This is not a plugin! This is a Community Skins Pack for the XSkinMenu plugin in .json format. - You can also use this skins Pack in other plugins. This Pack will be actively supported and updated. New skins will be gradually added to it, and broken or removed skins will be deleted. We are aware of and remember Facepunch new rules, which prohibit us from giving players free access to Facepunch content. Therefore, this Pack will help you quickly and efficiently replace paid content from Facepunch. What will happen if skins from this Pack are approved and added to the game? - No problem! The XSkinMenu plugin automatically checks and removes such skins from the main Skins.json file. How do I use this skins Pack? - Installing this skins Pack takes less than a minute, and we have two options for doing so. - Go to the root folder of the plugin data --> oxide/data/XDataSystem/XSkinMenu: Option 1. Unload the XSkinMenu plugin. Download this Pack and replace the contents of the main Skins.json file with the contents of this skins Pack. Load the XSkinMenu plugin. ( This option is ideal for those who do not add/remove skins. ) Option 2. Simply download this Pack and move the file to the root folder of the plugin data. Use the console command "xskin_import_file FileName" (where FileName is the name of the downloaded file). The plugin will automatically read the Pack file, check the validity of the skins, and add them to the main Skins.json file. The plugin ignores duplicate skins/items. Therefore, after updating this Pack (or when installing the Pack for the first time) and performing Option 2, only those skins that are not yet in the main Skins.json file will be added. - When this Pack is updated, repeat one of the options again. You should know and remember that community skins are not cached in the game client and are not loaded instantly like Facepunch content. Each player will need some time to download community skins to their PC. (Skins are downloaded automatically after interacting with the XSkinMenu plugin UI.) Once these community skins have been downloaded to the players PC, they will be able to use them quite quickly in the future, as the skins files will already be on their PC and can be quickly cached by the game client. Also, a very large number of community skins (especially 10,000 or more) can have a negative impact on the performance of your server and your players clients. However, this Pack contains less than 10,000 skins (namely ~5,200 skins as of today) and they have all been checked, so there will be no problems.$11.49- 6 comments
-
- 2
-

-

-
- #xskinmenu
- #skin
- (and 9 more)
-
Version 1.3.1
27 downloads
Collect player feedback fast with an in-game UI. Log it to console, files, or send it straight to Discord via webhooks. Stay connected to your community and improve your server with real, direct input. Join my Discord community to stay informed on new plugins, updates, and sales. https://discord.com/invite/yz5D3PBXa8 Intuitive feedback interface: Players can easily submit feedback through a user-friendly UI. Customizable logging options: Feedback is logged in the server console, specific log files, or sent via Discord webhooks. Optional Discord integration: Automatically sends feedback to a designated Discord channel via webhooks Image Library (Required) Discord Messages (Optional) - Used to send feedback to discord: /feedback – Opens the feedback UI. feedback.use – Grants access to the /feedback chat command. feedback.blocked – Users with this permission will not be able to send feedback.$7.99 -

Version 1.1.0
32 downloads
Polls is a plugin that allows you to receive feedback from your players via a GUI. When a player joins your server, if a poll is active, they will be presented by a GUI with the poll questions you set in the config. Alternatively, if they don't want to participate in the poll, they can close out of the GUI. Run polls for a specified amount of time. Store poll results in a file. Send poll results to Discord via a webhook. /startpoll <duration> - Start a poll using the settings in the config file. /stoppoll - Stop the active poll and store the results. polls.start - Allows the player to start and stop polls Below is a config for Polls that was used on my own server. { "Chat Options": { "ChatColor": "#3aaa45", "ChatPrefix": "Polls: " }, "Discord Options": { "Send embed to Discord when the poll ends": true, "Webhook URL": "REDACTED" }, "Questions": [ { "Answers (MAX 7)": [ "Procedural", "Barren", "Custom PVP Map" ], "Question": "What map should be used for Central?" }, { "Answers (MAX 7)": [ "Yes", "No" ], "Question": "Should we add more kits?" }, { "Answers (MAX 7)": [ "Yes", "No", "Yes, but only within marked grids" ], "Question": "Should you be allowed to build over water again?" } ], "Debug": false } If you need support, want to find all of my other plugins, or just talk, feel free to join my Discord @ https://discord.gg/4ahpdSBThj$2.99 -
Version 1.0.0
16 downloads
xDisablePlayerBoats + Timed Event for Player-made Boat Building/Editing xDisablePlayerBoats lets you block players from building/editing player made boats (Rust's NAVAL Update) either completely or only during a configurable ingame time window (perfect for “boat building events”). This plugin hooks into Rust’s build system and prevents placement of key boat-building items, including: Boat Building Station Boat Building Plan Steering Wheel Small Boat Engine Sail When blocked, players receive a clear chat message explaining whether boat building/editing is fully disabled or only allowed during event hours. Permission xdisableplayerboats.bypass - Players with this permission can build boats even when restrictions are active. Config { "EventEnabled": false, "StartHour": 18, "EndHour": 23, "EventStartMessageText": "» Boat building event is now active! You can build/edit boats now.", "EventEndMessageText": "» Boat building event is now over! Boat building/editing is disabled now." } EventEnabled = false → Boat building is always disabled (INGAME-TIME!) EventEnabled = true → Boat building is only allowed between StartHour–EndHour (INGAME-TIME!) Supports wrap-around hours (example: 22 → 06) Ideal for: Servers that want to reduce water/boat spam PvP servers that want controlled boat availability Running scheduled boat-building events Enforcing progression/economy balance$8.99 -
Version 1.0.4
21 downloads
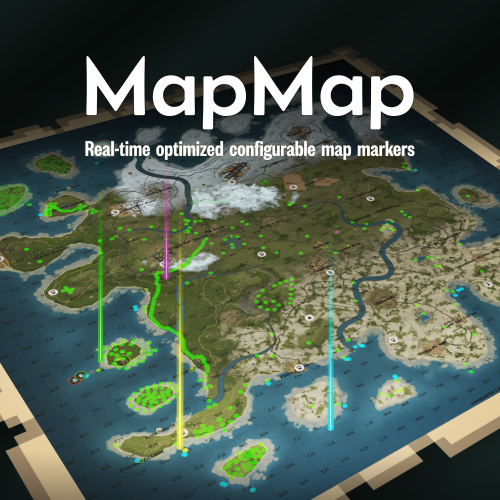
Ever loaded into a server and wondered... where is everyone? Those first few moments can make or break a new player's experience. MapMap turns that empty map into a vibrant, growing civilization MapMap adds beautiful, configurable map markers for 22 entity types, encouraging organic social interaction- all with minimal performance impact • New players see activity and stay longer • Organic towns and communities form • You control every aspect Supports Tool Cupboard Legacy Shelter Boat Building Station Player Boat Tugboat PT Boat RHIB Rowboat Kayak Submarine Hot Air Balloon (New!) Minicopter Attack Helicopter Scrap Transport Helicopter Car Bike Snowmobile (New!) Horse Train Engine Train Car Supply Drop (New!) Locked Crate (New!) Performance You Can Trust • Dynamic entities (boats, tugboats, vehicles) update in real-time with an incredibly efficient system, no unnecessary processing • Static entities (cupboards, shelters, stations) are updated only when created or destroyed, zero ongoing overhead • Adjustable update interval lets you fine-tune performance vs real-time accuracy Simple, Clean Configuration Match your server's theme or make each entity type instantly recognizable with 12 vibrant colors, alongside adjustable size and transparency- each individually configurable. Example: "UpdateInterval": 1.0, "ToolCupboard": { "Enabled": true, "Radius": 0.1, "Alpha": 0.3, "Color": "green" }, "LegacyShelter": { "Enabled": true, ... Colors • Red • Orange • Yellow • Lime • Green • Blue • Indigo • Purple • Magenta • Pink • White • Gray Ready to watch your server come alive? Get MapMap today and turn your next wipe into a story your players will talk about. Drop the file in your carbon/plugins folder, load the plugin c.load MapMap), and configure carbon/configs/MapMap.json to your liking if you adjust the config, save it, then run c.reload MapMap in the console I provide long-term support and am always open to bug reports and constructive feedback$19.99 -

Version 2.2.1
347 downloads
Play To Win A complete, COMMUNTIY SERVER SAFE configurable playtime-based reward and VIP progression system for Rust. Features ✔ Awards points automatically as players stay online ✔ Players redeem free VIP via a command ✔ Custom VIP duration ✔ /points to show stats, playtime & VIP ✔ Info & Settings GUI ✔ Force-expire free VIP (single or all) DISCORD LOGGING TEMPORARILY REMOVED FOR IMPROVEMENTS, WILL BE FIXED SOON Commands: /freevip - claim freevip or check progress /points - check stats / points amount /awardpoints (name) (amount) - give points to a player /expirevip (player) - expire a player's free VIP admin permission: playtowin.admin$7.49- 15 comments
- 1 review
-
- 1
-
-
- #vip
- #community
- (and 3 more)
-

Version 1.5.0
192 downloads
Want to include raid schedules into your community server without blocking damages ? This is the perfect plugin for you ! Features - Set custom schedules for each day of the week, you can also set your timezone - Receive an alert on discord (using webhooks) each time a player is destroying another player entity out of the schedules - Run a custom command when a raid alert is triggered, commonly used to auto-ban raiders - Define which type of construction you want to protect - Ignore twig constructions if you want Permissions - tp2raider : Allow user to teleport on the latest raider detected by typing /tp2raider Dependencies None Language It supports different languages, EN by default, feel free to add your own translation. Support This plugin won't get you blacklisted from community by Facepunch. Join my discord if you need support or have any question => https://discord.gg/RZ8h7e2D6E Demo$15.00 -
Version 2.1.5
536 downloads
Clans for discord Recently, some of the top servers have been making clan bots for their Discord which can drive a thriving Discord community which is one of the most important things for a Rust server. Having a thriving Discord community means you are able to hold onto those players for your servers. Users can make a clan, invite their friends, promote and demote their friends within the clan, and even if they wanted to disband the clan they can. You can set the bot to make a clan text chat, displaying clans separately from online members, give the leader a special role, ETC* The non admin commands are: - clan create - clan invite - clan promote - clan demote - clan info - clan kick - clan leave - clan disband The admin commands are: - clan edit - clan force disband - clan force kick member - clan force invite member All clans and everything are stored in a database that you provide, so the clan data cannot messed up VIA roles and what not. All the commands are slash commands for ease of use as seen in the attached photos. All commands are protected by user checks. So people cannot do actions for clans that they are not in unless they are given an admin role that is defined in the bot config. The bot is very simple to install The file also includes a readme.md file which includes the info that you need to know. Need support or want updates about what is coming to the bot? Join the support discord here https://discord.gg/RVePam7pd7$19.99 -
Owners Outpost is a new community hub built for server owners, administrators, staff, developers, and freelancers. It’s designed to bring together people who manage and create online communities, offering a central place to share resources, exchange ideas, and collaborate on projects. The project is still in its early stages, focusing on building the foundation and connecting with server owners and professionals who want to be part of something that supports and uplifts others in the space. Over time, Owners Outpost aims to become a reliable network for finding help, talent, and tools that make running and improving servers easier and more rewarding. Join the community and be part of its growth: https://discord.gg/WCZQnj3E
-
Version 1.0.1
907 downloads
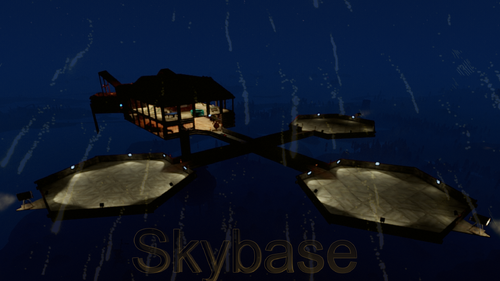
Skybase is a building our server has used for a few years and figured we should share it and maybe your community can make use for it as well. Features: Slot Machines Poker Tables Admin / Hotel Rooms Vending Machines Heli Landing Zones Speaker / Radio Setup Mixing Table Fridge Computer Station Crafting Setup Smelting Zone Hangout Spots with a view. How we use it: Set a zone with Zone Manager, Set flags for No Stability, Decay Etc if needed and have the building within Radius. Skybase is pasted with CopyPaste I use the command /Paste SkybaseFinal Height 200 I also set a command /skybase to let players teleport here It can be pasted on water as well. Thank you for Viewing! Any issues or suggestions are welcome! Courtesy of ꧁༺ † 𝓨𝓪𝓶𝓲 𝓷𝓸 𝓣𝓮𝓷𝓡𝔂𝓾𝓾 † ༻꧂ x Wrecks RIP my friend... ꧁༺ † 𝓨𝓪𝓶𝓲 𝓷𝓸 𝓣𝓮𝓷𝓡𝔂𝓾𝓾 † ༻꧂Free- 16 comments
-
- 4
-
-
-
- #copypaste
- #community
- (and 1 more)
-

Version 1.0.1
385 downloads
AI Assistant Bot Overview This AI Assistant bot is designed to interact with users on Discord by connecting to the OpenAI API. It supports a variety of features, including reading documents, handling attachments, and maintaining configurable conversation histories. Here's everything you need to know about configuring and using the bot. IMPORTANT NOTE Before continuing to read the instructions and explanations, please be aware that this bot relies on paid dependencies, including the OpenAI API key. You must ensure your API key has sufficient balance, as the cost depends on the size of your documents and the level of player interaction. While the cost is minimal for smaller servers, it may increase for larger communities with higher usage. I’ve explained more about the costs and other details below. If you’re looking for the installation guide, scroll down a bit past the explanation, and you’ll find it there. File and Folder Structure 1. As soon as you launch the bot for the first time, if no configuration file exists, you will see the following message: Default config.json file created. Please update it with your API keys and preferences. 2. You must update the `config.json` file with your desired settings, API keys, and preferences before relaunching the bot. After making the necessary configurations, restart the bot to apply the changes. 3. When you launch the bot for the first time, several files and folders are automatically generated to support its functionality. These include: Generated Folders: 1. `docs/`: - You can store documents in a folder for the bot to reference during conversations. While I haven’t tested it with many users simultaneously, the model-switching feature helps avoid rate limits, ensuring smooth operation. One of the models has no daily limits, so the bot should function without interruptions. However, your total text file size **should not exceed 10-12 MB** since no AI currently supports processing that much text efficiently. If you have large files, it's best to **split them into smaller chunks**—for example, separate files for topics like "raid," "ranks," and other categories to ensure optimal performance.(again please be sure your total documents wont hit 10-12 MB) In the near future, I plan to develop a **search system** that will make document retrieval **more efficient and cost-effective** for long-term usage! I hope this update will allow the bot to process documents in **image formats or PDFs** and support much larger files for better exploration. 2. `usage/`: - Contains two important configuration files: - **`whoami.txt`**: A file where you define the bot's identity. Use this file to explain who the bot is and configure its personality and purpose step by step. - **`conditions.txt`**: A file to specify conditions for the bot’s responses. For example, you can add rules like "Never generate harmful content" or "Avoid generating code." I’ve included my own configurations in the ZIP file you’ll receive—these have been tested and work well. However, you can edit them as needed. Some essential settings have already been added to ensure the bot functions properly. 3. `userschat/`: - Stores user conversation histories. The bot uses these files to remember the context of recent interactions for a configurable amount of time. 4. `downloads/`: - A folder to store files uploaded or downloaded by users during their interactions with the bot. 5. How to Configure the Usage Files The `usage/` folder includes the following AI-readable files: 1. `whoami.txt`: - Use this file to define the bot's identity. For example, you can write: `You are a helpful and friendly AI assistant designed to answer questions, provide guidance, and help users interact with documents.` - Configure it incrementally to refine the bot's personality. 2. `conditions.txt`: - Add conditions to guide the bot's responses. For example: `Never generate harmful or inappropriate content.` `Avoid generating programming code unless explicitly requested.` `Always provide accurate and ethical answers.` - These conditions help you customize the bot's behavior to align with your community's values. Tips for Efficient Configuration 1. Less is More: Write concise and clear prompts in these files to minimize token usage. Fewer but well-structured instructions reduce costs and improve the bot’s understanding. 2. Cost Insight: API usage costs are minimal. For instance, after over 1,000 requests and millions of tokens, the total cost was only 40 cents. However, ensure your OpenAI account has enough funds, as the bot will stop functioning if the balance is insufficient. AI-Understandable Files The bot processes these files naturally, so you can write them in plain, conversational language. For example: - Whoami Example: "You are a smart and efficient assistant that helps users manage files, answer queries, and provide creative solutions." - Conditions Example: "Avoid political discussions, never generate malicious content, and always prioritize user privacy." These files act as dynamic prompts that guide the bot’s behavior in real-time. Cost Management Tips - While the cost of running the bot is minimal, it scales based on the number of requests and tokens used. - Use concise prompts and optimize file content to reduce token usage. In future updates, I will introduce a token limit and methods to save tokens both on the bot side and the player side. However, there is already a setting called "temperature of response" in the bot config, which controls message length and creativity—making responses either longer and more creative or shorter and more precise. - Regularly monitor your OpenAI account balance to avoid interruptions. Adding funds ensures smooth operation, especially when the bot is used in a large community. Key Features 1. Multi-functional AI Assistant: - The bot connects to OpenAI API and supports multiple AI models such as `gpt-3.5-turbo`, `gpt-4`, and others. - It intelligently answers questions based on provided information and configuration settings. - I have carefully optimized the list of AI models to prioritize efficiency and avoid rate limits, all while maintaining functionality. Each request to the bot incurs a cost, as OpenAI's API usage is paid. If cost isn't a concern, the GPT-4 models are the best choice due to their superior creativity and advanced responses. However, for cost-effective usage, the configuration balances between model capabilities and expenses, ensuring a practical yet powerful bot experience. 2. Highly Configurable: - The bot is driven by a comprehensive configuration file generated on the first launch. You can customize nearly every aspect of its functionality. 3. Document Handling: - The bot supports attachments in formats like `txt`, `json`, and `csv`. These files can be processed for extended interactions, although this feature can be disabled if not preferred. 4. Conversation Tracking: - The bot maintains user conversations in files for a configured duration (`time_to_keep_history_conversation_in_secconds`). This helps the bot remember context within a specified timeframe before creating a new history file. 5. Rate Limit Handling: - Supports switching between AI models to avoid rate limits imposed by OpenAI's API tiers. - You can configure the rate limit thresholds for individual users. I was concerned about large communities using lower-tier OpenAI API keys, as they may face rate limit issues. To address this, I implemented a model-switching function to avoid these rate limits per minute. However, if you upgrade your account for long-term usage, you can reduce these problems. You can find more information about how OpenAI’s usage tiers work at this link: OpenAI Rate Limits Guide. On higher tiers, there are no usage limits, so you won’t encounter the same restrictions. If you spend over an specific amount, you should see no issues and enjoy smoother performance in the long run. 6. Spam Protection: - Users are limited to a configurable number of messages (e.g., 5 messages per minute) to prevent spam and API overuse. 7. Admin and Owner Controls: - Owner IDs in the configuration file can configure advanced settings and access an "EditingMode" for direct file and folder operations, allowing them to bypass limits on the code or have root access in the current or future updates. 8. Status and Activity Configuration: - The bot can display a custom status, activity type (e.g., "Playing AI-Assistant"), and optional activity URL. It supports most status and activity types based on the available Discord status documentation. 9. Response Temperature: - Adjust the bot's creativity and response tone using configurable temperature settings (e.g., "cold" for factual precision, "hot" for maximum creativity). How to Configure the Bot 1. Configuration File The bot generates a `config.json` file on its first launch. You'll need to configure this file step-by-step: - Discord Bot Token: Obtain it from Discord Developer Portal . Ensure to enable intents (Message Content, Presence, and Server Members) in the bot settings. - OpenAI API Key: Generate an API key from OpenAI Platform . Note that OpenAI is a paid service, and API usage costs depend on your tier (e.g., $5/month for basic usage). Each tier has different rate limits. - Owner IDs: Add your Discord user IDs to grant access to advanced bot controls. - Log Channels and Warnings: Configure `log_channel_ids` for file upload/download logs and `warning_ids` to notify admins of unauthorized access attempts. How to Use the Bot 1. Editing Mode Admins can enter Editing Mode to manage files and folders using simple commands. All explanations can be found once you enter Editing Mode by typing the available help commands. 1. Change Directory: Use commands like `cd <directoryname>` or `cd ..` to navigate between directories. 2. List Files: Use `ls` or `list` to see the files in the current directory. 3. View File: Use `view <filename>` to display the contents of a file. 4. Edit File: Use `edit <filename>` to modify a file's contents. 5. Download Files: Use `download <filename>` to download a specific file, or `download all` to download all files. 6. Create/Remove Files: Use `add <filename>` to create a file, and `rm <filename>` to delete a file. 7. Exit Editing Mode: Use `exit` to leave Editing Mode. Handling Attachments - The bot can process file attachments in supported formats (`txt`, `json`, `csv`). However, enabling this feature may lead to excessive API usage if users send large files. You can enable or disable this feature in the configuration: "handle_attachments (true/false) - Enable this to allow the bot to respond to file uploads or images. Note: This will use more tokens per API request depending on how large the text file is.": "false", 2. Configurable Settings 1. Bot Status You can set the bot's status and activity type in the configuration: "bot_status": { "status(e.g. online,idle,dnd)": "online", "activity_type(e.g. playing, listening, watching, competing or streaming)": "playing", "activity_text": "AI-Assistant", "activity_url": "https://www.twitch.tv/your_channel - Place a twitch link here if activity type is set to streaming." }, 2. Spam Protection To prevent abuse, configure message rate limits: "spam_detection": { "message_limit": 5, "rate_limit_period (in seconds)": 60 }, This limits users to 5 messages per minute by default. Adjust these settings as needed. 3. Response Temperature Control the bot's tone and creativity: - Cold: Factual and precise. - Neutral: Balanced between precision and creativity. - Warm: Creative responses while maintaining relevance. - Hot: Highly creative and speculative. You can also override with a temperature value between `0.1` and `1.0`: "Response Temperature": { "Ai_selected_mode(e.g. cold,natural,warm,hot)": "natural", "Ai_promopts_explnation": { "Cold (Low creativity, high precision)": "Respond with factual and precise information, avoiding creative or speculative responses.", "Neutral (Balanced creativity and precision)": "Respond with a balance of creativity and accuracy, adapting tone to fit the context.", "Warm (Higher creativity, moderate precision)": "Respond creatively while maintaining relevance to the topic.", "Hot (Max creativity, low precision)": "Respond with maximum creativity, even if it involves speculative or unconventional ideas." }, "Temperature Value (Optional Override 0.1 to 1.0 (Cant be 0.0 it means disabled temp minimum is 0.1))": 0.0, "Temperature_Value_prompt": "Your selected response temperature has been set to {prompt_temp_value} please resonse the message according to this temprature float number that is between 0.1 and 1 anythings beyond 1.0 is equal to 1.0 low means less creativity and amount of text higher means lots of creativity and explnation", "Set this to false to disable the `no_temp_error` message. Remove Ai_selected_mode and set temperature to 0.0 for a natural AI response.": "true" }, 4. file Cleanup Configuration The File Cleanup section in the configuration file controls how the bot manages and cleans up old user conversation files. This feature ensures that storage isn't unnecessarily occupied by outdated conversation histories. "file_cleanup": { "file_age_limit_seconds": 727200, "cleanup_interval_seconds - if = 0 it means disable and never clean the users conversation": 43200 }, Key Parameters: 1. "file_age_limit_seconds": - Specifies the maximum age (in seconds) a conversation file can reach before being deleted. - For example, if set to `727200`, files older than 8 days (727200 seconds) will be automatically removed. 2. "cleanup_interval_seconds - if = 0 it means disable and never clean the users conversation": - Defines the interval (in seconds) at which the bot will check for and delete outdated files. - If set to `43200`, the bot will check for aged files every 12 hours. 3. Disable Cleanup: - To disable the cleanup feature entirely and retain all conversation histories permanently, set `cleanup_interval_seconds` to `0`: "cleanup_interval_seconds - if = 0 it means disable and never clean the users conversation" How It Works: - The bot periodically scans the `userschat/` folder to identify files older than the age limit ("file_age_limit_seconds"). - Any files that exceed this age are automatically deleted during the cleanup interval. - This ensures efficient management of storage and prevents excessive buildup of old files. By adjusting these settings, you can control how long user conversations are retained and the frequency of cleanup operations. For servers with strict data retention policies, this feature can be fine-tuned or disabled entirely. 5. Bot Messages Every bot message is fully configurable in the `bot_messages` section. You can edit warnings, greetings, or any response to match your preferences or server culture. Version and Updates - Current Version: `1.0.0` - Updates are guaranteed if there are any issues or bugs in the code. New feature updates will only be provided if new ideas come to mind or are suggested through user feedback. However: > This bot is actively used by me, so any new updates or enhancements will be released as soon as they are ready! # Guide to Install and Run Your Discord AI Assistant Bot # Update Your Server Ensure your server is up-to-date before proceeding (this is crucial if you are hosting the bot on your own machine): sudo apt update && sudo apt upgrade -y Install Python 3 and pip Install Python 3 and `pip` (Python package manager). If you're logged in as `root`, you can omit `sudo`: sudo apt install python3 python3-pip -y Verify the Installation Run the following commands to confirm Python 3 and `pip` are installed correctly: python3 --version pip3 --version > Example Output: SHAYAN:/home python3 --version Python 3.8.10 SHAYAN:/home pip3 --version pip 20.0.2 from /usr/lib/python3/dist-packages/pip (python 3.8) Install Virtual Environment (Optional but Recommended) To isolate your Python project, install the `venv` module: sudo apt install python3-venv -y Create a Virtual Environment Create a virtual environment to keep dependencies isolated: python3 -m venv venv Activate the Virtual Environment Activate the virtual environment to work within it: source venv/bin/activate Note: To deactivate the virtual environment, run the following command later:: deactivate Install Required Dependencies Use `pip3` (or `pip` inside the virtual environment) to install the necessary libraries for the bot: pip3 install discord.py openai Important Note If you encounter errors like: `Error: module 'openai' has no attribute 'error'` or issues related to the version of the `openai` library being outdated, too new, or incompatible, use the following command to fix the problem: pip install openai==0.28.0 This will install the specific version `0.28.0` of the `openai` library, which is known to work with the bot. Once installed, the bot should start working without issues. Run Your Bot Navigate to the directory where your bot script (`AIasistant.py`) is located and run it: cd /path/to/your/script python3 AIasistant.py 1.Navigation Tips: - Use `cd directory_name` to go into a directory. - Use `cd ..` to go back one directory. - If you need to upload the script file (`AIasistant.py`) from your local PC to your host, use an SFTP client like WinSCP or FileZilla. Alternatively, open the file on your host using `nano`: nano AIasistant.py Paste the bot code, then save and exit using `Ctrl + X`, `Y`, and `Enter`. Hosting Platforms for Your Bot While this guide assumes you're running the bot on your own server, there are several platforms where you can host your Discord bot. Tip: Many of these platforms provide pre-installed Python environments with dependencies. If you're using such a platform, you may not need to install Python manually—just upload the bot code and define dependencies. Pre-Bundled Virtual Environment (Optional) I’ve already set up a virtual environment (`venv`) with all dependencies installed alongside the bot code. You can simply transfer it to your host and run the bot. However: - Python 3 must still be installed on the host. - The `venv` may not work directly if the host's OS differs from your local system. To make it work: 1. Upload the zip file to the host using SFTP or any file transfer method. 2. Extract the contents using the following command: unzip -o AI-Assistant.zip 3. Navigate to the directory containing the files: cd AI-Assistant 4. Activate the virtual environment: source venv/bin/activate 5. Run the bot: python3 AIassistant.py Tip: You can use tools like **tmux** or **nohup** to keep the bot running on your host permanently. These tools allow the bot to continue running even if you disconnect from the server. You can search online for tutorials on how to use them. While the bot itself is stable and won’t crash, occasional Discord rate limits or heartbeat issues might cause it to stop. Most professional bot hosting platforms include anti-crash mechanisms, so you generally don’t need to worry about this. If transferring the `AI-Assistant.zip` does not work, simply recreate the virtual environment on the host and install dependencies by following the initial setup steps above. # Final Note # Please remember that OpenAI's API is a paid service, and there is a usage cost per message. Be sure to check your usage to manage costs effectively. If you need help or have questions about the bot, feel free to reach out to me on Discord: ` shayan_. ` You can contact me there for assistance. As far as this post and tool are concerned, I’ve decided to give a part of this project to AI. I wrote the message fully and gave some parts of it to AI to fix and format the tutorial and explanations for me For sure, it’s much more readable than my original text But thanks to AI, our world might be an easier—or scarier—place in close future! # Exact Configuration File # { "discord_bot_token": "Enter your Discord bot token from https://discord.com/developers/applications. Remember to enable intents in the bot configuration.", "openai_api_key": "Enter your OpenAI API key here. Purchase it at https://platform.openai.com/ to use OpenAI models. More details are in the README file.", "discord_link": "Your Discord Server Link Here", "ai_models": [ "gpt-3.5-turbo-16k", "gpt-3.5-turbo", "chatgpt-4o-latest", "gpt-4o-mini", "gpt-4o" ], "time_to_keep_history_conversation_in_secconds": 3600, "handle_attachments (true/false) - Enable this to allow the bot to respond to file uploads or images. Note: This will use more tokens per API request depending on how large the text file is.": "false", "send_bot_response_in_2000_characters_chunks": "true", "allowed_file_extentions": [ "txt", "json", "csv" ], "blacklisted_directories_to_expand": [ "userschat" ], "owner_ids": [ "User IDs listed here will have access to editing mode and avoid rate limits.", "owner_discord_user_id_1", "owner_discord_user_id_2" ], "warning_ids": [ "Warnings about unauthorized access will be sent to these user IDs.", "warning_discord_user_id_1", "warning_discord_user_id_2" ], "warning_channel_ids": [ "Warnings about unauthorized access will be sent to these channels.", "warning_discord_channel_id_1", "warning_discord_channel_id_2" ], "warning_role_ids": [ "Discord role IDs listed here will be tagged in warning channel messages.", "discord_role_to_tag_1", "discord_role_to_tag_2" ], "log_channel_ids": [ "Logs related to file uploads and downloads will be sent to these channels.", "log_discord_channel_id_1", "log_discord_channel_id_2" ], "editingmode_commands": { "enter_editingmode": [ "editingmode", "editmode" ], "listing_command": [ "ls", "list", "files", "avilable" ], "change_dir": [ "cd", "dir", "directory" ], "change_dir_return": [ "..", "back", "return" ], "show_file": [ "view", "show" ], "download_file": [ "download", "get" ], "download_all": [ "all", "everything" ], "edit_file": [ "edit", "change", "replace" ], "append_to_file": [ "append", "addto" ], "new_file": [ "add", "new", "mk" ], "remove_file": [ "remove", "rm", "del" ], "exiting_command": [ "exit", "quit", "deactive", "leave" ], "help_commands": [ "cmd", "help", "command", "commands" ] }, "auto_cleanup": { "Clear the last conversation from the bot prompt if its size exceeds the specified limit in kilobytes (KB). This helps reduce token usage per request and improves efficiency.": 20, "Create_new_conversation_file_if_size_limit_exceeded": "true" }, "file_cleanup": { "file_age_limit_seconds": 727200, "cleanup_interval_seconds - if = 0 it means disable and never clean the users conversation": 43200 }, "chat_history": { "allow_users_to_clearself_history (true/false)": "true", "clear_chat_history_commands": [ "clearhistory", "clean", "clear", "reset" ], "not_allowed_message": "**You dont have permission to clear your chat history it would automatically be reseted every `{time_threshold_secconds}` secconds.**" }, "bot_status": { "status(e.g. online,idle,dnd)": "online", "activity_type(e.g. playing, listening, watching, competing or streaming)": "playing", "activity_text": "AI-Assistant", "activity_url": "https://www.twitch.tv/your_channel - Place a twitch link here if activity type is set to streaming." }, "spam_detection": { "message_limit": 5, "rate_limit_period (in seconds)": 60 }, "Response Temperature": { "Ai_selected_mode(e.g. cold,natural,warm,hot)": "natural", "Ai_promopts_explnation": { "Cold (Low creativity, high precision)": "Respond with factual and precise information, avoiding creative or speculative responses.", "Neutral (Balanced creativity and precision)": "Respond with a balance of creativity and accuracy, adapting tone to fit the context.", "Warm (Higher creativity, moderate precision)": "Respond creatively while maintaining relevance to the topic.", "Hot (Max creativity, low precision)": "Respond with maximum creativity, even if it involves speculative or unconventional ideas." }, "Temperature Value (Optional Override 0.1 to 1.0 (Cant be 0.0 it means disabled temp minimum is 0.1))": 0.0, "Temperature_Value_prompt": "Your selected response temperature has been set to {prompt_temp_value} please resonse the message according to this temprature float number that is between 0.1 and 1 anythings beyond 1.0 is equal to 1.0 low means less creativity and amount of text higher means lots of creativity and explnation", "Set this to false to disable the `no_temp_error` message. Remove Ai_selected_mode and set temperature to 0.0 for a natural AI response.": "true" }, "bot_messages": { "warning_message": "# {role_tags} \n **Warning!** User ID `{user_id}` - tagged as <@{user_id}> tried to access the editing system without permission.", "warning_message_direct": "# **Warning!** User ID `{user_id}` - tagged as <@{user_id}> tried to access the editing system without permission.", "not_owner_message": " You are not an owner to use this command. This action has been reported to the admins to take actions. ", "not_allowed_assistant": "**Assistant is not allowed to assist with the following files: {attachment}. Files like photos, PDFs, or any type of attachments are not assistable due to security reasons. This feature has been disabled by the admins. If you need assistance with something that requires attachments uploading, please contact Admins themselves. You can open a ticket on our Discord server:** \n {discord_link}", "file_upload": "**[`{attachment.filename}`]({attachment.url}) uploaded to `{user_state.current_directory}` by <@{user_id}> (UserID:`{user_id}`)**", "file_download": "**[`{file_name}`]({file_link}) downloaded by <@{user_id}> (UserID: `{user_id}`)**", "limited_use": "<@{user_id}>, you're sending too many messages! Please wait `{time_left}` more seconds before sending another message.", "not_allowed_to_leave": "**You are not allowed to leave this directory! (No other Direcotry with bot access exist please type the command with a directory name after it to switch path)**", "no_temp_error": " No temperature is defined. Please contact the developers about this problem.", "no_valid_defined_prompt": "No response temperature is defined. Response as you like", "normal_users_greeting": "# You are now connected with **Epic-Rust.org AI Assistant**. Feel free to ask any questions about the server! Please note that your conversation with the bot is being saved to improve your experience. Join our [Discord](https://epic-rust.org/discord) | Visit our [Shop](https://epic-rust.org/) | Check out our [Steam Group](https://epic-rust.org/steam)", "normal_users_greeting_clearning_access": "# You are now connected with **Epic-Rust.org AI Assistant**. Feel free to ask any questions about the server! Please note that your conversation with the bot is being saved to improve your experience - If you encounter bot issues or bad responses, simply clear the conversation history using {clear_commands} for a fresh start and more accurate answers. Join our [Discord](https://epic-rust.org/discord) | Visit our [Shop](https://epic-rust.org/) | Check out our [Steam Group](https://epic-rust.org/steam)", "owner_users_greeting": "# Welcome, Admin! You can enter **Editing Mode** by simply typing {formatted_editing_mode_args}. Once inside, use {formatted_Valid_Help_Commands} to view all available commands and options for the bot. ", "how_to_use": "**Available Commands:**\n# 1. **{formatted_change_dir_args} <directoryname> or using {formatted_change_dir_args} {formatted_dir_return_args}**: Change the current directory.\n# 2. **{formatted_listing_args}**: List the contents of the current directory.\n# 3. **{formatted_show_file_args} <filename>**: View the contents of a specific file.\n# 4. **{formatted_download_file_args} <filename>**: Download a specific file.\n# 5. **{formatted_download_file_args} {formatted_download_all_args}**: Download all files in the current directory, 8 files at a time.\n# 6. **{formatted_edit_file_args} <filename>**: Edit the contents of a specific file. You will be prompted to enter the new content for the file.\n# 7. **{formatted_append_to_files_args} <filename>**: Append content to an existing file. You will be prompted to provide the content to append.\n# 8. **{formatted_new_file_args} <filename>**: Create a new file and add content to it. You will be prompted to enter the content for the new file.\n# 9. **{formatted_remove_file_args} <filename>**: Delete a specific file.\n# 10. **{formatted_exit_command_args}**: Exit editing mode if you are in it.\n# For more help, just type {formatted_Valid_Help_Commands} again. Happy exploring!", "bot_cleared_message": "**The bot does not remember the last conversation due to file size limits and long conversation. A new conversation file has been created. Please proceed with your questions again.**" }, "version": "1.0.1", "Created By": "SHAYAN - Discord Id for more support: shayan_. " } Discord ID : SHAYAN_.Free -

Version 2.2.4
37 downloads
Welcome to Gravis Island! (3700km Map) As featured in the Official Rust Community Blog and Rustmaps.com, as well as hosted on many official Rust servers we hope to bring a new experience to Rust players with Gravis Island Creators CollapsedOrange Lone Nox WhoisMikeJones? Gravis Island was developed with the intention of creating a familiar Rust experience while expanding on the idea of focusing on in-game items that are currently underutilized. Everything that has been placed on this map was hand-done by four veterans in the Rust Map Making scene. This experience was more than just making something fun for players, but a great team-building experience where we got to know each other more and shared some great laughs along the way. The map we made has some small additions to monuments we feel could help increase foot traffic, while also giving more reasons to explore more of the map. We implemented a network of mountain tunnels to allow the players to traverse the landscape in an easier way, with small wooden bridges, military checkpoints, and more. To prepare for the future submarine update, we instituted ocean-based monuments players could visit on their explorations out at sea. Just adding new content wasn’t our only focus, user playability, performance, and progression was a key component in our initial planning stages. We conceptualized many mockups of different styles of maps until our team felt we had something that was balanced. Our progression begins on the southwest of the map and cascades to the northeast. As a player moves from one side to the other, they will be met with better tier monuments and more difficult challenges along the way. The map also features a handful of various islands that players can travel to if they prefer the more secluded lifestyle. Every aspect of this map was handcrafted from beginning to end. We are very proud of what we accomplished in the two weeks we worked on this together and had a wonderful time making it. Information and Specifics Our wonderful friend and well-known idle in the Rust community has done an excellent walkthrough of the map showing you pretty much every key point! Be sure to check it out HERE! This map CAN be run under the community tab (vanilla) however you still need to have oxide installed in order for the plugin for the map to fully load. Standard Monuments (Unchanged) Junkyard Outpost Airfield Water Treatment Plant Satellite Dish Military Tunnel Launch Site Power Plant Quarries Mining outpost Oil Rigs Caves (SPOILER: I5, V3, P9, U11, L16) Underground train system Aboveground train system Underwater Labs Nuclear Missile Silo Radtown Tweaked Monuments Harbor (Little extension with more loot and recycler) Trainyard (Little railway that goes off to seem more natural with the land) Supermarket (More decor/cover added around the outside) Gas Station (More Decor/cover added around the outside) Sewer Branch (Custom rockface road leading up to it in the artic biome) Custom Monuments Checkpoint (entry point to go through the mountain tunnel leading to mil tuns. Does include a few NPCs, loot and MRLS) Two roadside water pump stations Water Villages in the ocean Mini Pawn station on the roadside Underground tunnel system through the mountains Fully custom bridges crossing rivers or bodies of water Underwater dive sites Custom Arctic Research Facility Featured Videos https://www.youtube.com/watch?v=l3PgnE7rSZ8 Join the Discord: https://discord.gg/MsDheKZXmF$69.99 -

Version 1.0.1
475 downloads
This is a community center build specifically for our lord and savior, Death - owner and maintainer of the Rust-EZ servers. This was not meant for any other servers, hence the custom labeling here and there. If you wish to download and modify this monument in any way, go ahead, but plz credit me as the OG creator iz all i ask If you want to swap the custom text names in the monument, again that's totally fine if you want to make it for your own server(s). To Death personally: If you encounter any issues at all / suggestions, DM me on discord for the fastest response. To other users: If you encounter any issues at all, you're out of luck pal. You've been warned above. I ran the "Remove Duplicate Prefabs" check at the very end, so it should be "optimized". If you're having trouble with the Alpha channel lining up with the manhole/sewer entrances, apply the Alpha channel first, THEN move the entire monument into position to align the manhole entrances. Everything else (height mask, splat, etc) should work out of the box.Free -
Version 1.0.0
27 downloads
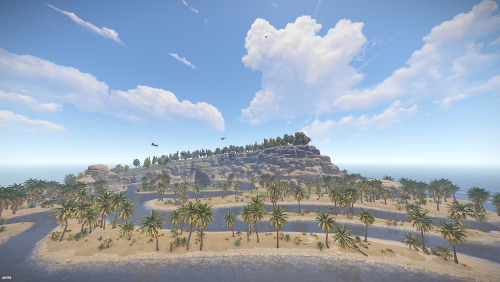
The Lost Isle - some mysterious crystaline formations appear to be causing oddities on an isle once thought lost 640 wide island rich in resources with interesting places to build and beautiful vistas , it was made with community building (pve) / clan building and island control (pvp) in mind - Cewkies XL buildable cave - river network with water roundabouts - small exlplorable pyramid - up mountain river (boat up and down) - Cewkies Fountain$4.99 -

Version 1.0.0
21 downloads
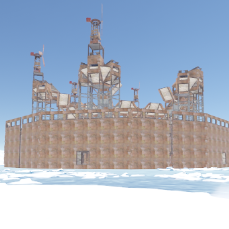
Now you will have a Rust style space for your clan, group or game team. The community is a circular space with several construction zones for your base or house. Surrounded by a large wall which offers a defense for your team. The community offers a decorative space for your Rust server, junkyard style.$12.90-
- 1
-
-
- #thecommunity
- #community
- (and 57 more)
-

Version 1.1.1
83 downloads
If you're looking to create a fun, community chatting environment for your players, Emotipedia allows players to use emotes! When an emote keyword is recognised in a chat message, the emote shows up on all of your players screens! Features Emotes fade in on a random position on screen Fully configurable emote library (any small square image via URL will work!) Twitch Emotes (BTTV, FFZ) Discord Emotes Any emotes! (not animated though ) Uses image caching (100% crisp emotes for all players, even on 0 graphics) Set size of emotes on screen How long emotes are shown for Use first or all emotes from a message Configurable emote cooldown duration Players can enable/disable emotes on their screen Commands /emotehelp - lists all emotes and commands /emotetoggle - toggles emote visibility Permissions There's only a single permission. When a player has this permission, their chat messages will be read by the plugin and display emotes. Without it, the plugin will not function on those chat messages. Grant this to all players, or keep it for your VIP groups if you wanna give something special to them! emotipedia.enabled Configuration Configuration is super simple! { "Chat message when plugin is loaded": true, "Console messages when emotes are cached": false, // Helpful for debuging if an emote doesn't seem to work. "Emote size (square pixels when displayed on a 1920x1080 screen)": 55.0, "Purist Mode (requires correct capitalization)": false, // Triggers with "PogU" (purist = true) vs "pogu" (purist = false) "Emote display duration on screen (seconds)": 5, "Only one emote per message (uses first emote)": true, // Set it to false if you really love players using emotes "If the message contains only emotes, hide it from chat": true, // EG: Typing "POGGERS" will only show the emote, not the chat message. "Cooldown (seconds before another emote can be sent by a player; can be set to 0)": 5, // Set it to 0 for fun mode ;) "Emotes": [ { "Emote Name": "OMEGALUL", "Emote URL": "https://cdn.betterttv.net/emote/583089f4737a8e61abb0186b/3x" }, { "Emote Name": "monkaS", "Emote URL": "https://cdn.betterttv.net/emote/56e9f494fff3cc5c35e5287e/3x" }, { "Emote Name": "POGGERS", "Emote URL": "https://cdn.betterttv.net/emote/58ae8407ff7b7276f8e594f2/3x" } // There are 50 popular default twitch emotes included - not all listed here! // To add more emotes, simply copy the above format. The name is the keyword // which triggers the emote to show on screen. The url should be of a small, // square image. Ideally the resolution should match your Emote Size setting. ], "Plugin Version": { "Major": 1, "Minor": 0, "Patch": 0 } } Future Features It's a pretty simple plugin, so nothing is officially planned. Hop on discord and let us know if you'd like to see a new feature added in the future! Currently testing for the next version: API - other plugins will be able to trigger a configured emote to show for a specified list of players. Emotes will respect global/team chat and only show for the players in said chat. Premium Support After buying the plugin, join the <I/O> Discord server! With proof of purchase, you get access to a premium support channel. Come and chat with us! https://discord.gg/TTb3f3XEhq$13.50 -
Version 1.1
245 downloads
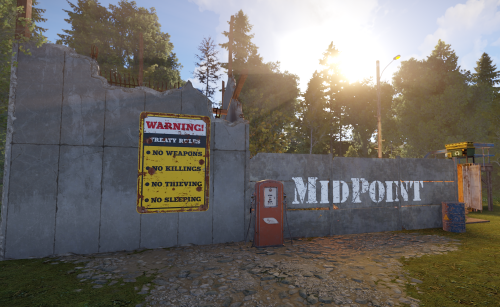
Midpoint is a small monument (one PvE and one ) that can be placed near roads. Convenient for new players that just joined your server and do not have teleportation rights or just simply wish to enjoy the company of others in safety around a fire pit. There are 3 vending machines, a slot machine, big furnace, small refinery, workbench 1 and 2, recycler, research table and repair bench. PVE does not require a safe zone and comes with Reactivetarget for target practice, good for some fun. PVP includes safe zone mechanism. No build was added to both pve and pvp monument. No peacekeeprs added, you can add them in either in RustEdit or in game. The package consists of two versions of the monument, specifically designed to cater to the needs of both PVE and PVP servers. I have made the item free of charge for anyone to download. (item no longer supported)Free