
Search the Community
Showing results for tags 'combat'.
-

Version 1.0.2
7 downloads
nanoCombatLog - a convenient UI-based combat history system for your players! The plugin saves the history of recent battles and provides players with detailed information about each fight directly in a convenient interface. Players can see who dealt damage and how many times, where the hits landed, how much damage was received and dealt, and analyze the course of each battle in detail. History is saved for: players, NPCs, and animals Configurable in the configuration and additionally in *nanoSettingModule *if installed Works both with nanoModalMenu and WITHOUT it! Plugin and image installation instructions: When downloading the plugin - you will receive an archive with the following structure: oxide ├── plugins │ └── nanoCraftSystem.cs // main plugin file │ └── data └── nanoSystemModule └── nanoCombatLog └── Images └── *.png // plugin images You need to install the icons using the same path structure as shown in the archive. Please note - first extract the archive to your computer and only then upload the images to your server! Feature list: Color theme support: *Color theme selection is available only when nanoModalMenu and nanoSettingModule are installed. Otherwise, only the Light theme will be available by default. White Included with Plugin Dark View Theme Blue View Theme Purple View Theme Configuration JSON { "Header menu settings": { "Multilingual translation for the menu title": { "ru": "ИСТОРИЯ БОЁВ", "en": "COMBAT LOG" }, "Multilingual translation for the menu description": { "ru": "Изучите историю ваших последних сражений\nПроанализируйте и выявите свои слабые зоны", "en": "Review your recent combat history\nAnalyze your performance and identify your weak points" }, "List of items for menu decoration [Shortname] (no more than 9 items)": [ "rifle.ak.glass.green", "rifle.ak.glass.blue", "rifle.ak.glass.pink", "rifle.ak.glass.red", "rifle.ak.glass", "pistol.semiauto.a.m15", "m16a2", "rifle.lr300.space", "shotgun.m4" ] }, "Default settings parameters": { "Display NPC interactions in history": true, "Display animal interactions in history": true } } Chat Commands /combat - opens the combat history menu$11.99 -

Version 1.1.0
17 downloads
[ ✓ ] Works on any host. [ ✓ ] The plugin needs the free CrashExtensions library. Can't upload DLLs on your host? No problem: the zip includes a small installer plugin. Drop it in your plugins folder, run crashext.install, restart once, and you're done. Pathways gives your players a reason to keep playing: every rock they hit, crate they open, animal they hunt, base they breach and minute they drive earns XP. Each level brings a skill point, and the points go into nine skill trees, Gathering, Survival, Combat, Vehicles, Crafting, Team, Demolition, Homestead and Explorer, where each skill makes a real difference in game, from more ore and shared team heals to faster fuses, longer breath underwater and vehicles that save fuel. Each tree has 11 skills and a capstone, 108 skills in all, each with its own icon in the style of Rust's own items. Every tree reads top-down like Rust's tech tree: the tree slot at the top, square skill slots joined by right-angle links that light up as skills are bought, the capstone at the bottom, on a canvas the player can drag. Click a skill and a vanilla-style panel shows what every rank gives and what it needs before a point is spent; click the tree slot for its progress, the XP it earns and its respec. Home shows every tree as a card with its points and progress. The max level is 200, so players pick a path: about five trees out of nine, saved as presets they can switch between. Spend every point of a tree and it can be prestiged up to rank 6, right from the tree: the tree resets, the points come back, and each prestige earns a point for that tree's six prestige skills, which sit in a prestige box under the tree, each with its own icon, and are kept for good. One tree can be respecced on its own, a leaderboard ranks everyone by level or prestige with their Steam avatar, admins can build their own trees in game, and a map wipe reset is there if you want it, off by default, with a backup made before anything changes. Works on Oxide and Carbon Needs CrashExtensions (included) 9 trees, 108 skills, 54 prestige skills Leaderboard, presets and an in-game tree editor Jump to: Features · Screenshots · How progression works · Commands · Permissions · Works with · Install · Configuration · Test server · FAQ Features For players Nine trees, one level. Gathering, Survival, Combat, Vehicles, Crafting, Team, Demolition, Homestead and Explorer share one level and one pool of skill points, so a player builds the mix that fits how they play. Trees like Rust's tech tree. Each tree reads top-down: the tree slot at the top, square skill slots joined by right-angle links that light up as skills are bought, the capstone at the bottom and a background glow in the tree's color. Drag the canvas in any direction with smooth inertia. 108 skills with their own icons. 11 skills and a capstone per tree, each icon built from Rust's own items, greyed out and locked until it is in reach. Know before you click. The vanilla-style skill panel shows the skill's rank, what it gives now, what the next rank adds, every rank's value and what it still needs. The tree panel shows your progress, the XP this tree earns you and its respec. Home at a glance. Your level, XP, skill points, points spent and prestige rank on top, and a card per tree with its points, progress and prestige status. Skills you feel. More ore, wood, food and crops, extra stacks, weak-spot hits, smelted ore, slower tool wear, faster and cheaper crafting, free upgrades and repairs, bigger magazines, crits and lifesteal, harder headshots and explosives, less damage taken, vehicles that save fuel and shrug off damage, XP and heals shared with your team, faster fuses and rockets, longer breath underwater, faster crate hacks, keycards that last, and more. Nine capstones. Motherlode (bonus high quality metal ore every 10th ore node, and a felled tree brings down the ones around it), Second Wind (a killing blow leaves you at 15 health, once every 10 minutes), Warbound (less damage taken at low health), Overdrive (fuel saving and tougher vehicles), Salvage Run (barrel loot straight to your inventory, its components already recycled), Rallying Cry (going down heals and shields your team), Breach (blowing up an enemy base part toughens you up), Trophy Hunt (a boost for each animal you kill) and Master Key (a keycard opens the reader one level up). Team play. The Team tree works with Rust's own teams: share XP, heals, food and tea boosts with teammates nearby, and get bonuses while you stick together. Build presets. Save your whole build in a slot and apply it later in one click. Trees that lose ranks are respecced at the normal price, and you see the total before you pay. Respec one tree. Get a tree's points back without touching the others, with a two-step confirm that shows the points you get back, the cost and your balance after. Prestige from the tree. A maxed tree shows a PRESTIGE pill under its capstone and can be prestiged up to rank 6. Its skills start over, the points come back, and each prestige earns a point for that tree's six prestige skills, each with its own icon in the prestige box under the tree, kept through later prestiges. Leaderboard. The top 100 by level or by prestige, each row with the player's Steam avatar, and your own rank pinned at the bottom. Always at hand. An XP row in the vanilla vitals and a small skill point button next to them that shows your unspent points and opens the window. Smooth from open to close. The window fades in, a tree unfolds from its tree slot, an upgrade flashes and counts up, a maxed skill bursts in gold, and a prestige gets its own full moment. For server owners XP from real play. Gather hits, finished nodes and trees, skinning, pickups, player, NPC and animal kills, Bradley and the patrol heli, barrels, crates, hackable crates, supply drops, missions, raids, keycard swipes, sunken crates, crafting, building, fishing and minutes spent driving. Every amount is in the config, crates and animals can pay by size, and 0 turns a source off. Kill XP that can't be farmed. No XP for killing a teammate, a sleeper, a player who respawned less than 60 seconds ago, or the same player twice inside 10 minutes. Raid XP never pays on your own or your team's base. NCP toasts. With the free NCP plugin loaded, level ups, max level, prestige, tree resets, XP lost, rested XP and capstone abilities pop up as NCP toasts, each with its own type and icon in the config. Without NCP they go to chat. Raiding stays fair. The three raid skills and the vehicle speed skill ship switched off. Turned on, the raid skills only work inside RaidableBases raids unless you say otherwise. Your pace. The XP curve, max level (200 by default), points per level, prestige ranks, the levels needed between prestiges and the highest any reduction can reach are all yours to set. Optional systems. BetterChat level titles, an XP loss on death and rested XP for time offline, all off by default. Open Pathways from your own NPCs (vanilla or HumanNPC). Make it yours in game. The editor builds your own trees (up to 12, with up to 40 skills each, any effect, any icon, level or permission gates, even a permission granted at max rank) and changes the numbers of the built-in ones. It saves with backups and applies live, no reload. Rewards. Run console commands once when a player reaches a level or a prestige rank. VIP XP. XP multipliers by permission (pathways.vip gives 1.5x out of the box), plus a global multiplier for double XP weekends. Every number in the config. The value of every skill per rank, the nine capstones, the respec cost and currency, the free respec timer, the loot tables, each tree on or off. Opt-in wipe reset. Off by default. Turned on, a map wipe resets levels, XP and skills (prestige kept if you want), copies the players folder aside first, and finishes safely even after a crash or a missed wipe. Admin commands. Give XP, set a level, give or take skill points and reset a player or a single tree, from the server console, RCON or in game. Light on the server. The gameplay hooks are subscribed only while someone online owns a skill that needs them, effects read a per-player cache rebuilt only when skills change, the leaderboard ranks in memory, and profiles load over several frames on a reload. Safe with your files. A config with a typo is never overwritten: it is copied aside and the plugin waits for a fix. A profile that can't be read is never saved over. For developers API. GetLevel, GetXp, GetNodeRank, IsNodeActive, GetTreePrestige, GetPlayerPrestige, GetLeaderboardRank and AddXp, plus timed effects (PathwaysAddTempEffect, PathwaysRemoveTempEffect, PathwaysClearTempEffects) and pauses (PathwaysSuspend, PathwaysResume, PathwaysIsSuspended) for events and arenas. Hooks. CanPathwaysGainXp, CanPathwaysLoseXp, CanPathwaysAreaFell, OnPathwaysLevelUp, OnPathwaysPrestige, OnPathwaysNodeUpgraded and OnPathwaysPresetApplied. See API / Hooks. Screenshots Every screen below is Pathways running in Rust. Home: your level, XP, skill points, prestige and a card for each of the nine trees The Gathering tree: square skill slots, right-angle links, the capstone at the bottom The skill panel: its value now and at the next rank, every rank and what it needs A locked skill names the skill it needs first Motherlode, the Gathering capstone, and its requirements The tree panel: progress, the XP this tree earns and its respec Combat mastered at 40 of 40, the PRESTIGE pill under its capstone Prestige: the rank the tree reaches and what it gives Prestige skills unlocked: spend a prestige point on one of six An owned prestige skill in the gold prestige box Home with a rank III prestige emblem Respec one tree: points back, the cost and the next free respec A respec asks for a second click The leaderboard by level, with Steam avatars and your row pinned Build presets: save a build and apply it in one click The Explorer tree and its Master Key capstone How progression works Earn XP. Everything in the XP sources list pays into one pool. Level L+1 costs 120 x (L+1)^1.34 XP by default, so the first levels come fast and the late ones take real playtime. Spend points. Each level gives one skill point, 200 by the max level. The skills in a tree's first row, right under the tree slot, can be bought right away; the others need the skill above them at rank 1 first. Skills have 3 to 5 ranks. Pick your path. The skills that are on by default add up to 347 points, so a maxed player fills about five of the nine trees. Presets make switching easy. Max a tree. Most trees take 40 points (Vehicles 37 and Demolition 30 while their off-by-default skills stay off). The capstone needs both of its branches at max rank and costs 3 points. Respec. Gives one tree's points back to the pool. It costs 250 scrap by default and is free once every 2 days; players with pathways.freerespec never pay. Prestige. With every point of a tree spent, a PRESTIGE pill appears under the tree's capstone. The tree resets, its points come back, the tree's prestige rank goes up (max 6) and you get a prestige point. Players need to gain 5 levels between prestiges of any tree (at max level their XP still counts), so one set of points can't prestige every tree in an afternoon. Prestige skills. Each tree has six prestige skills in the prestige box under it, each with its own icon, that open once the tree has been prestiged. They cost one prestige point each and are kept forever. 9 trees x 6 ranks = 54 prestige points for 54 prestige skills. Commands /pathways - open Pathways. You can add more names for it in the config. /pathways top - the leaderboard (/pathways top prestige for the prestige tab). /pathways presets - your build presets. /pathways hud - turn your XP row on or off. pathways.open and pathways.close - the same from the F1 console, or for a bind. pathways.board <level|prestige> - the leaderboard (as text from the server console). pathways.preset <save|apply|delete> <slot> [name] - presets from the F1 console. Admin From the server console, RCON or a player with pathways.admin. <player> is a Steam ID (online or offline) or a name: pathways.givexp <player> <amount> - give XP (it levels the player up as usual). pathways.setlevel <player> <level> - set the level, XP back to the start of it. pathways.givepoints <player> <points> - give bonus skill points, or take them with a negative number. pathways.reset <player> [tree] - reset everything of a player, or only one tree's skills for free. Permissions pathways.use - open Pathways and earn XP. pathways.admin - the admin console commands and the pathway editor in game. pathways.admin.grants - together with pathways.admin, lets the editor save a node that grants a permission no node grants yet. Nobody has it by default. pathways.admin.urls - together with pathways.admin, lets the editor take a new https image URL as an icon (your server downloads it). URLs already in the config keep working. Nobody has it by default. pathways.freerespec - respec any tree for free, any time (presets too). pathways.nopenalty - never lose XP on death (when the death penalty is on). pathways.board.hide - stay off the leaderboard. A permission you add to the XP multipliers (for example pathways.vip) - more XP. A permission that starts with pathways. is registered for you. A typical setup: oxide.grant group default pathways.use oxide.grant group vip pathways.vip oxide.grant user YOUR_STEAM_ID pathways.admin Works with NCP: free, optional: level ups, max level, prestige, tree resets, XP lost, rested XP and capstone abilities show as NCP toasts instead of chat lines Economics / ServerRewards: optional respec and preset currency, scrap by default Raidable Bases: the raid skills (off by default) only work inside its raids BetterChat: optional level titles in chat, off by default HumanNPC: open Pathways by talking to one of your NPCs, off by default Carbon: same code path as Oxide ImageLibrary: not needed, images run on our own CrashExtensions library Install Install the extension, once per server. Stop the server, copy Oxide.Ext.CrashExtensions.dll into RustDedicated_Data/Managed (Carbon: carbon/extensions) and start it again. The console prints Loaded extension CrashExtensions with its version. An older copy of the DLL is simply overwritten: it is one shared file for all our plugins. Install the plugin. Copy Pathways.cs into oxide/plugins (Carbon: carbon/plugins). It compiles on its own and creates its config. Grant pathways.use to your players (the setup above) and type /pathways in game. Plugin does not compile? The extension is missing or too old: check the folder and restart again. On a hosting panel, upload the DLL with the file manager or SFTP, and keep a copy in case the panel resets that folder on an update. Host doesn't allow DLL uploads? Put CrashExtInstaller.cs from the zip in your plugins folder and run crashext.install once in the server console: it downloads the extension from GitHub, checks it and puts it in place. Restart once and Pathways loads. Optional plugins (none is needed): Economics or ServerRewards for the respec cost, RaidableBases for the raid skills, BetterChat for chat titles, HumanNPC to open Pathways from an NPC. Configuration Everything lives in oxide/config/Pathways.json. Player profiles are stored in oxide/data/Pathways/players. Config sections (click to expand) Test server Available on our test server. Try Pathways before you buy: join and type /pathways in chat. client.connect 91.229.114.54:28015 FAQ Q: Is XP per tree or shared? A: Shared. One level and one pool of skill points for all nine trees, so players choose where the points go. Q: Can a player max every tree? A: Not with the defaults, on purpose: 200 points against 347 in skills, so a maxed player fills about five trees. Presets let them switch builds. Raise "Max level" or "Skill points per level" if you want more. Q: Can I turn a tree off? A: Yes. Set it to false under "Trees enabled". Its tree slot shows TURNED OFF and its skills stop working; points already spent there stay spent until an admin resets that tree. Q: Will the raid skills wreck my server's raiding? A: They ship switched off. Turned on, they only work inside RaidableBases raids while "Raid effects only inside RaidableBases raids" is on (the default), never on player bases. Q: Does progress reset on a wipe? A: Only if you turn it on. With "Reset level, XP and skills on a map wipe" on, the plugin copies oxide/data/Pathways/players aside before it changes anything, then resets every profile. Prestige ranks and prestige skills are kept unless you say otherwise. Q: Do I need Economics, ServerRewards, RaidableBases, BetterChat or HumanNPC? A: No. Respecs cost scrap by default, and every one of those plugins only adds an optional feature when it is installed. Q: Can players farm kills for XP? A: Not cheaply. Teammates, sleepers, a player killed within 60 seconds of respawning and the same pair of players inside 10 minutes all give no kill XP. Q: Can I make my own trees? A: Yes, in game. Admins get NEW PATHWAY on the Home screen and EDIT PATHWAY on every tree, or DUPLICATE to start from a built-in one. Up to 12 custom trees with up to 40 skills each. Q: How do I run a double XP weekend? A: Set "Global XP multiplier" to 2 and reload the plugin. Permission multipliers stack on top of it. Q: Does it work on Carbon? A: Yes. The extension goes into carbon/extensions instead of RustDedicated_Data/Managed, and the plugin into carbon/plugins. Q: How do I translate it? A: English is built in. Edit oxide/lang/en/Pathways.json, or copy it into another language folder and translate its values: each player reads their own game language. Q: Does it contact any outside service? A: It downloads its art (the skill icons, frames and backgrounds) once from the Venux CDN, rust-cui.crashplugins.space, which your server then keeps. For the leaderboard avatars it reads the public Steam profile of the players on screen from steamcommunity.com. Nothing about your server or your players is sent anywhere. You do not need ImageLibrary. API / Hooks Read progress or pay XP from your own plugin: [PluginReference] private Plugin Pathways; int level = Pathways?.Call<int>("GetLevel", (ulong)player.userID) ?? 0; Pathways?.Call("AddXp", (ulong)player.userID, 250d, "MyEvent"); int GetLevel(ulong playerId), double GetXp(ulong playerId) (XP into the current level) int GetNodeRank(ulong playerId, string nodeId) (a custom node is x.<tree id>.<node id>), bool IsNodeActive(ulong playerId, string nodeId) (owned and giving its effect or permission now; an offline id reads the profile from disk, so not for every tick), int GetTreePrestige(ulong playerId, string treeId), int GetPlayerPrestige(ulong playerId) (the highest tree prestige, 0 to 6), int GetLeaderboardRank(ulong playerId, string board) (level or prestige, 0 = not on the board) void AddXp(ulong playerId, double amount, string source) - follows the same rules as gameplay XP: pathways.use, the multipliers and CanPathwaysGainXp. bool PathwaysAddTempEffect(ulong playerId, string source, string effect, string filter, float percent, float seconds), bool PathwaysRemoveTempEffect(ulong playerId, string source, string effect = null), int PathwaysClearTempEffects(string source) - timed effects by name (GatherYield, Ore...); the same source, effect and filter refresh the entry. void PathwaysSuspend(ulong playerId, string source, bool effects, bool xp), void PathwaysResume(ulong playerId, string source), bool PathwaysIsSuspended(ulong playerId) - pause a player's skills and / or XP during your event. Pauses never save: they end on disconnect and on a Pathways reload. Hooks Pathways calls: object CanPathwaysGainXp(BasePlayer player, float amount, string source) - return false to block the gain, or a number to replace the amount. object CanPathwaysLoseXp(BasePlayer player, double amount) - the death penalty: false skips it, a number replaces it. object CanPathwaysAreaFell(BasePlayer player, int count) - Motherlode's area felling: anything non-null cancels it. void OnPathwaysLevelUp(BasePlayer player, int level) - once per level gained; player can be null for an offline grant. void OnPathwaysPrestige(BasePlayer player, string treeId, int rank) - after a tree is prestiged. void OnPathwaysNodeUpgraded(BasePlayer player, string nodeId, string treeId, int rank) - after each buy. A notice only: a respec does not undo what you did with it, so anything that must be taken back belongs on a permission node. void OnPathwaysPresetApplied(BasePlayer player, int slot) - after a preset is applied. Questions, ideas or bug reports? Use the Support tab of this file or join our Discord.$45.00 -
Version 1.0.0
8 downloads
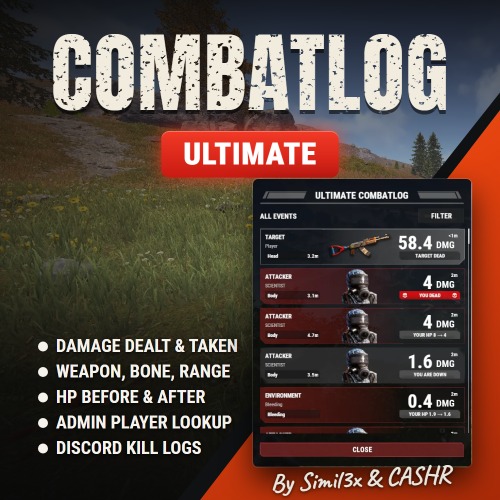
UltimateCombatlog shows players what happened in a fight. Type /combatlog and a window opens with recent damage dealt and taken: the weapon, body part, distance, HP before and after. History is kept for up to 24 hours, 100 entries per player by default. Other players' names stay hidden unless you allow them. It has filters and works in English and Russian with no additional plugins. HOW THE LIST WORKS Rows already in the list update by themselves. New events wait behind the UPDATE LIST button, so the row you are reading does not jump away. Sources: players, NPCs, turrets, traps, falls, cold, radiation and bleeding. Wounded players, deaths and destroyed objects are marked. Incendiary and HV ammo get a mark on the row. Hover over the time for the exact date and time in UTC. Repeated events are combined: shotgun pellets become one hit, a burst at one object becomes one row, and bleeding becomes one line with the tick count and the total damage. Category and events accept several values at once. A player's filters stay until their history is cleared. Type this in the F1 console to read a player's history in the same window: combatlog.get <steamid> ultimatecombatlog.admin - use combatlog.get ultimatecombatlog.viewnick - see the names of other players (grant it to the group "default" to show names to everyone) Combat history is kept in memory and is not saved to disk: a plugin reload or a server restart clears it. LONG-RANGE KILLS IN DISCORD Off by default. Paste a webhook URL, turn it on, and kills from 150 metres or more are posted with both names, SteamIDs, weapon, damage, body part and distance. Change the distance and exclude weapons or players in the config. No additional plugins required. Name hiding applies to the in-game window. Enabled Discord reports include player names and SteamIDs. INSTALLATION 1. Copy the data folder from the archive into oxide/ (carbon/ on Carbon). 2. Copy UltimateCombatlog.cs into oxide/plugins/ (carbon/plugins/ on Carbon). 3. Players open the window with /combatlog. 4. Grant permissions if you need them: oxide.grant user <steamid> ultimatecombatlog.admin oxide.grant group admin ultimatecombatlog.viewnick On Carbon use c.grant. Message us on Discord (Simil3x or _cashr_) or Telegram (@Simil3x_dm). Updates and support are included. Support is available through Discord and Codefling private messages.$19.99-
- 1
-

-
- #combat
- #combatlog
- (and 14 more)
-
Version 1.1.3
381 downloads
CombatBlock is a classic plugin that serves as a great addition to the RaidBlock (NoEscape) plugin. This plugin features extensive settings and several types of modern design. It has a cohesive style and pairs excellently with the RaidBlock plugin. Provide your players with an optimized and stylish plugin that will operate quickly and seamlessly. List of features: UI Interface Variations: Perfectly complements the RaidBlock plugin. 0 option 1 option 2 option Configuration of Additional Triggers: You set the triggers for the plugin yourself. Attacking an NPC Receiving damage from an NPC Inflicting damage on a sleeping player Deactivating combat-block upon death Configuration of Restrictions During Combat-Block: Blocking teleportation Blocking trade Blocking the use of kits Blocking commands (Supports chat and console commands) Permissions: combatblock.ignore - with this permission, the player will have immunity to combat blocking. Api: Object CanCombatBlocked(BasePlayer player) Object CanCombatBlock(BasePlayer player) void OnCombatBlockStarted(BasePlayer player) void OnCombatBlockStopped(BasePlayer player) Configuration: An excellent addition to this plugin:$9.11- 22 comments
- 2 reviews
-
- 4
-
-

-
- #combat
- #combat block
- (and 5 more)
-

Version 1.0.1
7 downloads
Death Recap shows players a clean panel when they die: killer, weapon, distance, health left, gear, body hit map, damage timeline and rivalry score, plus admin tools to review kills. DEATH RECAP · FIGHT REVIEW · ADMIN TOOL Know exactly how you died A clean recap opens the moment you die: who killed you, with what, from how far, where you got hit and how much health they had left. No more how did I lose that fight? And for admins, a powerful tool to review fights and spot suspicious kills. 12 things shown on death 5 deaths kept in history 1 click to review a kill 0 dependencies Killer, weapon, distance: with attachments, health left and the killer's gear Body hit map: head, torso, arms and legs light up with the hits taken Damage timeline: every hit in order, headshots in red Rivalry score: you 2 · them 5, this wipe Admin kill review: check any player's victims in one click, plus Discord logs Every detail of the fight The killer Name, weapon with its attachments, distance, health left (or also dead if you traded), and their gear: helmet, chest plate, kilt. You finally understand why your bullets did so little. Body hit map Each body part gets brighter the more bullets it took, with the number of hits. The fight in numbers Hits taken, headshots, damage dealt back to the killer, fight duration and damage per attacker when several enemies shot you. Damage timeline and hit list Every hit in order with its timing (+0.4s, +1.2s...) and body part. Bleeding is credited to the player who caused it, so you never see unknown damage. Rivalry score If the same player keeps killing you, the recap shows the score between you this wipe. Not only PvP Optional recap for scientists, helicopter, Bradley, turrets, traps, animals, fall, radiation, cold, drowning... (off by default). Comfortable, never in the way Death history: the last 5 deaths by default, with arrows to browse them Your choice: turn off the automatic recap and open it with /recap instead (optional) Your last kill: /recap kill: You killed X, 4 hits, 2 headshots, or automatic if you enable it Settle the cheating reports /recap view <player> See the last recap of any player. /recap kills <player> See a player's last victims (10 by default) with weapon, distance, hits, headshots and time. Click a victim to open the full recap of that kill. Discord log Optional post for every PvP death, with weapon, distance, hits, headshots, damage and the killer's gear. Fully configurable Show or hide each element if you want to keep some mystery, panel position (right, left, center), display duration, accent color. Every setting in game, English and French included, and it plugs into the free Yorixx Hub. /recap: Open your last death recaps /recap auto: Turn the automatic recap on or off /recap kill: Short summary of your last kill /recap admin: Open the settings panel /recap view <player>: See a player's last recap /recap kills <player>: See a player's last victims /recap test [pvp|npc|fall|kills]: Preview the panels with test data deathrecap.info: Plugin status (console) Player commands accept a name or a SteamID. The chat command can be renamed in the settings. Permissions deathrecap.admin: Settings panel, /recap view and /recap kills deathrecap.use: See the recap (only if Require permission to see the recap is on) 1. Create the webhook In your Discord channel settings: Integrations, Webhooks, New Webhook, then Copy Webhook URL. 2. Paste it in the plugin In game: /recap admin, Discord tab, click Webhook URL, paste with Ctrl + V, press Enter, turn Post PvP deaths ON and Save. Keep your webhook URL private, and use a staff-only channel: busy servers post a lot. Network use Death Recap only contacts Discord, and only if you paste a webhook URL and turn PvP death posts on. No analytics, no tracking, no license check. Configuration Everything below can also be edited in game. { "General: Enabled": true, "General: Chat command": "recap", "General: Require permission to see the recap": false, "General: Show automatically on death": true, "General: Hide after X seconds (0 = until respawn)": 0, "General: Fight memory (seconds)": 30, "General: Send a short recap to the killer automatically": false, "General: Recap for deaths not caused by players (traps, animals, fall, suicide...)": false, "General: Deaths kept in history per player": 5, "General: Players can turn off the automatic recap": true, "General: Debug logs": false, "Display: Show killer health": true, "Display: Show distance": true, "Display: Show weapon": true, "Display: Show weapon attachments": true, "Display: Show damage dealt to the killer": true, "Display: Show hit list": true, "Display: Max rows in hit list": 5, "Display: Show killer gear": true, "Display: Show rivalry score (kills between you and the killer this wipe)": true, "Display: Show body hit map": true, "Display: Show damage per attacker": true, "Display: Show damage timeline": true, "Admin: Victims kept per player for /recap kills": 10, "Discord: Post PvP deaths": false, "Discord: Webhook URL": "https://discord.com/api/webhooks/...", "UI: Accent color (hex)": "#A45BC7", "UI: Position (right, left, center)": "right", "UI: Show credit": true, "Config version": { "Major": 1, "Minor": 0, "Patch": 0 } } Support Questions, bugs or ideas: join our Discord.$12.99 -

Version 1.3.4
76 downloads
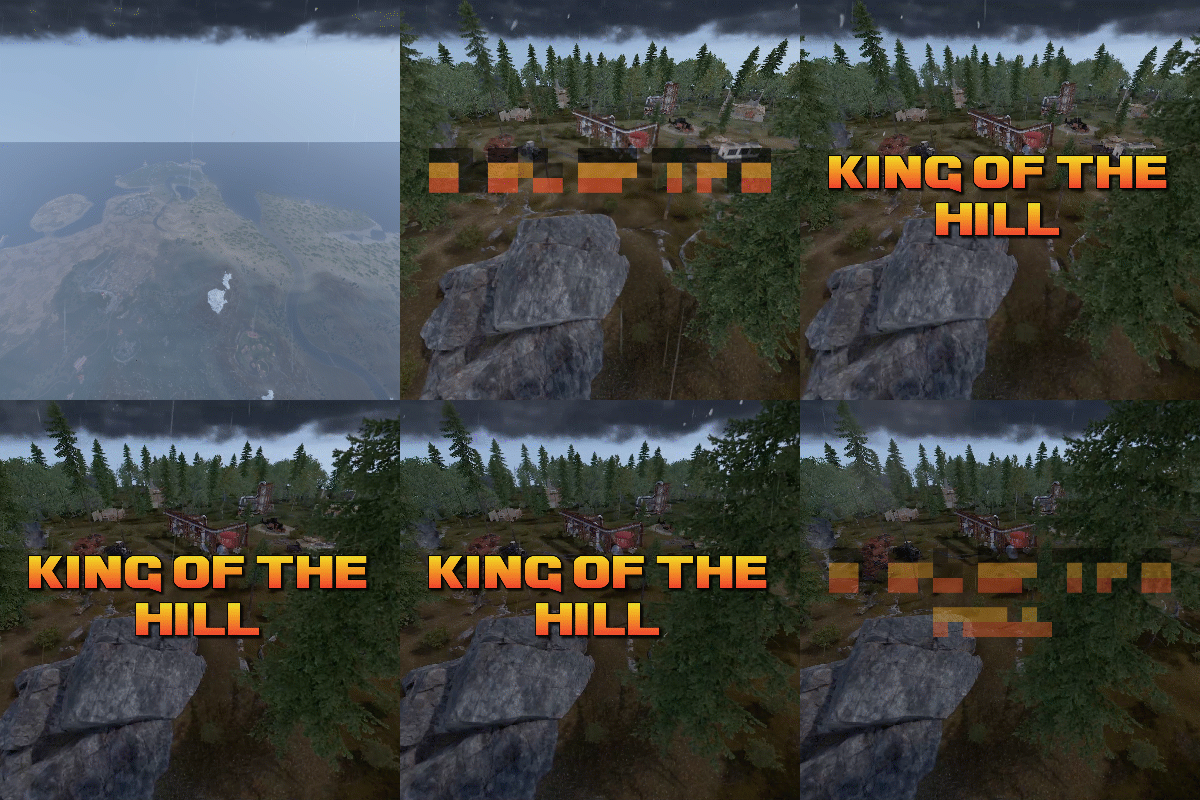
Turn any monument or custom location into a high-intensity PvP battleground. King Of The Hill creates a capture-based event where players must fight waves of hostile scientists while holding control of the zone to claim powerful rewards. Watch as a glowing capture sphere appears, scientists flood the area in escalating waves, and a locked crate spawns at the center — creating a fast-paced, competitive event that feels native to Rust rather than scripted. Players must eliminate all enemies and maintain control of the zone until the capture timer completes to secure victory and loot the crate. Features • Spawn KOTH events anywhere on the map • Monument or custom-position support • Progressive capture system • Escalating scientist waves • Hackable Locked Crate rewards • Dynamic zone bubble and map marker • Server-side UI capture progress • Automatic wave spawning • Auto-start mode with cooldown timers • Full admin UI panel • Automatic cleanup and despawn handling • Fully configurable values Chat Commands (Admin Only) /koth Opens the King Of The Hill admin UI panel Permissions koth.admin Required to configure, start, or end King Of The Hill events Configuration { "Auto": false, "AutoCooldown": 2700, "Radius": 30, "CaptureTime": 600, "Duration": 2700, "SpawnRadius": 25, "UIRadius": 100, "Waves": [5, 8, 10, 13, 15], "CrateEnabled": true, "MapMarker": true, "ZoneBubble": true, "ScientistGearTier": "Heavy", "WaveDelay": 5 } Default values are optimized for performance and competitive balance. Notes This plugin is designed to feel vanilla-friendly, competitive, and performance-aware. It works especially well on servers that want fast-paced PvP objectives without relying on static monuments or predictable events. Feedback, suggestions, and feature requests are always welcome. Created by CodeBrothers Check out our other work on Codefling$29.99 -

Version 1.2.2
965 downloads
NoEscape stands out as a robust solution to control rust players raiding & combat actions. As an innovative plugin for Rust, offering a range of unique features along with a visually appealing overlay. It provides 10 different colors for customization and a visible dome adjuster, enhancing user interaction. This plugin is designed to deliver optimal performance while maintaining backward compatibility with the free NoEscape from umod ensuring a smooth transition. Features Twig Building Ignorance: The plugin intelligently ignores twig buildings, preventing griefers from exploiting the raid/combat block system during simple base construction. Door Shooting Logic: Shooting a door outside the predefined radius won't trigger a raid block, even if the door is destroyed. Reliability and Compatibility Reload Behavior: Reloading NoEscape clears all existing raid/combat blocks. Team and Clan Support: Compatible with Teams & Clans, especially beneficial when used with the Auto Team plugin(umod clans). Removal Tools Support: Fully compatible with remove tools within the game or plugins. Command Blocking: Offers optional command blocking. Commands can be specified to block only for raids ("shop": 1) or combat ("shop": 2), or both ("shop": 3). Health/Regen Logic for Raids: Optional feature to manage health and regeneration of building blocks during raids / base building. Sound Effects: Option to include sound effects for enhanced user experience. UI System: Implements a user interface specifically for raid & combat scenarios that includes complete customization support. Hud Preset Positions: ( 0 Left Top | 1 Left Bottom | 2 Right Top | 3 Right Bottom | 4 Custom ) Combat-Blocking Logic: Combat-blocking is only active when not in a raid-blocked state. This not only saves on performance but also improves the gameplay experience. Raid-Block Self-Ignorance: Prevents raid-blocking on one's own buildings. MLRS Support: Yes, but only the vanilla ones launched by the vehicle on the map are supported, 3rd party plugins are not. Fire Damage Logic: If a wooden (but not twig) base takes fire damage, it triggers a raid. Damage Source Ignorance: Ignores non-player damage and buildings set to owner ID 0 by third-party plugins. Visual Enhancements: Color Support for Spheres: Adds color customization options for the visible spheres. Visualization Level Setter: Allows users to set the level of visualization for easier navigation and interaction. In conclusion, NoEscape provides a comprehensive and robust solution for Rust players, offering a blend of unique features, compatibility, and visual enhancements to elevate the gaming experience. Permissions noescape.combatblock.ignore <now ignores players from being combat blocked> noescape.raidblock.ignore <now ignores players from being raid blocked & becoming combat blocked when leaving a raid-zone> noescape.admin Allows you to use the console / F1 command "newcolor" for changing the Raid overlay settings in game. Also allows you to use the console / F1 command "noescape" for allowing to raid your self or trigger combat block on npcs. Command /blocked -- shows the remaining time of your combat block or raid block in chat. newcolor <1-10> <0-8> -- first number is the color setting, second number is the sphere darkness level. noescape or noescape steamID Need to trigger raids on your self or combat block for NPCs? For testing! Use the new noescape command! Example: F1 menu Type "noescape" in game to toggle for your self. Example: F1 menu or server-console Type "noescape steamID" to toggle for someone else. Requires the noescape.admin perm to use in game. Configuration { "Specify commands to block ( 3 = Block Both | 1 = Block Raid | 2 = Block Combat )": { "shop": 3, "kill": 3, "tp": 3 }, "Combat Block": { "Enable Combat Block For Shooter": true, "Enable Combat Block For Being Shot": true, "Block Time (Seconds)": 60, "Damaged Health Percentage on a player to trigger combat block (0 = disabled)": 0 }, "Raid Block": { "Enable Raid Block?": true, "Allows Raid Block to trigger for your own stuff.": false, "3rd party plugin Raid-Protection GetProtectionPercent to trigger a raid. Example: 50 means at 50% protection it will trigger a raid zone-bubble.": 50, "Raid Block player until death instead of distance checks or zones. + 'Optional' timer setting in seconds Default: 0.0 = disabled.": { "Die": false, "Time": 0.0 }, "Block Time (Sec)": 300.0, "Block Radius": 100.0, "Damaged Health Percentage on an entity to trigger a raid (0 = disabled)": 0, "Sphere Visibility (Recommend 3 or 5, 0 = disabled)": 3, "Sphere Color (0 = none, 1 = Blue, 2 = Cyan, 3 = Green, 4 = Pink, 5 = Purple, 6 = Red, 7 = White, 8 = Yellow, 9 = Turquoise, 10 = Brown)": 6, "Sphere generation speed, how fast the bubble grows Default: 10f, max 100f": 10.0, "Enable Random Sphere Colors? (Randomly selects a new color each time a raid block is triggered)": false, "Allow Upgrade or Block?": true, "Override facepunches default repair wait time after being attacked? Default: 30sec": 30, "Enable Base Building Block Features": true, "Apply Combat Blocking when leaving a raid zone": true }, "User Interface": { "Enable uMods UI: Not Configurable.": false, "RaidGUI": { "Enable Raid UI": true, "Item ID Default: 1248356124, 0 = None": 1248356124, "Skin ID: Default 0": 0, "Switch to sprite instead of Icon": false, "Sprite Default: assets/icons/explosion.png": "assets/icons/explosion.png", "Sprite Color Default: 0.95 0 0.02 0.67": "0.95 0 0.02 0.67", "Hud Preset Positions: ( 0 Left Top | 1 Left Bottom | 2 Right Top | 3 Right Bottom | 4 Custom )": 0, "Hud Transparency Default: #, 0.1f": { "Hex": "#", "Rgb": "0 0 0 0.1" }, "Text Color Default: #09ff00": { "Hex": "#09ff00", "Rgb": "0.0352941176470588 1 0 1" }, "Text Font Size Default: 13": 13, "Hex or RGB toggle: Default is Hex": true, "Custom UI POS: Key is anchorMin | Value is anchorMax": { "Hud": { "Key": "0.345 0.11", "Value": "0.465 0.14" }, "Icon": { "Key": "0 0", "Value": "0.13 1" }, "Text": { "Key": "0.15 0", "Value": "1 1" } } }, "CombatGUI": { "Enable Combat UI": true, "Item ID Default: 1545779598, 0 = None": 1545779598, "Skin ID: Default 0": 0, "Switch to sprite instead of Icon": false, "Sprite Default: assets/icons/bullet.png": "assets/icons/bullet.png", "Sprite Color Default: 0.95 0 0.02 0.67": "0.95 0 0.02 0.67", "Hud Preset Positions: ( 0 Left Top | 1 Left Bottom | 2 Right Top | 3 Right Bottom | 4 Custom )": 0, "Hud Transparency Default: #, 0.1f": { "Hex": "#", "Rgb": "0 0 0 0.1" }, "Text Color Default: #09ff00": { "Hex": "#09ff00", "Rgb": "0.0352941176470588 1 0 1" }, "Text Font Size Default: 13": 13, "Hex or RGB toggle: Default is Hex": true, "Custom UI POS: Key is anchorMin | Value is anchorMax": { "Hud": { "Key": "0.345 0.11", "Value": "0.465 0.14" }, "Icon": { "Key": "0 0", "Value": "0.13 1" }, "Text": { "Key": "0.15 0", "Value": "1 1" } } } }, "Building (None = Doors, VendingMachine, ShopFront, Barricades)": { "None": { "Raid Blocked Building Spawned Health Percentage": 35, "Health Regen Rate (Sets how fast it gens the health every x(Sec)": 1.0, "Regen Amount (0 = Disabled Sets how much to regen every x(Sec)": 20.0, "After Being Attacked Regen Time (Sec)": 30.0 }, "Twigs": { "Raid Blocked Building Spawned Health Percentage": 10, "Health Regen Rate (Sets how fast it gens the health every x(Sec)": 1.0, "Regen Amount (0 = Disabled Sets how much to regen every x(Sec)": 1.0, "After Being Attacked Regen Time (Sec)": 30.0 }, "Wood": { "Raid Blocked Building Spawned Health Percentage": 20, "Health Regen Rate (Sets how fast it gens the health every x(Sec)": 1.0, "Regen Amount (0 = Disabled Sets how much to regen every x(Sec)": 20.0, "After Being Attacked Regen Time (Sec)": 30.0 }, "Stone": { "Raid Blocked Building Spawned Health Percentage": 30, "Health Regen Rate (Sets how fast it gens the health every x(Sec)": 1.0, "Regen Amount (0 = Disabled Sets how much to regen every x(Sec)": 25.0, "After Being Attacked Regen Time (Sec)": 30.0 }, "Metal": { "Raid Blocked Building Spawned Health Percentage": 40, "Health Regen Rate (Sets how fast it gens the health every x(Sec)": 1.0, "Regen Amount (0 = Disabled Sets how much to regen every x(Sec)": 30.0, "After Being Attacked Regen Time (Sec)": 30.0 }, "TopTier": { "Raid Blocked Building Spawned Health Percentage": 50, "Health Regen Rate (Sets how fast it gens the health every x(Sec)": 1.0, "Regen Amount (0 = Disabled Sets how much to regen every x(Sec)": 40.0, "After Being Attacked Regen Time (Sec)": 30.0 } }, "Upgrading only works for BuildingBlocks": { "Twigs": { "Raid Blocked Upgrading Spawned Health Percentage": 10, "Health Regen Rate (Sets how fast it gens the health every x(Sec)": 1.0, "Regen Amount (0 = Disabled Sets how much to regen every x(Sec)": 1.0, "After Being Attacked Regen Time (Sec)": 30.0 }, "Wood": { "Raid Blocked Upgrading Spawned Health Percentage": 20, "Health Regen Rate (Sets how fast it gens the health every x(Sec)": 1.0, "Regen Amount (0 = Disabled Sets how much to regen every x(Sec)": 20.0, "After Being Attacked Regen Time (Sec)": 30.0 }, "Stone": { "Raid Blocked Upgrading Spawned Health Percentage": 30, "Health Regen Rate (Sets how fast it gens the health every x(Sec)": 1.0, "Regen Amount (0 = Disabled Sets how much to regen every x(Sec)": 25.0, "After Being Attacked Regen Time (Sec)": 30.0 }, "Metal": { "Raid Blocked Upgrading Spawned Health Percentage": 40, "Health Regen Rate (Sets how fast it gens the health every x(Sec)": 1.0, "Regen Amount (0 = Disabled Sets how much to regen every x(Sec)": 30.0, "After Being Attacked Regen Time (Sec)": 30.0 }, "TopTier": { "Raid Blocked Upgrading Spawned Health Percentage": 50, "Health Regen Rate (Sets how fast it gens the health every x(Sec)": 1.0, "Regen Amount (0 = Disabled Sets how much to regen every x(Sec)": 40.0, "After Being Attacked Regen Time (Sec)": 30.0 } }, "Sound Effects": { "RaidStart": "assets/bundled/prefabs/fx/takedamage_hit.prefab", "CombatSart": "assets/bundled/prefabs/fx/kill_notify.prefab", "RaidEnd": "assets/prefabs/building/door.hinged/effects/vault-metal-close-end.prefab", "CombatEnd": "assets/prefabs/building/door.hinged/effects/vault-metal-close-end.prefab", "Denied": "assets/prefabs/weapons/toolgun/effects/repairerror.prefab" }, "Message Responses": { "ChatIcon": 0, "RaidBlocked": "You are now <color=#00FF00>raid blocked</color>! For <color=#00FF00>{0}</color>!", "UnRaidBlocked": "You are <color=#00FF00>no longer</color> raid blocked.", "CombatBlocked": "You are <color=#00FF00>combat blocked</color> For <color=#00FF00>{0}</color>.", "UnCombatBlocked": "You are <color=#00FF00>no longer</color> combat blocked.", "CommandBlocked": "Access Denied: Cannot use <color=#FFA500>'{0}'</color> command during <color=#FFA500>{1}</color>: <color=#FFA500>{2}</color>", "ActionBlocked": "Denied: Cannot <color=#FFA500>{0}</color> while <color=#FFA500>raid blocked</color>", "RepairBlocked": "Unable to repair: Recently damaged. Repairable in: ", "CmdBlocked": "Raidblocked: for {0}\nCombatblocked: for {1}", "CmdNotBlocked": "You're not Blocked" } } API Hooks Useful to force quit 3rd party plugin actions when players trigger Combat/Raid Blocks. private void OnCombatBlock(BasePlayer player) private void OnRaidBlock(BasePlayer player) Useful for checking commands, etc, before allowing a player to do something private bool IsCombatBlocked(BasePlayer player) | IsCombatBlocked(string player) | IsCombatBlocked(ulong player) private bool IsRaidBlocked(BasePlayer player) | IsRaidBlocked(string player) | IsRaidBlocked(ulong player) private bool IsEscapeBlocked(BasePlayer player) | IsEscapeBlocked(string player) | IsEscapeBlocked(ulong player)$24.99 -
Version 1.0.0
1 download
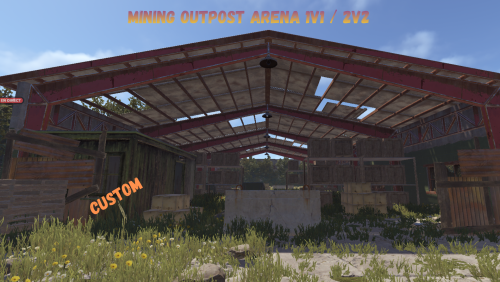
Custom arena map centered around a mining outpost with a crashed heli site. Built for close to mid range fights,. clean layout, Great for 1v1s, 2v2s, or just quick arena fights$2.99 -
Version 1.5.4
339 downloads
Establish dynamic military control points across your Rust server with tactical checkpoint deployments. Military Checkpoints delivers armed guard forces and defensive infrastructure to strategic locations, creating high-stakes combat zones that challenge players to breach fortified positions. Watch as military forces establish a defensive perimeter complete with armed scientists and protective barriers. Players must eliminate all defending forces to claim access to the checkpoint's secured loot and resources. Features Spawn checkpoints on raods Armed Scientists with defensive AI behavior Configurable deployment radius and guard count Automated checkpoint spawning with time intervals Randomt selection Automatic cleanup and despawn system Performance-optimized spawn validation Admin commands for manual control Fully customizable configuration values Chat Commands (Admin Only) /checkpoints - Manually spawn a Military Checkpoint at a random location Permissions militarycheckpoints.admin - Required to manually spawn checkpoints and access admin commands Configuration { "Plugin Enabled": true, "Checkpoint Settings": { "Cleanup Delay After Clear (seconds)": 300.0, "Barricade Prefabs": [ "assets/prefabs/deployable/barricades/barricade.concrete.prefab", "assets/prefabs/deployable/barricades/barricade.sandbags.prefab" ], "Min Barricades Per Checkpoint": 6, "Max Barricades Per Checkpoint": 8 }, "Scientist Settings": { "Min Scientists": 3, "Max Scientists": 6, "Scientist Health": 100.0, "Scientist Prefab": "assets/rust.ai/agents/npcplayer/humannpc/scientist/scientistnpc_roam.prefab", "Scientist Sense Range": 50.0, "Scientist Target Lost Range": 60.0, "Scientist Attack Range Multiplier": 1.5, "Scientist Max Roam Distance": 50.0 }, "Loot Settings": { "Min Regular Crates": 2, "Max Regular Crates": 4, "Locked Crate Chance (0.0 - 1.0)": 0.25, "Military Crate Prefab": "assets/prefabs/deployable/chinooklockedcrate/codelockedhackablecrate.prefab" }, "Spawn Settings": { "Max Active Checkpoints": 5, "Spawn Interval (seconds)": 600.0, "Min Distance Between Checkpoints": 200.0, "Road Detection Radius": 10.0 }, "UI Settings": { "Main Color (RGBA)": "0.1 0.1 0.1 0.95", "Panel Color (RGBA)": "0.15 0.15 0.15 0.9", "Button Color (RGBA)": "0.25 0.45 0.25 1", "Button Hover Color (RGBA)": "0.35 0.55 0.35 1", "Text Color (RGBA)": "0.9 0.9 0.9 1", "Success Color (RGBA)": "0.3 0.7 0.3 1", "Danger Color (RGBA)": "0.7 0.3 0.3 1" } } Default values are balanced for tactical gameplay and server performance. Notes This plugin creates authentic military checkpoint encounters that blend seamlessly with Rust's combat mechanics. Perfect for servers seeking territorial PvP hotspots and contested loot zones. Feedback, suggestions, and feature requests are always welcome. Created by CodeBrothers Check out our other work on Codefling$19.99 -

Version 1.0.0
11 downloads
Set of 3 PvP arenas - sharpen your accuracy and dominate the battle! Perfectly balanced arenas for training PvP skills at a distance of 100-130 meters. Created with an emphasis on the dynamics of the battle and maximum training efficiency. Suitable for team sessions, tournaments or game servers with a PvP orientation. What's inside: * 3 unique arenas with different layouts and cover * Balance between open positions and points for tactical maneuver * Optimized for combat at 100-130 meters - the key distance of most firefights in Rust * 🛠 Easy installation via Rust Edit * Ideal for PvP servers, training grounds, events or custom mini-games Improve your accuracy and reaction in conditions close to real combat Organize training with friends or clan members Hold tournaments and events with increased interest for players A great way to keep the audience on the server Support and installation assistance - included. Write to PM for details!$14.99 -
Version 1.0.13
264 downloads
King of the hill is an arena plugin similar to SurvivalArena, Paintball, ZombieInfection and GunGame. It spawns an arena high in the sky to host the game, and players can join from anywhere on the map via a command. The plugin will store all of the players items, stats and buffs, and teleport them to the lobby before the game starts. The objective of the game is to be the first player to hold the hill for the target time, or be the player with the highest hill time by the end of the event. Upon completion of the event (or if a player manually leaves), players are returned to the location that they joined from with their equipment, stats and modifiers in tact. The plugin is highly customizable and allows you to: Create as many equipment profiles as you'd like. The game will select one at random using a weighted system. Adjust hill locations, movement times, sizes, capture targets and game time limits. Spectate players using a computer station. Automatically run, and allow your players to vote for the event using the EventHelper plugin. The plugin is also compatible with the maps from Paintball, ZombieInfection & GunGame. Simply drop the json files into the respective data folders to run king of the hill on those maps. Chat command: koth.addhill Permission: kingofthehill.admin Description: Adds a hill spawn position at the players location and saves it into the spawned arenas profile. Command: koth.start Permission: kingofthehill.admin Description: Manually starts a game of koth. You can also specify random to pick a random map. Command: koth.end Permission: kingofthehill.admin Description: Manually ends an active game of koth. Command: koth.spawnarenaend Permission: kingofthehill.admin Description: Spawns the arena without starting the game. Useful for adding new hill positions. Command: koth.cleararenaspawnarenaend Permission: kingofthehill.admin Description: Clears a spawned arena. Chat command: koth.setcentrepoint Permission: kingofthehill.admin Description: Sets the spawn position of the arena based on the players location. Chat command: koth.ban/koth.unban <id> Permission: kingofthehill.admin Description: Bans/unbans the target player from joining future events.$19.99 -

Version 2.0.3
161 downloads
Bring Rust monuments to life with cinematic, high-intensity combat events. Armed Deployment dynamically delivers a Bradley APC, heavy scientists, and a hackable locked crate to any location you choose, all inserted by an immersive Chinook deployment sequence. Watch as a Chinook approaches the target zone, descends, deploys hostile forces, and extracts — creating a truly memorable server event that feels built into the game rather than scripted. Players must eliminate all threats and destroy the Bradley APC before they can claim the locked crate and its rewards. Features • Spawn deployments anywhere on the map • Cinematic Chinook delivery and extraction • Heavy Scientists with controlled roaming • Bradley APC with movement blocking • Hackable Locked Crate rewards • Dynamic deployment radius and map marker • Server-side UI progress tracking • Automatic cleanup and despawn timers • Admin-controlled start and cancellation • Automated deployments with configurable intervals • Fully configurable values Chat Commands (Admin Only) /adpanel Toggles the Armed Deployment admin UI panel Permissions ArmedDeployment.admin Required to start, cancel, or automate Armed Deployments Configuration { "Auto": false, "AutoMin": 60, "RandMon": true, "ManLoc": { "X": 0, "Y": 0, "Z": 0 }, "Mons": { "airfield": true, "trainyard": true, "powerplant": true, "military_tunnel": true, "launch_site": true, "water_treatment": true, "dome": true, "satellite": true, "junkyard": true, "excavator": false, "harbor": true, "arctic_base": true, "lighthouse": false, "gas_station": false, "supermarket": false, "mining_outpost": false, "sewer_branch": false, "oil_rig_small": false, "oil_rig_large": false }, "SciCnt": 12, "BradCnt": 1, "EvtRad": 150, "MaxAttempts": 10, "ChApproachH": 80, "ChApproachD": 400, "ChSpeed": 25, "ChHoverH": 15, "ChDescentH": 50, "ChExitD": 500, "MinClearH": 40, "ObstacleRad": 30, "MonSearchRad": 80 } Default values are optimized for performance and cinematic impact. Notes This plugin is designed to feel vanilla-friendly, cinematic, and performance-aware. It works especially well on servers that want high-risk, high-reward PvP encounters without relying on random world events. Feedback, suggestions, and feature requests are always welcome. Created by CodeBrothers Check out our other work on Codefling$29.99 -

Version 2.0.9
826 downloads
Purchase a License, Track Down Bounties and Cash Out. Now using NPC Spawn to enhance your Bounty Combat Logic / Weapon Support. Now using Full Random Dynamic Spawning on the Majority of FP Monuments. The Bounties are not Players, They are Scientists That you set up in config & Spawn in Randomly At FP Monuments. Works with Kits or setup your own via config. Requires Economics or Server Rewards to handle cashout, without this, the NPC Cashout will not spawn. With "Bounty Hunter” you open a new lane of Economic gameplay for your server. Set a License fee in order to be able to "Legally" Cashout Bounty Tokens (License is optional) to sell for monetary gain. Outfit your Bounties, You are able to set whatever outfit or clothing you like, as well as skin, weapon and skin id for that Bounty Tier. Once the bounty is taken down players can cashout tokens with Economics or Server Rewards. Spawn in the Bounty Hunter NPC, with markers enabled the cashout location will be displayed on the map. Output all Sales to Discord to track your Economy and make Adjustments as needed to The Bounty Hunter NPCS "Bonus Buy” & "Discount Buy” as needed to suit your taste. Commands OPTIONS HAVE BEEN ADDED TO SPAWN THE NPC DYNAMICALLY ACROSS MAPS AT BANDIT CAMP, THIS WILL OVVERIDE THE COMMAND SPAWNED NPC /spawnbountyhunter – Requires Admin Permission – Will spawn a Bounty Hunter NPC in your Position. /removebountyhunter – Requires Admin Permission – Will remove the Bounty Hunter NPC you are looking at. /BuyBL – With Sufficient funds, the player can purchase a Bounty Hunter License (Configurable to be disabled and bypassed) /ab - Will Setup a custom spawn point in data for bounties to spawn at BuyBL is configurable, target your players id and sell them the license via shop. Usage "BuyBL playerid Quick Demo HOOKS OnBountyActive OnBountyInactive Config { "Spawn Bots On Plugin Reload?": true, "Amount to Spawn On Plugin Reload(Must be less than Max Active Bounties)?": 5, "Announce Top Bounty Hunters To Chat Every x Seconds (0 To Disable)": 600, "Discord Webhook URL": "INSERT_WEBHOOK_URL", "Enable Skill Tree Xp Gain?": false, "Require License for Xp Gain?": true, "Enable Monument Spawns?": true, "Enable Custom Spawns?": false, "Clear Custom Spawns File On Wipe?": false, "Chat Icon": 0, "Maximum Active Bounties": 3, "Drop Bounty Tokens In Pouch?": true, "Base Item for the Bounty Tokens?": "blood", "Tokens Marketable to the Bounty NPC?": true, "Console Command to Purchase a Bounty License? (For GUI Shops)": "buybl", "Chat Command to Purchase a Bounty License?": "buybl", "Require a Bounty License To Cash In Tokens to the Bounty NPC?": true, "Price to Purchase a Bounty License?": 10000, "Lose Bounty License on Death?": true, "Clear Licenses on Wipe?": false, "Dynamic Spawn at this Monument (Requires your Position Input to be set to match Monument if Changing from Bandit.)": "assets/bundled/prefabs/autospawn/monument/medium/bandit_town.prefab", "Dynamic Spawn Points (Relative to Monument)": [ { "x": 64.86, "y": 2, "z": -46.2 }, { "x": -0.58, "y": 0.83, "z": -68.93 } ], "Dynamic Spawn Rotation Correction": 45, "Clear Kill Counters on Wipe?": false, "Dynamic (Bandit Camp) Spawn Of The NPC Enabled?": true, "Economy Plugin - 1 Economics - 2 Server Rewards": 1, "Maximum Amount of Like Tokens Sold at a Time": 3, "NPC Interaction Cooldown In Seconds": 3, "NPC Kit Enabled?": false, "NPC Kit Name?": "", "Amount of Time In Seconds Between Bounty Spawns": 600, "Amount of Time In Seconds for a Bounty to Despawn": 1200, "Enable Spawn SFX?": true, "Enable Despawn SFX?": true, "Announce to Chat When Bounty is Active?": true, "Announce to Chat When Bounty is Claimed?": true, "Bounty Tiers": [ { "Tier Name": "Tier 1 Bounty Target", "Skill Tree Xp Value": 100, "Marker Settings": { "Marker Enabled?": true, "Marker Radius": 0.2, "Marker Color": "FF0000", "Marker Outline": "606060", "Marker Alpha": 0.75 }, "Bounty Kit Enabled?": false, "Bounty Kit Name?": "", "Bounty Clothing Options": [ { "Shortname": "hazmatsuittwitch", "Skin": 0 } ], "Bounty Total Health": 150, "Bounty Damage Scaling": 1, "Bounty Roam Range": 100, "Bounty Chase Range": 100, "Bounty Sense Range": 100, "Bounty Listen Range": 100, "Bounty Memory Duration": 60, "Bounty Speed": 10, "Aim Cone Scale": 1, "Attack Range Multiplier": 2, "Vision Cone Scale": 135, "Turret Damage Scale": 1, "Weapon to Equip?": "rifle.ak", "Weapon Skin ID": 3140321604, "Bounty Token Name": "Tier 1 Bounty Token", "Bounty Token Skin": 3155517347, "Is the Token Marketable to the Bounty NPC?": true, "Sale Price?": 1000, "Max Discount Buy Variation in %? (Negative Values) (To Simulate Supply & Demand)": -10, "Maximum Bonus Variation in %? (Positive Values) (To Simulate Supply & Demand)": 5, "Min Item Drop": 1, "Max Item Drop": 3, "Bounty Optional Drops": [ { "Shortname": "stones", "Skin": 0, "Custom Name": "", "Amount Min": 3, "Amount Max": 10, "Chance to Drop": 20 }, { "Shortname": "scrap", "Skin": 0, "Custom Name": "", "Amount Min": 5, "Amount Max": 30, "Chance to Drop": 30 }, { "Shortname": "paper", "Skin": 3048132587, "Custom Name": "Cash", "Amount Min": 1, "Amount Max": 3, "Chance to Drop": 40 } ] }, { "Tier Name": "Tier 2 Bounty Target", "Skill Tree Xp Value": 200, "Marker Settings": { "Marker Enabled?": true, "Marker Radius": 0.2, "Marker Color": "FF0000", "Marker Outline": "606060", "Marker Alpha": 0.75 }, "Bounty Kit Enabled?": false, "Bounty Kit Name?": "", "Bounty Clothing Options": [ { "Shortname": "hazmatsuit.arcticsuit", "Skin": 0 } ], "Bounty Total Health": 225, "Bounty Damage Scaling": 1, "Bounty Roam Range": 100, "Bounty Chase Range": 100, "Bounty Sense Range": 100, "Bounty Listen Range": 100, "Bounty Memory Duration": 60, "Bounty Speed": 20, "Aim Cone Scale": 1, "Attack Range Multiplier": 4, "Vision Cone Scale": 135, "Turret Damage Scale": 1, "Weapon to Equip?": "rifle.lr300", "Weapon Skin ID": 2715918380, "Bounty Token Name": "Tier 2 Bounty Token", "Bounty Token Skin": 3155517539, "Is the Token Marketable to the Bounty NPC?": true, "Sale Price?": 2000, "Max Discount Buy Variation in %? (Negative Values) (To Simulate Supply & Demand)": -5, "Maximum Bonus Variation in %? (Positive Values) (To Simulate Supply & Demand)": 15, "Min Item Drop": 1, "Max Item Drop": 3, "Bounty Optional Drops": [ { "Shortname": "metal.fragments", "Skin": 0, "Custom Name": "", "Amount Min": 200, "Amount Max": 500, "Chance to Drop": 30 }, { "Shortname": "scrap", "Skin": 0, "Custom Name": "", "Amount Min": 240, "Amount Max": 300, "Chance to Drop": 30 }, { "Shortname": "paper", "Skin": 3048132587, "Custom Name": "Cash", "Amount Min": 10, "Amount Max": 15, "Chance to Drop": 40 } ] }, { "Tier Name": "Tier 3 Bounty Target", "Skill Tree Xp Value": 300, "Marker Settings": { "Marker Enabled?": true, "Marker Radius": 0.2, "Marker Color": "FF0000", "Marker Outline": "606060", "Marker Alpha": 0.75 }, "Bounty Kit Enabled?": false, "Bounty Kit Name?": "", "Bounty Clothing Options": [ { "Shortname": "scientistsuit_heavy", "Skin": 0 } ], "Bounty Total Health": 325, "Bounty Damage Scaling": 2, "Bounty Roam Range": 100, "Bounty Chase Range": 100, "Bounty Sense Range": 100, "Bounty Listen Range": 100, "Bounty Memory Duration": 60, "Bounty Speed": 30, "Aim Cone Scale": 1, "Attack Range Multiplier": 2, "Vision Cone Scale": 135, "Turret Damage Scale": 1, "Weapon to Equip?": "rifle.ak.ice", "Weapon Skin ID": 0, "Bounty Token Name": "Tier 3 Bounty Token", "Bounty Token Skin": 3155517732, "Is the Token Marketable to the Bounty NPC?": true, "Sale Price?": 3200, "Max Discount Buy Variation in %? (Negative Values) (To Simulate Supply & Demand)": -3, "Maximum Bonus Variation in %? (Positive Values) (To Simulate Supply & Demand)": 20, "Min Item Drop": 1, "Max Item Drop": 3, "Bounty Optional Drops": [ { "Shortname": "metal.refined", "Skin": 0, "Custom Name": "", "Amount Min": 200, "Amount Max": 500, "Chance to Drop": 30 }, { "Shortname": "scrap", "Skin": 0, "Custom Name": "", "Amount Min": 440, "Amount Max": 600, "Chance to Drop": 30 }, { "Shortname": "paper", "Skin": 3048132587, "Custom Name": "Cash", "Amount Min": 20, "Amount Max": 35, "Chance to Drop": 40 } ] } ], "Marker Settings For NPC": { "Marker Enabled?": true, "Marker Radius": 0.2, "Marker Color": "FF0000", "Marker Outline": "606060", "Marker Alpha": 0.75 }, "NPC Weapon": "rifle.bolt", "NPC Weapon Skin": 819149392, "NPC Clothing Options": [ { "Shortname": "burlap.trousers", "Skin": 1760352876 }, { "Shortname": "burlap.shirt", "Skin": 1760350097 }, { "Shortname": "shoes.boots", "Skin": 547978997 }, { "Shortname": "hat.boonie", "Skin": 3077061771 }, { "Shortname": "burlap.gloves", "Skin": 1338273501 } ] } LANG { "NoPerms": "[<color=#b5a642>Bounty Hunter</color>] You do not have permission to run this <color=#b54251>Command</color>!", "NoTokens": "[<color=#b5a642>Bounty Hunter</color>] :coffeecan: You have no <color=#b5a642>Bounty Tokens</color> on you that I can cash out. \nBe on the look out, see you soon!\n\n:exclamation:", "BountyHunterCooldownMessage": "[<color=#b5a642>Bounty Hunter</color>] :angry: Wait <color=#a642b5>{0}</color> second(s)!, I think I spotted a <color=#b5a642>Bounty</color>...", "EconomicsMessage": "[<color=#b5a642>Bounty Hunter</color>] :eyes: \n\n I can net you <color=#85bb65>$</color><color=#42b5a6>{0}</color> for your <color=#42b5a6>{1}x</color> <color=#a642b5>{2}</color>(s).", "SrMessage": "[<color=#b5a642>Bounty Hunter</color>] :eyes: \n\n I can net you <color=#42b5a6>{0}</color> <color=#cd5c5c>RP</color> for your <color=#42b5a6>{1}x</color> <color=#a642b5>{2}</color>(s).", "SaleDisabled": "[<color=#b5a642>Bounty Hunter</color>] <color=#42b5a6>Sales</color> are Disabled in the Config, Enable and Try again.", "NoBountyHunterLicense": "[<color=#b5a642>Bounty Hunter</color>] :eyebrow: Are you out there targeting Bounties without a <color=#42b5a6>License</color>? \nUse <color=#42b5a6>/BuyBL</color> to purchase one.", "AlreadyHasLicense": "[<color=#b5a642>Bounty Hunter</color>] You already have a <color=#b54251>Bounty Hunter License</color>.", "BuyBountyHunterLicenseSuccess": "[<color=#b5a642>Bounty Hunter</color>] <color=#b54251>Bounty Hunter License</color> Obtained. \nYou were charged {0}<color=#3e9c35>{1}</color>, Stay Vigilant, <color=#8bb542>{2}</color>!", "InsufficientFunds": "[<color=#b5a642>Bounty Hunter</color>] You don't have enough funds to purchase a <color=#b5a642>Bounty Hunter License</color>. \nIt costs <color=#42b5a6>{0}</color><color=#a642b5>{1}</color>.", "Despawn": "[<color=#b5a642>Bounty Hunter</color>] The <color=#42b5a6>{0}</color> has <color=#b54251>Fled</color> the Island.", "BountySpotted": "[<color=#b5a642>Bounty Hunter</color>]\n\n A <color=#42b5a6>{0}</color> has been spotted near <color=#b56d42>{1}</color>.", "BountyEliminated": "[<color=#b5a642>Bounty Hunter</color>] The <color=#42b5a6>{0}</color> was <color=#b5a642>Eliminated</color> by <color=#8bb542>{1}</color>!", "BountyDrop": "[<color=#b5a642>Bounty Hunter</color>] The <color=#42b5a6>{0}</color> dropped a pouch! Open it and deliver the <color=#42b5a6>Bounty Token</color> to the Bounty Hunter for your Reward!", "Revoked": "[<color=#b5a642>Bounty Hunter</color>] Your <color=#42b5a6>Bounty License</color> has been <color=#42b5a6>Revoked</color> be wary of Death next time!" }$29.99 -
Version 1.6.3
82 downloads
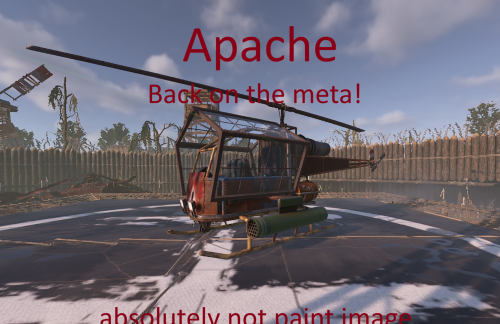
Apache (Attack Heli Rocket Selector + Armored Windows + Player Cooldown) The Apache plugin turns the Rust attack helicopter into a fully customizable, player-controlled combat platform with advanced weapon systems, smart rocket handling, and experimental features you won’t find anywhere else. Apache is a lightweight, server-friendly Rust plugin that upgrades the Attack Helicopter rocket pod into a configurable multi-ammo system with clean in-game controls and full balancing options. Players can cycle rocket types with the USE key (E) while piloting, and the helicopter will fire the selected rocket type as long as ammo is available. When a type runs out, Apache will announce “out of ammo” and automatically switch to the next available enabled type. Features Rocket type selector (Pilot only) Press E to cycle through enabled rocket types Shows chat feedback: selected type, remaining ammo, and cooldown Gunner support The gunner can also fire the rockets The gunner can aim the rockets using the built-in helicopter monitor Supported ammo types HV Basic Incendiary MLRS SAM Out-of-ammo intelligence Warns at 0 ammo Announces what rocket type will be used next Automatically switches to the next available enabled type Per-rocket balancing Separate cooldown, launch speed, and up-bias (trajectory lift) for each rocket type Configurable Helicopter HP Server owners can control how durable the Apache is by adjusting the helicopter's max health in the configuration. Alternating launch positions Uses Left/Right local offsets (configurable) so you can align firing to your pod locations Optional armored windows Toggle armored window on/off from config Permission system apache.admin → unlimited spawns + admin tools apache.player → cooldown-limited spawns Player spawn cooldown Configurable X hours per spawn for players with apache.player Stores cooldown data in a data file Admin reset /apache reset wipes cooldown data and starts fresh Works with /shop plugin You can use spawn.apache %steamid% Default Configuration Behavior (Important) On first run, Apache auto-generates the config with most rocket types disabled by default. Enabled by default: HV Disabled by default (must be enabled manually in the JSON if you want them): Basic MLRS SAM Incendiary This is intentional for safety/balance: the server owner enables only the rocket types they want by editing the .json configuration file. Commands F1 Console: spawn.apache Spawns an Apache for yourself (with admin permission without cooldown). spawn.apache <steamid|name> Spawns an Apache for a target player (admin only without cooldown). Chat commands: /apache Same behavior as spawn.apache (for players with cooldown configured in .json). /apache reset (admin only) Wipes stored cooldown data and resets all player spawn timers. Permissions apache.admin Admin usage: unlimited spawning, spawning for others, and reset command. apache.player Player usage: allows self-spawn with configurable cooldown. Configuration Apache generates a JSON config with: Enable/disable each rocket type (also blocks inserting disabled ammo into the pod) Armored windows on/offLeft & Right launch offsets (local heli space) Local offset axis reminder: X = left(-) / right(+) Y = up(+) Z = forward(+) Per-rocket: Cooldown (seconds) Launch speed Up bias (adds a small upward lift to trajectory) Notes / Compatibility Designed to be server-friendly: only affects plugin-spawned helicopters Works without requiring players to bind keys (uses E / USE) Your first configs: { "EnableArmoredWindows": true, "HelicopterMaxHealth (min: 850, max: 9999)": 850.0, "PlayerSpawnCooldownHours": 6.0, "HV": { "Enabled": true, "CooldownSeconds": 1.0, "LaunchSpeed": 65.0, "UpBias": 0.02 }, "Incendiary": { "Enabled": false, "CooldownSeconds": 1.0, "LaunchSpeed": 40.0, "UpBias": 0.02 }, "Basic": { "Enabled": false, "CooldownSeconds": 1.0, "LaunchSpeed": 40.0, "UpBias": 0.02 }, "MLRS": { "Enabled": false, "CooldownSeconds": 1.0, "LaunchSpeed": 70.0, "UpBias": 0.03 }, "SAM": { "Enabled": false, "CooldownSeconds": 0.8, "LaunchSpeed": 85.0, "UpBias": 0.02 }, "LeftOffsetLocal": { "x": -2.0, "y": -0.5, "z": 3.0 }, "RightOffsetLocal": { "x": 2.0, "y": -0.5, "z": 3.0 } }$24.00 -
Version 1.0.43
3,997 downloads
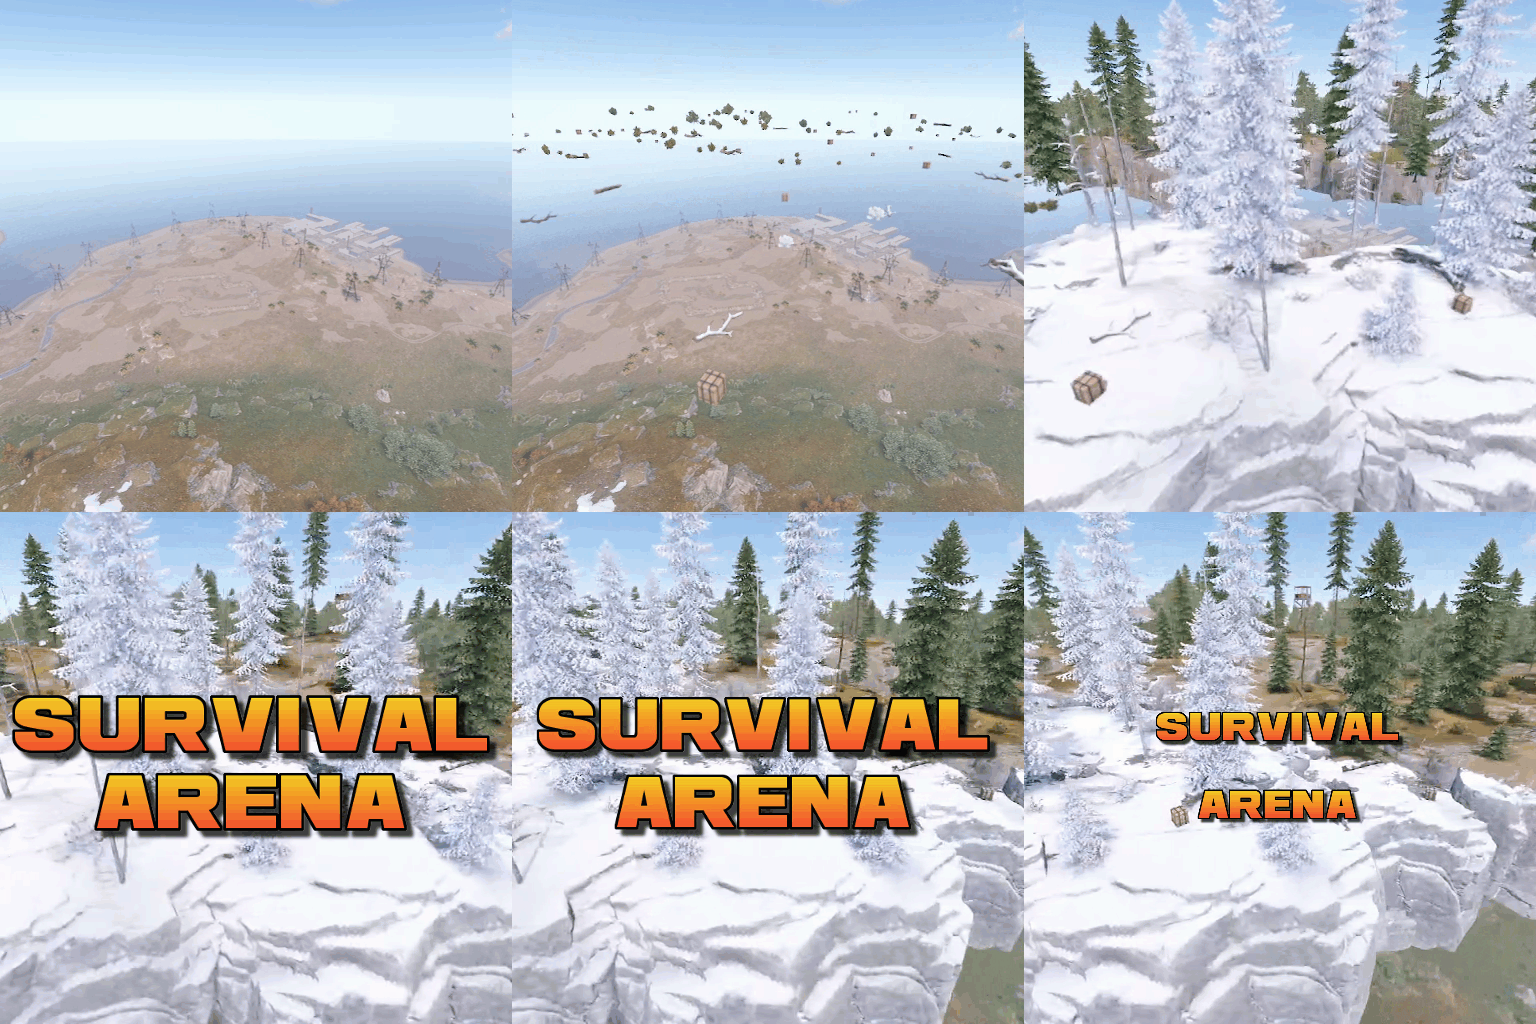
Survival Arena is a plugin that spawns a Battle-royal style game, where players must scavenge for equipment and fight to the death, all while staying inside of a shrinking, non-radiated zone. The plugin spawns a large play area high in the sky and inherits the biome type from the ground below. This means that if the area is suspended above an arctic biome, all of the rocks, trees, logs and bushes will be spawned mirroring that biome type. Players are teleported into the center building when they join, and once the game begins, they must loot containers to gear up to survive. Players are returned to their original locations when they leave the event or respawn after dying at the event. Server owners can change or add loot profiles via the config. The plugin will select a random profile when the arena begins and fill the loot containers based on your specifications. It comes with 2 default loot profiles: Primitive - spears, melee weapons, bows, crossbows, burlap equipment, revolvers etc GunLoot - more modern weapons. The plugin uses EventHelper to run automatically, handle joining and leaving, and will allow players to vote to start the game. Admins can also add additional trees, bushes, logs and loot spawns to the arena via command. Type: Chat Command: survivalarena Function: Sends the user the UI to start up the game. Loot profiles, spawn height and lobby time can be adjusted here before starting the game. Type: Chat/Console Command: startarena <heightMod> <lobbytime> <arenaName> <lootProfile> Function: Spawns and starts the game using the specified heightmod and lobbytime parameters. You can simply use the command with no parameters to start it using the default settings and a random arena/lootprofile. Type: Chat/Console Command: endarena Function: Ends any active games and despawns the arena. Type: Chat Command: spawnarena <name> Function: Spawns the arena, but does not start the game. Useful for debugging and development. Type: Chat Command: setcentrepoint Function: Sets the arena's new center point at the players location. Useful if you want to move the spawn so it has more biome variety. Be sure not to make it too high or too close to the ground. Type: Chat Command: survival Function: Used to join the game when the lobby is active. Type: Chat Command: saremove Function: Removes the tree, loot container, log or bush that the player is looking at. This will no longer spawn in future games. Type: Chat Command: addtree Function: adds a tree spawn at the players position. Type: Chat Command: addbush Function: adds a bush spawn at the players position. Type: Chat Command: addlog Function: adds a log spawn at the players position. Type: Chat Command: addloot Function: adds a loot spawn at the players position. Type: Chat Command: saleave Function: Leaves the event Type: Console/Chat Command: wipeoldarena Function: Wipes any entities that are at the same height or higher than the arena. survivalarena.admin survivalarena.autojoin If you wish to create your own arena, you may follow this tutorial here: https://youtu.be/BxmcjHjIJDU Please note that the map file name needs to contain survivalarena or it will not allow the getarena command to work. Also I will not be offering support for this, so use at your own risk. API Hook Calls void OnSurvivalArenaStart() - Called when the lobby starts. void OnSurvivalArenaEnd() - Called when the game is ending. void OnSurvivalArenaWin(BasePlayer player) - Called when a player wins the game. void OnEventLeave(BasePlayer player, string pluginName) - Called when a player leaves the event. object OnEventJoin(BasePlayer player, string pluginName) - Called when a player is attempting to join the event. Returning a string will prevent the player from joining and will print the string to them. void OnEventJoined(BasePlayer player, string pluginName) - Called when a player has successfully joined the arena. void OnPlayerItemsRestored(BasePlayer player) - called when a players items have been restored. Hook Methods bool IsEventPlayer(BasePlayer player) - returns true or null if the player is an EventPlayer.$19.99 -
Version 1.0.3
2,189 downloads
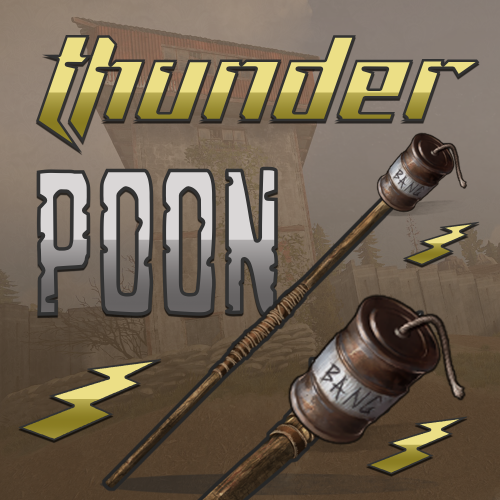
Thunderpoon allows players to attach beancan grenades to spears by dragging the two items together. Damage radius as well as damage is configurable in the config file. Permission You can avoid using permissions by setting usepermission config option in the config file. thunderpoon.use Config The default values are tested and somewhat balanced. If you're unsure on how to configure I recommend leaving as-is or asking questions in the discussion tab. UsePermission - Setting to false will allow everyone to craft thunderpoons. Damage - The amount of damage caused by the explosion. MinRange - The minimal size of the explosion radius. MaxRange - The maximum size of the explosion radius. detonateChance - The chance of detonation when thrown. Icon by @SawyerWDFree -

Version 1.0.3
14 downloads
xMegaphone xMegaphone is a powerful megaphone broadcast system for Rust servers that allows players and/or admins to submit custom announcements through an intuitive UI. Messages can be displayed globally as either animated sliding text or clean static text, making it perfect for announcements, events, advertisements, community communication or even selling megaphones to your players for real money. The plugin is optimized for performance and designed to run smoothly on most servers. For maximum flexibility, you can choose between two display modes depending on your server’s needs: Type 0 - Sliding Text: Eye-catching animated ticker that scrolls across the screen. Type 1 - Static Text: Performance-friendly message displayed in the center without animation (recommended for very high population servers). This allows you to balance visual impact and performance with a simple configuration change. ■ Inspired by the classic megaphone system from the game "Combat Arms" (when it wasn't dead lol), bringing that nostalgic broadcast experience to your server. Plugin Preview Permission xmegaphone.use - Needed to use the /xmp command xmegaphone.admin - Needed to use admin commands </> Chat Commands (Players) /xmp - Opens the xMegaphone UI ⌨ Chat/Console Commands (Admins) /xmp - Opens the xMegaphone UI /xmp give <steamId|partialName> <amount> - Adds megaphone uses to a player. /xmp set <steamId|partialName> <amount> - Sets a player’s megaphone uses to an exact number. /xmp reset <steamId|partialName> - Resets a player’s uses back to your configured StartingMegaphoneUses value. Config { "Uses": { "StartingMegaphoneUses": 0 }, "Message": { "MaxLength": 80 }, "Ticker": { "MegaphoneType": 0, "DurationSecondsType0": 20.0, "DurationSecondsType1": 8.0, "FontSize": 18, "ShowSender": true, "PrefixText": "[MEGAPHONE]", "PrefixColor": "#cffc03", "SenderColor": "#75ff9a", "TextColor": "#ffffff" } } ^ "StartingMegaphoneUses" = How many megaphones a player receives when added to datafile for first time.$9.99- 2 comments
-
- 1
-
-
- #server
- #megaphone
- (and 21 more)
-
-
Version 1.1.3
62 downloads
Transform quarry monuments into contested PvP hotspots with dynamic resource spawns and hostile defenders, without disrupting vanilla quarry functionality. When a quarry is activated, resource-rich ore nodes emerge around the monument while scientists and guard dogs materialize to defend it. Players must fight through NPC resistance while competing with rivals, naturally creating intense PvP encounters and contested monument control. Rather than creating a separate event system, Quarry Assault reacts directly to quarry activation, making these monuments feel dangerous, alive, and worth fighting over. Designed to feel fully integrated with Rust’s mechanics, Quarry Assault automatically starts when quarries turn on, respawns resources periodically, and cleans up when the quarry shuts down or all defenders are eliminated. Features • Automatic activation when any quarry starts running • Enhances (does not replace) vanilla quarry behavior • Resource-rich ore node spawns (metal, sulfur, stone) • Hostile scientist NPCs with AK-47s and hazmat suits • Guard dog patrols for additional defensive layers • Intelligent quarry type detection (Stone, Sulfur, HQM) • Cinematic spawn animations — nodes and NPCs rise from the ground • Configurable spawn radius and density • Periodic node respawning while the quarry is active • Clean despawn when quarry stops or defenders are eliminated • Modern in-game admin control panel • Server-wide event alerts and UI notifications • Performance-aware spawning logic with staggered delays • Fully configurable spawn counts, timings, and distances Chat Commands (Admin Only) /quarry Opens the Quarry Assault control panel to view active events and adjust settings Permissions quarryassault.admin Required to start, stop, or configure Quarry Assault events Configuration { "NodeCount": 25, "NPCCount": 30, "DogCount": 10, "EventRadius": 50, "MinNodeDistance": 5, "MinNPCDistance": 3, "MinNodeToNPCDistance": 4, "NodeRespawnTime": 300, "NodeSpawnDelay": 0.15, "NodeRiseTime": 1.5, "NPCSpawnDelay": 0.2, "NPCRiseTime": 1.0, "DogSpawnDelay": 0.15 } Default values are tuned for balanced risk, server performance, and rewarding PvP encounters. How It Works When a quarry activates: • The plugin detects the quarry type (Stone, Sulfur, or HQM) • Resource nodes spawn in a radius around the quarry with rising animations • Scientists materialize to defend the resources • Guard dogs patrol the perimeter • Server-wide alerts notify all players During the event: • Nodes respawn periodically (configurable) • NPCs roam within the event radius and engage players • The event continues as long as the quarry is powered When the event ends: • If defenders are eliminated: NPCs despawn, nodes remain • If manually stopped: All entities are removed cleanly • The quarry returns to vanilla behavior Notes Quarry Assault is built to enhance vanilla Rust, not override it. Quarries function exactly as expected , this plugin simply raises the stakes and increases monument contestation. Ideal for PvP-focused servers, progression-based gameplay loops, and servers looking to make monuments feel more alive. Multi-quarry support: Stone Quarry, Sulfur Quarry, and HQM Quarry supported simultaneously. Performance optimized: Staggered spawning prevents server lag even with large entity counts. Created by CodeBrothers Check out our other work on Codefling$19.99 -

Version 1.0.16
97 downloads
DESCRIPTION WILL BE UPDATED SOON WITH NEW VERSION!$34.99 -
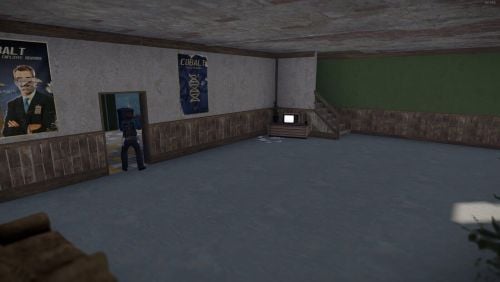
Version 3.9.38
28 downloads
I've disabled sales of this product here moving forward.$9.99- 3 comments
-
- 4
-
-
-
- #nuketown
- #nuketown arena
- (and 14 more)
-


Version 1.0.2
52 downloads
Description Elevate your Rust server with PVP Ping, the ultimate plugin for strategic combat and advanced map tracking between teams! This plugin empowers players to mark key locations on the map, allowing for enhanced coordination and tactical planning. Whether you're organizing an ambush or tracking enemy movements, PVP Ping ensures your players stay one step ahead. With customizable ping types, you can tailor the plugin to fit your server's needs. Players can set markers with unique icons, colors, and areas of effect, making it easy to strategize in real time. Use the native UI to view and manage active pings. Add a dynamic layer of strategy to your server and let players experience the thrill of precision combat. Watch as they adapt to new tactics and utilize pings during raids. Instead of yelling at which box the meds are in, they can now just ping it. PVP Ping is designed to integrate seamlessly with a players Rust experience. All you have to do is aim and press the use key to send the ping. It feels so good it should be native to Rust. Config Options You can change the icon colors and icons within the config. Also you can change the min/max distance, ping cooldowns, durations, and sound effect of ping. The available colors are: Green, Teal, Red, Purple, Blue, Yellow The available icons are: Default, Dollar, House, AirDrop, Hostile, Shield, Death, Bed, Sleep, Gun, Node, Loot, Tool Here is an example: "prefab-shortname": { "Icon": "Loot", "Color": "Teal" } Watch Video$9.99 -
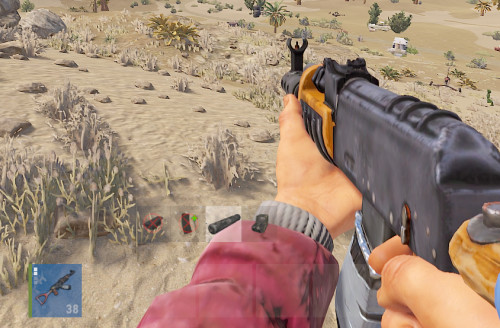
Version 0.3
42 downloads
Weapon Mod Menu is a plugin that allows players on your server to swap between weapon mods without having to open up their inventory. No longer will your teammate slack behind because they had to switch between a flashlight and a laser. This plugin uses an easy-to-use configuration file where you can choose which weapon mods can be selected in the menu, and has a simple but pretty UI. Permission needed to use: WeaponModMenu.use o.grant user <Username> WeaponModMenu.use Commands: modmenu Bind z modmenu$10.00 -

Version 1.0.1
51 downloads
Industrial Arenas These arenas will perfectly decorate your battle server Industrial Arena A 1715 Prefabs for this build Installation Modifiers: Biome, Height, Splat, Topology Arena diameter: 150m Industrial Arena B 1753 Prefabs for this build Installation Modifiers: Biome, Height, Splat, Topology Arena diameter: 85m Industrial Arena C 2028 Prefabs for this build Installation Modifiers: Biome, Height, Splat, Topology Arena diameter: 100m Industrial Arena D 3607 Prefabs for this build Installation Modifiers: Biome, Height, Splat, Topology Arena diameter: 200m Industrial Arena E 2186 Prefabs for this build Installation Modifiers: Biome, Height, Splat, Topology Arena diameter: 125m Check out more of my work here! If you have any ideas or suggestions on how to improve / supplement this pack, please contact me. (Discord: jtedal#8448)$14.99-
- 6
-
-
-

-
- #mad mappers
- #jtedal
- (and 9 more)
-
Version 2.0.1B
124 downloads
IMRG plugins are currently not for sale. Additionally the "IMR Tools Package" are (or soon to be) unlisted. Those who've already bought our plugins are welcome to still submit support request if necessary. Once we've more time to allocate to Codefling plugins will be relisted again as well as more added. Advanced Combat Logging is a plugin that improves upon the combatlog feature in Rust for both players and admins in a number of key ways. For reference, combatlog is a command players use regularly to see the "combat logs" of their fights, and this plugin takes that many steps further by upgrading the information shown to display the actual steamID and player name of the players involved in the fight (which the normal combat log doesn't show), in addition to allowing customization of the log with such things like the amount of combat interactions or how long ago the combat happened, who it is or isn't shown to, and which type of interactions to log (players, animals, scientists, etc). For admins, it also creates fully customizable persistent server log files with no performance impact with records of combat logs of fights that took place on the server so they can be reviewed later for balance, hacker/scripter investigation, seeing what you missed, and much more! Features • Improves upon the existing combatlog feature for both players and admins • Takes the guesswork out of the logs to include actual steamID and player name for complete accuracy rather than vanilla combatlog which shows neither • Creates customizable log files for server owners so they can conveniently review all combat logs on their server even when they're not actively around and using the command • Through review of the generated log files, allows admins to compare and contrast logs at their own pace to look for patterns of potential hackers, scripters, other foul play, or other things • VIP Ready to allow specific players or groups of players to see better combat logs than normal players and many other options • Lets admins choose which type of combatlogs will be recorded per permission group by specifying the short prefab names (for example, players, specific animals, specific scientists, etc) as well as other possibilities • Can block all or specific players from using the combatlog feature as well if so desired • Great performance • Highly customizable Depends On IMR Tools Package: https://codefling.com/tools/imr-tools-package Always make sure you have the IMR Tools Package installed first when running any plugins by IMR Games. Installation - Make sure you have the IMR Tools Package installed, as explained above. - Put this plugin in your oxide plugins folder. - It will generate a config and lang file. - When in use, will also generate log files in the standard oxide logs directory. - Customize and enjoy! Console Commands combatlog - Brings up the custom combat log in the console combatlog steamid - Brings up the custom combat log in the console for that specific player (admin only) Permissions All permissions in this plugin are completely customizable in the config file. There can be as little or as many permission groups as you like depending on what you want to do. The only requirement is that the beginning of the permission use the plugin name which is imrgadvancedcombatlogging. Permission groups also follow a "priority" system, with the permissions listed first taking higher priority if a player happens to have multiple. Included in the default config are the following permission group examples just to demonstrate a few things you can do: - Example 1: Players with this permission cannot use the combatlog command. Useful if you want to block specific players or even all non-VIP players from using it - Example 2: Permission for admins that unlocks all features of the plugin - Example 3: VIP permission for players with upgraded combatlog features plus the ability to use combatlog - Example 4: Permission that lets players use the command with basic features - Example 5: Permission that lets players only see combatlogs related to animals These are just examples, but the plugin can be used in many ways! Config { "File Log Settings": { "Only Log If Player Has Been Hurt By Another Player Recently": false, //Limits combat logs to only situations where players were hurt by other players. "Max Combat Lines": 60, //Maximum line entries of combat interactions per log to show. "Max Combat Time Lines Seconds": 600.0, //Maximum time in seconds to show a combat interaction, ending in the death of a player and going back that many seconds of combat interactions. "Show Improved Identifiers": true, //Upgrade the standard vanilla combat log with steamID and actual player names. This makes it possible to identify each target involved in combat specifically for a much clearer picture of who was doing what. "Prefab Short Name Whitelist": [ //Short prefab names for which types of combat interactions to log. For example, if including only player, then only PVP interactions will be logged. If adding animal shortnames, then PVP and animal combat interactions will be logged. If this is left empty, then every combat interaction will be logged, including players, animals, scientists, etc. "player" ] }, "Console / RCON Settings": { "Block Combat Log Command": false, //Prevent anyone from using the combatlog command via Console/RCON. "Line Delay Seconds": 0.0, //How many seconds must pass after a combat interaction has occurred before it will show up with the command. "Max Combat Lines": 9999999, //Example of pretty much unlimited combat interactions being visible per combat log. "Max Combat Time Lines Seconds": 9999999.0, //Example of pretty much any length of combat interactions being visible per combat log. "Show Improved Identifiers": true, "Prefab Short Name Whitelist": [] }, "Settings (By Permission)": { "imrgadvancedcombatlogging.blocked": { //Permissions that do different things based on the configuration settings in each permission group. Server owners can make as many permission groups as they like with whatever custom settings they prefer. "Block Combat Log Command": true, "Line Delay Seconds": 0.0, "Max Combat Lines": 0, "Max Combat Time Lines Seconds": 0.0, "Show Improved Identifiers": false, "Prefab Short Name Whitelist": [] }, "imrgadvancedcombatlogging.admin": { "Block Combat Log Command": false, "Line Delay Seconds": 0.0, "Max Combat Lines": 999999, "Max Combat Time Lines Seconds": 9999999.0, "Show Improved Identifiers": true, "Prefab Short Name Whitelist": [] }, "imrgadvancedcombatlogging.vip": { "Block Combat Log Command": false, "Line Delay Seconds": 0.0, "Max Combat Lines": 60, "Max Combat Time Lines Seconds": 600.0, "Show Improved Identifiers": true, "Prefab Short Name Whitelist": [] }, "imrgadvancedcombatlogging.normal": { "Block Combat Log Command": false, "Line Delay Seconds": 10.0, "Max Combat Lines": 30, "Max Combat Time Lines Seconds": 120.0, "Show Improved Identifiers": false, "Prefab Short Name Whitelist": [ "player" ] }, "imrgadvancedcombatlogging.animals": { "Block Combat Log Command": false, "Line Delay Seconds": 10.0, "Max Combat Lines": 50, "Max Combat Time Lines Seconds": 120.0, "Show Improved Identifiers": false, "Prefab Short Name Whitelist": [ "chicken", "stag", "boar", "wolf", "bear", "polarbear", "simpleshark" ] } } } Lang { "Blocked": "You don't have permission to use combatlog" //Message players will receive if they try to use the combatlog command and they're either specifically blocked from using it or they don't have permission to use it. }$4.99