
Search the Community
Showing results for tags 'system'.
Found 22 results
-

Version 0.1.5
70 downloads
What is it? A nice user-friendly warning system Usage When someone is breaking rules or trolling others just warn them, you can also set a command that will be executed through server console that will get executed upon reachin certain amount of warnings (can be configured in cfg) Permissions warnmenu.use -- Gives you full control to operate the WarnMenu Chat command /warn -- Opens the WarnMenu /warn "Name/SteamID" "Warning reason" -- Warns the specified player with your reason /warnmenu.save -- Force the plugin to write the data from memory to the data file /wmessage <NameOrID | * > <message> - Shows a gametip message (Doesn't count as a warning) to specific player or to all players when you put * instead of the name Data files All Data files can be located at: \oxide\data\WarnMenu\warns There you can find all the warnings for each player Features WarnMenu features * Online Tab - In this tab you can easily select any online player that you want to warn * Search All Tab - Once you open this tab, there you can see all the players and browse in them * Find player Tab - When you click on the button you will be able to search for a specific player using his Name or SteamID Warn Types * CUI-Based - A CUI warning message will pop-up on player's screen when he gets warned * Chat-Based - A chat message will pop-up in player's chat when he gets warned Executable commands * On reaching certain amount of warnings, you can make the server execute a command on a player(configurable in cfg) F.e.: "1": "say {0} just reached 1 warning! SHAME on him!", "3": "kick {0} Kicked for reaching 3 warnings", Localization { "Syntax": "Commands:\n/report (Opens Reporter GUI)", "CUI Online": "Online Players", "CUI Player": "Player: {0}", "CUI SteamID": "SteamID64: {0}", "CUI Warnings": "Warnings: <color=#8f1919>{0}</color>", "CUI NewWarn": "New\nWarning", "CUI WarningID": "Warning ID: {0}", "CUI WarnedBy": "Warned by: {0}", "CUI Date": "Date: {0}", "CUI Reason": "Reason: \n{0}", "CUI Remove": "Remove", "CUI Close": "close", "CUI Warn": "Warn", "CUI WarnAddMenuPlayer": "Warning for\n<color=#d43939>{0}</color>", "CUI SearchAll": "Search All", "CUI SelectPlayer": "Select a player to warn:", "CUI Find": "Find player", "CUI Find2": "Select", "CUI Find3": "Find player:\n(steamID/Name)", "CUI CantFindPlayer": "Couldn't find the player\nsearching argument: {0}", "CUI FoundPlayer": "Found player: {0}", "CUI Refresh": "Refresh", "CantFindPlayer": "Couldn't find that player", "WarnMessage": "Warned: <color=#8f1919>{0}</color>\nReason: {1}", "JoinMessage": "{0} has joined with <color=#8f1919>{1}</color> warnings", "WarnReceive": "You have received a <color=#8f1919>warning</color>\nBy: {0}\nReason: {1}", "CUI WarnReceive": "<color=#8f1919>Warning</color>\nreceived", "CUI WarnReceive2": "By: {0}\nReason: {1}", "Message Syntax": "/wmessage <player|*> <message>", "No Player": "Couldn't find player with that name", "CUI WarnAddMenuClans": "Warning for clan\n<color=#d43939>{0}</color>", "CUI Clans": "Clans", "SyntaxClan": "Syntax: /warn.clan (p | g) (clan tag) (reason)", "ClansNotLoaded": "Clans plugin is not loaded!", "ClanNotFound": "Couldn't find a clan with that tag!", "ClanWarnedGlobal": "{0} clan has been warned: {1}", "CUI isGlobal": "Global announce?\n{0}", "CUI ClansNot": "Clans plugin is not loaded!" } Configuration { "Announce on join with warnings?(to admins)": true, "Execute commands on reaching count:": { "Enabled?": true, "(Format: 5 : mute {0}) where 5 is number of warns and {0} is player's id": { "5": "example.command {0}", "7": "example.command {0}", "10": "example.command {0}" } }, "Warn message settings": { "Text-based warn message?": true, "CUI-based warn message?": true, "How long until CUI message gets removed (secs)": 5.0 }, "Audio settings": { "Enable audio on warning?": true, "Audio path": "assets/content/nexus/ferry/effects/nexus-ferry-departure-horn.prefab" }, "Highlight settings": { "Enabled?": true, "Minimum amount of warns to highlight": 3 }, "wMessage settings": { "Audio path": "assets/content/nexus/ferry/effects/nexus-ferry-departure-horn.prefab", "Time before disappear": 10.0 }, "Discord (clan)": { "Webhook url": "WEBHOOK", "Enabled?": true }, "Discord (player)": { "Webhook url": "WEBHOOK", "Enabled?": true } }$10.00 -
Version 1.1.2
183 downloads
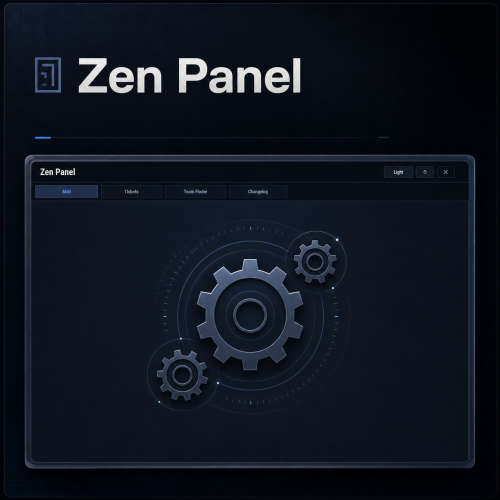
Zen Panel is my modular UI framework/API, designed to power an ecosystem of UI plugins through one shared panel and common functions. It provides the main interface, centralized theme and layout handling, notification support, image utilities, and a clean integration surface for my utility plugins like Zen Mail, Zen Tickets, Zen Team Finder, and more. This plugin servers as a dependency and has no real function on it's own. Carbon Aliases by thepitereq is required only if your server uses the Oxide modding framework (Carbon users do not need to install Carbon Aliases) Zen Panel comes with it's own configuration where you can specify which Zen plugin tabs to display and their order. You can also modify the themes to your liking and configure the timestamp if you wish to offset it (in minutes) from your server time. You can configure the position and size of the HUD notification bell using a chat command (opens a basic repositioning tool) Permissions: zenpanel.admin - Lets you use the /notif_iconpos command to resize/reposition the HUD notification bell Chat commands: /notif_iconpos - Opens and uses the HUD bell position/size editor Default Config: { "UI - Tabs In Order (omit to hide)": [ "mail", "tickets", "teamfinder", "changelog" ], "Notification Icon Image URL (HUD bell)": "https://i.ibb.co/FkBKbkVc/bell.png", "UI - Default Theme (Dark/Light)": "Dark", "UI - Dark Theme": { "Overlay": "0.03 0.04 0.06 0.78", "Window": "0.05 0.08 0.12 0.985", "Header": "0.06 0.09 0.14 1.00", "Panel": "0.07 0.10 0.16 1.00", "PanelAlt": "0.08 0.11 0.17 1.00", "Card": "0.11 0.15 0.22 1.00", "CardAlt": "0.09 0.13 0.20 1.00", "Border": "0.16 0.21 0.31 1.00", "BorderStrong": "0.26 0.34 0.48 1.00", "Text": "0.92 0.95 0.98 1.00", "TextMuted": "0.60 0.67 0.76 1.00", "Accent": "0.45 0.66 1.00 1.00", "AccentSoft": "0.18 0.25 0.39 1.00", "AccentText": "1.00 1.00 1.00 1.00", "Success": "0.29 0.77 0.48 1.00", "SuccessSoft": "0.12 0.24 0.17 1.00", "Warning": "0.92 0.72 0.33 1.00", "WarningSoft": "0.28 0.19 0.06 1.00", "Danger": "0.92 0.42 0.42 1.00", "DangerSoft": "0.28 0.11 0.11 1.00", "Offline": "0.54 0.61 0.70 1.00", "OfflineSoft": "0.16 0.19 0.25 1.00", "Input": "0.09 0.13 0.20 1.00", "AvatarFill": "0.08 0.11 0.18 1.00" }, "UI - Light Theme": { "Overlay": "0.10 0.14 0.20 0.12", "Window": "0.87 0.90 0.94 0.985", "Header": "0.84 0.88 0.93 1.00", "Panel": "0.86 0.89 0.93 1.00", "PanelAlt": "0.83 0.87 0.92 1.00", "Card": "0.92 0.94 0.97 1.00", "CardAlt": "0.89 0.92 0.96 1.00", "Border": "0.69 0.76 0.85 1.00", "BorderStrong": "0.56 0.66 0.82 1.00", "Text": "0.16 0.20 0.25 1.00", "TextMuted": "0.41 0.48 0.58 1.00", "Accent": "0.30 0.51 0.92 1.00", "AccentSoft": "0.80 0.87 0.98 1.00", "AccentText": "1.00 1.00 1.00 1.00", "Success": "0.24 0.62 0.36 1.00", "SuccessSoft": "0.83 0.93 0.86 1.00", "Warning": "0.79 0.58 0.18 1.00", "WarningSoft": "0.94 0.90 0.80 1.00", "Danger": "0.79 0.34 0.34 1.00", "DangerSoft": "0.95 0.86 0.86 1.00", "Offline": "0.55 0.62 0.70 1.00", "OfflineSoft": "0.86 0.90 0.95 1.00", "Input": "0.96 0.97 0.99 1.00", "AvatarFill": "0.86 0.90 0.96 1.00" }, "UI - HUD Anchor Min": "0.5 0.00", "UI - HUD Anchor Max": "0.5 0.00", "UI - HUD Offset Min (px)": "-326 4", "UI - HUD Offset Max (px)": "-294 36", "UI - HUD Unread Counter Font Size": 15, "UI - HUD Unread Counter Text Color": "0.98 0.99 1.00 1.00", "UI - HUD Unread Counter Shadow Color": "0.04 0.05 0.07 0.98", "Timestamp Offset (minutes)": 0, "Notification Icon UI Layer (Overlay/Hud/Hud.Menu)": "Overlay" } Sample image from plugins using Zen Panel: Notification bell layer (v1.1.0): Overlay keeps the previous behavior. Set "Notification Icon UI Layer (Overlay/Hud/Hud.Menu)" to "Hud" to show the bell below overlay menus, or "Hud.Menu" if preferred. Oxide users should also update Carbon Aliases to the latest version.Free -
Version 1.0.5
116 downloads
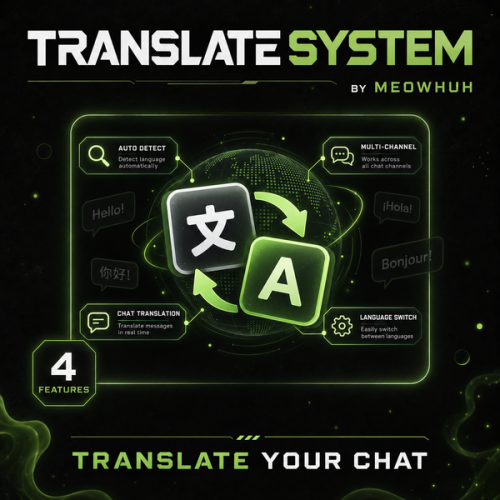
Automatic chat translation for Rust servers. Running an international Rust server should not mean players have to copy messages into external translators just to understand each other. TranslateSystem automatically translates chat messages into each player's selected language while keeping the normal Rust chat experience. Players can use their Rust client language automatically or choose their own language, while server owners can control chat channels, translation services, preserved Rust terms, caching, message filters, permissions, and request limits. Perfect for PvE, PvP, Vanilla+, modded, RPG/RP, international servers, or any server with players speaking different languages. Features Automatically translates chat messages separately for each player's language. Uses the player's Rust client language automatically or allows players to select their own language. Supports Global, Team, Local, Clan, and Card Game chat channels. Enable or disable translation separately for each supported chat channel. Supports MyMemory, Google Cloud Translation, Microsoft Translator, Yandex Cloud, LibreTranslate, and OpenAI. MyMemory is available as the default translation service and fallback if another configured provider fails. BetterChat and IQChat support while keeping their chat formatting. Players can enable or disable translations for themselves at any time. Optional permission requirement for receiving translations. Option to translate the sender's own messages. Option to show the original message underneath the translated message. Automatic source-language detection. Custom language selection for individual players. Preserved Rust terms prevent configured words such as TC, Oil Rig, Cargo, Bradley, AK, sulfur, HQM, Workbench, monument names, and other terms from being translated. Built-in translation cache reuses recent translations and reduces unnecessary API requests. Configurable cache lifetime and maximum stored translations. Message filters can ignore messages without letters, very short messages, and colon emoji codes such as :heartrock:. Optional per-player rate limiting. Configurable maximum simultaneous translation requests. Configurable API timeout, failed-request cooldown, and rate-limit cooldown. Optional server console chat logging. Configurable command aliases. Player translation settings and selected languages are saved automatically. English and Russian plugin messages included. Supported Languages TranslateSystem supports all 25 Rust client languages, allowing players to communicate across different languages without manually translating chat messages. Players can automatically use their Rust client language or manually select their preferred translation language. Language Language Code English en Russian ru German de French fr Spanish (Spain) es Spanish (Latin America) es-419 Italian it Turkish tr Arabic ar Czech cs Danish da Greek el Polish pl Ukrainian uk Japanese ja Korean ko Chinese (Simplified) zh-cn Chinese (Traditional) zh-tw Dutch nl Norwegian no Swedish sv Finnish fi Portuguese (Portugal) pt-pt Portuguese (Brazil) pt-br Vietnamese vi Tip Example: A German player can use /translate lang de to receive translated messages in German, while a Russian player can use /translate lang ru to receive messages in Russian. Players can also use /translate auto to automatically follow their Rust client language without selecting a language manually. Commands /translate - Shows your current translation status and available commands. /translate on - Enables automatic chat translations for yourself. /translate off - Disables automatic chat translations for yourself. /translate auto - Uses your Rust client language for translations. /translate lang <code> - Sets your translation language manually. /translate status - Shows whether translation is enabled and which language is currently being used. Command aliases are fully configurable. Command Examples /translate /translate on /translate off /translate auto /translate lang en /translate lang de /translate lang ru /translate lang fr /translate lang es-419 /translate lang zh-cn /translate status Note Language Selection Use /translate auto to automatically follow the player's Rust client language. Use /translate lang <code> to select a preferred language manually. Language preferences are saved automatically. Players can enable or disable translations whenever they want. Admin Command /translate stats - Shows the current translation cache size and active translation requests. Permissions translatesystem.use - Required to use TranslateSystem commands and receive translations when the permission requirement is enabled in the configuration. translatesystem.admin - Allows access to /translate stats. Tip Permission Settings By default, the permission requirement for receiving translations is disabled. Enable Require permission to receive translations in the configuration if you want to restrict translation functionality to selected players or permission groups. Translation Services TranslateSystem supports multiple translation providers, allowing server owners to select the service that best fits their server. Service Description MyMemory Default translation service without requiring your own API key. Google Google Cloud Translation using your API key. Microsoft Microsoft Translator using a subscription key and optional resource region. Yandex Yandex Cloud Translation using your API key. LibreTranslate Connect to a LibreTranslate server with optional API-key support. OpenAI OpenAI API translation with configurable API key, model, and token limit. MyMemory Available as the default translation service. Does not require server owners to configure their own translation API key. Can serve as a fallback when another configured translation provider fails. Google Supports Google Cloud Translation. Requires a Google Cloud Translation API key. Can be selected as the main translation provider. Microsoft Supports Microsoft Translator. Requires a Microsoft Translator subscription key. Supports an optional resource region. Yandex Supports Yandex Cloud Translation. Requires a Yandex Cloud service account API key. LibreTranslate Supports LibreTranslate servers. Configurable server address. Optional API key for servers requiring authentication. OpenAI Supports translation using the OpenAI API. Configurable API key. Configurable model. Configurable maximum completion token limit. Note Translation Service Notes MyMemory is the default translation service. Other translation providers require their respective API credentials or server settings. API request timeouts and cooldowns are configurable. Translation availability for specific language codes can depend on the selected provider. Chat Channels TranslateSystem supports multiple Rust chat channels, with separate configuration options for each channel. Chat Channel Description Global Translates messages sent in global chat. Team Translates messages between team members. Local Translates messages in nearby-player chat. Clan Translates supported clan chat messages. Card Games Translates messages in supported card game chat. Each supported chat channel can be enabled or disabled separately. Tip Example: Enable translation for Global, Team, and Clan chat while disabling translation for Local and Card Game chat. This allows server owners to control where automatic translation is applied. Preserved Rust Terms TranslateSystem allows server owners to configure words and phrases that should remain unchanged during translation. This is useful for preserving commonly used Rust terminology, weapon names, monument names, and abbreviations. Examples of preserved terms: Building and resources: TC, HQM, Workbench, scrap, sulfur. Weapons: AK, AK-47, LR, L96, M2, M249, MP5, SAR, DB, Tommy, Thompson. Monuments and events: Oil Rig, Large Oil, Small Oil, Cargo, Cargo Ship, Bradley, Outpost, Bandit Camp, Launch Site, Airfield, Dome, Train Yard, Power Plant, Military Tunnels. Tip Example: A player sends a message containing AK, TC, or Oil Rig. These configured terms remain unchanged in translated messages, helping players recognize familiar Rust terminology regardless of their selected language. Translation Cache & Request Controls TranslateSystem includes configurable caching and request controls to help manage translation API usage. Setting Description Translation Cache Reuses recently translated messages to avoid unnecessary translation requests. Cache Lifetime Controls how long cached translations are kept. Maximum Cached Translations Limits the number of translations stored in the cache. Maximum Simultaneous Requests Controls how many translation requests can run at the same time. API Timeout Sets the maximum time allowed for translation requests. Failed Request Cooldown Configures a delay after failed API requests. Rate Limit Cooldown Configures a delay when the translation provider reports rate limiting. Player Rate Limit Optionally limits how frequently individual players can submit messages for translation. Note Default Cache Settings Translation caching is enabled. Cached translations are kept for 60 minutes. Maximum cached translations: 5000. Maximum simultaneous translation requests: 1. These values can be changed in the configuration. Message Filters TranslateSystem includes optional message filters to reduce unnecessary translation requests. Skip messages that do not contain letters. Skip short messages below the configured minimum length. Skip colon emoji codes such as :heartrock:. Configure a minimum message length. Optionally limit translation requests per player. Configure the number of messages allowed within a specified time window. Tip Example: Set the minimum message length to 2 and enable the colon emoji code filter to avoid unnecessary translation processing for very short messages and messages such as :heartrock:. Example Configuration { "Commands": [ "translate" ], "[Chat] Require permission to receive translations": false, "[Chat] Translate sender's own message": false, "[Chat] Show original message under translation": false, "[Chat] Automatically detect the message language": true, "Chat Channels": { "[Chat] Global": true, "[Chat] Team": true, "[Chat] Local (nearby players)": true, "[Chat] Clan": true, "[Chat] Card games": true }, "Translation": { "[API] Selected service (choose MyMemory, LibreTranslate, Google, Microsoft, Yandex or OpenAI)": "MyMemory", "[OpenAI] API key": "", "[OpenAI] Model": "", "[OpenAI] Maximum completion tokens": 500, "[Google] Cloud Translation API key": "", "[Microsoft] Translator subscription key": "", "[Microsoft] Resource region (empty for global)": "", "[Yandex] Cloud service account API key": "", "[LibreTranslate] Server address": "", "[LibreTranslate] API key (if required)": "", "[API] Request timeout (seconds)": 10.0, "[API] Wait after a failed request (seconds)": 30.0, "[API] Wait after rate limit (seconds)": 300.0 }, "Message Filters": { "[Filter] Skip messages without letters": true, "[Filter] Skip colon emoji codes such as :heartrock:": true, "[Filter] Minimum message length (characters)": 2 }, "Cache": { "[Cache] Reuse recent translations": true, "[Cache] Keep translations for (minutes)": 60, "[Cache] Maximum saved translations": 5000 }, "Requests": { "[Requests] Maximum requests at the same time": 1 }, "Player Rate Limit": { "[Rate Limit] Limit messages per player": false, "[Rate Limit] Messages allowed per player": 8, "[Rate Limit] Count messages over this period (seconds)": 10.0 }, "[Chat] Log chat to server console": false, "[Chat] Words and Rust terms to leave untranslated": [ "TC", "Oil Rig", "Large Oil", "Small Oil", "Cargo", "Cargo Ship", "Bradley", "Bradley APC", "AK", "AK-47", "LR", "L96", "M2", "M249", "MP5", "SAR", "DB", "Tommy", "Thompson", "scrap", "sulfur", "HQM", "Workbench", "Outpost", "Bandit Camp", "Launch Site", "Airfield", "Dome", "Train Yard", "Power Plant", "Military Tunnels" ], "Config Version": { "Major": 1, "Minor": 0, "Patch": 1 } } Note Configuration Notes Commands: Configurable chat command aliases. Require Permission: Controls whether players need permission to receive translations. Translate Sender: Optionally translates the sender's own messages. Show Original: Displays the original message underneath the translated message. Language Detection: Automatically detects the source language of messages. Chat Channels: Controls translation separately for Global, Team, Local, Clan, and Card Game chat. Translation Service: Selects MyMemory, Google, Microsoft, Yandex, LibreTranslate, or OpenAI. API Settings: Configure service credentials, request timeouts, and cooldowns. Message Filters: Configure minimum message length, non-letter message filtering, and emoji code filtering. Cache: Configure translation caching, cache lifetime, and maximum cached translations. Requests: Controls the maximum number of simultaneous translation requests. Player Rate Limit: Optionally limits translation requests per player. Chat Logging: Enables or disables server console chat logging. Preserved Terms: Defines words and Rust terminology that should not be translated. Warning Important: Some translation services require valid API credentials and may have their own usage limits or costs. Check the selected provider's supported languages, pricing, and request limits before enabling it on a busy server. MyMemory is available as the default translation service without requiring your own API key. Why Choose TranslateSystem? Language differences can make communication difficult on Rust servers with players from different countries. TranslateSystem handles translation automatically for each player while still giving them control over whether translations are enabled and which language they want to use. With support for all 25 Rust client languages, multiple translation services, BetterChat and IQChat compatibility, configurable chat channels, preserved Rust terms, caching, message filters, and request controls, TranslateSystem makes it easier for players speaking different languages to communicate naturally in the same chat. Whether you run a small international server or a large multilingual community, TranslateSystem helps remove language barriers without requiring players to leave the game or use external translation tools$13.99- 3 reviews
-
- 3
-

-

-
- #translate
- #system
- (and 8 more)
-
Version 1.0.0
9 downloads
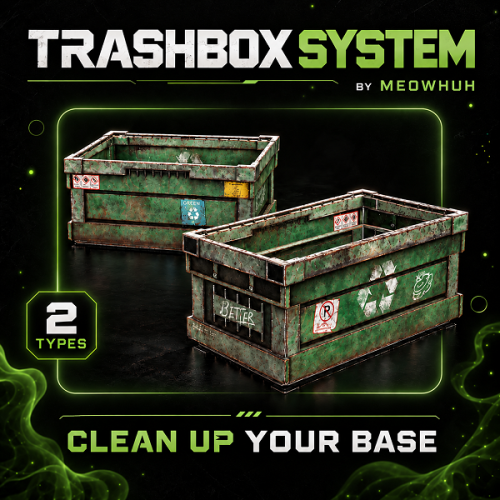
Automatic item disposal with customizable trash boxes for Rust servers. Getting rid of unwanted items should not mean dropping everything on the ground or filling storage boxes with useless loot. TrashBoxSystem lets players dispose of unwanted items using special trash boxes that automatically delete their contents. Server owners can control how quickly items are deleted, require boxes to be closed before deletion, protect specific items from being discarded, and manage who can use trash boxes. With configurable box skins, permission-based access, item protection, and simple admin commands, TrashBoxSystem provides an easy way to manage item disposal without affecting normal storage boxes. Perfect for PvE, PvP, Vanilla+, modded, RPG/RP, survival, and high-population Rust servers. Features Automatically deletes unwanted items placed inside special trash boxes. Uses Large Wooden Boxes with a configurable skin ID to identify trash boxes. Normal storage boxes remain unaffected by the plugin. Instantly deletes eligible items when the deletion cooldown is disabled. Optional cooldown allows items to be deleted one stack at a time. Configurable deletion cooldown in seconds. Optional setting to delete items only when the trash box is closed. Supports combining close-only deletion with a configurable deletion cooldown. Block specific items from being placed inside trash boxes using their Rust item shortnames. Checks items inside other items to prevent protected contents from being discarded. Optional permission requirement for placing, opening, and picking up trash boxes. Admin permission automatically bypasses trash box usage restrictions. Admin command to give trash boxes to yourself or other online players. Supports giving multiple trash boxes with a single command. Players can be selected by name or Steam ID when giving trash boxes. Admin command to spawn a trash box directly at the surface you are looking at. Configurable maximum distance for spawning trash boxes. Automatically recognizes existing deployed trash boxes when the plugin initializes. English and Russian plugin messages included. Deletion Modes TrashBoxSystem provides several configurable options to control when and how items are removed. Mode Description Instant Deletion Automatically deletes eligible items without a configured cooldown. Cooldown Deletion Deletes one item stack at a time using a configurable delay. Delete on Close Waits until the trash box is closed before deleting its contents. Cooldown + Delete on Close Waits for the box to close, then deletes item stacks using the configured cooldown. Tip Example: Enable the deletion cooldown and set it to 1 second to remove one item stack every second. You can also enable Delete items only when the box is closed to let players finish managing the contents before deletion begins. Protected Items Server owners can prevent specific items from being discarded by adding their shortnames to the blocked items list. Blocked items cannot be placed inside trash boxes. Items containing blocked items are also protected. The plugin checks nested item contents for protected items. Blocked items are excluded from the deletion process. Add or remove item shortnames directly in the configuration. Note Example: Adding rifle.ak to the blocked items list prevents AK-47 rifles from being placed inside trash boxes. This also protects items containing a blocked item in their internal contents. Admin Commands /givetrashbox - Gives yourself one trash box. /givetrashbox <amount> - Gives yourself the specified number of trash boxes. /givetrashbox <player name or Steam ID> - Gives one trash box to the selected online player. /givetrashbox <player name or Steam ID> <amount> - Gives the specified number of trash boxes to the selected online player. /spawntrashbox - Spawns a trash box at the surface you are looking at within the configured maximum distance. Command Examples /givetrashbox /givetrashbox 5 /givetrashbox PlayerName /givetrashbox PlayerName 3 /givetrashbox "Player Name" 5 /spawntrashbox Note Command Notes All commands require trashboxsystem.admin. Player names containing spaces must be placed inside quotation marks. Giving trash boxes to another player requires that player to be online. The /spawntrashbox command uses the configured maximum spawn distance. Permissions trashboxsystem.admin - Allows access to all TrashBoxSystem admin commands and bypasses trash box usage restrictions. trashboxsystem.use - Allows players to place, open, pick up, and use trash boxes when the permission requirement is enabled. Tip Permission Settings By default, the permission requirement is disabled, allowing players to use trash boxes without needing trashboxsystem.use. Enable Require permission to place, open and pick up trash boxes in the configuration to restrict access to permitted players. Players with trashboxsystem.admin can use trash boxes regardless of the usage permission setting. Example Configuration { "[Box] Skin ID": 3526139942, "[Usage] Require permission to place, open and pick up trash boxes": false, "[Items] Blocked item shortnames": [ "rifle.ak" ], "[Deletion] Enable cooldown between item stacks": false, "[Deletion] Cooldown (seconds)": 1.0, "[Deletion] Delete items only when the box is closed": false, "[Spawn] Maximum distance (meters)": 25.0, "Config Version": { "Major": 1, "Minor": 0, "Patch": 0 } } Note Configuration Notes Box Skin ID: Determines which Large Wooden Boxes are recognized as trash boxes. Require Permission: Enables or disables permission-based trash box access. Blocked Items: Prevents specified items and items containing protected contents from being discarded. Enable Cooldown: Controls whether item stacks are deleted individually with a delay. Cooldown: Sets the number of seconds between item stack deletions when enabled. Delete on Close: Prevents deletion while a trash box is open. Spawn Distance: Sets the maximum distance for the /spawntrashbox admin command. Warning Important: Items deleted by TrashBoxSystem are permanently removed from the trash box. Use the blocked items list to protect valuable items, or enable deletion on close to give players more control over when disposal begins. Why Choose TrashBoxSystem? Managing unwanted items should be simple without forcing players to drop everything on the ground or use normal storage boxes as temporary trash containers. TrashBoxSystem provides automatic item deletion, configurable deletion timing, protected items, permission-based access, and simple admin management in one lightweight plugin. Whether you want instant item disposal or a more controlled trash system with deletion delays and protected items, TrashBoxSystem gives server owners the flexibility to configure item disposal around their server's needs$10.00 -

Version 1.37.13
1,280 downloads
Creates quests/missions that players complete to get rewards (currency, items, etc.). Players spend the currency they receive to open cases. The interface is nice and user-friendly. Features: Beautiful user interface Logging of purchases and balance top-ups (to the console and to a file) Versatility (can work with various economy plugins) Performance (plugin is faster than existing competitors) Interesting idea Any text in the interface can be customized Preview Commands addfirstcurrency {userid} {amount} (give the player the first currency) addsecondcurrency {userid} {amount} (give the player a second currency) battlepass.wipedata (clear player progress) pass (open interface) battlepass.migrate (migrate to PlayerDatabase) battlepass.convert.128 (convert from 1.28.0) Item Types Item Command Plugin Mission Types Gather Kill Craft Look Build Upgrade Fishing LootCrate Swipe RaidableBases RecycleItem HackCrate PurchaseFromNpc ArcticBaseEvent GasStationEvent SputnikEvent ShipwreckEvent HarborEvent JunkyardEvent SatDishEvent WaterEvent AirEvent PowerPlantEvent ArmoredTrainEvent ConvoyEvent SurvivalArena KillBoss Web Config Editor Manage the Battlepass settings in our web config editor. You change the config in a browser form instead of editing files on the server by hand. P.S. The web config editor is open to members of the "Battlepass" group in our Discord server. Join at https://discord.gg/mevent and ask for the group. FAQ How to use multiple NPCs in one mission Loot Hackable Crates (config example) Default Config$21.95 -
Version 1.1.1
33 downloads
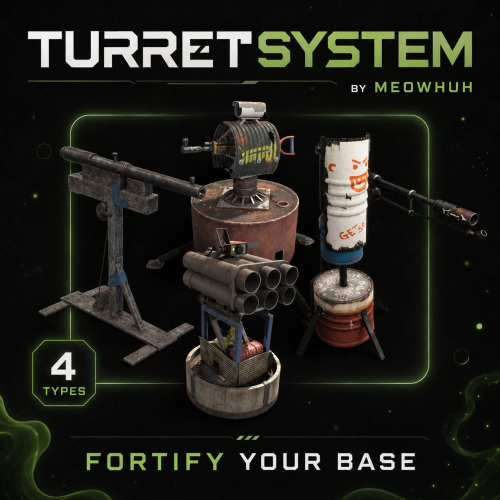
TurretSystem Complete turret and base-defense management for Rust servers. Managing a defended base should not mean running from turret to turret, opening every inventory, searching for missing ammo, or trying to remember which defenses still need weapons. TurretSystem lets players manage Auto Turrets, SAM Sites, Shotgun Traps, and Flame Turrets from one clean UI or simple chat commands. Quickly add weapons, refill ammunition and fuel, clear inventories, change ammo types, control power, and manage multiple defenses across an entire TC base. Perfect for PvE, PvP, Vanilla+, modded, RPG/RP, and high-population servers. Features Clean TC-based UI with filters for every supported defense type. Single and bulk power control, refill, clear, weapon change, ammo change, inventory access, and mode control. Manage Auto Turret authorization lists and view owner, weapon, ammo, and power information. Separate placement limits for Auto Turrets, SAM Sites, Shotgun Traps, and Flame Turrets. Custom Auto Turret interference limits with permission overrides. VIP Auto Turret profiles: rotation, viewing angle, health, range, bullet speed, aim cone, damage, and infinite ammo. Automatic weapon, skin, attachment, and ammo loadouts based on permissions. Automatic SAM, Flame Turret, and Shotgun Trap ammo/fuel. Optional physical switches/buttons for Auto Turrets and SAM Sites. Optional Auto Turret placement on boats with count and distance limits. Optional SAM protection for aircraft carrying TC-authorized players. Detailed admin statistics by player, base, looked-at turret, or nearby radius. Configurable command aliases, UI colors, chat messages, and GameTips. Full English and Russian localization included. No dependencies. Showcase Video Commands /ts or /turretmenu → Open the turret management UI. /ts help → Show command help. /turret or /turrets [on|off] → Control one looked-at Auto Turret or all Auto Turrets in the current TC. /turret(s) fill <amount> <ammo> → Add ammo. /turret(s) fill <weapon> → Install a weapon. /turret(s) clear ammo|guns [weapon] → Clear ammo or weapons. /turret(s) change guns <weapon> → Replace weapons. /turret(s) change ammo <ammo> → Replace ammo types. /sam or /sams [clear|fill <amount>] → Control and refill SAM Sites. /trap or /traps fill <amount>|clear → Refill or clear Shotgun Traps. /fturret or /fturrets fill <amount>|clear → Refill or clear Flame Turrets. /ts storage or /ts box → Show storage box command help. /ts storage set or /ts box set → Link the storage box you are looking at for refilling and changing turret weapons or ammunition. When boat placement is enabled, hold an Auto Turret and left-click a valid flat boat floor/foundation. Command aliases are fully configurable. Admin Commands /tsadmin help — Show admin help. /tsadmin player <steamid|name> — List a player’s defenses. /tsadmin base — Show statistics for the current TC/base. /tsadmin turret — Inspect the defense you are looking at. /tsadmin nearby [radius] — List nearby defenses. Console: ts.admin player <steamid|name> Permissions turretsystem.use → Required to open the `/ts` UI and use normal TurretSystem player commands. turretsystem.admin → Full plugin and admin-statistics access. Bypasses `turretsystem.use`, all command permissions, placement limits, Auto Turret interference limits, and the active-without-electricity limit. It also uses free item-management mode. turretsystem.free → Allows refill, weapon, ammo, change, and clear commands without taking resources from the player. Items cleared from a defense are removed instead of returned. Command Permissions turretsystem.cmd.toggle → Toggle looked-at or bulk Auto Turrets and SAM Sites. turretsystem.cmd.on → Use Auto Turret `on` commands. turretsystem.cmd.off → Use Auto Turret `off` commands. turretsystem.cmd.refill → Refill SAM Sites, Shotgun Traps, and Flame Turrets, and add weapons/ammo to Auto Turrets. turretsystem.cmd.clear → Clear weapons, ammo, rockets, shells, or fuel. turretsystem.cmd.changegun → Replace Auto Turret weapons. turretsystem.cmd.changeammo → Replace Auto Turret ammo types. Physical Switch/Button Permissions turretsystem.autoturret → Allows the configured physical switch/button to be attached to the owner’s Auto Turrets. turretsystem.samsite → Allows the configured physical switch/button to be attached to the owner’s SAM Sites. These are only required when the physical-control feature and per-type permission requirement are enabled. Configurable Limit & Profile Permissions turretsystem.place.autoturret.X → Sets the owner/building Auto Turret placement limit. turretsystem.place.samsite.X → Sets the SAM Site placement limit. turretsystem.place.shotguntrap.X → Sets the Shotgun Trap placement limit. turretsystem.place.flameturret.X → Sets the Flame Turret placement limit. turretsystem.interference.autoturret.X → Sets how many Auto Turrets may be active in the configured player/building scope. turretsystem.custom.autoturret.<name> → Applies the configured health, range, rotation, scanning, bullet speed, aim cone, damage, and infinite-ammo profile. When several profiles match, the highest `Priority` wins. turretsystem.weapon.<name> → Automatically installs the configured weapon, skin, attachments, and ammo when the owner deploys an Auto Turret. When several weapon permissions match, the first matching profile in the config is used. turretsystem.X → Sets the maximum number of attached-control defenses that may be active without normal electricity. Default examples include placement tiers, interference `.12/.20/.30`, custom profiles `vip/king/ultra`, weapon profiles `vip/premium/king/ultra`, and no-electricity tiers `.3/.6/.12`. Limit Note For numeric limit permissions, the plugin uses the highest value between the default limit and every permission the player has. Set the default below your upgrade tiers. In the supplied config, the no-electricity default is `13`, so the example `.3/.6/.12` permissions will not change it until you lower the default or raise those permission values. Example Configuration English Language File Russian Language File Why Choose TurretSystem? Because managing a defended base should not mean running between every turret and opening every inventory manually. TurretSystem combines a clean UI, powerful bulk controls, fair limits, VIP upgrades, automatic loadouts, boat defenses, and admin inspection in one standalone plugin.$21.95 -
Version 1.0.0
11 downloads
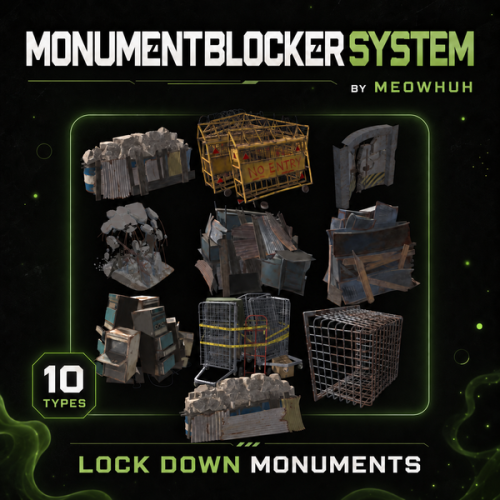
Complete monument blocker management for Rust servers. Managing monument blockers should not mean being stuck with the same health, damage, destruction, and respawn behavior on every server. MonumentBlockerSystem lets server owners manage Rust monument blockers from one clean UI. Remove blocker types from the map, customize their health, control respawning, adjust damage by type, and create custom damage multipliers for individual Rust items. Perfect for PvE, PvP, Vanilla+, modded, RPG/RP, custom progression, and custom monument servers. Features Clean in-game admin UI for managing all supported monument blocker types. Remove individual monument blocker types from the map. Set custom maximum health for each blocker type. Enable or disable blocker respawning with a configurable respawn delay. Configure a global damage multiplier for each blocker type. Separate damage multipliers for Blunt, Bullet, Explosion, Heat, Slash, and Stab damage. Custom damage multipliers for individual Rust item shortnames, managed directly from the UI. Changes are applied immediately to existing and newly spawned monument blockers. Supports Lockers, Desks, Trolley, Vent Cage, Collapse, Blast Door, Terminals, Barricades, and both monument barrel blocker sizes. Commands /monumentblockers or /mbs → Open the MonumentBlockerSystem management UI. Command are fully configurable. Permissions monumentblockersystem.admin → Full access to the MonumentBlockerSystem UI and all monument blocker settings. Example Configuration Why Choose MonumentBlockerSystem? Because monument blockers should not have the same fixed behavior on every Rust server. MonumentBlockerSystem combines a clean admin UI, custom health, configurable respawning, blocker removal, damage-type scaling, and item-specific damage multipliers in one focused plugin, giving server owners full control over monument blockers without manually managing entities across the map.$12.49-
- 1
-
-
- #monument
- #monumentblocker
- (and 6 more)
-
Version 1.7.1
62 downloads
Dynamic Vending Prices Every NPC shop order rolls its own price — shown on Rust's own vanilla shop badge Every order at Outpost, Bandit Camp, the Fishing Villages and every other NPC shop rolls its own surcharge or discount, so prices move independently instead of every item sharing one multiplier. The change is drawn by Rust's own percentage badge in the vanilla shop UI — no custom interface, no CUI, no client-side files. 45% 90% 0 1 Max surcharge Max discount Dependencies Permission At a glance ✓ A separate price for every order — each item in each shop gets its own roll; two shops selling the same item usually show different prices ✓ Separate surcharge and discount ranges — rises hurt more than falls help, so the two directions are configured independently (defaults: +45% cap, -90% floor) ✓ Rolls on Rust in-game days — prices change at in-game 00:00, roughly once per real hour; real-time rotation is available instead ✓ Works with any currency, not just scrap — cloth, wood, fish, low grade fuel and everything else (optional, one config setting) ✓ Deterministic — prices are derived from what is being sold, not entity IDs, so a restart, reload or crash never rerolls them mid-day ✓ Reverts cleanly — unloading restores your price multiplier convars and hands every machine back to Rust's own pricing ✓ No UI, no downloads, no ImageLibrary — it drives the shop panel Rust already has Requirements: none. No dependencies and no optional plugins. Harmony is used only when non-scrap currency support is enabled, and it ships with Oxide. 01 — The roll One roll per order, per period Rust already has a dynamic pricing system for NPC vending machines — it is what draws the green and red percentage badge on the vanilla shop panel. Left alone it moves prices slowly, and only in response to what players buy. This plugin drives that same system directly: for each sell order it computes a multiplier, writes it into the machine's sales data, then calls FullUpdate() so Rust re-derives the displayed price and networks it to clients. Players see a normal Rust shop with normal Rust price badges. For each order, once per period: 1. Roll the direction first — Chance the price goes UP (%) decides surcharge or discount 2. Pick a percentage from that direction's own min/max range, in whole steps of Change step (%) 3. Convert to a multiplier and write it to the order's slot The roll is seeded from the shop name, the item sold, the currency and the slot index — never from the machine's entity ID, because those are regenerated on every restart and wipe and would reroll every price. That is what makes prices survive restarts. Two kinds of price change Most orders are you pay orders: the multiplier changes the currency cost. Some NPC orders are you sell orders — you hand over fish or wood and receive scrap. For those, Rust does not change the price, it changes how much scrap you receive. The plugin handles both, and reports them differently in vendprices.show: Outpost | rifle.ak x1 costs 300 -> 165 scrap (-45%) Fishing | scrap x20 you get 20 -> 29 scrap for 5 fish.troutsmall ( 45%) 02 — Any currency Vanilla Rust refuses to discount anything not priced in scrap — this lifts that Rust's GetDiscountForSlot returns "no change" for anything not priced in scrap. With Only scrap-priced orders change set to false (the default) the plugin installs a small Harmony patch so fish, wood, cloth and low grade fuel shops get price changes too. Set it to true to stay entirely inside vanilla behaviour — the plugin still works, it just leaves non-scrap shops alone. 03 — Rotation In-game days, or your own real-time schedule By default prices roll at in-game 00:00. A Rust day is about an hour of real time, so prices change roughly every hour, not once a day. If you want a genuine once-a-day rotation, set Roll on Rust in-game days to false and leave the interval at 24 hours — optionally pinned to a UTC hour, with an optional chat broadcast when prices change. 04 — Limits that come from Rust Two things no plugin can override — so the plugin counts and reports them instead Deep-sea machines are excluded. Rust sets BypassDynamicPricing on vending machines inside deep-sea zones, and its pricing code then ignores every multiplier regardless of what any plugin writes. These machines are counted and listed separately in vendprices.show so your totals still add up. Price multiplier clamps. Rust clamps every multiplier with two server convars, stock 0.5 and 2.0 — a -90% discount would be silently clamped to -50%. With Widen Rust's own price multiplier clamps enabled (default), the plugin widens them just enough for your ranges, records your original values in its data file, and restores them on unload. Prefer to manage them yourself? Set the option to false and set npcvendingmachine.minimumpricemultiplier / maximumpricemultiplier by hand. 05 — Commands & permissions Four console commands, one permission — pricing itself is deliberately ungated A price is a property of the machine, not of the player looking at it — every player at a shop sees the same price, and no permission changes what anyone pays. The server console always has access; vanilla admin/owner auth works too. Command What it does vendprices.show Current period, next roll, machine counts by shop, and every rolled price — run this first when something looks wrong vendprices.apply Re-writes current prices to every machine immediately vendprices.reroll Forces a brand new roll for the current period — not undoable; it advances a salt, so the previous prices cannot be recovered vendprices.debug Per-machine table: sales slots, bypass state, and whether each machine is handled dynamicvendingprices.admin oxide.grant user <name> dynamicvendingprices.admin oxide.grant group admin dynamicvendingprices.admin 06 — Configuration Everything has a sane default — most servers change nothing Default oxide/config/DynamicVendingPrices.json: { "Price fluctuation": { "Enabled": true, "Surcharge (price goes UP) - minimum (%)": 10, "Surcharge (price goes UP) - maximum (%)": 45, "Discount (price goes DOWN) - minimum (%)": 10, "Discount (price goes DOWN) - maximum (%)": 90, "Change step (%)": 5, "Chance the price goes UP (%)": 50, "Widen Rust's own price multiplier clamps to fit the range above": true, "Also randomise what you are paid when selling scrap to a machine": true, "Only scrap-priced orders change (false = every currency, uses a Harmony patch)": false }, "Rotation": { "Roll on Rust in-game days (every in-game 00:00)": true, "Real hours between price rolls (only used when the above is false)": 24.0, "Roll at this UTC hour (only used for a 24h real-time interval)": 0, "Broadcast a chat message when prices change": true }, "Machines": { "Only these shop names (empty = every NPC vending machine)": [], "Never touch these shop names": [], "Force Rust's dynamic pricing system on (required for the % badge to show)": true, "Seconds between rescanning the world for vending machines (0 = never)": 300.0 }, "Seconds between re-applying our prices (0 = only on rotation and shop open)": 30.0 } Price fluctuation Setting Default Notes Enabled true false leaves every price at vanilla Surcharge - minimum (%) 10 Smallest price rise Surcharge - maximum (%) 45 Largest price rise — a 90% AK would be 570 scrap Discount - minimum (%) 10 Smallest price fall Discount - maximum (%) 90 Largest price fall — 90 means an item can cost a tenth of normal Change step (%) 5 Percentages land on multiples of this — 5 gives 10, 15, 20 … Chance the price goes UP (%) 50 0 = everything always discounted, 100 = always surcharged Widen Rust's own clamps true See Price multiplier clamps above Also randomise what you are paid when selling scrap true false leaves you sell orders alone Only scrap-priced orders change false true = vanilla behaviour, no Harmony patch A minimum above the maximum is corrected automatically rather than throwing. Rotation Setting Default Notes Roll on Rust in-game days true Rolls at in-game 00:00 — roughly hourly on default day length Real hours between price rolls 24.0 Used only when the above is false Roll at this UTC hour 0 Used only for a 24h real-time interval Broadcast a chat message when prices change true Chat broadcast to online players Machines Setting Default Notes Only these shop names [] Whitelist by shop name — empty means every NPC vending machine Never touch these shop names [] Blacklist, applied before the whitelist Force Rust's dynamic pricing system on true Sets npcvendingmachine.dynamicpricingenabled — without it the badge does not show Seconds between rescanning the world 300.0 Self-healing rescan for machines that slipped past the spawn hook — 0 disables Shop names are matched case-insensitively. Run vendprices.show to see the exact names on your map — it groups machines by shop name. Re-apply interval & data file Seconds between re-applying our prices — default 30.0. Rust's own demand system keeps recalculating multipliers as players buy things, so the plugin rewrites its values periodically. Prices are also re-applied the moment a player opens a shop, so 0 is a valid setting on a large server; the shop-open hook alone covers what players see. oxide/data/DynamicVendingPrices.json holds the current period, the reroll salt, a readable snapshot of every rolled price, and your original price multiplier convar values. Deleting it forces a fresh roll — but never delete it while loaded with widened clamps, or unload cannot restore your convars. Localization Default oxide/lang/en/DynamicVendingPrices.json: { "PricesChanged": "<color=#8cc63e>Vending machine prices have changed!</color> Every item has a new price for the next {0} hours.", "PricesChangedRustDay": "<color=#8cc63e>A new day breaks and vending machine prices have changed!</color> Every item has a new price until the next dawn.", "NoPermission": "You need the dynamicvendingprices.admin permission to use that." } PricesChanged is used for real-time rotation ({0} = interval in hours); PricesChangedRustDay is used for in-game day rotation and has no placeholder. 07 — Questions Before you buy Prices at Outpost look unchanged — what do I check first? Run vendprices.show. It reports enabled, the current clamps, and how many orders were repriced. If repriced is 0, the machines are being filtered out — check your shop name whitelist. If enabled is False, set Force Rust's dynamic pricing system on to true. Some machines never change price. Almost certainly deep-sea machines. Rust marks them BypassDynamicPricing and ignores all multipliers on them. They are listed explicitly at the bottom of vendprices.show. Shops that trade in fish, wood or cloth are not changing. Set Only scrap-priced orders change to false. Vanilla Rust genuinely refuses to discount anything not priced in scrap; that setting installs the patch that lifts the restriction. Does this edit my server config? Yes — two convars, npcvendingmachine.minimumpricemultiplier and maximumpricemultiplier — and only when the widening option is on and your ranges need more room. Both are Saved = true, so the plugin records your original values and restores them on unload. Do prices reset when the server restarts? No. Prices are keyed to the period and to what is being sold, so a restart re-derives exactly the same prices for the rest of the period. How do I make prices change less often? Set Roll on Rust in-game days to false. In-game days are about an hour of real time. Can I make the shops only ever cheaper? Set Chance the price goes UP (%) to 0. Does it affect player-placed vending machines? No. It only touches NPC vending machines. Does it work with other vending plugins? It writes to Rust's own sales data. A plugin that also writes there — or that replaces the shop UI entirely — will conflict. Use the shop name blacklist to hand specific shops over. Performance? Machines are tracked in a set built at startup and maintained by spawn and kill hooks — no per-frame work, no entity scan on the hot path. The 30-second re-apply pass writes only where a value actually differs. 08 — Hooks & API For plugin developers // Returns float, or null if the key is unknown object multiplier = DynamicVendingPrices?.Call("GetVendingPriceMultiplier", key); // Returns int - positive for a surcharge, negative for a discount. null if unknown object percent = DynamicVendingPrices?.Call("GetVendingPriceChange", key); The key format is shopName|itemToSellID|currencyID|slotIndex — for example Outpost|-1123473824|-932201673|3. An empty shop name becomes the literal shop. // Called after every price roll, including the first roll at server start void OnVendingPricesRolled(long period) period is the in-game day number when rolling on Rust days, or the real-time period index otherwise. It is opaque — treat it as an identity for "which set of prices is current", not as a date. Credits Yanwolsing — author. All rights reserved. Redistribution and resale — modified or unmodified — are strictly prohibited. See the license notice in the plugin file. The plugin drives Facepunch's own NPC vending machine dynamic pricing system rather than replacing it — which is why the price badge is the stock Rust one.Free -

Version 1.0.02
19 downloads
MyChat - a powerful and versatile chat system for players, offering extensive customization and exciting features that introduce new ways to communicate and interact on your server. Functions: 1. Chat Customization Prefixes, colors, and formatting CAPS lock prevention (hello everyone. THIS IS MY CHAT PLUGIN. it works perfectly. → Hello everyone. This is my chat plugin. It works perfectly.) Forbidden words and nickname replacement Temporary chat blocks and player-specific mutes 2. Mentions & Private Messaging Mention players (@player) Mention all players (@everyone) - requires permission Mention groups - requires permission Send private messages (/msg) Quickly reply to the last player you messaged. Sound notifications for messages and mentions Personal Rename System Group Messaging by Status 3. Chat Moderation & Anti-Spam Chat and voice mute (/mute <chat/voice> <sec> <reason>) Temporary timeouts to prevent spam Automatic message replacement for bad words Log all actions to Discord (messages, mutes, blocked words) 4. Dynamic Messages & Auto Responses Custom chat commands with variables (online count, joining players, etc.) Automatic messages on player join/leave Auto-responder for specific keywords Timed messages in chat Commands: /chat - open the settings interface /msg <player> <message> - private message /reply - quickly respond to the last player you talked to /mute <player> <chat/voice> <time> <reason> - mute player /unmute <player> <chat/voice> <reason> - unmute player /rename <player> <name> - assign a custom name visible only to you /rename <player> - remove your custom name for that player /<group.name> <message> - send a message to all players with a specific status Permissions: mychat.admin - access to administrative commands (mute, unmute, etc.) mychat.mention.everyone - allows mentioning all players with '@everyone' Configuration: API: Hooks:$22.00 -

Version 1.0.22
19 downloads
MyTeleport - an advanced and modern teleportation system for players, offering flexible teleport requests, homes, warps and powerful admin controls. Functions: 1. Player & Admin Teleportation Player teleport requests and accepts Admin teleport to players, coordinates and map markers Teleport all players to a position or to a player Dynamic height detection (use y to auto-detect ground level) Fast, optimized teleport pipeline 2. Homes System Set / teleport / remove personal homes Admin management for player homes (list / remove / tp) Home set mode: command or item Min distance between homes, build-zone checks and allowed block/item lists Custom icons and colors for homes 3. Warps Create permission-based or public warps Teleport to warps and list warps Warp creation/removal with optional permission flag 4. Requests & Trust /tp <player> - send teleport request Accept / cancel / auto-retry requests Trust system for instant teleports to trusted players UI request panel (configurable) and sound notifications 5. Moderation & Restrictions Combat block with configurable triggers and duration Restrict teleports by status (hunger, bleed, rad, cold, swim, building blocked, safe zones) Monument radius and restricted monuments list Option to deny teleport if target's vehicle has no free seats 6. Status & Notifications Notification type: chat / toast / both (notify setting) Sounds for teleport, request received, request accepted Simple Status integration for active teleport UI (customizable text, colors, icon, progress) Admin Commands: /tp <player> - Teleport to a player /tp <x> <y/"y"> <z> - Teleport to specific coordinates (use "y" to automatically determine the terrain height) /tp <player> <target> - Teleport one player to another /tpm - Enable or disable teleportation to a map marker /tp.all - Teleport all players to yourself /tp.all <x> <y/"y"> <z> - Teleport all players to specified coordinates (use "y" for automatic height) /tp.all <player> - Teleport all players to a specific player /a.home <player> list - Show all home points of a player /a.home <player> teleport/tp <home.name> - Teleport to a specific home of a player /a.home <player> remove/rem <home.name> - Remove a specific home of a player /warp list - Show a list of all created warps /warp create/add <name> <permission>* - Create a warp at your current location with the given name (permission optional) /warp remove/rem <name> - Remove a specific warp Player Commands: /tp <player> - Send a teleport request to the specified player /reply - Send a teleportation request to a past player /accept - Accept a teleport request /cancel - Cancel an active teleport request /trust <player> - Add or remove a player from your trusted list (allows teleportation without confirmation) /<warp.name> - Teleport to a specified warp (if permission is granted) Permissions: myteleport.moder - access to administrative commands myteleport.tp.request - allow sending teleport requests myteleport.tp.accept - allow accepting requests myteleport.warp.tp - default permission for warp teleportation myteleport.warp.list - permission to list warps myteleport.warp.create - permission to create warps myteleport.warp.remove - permission to delete warps Configuration: API: Hooks:$24.00 -

Version 1.0.0
11 downloads
xPenaltySystem is a moderation system for Rust servers. Staff can manage online and offline players, assign warning points, apply mutes or bans, and review complete activity histories. Create penalty rules that automatically trigger at configurable point thresholds and durations. Optional Discord logging keeps every staff action recorded outside the game. Fully UI driven Manage penalties through an clean UI. Dynamic Penalty Rules Automatically trigger warnings, timed mutes, and bans at configurable point thresholds. Online & Offline Players Search, review, and moderate any recorded player. Activity History Track every penalty, reason, recipient, and responsible staff member. Discord Logging Send all administrative activity directly to Discord. Permission xpenaltysystem.admin - Required to use the penalty system Chat Commands /xps - Requires the permission | ChatCommand is configurable in the config.$19.99 -
Version 1.6.7
146 downloads
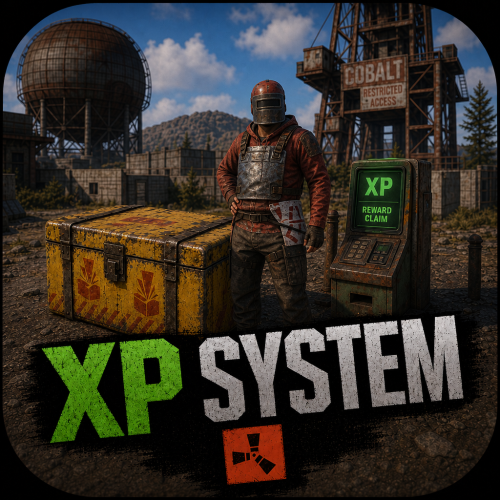
The XP System is an XP and Rewards based system. Designed to keep players to keep playing on your servers. I have been running this for years now on my servers and I must say it is great, Players are always on trying to get the MOST XP and to remain as the leader at the top of the list and hold the title. Has a Prestige Leveling system with it as well, so every time a player hits 100 XP, they Prestige and it is announced to the server. At that point the rewards are all now double (see screenshots below) if they Prestige a 3rd time then the rewards are triple and so forth, The most I have personally seen a player Prestige was 6 times in a single wipe. Of course the longer the wipe schedule the more a player can earn. Time for leveling is set to every 30 Minutes of being on the server, with a warning to all players a few mins before that XP is about to be issued and to make sure they have space in their inventory. The leader with the most XP, Also is broadcasted to everyone. The leader also receives each time they hold the title A random amount of Scrap as well as a Large Present. NOTE: The leader will hold the title whether they are online or offline until another players takes over. IF the leader is offline they will NOT gain more XP, they must be online in order to gain XP. However they will still gain the Leader Rewards if they are still the leader and offline until another players gains the most XP beating them. Features Custom Rewards Items (this doesn't need to be changed as it is setup pretty damn good as is and none of my players have ever complained about any of the items. (recommend just leaving it as is) Auto Wipe Feature when server is wipe to reset all player data Apply extra rewards for Top XP Leader Set min and max amounts of Scrap Rewards for TOP XP Leader Level Settings are already setup (highly recommended that you DO NOT CHANGE ANY OF IT) Top XP Leader broadcasted to all players when rewards are issued so everyone knows who the XP Leader is. Encourages players to stay on your servers so they can try and be the leader - I cannot tell you how funny it is to see players jump on right after a wipe just so they can try and be the TOP XP Leader and try and hold the Title Features and API XP Call that I personally use for DeathNotes (requires a customized DeathNotes to work, if you want a copy please DM me with your Order Number and I will send you a custom DeathNotes Plugin to use with the XP System, What this does is when a Death Note is used, it shows the Current XP Level for the Player who killed anything and also the Victims XP Level if they are a victim) Unique Prestige Leveling System just like in COD every 100 XP earned the Player hits a Prestige Level and the rewards are doubled or tripled and so forth see screenshots Broadcasts to Console when the XP Rewards are issued as well as who is the current Top XP Holder and if they are online or offline Option to disable giving of Gifts to Highest XP Holder if offline (enabled by default) Option to disable Admin Players from receiving XP and Gifts (enabled by default) NOTE: Pretty much this is a plug and play drop in plugin that instantly works with absolutely NO NEED to change anything in the config file. It has been tried and tested for over 4 years running on all my servers. OF course you can still change the settings it is HIGHLY RECOMMENDED TO LEAVE IT AS IS! Commands /xp - (public for all players) shows the current XP Level /xp list (public for all players) shows the current XP, Prestige Level and ZP Rewards List Console Commands xp.give - gives a player XP. Example: xp.give FastBurst 100 = FastBurst will receive 100 XP xp.reset - resets a players XP. Example: xp.reset FastBurst = FastBurst XP is not reset to 0 xp.resetall - manually resets the XP Data File Permissions permissions are only set if you set them as part of one of the rewards API Call private int GetXP(ulong player) { // returns the int value of the players XP Level } Configuration { "General Settings": { "Wipe data on new map": true, "Gametip announcement duration (seconds, 0 to disable)": 0.0, "Start level": 0, "Enable Scrap and Presents for Highest XP": true, "Minimum amount of Scrap to give for Highest XP if enabled": 25, "Maximum amount of Scrap to give for Highest XP if enabled": 125, "Enable giving of XP and Gifts to Admin players (default true)": true, "Enable giving of Scrap and Presents to Highest XP if offline (default true)": true }, "Time Settings": { "Experience for playtime": 1, "Time between give experience for playtime (seconds)": 1800, "Popup Announcement time before XP (seconds)": 1620 }, "Reward Item Settings": [ { "Level": 1, "Items": [ { "Command": "", "Shortname": "chicken.cooked", "Amount": 25, "Skin": 0, "Display name": "Cooked Chicken", "Blueprint": false, "Permission": "" } ] }, { "Level": 2, "Items": [ { "Command": "", "Shortname": "wood", "Amount": 2500, "Skin": 0, "Display name": "Wood", "Blueprint": false, "Permission": "" } ] }, { "Level": 3, "Items": [ { "Command": "", "Shortname": "xmas.present.medium", "Amount": 1, "Skin": 0, "Display name": "Medium Present", "Blueprint": false, "Permission": "" } ] }, { "Level": 4, "Items": [ { "Command": "", "Shortname": "stones", "Amount": 1000, "Skin": 0, "Display name": "Stones", "Blueprint": false, "Permission": "" } ] }, { "Level": 5, "Items": [ { "Command": "", "Shortname": "xmas.present.large", "Amount": 1, "Skin": 0, "Display name": "Large Present", "Blueprint": false, "Permission": "" } ] }, { "Level": 6, "Items": [ { "Command": "", "Shortname": "metal.fragments", "Amount": 250, "Skin": 0, "Display name": "Metal Fragments", "Blueprint": false, "Permission": "" } ] }, { "Level": 7, "Items": [ { "Command": "", "Shortname": "ammo.pistol", "Amount": 50, "Skin": 0, "Display name": "Pistol Ammo", "Blueprint": false, "Permission": "" } ] }, { "Level": 8, "Items": [ { "Command": "", "Shortname": "chainsaw", "Amount": 1, "Skin": 0, "Display name": "Chainsaw", "Blueprint": false, "Permission": "" } ] }, { "Level": 9, "Items": [ { "Command": "", "Shortname": "jackhammer", "Amount": 1, "Skin": 0, "Display name": "Jackhammer", "Blueprint": false, "Permission": "" } ] }, { "Level": 10, "Items": [ { "Command": "", "Shortname": "metal.refined", "Amount": 250, "Skin": 0, "Display name": "High Quality Metal", "Blueprint": false, "Permission": "" } ] }, { "Level": 20, "Items": [ { "Command": "", "Shortname": "metal.fragments", "Amount": 500, "Skin": 0, "Display name": "Metal Fragments", "Blueprint": false, "Permission": "" } ] }, { "Level": 30, "Items": [ { "Command": "", "Shortname": "scrap", "Amount": 500, "Skin": 0, "Display name": "Scrap", "Blueprint": false, "Permission": "" } ] }, { "Level": 40, "Items": [ { "Command": "", "Shortname": "hq.metal.ore", "Amount": 150, "Skin": 0, "Display name": "High Quality Metal Ore", "Blueprint": false, "Permission": "" } ] }, { "Level": 50, "Items": [ { "Command": "", "Shortname": "metal.ore", "Amount": 2000, "Skin": 0, "Display name": "Metal Ore", "Blueprint": false, "Permission": "" } ] }, { "Level": 60, "Items": [ { "Command": "", "Shortname": "ammo.rifle", "Amount": 250, "Skin": 0, "Display name": "5.56 Rifle Ammo", "Blueprint": false, "Permission": "" } ] }, { "Level": 70, "Items": [ { "Command": "", "Shortname": "sulfur.ore", "Amount": 2000, "Skin": 0, "Display name": "Sulfur Ore", "Blueprint": false, "Permission": "" } ] }, { "Level": 80, "Items": [ { "Command": "", "Shortname": "supply.signal", "Amount": 1, "Skin": 0, "Display name": "Supply Signal", "Blueprint": false, "Permission": "" } ] }, { "Level": 90, "Items": [ { "Command": "", "Shortname": "gunpowder", "Amount": 1000, "Skin": 0, "Display name": "Gun Powder", "Blueprint": false, "Permission": "" } ] }, { "Level": 100, "Items": [ { "Command": "", "Shortname": "lmg.m249", "Amount": 1, "Skin": 0, "Display name": "M249", "Blueprint": false, "Permission": "" } ] } ], "Levels Settings": [ { "Level": 1, "Experience to get level": 1.0 }, { "Level": 2, "Experience to get level": 1.0 }, { "Level": 3, "Experience to get level": 1.0 }, { "Level": 4, "Experience to get level": 1.0 }, { "Level": 5, "Experience to get level": 1.0 }, { "Level": 6, "Experience to get level": 1.0 }, { "Level": 7, "Experience to get level": 1.0 }, { "Level": 8, "Experience to get level": 1.0 }, { "Level": 9, "Experience to get level": 1.0 }, { "Level": 10, "Experience to get level": 1.0 }, { "Level": 11, "Experience to get level": 1.0 }, { "Level": 12, "Experience to get level": 1.0 }, { "Level": 13, "Experience to get level": 1.0 }, { "Level": 14, "Experience to get level": 1.0 }, { "Level": 15, "Experience to get level": 1.0 }, { "Level": 16, "Experience to get level": 1.0 }, { "Level": 17, "Experience to get level": 1.0 }, { "Level": 18, "Experience to get level": 1.0 }, { "Level": 19, "Experience to get level": 1.0 }, { "Level": 20, "Experience to get level": 1.0 }, { "Level": 21, "Experience to get level": 1.0 }, { "Level": 22, "Experience to get level": 1.0 }, { "Level": 23, "Experience to get level": 1.0 }, { "Level": 24, "Experience to get level": 1.0 }, { "Level": 25, "Experience to get level": 1.0 }, { "Level": 26, "Experience to get level": 1.0 }, { "Level": 27, "Experience to get level": 1.0 }, { "Level": 28, "Experience to get level": 1.0 }, { "Level": 29, "Experience to get level": 1.0 }, { "Level": 30, "Experience to get level": 1.0 }, { "Level": 31, "Experience to get level": 1.0 }, { "Level": 32, "Experience to get level": 1.0 }, { "Level": 33, "Experience to get level": 1.0 }, { "Level": 34, "Experience to get level": 1.0 }, { "Level": 35, "Experience to get level": 1.0 }, { "Level": 36, "Experience to get level": 1.0 }, { "Level": 37, "Experience to get level": 1.0 }, { "Level": 38, "Experience to get level": 1.0 }, { "Level": 39, "Experience to get level": 1.0 }, { "Level": 40, "Experience to get level": 1.0 }, { "Level": 41, "Experience to get level": 1.0 }, { "Level": 42, "Experience to get level": 1.0 }, { "Level": 43, "Experience to get level": 1.0 }, { "Level": 44, "Experience to get level": 1.0 }, { "Level": 45, "Experience to get level": 1.0 }, { "Level": 46, "Experience to get level": 1.0 }, { "Level": 47, "Experience to get level": 1.0 }, { "Level": 48, "Experience to get level": 1.0 }, { "Level": 49, "Experience to get level": 1.0 }, { "Level": 50, "Experience to get level": 1.0 }, { "Level": 51, "Experience to get level": 1.0 }, { "Level": 52, "Experience to get level": 1.0 }, { "Level": 53, "Experience to get level": 1.0 }, { "Level": 54, "Experience to get level": 1.0 }, { "Level": 55, "Experience to get level": 1.0 }, { "Level": 56, "Experience to get level": 1.0 }, { "Level": 57, "Experience to get level": 1.0 }, { "Level": 58, "Experience to get level": 1.0 }, { "Level": 59, "Experience to get level": 1.0 }, { "Level": 60, "Experience to get level": 1.0 }, { "Level": 61, "Experience to get level": 1.0 }, { "Level": 62, "Experience to get level": 1.0 }, { "Level": 63, "Experience to get level": 1.0 }, { "Level": 64, "Experience to get level": 1.0 }, { "Level": 65, "Experience to get level": 1.0 }, { "Level": 66, "Experience to get level": 1.0 }, { "Level": 67, "Experience to get level": 1.0 }, { "Level": 68, "Experience to get level": 1.0 }, { "Level": 69, "Experience to get level": 1.0 }, { "Level": 70, "Experience to get level": 1.0 }, { "Level": 71, "Experience to get level": 1.0 }, { "Level": 72, "Experience to get level": 1.0 }, { "Level": 73, "Experience to get level": 1.0 }, { "Level": 74, "Experience to get level": 1.0 }, { "Level": 75, "Experience to get level": 1.0 }, { "Level": 76, "Experience to get level": 1.0 }, { "Level": 77, "Experience to get level": 1.0 }, { "Level": 78, "Experience to get level": 1.0 }, { "Level": 79, "Experience to get level": 1.0 }, { "Level": 80, "Experience to get level": 1.0 }, { "Level": 81, "Experience to get level": 1.0 }, { "Level": 82, "Experience to get level": 1.0 }, { "Level": 83, "Experience to get level": 1.0 }, { "Level": 84, "Experience to get level": 1.0 }, { "Level": 85, "Experience to get level": 1.0 }, { "Level": 86, "Experience to get level": 1.0 }, { "Level": 87, "Experience to get level": 1.0 }, { "Level": 88, "Experience to get level": 1.0 }, { "Level": 89, "Experience to get level": 1.0 }, { "Level": 90, "Experience to get level": 1.0 }, { "Level": 91, "Experience to get level": 1.0 }, { "Level": 92, "Experience to get level": 1.0 }, { "Level": 93, "Experience to get level": 1.0 }, { "Level": 94, "Experience to get level": 1.0 }, { "Level": 95, "Experience to get level": 1.0 }, { "Level": 96, "Experience to get level": 1.0 }, { "Level": 97, "Experience to get level": 1.0 }, { "Level": 98, "Experience to get level": 1.0 }, { "Level": 99, "Experience to get level": 1.0 }, { "Level": 100, "Experience to get level": 1.0 } ], "Version": { "Major": 1, "Minor": 6, "Patch": 2 } } Localization { "XP Added Chat": "<color=green>You earned {0} XP</color>", "XP Added Gametip": "<color=white>You earned {0} XP</color>", "New Level": "<color=green>You now have {0} XP, for the reward list type /xp list.</color>", "Level1": "<color=green>You have {0} XP, Prestige {1}.</color>", "Level2": "<color=green>You level up 1 XP every 30 minutes.</color>", "Level3": "<color=green>For the XP reward list type /xp list.</color>", "New Prestige": "<size=16><color=orange>CONGRATULATIONS!</color> {0} has just reach Prestige Level {1}!</size>", "Highest XP": "{0} has the most XP in this server, {1}. {2}", "HighXP Items": "Receives {0} in Scrap and 1 Large Present!", "XPInfo": "<color=green><size=13>XP is gained by playing on the server, it rewards you with items, type /xp for more information.</size></color>", "Reward Received": "<color=green>You have been rewarded with {1} for your XP.</color>" }$25.00 -

Version 1.1.0
99 downloads
PortalSystem Fast travel that stays balanced for any Rust server. PortalSystem adds placeable, name-linked portals that teleport players between a matching pair — while giving you full admin control over cooldowns, limits, costs, and sharing. And yes: Map/Monument Portals are included too, so you can create fixed portals for hubs, events, monuments, arenas, and custom locations — perfect for building a real server travel network. Perfect for: PvE, RPG/RP, Hub servers, Vanilla+, and PvP servers that want fast travel without abuse. Features Portal Pair System (name linking): Portals link by name — only 2 portals can share the same name (A ↔ B). Use one to teleport to the other. Player Portals (placeable item): Portals are placed from an item (configurable name + skin). Includes anti-stack to prevent stacking/abuse. Map / Monument Portals: Admins can place fixed portals on monuments / locations using /portal commands (great for hubs & travel routes). Portal UI Menu: Clean UI to manage portal settings in-game (distance-limited to prevent remote abuse). Sharing Modes: Set portals as Everyone / Only Me / My Team. Optional clan logic (treat clanmates/allies as team) if enabled. Access Mode: Set a portal to Entry / Exit / Both. Teleport Cooldowns: Global cooldown + VIP overrides (permission → cooldown seconds). Portal Limits: Default portal limit per player + optional permission limits (portalsystem.limit.X). (Limit 0 = unlimited.) Entry Costs (optional): Charge players to use portals via: Items Economics ServerRewards Includes a bypass permission for free entry. Pickup System: Pickup with hammer right-click hold (configurable) with optional durability/HP behavior. Portal Visual Options: Optional name text above portals + optional map marker support + optional placement indicator. Loot Integration (optional): Add portal items to loot containers with configurable chances. Map Portals (Custom Maps) PortalSystem supports map-placed portals for custom maps, hubs, monuments, arenas, and event areas. How to use 1. Enable it in config: [Custom Maps] Enable map-placed portals from prefabs = true 2. Place prefab "Halloweenportalexit" on your map and set its Name to: portalsystem.<portal name> (Prefix is configurable via [Custom Maps] Prefab name prefix (e.g. portalsystem.) — default: portalsystem.) 3. 2 portals with the same name will link (A ↔ B). Important: Make sure you don’t break the prefab, and don’t add these portals as part of other prefabs. Commands Player /buyportal → Buy a portal (if enabled; Economics/ServerRewards). /giveportal [amount] → Give yourself portal items. /giveportal <player> [amount] → Give portal items to another player. (Also available as console: giveportal <player> [amount].) Admin /spawnportal → Spawns a portal at your look position and opens its UI. /portal add <name> → Add a Map/Monument Portal where you’re looking. /portal remove → Remove the portal you’re looking at (monument). /portal reset → Remove all portals on the current monument. /portal edit → Edit the portal you’re looking at. /portal list → List monument portals on the current monument. /portal list all → List all monument portals (grouped by monument) in console. Example Configuration Permissions portalsystem.use → Use portals (teleport) portalsystem.place → Place portals portalsystem.give → Use /giveportal portalsystem.spawn → Use /spawnportal portalsystem.admin → Access /portal map/monument portal management portalsystem.buy → Required for /buyportal (when enabled) portalsystem.free → Free /buyportal purchase (bypass buy cost) portalsystem.freeuse → Bypass entry cost when using portals (configurable) portalsystem.limit.X → Extra portal limits via permission (example: portalsystem.limit.6) VIP cooldown perms → whatever you define in the VIP cooldown override list API Item API_CreatePortalItem() // returns a ready-to-use portal item BaseEntity API_SpawnPortal(Vector3 position, Quaternion rotation, string name) // spawns a portal entity at position/rotation and registers it (spawn portal) Why Choose PortalSystem? Because fast travel should be useful for players and controllable for admins. PortalSystem gives you a clean paired portal system, plus Map/Monument Portals for hubs and events all while keeping things fair with cooldowns, limits, costs, and sharing rules.$19.95 -

Version 1.8.5
421 downloads
xSkillSystem xSkillSystem adds an RPG-style leveling experience to your gameplay. Whether you're chopping wood, mining for ores, or battling wildlife, every action earns you XP and helps you level up specialized skills. XP Table was testet properly and it should be fine. There are gather rates impact which are configurable and also a passive HP regen for skill "Vitality" depending on its level which is also configurable. Comes with an external config editor! » Discord « PLUG&PLAY PLUGIN, but configs are available to adjust it to your needs Built in image caching/reading (ImageLibrary is NOT needed) => Automatic skill icons download and placement. Skills: Each player starts at Level 1 in every skill and levels up through regular gameplay. Here's what you can master: Woodcutting – Chop trees. (Configurable Gather Rates depending on Level) Mining – Dig deep and extract valuable resources like stone, metal, and sulfur. (Configurable Gather Rates depending on Level) Gathering – Pick up natural items from the environment. (Configurable Gather Rates depending on Level) Slayer – Hunt animals, kill NPCs and fight players. (Configurable player speed boost 'Blood Rush' perk depending on Level) Skinning – Skin downed animals for XP. (Configurable Gather Rates depending on Level) Building - Gain XP by building, upgrading, deploying etc. Crafting – Gain XP as you build tools, weapons, and other items. (Configurable Craft Speed depening on Level) Vitality - Gain XP by using medical syringes & bandages (Configurable passive HP regen depending on Level) Looting - Gain XP by killing barrels or looting different type of crates. Cooking - Gain XP by cooking food. Prospecting - Gain XP by using Metal Detector and have success on it (When flag appears) Custom Level Rewards Double XP Weekends Commands Plugin Preview ( *v1.2.7* ) > Clipchamp didn't allow me 60FPS export, sorry External Config Editor Config Permissions Language API$21.99- 15 comments
- 8 reviews
-
- 6
-
-
-
- #skill system
- #level system
- (and 27 more)
-
Version 1.3.4
239 downloads
xChatStyles xChatStyles adds smooth gradient colors to player names, prefixes, and chat messages, giving your server a premium, modern look without clutter or spam. It’s clean, readable, and designed to enhance chat - not overpower it. It lets you customize how players appear in chat using animated-looking color gradients. Perfect for VIPs, staff, donators, or special roles. No flashy UI. No complicated setup. Just beautiful chat. Features Gradient Names & Messages Smooth color gradients instead of flat colors, but you can also use a solid color Player names Chat messages Prefixes (VIP, Admin, etc.) Looks great without hurting readability Styled Mentions (@PLAYERNAME) Multiple Prefix Support Players can have more than one prefix Each prefix can have its own color style Great for VIP & Donator Perks Instantly makes VIP ranks feel premium Visual reward without gameplay imbalance Easy to sell as a cosmetic perk Trade System for Prefixes (REQUIRES Economics if you want to use trade feature) Server Friendly No lag or spam Optimized to run smoothly on live servers Works quietly in the background Supports permission-based style, not just permanent chat style. xChatStyles Web Editor Plugin Preview Permissions (Custom Tab) xchatstyles.customtab - Ability to see the "Custom" Tab in /xcs xchatstyles.customprefix - Ability to see and select "Prefix" in "Custom" Tab xchatstyles.custommessagecolor - Ability to see and select "Message" in "Custom" Tab xchatstyles.customusernamecolor - Ability to see and select "Username" in "Custom" Tab Chat Commands (Player) /xcs - Opens the Ui /xcs <PLAYERNAME/STEMAID> - Opens the Ui with the view of the target player and you can remove owned styles from that user. Chat & Console Commands (Admin) /* Add chat styles without permission */ /addprefix <STEAMID> <PREFIXNAME> <#HEX> <#HEX> <#HEX>... /addmessagecolor <STEAMID> <#HEX> <#HEX> <#HEX>... /addusernamecolor <STEAMID> <#HEX> <#HEX> <#HEX>... /addall <STEAMID> <PREFIXNAME> <#HEX> <#HEX> <#HEX>... [This will add a prefix with provided color(s), message style with provided color(s) and username style with provided color(s) with just 1 command.] /* Add chat styles without permission */ /* Add chat styles WITH permission */ /addprefix <xchatstyles.PERMISSIONNAME> <PrefixName> <#HEX> <#HEX> <#HEX> ... /addall <xchatstyles.PERMISSIONNAME> <PrefixName> <#HEX> <#HEX> <#HEX> ... /addmessagecolor <xchatstyles.PERMISSIONNAME> <#HEX> <#HEX> <#HEX> ... /addusernamecolor <xchatstyles.PERMISSIONNAME> <#HEX> <#HEX> <#HEX> ... /* Add chat styles WITH permission */ ---> As long as the player has permission, they can select it with /xcs ---> Automatically removed when permission is revoked ---> Permission-Based ChatStyles has (Permission) indicator in /xcs ---> The permission must start with 'xchatstyles.*'. Example: /addall <xchatstyles.vip> VIP <#HEX> <#HEX> <#HEX> ... /*********************************************************************************************************/ /* Use 1 #HEX Color (Example: #fcba03) for a single color, use multiple #HEX Colors for a color gradient */ /* */ /* Example: /addprefix 76561198412496844 OMEGA #32a852 #71a67f */ /* */ /*********************************************************************************************************/ /removeprefix <steamid> <index|PrefixName> /removemessagecolor <steamid> <index> /removeusernamecolor <steamid> <index> Recommended Plugin for >TIMED< PERMISSION: Config { "MaxPrefixes": 3, "DefaultUsernameColor": "#55aaff", "DefaultMessageColor": "#ffffff", "DefaultSize": 15, "AllowSelectingDuplicatePrefixNames": true, "NotifyOnStyleReceived": true, "PrefixBrackets": "[]", "ShowPrefixBracketsWithSizeTag": true, "Trade": { "AllowTrading": false, "PlayerCanSellPermissionBasedPrefix": false, "UseCurrencySign": true, "CurrencySign": "$", "AnnounceNewPrefixSaleGlobally": true, "AnnouncePrefixPriceUpdateGlobally": true }, "PermissionStyles": {} }$24.99 -
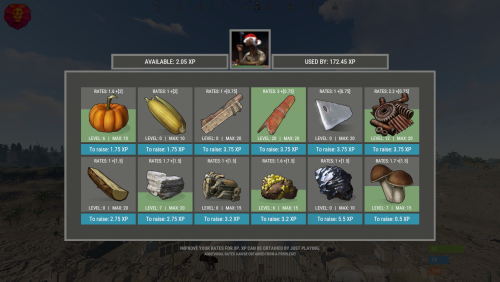
Version 1.1.2
28 downloads
XGatherUP - increase in rates for XP. - Optimization of the interface for different monitor resolutions. - Storing player data in - oxide/data/XGatherUP - There is a lang ru/en. - Sound effects when interacting with the menu. - Configuring the issuance of XP. [ Loot, kill, break barrels, open crates, pick from the ground, harvest ] - Setting up starting rates for each category. - Setting up bonus rates for each category according to the permit. [ Multiple permissions can be configured ] - Setting up permissions to access the upgrading of a certain category. - Mini-panel with XP quantity. [ You can hide ] - Customization of categories for which you can increase rates. [ Bonus mining, mining, picking from the ground, components, harvesting ] - Setting the maximum level, XP for upgraging one level, rates for one upgraded level, a list of resources/components for which the rates will be increased. -> Overview - YouTube <- Shortnames for config settings. Commands /rate - open the menu to upgrading rates. xp_give <SteamID> <Amount> - give XP. Config { "General settings": { "Use plugin balance to increase rates [ Default, XShop, Economics ]": "Default" }, "GUI settings": { "Number of categories per line": 6, "OffsetMin - menu": "-475 -255", "OffsetMax - menu": "475 180" }, "Setting up permissions and additional rates": { "xgatherup.default": { "Resource": 1.5, "Harvest": 2.0, "Loot": 0.75 } }, "XP settings | Shortname : ValueXP": { "XP for pickup resources": { "stones": 10.0, "sulfur.ore": 15.0, "metal.ore": 12.5 }, "XP for harvesting": { "potato.entity": 2.5, "corn.entity": 1.75, "hemp.emtity": 0.25 }, "XP for bonus gather": { "stones": 5.0, "sulfur.ore": 10.0, "metal.ore": 7.5 }, "XP for kill / breaking barrels": { "boar": 10.0, "loot-barrel-1": 7.5, "heavyscientist": 2.5 }, "XP for open crates": { "crate_normal": 5.0, "crate_normal_2": 1.0, "crate_tools": 3.5 } }, "Category settings": { "Resource": [ { "Permission to access the leveling category": "xgatherup.default", "Displayed item shortname/picture name. [ Must not be empty ]": "wood", "Maximum upgrading level": 20, "Rates for one level of upgrading": 0.1, "Starting rates of upgrading": 1.0, "Number of XP to upgrade one level": 2.75, "Link to custom image": "", "Shortnames of resources/components for which rates will be increased": [ "wood", "charcoal" ] }, { "Permission to access the leveling category": "xgatherup.default", "Displayed item shortname/picture name. [ Must not be empty ]": "stones", "Maximum upgrading level": 20, "Rates for one level of upgrading": 0.1, "Starting rates of upgrading": 1.0, "Number of XP to upgrade one level": 2.75, "Link to custom image": "", "Shortnames of resources/components for which rates will be increased": [ "stones" ] }, { "Permission to access the leveling category": "xgatherup.default", "Displayed item shortname/picture name. [ Must not be empty ]": "metal.ore", "Maximum upgrading level": 15, "Rates for one level of upgrading": 0.1, "Starting rates of upgrading": 1.0, "Number of XP to upgrade one level": 3.2, "Link to custom image": "", "Shortnames of resources/components for which rates will be increased": [ "metal.ore", "metal.fragments" ] }, { "Permission to access the leveling category": "xgatherup.default", "Displayed item shortname/picture name. [ Must not be empty ]": "sulfur.ore", "Maximum upgrading level": 15, "Rates for one level of upgrading": 0.1, "Starting rates of upgrading": 1.0, "Number of XP to upgrade one level": 3.2, "Link to custom image": "", "Shortnames of resources/components for which rates will be increased": [ "sulfur.ore", "sulfur" ] }, { "Permission to access the leveling category": "xgatherup.default", "Displayed item shortname/picture name. [ Must not be empty ]": "hq.metal.ore", "Maximum upgrading level": 10, "Rates for one level of upgrading": 0.1, "Starting rates of upgrading": 1.0, "Number of XP to upgrade one level": 5.5, "Link to custom image": "", "Shortnames of resources/components for which rates will be increased": [ "hq.metal.ore", "metal.refined" ] }, { "Permission to access the leveling category": "xgatherup.default", "Displayed item shortname/picture name. [ Must not be empty ]": "mushroom", "Maximum upgrading level": 15, "Rates for one level of upgrading": 0.1, "Starting rates of upgrading": 1.0, "Number of XP to upgrade one level": 0.5, "Link to custom image": "", "Shortnames of resources/components for which rates will be increased": [ "mushroom" ] } ], "Harvest": [ { "Permission to access the leveling category": "xgatherup.default", "Displayed item shortname/picture name. [ Must not be empty ]": "pumpkin", "Maximum upgrading level": 10, "Rates for one level of upgrading": 0.1, "Starting rates of upgrading": 1.0, "Number of XP to upgrade one level": 1.75, "Link to custom image": "", "Shortnames of resources/components for which rates will be increased": [ "pumpkin" ] }, { "Permission to access the leveling category": "xgatherup.default", "Displayed item shortname/picture name. [ Must not be empty ]": "corn", "Maximum upgrading level": 10, "Rates for one level of upgrading": 0.1, "Starting rates of upgrading": 1.0, "Number of XP to upgrade one level": 1.75, "Link to custom image": "", "Shortnames of resources/components for which rates will be increased": [ "corn" ] } ], "Loot": [ { "Permission to access the leveling category": "xgatherup.default", "Displayed item shortname/picture name. [ Must not be empty ]": "semibody", "Maximum upgrading level": 20, "Rates for one level of upgrading": 0.1, "Starting rates of upgrading": 1.0, "Number of XP to upgrade one level": 3.75, "Link to custom image": "", "Shortnames of resources/components for which rates will be increased": [ "semibody" ] }, { "Permission to access the leveling category": "xgatherup.default", "Displayed item shortname/picture name. [ Must not be empty ]": "metalpipe", "Maximum upgrading level": 20, "Rates for one level of upgrading": 0.1, "Starting rates of upgrading": 1.0, "Number of XP to upgrade one level": 3.75, "Link to custom image": "", "Shortnames of resources/components for which rates will be increased": [ "metalpipe" ] }, { "Permission to access the leveling category": "xgatherup.default", "Displayed item shortname/picture name. [ Must not be empty ]": "metalblade", "Maximum upgrading level": 20, "Rates for one level of upgrading": 0.1, "Starting rates of upgrading": 1.0, "Number of XP to upgrade one level": 3.75, "Link to custom image": "", "Shortnames of resources/components for which rates will be increased": [ "metalblade" ] }, { "Permission to access the leveling category": "xgatherup.default", "Displayed item shortname/picture name. [ Must not be empty ]": "scrap", "Maximum upgrading level": 20, "Rates for one level of upgrading": 0.1, "Starting rates of upgrading": 1.0, "Number of XP to upgrade one level": 3.75, "Link to custom image": "", "Shortnames of resources/components for which rates will be increased": [ "scrap" ] } ] } }$19.99 -
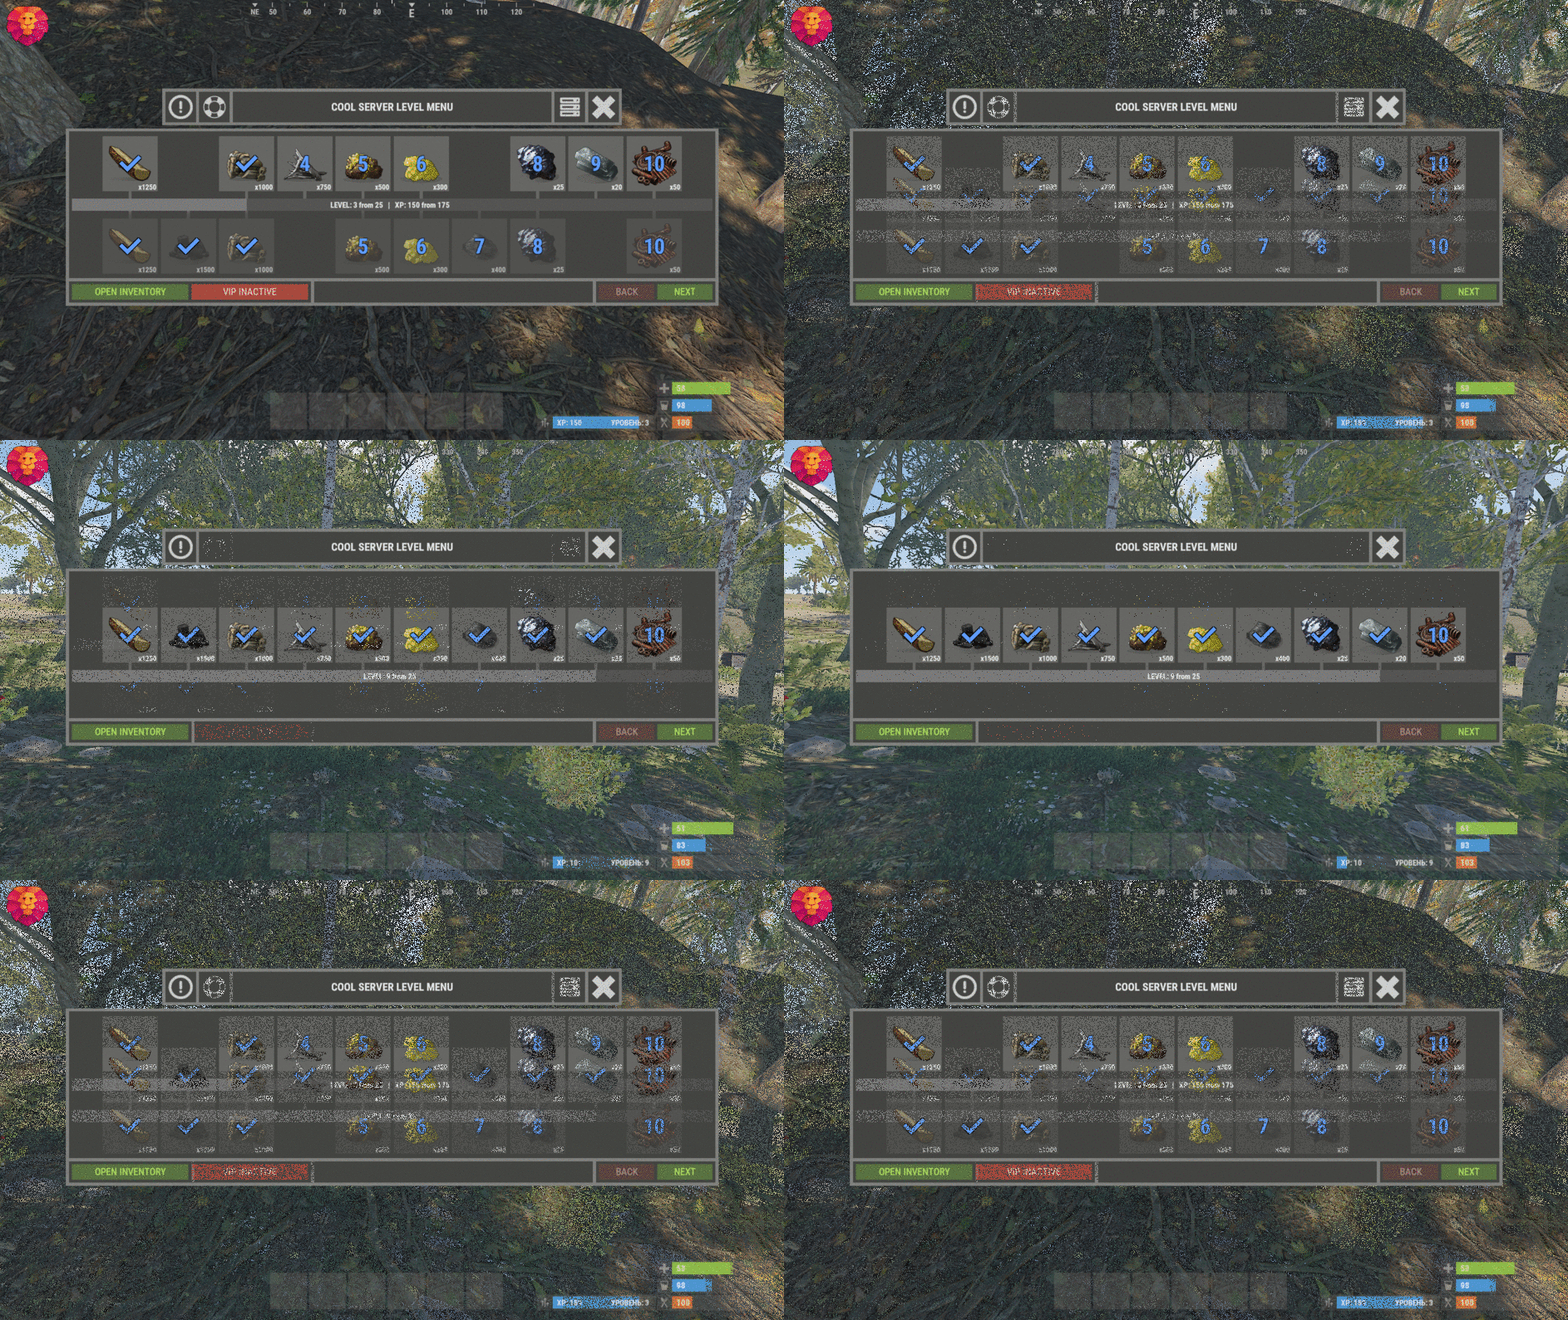
Version 1.2.0
370 downloads
XLevels (BattlePass) - levels and awards for your server. - Optimization of the interface for different monitor resolutions. - Storing player data in - oxide/data/XDataSystem/XLevels - There is a lang ru/en/uk/es. - Sound effects when interacting with the menu. - Setting the number of levels and XP to increase the level. - Setting up the level reward. [ Item, Custom Item, Command ] [ You can customize the rewards for a specific level. For example 5, 10, 20, 30. The rest will be without rewards ] - Configuring the issuance of XP by permissions for online. - Setting the XP multiplier by permissions. - Setting up coupons. [ Exchange for XP ] - Configuring boxes and the chance to spawn coupons. - Configuring the issuance of XP. [ Loot, kill, break barrels, open boxes, pick from the ground, harvest ] - Possibility to enable/disable the system of coupons. - Possibility to enable/disable VIP levels. - Chat prefix with player level. - Mini-panel with pumping progress. - Inventory with received awards. - Two options to get into the level menu. [ Command | NPC shops/keepers ] - Setting the increase in the amount of required XP with each pumped level. - The ability to accumulate XP if the maximum level is reached. [ Useful for top players ] - The ability to exchange coupons for XP if the maximum level is reached. [ Useful for top players ] - Top players. [ Level | XP ] - The ability to level up and receive rewards again after the maximum level has been reached. [Level and XP reset to zero. ] - Rank system. [ Setting in config. Display in the chat (prefix) and in the menu. ] - Possibility to hide the reward. [ The reward will not be displayed until the player reaches the required level. ] -> Overview - YouTube <- Shortnames for config settings. WORK WITH BetterLoot For the correct spawning of coupons in the crate, in the BetterLoot plugin, remove/comment out the following line of code. 630 - container.inventory.capacity = container.inventory.itemList.Count; Permissions xlevels.vip - access to VIP rewards. xlevels.top - access to the top players. Commands Open the level menu - /level, /lvl, /pass Give XP - level_give_xp <SteamID> <Amount XP> API int API_GetLevel(BasePlayer player) - returns the player's level. int API_GetLevel(ulong userID) - returns the player's level. void API_GiveXP(BasePlayer player, float XPAmount) - give the player XP. string API_GetPlayerPrefix(BasePlayer player) - get a ready-made player prefix with all the settings. string API_GetPlayerPrefix(ulong userID) - get a ready-made player prefix with all the settings. Hooks void OnXLevelsXPGained(BasePlayer player, float xp) - called when the player gains XP. void OnXLevelsUP(BasePlayer player, int level) - called when the player level up. Config { "General settings": { "XP for the pickup of resources": true, "XP for harvest": true, "XP for bonus resources": true, "XP for kill": true, "XP for opening crates": true, "Include messages of received rewards in chat": true, "Include level up messages in chat": true, "Enable coupons": true, "Enable VIP rewards": true, "Get VIP reward - [ True - only with permission | False - without permission ]": true, "Take VIP Reward - [ True - take only with permission | False - take at any time without permission ]": true, "Add XP if the maximum level is already reached - [ Suitable for top players ]": false, "Exchange coupons if you have already reached the maximum level - [ Suitable for top players ]": false, "Reset the level and XP of the player after reaching the maximum level - [ Players will re-open levels and receive rewards ]": false, "There is a plugin for custom loot": false, "Profile SteamID for custom avatar": 0, "List of commands to open the menu": [ "level", "lvl", "pass" ], "Enable prefix in chat - [ Set to False if the prefix should be disabled or the prefix is used by a third party chat plugin ]": true, "Display the level in prefix": true, "Display the rank in prefix": true, "List of available ranks - [ Level - Rank ] ( If the list is empty, then the rank will not be displayed in the menu )": { "0": "CAP-Х", "1": "IRON-1", "2": "IRON-2", "3": "IRON-3", "4": "BRONZE-1", "5": "BRONZE-2", "6": "BRONZE-3", "7": "SILVER-1", "8": "SILVER-2", "9": "SILVER-3", "10": "GOLD-1", "11": "GOLD-2", "12": "GOLD-3", "13": "PLATINUM-1", "14": "PLATINUM-2", "15": "PLATINUM-3", "16": "DIAMOND-1", "17": "DIAMOND-2", "18": "DIAMOND-3", "19": "IMMORTAL-1", "20": "IMMORTAL-2", "21": "IMMORTAL-3", "22": "RADIANT-1", "23": "RADIANT-2", "24": "RADIANT-3", "25": "GOD" } }, "Vendings settings": { "Open the level menu. [ True - Immediately after the opening of the NPC shop | False - UI button ]": false, "Access to the level menu is only through the NPC shops. [ True - NPC shop | False - Command ]": false, "List of NPC shops in which you can open the level menu (shop name)": [ "Black Market" ] }, "XP multiplier": { "Enable XP multiplier when exchanging coupons - [ This parameter affects only the multipliers for the exchange of coupons ]": false, "Setting up permissions for XP multipliers for the exchange of coupons and other actions. [ Permission | XP multiplier ]": { "xlevels.125p": 2.25, "xlevels.75p": 1.75, "xlevels.10p": 1.1 } }, "Issuing XP for online": { "Enable issuing XP to online players": false, "XP issue interval (in sec.)": 15.0, "Setting up permissions. [ Permission | XP ]": { "xlevels.default": 5.0 } }, "Mini-bar location / Main menu settings": { "AnchorMin": "1 0", "AnchorMax": "1 0", "OffsetMin": "-403 16", "OffsetMax": "-210 42", "Show mini-bar": true, "Color background_1": "0.517 0.521 0.509 0.95", "Color background_2": "0.217 0.221 0.209 0.95", "Display reward container - [ True - Only when there is a reward in the level | False - Always ]": false, "Display required reward level": true, "Display required VIP reward level": true }, "Settings levels": { "Maximum level": 25, "Number of XP to upgrade one level": 100.0, "How much to increase the number of XP with each level": 25.0 }, "XP settings | Shortname : ValueXP": { "XP for the pickup of resources": { "stones": 10.0, "sulfur.ore": 15.0, "metal.ore": 12.5 }, "XP for harvest": { "potato.entity": 2.5, "corn.entity": 1.75, "hemp.emtity": 0.25 }, "XP for bonus resources": { "stones": 5.0, "sulfur.ore": 10.0, "metal.ore": 7.5 }, "XP for kill / destroy barrel": { "boar": 10.0, "loot-barrel-1": 7.5, "heavyscientist": 2.5 }, "XP for opening crates": { "crate_normal": 5.0, "crate_normal_2": 1.0, "crate_tools": 3.5 } }, "Coupons for XP": [ { "Coupon name": "Coupon 5XP", "Coupon text": "Coupon for 5XP\n\nExchange them and get XP to level up!\n\nCommand for exchange - /level", "Coupon skin": skinID, "XP amount": 5, "Setting the chance of falling out of crates/barrels": [ { "Name crate/barrel": "crate_normal_2", "Drop chance": 50.0, "Minimum amount of coupons": 1, "Maximum number of coupons": 3 } ] }, { "Coupon name": "Coupon 10XP", "Coupon text": "Coupon for 10XP\n\nExchange them and get XP to level up!\n\nCommand for exchange - /level", "Coupon skin": skinID, "XP amount": 10, "Setting the chance of falling out of crates/barrels": [ { "Name crate/barrel": "crate_normal_2", "Drop chance": 50.0, "Minimum amount of coupons": 1, "Maximum number of coupons": 3 } ] }, { "Coupon name": "Coupon 25XP", "Coupon text": "Coupon for 25XP\n\nExchange them and get XP to level up!\n\nCommand for exchange - /level", "Coupon skin": skinID, "XP amount": 25, "Setting the chance of falling out of crates/barrels": [ { "Name crate/barrel": "crate_normal_2", "Drop chance": 50.0, "Minimum amount of coupons": 1, "Maximum number of coupons": 2 } ] }, { "Coupon name": "Coupon 50XP", "Coupon text": "Coupon for 50XP\n\nExchange them and get XP to level up!\n\nCommand for exchange - /level", "Coupon skin": skinID, "XP amount": 50, "Setting the chance of falling out of crates/barrels": [ { "Name crate/barrel": "crate_normal_2", "Drop chance": 50.0, "Minimum amount of coupons": 1, "Maximum number of coupons": 2 } ] }, { "Coupon name": "Coupon 100XP", "Coupon text": "Coupon for 100XP\n\nExchange them and get XP to level up!\n\nCommand for exchange - /level", "Coupon skin": skinID, "XP amount": 100, "Setting the chance of falling out of crates/barrels": [ { "Name crate/barrel": "crate_normal_2", "Drop chance": 50.0, "Minimum amount of coupons": 1, "Maximum number of coupons": 1 } ] }, { "Coupon name": "Coupon 200XP", "Coupon text": "Coupon for 200XP\n\nExchange them and get XP to level up!\n\nCommand for exchange - /level", "Coupon skin": skinID, "XP amount": 200, "Setting the chance of falling out of crates/barrels": [ { "Name crate/barrel": "crate_normal_2", "Drop chance": 50.0, "Minimum amount of coupons": 1, "Maximum number of coupons": 1 } ] }, { "Coupon name": "Coupon 500XP", "Coupon text": "Coupon for 500XP\n\nExchange them and get XP to level up!\n\nCommand for exchange - /level", "Coupon skin": skinID, "XP amount": 500, "Setting the chance of falling out of crates/barrels": [ { "Name crate/barrel": "crate_normal_2", "Drop chance": 50.0, "Minimum amount of coupons": 1, "Maximum number of coupons": 1 } ] } ], "Level reward": { "1": { "Item shortname / custom reward name [ Must not be empty ]": "wood", "Reward display name": "Wood", "Item quantity": 1250, "Item skin": 0, "Command": "", "Link to custom image": "", "Hide reward - [ Reward will not be displayed until the player reaches this level ]": false }, "2": { "Item shortname / custom reward name [ Must not be empty ]": "charcoal", "Reward display name": "Charcoal", "Item quantity": 1500, "Item skin": 0, "Command": "", "Link to custom image": "", "Hide reward - [ Reward will not be displayed until the player reaches this level ]": false }, "3": { "Item shortname / custom reward name [ Must not be empty ]": "metal.ore", "Reward display name": "Metal ore", "Item quantity": 1000, "Item skin": 0, "Command": "", "Link to custom image": "", "Hide reward - [ Reward will not be displayed until the player reaches this level ]": false }, "4": { "Item shortname / custom reward name [ Must not be empty ]": "metal.fragments", "Reward display name": "Metal fragments", "Item quantity": 750, "Item skin": 0, "Command": "", "Link to custom image": "", "Hide reward - [ Reward will not be displayed until the player reaches this level ]": false }, "5": { "Item shortname / custom reward name [ Must not be empty ]": "sulfur.ore", "Reward display name": "Sulfur ore", "Item quantity": 500, "Item skin": 0, "Command": "", "Link to custom image": "", "Hide reward - [ Reward will not be displayed until the player reaches this level ]": false }, "6": { "Item shortname / custom reward name [ Must not be empty ]": "sulfur", "Reward display name": "Sulfur", "Item quantity": 300, "Item skin": 0, "Command": "", "Link to custom image": "", "Hide reward - [ Reward will not be displayed until the player reaches this level ]": false }, "7": { "Item shortname / custom reward name [ Must not be empty ]": "gunpowder", "Reward display name": "Gunpowder", "Item quantity": 400, "Item skin": 0, "Command": "", "Link to custom image": "", "Hide reward - [ Reward will not be displayed until the player reaches this level ]": false }, "8": { "Item shortname / custom reward name [ Must not be empty ]": "hq.metal.ore", "Reward display name": "HQM ore", "Item quantity": 25, "Item skin": 0, "Command": "", "Link to custom image": "", "Hide reward - [ Reward will not be displayed until the player reaches this level ]": false }, "9": { "Item shortname / custom reward name [ Must not be empty ]": "metal.refined", "Reward display name": "HQM", "Item quantity": 20, "Item skin": 0, "Command": "", "Link to custom image": "", "Hide reward - [ Reward will not be displayed until the player reaches this level ]": false }, "10": { "Item shortname / custom reward name [ Must not be empty ]": "scrap", "Reward display name": "Scrap", "Item quantity": 50, "Item skin": 0, "Command": "", "Link to custom image": "", "Hide reward - [ Reward will not be displayed until the player reaches this level ]": false } }, "VIP level reward": { "1": { "Item shortname / custom reward name [ Must not be empty ]": "wood", "Reward display name": "Wood", "Item quantity": 1250, "Item skin": 0, "Command": "", "Link to custom image": "", "Hide reward - [ Reward will not be displayed until the player reaches this level ]": false }, "2": { "Item shortname / custom reward name [ Must not be empty ]": "charcoal", "Reward display name": "Charcoal", "Item quantity": 1500, "Item skin": 0, "Command": "", "Link to custom image": "", "Hide reward - [ Reward will not be displayed until the player reaches this level ]": false }, "3": { "Item shortname / custom reward name [ Must not be empty ]": "metal.ore", "Reward display name": "Metal ore", "Item quantity": 1000, "Item skin": 0, "Command": "", "Link to custom image": "", "Hide reward - [ Reward will not be displayed until the player reaches this level ]": false }, "4": { "Item shortname / custom reward name [ Must not be empty ]": "metal.fragments", "Reward display name": "Metal fragments", "Item quantity": 750, "Item skin": 0, "Command": "", "Link to custom image": "", "Hide reward - [ Reward will not be displayed until the player reaches this level ]": false }, "5": { "Item shortname / custom reward name [ Must not be empty ]": "sulfur.ore", "Reward display name": "Sulfur ore", "Item quantity": 500, "Item skin": 0, "Command": "", "Link to custom image": "", "Hide reward - [ Reward will not be displayed until the player reaches this level ]": false }, "6": { "Item shortname / custom reward name [ Must not be empty ]": "sulfur", "Reward display name": "Sulfur", "Item quantity": 300, "Item skin": 0, "Command": "", "Link to custom image": "", "Hide reward - [ Reward will not be displayed until the player reaches this level ]": false }, "7": { "Item shortname / custom reward name [ Must not be empty ]": "gunpowder", "Reward display name": "Gunpowder", "Item quantity": 400, "Item skin": 0, "Command": "", "Link to custom image": "", "Hide reward - [ Reward will not be displayed until the player reaches this level ]": false }, "8": { "Item shortname / custom reward name [ Must not be empty ]": "hq.metal.ore", "Reward display name": "HQM ore", "Item quantity": 25, "Item skin": 0, "Command": "", "Link to custom image": "", "Hide reward - [ Reward will not be displayed until the player reaches this level ]": false }, "9": { "Item shortname / custom reward name [ Must not be empty ]": "metal.refined", "Reward display name": "HQM", "Item quantity": 20, "Item skin": 0, "Command": "", "Link to custom image": "", "Hide reward - [ Reward will not be displayed until the player reaches this level ]": false }, "10": { "Item shortname / custom reward name [ Must not be empty ]": "scrap", "Reward display name": "Scrap", "Item quantity": 50, "Item skin": 0, "Command": "", "Link to custom image": "", "Hide reward - [ Reward will not be displayed until the player reaches this level ]": false } } }$24.49 -

Version 1.1.1
31 downloads
xCrosshair xCrosshair is a customizable crosshair system for Rust servers, giving players full control over their personal reticle/crosshair through an ingame UI menu. With multiple built-in shapes, color presets, HEX input support, outlines, and adjustable visual parameters, each player can design a crosshair that fits their preferred style. Features 7 crosshair shapes Full customization options Size Thickness Alpha/Transparency Outline toggle RGB/HEX color selection Quick-use color presets Per-player saved settings Chat Commands /crosshair - Opens the crosshair settings menu /ch - Opens the crosshair settings menu Permission xcrosshair.use - This permission is needed to use the crosshair. Preview ^ Sorry for bad video quality.$12.99 -

Version 1.1.5
83 downloads
The SimpleCraftSystem Plugin introduces a versatile and sleek crafting interface reminiscent of Rust's original style. It seamlessly integrates into the game, offering a highly customizable experience. This plugin empowers players to design and implement numerous recipes, providing the freedom to tailor their crafting journey to their liking. Acquiring this plugin unlocks an array of opportunities to amplify your server's gameplay. Its pivotal feature lies in the ability to seamlessly integrate with other plugins, thereby expanding your crafting options significantly. By investing in this plugin, you gain the power to incorporate an extensive range of crafts for various items from diverse plugins. One of its standout features is the ability to create multiple crafting pages, each serving as a dedicated space for crafting specific items or categories. This not only streamlines the crafting process but also allows for organized and efficient gameplay. Navigating between these crafting pages is intuitive, enabling quick access to various recipes without hassle. This expanded crafting system serves as a catalyst for increased engagement and intrigue among your server's community. It diversifies the available items and resources, encouraging players to experiment, strategize, and delve deeper into the game's intricacies. As a result, the server becomes a dynamic and thrilling environment where creativity and exploration flourish. Example Config: { "Recipes": { "example.trashcan": { "Result": { "Shortname": "box.wooden.large", "SkinID": 1595211850, "Amount": 1, "Name": "Trashcan", "Description": "Trashcan that disposes anything you've put in the box permanetely." }, "Ingradients": [ { "Shortname": "box.wooden.large", "SkinID": 0, "Amount": 1, "Name": null, "Description": null }, { "Shortname": "scrap", "SkinID": 0, "Amount": 100, "Name": null, "Description": null } ] }, "backpack.small": { "Result": { "Shortname": "backpack.small", "SkinID": 0, "Amount": 1, "Name": null, "Description": null }, "Ingradients": [ { "Shortname": "cloth", "SkinID": 0, "Amount": 1000, "Name": null, "Description": null } ] }, "backpack.large": { "Result": { "Shortname": "backpack.large", "SkinID": 0, "Amount": 1, "Name": null, "Description": null }, "Ingradients": [ { "Shortname": "backpack.small", "SkinID": -1, "Amount": 1, "Name": null, "Description": null }, { "Shortname": "cloth", "SkinID": 0, "Amount": 10000, "Name": null, "Description": null } ] } }, "Craft Pages": { "example.craftpage": { "Buttons": [ { "Label": "BACKPACKS", "Craft Page ID": "backpacks" } ], "Recipes": [ "example.trashcan" ], "Effect": "assets/bundled/prefabs/fx/item_unlock.prefab", "Chat Command to open": "cs", "Console Command to open": "", "Loot entity to open": { "Entity skin ID": 0, "Prefab full name": "assets/prefabs/deployable/repair bench/repairbench_deployed.prefab" } }, "backpacks": { "Buttons": [ { "Label": "MAIN", "Craft Page ID": "example.craftpage" } ], "Recipes": [ "backpack.small", "backpack.large" ], "Effect": null, "Chat Command to open": "", "Console Command to open": "", "Loot entity to open": { "Entity skin ID": 0, "Prefab full name": "" } } } }$12.50 -

Version 1.0.7
165 downloads
Experiments is a plugin introducing the old research system in Rust! Do you remember when tech tree was not around and you could gamble your scrap for a random blueprint? This plugin introduces just that and is made to be as close to the old system as possible with a ton of configurable options! Features: - Gamble scrap for a random bp at each workbench tier. - Disables tech tree system - Restrict certain blueprints from the random search - Change cost of research for each tier Here is a preview video I made to show off how the system works! Config: { "Block Tech Tree?": true, "Disable Research Sound?": false, "Experiment Time (Could effect timing with the reseach sound)": 10, "Tier 1 Scrap Cost": 75, "Tier 2 Scrap Cost": 500, "Tier 3 Scrap Cost": 1000, "Disable Default Blueprints?": true, "Blueprint Blackist": [ "electric.blocker", "electric.orswitch", "mask.balaclava", "fridge", "water.barrel" ] }$9.99- 22 comments
- 3 reviews
-
- 6
-
-
-
- #old research
- #random
- (and 6 more)
-
Version 1.0.0
8 downloads
This plugins allows a queue system based in teams and players online per team instead of general server queue. You can define the amount of teams available, the amount of players connected per team allowed, and some more parameters to personlize the pluging to your needs. Commands All the commands are console commands. createTeam <team name> -> Creates a new team in the configuration. deleteTeam <team name> -> Deletes a team and all the players associated to it. addPlayer <steamID64> <team name> -> Adds a player (steamID64) to the introduced team. deletePlayer <steamID64> <team name> -> Deletes a player from allowed and from the team. clearAllTeams -> Resets all the teams and all the player-team associations. onlinePlayersEachTeam <int> -> Defines how many players online per team are allowerd. adminbypass <on|off> -> Defines if admins and mods must have team configurations. How to start Team Queue System is a easy-to-start plugin. After uploading the ".cs" file to the server, configure the main parameters. adminbypass <on|off> onlinePlayersEachTeam <int> Now start creating as much teams as you wish. createTeam <team name> Once you have created the teams, start adding the players with their steamID64. addPlayer <steamID64> <team name> Players are now ready to connect to the server and teams are defined. Once the max amount of online players per team is reached, additional team members will be unable to connect until a space is free in the team. If you have any question, feel free to ask. All the suggestions are welcome! Enjoy!$5.00 -
Version 1.0.0
8 downloads
It's a Train Depot in RUST, and you need a red card and a fuse to unlock the full loot. Features: There is radiation; Great detail; There is some buildings; Simple installing on your map; Can be connected with railway system; Optimized FPS. General info: Prefabs count: 3758; Type: for looting; Modifiers: Alpha&Height&Splat&Topology. Loot: Oil Barrels: 8; Food box/crates: 8; Barrels: 57; Ordinary crates: 18; Random crates: 3 Military crate: 1; Elite crates: 3. Other information: I recommend you to familiarize yourself with my map ( There are 41k prefabs on 2500 map size ) I make custom prefabs to order. Discord: shemov#6310$13.60