Search the Community
Showing results for tags 'rust plugins'.
Found 15 results
-
Version 1.2.2
6 downloads
nanoWelcomeModule - a welcome module for your server! Required - the nanoModalMenu plugin must be installed Plugin and image installation instructions: When downloading the plugin - you receive an archive with the following structure: oxide ├── plugins │ └── nanoWelcomeModule.cs // main plugin file │ └── data └── nanoSystemModule └── nanoWelcomeModule └── Images └── *.png // menu images and icons You need to install the icons using the same path as in the archive. Be careful - first extract the archive to your computer and only then upload the images to your server! Feature list: Display your social media links: You can add any QR codes for your server's social media pages or store, all of this is configured through the configuration and images. Our Plugins information section: A fully customizable section, you can specify the advantages of your server, its important aspects, or any other information about your server by adding an icon of an in-game item! *All sections support scrolling and have no item limit! Information section: A quick access section with the ability to display the server online count, the player's privileges using IQPermissions, text information with an icon about your server mechanics, and quick access buttons *All sections support scrolling and have no item limit! Multilingual text support: Specify text in any language, and each player will be able to see information that matches their language! Color theme support: Examples of color themes with the nanoWelcomeModule open and links to them: White Included with Plugin Dark View Theme Purple View Theme Blue View Theme Configuration JSON { "Header menu settings": { "Multilingual translation for the menu title": { "ru": "ИНФОРМАЦИЯ", "en": "INFORMATION" }, "Multilingual translation for the menu description": { "ru": "Тут ты узнаешь насколько интересный наш сервер и каким правилам придерживаться", "en": "Here you will learn what makes our server interesting and which rules you should follow" }, "List of items for menu decoration [Shortname] (no more than 9 items)": [ "spraycan", "documents", "tool.binoculars", "building.planner", "advancedblueprintfragment", "campfire", "map", "note", "wallpaper.tool" ] }, "Menu content settings": { "Category settings [UniqueKey] = Settings": { "rules": { "Image file name from `/data/nanoSystem/nanoInfoModule/Images` [Do not include the extension]": "RULES_ICON", "Multilingual category translation [LanguageKey] = Translation": { "ru": "ПРАВИЛА", "en": "RULES" }, "List of category content": [ { "Multilingual translation of the text block title [LanguageKey] = Translation": { "ru": "БУДЬ ВЕЖЛИВЫМ", "en": "BE RESPECTFUL" }, "Multilingual translation of the text block [LanguageKey] = Translation": [ { "ru": "1. Уважайте других игроков и общайтесь без оскорблений, унижений и провокаций\n2. Запрещены токсичное поведение, травля, угрозы и дискриминация в любом виде\n3. Не засоряйте чат флудом, спамом, капсом или бессмысленными сообщениями\n4. Используйте голосовой и текстовый чат адекватно, без шума, криков и намеренного раздражения других игроков\n5. Если возник конфликт, решайте его спокойно или обращайтесь к администрации сервера", "en": "1. Respect other players and communicate without insults, humiliation, or provocation\n2. Toxic behavior, harassment, threats, and discrimination in any form are prohibited\n3. Do not flood the chat with spam, caps, or meaningless messages\n4. Use voice and text chat appropriately, without noise, screaming, or intentionally annoying other players\n5. If a conflict arises, resolve it calmly or contact the server administration" } ] }, { "Multilingual translation of the text block title [LanguageKey] = Translation": { "ru": "ЧЕСТНАЯ ИГРА", "en": "FAIR PLAY" }, "Multilingual translation of the text block [LanguageKey] = Translation": [ { "ru": "1. Запрещено использовать читы, макросы, скрипты или стороннее ПО, дающее игровое преимущество\n2. Использование багов, дюпов и уязвимостей сервера для личной выгоды запрещено\n3. Не пытайтесь обходить правила сервера через альтернативные аккаунты, VPN или иные способы сокрытия нарушений\n4. Запрещено выдавать себя за администрацию, модераторов или других игроков\n5. Любая нечестная игра, нарушающая баланс сервера, может привести к наказанию", "en": "1. Cheats, macros, scripts, or third-party software that provide an in-game advantage are prohibited\n2. Exploiting bugs, dupes, or server vulnerabilities for personal gain is forbidden\n3. Do not attempt to bypass server rules using alternate accounts, VPNs, or other methods to hide violations\n4. Impersonating administrators, moderators, or other players is prohibited\n5. Any unfair gameplay that disrupts the server balance may result in punishment" } ] }, { "Multilingual translation of the text block title [LanguageKey] = Translation": { "ru": "СТРОЙКА И РЕЙДЫ", "en": "BUILDING AND RAIDS" }, "Multilingual translation of the text block [LanguageKey] = Translation": [ { "ru": "1. Не стройте объекты, которые намеренно мешают спавну, проходу или нормальной игре других игроков\n2. Запрещено злоупотреблять постройками, шкафами, турелями и ловушками для нечестной блокировки территории вне правил сервера\n3. Уважайте лимиты сервера на количество построек, турелей, членов клана и других игровых объектов\n4. Если на сервере действуют ограничения на рейды новичков или специальные PvP/PvE зоны, их необходимо соблюдать\n5. Постройки и рейды, создающие чрезмерную нагрузку на сервер или нарушающие его правила, могут быть удалены администрацией", "en": "1. Do not build structures that intentionally block spawns, movement, or normal gameplay for other players\n2. Abusing buildings, tool cupboards, turrets, or traps to unfairly block territory outside server rules is prohibited\n3. Respect the server limits on buildings, turrets, clan members, and other in-game objects\n4. If the server has raid restrictions for beginners or special PvP/PvE zones, those rules must be followed\n5. Buildings and raids that create excessive server load or violate server rules may be removed by the administration" } ] } ] }, "nanoSettingModule": { "Image file name from `/data/nanoSystem/nanoInfoModule/Images` [Do not include the extension]": "SETTINGS_MODULE_ICON", "Multilingual category translation [LanguageKey] = Translation": { "ru": "НАСТРОЙКИ", "en": "SETTINGS" }, "List of category content": [ { "Multilingual translation of the text block title [LanguageKey] = Translation": { "ru": "О ПЛАГИНЕ", "en": "PLUGIN" }, "Multilingual translation of the text block [LanguageKey] = Translation": [ { "ru": "Плагин nanoSettingModule предназначен для управления и настройки других модулей системы nanoModalMenu\nС его помощью игроки могут изменять доступные параметры, взаимодействовать с подключёнными модулями и подстраивать отдельные функции под свои предпочтения\nЭтот модуль выступает как единая точка доступа к пользовательским настройкам и делает работу с интерфейсом более удобной и понятной", "en": "The nanoSettingModule plugin is designed to manage and configure other modules in the nanoModalMenu system\nWith it, players can change available settings, interact with connected modules, and adjust certain features to match their preferences\nThis module acts as a central access point for user settings and makes the interface more convenient and easier to use" } ] } ] }, "nanoWelcomeModule": { "Image file name from `/data/nanoSystem/nanoInfoModule/Images` [Do not include the extension]": "WELCOME_MODULE_ICON", "Multilingual category translation [LanguageKey] = Translation": { "ru": "ПРИВЕТСТВИЕ", "en": "WELCOME" }, "List of category content": [ { "Multilingual translation of the text block title [LanguageKey] = Translation": { "ru": "ПРИВЕТСТВЕННЫЙ МОДУЛЬ", "en": "WELCOME MODULE" }, "Multilingual translation of the text block [LanguageKey] = Translation": [ { "ru": "nanoWelcomeModule - это модуль, который помогает игрокам быстро получить важную информацию о сервере сразу в одном месте\nВ нём можно разместить краткую информацию, преимущества сервера, ссылки на социальные сети, полезные сведения, а также любой дополнительный текст по желанию\nПомимо этого, модуль поддерживает быстрый доступ через кнопки и может отображать информацию, полученную из других подключённых плагинов", "en": "nanoWelcomeModule is a module that helps players quickly access important server information all in one place\nIt can be used to display a server description, its advantages, social media links, useful details, and any additional custom text if desired\nIn addition, the module supports quick access buttons and can display information received from other connected plugins" } ] } ] }, "nanoKitsModule": { "Image file name from `/data/nanoSystem/nanoInfoModule/Images` [Do not include the extension]": "KITS_MODULE_ICON", "Multilingual category translation [LanguageKey] = Translation": { "ru": "НАБОРЫ", "en": "KITS" }, "List of category content": [ { "Multilingual translation of the text block title [LanguageKey] = Translation": { "ru": "НАБОРЫ СЕРВЕРА", "en": "SERVER KITS" }, "Multilingual translation of the text block [LanguageKey] = Translation": [ { "ru": "nanoKitsModule - это модуль, это простой и удобный плагин на наборы для вашего сервера.\nНичего лишнего, отличная оптимизация и только нужный функционал!\nПродавайте привилегии с наборами и наслаждайтесь интегрированным интерфейсом в меню nanoModalMenu", "en": "nanoKitsModule is a simple and convenient kits plugin for your server.\nNothing unnecessary, excellent optimization, and only the features you need!\nSell privileges with kits and enjoy the integrated interface in the nanoModalMenu" } ] } ] }, "nanoChat": { "Image file name from `/data/nanoSystem/nanoInfoModule/Images` [Do not include the extension]": "CHAT_MODULE_ICON", "Multilingual category translation [LanguageKey] = Translation": { "ru": "ЧАТ", "en": "CHAT" }, "List of category content": [ { "Multilingual translation of the text block title [LanguageKey] = Translation": { "ru": "ЧАТ СЕРВЕРА", "en": "SERVER CHAT" }, "Multilingual translation of the text block [LanguageKey] = Translation": [ { "ru": "nanoChat - даннный плагин сделан для простого контроля и настройки чата для ваших игроков\nИспользуйте цвет ника и отдельные префиксы по разрешениям\nРазделяйте их на привилегии и зарабатывайте с помощью этого\nВместе с nanoSettingsModule - ваши игроки получат еще больший контроль над системой чата, данный модуль будет дополнять возможности nanoChat", "en": "nanoChat is a plugin designed for simple chat control and configuration for your players.\nUse nickname colors and separate prefixes based on permissions.\nDivide them into privileges and monetize them.\nTogether with nanoSettingsModule, your players will get even more control over the chat system, and this module will expand nanoChat's capabilities" } ] }, { "Multilingual translation of the text block title [LanguageKey] = Translation": { "ru": "ЦВЕТА НИКА", "en": "NICKNAME COLORS" }, "Multilingual translation of the text block [LanguageKey] = Translation": [ { "ru": "А ещё вы можете создавать различные <color=#33232FF>цвета</color> для ников игроков и даже задавать градиент, используя несколько цветов", "en": "You can also create different <color=#33232FF>colors</color> for players' nicknames and even set a gradient by using multiple colors.\n" } ] } ] } } } }$19.99 -
Version 3.2.1
17,662 downloads
Premium Item Skinning · Oxide + Carbon SKINNER v3.1.6 Skin every item like it’s worth keeping — 60x faster, 200x leaner. The unrivalled no.1 performance skinning plugin. Skin any item in the game with a unique skinbox — live skinning, auto skinning, and skin sets. The numbers, not the noise Measured, not marketed Skinner 2.0 delivers unrivalled efficiency. In standard testing versus the closest performing plugin, runtime was 60x faster and memory use 200x more efficient. What’s new in 3.0 Skinner 3.0 is here — a full visual overhaul with dynamic, permission-based UI menus. ✓Visual overhaul with dynamic, permission-based UI menus ✓Automatic skin filtering and dev modes for the new TOS ✓Permission-based skin sets ✓Team-share skins ✓Auto-unlock owned skins Features Everything skinner does Live skinning Skin items in place without moving them. Auto import Automatically import and use all game-approved skins. Skin sets Create a variety of skin sets for any item. Skin requests Players request skins; admins approve them in game. Auto skins Apply selected skins to every item that enters your inventory. Team share Skin your whole team’s inventory from your own sets. See it running Live demo Live-skin any item in your inventory. Skin deployables you’re looking at. Commands Every command Skin menu /skin /s, /skinbox, /sb Live-skin any item in your inventory by picking a skin. /skincraft /sc Build skin sets used by the auto, team, and base commands. /skinitem /si, /skindeployed, /sd Skin a deployable you are looking at. Args: 1, 2 or 3 to use a skin set. Automatic /skincon /scon Skin every item in the container you are looking at. Args: 1/2/3 (optional). /skininv /sinv Skin every item in your inventory. Args: 1/2/3 (optional). /skinauto /sauto Auto-skin every item as it enters your inventory. Args: 1/2/3 (optional). /skinteam /st Skin your inventory and your team’s. Args: 1/2/3. Use /skinteam toggle to opt in or out. /skinbase /skinbuilding Skin all deployables in your base. Args: item filter, e.g. /skinbase sleepingbag. /skinall /sa Skin all items in every container in your base. Args: shortname, e.g. /skinall rifle.ak. /skinset /ss Set your currently selected skin set. Import & requests /skinimport /sip Import a custom workshop skin. Args: WorkshopID, e.g. /skinimport 2397648701. /colimport /cip Import a workshop collection. Args: Collection ID, e.g. /colimport 2921147807. /skinrequest /sr Request a skin be added — shows in the requests box. Args: WorkshopID. /skinrequests /srs Open the approval box. Try = copy the item, Approve = add the skin, Deny = remove it. Permissions Grant exactly what you want Player skinner.default /skin skinner.items /skinitem skinner.craft /skincraft skinner.skinauto /skinauto skinner.skincon /skincon skinner.skininv /skininv skinner.skinbase /skinbase skinner.skinteam /skinteam skinner.skinall /skinall skinner.skinrequest /skinrequest Admin skinner.import Enables /skinimport, /colimport, and /skinrequests. skinner.bypassauth Skips the building-auth check when using /skinitem. skinner.permskintry Enables Try in /skinrequests. Trying a skin copies the item — admins only. Auto-assigned skinner.skinautotoggled A player disables skinauto. skinner.skinteamblock A player opts out of team skins. Cooldowns Grant skinner.<command><seconds> (e.g. skinner.default30) to enforce the cooldowns set in the config. No cooldown permission = no cooldown. If a player has several, the shortest wins. Importing skins Five ways to add skins Via config Add workshop IDs to the Imported Skins List; reload and shortnames/display names auto-populate. Via collections Add whole workshop collection IDs; every skin imports automatically on load. Via commands /skinimport <WorkshopID> and /colimport <CollectionID> from chat, the F1 console, or RCON. Via skin requests Players /skinrequest; admins Try/Approve/Deny in the requests box. Requests log to a Discord webhook. From other plugins Convert data from SkinBox, xSkins, and SkinController with the SkinDataConverter tool, then paste into the config. Get the converter → Configuration Tune every behaviour { "Auto import approved skins": true, "Remove player data after inactivity (days)": 14, "Apply names of skins to skinned items": true, "Add Search Bar UI": true, "Override spraycan behaviour": false, "Use spraycan effect when holding spraycan and skinning deployables": true, "Blacklisted Skins (skinID)": [], "Blacklisted Items (itemID)": [], "Import Skin collections (steam workshop ID)": [], "Imported Skins List": { "861142659": {}, "2617744110": {} } } Developer API Hook into Skinner A small, stable surface for reading the cached skin data and resolving redirect items from your own plugin. //Get all cached skins public Dictionary<int, List<ulong>> GetAllCachedSkins() => _cachedSkins; //Check if a skin is a redirect item public bool IsRedirectID(ulong uID) => HasMask(uID); //Convert a redirect ID to its item ID public int RedirectIDtoItemID(ulong uID) => (int)UnsetMask(uID); //Get the list of skins for an item public List<ulong>? GetSkinsItemList(int itemid) { _cachedSkins.TryGetValue(itemid, out List<ulong>? cachedSkins); return cachedSkins; } Watch See Skinner in action http://youtu.be/ewKlNILTwv8 Skin every item like it’s worth keeping. The unrivaled no.1 performance skinbox for Rust — 60x faster, 200x leaner. Oxide + Carbon. Join the Discord → Skinner v3.1.6 · by Whispers88 · Oxide + Carbon · 5/5 from 50 reviews · 69 versions · on Codefling since March 2022$24.99 -
Version 1.0.9
1,102 downloads
Turn your Rust server's nights into a survival challenge. Stop spawning random NPCs. Start orchestrating a coordinated apocalypse. Zombie Swarm Core is a high-performance, squad-based system that transforms how NPCs interact with your players. This plugin doesn't scatter individual zombies across the map; instead, it creates connected squads that patrol, hunt, and move as a single, intimidating unit. Version Features Zombie Swarm gives you complete control over the threat cycle: Classic Terror: Hordes appear only at nightfall. Daytime Scourge: Keep players on edge even in broad daylight. 24/7 Survival: Configure the swarm to be a constant and relentless threat. Custom Time Windows: Define the exact start and end times for horde activity. Nighttime Visual Effects: Optional glowing eyes effect for terrifying nighttime encounters. Auto-Cleanup: Automatically removes NPCs and corpses when the event ends. Advanced squadron intelligence Coordinated movement: NPCs move as a unified swarm, maintaining formation. Dynamic states: Patrol mode: Monitors areas when no players are nearby. Pursuit mode: Aggressively pursues players upon detection. Hive mind system: Damage one zombie... and the entire squad instantly becomes aggressive. Adaptive behavior: Zombies dynamically change their actions at configurable intervals. Server performance and optimization No map scanning: Uses intelligent radio-based player generation. Optimized physics: Cached environmental checks. High-speed data handling: Uses HashSets for fast feature management. Automatic cleanup system: Prevents feature buildup and lag. Intelligent spawning system Efficient, immersive, and fully customizable: Player-based generation: Hordes dynamically spawn around players. Distance control: Configure the minimum and maximum spawn range. Horde limits: Maximum number of zombies worldwide Hors per player Zombies per horde Automatic recharge: Maintains constant pressure by replenishing hordes over time. Patrol movement and behavior Bring your zombies to life (and scare them): Sprint probability: The chance that zombies will sprint while on patrol. Behavior intervals: Control how often zombies change their actions. Formation spacing: Adjust how close together teams move. Commands and Permissions Permission: zombieswarm.admin (or server administrator) /swarms - Displays the current status of active hordes and the overall entity count. Configuration file Installation Drag the ZombieSwarm.cs file to your oxide/plugins folder. The plugin will start automatically at sunset (default: 7:00 PM). (Optional) Adjust the nighttime hours in the configuration file to match your server's day/night cycle.Free -
Version 2.4.30
9,159 downloads
MultiEvents is an event management plugin for your Rust server. You create, run and show events to players in a good-looking interface that you can customize. With several event types, integration with other plugins and a visual editor, MultiEvents gives your players a reason to keep coming back. ️ Features of Multi Events Customizable UI with several templates: Fullscreen, ServerPanel V1 and ServerPanel V2. In-game visual editor for building and customizing event interfaces. Changes apply right away, and you don't need to write code. Event categories, descriptions, icons and banners. Built-in notifications tell players about upcoming and running events. Event inventory with configurable permissions that decide who gets access and who can take part. Image library support, so your events can use your own graphics and icons. Multi-language support, and the plugin is easy to translate for players from other countries. ServerPanel integration: players open the events from the ServerPanel menu. API for other plugins, so developers can extend and customize it. Comes with events such as CollectionResources, FoundationDrop, HelicopterPet, HuntAnimal, KingOfHill, LookingLoot and SpecialCargo, each with its own gameplay. Detailed JSON configuration for setting up and managing events. Optimized for performance and runs smoothly with a large player base and a lot of data. Included Events MultiEvents comes with these events, ready to use on your server: CollectionResources: Collect resources and compete with other players! The more resources you collect, the higher your score. Use different tools to get multipliers for your gathering. Top players will receive valuable rewards! FoundationDrop: Players spawn on a platform made of foundations. The foundations begin to degrade and fall away one by one. Players must survive by jumping between foundations. The last player standing wins! When only one foundation remains, players receive weapons and radiation appears to speed up the finale. HelicopterPet: Try to get the attention of the patrol helicopter! The more it focuses on you, the more points you earn. Get points when the helicopter orbits around you and even more when it's attacking. The player with the most points at the end wins! Be careful though: this isn't your friendly neighborhood chopper! HuntAnimal: Hunt animals across the map to earn points! Different animals are worth different amounts: chickens are worth 1 point, while bears are worth 10 points. Wolves, boars, horses, and deer are worth 4 points each. The player with the most points at the end of the event wins! KingOfHill: Race to the highest point! Your score is based on the highest elevation you reach. Stay on solid ground: no flying, swimming or vehicles. The player who reaches the highest point and maintains their position wins! Watch your step and keep climbing! LookingLoot: Search for loot across the map! Earn points by looting containers and barrels. Most items are worth 1 point each, but special items like scrap and gears are worth 2 points. The player who collects the most valuable loot wins! Be quick: containers can only be looted once! SpecialCargo: Deliver the special cargo from one monument to another! A random player will be chosen to carry the cargo. The carrier must reach the destination monument marked on the map while avoiding other players. If the carrier dies, a new random player becomes the carrier. Teleportation is disabled for the carrier. Deliver the cargo to win! You can customize every event in the visual editor, and each one comes with default settings, so it is ready to play right after installation. Expansion Packs & Add‑ons Extend MultiEvents with premium expansion packs and our large‑scale raid framework. They come pre‑configured, can be fully customized and plug straight into your server. MultiEvents Pack 1 Barrels, PvP Player Battle, NPC Missile Silo, Pumpkin Picker, Vehicle Hunter. View on Codefling → MultiEvents Pack 2 Another set of competitive and gathering events to add variety to your rotation. View on Codefling → MultiEvents Pack 3 Corn Collector, Gold Rush (with rare items), Mushroom Madness, NPC Underwater Lab, Patrol Helicopter Hit. View on Codefling → OPERATION FORTRESS Large‑scale PvE raid framework with handcrafted bases, waves and rewards. It works well alongside your events. View on Codefling → Showcase Fullscreen Template ServerPanel V1 Template ServerPanel V2 Template Video Overview Commands /events: Opens the events menu for players Permissions multievents.edit: Permission to edit events Visual Editor MultiEvents has a visual editor for creating and customizing events. You don't need to write code: change settings, colors and text and set up event elements right in the game. Setting up an event this way is quick. Web Config Editor Manage the MultiEvents settings in our web config editor. You change the config in a browser form instead of editing files on the server by hand. P.S. The web config editor is open to members of the "MultiEvents" group in our Discord server. Join at https://discord.gg/mevent and ask for the group. FAQ Q: Can I integrate MultiEvents with other plugins? A: Yes. MultiEvents has an API that lets other plugins register and manage events, and it opens from the ServerPanel menu. Q: How do I add MultiEvents to the ServerPanel menu? A: You can do this directly from the ServerPanel in-game: 1. Open the ServerPanel menu in-game. 2. If you have permission to edit, switch the panel to edit mode so you can see the blue "EDIT CATEGORY" and "EDIT PAGES" buttons. 3. Choose the category where you want MultiEvents to appear and click the "EDIT CATEGORY" button for that category. 4. While you are in this category in the ServerPanel, click the "EDIT PAGES" button to create a new page (or edit an existing one) for MultiEvents. 5. For that page, set these exact parameters: Type: Plugin Plugin Name: MultiEvents Plugin Hook: API_OpenPlugin 6. Save the changes. The MultiEvents button will now appear in the ServerPanel in the category you selected. Q: How do I add custom images for my events? A: MultiEvents supports an image library. Upload your images to your server, and reference them in the plugin configuration or through the visual editor. Q: Does MultiEvents support multiple languages? A: Yes, MultiEvents has built-in localization support. You can customize all text elements in the editor and add translations for different languages. Q: How do I configure rewards in MultiEvents? A: There are two ways. To drop rewards into a custom inventory UI, set up items in the inventory settings, give them unique IDs and reference these IDs in the event configuration. To give rewards straight to the player's in-game inventory, list them in the event settings. Q: How do I set up rewards (Item, Command, Plugin, Kit) and what placeholders are available? A: Types: Item (ShortName, Amount, DisplayName, Skin), Command (Command string), Plugin (Plugin Name, Hook, Amount), Kit (Kit name). Placeholders for Command: %steamid%, %username%. Multiple commands are separated by | (line breaks are also supported). Give an item: "Type": "Item", "ShortName": "stones", "Amount": 2500, "DisplayName": "Stones", "Skin": 0 Give a kit: "Type": "Kit", "Kit": "vip_starter" Run commands: "Type": "Command", "Command (%steamid%)": "inventory.giveto %steamid% scrap 1000|oxide.usergroup add %steamid% vip" Add BankSystem balance (via Plugin): "Type": "Plugin", "Plugin": "BankSystem", "Hook": "Deposit", "Amount": 2500 Q: What are the recommended sizes for event images? A: Event banners should be 390x349 pixels and event icons 64x64 pixels. Developer API MultiEvents has an API for other plugins: void API_RegisterEvent(string eventId, JObject data): Register a new event with MultiEvents API_RegisterEvent Parameters: eventId (string): unique identifier for the event. data (JObject): JSON object containing event details. JObject Structure: title (string, required): The title of the event. description (string, optional): A brief description of the event. commandToStart (string, required): The command to start the event. commandToStop (string, required): The command to stop the event. bannerURL (string, optional): URL for the event's banner image. icon (string, optional): URL for the event's icon image. scrollElements (JArray, optional): Custom UI elements for the event's scroll view. Creating UI Elements for scrollElements: The scrollElements parameter adds custom UI elements to the event description. Each element is a JObject whose properties depend on its type. Common Properties: type (string): "label", "image", "panel", or "button" color (string): HEX color code (e.g., "#FFFFFF") alpha (float): Opacity from 0 to 100 position (JObject): Element position and dimensions Type-Specific Properties: Text Elements: text (JArray of strings), textColor (HEX), fontSize (int), font (string) Image Elements: image (string URL) Button Elements: text, textColor, fontSize, command (string) Panel Elements: cursorEnabled (bool) Example of UI Elements: var customScrollElements = new JArray { // Label example new JObject { ["type"] = "label", ["text"] = new JArray { "Duration: <color=#D74933>10 mins</color>", "Reward: <color=#D74933>100 scrap, Jackhammer, Python Revolver</color>" }, ["textColor"] = "#E2DBD3", ["alpha"] = 100f, ["fontSize"] = 14, ["font"] = "robotocondensed-regular.ttf", ["align"] = "MiddleLeft", ["position"] = new JObject { ["anchorMinX"] = 0f, ["anchorMinY"] = 1f, ["anchorMaxX"] = 1f, ["anchorMaxY"] = 1f, ["offsetMinX"] = 0f, ["offsetMinY"] = -200f, ["offsetMaxX"] = 0f, ["offsetMaxY"] = -140f } }, // Image example new JObject { ["type"] = "image", ["image"] = "https://example.com/image.png", ["color"] = "#FFFFFF", ["alpha"] = 100f, ["position"] = new JObject { ["anchorMinX"] = 0f, ["anchorMinY"] = 1f, ["anchorMaxX"] = 0f, ["anchorMaxY"] = 1f, ["offsetMinX"] = 0f, ["offsetMinY"] = -234f, ["offsetMaxX"] = 42f, ["offsetMaxY"] = -192f } }, // Button example new JObject { ["type"] = "button", ["text"] = "Click Me", ["textColor"] = "#FFFFFF", ["color"] = "#D74933", ["alpha"] = 100f, ["fontSize"] = 14, ["command"] = "customcommand {user}", ["position"] = new JObject { ["anchorMinX"] = 0.5f, ["anchorMinY"] = 0f, ["anchorMaxX"] = 0.5f, ["anchorMaxY"] = 0f, ["offsetMinX"] = -60f, ["offsetMinY"] = 20f, ["offsetMaxX"] = 60f, ["offsetMaxY"] = 50f } } }; Example Usage: MultiEvents.Call("API_RegisterEvent", "CollectionResources", new JObject { ["title"] = "Collection Resources", ["description"] = "Collect resources and compete with other players! The more resources you collect, the higher your score. Use different tools to get multipliers for your gathering. Top players will receive valuable rewards!", ["commandToStart"] = "collectionresources.start", ["commandToStop"] = "collectionresources.stop", ["bannerURL"] = "https://gitlab.com/TheMevent/PluginsStorage/raw/main/Images/MultiEvents/CollectionResources.png", ["icon"] = "https://gitlab.com/TheMevent/PluginsStorage/raw/main/Images/MultiEvents/Icons/CollectionResources.png", ["scrollElements"] = customScrollElements }); (hook) OnEventStart(string eventName): Hook called when an event begins (hook) OnEventEnd(string eventName): Hook called when an event ends bool API_PlayerHideNotify(ulong userId): Lets you hide event notifications for a specific player. Returns true if notifications are hidden for that player. string GetBannerUrlByEventId(string eventId): Returns the banner URL of an event by its ID, for example to show the banner in your own UI. TEST SERVER Join our test server and try all the features yourself! Copy the IP address below to start playing. connect 155.103.86.38:28015 Run the events on your server with MultiEvents and give players a reason to keep coming back.$41.00- 23 comments
- 8 reviews
-
- 3
-

-

-
- #mutlievents
- #events
- (and 15 more)
-
Version 1.0.1
76 downloads
The Figma to Rust UI Export Plugin converts Figma interfaces into UI code for Rust game plugins. Designers and developers can turn their Figma designs into working UI elements for Rust. Guidelines Use Frames, Not Groups Why: Groups with rectangles won't export correctly. Frames with fills give the correct Rust UI hierarchy. How: Always use Frames (Shift + A) for containers. Apply fills directly to the frame (not nested rectangles). Frame Example: Icons: Vector or PNG Only Why: Nested icon frames cause export errors. How: Flatten icons into a single vector shape (Combine paths) or export as PNG. Right-click icon layers → Flatten Selection or export via Export Settings. Parent Naming Conventions Why: Rust requires parent layers to be named Overlay or Hud (case-sensitive). How: Rename root frames in Figma to exactly Overlay or Hud in the Layers panel. Constraints Configuration Why: Defines how elements scale/position in Rust's UI system. Horizontal Constraints: Left/Right/Center: Anchors to screen edges. Scale: Full-width (AnchorMin="0 0" AnchorMax="1 1"). Vertical Constraints: Top/Bottom/Center: Anchors to top/bottom edges. Scale: Full-height (AnchorMin="0 0" AnchorMax="1 1"). Constraints Example: Pro Tips Test constraints in Figma's Prototype mode to preview scaling behavior. Avoid mixed constraints (e.g., Left + Scale) unless intentional. Use Auto Layout for responsive elements (supports padding/spacing). Troubleshooting Export fails? Check for unnamed parents or nested groups. Icons missing? Make sure they're flattened vectors or PNGs. UI misaligned in Rust? Check the constraints and parent names again.$45.00- 1 comment
- 1 review
-
- 10
-
-
-
- #ui exporter
- #figma plugin
- (and 4 more)
-
Version 2.0.264
46,442 downloads
Carbon is a self-updating, lightweight framework for Rust offering the best performance and stability possible. It's backwards compatibility Oxide data files and plugins make it the ultimate replacement for those wanting more from their plugins with less headache and performance overhead. Why use Carbon Carbon manages hooks in memory, instead of having to physically patch server files like Oxide does. This allows you to freely update the server without having to update Carbon, and the convenient fact that a Carbon update is rarely required, even if a new server update is released. It has much better performance thanks to dynamic hooks, which allows Carbon to dynamically load and unload hooks depending on the plugins you're running, instead of having over 800 hooks invoking that aren't being used. In addition to our full-time development team, we're able to hyper-optimize everything to ensure the best performance possible. Switching from Oxide This process is very simple thanks to our backwards compatibility and automatic migration when you boot the server with Carbon for the first time. It automatically copies all of your Oxide user and user data files, plugins, plugin configs, plugin data files, extensions and Harmony patches over to the managed Carbon directory. It's as easy as installing Carbon and letting it work! Automatic migration to Carbon Manual migration to Carbon More Reasons to Switch Carbon is free and will always be free Extremely lightweight Seamless migration from Oxide MySQL and SQLite user permission and data support Built-in modules maintained by the Carbon team to ensure essentials plugins are always ready for the big update Accurate and detailed error logging (No more incorrect stack traces. Find the issue quickly.) Native profiler to quickly identify performance issues with an intuitive in-game interface Plugin metrics to also identify performance issues at a glance that offers detailed print outs of plugin and hook usage Carbon is updated hours in advanced to force updates so you're never worrying if you can update your servers on-time Carbon updates itself when your server boots. No more auto update scripts or manual updates needed! Install, update and configure plugins all from our panel in-game without ever having to touch files again! Carbon offers a staging build that's updated all month to enable you to run modded staging servers and test your plugins well in advance to the big update Documentation Installing Carbon - https://carbonmod.gg/owners/installing-carbon Configuring Carbon - https://carbonmod.gg/owners/configuring-carbon Staging Builds Would you like to run Carbon on staging or aux branches of Rust throughout the month? Our staging and aux branches are always up-to-date, so you can properly test plugins prior to a major update or provide a modded server for players to try out new Rust updates before they're live! Staging - https://github.com/CarbonCommunity/Carbon.Core/releases/tag/rustbeta_staging_build Aux01 - https://github.com/CarbonCommunity/Carbon.Core/releases/tag/rustbeta_aux01_build Aux02 - https://github.com/CarbonCommunity/Carbon.Core/releases/tag/rustbeta_aux02_build Aux03 - https://github.com/CarbonCommunity/Carbon/releases/tag/rustbeta_aux03_build For Developers If you're a developer, you can enjoy all of the latest improvements of C# 10 as well as the ability to add your own methods anywhere in the assembly without being locked down to pre-existing hooks. All of your existing Oxide plugins will be compatible, though we recommend making a Carbon-specific version available to utilize Carbon to its fullest. Check out Creating your First Plugin to get started!Free -

Version 1.0.6
543 downloads
Bright Nights is the plugin every player has been waiting for. Make your nights brighter and actually playable! Enhanced gameplay with brighter nights Customizable night time brightness Smooth transitions between night and day cycles Lightweight high performance plugin Inverted Night (Option) - make nights as bright as day Saves your players from having to eat too many carrots Bright Nights brings exciting new visuals to the game allowing your players to make the most of night time game play. Inverted nights brings a whole new meaning to bright nights. Inverted nights adds a sun to the night cycle to create a daylight like play style, while maintaining a dark skybox. This option can be enabled via the config. /Settime - allows you to set the ingame time (good for testing settings) Args - Hours (24h) example: 7.5 will be 7:30 am or 0 will be midnight - Sunset - goes to sunset time - Sunrise - goes to sunrise time brightnights.admin - Allows use of the /settime command Does bright nights effect rust events ? Bright Nights does not change any of the date time settings for rust so timed events will run as per normal. Can I adjust the brightness? Yes! Brightnights has a config file which allows for the adjustment of brightness and transition settings. Is the plugin hard to set up? Bright nights is a drag and drop plugin, with no additional set up required.$14.99- 20 comments
- 4 reviews
-
- 5
-
-
- #brightnights
- #bright nights
- (and 28 more)
-
Version 1.8.5
6,894 downloads
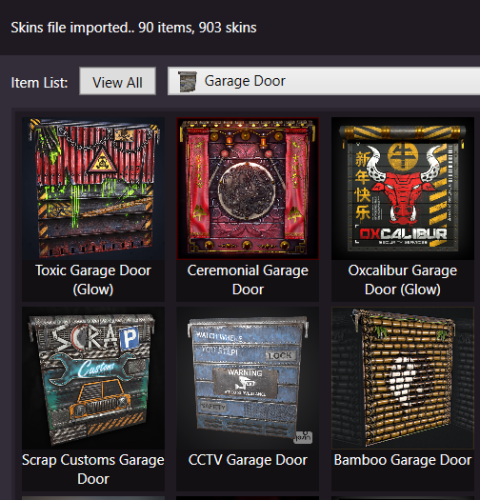
Skins Editor for SkinBox by k1lly0u, Skinner by Whispers88, LSkins by LAGZYA, SkinController by Amino and Skins by misticos. Features Visual editor for skins configured Add workshop skins by url or id (collections supported) Select and bulk delete skins Ability to import from one skin plugin, and export to another How to Download and extract RustSkinsEditorv***.zip Run RustSkinsEditorv***.exe (having trouble running?, make sure you download .NET 9.0) Click Import, pick Plugin you would like to Import (SkinBox, Skinner, Skins), then locate json file you would like to import. Add Skins using workshop link or id, workshop collection supported. When done editing, click Export, pick Plugin you would like to Import (SkinBox, Skinner, Skins). For SkinBox and Skinner, you will get a json code for you to copy and paste in the appropriate config file (This is for avoiding interference with the config properties). Important Disclaimer – Facepunch TOS Update (Effective August 7, 2025) Facepunch has updated its Terms of Service for Servers, effective August 7th, to explicitly prohibit granting any DLC items or paid workshop skins to players who do not own them. As a result: Server owners are fully responsible for ensuring that no market/paid skins are granted to unauthorized players. Violating this policy may result in your server being delisted or banned from the server list. How This Editor Helps This Editor includes features to make compliance easier: Highlights Market Skins so you can easily spot and review them. Delete All Market Skins button to quickly clean up your plugin configuration.Free -
Version 2.3.0
216 downloads
Reward Gifts is a playtime gift reward system that utilizes a UI for delivery and administration for daily gifts. Easy to use, easy to create, add or delete rewards. ** Requires Image Library installed on server. ** Features No AFK Mode, so players can't try and trick the system to claim gifts for playtime, if they are AFK, the clock stops for them till they resume playing. Support for Server Rewards and Economics as gifts that can be added. Reward Gift Icon on the bottom left side of the screen (pre-programmed location) Enabled by default can be disabled in the config file. Data Files for both the Reward Gifts and Player Data Auto Reset timers in Days for players. Default is set to 1 day to reset the player play time. 90% Complete Customization of the UI Interface Theme thru the config file. Complete UI Reward Gift Claim Menu System. Once a player has played during a set amount of time, that defined reward gift can be claimed. Complete UI Admin Creation Tool for adding or removing reward gifts thru the UI System. Ability for Admins/Owners to add their own Logo to the Top of the UI System for more complete Customization feel. Option to have Sound Effect on redeeming rewards Option to have popup notification on redeeming rewards Commands /gifts - Chat command to call the Reward Gifts System Claim Menu (If enabled Gift Icon Button will do the same) /giftswipe - For admins only, this will wipe and reset all player data Permissions rewardgifts.admin - For admins to be able to administrate the Rewards rewardgifts.vip - If you want to allow VIP reward gifts as well, players will need a VIP permission in order to claim special VIP Gifts Configuration Thru the config file admin can almost completely customize the look and feel for coloring the theme of the system itself. Localization$15.00 -
Version 1.0.9
39 downloads
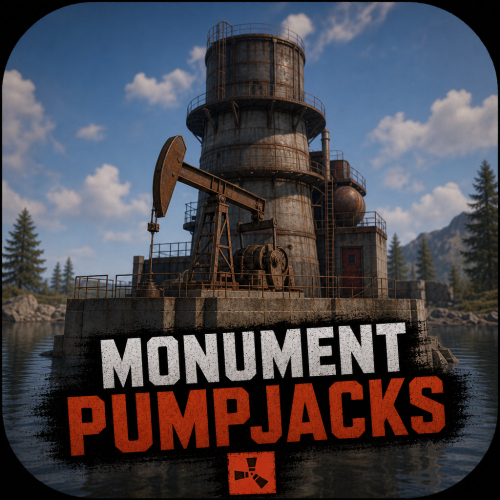
You can now find public Pump Jacks at almost ALL the Large Monuments NOW! Features Ability to enable/disable at the Monuments listed below Change rotation of each pumpjack Change position/location of where the pumpjack is located. (All are preset to a effective location already but you can still change it if you wish to) Instant placement Adjust the height of each pumpjack These include the following locations: Airfield Launch Site Small and Large Harbors Military Tunnels Satellite Dish The Dome Sewer Branch The Junk Yard Missile Silo Ferry Terminal FAIR WARNING: Do not leave your goods in the Pump Jacks! If you are running one of these and the server restarts, those items are gone. Configuration$5.00 -

Version 2.1.1
57 downloads
Enhance your Rust server with the Vehicle Registration plugin, designed to bring a realistic and organized vehicle management system to your gameplay. This plugin allows players to register their vehicles and manage their registration details seamlessly. Ideal for role-playing servers or any server looking to add depth to their vehicle interactions. Features Players can register their vehicles, providing necessary details like owner name, registration number, date of birth, and expiration date. Permission-Based Access vehicleregistration.dealer: Allows players to register vehicles. vehicleregistration.police: Allows players to view vehicle registration details and fines/cases. Data Management: Store car registration data and associated notes. Load and save data efficiently to ensure information persistence across server restarts. Chat Commands: /vre /vresearch (For Police Only) Manage Registration Fine: Add fine to vehicle registrations to keep track of important details or incidents related to the vehicle. Installation: Download the Vehicle Registration plugin. Place the plugin file in your server’s oxide/plugins or carbon/plugins directory. Reload the server or use the appropriate command to load the plugin. Config: "Main Command": "vre", "Search Command": "vresearch", "Enable Logging": true, "Messages": { "Invalid Data": "Please fill out all fields correctly.", "Invalid Date of Birth": "The Date of Birth entered is not a valid date.", "Invalid Expiration Date": "The Expiration Date entered is not a valid date.", "Must Be Looking At Vehicle": "You must be looking at a vehicle to use this command.", "Registration Success": "Vehicle registered successfully. \n <color=#00FF00>Registration Number:{0}", "Edit Success": "Registration details updated successfully.", "Add Fine Success": "Fine added successfully to Registration Number: {0}", "Edit Fine Success": "Case number {0} edited successfully for Registration Number: {1}", "Delete Case Success": "Case number {0} deleted successfully for Registration Number: {1}", "Mounted Unregistered Vehicle": "<color=#FF0000>Unknown Vehicle Number Plate.", "Mounted Registered Vehicle": "<color=#00FF00>Vehicle Number Plate: {0}", "No Search Results": "No registrations found matching that query." Support: For any issues or support, please visit my support page or contact us through the server’s community channels. Bring order and realism to your server’s vehicle management with the Vehicle Registration plugin!$15.00 -

Version 1.2.0
919 downloads
*CROSSED OUT TEXT IS FOR PREMIUM VERSION* Auto Ban / Report Ban – Free Edition AutoBan Enhanced is the ultimate plugin for Rust server administrators who want to keep their community safe, fair, and fun. This premium edition builds on the original AutoBan system with new advanced moderation tools, smarter automation, and seamless integrations with Discord. Key Features Automatic Weighted Banning Players are automatically banned once they reach a configurable number of weighted reports. Trusted players, moderators, or admins can have higher report weights for faster action. Mass Reporting Protection Includes cooldowns, per-hour limits, and unique report tracking to prevent abuse of the reporting system. Full F7 Integration Captures and processes in-game reports (F7), with optional keyword scanning for valid reasons. Player-Friendly Reporting System Players can submit reports via chat commands or a guided reason menu for consistency. Customizable Ban Durations Supports human-readable ban times like 30m, 4h, 7d, or permanent. Ban History & Report Logs New commands to view report history and a structured audit log of admin actions. Progressive Punishments (optional) Configure warnings, mutes, or bans at different thresholds. Discord Integration with Embeds Sends clean, embedded messages for reports and bans, including player info, reasons, timestamps, and expiration. Ignored Players & Permissions Protect admins and whitelisted users from automated bans. Export & Data Storage Export reports to JSON for external review or backups. Granular Permissions Fine-grained control over who can report, view, ban, unban, reset, or audit. Usage: Chat Commands /report <username> – start a report (shows menu if no reason given). /report <username> <reason> – report with reason directly. /reportreason <number> – pick a reason from the menu. /AB.viewreports – view all current reports (requires permission). /AB.history <userid> – view detailed history of a player’s reports. /AB.auditlog [N] – view last N admin/audit actions. /AB.showbans – view all bans. /AB.unban <userid> – unban a player. /AB.resetreports <userid> – reset reports for a player. /AB.exportreports – export reports to a JSON datastore. 🛠 Console Commands AB.getreports – list all reports in console. AB.getbans – list all bans in console. AB.resetreportsConsole <userid> – reset reports via console. AB.ban <userid> <reason> – manually ban a player. AB.unban <userid> – manually unban a player. Oxide / Carbon Permissions AutoBan.report – allow reporting via F7. AutoBan.chatreport – allow reporting via chat. AutoBan.viewreports – view all reports. AutoBan.ignore – player immune to auto-bans. AutoBan.ban – manually ban players. AutoBan.unban – manually unban players. AutoBan.viewbans – view all bans. AutoBan.resetreports – reset player reports. AutoBan.trusted – weighted reporter (e.g., counts x2). AutoBan.mod – stronger weighted reporter (e.g., counts x3). Example Config { "Max reports till user gets banned (weighted)": 5, "Reason given to banned user": "You have been reported too many times and have been banned for precautionary measures. An admin will review this suspension soon.", "Valid reasons": ["cheating", "aimbot", "hacking", "esp", "teaming", "racism", "griefing", "walling", "doorcamping", "spawn killing"], "Valid report types": ["cheat", "abusive", "name", "spam"], "Scan type of F7 reports": true, "Broadcast ban to chat": true, "Ignored Players": { "76561198000000000": "Admin" }, "Timer for broadcasting bans to admins and console": 820, "Send bans to users with the AutoBan.viewbans permission": false, "Send reports to URL": false, "URL to send reports to": "http://example.com", "Send reports to Discord": true, "Send bans to Discord": true, "Discord Reports Webhook URL": "http://example.com/reports", "Discord Bans Webhook URL": "http://example.com/bans", "Ban Duration": "72h", "Max reports a player can submit per hour": 3, "Max reports a player can receive per hour": 5, "Cooldown between reports from the same player in minutes": 10, "Weighted report permissions": { "AutoBan.trusted": 2,"AutoBan.mod": 3 }, "Use Discord embeds for webhooks": true, "Max lines per chat response to avoid spam": 8 } With AutoBan Enhanced, you get automated moderation, better transparency, and flexible punishment systems, freeing up admins to focus on building community instead of fighting cheaters.Free -

Version 1.0.2
6 downloads
A clean, lightweight MMORPG-style HUD for Rust, showing: Player Avatar pulled from steamid , player name , server name loaded automatically from server config Online players & sleepers Position grid In-game economy balance ( ServerRewards / Economics ) Local + Server Time Standard Rust Events ( Cargo / CH47 / Patrol Helicopter / Bradley ) Custom Events Sputnik, Caravan, Shipwreck, Space Event, Water Event, Gas Station, Arctic Base, Supermarket, Satellite Dish, Ferry Terminal, Power Plant, Harbor, Air Event, Junkyard, Convoy, Armored Train Fully configurable, with smart UI updates that avoid lag and UI flicker. Dependencies : ImageLibrary (for Steam avatars) Recommended (optional): ServerRewards Economics Sputnik Caravan Shipwreck Space Event Water Event Gas Station Arctic Base Supermarket Satellite Dish Ferry Terminal Power Plant Harbor Air Event Junkyard Convoy Armored Train Jet Event Cargo Plane Crash Event Airfield Event Permissions : oxide.grant group default mmorpghud.use oxide.grant group admin mmorpghud.admin - Admin Panel access Chat Command : /hud - Toggle HUD on/off /timezone - View/set local timezone /timezone auto - Auto-detect timezone from IP /hudadmin - Allows access to the admin configuration panel. Config : { "Update Interval (seconds)": 5.0, "Colors": { "Panel Background": "#0d0d12F0", "Panel Border": "#00ffff60", "Neon Cyan": "#00ffffFF", "Neon Magenta": "#ff00ffFF", "Neon Green": "#00ff00FF", "Neon Yellow": "#ffff00FF", "Text White": "#ffffffFF", "Text Gray": "#888888FF", "Event Active": "#00ff00FF", "Event Inactive": "#444444FF" }, "Features": { "Show Avatar": true, "Show Players": true, "Show Sleepers": true, "Show Local Time": true, "Show Server Time": true, "Show Location": true, "Show Economy": true, "Show Events": true, "Economy Label": "COINS" }, "Position": { "Anchor (TopLeft, TopRight, BottomLeft, BottomRight)": "TopLeft", "Offset X (pixels from anchor)": 5.0, "Offset Y (pixels from anchor)": 5.0, "Panel Width": 305.0 }, "Events": { "Airdrop": true, "Patrol Helicopter": true, "Cargo Ship": true, "Bradley APC": true, "Chinook (CH47)": true, "Sputnik": false, "Caravan": false, "Shipwreck": false, "Space Event": false, "Water Event": false, "Gas Station": false, "Arctic Base": false, "Supermarket": false, "Satellite Dish": false, "Ferry Terminal": false, "Power Plant": false, "Harbor": false, "Air Event": false, "Junkyard": false, "Convoy": false, "Armored Train": false, "Airfield Event": false, "Cargo Plane Crash": false, "Jet Event": false }, "Economy Plugin (ServerRewards or Economics)": "ServerRewards", "Admin Panel Colors": { "Panel Background": "#0d0d12F5", "Panel Border": "#00ffff60", "Button": "#1a1a2eFF", "Button Active": "#00ffffFF", "Toggle On": "#00ff00FF", "Toggle Off": "#ff0000FF" } }$15.00-
- 1
-
-
- #info panel rust
- #rust hud
- (and 5 more)
-
Version 1.1.1
463 downloads
Auto Sign Moderation is an AI based moderation plugin to automatically handle moderation of all signs and images in rust. Automatically hide, remove and log signs on your server Free Moderation mode - Basic AI moderation completely free Advance Moderation mode - Custom AI instructions to moderate content Discord logging of moderated signs Batch mode - Send images in batches for better performance and less cost Auto Sign Moderation has an optional loading image for when an image is pending approval and a Discord logging mode, where moderated content is logged to discord. autosignmoderation.whitelist - bypass sign checks There are two main moderation modes. The first is the moderation API, which is a free API endpoint of Open AI. This model has limited options for what it can moderate generally speaking it works best for sexual and violent type content. The Advance Moderation API uses the gpt-4o-mini model. This is a paid model, where each request will cost the end user. This plugin has been designed in a way to reduce costs of using the paid model, dependant on image size the cost per image is close to $0.15 per 100 images checked (more about this in the FAQ). { "Image Size 25 - 100%": 50.0, "Image Quality 25 - 100%": 75.0, "Sign Update Cooldown (seconds)": 5.0, "Player Moderated Cooldown (seconds)": 300.0, "Hide signs while being checked": true, "Use Temp Loading Image": false, "Temp Loading Image URL:": "https://i.postimg.cc/4NNrqT2x/pngegg-2.png", "Logging Mode Only": false, "Send Player Chat Warnings": false, "Batch Mode - Disables hiding of signs": { "Check images in batches (Advance Mode Only)": true, "Batch Image Check Rate (Minutes)": 15.0, "Minimum images to batch check": 3.0, "Max checks to bypass minimum images 0 = no bypass": 4.0 }, "Discord Settings": { "Log to Discord": false, "Log moderated Images to Discord (WARNING THIS MAY SEND NSFW CONTENT TO YOUR DISCORD)": false, "Discord Webhook": "https://support.discord.com/hc/en-us/articles/228383668-Intro-to-Webhooks", "Discord Username": "Sign Moderator", "Server Name": "", "Avatar URL": "https://i.ibb.co/sQ10728/Loading-Pls-Wait2.png" }, "Moderation API (Free) - Limited Options": { "Enable": true, "Open AI Token": "https://openai.com/index/openai-api/", "Cooldown between API Checks (seconds)": 1.0, "Block images of harassment": true, "Block images of harassment/threatening": true, "Block images of sexual": true, "Block images of hate": true, "Block images of hate/threatening": true, "Block images of illicit": true, "Block images of illicit/violent": true, "Block images of self-harm/intent": true, "Block images of self-harm/instructions": true, "Block images of self-harm": true, "Block images of sexual/minors": true, "Block images of violence": true, "Block images of violence/graphic": true }, "Advance Moderation API (Paid)": { "Enable GPT Model (WARNING THIS IS PAID PLEASE READ DOCS)": false, "Open AI Token": "https://openai.com/index/openai-api/", "Cooldown between API Checks (seconds)": 1.0, "Model (Don't change this if you dont know what it is)": "gpt-4o-mini", "Content to moderate": "Pornography, Hate Speech, Child Exploitation, Racist images signs text or symbols, Words like nigger, symbols which resemble swastikas" } } FAQ: Whats the difference between the paid model vs the free one? The paid model allows for complete customization of content to be moderated and it has text recognition. Meaning it is extreamly useful for symbols and hate text. What are the settings to make checks cheapest? Batch mode, will send multiple images within the same batch. This effectively reduces the default cost by about half once you send images in batches of 3 or more. Reducing the image size and resolution also assists in reducing the cost. Be mindful that if your quality reduction setting is too high the AI model may struggle moderating fine detailed content. Keeping your content to moderate prompt simple and straight forward is important as well. If the query becomes extreamly long or complex it may cost more. How do I set up an OpenAPI Token? First sign up to OpenAPI if you dont have an account: https://platform.openai.com/signup Set up an organisation this can be called anything https://platform.openai.com/settings/organization/general Create a project https://platform.openai.com/settings/organization/projects Create an API key in your organisation under the just created project https://platform.openai.com/api-keys If you wish to use the paid model there are two more steps Set your usage limits for your organisation start with a low amount for testing such as $10 https://platform.openai.com/settings/organization/limits Add credit to your account https://platform.openai.com/settings/organization/billing/overview. Its best to just add a small amount of credit such as $10 and then top up later. Where do i monitior API usuage? You can monitor usage here: https://platform.openai.com/settings/organization/usageFree- 7 comments
- 1 review
-
- 6
-
-
-
- #auto sign moderation
- #autosignmoderation
- (and 21 more)
-
Version 1.0.4
17 downloads
This is a plugin I had created based off a suggestion, its a basic plugin that handles players that are banned in a way to save time for admins. This plugin is super configurable, and will allow it to take full effect on banned players that maybe were cheating and had friends enjoying their loot. Features: Change all codes within TC of banned player Destroy all beds/sleeping bags within TC of banned player Clear everyone's privilege on TC of banned player Kill banned player and remove items from body Kill banned player and everyone auth'd on TC, will also remove all items on players Remove containers from dropping items in a stash Remove all containers, it will physically delete these objects (Campfires, Furnaces, Boxes, Fridges, etc) Remove all building blocks (Foundations, Walls, Doorways, Ceilings, etc) Configuration: { "Run lockup if player on team": false, // If true, when player is banned all these actions will happen. If false, player will be banned but options wont be ran. "Change all codes within the TC": true, "Clear everyone on the privlidge list": true, "Destroy all beds and bags within TC": true, "Kill banned player and destroy there stash": false, "Kill all players auth'd and destroy there stash": true, "Remove containers dropping items": true, "Remove all containters (Campfires, Furnaces, Storage, and Machines)": true, "Remove all building blocks within tool cupboard range": false }$10.00