Search the Community
Showing results for tags 'items'.
-
Version 1.0.3
382 downloads
The Ultimate Expansion for Skill Tree Progression Skill Tree Items: Pro is a powerful DLC plugin for the Skill Tree system that breathes new life into your server's loot tables. Instead of players just earning XP through grinding, they can now discover unique, consumable items that boost their progression, provide instant rewards, or grant temporary buffs directly from Skill Tree. Whether it’s a rare XP injection found on a Scientist or a biome-specific gathering boost hidden in an Arctic crate, this plugin adds a layer of excitement and strategy to every lootable object on your map. Advanced Consumable Types This plugin introduces four distinct item categories, each fully customizable to fit your server's economy: XP Boosters: Provide temporary XP multipliers. Go granular with filters for specific gather types, time-of-day restrictions (e.g., "Night Owl" boosts), or biome-specific requirements. XP Injections: Instant gratification. Set up various "vials" or "manuals" that grant a flat or randomized range of XP upon consumption. SP Injections: Extremely rare rewards that grant Skill Points directly, bypass the grind, and give players a reason to hunt for high-tier loot. Temporary Buffs: Grant any buff from the Skill Tree—including Ultimates—for a limited time. These stack with existing skills, allowing players to feel the power of high-level perks early on. Dynamic Loot Distribution The core of Skill Tree Items: Pro is its highly sophisticated loot engine. You aren't limited to just crates and barrels; you can inject these items into almost every interaction in Rust. See a comprehensive list of supported LootSources below. Granular Configuration For the power users, the LootProfile system allows for surgical precision. You don't just set "Crates"; you can target specific prefab names, specific NPC profiles, or even the tier of a Raidable Base. Key Profile Features: Identifier System: Target specific entities (e.g., only "Elite" crates or a specific Boss from BossMonster). Skin ID Filtering: Require specific skin IDs for the source to trigger. Blacklisting: Exclude specific items or entities from dropping loot. Modifier Integration: Toggle whether player "ItemPerk" modifiers should influence the drop rates. Weight-Based Tables: Use a weighted dictionary system to determine exactly which items drop and how often. Command: stip.give <target> <profile> Tyoe: Console Permission required: skilltreeitemspro.admin Action: Gives the target player the specified item. Command: stip.giveall Tyoe: Chat Permission required: skilltreeitemspro.admin Action: Gives the user all items in the config. Command: stip.moveicon Tyoe: Chat Permission required: skilltreeitemspro.admin Action: Moves the active boost icon for all players. This is a comprehensive list of loot sources that can be used to setup loot profiles. Crate: Triggered when a player opens a crate for the first time. Barrel: Triggered when a player breaks a barrel. BossMonster: Triggered when a boss monster is killed by a player. Event: Triggered when an event is completed (Convoy, SurvivalArena, Armored train, Powerplant etc). ScientistNPC: Triggered when a scientist NPC is killed. HumanNPC: Triggered when a human npc, such as a tunner dweller, is killed. BetterNPC: Triggered when a NpcSpawn npc is killed. Woodcutting: Triggered when a tree is fully cut down. Mining: Triggered when a node is fully mined out. Skinning: Triggered when an animal is fully skinned. Foraging: Triggered when the player collects a map collectible (hemp, pumpkins, diesel barrels etc). Farming: Triggered when the player collects a player-grown collectible. Fishing: Triggered when the player catches a fish. Crafting: Triggered when an item is successfully crated. BotReSpawn: Triggered when an BotReSpawn npc is killed. NpcRaider: Triggered when an npc from NpcRaider is killed. RaidableBase: Triggered when a Raidable Base is spawned. The effect types dictate how the item will behave. You can have any number of effect types attached to an item. For example, you can create an item that gives the player 1000xp with the XPInjection type, gives them a temporary boost with the XPBoost type, and gives them access to the Raiding Ultimate from Skill Tree with the TemporaryBuff type. XPInjection: Provides the player with an injection of xp when consumed. SPInjection: Provides the player with an injection of skill points when consumed. TemporaryBuff: Provides the player with temporary access to any Skill Tree buff (including ultimates). XPBoost: Provides the player with a temporary xp boost when consumed. XP Source can be set so only the specified xp source provides the bonus. Timeframe can be set, so the player can only get xp during the specified time of day (ie 6pm to 6pm etc). Multiple Biomes can be added to restrict the xp bonus to sources inside of those biome types (ie a player can only gain xp while in the Arctic or Jungle). Biomes: Any, Arid, Temperate, Tundra, Arctic, Jungle. Here is a list of Skill Tree XP Sources that can be used with the XPBoost effect. All NodeHit NodeHitFinal TreeHit TreeHitFinal SkinHit SkinHitFinal CollectWildPlant CollectGrownPlant BuildingBlockDeployed FishCaught CatchOrangeRoughy CatchSalmon CatchSmallShark CatchSmallTrout CatchYellowPerch CatchAnchovy CatchHerring CatchSardine CatchTrash Crafting ScientistNormal TunnelDweller UnderwaterDweller ScientistHeavy SmallAnimal MediumAnimal LargeAnimal RoadSign Barrel Scarecrow Mission BradleyAPC LootHackedCrate LootHeliCrate LootBradleyCrate CookingMealXP RaidableBaseCompletion_Easy RaidableBaseCompletion_Medium RaidableBaseCompletion_Hard RaidableBaseCompletion_Expert RaidableBaseCompletion_Nightmare Win_HungerGames Win_ScubaArena Win_Skirmish Gut_Fish default_botrespawn crate_basic crate_elite crate_mine crate_normal crate_normal_2 crate_normal_2_food crate_normal_2_medical crate_tools crate_underwater_advanced crate_underwater_basic crate_ammunition crate_food_1 crate_food_2 crate_fuel crate_medical supply_drop detect_diggable Harbor_Event_Winner Junkyard_Event_Winner PowerPlant_Event_Winner Satellite_Event_Winner Water_Event_Winner Air_Event_Winner Armored_Train_Winner Convoy_Winner SurvivalArena_Winner swipe_card_level_1 swipe_card_level_2 swipe_card_level_3 boss_monster Zombie Raider JetPilot ArcticBaseEvent_Winner GasStationEvent_Winner SputnikEvent_Winner ShipWreckEvent_Winner Triangulation_Winner Caravan_Winner SupermarketEvent_Winner GingerbreadNPC PVP AutoTurret You can get a list of Skill Tree Buffs from the Skill Tree plugin page.$11.99- 20 comments
- 1 review
-
- 2
-

-

-
- #skilltree
- #skill
- (and 10 more)
-
Version 1.4.7
5,096 downloads
Manage your Rust server easier and more efficiently with the AdminMenu plugin. Track players, interact with them, edit their data and permissions, as well as change server convars and manage plugins. Features: Menu retains its state after closing, you won't lose everything you did before. Ability to fully translate the menu into any language. Large range of permissions for each action, will allow you to flexibly customize the admin menu for each group of administrators. Quick menu that allows you to perform quick actions Full list of players with the ability to filter by online, offline, admins and moderators. Also has a frame of different colors depending on the level of authorization. Wide range of information and actions for the selected player. Editing convars with search. Has a complete list of editable convars with descriptions for some of them. Extensive issue menu by category, with easy management of name, skin and amount (manual, +1, +100, +1000, +10000). Plugin management menu. It is possible to reload, unload or load a plugin easily and quickly. Updates occur in real time. Ability to create your own custom buttons that execute several commands Quick Start: You install the plugin in the plugins folder. Give yourself the adminmenu.fullaccess permission. Commands, use one of your choice, one for the player and one for the admin group: o.grant user [name or steamid] adminmenu.fullaccess o.grant group admin adminmenu.fullaccess Press the X button (swap seat button) or type adminmenu in the console. Enjoy Useful stuff: You can quickly open a player in the admin menu. To do this, point at the player and press X. You don't have to hover over the player exactly, you will be able to open players within a certain radius of the place you are looking at. CUSTOM BUTTONS Custom buttons are buttons that when pressed will execute commands on behalf of the administrator, commands can be several, below will be the details. At the moment, custom buttons can be created in two places: in the quick menu and in the menu when selecting a player. These places are separated in the config. Button Fields: "Execution as server" - Call the command on behalf of the server, not the administrator "Label" - Text that will be on the button, for each such inscription creates a field in the lang file, accordingly you can translate this text into several languages. "Commands" - Array of commands that will be executed on behalf of the administrator. Chat commands require a special entry, see examples. "Permission"- permission to display and use the button. You need to write the permission that will be after "adminmenu.". Example: if you enter the permission "test" the permission will be adminmenu.test "Position" - The location for the button, the first number is responsible for the row number, the second for the position within the row, starts from 0.There are limits of locations, if you have gone beyond the limit - the button will not be displayed. Common Tags: {adminUID} - administrator's id. {position} - administrator coordinates (underfoot) {view_position} - the position where the administrator is looking (can be used for spawning or something similar) {view_direction_forward} - forward view direction of the administrator {view_direction_backward} - the direction the administrator is looking backwards {view_direction_left} - direction of the administrator’s view to the left {view_direction_right} - administrator’s view direction to the right Tags for target only: {steamid}, {steamID}, {userID}, {STEAMID}, {USERID} - mean the same thing, namely the id of the selected player. {target_position} - target coordinates (underfoot) Example of commands: chat.say \"/{chat command}\" vanish ban {steamID} teleport {steamID} {adminUID} More information about the grant menu: The grant menu includes the full list of items including hidden items as well as custom items created by the CustomItemDefinitions library. The menu can be accessed from the navigation or from the menu of the selected player. When issuing itself has categories. Search works in any registry by any part of the name or short name. Has a page system at any stage. More information about the buttons in the Quick Menu: [Teleport to 0 0 0] - Teleport to coordinates 0 0 0. Requires adminmenu.quickmenu.teleportto000 permission [Teleport to Deathpoint] - Teleport to your deathpoint. Requires adminmenu.quickmenu.teleporttodeath permission [Teleport to Spawn point] - Teleport to a random spawn point. Requires adminmenu.quickmenu.teleporttospawnpoint permission [Kill Self] - Kill Self, kills even when immortal. Does not require permission. [Heal Self] - Fully heal yourself. Requires adminmenu.quickmenu.healself permission [Call Heli] - Call Helicopter to yourself (arrives in time). Requires adminmenu.quickmenu.helicall permission [Spawn Bradley] - Spawn bradley on yourself. Requires adminmenu.quickmenu.spawnbradley permission More information about the buttons in the menu of the selected player: [Teleport Self To] - Teleport yourself to the selected player. Requires adminmenu.userinfo.teleportselfto permission [Teleport To Self] - Teleport the selected player to yourself. Requires adminmenu.userinfo.teleporttoself permission [Teleport To Auth] - Teleportation to random authorization (TC). Requires adminmenu.userinfo.teleporttoauth permission [Teleport to Deathpoint] - Teleportation to a player's deathpoint. Requires adminmenu.userinfo.teleporttodeath permission [Heal] - Full healing, including metabolism. Requires adminmenu.userinfo.fullheal permission [Heal 50%] - Half healing. Requires adminmenu.userinfo.halfheal permission. [View Inventory] - View and edit player's inventory. Requires adminmenu.userinfo.viewinv permission [Strip Inventory] - Clear player's inventory. Requires adminmenu.userinfo.stripinventory permission [Unlock Blueprints] - Unlock all Blueprints. Requires adminmenu.userinfo.unlockblueprints permission [Revoke Blueprints] - Reset all Blueprints. Requires adminmenu.userinfo.revokeblueprints permission. [Kill] - Kill a player. Requires adminmenu.userinfo.kill permission [Kick] - Kick a player. Requires adminmenu.userinfo.kick permission [Ban] - Ban a player. Requires adminmenu.userinfo.ban permission More information about the buttons in the menu of the selected group: [Remove Group] - Remove group, has confirmation. Requires adminmenu.groupinfo.removegroup permission [Clone Group] - Clone group with the ability to copy users. Requires adminmenu.groupinfo.clonegroup permission Permissions: adminmenu.use - Ability to use admin menu with basic set. Open tab quick menu (each button has its own permission, without permissions is present only kill yourself button) and the list of players. adminmenu.fullaccess - Full access to all functions without the need for each permission, includes also adminmenu.use. It is recommended to give only to the main administrators. adminmenu.quickmenu.teleportto000 - Access to the button in the quick menu, teleportation to coordinates 0 0 0 0. adminmenu.quickmenu.teleporttodeath - Access to the button in the quick menu, teleportation to the point of your death. adminmenu.quickmenu.teleporttospawnpoint - Access to the button in the quick menu, teleportation to a random spawn point. adminmenu.quickmenu.healself - Access button in quickmenu, heal yourself completely. adminmenu.quickmenu.helicall - Access to the button in the quick menu, call a helicopter to yourself (arrives in time). adminmenu.quickmenu.spawnbradley - Access button in quickmenu, spawn bradley. adminmenu.userinfo.teleportselfto - Access to the button in the menu of the selected player, teleportation to the selected player. adminmenu.userinfo.teleporttoself - Access to the button in the menu of the selected player, teleport the selected player to himself. adminmenu.userinfo.teleporttoauth - Access to the button in the menu of the selected player, teleportation to random authorization (TC). adminmenu.userinfo.teleporttodeath - Access to the button in the menu of the selected player, teleportation to the place of death of the player. adminmenu.userinfo.fullheal - Access to the button in the menu of the selected player, full healing, including metabolism. adminmenu.userinfo.halfheal - Access to the button in the menu of the selected player, half healing. adminmenu.userinfo.viewinv - Access to the button in the selected player's menu, view and edit the player's inventory. adminmenu.userinfo.stripinventory - Access to the button in the menu of the selected player, clear the player's inventory. adminmenu.userinfo.unlockblueprints - Access the button in the menu of the selected player, unlock all drafts. adminmenu.userinfo.revokeblueprints - Access to the button in the menu of the selected player, reset all drafts. adminmenu.userinfo.kill - Access the button in the selected player's menu to kill the player. adminmenu.userinfo.kick - Access the button in the selected player's menu to kick the player. adminmenu.userinfo.ban - Access to the button in the menu of the selected player, ban the player. adminmenu.groupinfo.removegroup - Access to the button in the menu of the selected group, the ability to remove the group. adminmenu.groupinfo.clonegroup - Access to the button in the menu of the selected group, the ability to clone the group. adminmenu.convars - View and edit convars. adminmenu.permissionmanager - View and edit permissions in groups, player groups, create, delete and clone groups (requires additional permissions from these buttons). adminmenu.pluginmanager - Access to plugin management, reloading, unloading, loading plugins. adminmenu.give - Access to give resources, as well as yourself and the selected player.$30.00 -

Version 1.0.32
2,661 downloads
Item Perks is a plugin that enhances everyday weapons, tools and armour with over 50 different types of perks. Items with perks can be obtained a variety of ways, including: Finding them randomly in crates or barrels during your morning scrap farm. Randomly crafting an enhanced version of your equipment while you roof camp noobs from your base. Recycling enhanced equipment and finding enhancement kits stuck in the teeth of the recycler. Using a console or chat command that can be ran through seedy plugin traders like GUIShop. The plugin gives a large amount of control to server owners when it comes to implementation. You can: Enable/disable perks, or modify the minimum and maximum values that they roll when applied to gear. Blacklist or whitelist items to each perk, so they will be exclusively excluded or included (based on the list you choose). Adjust the weight of each perk, so it is more or less likely to be seen on gear., or adjust the chances amount of perks that items can potentially have. Fully adjust or disable the chance for item drops to be found, or enable the enhancement kit system so players can recycle gear. So much more (watch the configuration section of the video below to see the full extent). There are over 50 perks included with the plugin. The following list will describe briefly what each perk does. Name: Prospector Description: This perk increases your mining yield when mining stone, metal and sulfur nodes. Name: Lumberjack Description: This perk increases your woodcutting yield when chopping living or dead trees. Name: Butcher Description: This perk increases the resources gained from skinning humans and animals. Name: Horticulture Description: This perk increases the amount of resources gained when harvesting grown plants. Name: Forager Description: This perk increases the amount of resources gained when picking up map generated collectibles. Name: Angler Description: This perk increases the amount of fish you receive upon a successful catch. Name: BeastBane Description: This perk increases the damage dealt to animals. Name: ScientistBane Description: This perk increases the damage dealt to scientists. Name: FlakJacket Description: This perk reduces the damage received from explosions. Name: Elemental Description: This perk reduces damage from received from cold and heat sources. Name: Scavenger Description: This perk provides you with a chance to find additional scrap from crates and barrels. Name: Manufacture Description: This perk increases the speed of your crafting. Name: Durable Description: This peark reduces the durability damage of all equipped items. Name: BeastWard Description: This perk reduces the damage received from animals. Name: ScientistWard Description: This perk reduces the damage received from scientists. Name: Builder Description: This perk provides you with a chance for your building upgrades to be free. Name: Thrifty Description: This perk provides you with a chance for your crafting components to be refunded upon a successful craft. Name: Fabricate Description: This perk provides you with a chance to duplicate an item upon a successful craft. Name: Pharmaceutical Description: This perk increases the amount of healing received from all sources. Name: MeleeWard Description: This perk reduces the damage received from melee weapons. Name: Academic Description: This perk provides you with a chance to receive a scrap refund when researching an item at the research bench. Name: FallDamage Description: This perk reduces the impact damage received from falling. Name: Lead Description: This perk reduces the damage from radiation. Name: Smasher Description: This perk will provide you with a chance to instantly destroy barrels with any amount of damage. Name: Environmentalist Description: This perk will increase the speed of recyclers that you activate. Name: Smelter Description: This perk will increase the smelting speed of furnaces you activate. Name: Paramedic Description: This perk provides players that you revive with additional health. Name: Prepper Description: This perk provides you with a chance to not consume food when eating. Name: Regeneration Description: This perk will passively regenerate you. Name: SharkWard Description: This perk will reduce the amount of damage received from sharks. Name: SharkBane Description: This perk will increase the amount of damage dealt to sharks. Name: Deforest Description: This perk provides you with a chance to cut down nearby trees when successfully cutting a tree down. Name: BlastMine Description: This perk provides you with a chance to mine out nearby nodes when successfully mining out a node. Name: Tanner Description: This perk provides you with a chance to skin nearby corpses when successfully skinning out a corpse. Name: Vampiric Description: This perk will heal you for a percentage of the damage dealt to certain enemies. Name: Reinforced Description: This perk will reduce the the amount of damage that your vehicles receive when mounted. Name: ComponentLuck Description: This perk will provide you with a chance to receive additional components when looting barrels and crates. Name: ElectronicsLuck Description: This perk will provide you with a chance to receive additional electronics when looting barrels and crates. Name: UncannyDodge Description: This perk provides you with a chance to dodge incoming damage, reducing it to 0. Name: LineStrength Description: This perk increases the tensile strength of your fishing line. Name: HealShare Description: This perk will share healing effects with nearby players. Name: Attractive Description: This perk will provide you with a chance to automatically pick up components when destroying barrels. Name: WoodcuttingLuck Description: This perk provides you with a chance to find a random item when you cut down a tree. Name: MiningLuck Description: This perk provides you with a chance to find a random item when you mine out a node. Name: SkinningLuck Description: This perk provides you with a chance to find a random item when you skin out a corpse. Name: FishingLuck Description: This perk provides you with a chance to find a random item when you catch a fish. Name: Sated Description: This perk will increase the amount of calories and hydration you receive from food and water sources. Name: IronStomach Description: This perk provides you with a chance to negate negative effects when consuming food. Name: TreePlanter Description: This perk will provide a chance for a tree to instantly regrow when cut down. Name: RockCycler Description: This perk will provide a chance for a node to instantly respawn when mined out. Name: BradleyDamage Description: This perk increases the damage dealt to Bradley Tanks. Name: HeliDamage Description: This perk increases the damage dealt to Patrol Helicopters. Name: Thorns Description: This perk reflects a % of the damage done back to the attacker Command: ipgive Type: console/chat Parameters: <target ID/Name> <optional: shortname> <optional: perks> Description: Gives the target player an enhanced item. If shortname is specified, it will base the enhancement off of that item. If perks are specified, it will add only those perks to the item. Command: ipgivekit Type: console/chat Parameters: <target ID/Name> <perk> Description: Gives an enhancement kit to the target. itemperks.use - Required to receive any benefit from enhanced items. itemperks.loot - Required to loot enhanced items from crates and barrels. itemperks.craft - Required for a chance to received enhanced versions of crafted gear. itemperks.admin - Required to use admin commands. itemperks.enhance - Required to add enhancement kits to items via the workbench. itemperks.recycle - Required to receive enhancement kits from recycling enhanced items. IPAPI_CreateItem - creates and returns an enhanced item using the details fed into the method. If shortname is left blank, it will pick a random valid item. If api_perks is null it will pick random perk(s) and add them. Returns Item [HookMethod("IPAPI_CreateItem")] public object IPAPI_CreateItem(string shortname = null, ulong skin = 0, Dictionary<string, float> api_perks = null) { List<KeyValuePair<Perk, float>> perks = Pool.GetList<KeyValuePair<Perk, float>>(); foreach (var perk in api_perks) { Perk _perk; if (parsedEnums.TryGetValue(perk.Key, out _perk)) perks.Add(new KeyValuePair<Perk, float>(_perk, perk.Value)); } var result = CreateItem(shortname, skin, perks); Pool.FreeList(ref perks); // Returns an Item class return result; } Example usage: [ChatCommand("testipapi")] void TestIPAPI(BasePlayer player) { Dictionary<string, float> perks = new Dictionary<string, float>() { ["Prospector"] = 1f, ["Lumberjack"] = 1f, ["Butcher"] = 1f, ["Horticulture"] = 0.5f }; var item = (Item)ItemPerks.Call("IPAPI_CreateItem", "hammer.salvaged", (ulong)2830083288, perks); if (item == null) { Puts("Failed"); return; } item.name = "tool of the trade"; player.GiveItem(item); }$24.99- 209 comments
- 3 reviews
-
- 8
-
-
-
- #items
- #enhancement
- (and 6 more)
-

Version 1.0.9
852 downloads
Item Perks: Legendary items is a plugin that allows you to create and fully customize legendary named items on your rust server. It uses the perk sets available from the Item Perks plugin, allowing for the creation of some very unique items in Rust. The fields for creating a new item are: Name: Give the item a unique name that captures it's essence Skin: Assign a skin that matches what the item does. Description/Story: Add some flavor to the item and write a short blurb or backstory for the item, which will display when the player mouses over the ownership banner, along with the buffs. Buffs: Add as many or as few ItemPerk buffs as you would like, with any amount of buff values. Restrict enhancement: Prevent or allow enhancement kits to affect each Legendary item. Global chat announcement: Announce in chat when a player finds a really rare or powerful item. Amour slots: Set the amount of armor slots the item spawns with (if applicable). There are a number of drop sources that can be selected for your legendary items to drop. Along with the source, you can specify which item/prefab shortname you want to restrict the drop to, or which shortnames you want it to exclude. The shortname will depend on the loot source. Loot sources with the type "Prefab" will need to use the prefab shortname, where as those with the "Item" type will need to use item shortnames. Type: Prefab Example: crate_normal_2, heli_crate, crate_elite. Type: Prefab Example: loot-barrel-2, loot-barrel-1 Type: Boss name Example: scarecrow the destroyer. Type: Event name Supports: Harbor Event: "Harbor" Junkyard Event: "Junkyard" Satellite Dish Event: "SatDish" Water Event: "Water" Air Event: "Air" Arctive Base Event: "Arctic" Gas Station Event: "GasStation" Sputnik Event: "Sputnik" Shipwreck Event: "Shipwreck" Triangulation Event: "Triangulation" Supermarket Event: "Supermarket" Caravan Event: "Caravan" Powerplant Event: "Powerplant" Armored Train Event: "ArmoredTrain" Convoy Event: "Convoy" Ferry Terminal Event: "FerryTerminal" SurvivalArena: "SurvivalArena" Type: Prefab Example: scientistnpc_arena, scientistnpc_heavy. Type: Prefab Example: npc_tunneldweller, npc_underwaterdweller. Type: Npc name Example: military defenders. Type: Prefab Example: oak_b, swamp_tree_a, pine_dead_snow_c. Type: Prefab Example: stone-ore, sulfur-ore, metal-ore. Type: Prefab Example: chicken.corpse, shark.corpse, player_corpse. Type: Prefab Example: hemp-collectable, berry-red-collectable, corn-collectable. Type: Prefab Example: hemp.entity, pumpkin.entity, wheat.entity. Type: Item Example: rifle.ak, axe.salvaged, icepick.salvaged.$11.99 -
Version 1.1.8
1,358 downloads
Shop Controller is an advanced shop UI system. Offers selling of items and commands as well as an in-game item editor. FEATURES • UI Cart system (Optional) • In-game item editor • In-game command editor • Item cooldowns • Command cooldowns • Custom item skins • Custom items • Custom categories • Sell back to shop (Optional) • Easy color editing of the UI • Multi currency support (RP, Economics, any item) • Custom shop commands PERMISSIONS shopcontroller.use shopcontroller.admin SETUP The setup is very easy! - Set the commands you want the shop to be opened with - Set your currency. It supports RP, Economics, or any item (use the shortname)! - Set if you want to use the cart system or not - Plugin images, change if you want to use images other than the default ones. - UI Elements, all of these are color, "Rust Format" > https://tools.rustplugins.io/colors Support? Questions? Comments? Concerns? Message me in my Discord! https://discord.gg/ZsRgCUNv2x$29.99 -
Version 1.0.3
12 downloads
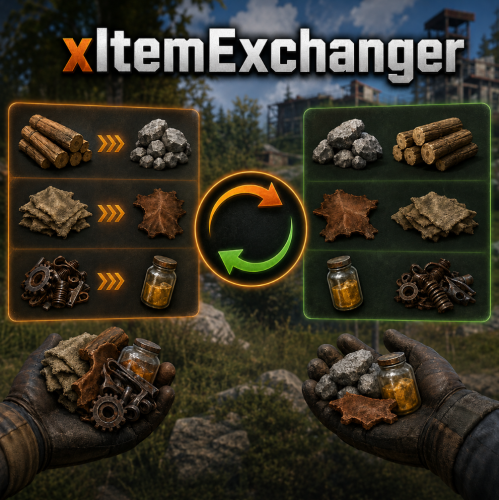
xItemExchanger The item exchanger plugin allows players to trade items in Rust using preconfigured exchange recipes easily. Players can view available trades, check details of specific recipes, and perform exchanges directly through chat commands. Notes Items are pulled directly from your main inventory, belt, and/or clothing slots. Output items respect stack sizes and optional skin IDs. Admins can create custom exchange recipes by editing the config file. Permission xitemexchanger.use Player Commands Config { "ChatCommand": "exchange", "Permission": "xitemexchanger.use", "UseCooldown": false, "CooldownSeconds": 5.0, "CurrencyShortname": null, "CurrencyPerCraft": 0, "Recipes": { "wood2stone": { "InputShortname": "wood", "InputAmount": 1000, "OutputShortname": "stones", "OutputAmount": 500, "SkinId": 0, "DisplayName": "1000 Wood -> 500 Stone" }, "cloth2leather": { "InputShortname": "cloth", "InputAmount": 100, "OutputShortname": "leather", "OutputAmount": 50, "SkinId": 0, "DisplayName": "100 Cloth -> 50 Leather" }, "scrap2lowgrade": { "InputShortname": "scrap", "InputAmount": 25, "OutputShortname": "lowgradefuel", "OutputAmount": 10, "SkinId": 0, "DisplayName": "25 Scrap -> 10 Low Grade" } } } ChatCommand: Command players use (Default: exchange) Permission: Permissionname (Default: xitemexchanger.use) UseCooldown: Enable/disable cooldowns between exchanges CooldownSeconds: How long players must wait if cooldown is enabled CurrencyShortname: Optional extra cost (e.g., scrap) CurrencyPerCraft: How much currency is consumed per exchange Recipes: Dictionary of all exchange recipes$8.99 -
Version 2.10.24
1,696 downloads
Crafting system that allows you to create items, cars, vehicles, recyclers, etc! Commands craft open interface crafts.setwb [categories: cat1 cat2 ...] set new custom workbench Permissions You can set permission in config, for example: "Permission (ex: crafts.use)": "crafts.use", crafts.setworkbench - allows you to use the "crafts.setwb" command (set custom workbenches) Craft Types Command Vehicle Item Recycler ModularCar How to install a custom workbench 1. Spawn the workbench (for example, in RustEdit or a plugin) 2. In the game, go to him and use the command "crafts.setwb" and specify the necessary categories. Example: /crafts.setwb Misc 3. Go to config (oxide/config/Crafts.json) and configure this workbench (use SafeZone, workbench level, etc.) VIDEO FAQ Q: Where can I see an example of a config? A: Config$19.95 -
Version 1.1.5
37 downloads
xStackSize xStackSize gives you full control over item stack sizes on your Rust server. Globally and permission-based. Fine-tune your economy, balance progression, or create VIP advantages with flexible and performance-friendly stack management. Whether you want larger stacksize for QoL, custom stacksizes for specific groups/permission, or complete control over your servers stacking system. INFO: xStackSize supports multiple permissions at the same time. If a player has more than one stack permission, the plugin automatically applies the highest stack size based on your configuration. The highest value always wins - whether it's global or permission-based. Example: If global is set to x3 and a permission gives x1, the player will use x3 since it’s higher. (If he has that permission) Features Global stack size control Permission-based StackSizes (VIP / ranks / groups) Custom StackSize per item Custom StackSize for CUSTOM ITEMS Force Split/Merge changed StackSize INSTANT instead of waiting for players to move items manually Blacklist items Easy to configure Performance friendly designed Additionally supports Quarries, Excavator, Furnaces and Conveyors Permission-based StackSizes: You can use any permission name in the config, as long as it starts with xstacksize. Examples: xstacksize.pro, xstacksize.vip, xstacksize.premium etc.. You can create multiple stack-size permissions. Simply copy and paste a new permission block in the config and give it a different permission name. Various Constellations (Examples, for better understanding) Console Command xstacksize.refresh (Useful if you have AutoApplyStackSizeChange set to 'false') Force-applies current stack rules to existing items immediately. It recalculates limits and retroactively normalizes/merges stacks in player inventories and storage containers without requiring item movement. Config (Use value '0' for UNLIMITED) { /* AutoApplyStackSizeChange force splits/merge items instantly instead of waiting for players to move items manually. */ "AutoApplyStackSizeChange": true, "StackSizeMultipliers": { "Weapon": 1.0, "Construction": 1.0, "Items": 1.0, "Resources": 1.0, "Attire": 1.0, "Tool": 1.0, "Medical": 1.0, "Food": 1.0, "Ammunition": 1.0, "Traps": 1.0, "Misc": 1.0, "Component": 1.0, "Electrical": 1.0, "Fun": 1.0, "CustomItems": 1.0 }, /* FixedItemStackSizes are fixed values, not multipliers (Example: 5000) */ "FixedItemStackSizes": { "wood": 0, "stones": 0 }, "PermissionStackSizeMultipliers": { "xstacksize.vip": { "Weapon": 1.0, "Construction": 1.0, "Items": 1.0, "Resources": 1.0, "Attire": 1.0, "Tool": 1.0, "Medical": 1.0, "Food": 1.0, "Ammunition": 1.0, "Traps": 1.0, "Misc": 1.0, "Component": 1.0, "Electrical": 1.0, "Fun": 1.0, "CustomItems": 1.0 } }, "BlacklistedItems": [ "pumpkin" ] }$15.99 -
Version 1.0.2
21 downloads
What: On each composter update, this plugin composts a total number of individual items roughly equivalent to what players can achieve in vanilla Rust via stack splitting, but without regard for how non-fertilizer items are arranged in the composter. Why: As of time of this writing, vanilla composting logic composts exactly 1 item from each stack in a composter, which forces players to split stacks in order to maximize efficiency. This is annoying, and also non-intuitive due to being inconsistent with the behavior of all other item-transforming deployables at this point. How: This plugin replaces the vanilla composter update logic with the following process: Calculates a "work capacity" (maximum number of individual items to compost) based on the number of composter slots that contain non-fertilizer item stacks, plus the number of empty slots Loops repeatedly over the composter inventory, composting 1 item from each non-fertilizer item stack until either the work capacity is exhausted, or nothing is left to compostFree -

Version 1.2.20
3,965 downloads
Epic Loot is a plugin that adds additional RPG style loot to crates, NPC corpses, barrels and crafting. There is a configurable chance that an enhanced piece with varying set types and modifiers will appear in a loot crate, barrel or corpse. Players also have a chance to receive an enhanced version of their crafted items, rather than the plain old vanilla armor/weapon/tool. Wearing more than 1 of the same type of item will provide the user with a set bonus. Depending on the set type, they may get access to higher mining yields, more damage to scientists or even access to exclusive loot tables that proc while gathering. The plugin is incredibly configurable, supports language conversions and allows users to modify and design their own set bonuses. There are currently 24 different set types and 27 unique set bonuses! Set types are added to the name of the item and are responsible for providing the user with a buff. Miners, - Increases the wearers mining yield. Lumberjacks, - Increases the wearers woodcutting yield. Skinners, - Increases the wearers skinning yield. Farmers, - Increases the wearers farming yield. Foragers, - Increases the wearers collection yield. Fishermans, - Increases the wearers fishing yield. Assassins, - Increases damage done to players. Demo, - Decreases damage from explosives. Elemental - Reduces cold and fire damage. Scavengers - Offers the wearer a chance to obtain additional scrap from barrels and crates. Transporters - Reduces the fuel costs for helicopters and boats. Crafters - Increases crafting speed. Reinforced - Reduces durability loss on all equipped items. Tamers - Reduces damage taken from animals. Hunters - Increase damage done to animals. Operators - Increases damage done to humanoid NPCs. Jockeys - Increases speed of the wearers mounted horse. Raiders - Offers the wearer a chance for their fired rocket/thrown explosive to be refunded. Builders - Offers the wearer a chance for their building/upgrade costs to be refunded. Assemblers - Offers the wearer a chance for their crafting materials to be refunded. Fabricators - Offers the wearer a chance for an additional crafted item to be produced. Medics - Increases healing received. Knights - Decreases damage received from melee attacks. Barbarians - Increased damage done with melee attacks. Smelting - Chance to receive a refined ore, instead of a raw ore, while mining. InstantMining - Chance to instantly mine the rest of a node out on hit. InstantWoodcutting - Chance to instantly cut down the rest of the tree on hit. Regrowth - Chance for the felled tree to respawn. InstantSkinning - Chance to instantly skin the rest of an animal on hit. InstantCook - Chance to receive cooked meat instead of raw meat while skinning. PVPCrit - Chance to critically damage a player, adding an additional 10-30% damage. Reflexes - Reduces damage taken from PVP. IncreasedBoatSpeed - Increases the speed of all watercraft. FreeVehicleRepair - Removes the repair cost for repairing vehicles of all kinds. Survivalist - Increases calories and hydration from all food sources. Researcher - Chance to receive your scrap back while researching. Feline - Reduces fall damage. Lead, - Reduces radiation damage. Gilled - Underwater breathing. Smasher - % Chance to destroy barells and roadsigns instantly. WoodcuttersLuck - Access to a loot table for woodcutting. MinersLuck - Access to a loot table for mining. SkinnersLuck - Access to a loot table for skinning. RockCycle - Chance to spawn a new rock once mined out. Attractive - Chance for loot to be instantly moved to your inventory. FishersLuck - Access to a loot table for fishing. TeamHeal - Shares heals with nearby team mates. HealthShot - Heals team mates for damage that would have been done when shot. BulletProof - Reduces the damage received from bullets. FishingRodModifier - Adjusts the tensile strenght of the cast fishing rod, making it harder to snap the line. UncannyDodge - Chance to dodge a projectile and negate its damage. When a user wears enough pieces of the same set, they will get access to extra set bonuses, depending on the number of pieces worn. Any of the buffs from the set types can be added as set bonuses to any set. You can also add the BonusMultiplier set bonus if you want to increase the set bonus percentage based on the number of pieces worn. BonusMultiplier - Add an additional bonus on top of the existing modifier. Type: chat Command: genitem Parameters: <optional: item shortname> <optional: set type> <optional: tier> Usage: /genitem pants miners s - will spawn a pair of pants with the miners set type and a random modifier from s tier range. /genitem transporters c - will spawn a random item with the transporters set type and a random modifier from the c tier range. /genitem pants b - will spawn a pair of pants with a random set type and a random modifier from the b tier range. /genitem pants - will spawn a pair of pants with a random set type and a random set modifier. Type: console Command: genitem Parameters: <target name/steam ID> <optional: item shortname> <optional: set type> <optional: tier> Usage: /genitem "new guy" pants miners s - will spawn a pair of pants with the miners set type and a random modifier from s tier range. /genitem "new guy" transporters c - will spawn a random item with the transporters set type and a random modifier from the c tier range. /genitem "new guy" pants b - will spawn a pair of pants with a random set type and a random modifier from the b tier range. /genitem 76561197988695317 pants - will spawn a pair of pants with a random set type and a random set modifier. Type: chat Command: eladdskin Parameters: <set type> <item shortname> Usage: /eladdskin Transporters pants 2533474346 - Adds the specified skin ID to the list of skins for the transporters pants. Type: chat Command: givescrappercurrency Parameters: <quantity> Usage: /givescrappercurrency 100 - gives 100 scrapper currency to the player. Type: console Command: givescrappercurrency Parameters: <target name/ID> <quantity> Usage: givescrappercurrency new 100 - gives new guy 100 scrapper currency. Type: console Command: elprintitems Parameters: none Usage: /elprintitems - will print a list of items that can be enhanced into console. Type: chat Command: el Parameters: none Usage: /el - opens up the EpicLoot menu. Type: chat Command: reseticonpositions Parameters: none Usage: /reseticonpositions - forces all player icon positions to be set to the default config value. Type: console Command: genspecificitem Parameters: <target id> <item shortname> <buff> <value> <tier> <skin> Usage: /genspecificitem - Create a specific item for the target player. epicloot.use - Required to access the menu. epicloot.admin - Required to use the genitem commands. epicloot.drop - Required for items to drop from crates, barrels and corpses. epicloot.salvage - Required to access the salvager menu. epicloot.enhance - Required to access the enhancement menu. epicloot.enhance.free - Enhancements have no cost. epicloot.craft - Required to randomly craft epic loot items. void GenerateItem(BasePlayer player, string type = null, List<string> item_shortname = null, string tier = null, bool msg = false) Type must be a set type (miners, transporters etc). Item_shortname can contain a number of item shortnames. The hook will pick a random item from the list. Tier must be either s, a, b or c.$19.99- 285 comments
- 13 reviews
-
- 12
-
-
-
- #enhanced
- #custom loot
- (and 7 more)
-
Version 0.1.4
223 downloads
An excellent plugin for remote trading between players with extensive functionality. The ability to log successful trades; The ability to create new permissions; The ability to customize permissions flexibly, including both new and existing ones; The ability to limit slots in trade; The ability to configure the method(Personal, CommonMinimum, CommonMaximum) for limiting the number of slots; The ability to set a cooldown on sending trade requests; The ability to configure the method(InitiatorOnly, TargetOnly, Both) for applying cooldown to players; The ability to purchase a bypass for the trade request cooldown; The ability to set a daily limit on sending trade requests; The ability to purchase additional trade requests after reaching the daily limit; The ability to forbid trading when wounded; The ability to forbid trading while swimming; The ability to forbid trading while mounted on certain seats; The ability to forbid trading in specified monuments, by name or by monument type; The ability to forbid trading in someone else's building privileges; The ability to forbid trading when taking damage; The ability to forbid trading during a combat block; The ability to forbid trading during a raid block; The ability to forbid certain items from being traded; The ability to automatically generate language files for specified languages(with content filled in English); The ability to set an effect upon receiving a trade request; The ability to change the effect upon a successful trade completion; The ability to display a status bar while waiting for a trade; The ability to choose between bar types(TimeCounter and TimeProgressCounter); The ability to specify the order of the bar; The ability to change the height of the bar; The ability to customize the color and transparency of the background; The ability to set a material for the background; The ability to switch between CuiRawImageComponent and CuiImageComponent for the image; The ability to get images from the local folder(*SERVER*\oxide\data\AdvancedStatus\Images); The ability to set own image and customize the color and transparency of the image; The ability to set sprite instead of the image; The ability to customize the color, size and font of the text. { "Chat command": "trade", "List of 'accept' commands": [ "accept", "yes" ], "List of 'cancel' commands": [ "cancel", "no" ], "Is it worth enabling GameTips for messages?": true, "Is it worth using Notify plugins for messages instead of the vanilla UI?": false, "Specify the regular message type for notify": 0, "Specify the warning message type for notify": 1, "Is it worth using the AdvancedStatus plugin?": true, "Is it worth saving trade logs to a file?": true, "List of language keys for creating language files": [ "en" ], "Slot limit calculation mode(Personal, CommonMinimum, CommonMaximum)": "CommonMaximum", "Trade cooldown apply mode(InitiatorOnly, TargetOnly, Both)": "InitiatorOnly", "Is it worth checking the target's trade cooldown?": false, "Time in seconds given to respond to a trade request": 15.0, "Price to skip 60 seconds of the trade request cooldown": 10.0, "The prefab name for the effect triggered when a trade request is received": "assets/bundled/prefabs/fx/invite_notice.prefab", "The prefab name for the effect triggered when a trade is successfully completed": "assets/prefabs/building/wall.frame.shopfront/effects/metal_transaction_complete.prefab", "List of mount names where trading is prohibited": [ "horsesaddle", "horsesaddlerear", "bikedriverseat", "bikepassengerseat", "motorbikedriverseat", "motorbikepassengerseat", "modularcardriverseat", "modularcarpassengerseatleft", "modularcarpassengerseatright", "modularcarpassengerseatlesslegroomleft", "modularcarpassengerseatlesslegroomright", "modularcarpassengerseatsidewayleft", "miniheliseat", "minihelipassenger", "transporthelipilot", "transporthelicopilot", "attackhelidriver", "attackheligunner", "submarinesolodriverstanding", "submarineduodriverseat", "submarineduopassengerseat", "snowmobiledriverseat", "snowmobilepassengerseat", "snowmobilepassengerseat tomaha", "workcartdriver", "locomotivedriver", "craneoperator", "batteringramseat", "ballistagun.entity" ], "Status. Bar - Display time in seconds. A value of 0 keeps it visible until the cooldown ends": 15.0, "Status. Bar - Type(TimeProgressCounter or TimeCounter)": "TimeCounter", "Status. Bar - Height": 26, "Status. Bar - Order": 10, "Status. Background - Color(Hex or RGBA)": "#EFC570", "Status. Background - Transparency": 0.7, "Status. Background - Material(Leave empty to disable)": "", "Status. Image - Url": "https://gitlab.com/IIIaKa/images/-/raw/main/StatusBars/Trader_Request.png", "Status. Image - Local(Leave empty to use Image_Url)": "Trader_Request", "Status. Image - Sprite(Leave empty to use Image_Local or Image_Url)": "", "Status. Image - Is raw image": false, "Status. Image - Color(Hex or RGBA)": "#EFC570", "Status. Image - Transparency": 1.0, "Status. Image Outline - Color(Hex or RGBA)": "0.1 0.3 0.8 0.9", "Status. Image Outline - Transparency": 1.0, "Status. Image Outline - Distance(Leave empty to disable). Example '0.75 0.75'": "", "Status. Text - Size": 12, "Status. Text - Color(Hex or RGBA)": "#FFFFFF", "Status. Text - Transparency": 1.0, "Status. Text - Font(https://umod.org/guides/rust/basic-concepts-of-gui#fonts)": "RobotoCondensed-Bold.ttf", "Status. Text - Offset Horizontal": 0, "Status. Text Outline - Color(Hex or RGBA)": "#000000", "Status. Text Outline - Transparency": 1.0, "Status. Text Outline - Distance(Leave empty to disable)": "", "Status. SubText - Size": 12, "Status. SubText - Color(Hex or RGBA)": "#FFFFFF", "Status. SubText - Transparency": 1.0, "Status. SubText - Font": "RobotoCondensed-Bold.ttf", "Status. SubText Outline - Color(Hex or RGBA)": "0.5 0.6 0.7 0.5", "Status. SubText Outline - Transparency": 1.0, "Status. SubText Outline - Distance(Leave empty to disable)": "", "Status. Progress - Background Color(Hex or RGBA)": "1 1 1 0.15", "Status. Progress - Background Transparency": 0.15, "Status. Progress - Reverse": true, "Status. Progress - Color(Hex or RGBA)": "#EFC570", "Status. Progress - Transparency": 0.7, "Status. Progress - OffsetMin": "0 0", "Status. Progress - OffsetMax": "0 0", "List of trade permissions": [ { "Permission Name": "trader.default", "Number of available trade slots": 3, "Cooldown time(in seconds) before next trade": 600.0, "Daily trade request limit. A value of 0 disables the limit": 50, "Price to purchase a trade after exceeding the daily limit. A value of 0 disables the purchase": 5.0, "Is it worth forbidding trade if the player is in a wounded state?": true, "Is it worth forbidding trade if the player is swimming?": true, "Is it worth forbidding trade if the player is mounted?": true, "Is it worth forbidding trade if the player is in someone else's building privilege area?": true, "Is it worth forbidding trade if the player has taken damage?": true, "Is it worth forbidding trade if the player has combat block?": true, "Is it worth forbidding trade if the player has raid block?": true, "List of monuments where trade is forbidden": null, "List of monument categories where trade is forbidden": [ "RadTown", "RadTownWater", "RadTownSmall", "TunnelStation", "Custom" ], "List of forbidden trade items": [ "rock" ] }, { "Permission Name": "trader.vip", "Number of available trade slots": 6, "Cooldown time(in seconds) before next trade": 450.0, "Daily trade request limit. A value of 0 disables the limit": 100, "Price to purchase a trade after exceeding the daily limit. A value of 0 disables the purchase": 2.5, "Is it worth forbidding trade if the player is in a wounded state?": true, "Is it worth forbidding trade if the player is swimming?": true, "Is it worth forbidding trade if the player is mounted?": true, "Is it worth forbidding trade if the player is in someone else's building privilege area?": true, "Is it worth forbidding trade if the player has taken damage?": true, "Is it worth forbidding trade if the player has combat block?": true, "Is it worth forbidding trade if the player has raid block?": true, "List of monuments where trade is forbidden": null, "List of monument categories where trade is forbidden": [ "RadTown", "RadTownWater", "TunnelStation" ], "List of forbidden trade items": [ "rock" ] }, { "Permission Name": "realpve.vip", "Number of available trade slots": 9, "Cooldown time(in seconds) before next trade": 300.0, "Daily trade request limit. A value of 0 disables the limit": 0, "Price to purchase a trade after exceeding the daily limit. A value of 0 disables the purchase": 0.0, "Is it worth forbidding trade if the player is in a wounded state?": false, "Is it worth forbidding trade if the player is swimming?": false, "Is it worth forbidding trade if the player is mounted?": false, "Is it worth forbidding trade if the player is in someone else's building privilege area?": false, "Is it worth forbidding trade if the player has taken damage?": false, "Is it worth forbidding trade if the player has combat block?": false, "Is it worth forbidding trade if the player has raid block?": false, "List of monuments where trade is forbidden": [ "oilrig_1" ], "List of monument categories where trade is forbidden": null, "List of forbidden trade items": [ "rock" ] } ], "Version": { "Major": 0, "Minor": 1, "Patch": 4 } } EN: { "CmdNotAllowed": "You do not have permission to use this command!", "CmdPlayerNotFound": "Player '{0}' not found! You must provide the player's name or ID.", "CmdMultiplePlayers": "Multiple players found: {0}", "CmdEconomicsNotEnough": "Not enough funds!", "CmdMain": "Available trade commands:\n\n<color=#D1CBCB>/trade</color> <color=#D1AB9A>bars *boolValue*(optional)</color> - Toggle status bar display\n<color=#D1CBCB>/trade</color> <color=#D1AB9A>*nameOrId*</color> - Send a trade request to the specified player\n<color=#D1CBCB>/trade</color> <color=#83BA7C>accept/yes</color> - Accept a pending trade request\n<color=#D1CBCB>/trade</color> <color=#DE5757>cancel/no</color> - Decline a pending or active trade\n<color=#D1CBCB>/trade</color> <color=#D1AB9A>limits</color> - View your trade limits\n<color=#D1CBCB>/trade</color> <color=#D1AB9A>buy limits *amount*(optional)</color> - Purchase additional trade requests\n<color=#D1CBCB>/trade</color> <color=#D1AB9A>buy cd *amount*(optional)</color> - Purchase a 60 second(* by amount) cooldown skip\n\n--------------------------------------------------", "CmdBarsEnabled": "Status bar display enabled!", "CmdBarsDisabled": "Status bar display disabled!", "CmdDailyLimitExtra": "You have exceeded the daily limit({0}) for sending trade requests!\n<size=10>However, you can buy additional requests using the <color=#D1AB9A>/trade buy limits</color> command for <color=#D1CBCB>${1}</color></size>", "CmdDailyLimit": "You have exceeded the daily limit({0}) for sending trade requests!", "CmdCooldownSkip": "You must wait {0} seconds before sending another trade request!\n<size=10>However, you can skip the cooldown using the <color=#D1AB9A>/trade buy cd</color> command for <color=#D1CBCB>${1}</color> per 60 seconds</size>", "CmdCooldown": "You must wait {0} seconds before sending another trade request!", "CmdWoundBlock": "You can't trade while wounded!", "CmdSwimming": "You can't trade while swimming!", "CmdMountBlock": "You can't trade while mounted here!", "CmdBuildingBlock": "You can't trade inside someone else's base!", "CmdDamageBlock": "You can't trade while taking damage!", "CmdCombatBlock": "You can't trade during combat block!", "CmdRaidBlock": "You can't trade during a raid block!", "CmdAcceptEmpty": "You have no pending trade requests!", "CmdAcceptOngoing": "You already have an active trade with player '<color=#D1AB9A>{0}</color>'!", "CmdDeclineEmpty": "You have no pending or active trades!", "CmdDecline": "Trade between you and player '<color=#D1AB9A>{0}</color>' has been canceled!", "CmdDeclineOther": "Player '<color=#D1AB9A>{0}</color>' canceled the trade with you!", "CmdSendSelf": "You cannot send a trade request to yourself!", "CmdSendNoRespond": "Player '<color=#D1AB9A>{0}</color>' has not responded to your trade request!", "CmdSendAlredyHave": "You already have a pending or active trade with player '<color=#D1AB9A>{0}</color>'!\n<size=10><color=#83BA7C>/trade yes</color> - Accept the pending trade request\n<color=#DE5757>/trade no</color> - Decline the pending or active trade</size>", "CmdSendTargetNotAllowed": "Player '<color=#D1AB9A>{0}</color>' does not have permission to use trading!", "CmdSendTargetAlredyHave": "Player '<color=#D1AB9A>{0}</color>' already has a pending or active trade with player '<color=#D1AB9A>{1}</color>'!", "CmdSendTargetHasCooldown": "Player '<color=#D1AB9A>{0}</color>' has an active cooldown, {1} seconds remaining!", "CmdSendTo": "Trade request successfully sent to player '<color=#D1AB9A>{0}</color>'.", "CmdSendFrom": "Player '<color=#D1AB9A>{0}</color>' has sent you a trade request.\n<size=10><color=#83BA7C>/trade yes</color> - Accept the pending trade request\n<color=#DE5757>/trade no</color> - Decline the pending or active trade</size>", "CmdPurchaseNotLimited": "You haven't reached your daily limit yet!", "CmdPurchaseHaveExtra": "You still have {0} additional trade requests! Use them before purchasing more.", "CmdPurchaseLimitsNotAllowed": "Purchasing additional trade requests is unavailable!", "CmdPurchasedLimits": "You have successfully purchased <color=#D1CBCB>{0}</color> trade requests!\n<size=10>Now you have <color=#D1CBCB>{1}</color> additional trade requests</size>", "CmdPurchaseNoCooldown": "You don't have a cooldown for sending trade requests!", "CmdPurchaseCooldownNotAllowed": "Purchasing a cooldown skip for trade requests is not available!", "CmdPurchasedCooldown": "You have successfully purchased a cooldown skip for <color=#D1CBCB>{0} seconds</color> for trade requests!\n<size=10>Now you need to wait <color=#D1CBCB>{1} seconds</color></size>", "CmdMyLimits": "Your trade request limits:\n\n<color=#D1CBCB>Cooldown</color> - <color=#D1AB9A>{0} sec</color>\n<color=#D1CBCB>Daily Limit</color> - <color=#D1AB9A>{1}</color>\n\n--------------------------------------------------", "BarInitiator": "Trade to: {0}", "BarTarget": "Trade from: {0}", "BarCooldown": "Trade cooldown:", "MsgStarted": "You have started a trade with player '<color=#D1AB9A>{0}</color>'!", "MsgCompleted": "Trade with player '<color=#D1AB9A>{0}</color>' completed successfully!", "MsgCanceled": "Player '<color=#D1AB9A>{0}</color>' canceled the trade!" } RU: { "CmdNotAllowed": "У вас недостаточно прав для использования этой команды!", "CmdPlayerNotFound": "Игрок '{0}' не найден! Вы должны указать имя или ID игрока.", "CmdMultiplePlayers": "Найдено несколько игроков: {0}", "CmdEconomicsNotEnough": "Не достаточно средств!", "CmdMain": "Доступные команды для трейда:\n\n<color=#D1CBCB>/trade</color> <color=#D1AB9A>bars *булевоеЗначение*(опционально)</color> - Переключение отображения статус баров\n<color=#D1CBCB>/trade</color> <color=#D1AB9A>*имяИлиАйди*</color> - Отправить запрос на трейд указанному игроку\n<color=#D1CBCB>/trade</color> <color=#83BA7C>accept/yes</color> - Принять ожидающий запрос на трейд\n<color=#D1CBCB>/trade</color> <color=#DE5757>cancel/no</color> - Отклонить ожидающий или активный трейд\n<color=#D1CBCB>/trade</color> <color=#D1AB9A>limits</color> - Узнать свои лимиты\n<color=#D1CBCB>/trade</color> <color=#D1AB9A>buy limits *количество*(опционально)</color> - Докупить дополнительное количество трейд запросов\n<color=#D1CBCB>/trade</color> <color=#D1AB9A>buy cd *количество*(опционально)</color> - Купить пропуск 60 секунд(* на количество) задержки перед отправкой трейд запросов\n\n--------------------------------------------------", "CmdBarsEnabled": "Отображение статус баров включено!", "CmdBarsDisabled": "Отображение статус баров выключено!", "CmdDailyLimitExtra": "Вы превысили допустимую дневную норму({0}) на отправку трейд запросов!\n<size=10>Но вы можете купить дополнительные запросы с помощью команды <color=#D1AB9A>/trade buy limits</color> за <color=#D1CBCB>{1}$</color></size>", "CmdDailyLimit": "Вы превысили допустимую дневную норму({0}) на отправку трейд запросов!", "CmdCooldownSkip": "Перед отправкой нового запроса на трейд вам необходимо подождать {0} секунд!\n<size=10>Но вы можете купить пропуск задержки с помощью команды <color=#D1AB9A>/trade buy cd</color> за <color=#D1CBCB>{1}$</color> за каждые 60 секунд</size>", "CmdCooldown": "Перед отправкой нового запроса на трейд вам необходимо подождать {0} секунд!", "CmdWoundBlock": "Вам запрещено пользоваться трейдом в предсмертном состоянии!", "CmdSwimming": "Вам запрещено пользоваться трейдом в воде!", "CmdMountBlock": "Вам запрещено пользоваться трейдом сидя в данном месте!", "CmdBuildingBlock": "Вам запрещено пользоваться трейдом в чужой базе!", "CmdDamageBlock": "Вам запрещено пользоваться трейдом при получении урона!", "CmdCombatBlock": "Вам запрещено пользоваться трейдом во время боя!", "CmdRaidBlock": "Вам запрещено пользоваться трейдом во время рейда!", "CmdAcceptEmpty": "У вас нет ожидающих запросов на трейд!", "CmdAcceptOngoing": "У вас уже есть активный трейд с игроком '<color=#D1AB9A>{0}</color>'!", "CmdDeclineEmpty": "У вас нет ожидающих или активных трейдов!", "CmdDecline": "Трейд между вами и игроком '<color=#D1AB9A>{0}</color>' отменён!", "CmdDeclineOther": "Игрок '<color=#D1AB9A>{0}</color>' отменил трейд с вами!", "CmdSendSelf": "Нельзя отправить трейд запрос самому себе!", "CmdSendNoRespond": "Игрок '<color=#D1AB9A>{0}</color>' не ответил на ваш трейд запрос!", "CmdSendAlredyHave": "У вас уже есть ожидающий или активный трейд с игроком '<color=#D1AB9A>{0}</color>'!\n<size=10><color=#83BA7C>/trade yes</color> - Принять ожидающий запрос на трейд\n<color=#DE5757>/trade no</color> - Отклонить ожидающий или активный трейд</size>", "CmdSendTargetNotAllowed": "У игрока '<color=#D1AB9A>{0}</color>' недостаточно прав для использования обмена!", "CmdSendTargetAlredyHave": "У игрока '<color=#D1AB9A>{0}</color>' уже есть ожидающий или активный трейд с игроком '<color=#D1AB9A>{1}</color>'!", "CmdSendTargetHasCooldown": "У игрока '<color=#D1AB9A>{0}</color>' имеется активный кулдаун, осталось {1} секунд!", "CmdSendTo": "Игроку '<color=#D1AB9A>{0}</color>' был успешно отправлен запрос на трейд.", "CmdSendFrom": "Игрок '<color=#D1AB9A>{0}</color>' отправил вам запрос на трейд.\n<size=10><color=#83BA7C>/trade yes</color> - Принять ожидающий запрос на трейд\n<color=#DE5757>/trade no</color> - Отклонить ожидающий или активный трейд</size>", "CmdPurchaseNotLimited": "Вы ещё не исчерпали свой дневной лимит!", "CmdPurchaseHaveExtra": "У вас ещё есть {0} дополнительных трейд запросов! Используйте их прежде, чем покупать новые.", "CmdPurchaseLimitsNotAllowed": "Покупка дополнительных трейд запросов недоступна!", "CmdPurchasedLimits": "Вы успешно докупили <color=#D1CBCB>{0}</color> трейд запросов!\n<size=10>Теперь у вас <color=#D1CBCB>{1}</color> дополнительных трейд запросов</size>", "CmdPurchaseNoCooldown": "У вас нет задержки на отправку трейд запросов!", "CmdPurchaseCooldownNotAllowed": "Покупка пропуска задержки на трейд запросы недоступна!", "CmdPurchasedCooldown": "Вы успешно купили пропуск на <color=#D1CBCB>{0} секунд</color> задержки для трейд запросов!\n<size=10>Теперь вам нужно подождать <color=#D1CBCB>{1} секунд</color></size>", "CmdMyLimits": "Ваши лимиты трейд запросов:\n\n<color=#D1CBCB>Время задержки</color> - <color=#D1AB9A>{0} сек</color>\n<color=#D1CBCB>Дневной лимит</color> - <color=#D1AB9A>{1}</color>\n\n--------------------------------------------------", "BarInitiator": "Трейд с: {0}", "BarTarget": "Трейд от: {0}", "BarCooldown": "Задержка трейда:", "MsgStarted": "Вы начали трейд с игроком '<color=#D1AB9A>{0}</color>'!", "MsgCompleted": "Трейд с игроком '<color=#D1AB9A>{0}</color>' успешно завершён!", "MsgCanceled": "Игрок '<color=#D1AB9A>{0}</color>' отменил трейд!" } bars *boolValue*(optional) - Toggle status bar display. *nameOrId* - Send a trade request to the specified player. accept/yes - Accept a pending trade request. cancel/no - Decline a pending or active trade. limits - View your trade limits. buy limits *amount*(optional) - Purchase additional trade requests. buy cd *amount*(optional) - Purchase a 60 second(* by amount) cooldown skip. Example: /trade bars true /trade iiiaka /trade yes /trade limits /trade buy limits 1 /trade buy limits 0.5$9.99 -

Version 1.1.75
3,816 downloads
Custom crafting panel at player's workbenches. Craft custom or non-craftable items, create your own blueprints. No chat commands required! oxide permission - craftmenu.use • How to create default blueprint. Simply leave ResearchCost as 0. • Crafting Recycler. Plugins for placing entities usually utilizes specific item together with skin id. Here you can find list of examples PlaceableEntities.txt • Adding same shortname multiple times. When you using same shortname for more than one blueprint you have add {number} at the end of it to prevent duplicates. Ex.: "box.wooden.large{1}" • Item is name too long. Inside lang file you can create replacements for default item names. • Wiping blueprints manualy. There are two admin console commands. "craftmenu_admin wipe" will wipe blueprints for all players "craftmenu_admin wipe <steamID>" wipes blueprints only for certain player. Premade blueprints from screenshots Blueprints.json$16.00 -
Version 1.0.5
88 downloads
King of the hill is an arena plugin similar to SurvivalArena, Paintball, ZombieInfection and GunGame. It spawns an arena high in the sky to host the game, and players can join from anywhere on the map via a command. The plugin will store all of the players items, stats and buffs, and teleport them to the lobby before the game starts. The objective of the game is to be the first player to hold the hill for the target time, or be the player with the highest hill time by the end of the event. Upon completion of the event (or if a player manually leaves), players are returned to the location that they joined from with their equipment, stats and modifiers in tact. The plugin is highly customizable and allows you to: Create as many equipment profiles as you'd like. The game will select one at random using a weighted system. Adjust hill locations, movement times, sizes, capture targets and game time limits. Spectate players using a computer station. Automatically run, and allow your players to vote for the event using the EventHelper plugin. The plugin is also compatible with the maps from Paintball, ZombieInfection & GunGame. Simply drop the json files into the respective data folders to run king of the hill on those maps. Chat command: koth.addhill Permission: kingofthehill.admin Description: Adds a hill spawn position at the players location and saves it into the spawned arenas profile. Command: koth.start Permission: kingofthehill.admin Description: Manually starts a game of koth. You can also specify random to pick a random map. Command: koth.end Permission: kingofthehill.admin Description: Manually ends an active game of koth. Command: koth.spawnarenaend Permission: kingofthehill.admin Description: Spawns the arena without starting the game. Useful for adding new hill positions. Command: koth.cleararenaspawnarenaend Permission: kingofthehill.admin Description: Clears a spawned arena. Chat command: koth.setcentrepoint Permission: kingofthehill.admin Description: Sets the spawn position of the arena based on the players location. Chat command: koth.ban/koth.unban <id> Permission: kingofthehill.admin Description: Bans/unbans the target player from joining future events.$19.99 -
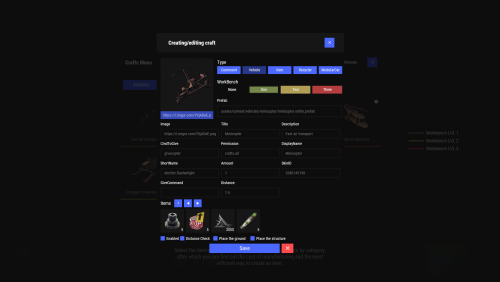
![More information about "[UI] Custom Items Creator"](https://codefling.com/uploads/monthly_2026_03/Beznazwy-1.thumb.png.fe284e9bfcf57d334b14353efac34f34.png)
Version 1.0.1
11 downloads
Custom Items Creator is modern plugin allowing you to easily create new custom items using gui instead of paying everytime for new custom item for your server. Plugin have over 24 custom powerups/attributes that you can combine with standard in game items + you have ability to change item name and skin id: Plugin have 2 UI's: Items Selector & Edit UI Commands: /selci – Opens the UI menu displaying all custom items. /editci – Opens the editor UI for the item you are currently holding in your hands. /editci [id] – Opens the editor UI for a specific custom item based on its ID. /giveci [id] – Adds the custom item with the specified ID directly to your inventory. /giveplayerci [name/steamid] [itemid] [amount] (console command) - give specific player custom item List of powerups: Indestructible - Infinite durability Anti-Bleeding - Prevents bleeding Infinite Oxygen - Prevents drowning Temperature Immunity - No freezing/heating Custom Magazine Size - Custom clip size Infinite Ammo - No reload needed Anti-Radiation - Radiation immunity No Hunger - Always full No Thirst - Always hydrated Lifesteal % - Heals on hit Critical Strike Chance - Chance for crit Critical Damage % - Crit multiplier Poison Damage % - Poison damage amount Poison Time In Seconds - Poison duration Bonus Damage To NPC & Animals - PvE damage boost Additional Buildings Damage % - Raid damage boost Thorns % - Reflects incoming damage like in minecraft Fall Damage Immunity % - Reduces fall damage Fire Resistance % - Reduces fire damage Explosive Resistance % - Reduces explosion damage Dodge Chance % - Chance to dodge damage Dispenser Bonus Multipler % - Resource yield boost Auto Smelt - Auto smelts ores Heal Value On Use - Instant heal amount on use/heal Permissions customitemscreator.admin - all perms customitemscreator.menu - access to /selci command customitemscreator.edit - access to edit items (/editci & save) customitemscreator.give - access to give items /giveci Delete items deleting them from data file - deleted from UI to avoid missclicks, dm me if you need any help with that You can translate powerups and messages in localization file - if you want dm me too$9.99 -

Version 2.3.2
9,706 downloads
Unique kit system with the highest possible functionality and beautiful design. This will please you (no need to sit in the config every time and try to fill in some incomprehensible values, etc.), and your players (convenient, clear and informative interface). You just start editing items directly in the game) and your players (comfortable, clear, informative interface)! Features of Kits Beautiful User Interface: Experience a visually appealing and user-friendly design. High Performance: Optimized for fast, reliable performance. Automatic Kit Conversion (uMod): Easily convert your existing kits. In-Game Kit and Item Setup: Configure kits directly in the game. Auto Kits & Wipes (Optional): Automate kit distribution and server wipes. Custom Items & Commands: Assign unique items and commands to kits. Advanced Item Settings: Fine-tune every aspect of your items. CopyPaste Integration: Seamlessly work with CopyPaste. Optional Features: Delays after wipes, set blocking in Building Block, logging, and item chances. Skills & ServerPanel Support: Enhance player experience with integrated support. Commands kit – open the kit interface kit help – get help with kits kit autokit – enable or disable automatic kit. Requires the "kits.changeautokit" permission. You can set this permission up in the plugin configuration under "Permission to enable/disable autokit". kit list – display all available kits kit [name] – redeem a specific kit kits.resetkits – delete all kits kits.give [name/steamid] [kitname] – grant a kit to player kits.convert – convert from uMod Kits kits.wipe – clear players data kits.reset – resets the player data or kits in the kits system. kits.reset data [<targetID>/all] – resets the data of a player or all players. Parameters: <targetID>: The ID of the player whose data is to be reset. If you specify all, the data of all players will be reset. kits.reset kits – resets all kits in the data kits.template <interface_type> <interface_style> <template> [template_version] – allows the administrator to customize the appearance of the bundles interface by choosing between fullscreen and inmenu mode. Different styles and templates are available for each interface type. The old style (old) is only available for fullscreen mode, while the new Rust style (rust) is available for both interface types. When using the Rust style, you must specify a specific template such as normal, content, categories or content_categories. For inmenu rust templates, you can also specify the ServerPanel template version (1 or 2). Parameters: <interface_type>: The type of interface template. Valid values: fullscreen: Fullscreen interface template. inmenu: Menu interface template. <interface_style>: The style of the interface. Valid values: old: The old interface style (fullscreen only). rust: New Rust interface style (for fullscreen and inmenu). <template>: The name of the target template. Valid values depend on the interface style: normal, content, categories, content_categories. [template_version]: (Optional, only for inmenu rust) ServerPanel template version. Valid values: 1 or 2. Specifies the template version to be used with the selected inmenu rust template. Examples: kits.template fullscreen old - Sets the fullscreen interface to the old style. kits.template fullscreen rust normal - Sets the fullscreen interface to the Rust style with the normal template. kits.template fullscreen rust content - Sets the fullscreen interface to the Rust style with the content template. kits.template fullscreen rust categories - Sets the fullscreen interface to the Rust style with the categories template. kits.template fullscreen rust content_categories - Sets the fullscreen interface to the Rust style with the content_categories template. kits.template inmenu rust normal 1 - Sets the menu interface to the Rust style with the normal template for ServerPanel version 1. kits.template inmenu rust content 2 - Sets the menu interface to the Rust style with the content template for ServerPanel version 2. kits.template inmenu rust categories 1 - Sets the menu interface to Rust style with the categories template for ServerPanel version 1. kits.template inmenu rust content_categories 1 - Sets the menu interface to the Rust style with the content_categories template for ServerPanel version 1. Video P.S. Video of the old version, video for the V2+ version is now in development Showcase Full screen Templates Template OLD STYLE Template NEW RUST Default: Content: Categories: Content & Categories: In-Menu Templates Template V1 (V1.1) Default: Content: Categories: Content & Categories: Template V2 Default: Content: Categories: Content & Categories: Template V4 Default: Content: Categories: Content & Categories: Editor Web Config Editor Easily manage your Kits settings with our web-based configuration editor. This tool allows you to adjust plugin configurations through a user-friendly interface, eliminating the need to manually edit files on your server. P.S. Join our Discord at https://discord.gg/mevent and request the "Kits" group for access to the web configuration editor. TEST SERVER Join our test server to view and experience all our unique features yourself! Copy the IP Address below to start playing! connect 194.147.90.239:28015 FAQ Q: Where can I see an example of a config? A: Config Q: Where can I see an example of a data? A: Data Q: How do I add Kits to ServerPanel? A: To add Kits to your ServerPanel, create a new category in your ServerPanel configuration with these settings: "Type": "Plugin", "Plugin Name": "Kits", "Plugin Hook": "API_OpenPlugin". Q: Does the Kits plugin support other plugins? A: Yes, this Kits plugin has an API similar to other popular kits plugins. If the plugin works with Kits - it works with this plugin too. Q: How do I enable the sale of kits? A: You need to configure the plugin economy (which plugin, its hooks, etc.), enable "Enable sale" in the Kits data (oxide/data/Kits/Kits.json or carbon/data/Kits/Kits.json) and set the price to "Selling price" "Enable sale": true, "Selling price": 100, Q: How do I use Economics to pay for kits? A: Example configuration settings: "Economy": { "Type (Plugin/Item)": "Plugin", "Plugin name": "Economics", "Balance add hook": "Deposit", "Balance remove hook": "Withdraw", "Balance show hook": "Balance", "ShortName": "", "Display Name (empty - default)": "", "Skin": 0 }, Q: How do I use ServerRewards to pay for kits? A: Example configuration settings: "Economy": { "Type (Plugin/Item)": "Plugin", "Plugin name": "ServerRewards", "Balance add hook": "AddPoints", "Balance remove hook": "TakePoints", "Balance show hook": "CheckPoints", "ShortName": "", "Display Name (empty - default)": "", "Skin": 0 }, Q: How do I use scrap to pay for kits? A: Example configuration settings: "Economy": { "Type (Plugin/Item)": "Item", "Plugin name": "", "Balance add hook": "", "Balance remove hook": "", "Balance show hook": "", "ShortName": "scrap", "Display Name (empty - default)": "", "Skin": 0 }, Q: How do I resize the kit image? A: You can do this in the config, here's an example of the image setup (-32 and 32 are width, and -75 and -11 are height "Kit Image": { "AnchorMin": "0.5 1", "AnchorMax": "0.5 1", "OffsetMin": "-32 -75", "OffsetMax": "32 -11" }, Q: How can I remove the numbers on the kits ("#1", "#2", etc.)? A: You need to turn off "Show Number?" in the config: "Show Number?": false, Q: How do I make it so that others can see kits with different permissions without being able to claim them? A: You need to turn off "Show All Kits?" in the config: "Show All Kits?": true, Q: Where can I edit the names in the plugin or add my own language? A: You can edit lang files that are located (for example) at "oxide/lang/en/Kits.json" or "carbon/lang/en/Kits.json". Q: Players get "The plugin does not work correctly, contact the administrator!" message. How to fix? A: This error occurs when the ImageLibrary plugin is not working properly. Solutions: Install the ImageLibrary plugin if it's not installed. Make sure ImageLibrary is loaded and running properly (check with o.plugins command). Restart the server after installing ImageLibrary. Check server console for ImageLibrary errors and fix them. Q: I see black images with Rust logo or get error 429 when loading images. What should I do? A: These issues occur when there are problems downloading images from the internet. The Kits plugin sends images to ImageLibrary but is not responsible for the downloading process itself. Error 429 typically occurs due to rate limits imposed by image hosting services like Imgur (see HTTP 429 documentation for more details). To fix this, enable Offline Image Mode which will use local images instead: Enable the mode in config: Open "oxide/config/Kits.json" (or "carbon/config/Kits.json" for Carbon) Set "Enable Offline Image Mode": true Set up the images: Create folder "TheMevent" in "oxide/data" (or "carbon/data" for Carbon) Download PluginsStorage (click "CODE" → "Download ZIP") Extract the ZIP and copy all contents to the "TheMevent" folder Reload the plugin: Type o.reload Kits (Oxide) or c.reload Kits (Carbon) Note: If you want to add your own custom images, place them in the "TheMevent" folder and reference them with the "TheMevent/" prefix. For example: "TheMevent/Icon1.png", "TheMevent/MyCustomIcon.jpg", etc. Q: What placeholders are available for commands and what do they do? A: You can use these placeholders in kit commands and they will be automatically replaced: %steamid% - Replaced with the player's Steam ID (e.g., "76561198000000000") %username% - Replaced with the player's display name (e.g., "PlayerName") %player.x% - Replaced with the player's X coordinate position %player.y% - Replaced with the player's Y coordinate position %player.z% - Replaced with the player's Z coordinate position Example usage in kit commands: "Commands on receiving (via '|')": "say Welcome %username%!|teleport %steamid% %player.x% %player.y% %player.z%" Note: Multiple commands can be separated by the "|" character, and they will be executed in sequence when the kit is redeemed. HOOKS private string[] canRedeemKit(BasePlayer player) private void OnKitRedeemed(BasePlayer player, string kitName) private double OnKitCooldown(BasePlayer player, double cooldown) API private bool TryClaimKit(BasePlayer player, string name, bool usingUI) private string[] GetAllKits() private object GetKitInfo(string kitname) private string[] GetKitContents(string kitname) private double GetKitCooldown(string kitname) private double PlayerKitCooldown(ulong ID, string kitname) private int KitMax(string kitname) private double PlayerKitMax(ulong ID, string kitname) private string KitImage(string kitname) private bool IsKit(string kitname) private bool isKit(string kitname) private void GetKitNames(List<string> list) private double GetPlayerKitCooldown(ulong userId, string name) private double GetPlayerKitCooldown(string userId, string name) private void SetPlayerCooldown(ulong userId, string name, int amount) private int GetPlayerKitUses(ulong userId, string name) private int GetPlayerKitUses(string userId, string name) private void SetPlayerKitUses(ulong userId, string name, int amount) private JObject GetKitObject(string name) private int GetKitMaxUses(string name) private string GetKitDescription(string name) private string GetKitImage(string name) private bool GiveKit(BasePlayer player, string name, bool usingUI) private bool HasKitAccess(string userId, string name) private int GetPlayerKitAmount(string userId, string name)$34.95 -
Version 1.0.0
5 downloads
Tired of swapping tools every time you build, wire, or plumb? MultiTool merges Rust’s most essential construction and utility tools into one smart, easy-to-use item — so you only need a single slot for all your tasks. Core Features 6 Essential Tools in One Slot: Hammer, building planner, wallpaper tool, wire tool, pipe tool, and hose tool — all combined into a single handy MultiTool item. No more juggling your hotbar or dropping tools when you need them most! Instant Mode Switching (by Default: “F” Key): To switch tool modes, simply tap your Flashlight key (F by default) while holding MultiTool. Each press cycles to the next available tool type. Switch roles on the fly: go from wiring to hammering or from fluid pipe to wall tool in seconds. Automatic Mode Selection: When enabled in the config, MultiTool can automatically detect what you're aiming at (electric, fluid, or industrial slot) and instantly switch to the correct tool. Just look at the slot — no manual fiddling required. Multi Planner Support: Seamlessly swap between standard building and boat planning with a single tool, also by pressing the F (flashlight) key. Colorful ESP Highlighting: Visual power-users can enable ESP: all relevant slots or connection points on entities light up in color, making it easy to understand networks or lay out complex base wiring at a glance. ESP visuals, distance, colors, and refresh speed are fully configurable. Wearable or Belt Use: MultiTool can optionally be worn on your back (like a backpack) or kept in your belt — you decide! How To Use Activate MultiTool: Equip the MultiTool in your hands. Switch Tool Modes: Press F (or your custom flashlight keybind) to cycle between modes. Exit MultiTool: Put the MultiTool away: Select the same slot again, select an empty slot, or jump to slot 7 (the classic “empty hands” slot). Multi Planner Mode: Use F to swap between build and boat planners. Optional: Enable “auto-switch” mode in the config, then just look at a wire/fluid/industrial slot — MultiTool will pick the right tool for you! Configuration Full control: Enable, disable, or reorder included tools as you like. Personalize ESP: Set highlight colors, detection distance, refresh rates, and more. Auto-mode behavior: Customizable for beginners or expert builders alike. Language and item descriptions: Fully translatable and overrideable as you need. Why choose MultiTool? Instantly free up 5–6 hotbar slots: Keep your essentials just a click away. Fast context switching: No more slowing down for base wiring or construction projects. Perfect for builders, electricians, and automation fans. No custom prefabs or entity overhead: Runs straight out of the box — just install and go! Requirements Requires just CustomItemDefinitions. MultiTool saves time, simplifies gameplay, and empowers both casual builders and hardcore engineers. One tool. Every job. No more clutter. Give your Rust players the quality-of-life upgrade they deserve!$12.00 -
Version 1.4.1
18 downloads
GachaPon is a high-performance gacha system plugin for Rust servers. Players can use designated items to obtain random rewards of various rarities, ranging from Common to Legendary. All gacha content is fully customizable, including obtainable items, drop rates, item durability, and notification settings. Server owners can configure the required items and amounts to perform a pull, apply discounts for 10-pull bundles, and enable a Daily Gacha system with customizable attempt limits and reset times. The daily free gacha system helps maintain player engagement. GachaPon is the perfect solution for servers looking to add a reward distribution system, ensuring that players keep coming back every day! Key Features Animated Gacha UI - Visually engaging capsule spinning and opening animations with rarity-specific visual effects 5-Tier Rarity System - Common, Uncommon, Rare, Epic, and Legendary categories with customizable colors and drop rates 10-Pull System - Bulk pull option with configurable discount rates Daily Free Gacha - Permission-based daily free pulls with configurable reset time (UTC) Global Announcements - Server-wide announcements for rare item drops Blueprint Support - Rewards can be configured as blueprints Item Condition System - Configure item durability/condition ranges for weapon rewards Skin Support - Apply custom skins to reward items High Performance - Object pooling, image caching, and optimized UI rendering Auto Config Migration - Automatic configuration updates while preserving user settings Multi-Language Support - Built-in English and Japanese localization Use Cases Server Economy - Create an engaging currency sink for your server's economy Event Rewards - Special gacha events with limited-time items VIP Perks - Daily free pulls as VIP benefits Player Engagement - Gamification element to increase player retention Loot Distribution - Alternative to traditional loot crates with more excitement Commands Player Commands /gacha - Perform a single gacha pull /gacha 10 - Perform 10 pulls at a discounted cost /gacha daily or /gacha free - Claim the daily free gacha (permission required) /gacha info - Display gacha rates and costs /gacha reload - Reload configuration (admin permission required) Admin Commands /gachaadmin reload - Reload the configuration files /gachaadmin give <player> [amount] - Give currency to a player /gacha test or /gacha test 10 - Test single pull (no cost, admin only) /gachaadmin reset <player | all> - Reset player data or all data /gachaadmin status - Display plugin status and statistics Permissions gachapon.use - Allows players to use basic gacha commands gachapon.daily - Allows players to claim the daily free gacha gachapon.admin - Allows access to admin commands and config reload Configuration "Categories": { "Legendary": { "Enabled": true, "Display Name": "LEGENDARY", "Chance %": 3.0, // Drop rate percentage for this category "Color (HEX)": "#FFD700", // Category color for UI display "Is Rare": true, // Mark as rare (triggers special effects) "Global Announce": true, // Broadcast to server when obtained "Rewards": [ { "Enabled": true, "Item Shortname": "rifle.ak", "Skin ID": 0, "Is Blueprint": false, "Amount Min": 1, "Amount Max": 1, "Chance %": 5.0, "Use Condition": true, "Condition Min (%)": 80.0, "Condition Max (%)": 100.0, "Display Name": "AK-47" } } }$20.00 -
Version 1.0.2
159 downloads
Take your Rust base automation to the next level with Usable Hoppers, the plugin that turns any containers into fully functional hoppers that automatically collect items from the ground within a configurable range. While Usable Hoppers is perfect for setting up an automated horse farm—where it gathers horse poop and deposits it into a composter—it’s versatile enough for other tasks too. Whether you're automating gathering dropped resources, or organizing loot from the battlefield, Usable Hoppers will save you time and effort. The plugin is designed to automate item collection directly from the ground, making resource management in your base smoother and more efficient. Usable on regular chests, furnaces, lootable crates and even airdrops. Fully customizable, you can control the pickup radius, item types, and collection frequency, giving you complete control over how it works in your base. Simplify your Rust gameplay and let Usable Hoppers do the heavy lifting! Chat commands: /uh - Shows available UsableHoppers commands. /uhset - Sets the container you are looking at to a hopper. /uhremove - Remove the hopper from the container you are looking at. /uhlist - Display all hoppers you own. /uhrange - Display the range of your hoppers. Admin commands: /uhclearall - Removes all hoppers in the game. /uhclearplayer <playername or steamid> - Removes a specific player's hopper. Permissions: Config: The config is easily configurable to your liking and performance requirements. Allowed containers for hoppers - Which containers allowed to be turned into hoppers. Command cooldown - The cooldown between command usage (in seconds). Debug mode - Used for detailed feedback in console. Hopper radius - The hopper pickup range, in a spherical dome. How often the hopper collects items - How often the hopper will attempt to pickup items in range. Higher values will increase performance Item types allowed - Which types of items that the hopper will pickup. Max hoppers per players - The number of hoppers available to each player. Max items per tick - The number of items the hopper will pickup at each tick. Default config. { "Allowed containers for hoppers": [ "woodbox_deployed", "box.wooden.large", "furnace", "storage_barrel_c", "storage_barrel_b" ], "Command cooldown": 0.0, "Debug mode": false, "Hopper radius": 3.0, "How often the hopper collects items": 10.0, "Item types allowed": { "ammunition": true, "attire": true, "blueprint": true, "component": true, "construction": true, "electrical": true, "food": true, "fun": true, "items": true, "medical": true, "misc": true, "resources": true, "tool": true, "traps": true, "weapon": true }, "Max hoppers per players": 5, "Max items per tick": 10 }Free -
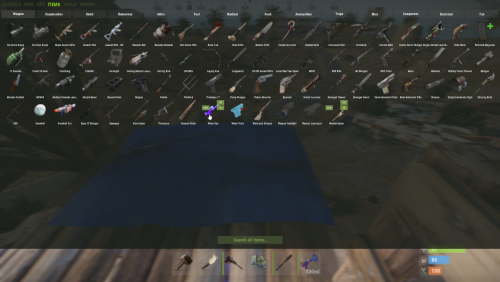
Version 1.1.7
213 downloads
Easily give access to Rusts F1 Spawn Menu! That's permission based with blacklisting support and customizable F1 Spawn button amounts! Features: * Ban whole categories or Items using their ShortName or ItemID's * Allow Admins or Developers to bypass F1 spawn * Control the amounts it gives on the 1k button & 100 buttons! * ItemID, Amount, SkinID, Conditions. * Shops & other 3rd party plugins. * DLC items only spawn if you are the Admin or the player has bought the DLC for that item. * TODO: Genetics & BPs. Perms: f1spawn.use | needed to use F1 Menu. f1spawn.bypass | needed to bypass blocked Items. f1spawn.dlc | needed to spawn DLC Items that the player does NOT OWN. Chat & Console Commands: /give itemID amount skin condition | everything past itemID are optional args /givearm itemID amount skin condition | everything past itemID are optional args give steamID-or-Name itemID amount skin condition | everything past itemID are optional args givearm steamID-or-Name itemID amount skin condition | everything past itemID are optional args Configuration File: { "Change Spawned Tag to supported variants like Crafted & Looted": false, "Ignore: Disabled 0, Admin 2, Developer 3": 0, "Set F1 1000 button spawn amount": 1000, "Set F1 100 button spawn amount": 100, "Set F1 Spawn liquids with max water": true, "Ban Categories: Weapon 0, Construction 1, Items 2, Resources 3, Attire 4, Tool 5, Medical 6, Food 7, Ammunition 8, Traps 9, Misc 10, Component 11, Electrical 12, Fun 13": [ 10 ], "Ban Items using: ShortNames (Easy to Read)": [ "explosive.timed", ], "Ban Items using: ItemIDs (Slightly Faster)": [ 143803535, ] }$10.00 -
Version 1.1.5
34 downloads
Simple Kits is a Kits plugin for Rust that offers a simple and easy to navigate UI while maintaining good server performance. Key Features UI for Kit Management: A custom, in-game user interface for players to view and redeem available kits. Admins can also use the UI to create and edit kits without manually editing the config file. Highly Customizable: Each kit can be configured with a specific name, short name, description, image, and items. It also supports item attachments, allowing for pre-modded weapons and tools, and autokit support. Built-in Cooldown and Usage Limits: You can define cooldown periods (global and per-player) and set a maximum number of uses for each kit, providing a balanced experience. There is also an option to automatically clear all cooldowns and use counts upon a server wipe. Permission Restricted Access: Kits can be restricted to specific players or groups using permissions, allowing for VIP kits or donor perks. API: The plugin exposes a comprehensive API that is compatible with the uMod Kits plugin's API. It allows other plugins to interact with the kit system, including giving kits, checking their existence, retrieving kit data, and managing player cooldowns and uses. Lightweight: stripped down features and more optimized to guarantee good performance. Performance Overview Commands and Permissions /kit - Open the kits menu. /kit {shortname} - Redeem any kit via it's shortname without opening the menu. No admin permission required, ownerid and moderatorid gain access the admin menu hassle free. Config { "VIP Store URL (Wthout https://)": "", "Enable Auto-Kits": true, "Clear Cooldowns and Redeem Limits on wipe": true, "Main Color RGBA (Use https://colors.misticos.dev/ (RUST Color))": "0 1 1 1", "Kits": { "starter": { "Name": "STARTER", "ShortName": "starter", "Description": "A simple kit to get your <color=#00ceff>base</color> going! \n24 Hour cooldown between redeems.", "Image": "https://files.tryhard.cloud/s/RygdtjDamAXHKwQ/preview", "Cooldown": 86400.0, "WipeCooldown": 0.0, "MaxUses": -1, "Perm": "", "Items": [ { "Id": 1079279582, "ShortName": "medkit", "Amount": 2, "SkinId": 0, "Slot": 1, "Container": 1, "Attachments": null }, { "Id": 1079279582, "ShortName": "bandage", "Amount": 2, "SkinId": 0, "Slot": 2, "Container": 1, "Attachments": null } ], "Hide": false } } } API (for developers) // Attempts to give a kit to the specified player. // Returns a string containing a failure message, otherwise returns the result of the internal GiveLoadout method. object GiveKit(BasePlayer player, string name); // Checks if a kit with the given name exists. // Returns a boolean value. bool IsKit(string name); // Populates a provided list with the names of all available kits. // This method does not return a value. void GetKitNames(List<string> list); // Retrieves the image URL for the specified kit. // Returns an empty string if no URL is set. string GetKitImage(string name); // Retrieves the description text for the specified kit. // Returns an empty string if no description is set. string GetKitDescription(string name); // Returns the maximum number of uses for a kit per player. // Returns 0 if no maximum is set. int GetKitMaxUses(string name); // Returns the cooldown period (in seconds) for a kit. // Returns 0 if there is no cooldown. int GetKitCooldown(string name); // Gets the number of times a specific player has used a specific kit. // Returns 0 if the player or kit data is not found. int GetPlayerKitUses(ulong playerId, string name); // Sets the number of uses for a specific kit for the given player. // This method does not return a value. void SetPlayerKitUses(ulong playerId, string name, int amount); // Retrieves the remaining cooldown time (in seconds) for a player's kit. // Returns 0 if the kit is not on cooldown. double GetPlayerKitCooldown(ulong playerId, string name); // Sets a new cooldown time (in seconds) for the specified kit for a player. // This method does not return a value. void SetPlayerCooldown(ulong playerId, string name, double seconds); Support and More Checkout my discord server here. Showcase Video$9.99- 2 comments
-
- 3
-

-
-
- #simplekits simple kits
- #tryhard
- (and 34 more)
-
Version 1.0.6
197 downloads
The plugin allows you to grant permission to players who will be able to save some loot. Description: This plugin and the ability to store your belongings in a safe deposit box, which you can open using one of the specified commands. You can limit the number of items you can put in a cell, and also set up a blacklist of items that cannot be put in a cell. You can assign privileges to use a cell depending on the group of players.The player can also transfer their items from wipe to wipe. How does it work? The player prescribes a chat command, which is specified in the config. It opens a cell with slots that are configured in the config. He can put items there that are not blocked in the config. Closes the cell and the items are successfully saved. If the player runs out of privilege, when trying to open a cell, he will return all items to his inventory. en - example of plugin configuration in English ru - example of plugin configuration in Russian My Discord: CASHR#6906 Join the Mad Mappers Discord here! Check out more of my work here!$15.00 -
Version 0.1.2
549 downloads
Allows toggling silent item giving(chat notifications and ownership) via Harmony patching. P.S. By default, silent item giving is enabled. The ability to disable item ownership assignment; The ability to disable item give messages via the 'give' command; The ability to disable item give messages via the 'giveid' command; The ability to disable item give messages via the 'givearm' command; The ability to disable item give messages via the 'giveequip' command; The ability to disable item give messages via the 'giveto' command; The ability to disable item give messages via the 'giveall' command; The ability to disable item blueprint give messages via the 'giveBp' command; The ability to disable messages about copying player inventory via the 'copyTo' command. silentitemsgive.admin - Grants access to the command silentgive.toggle silentgive.toggle *boolValue*(optional) - Toggle silent item giving. To access this command, you must be an administrator or have the silentitemsgive.admin permission. Example: silentgive.toggle silentgive.toggle trueFree -
Version 1.1.5
638 downloads
UItemSort UItemSort - this plugin allows the player to sort, and stack items in boxes and inventory. Plugin config variables "Use button images?": false, "Send plugin messages/reply?": true, "Sort button color.": "0.968627453 0.921568632 0.882352948 0.2", "Take similar button color.": "0.968627453 0.921568632 0.882352948 0.2", "Take all button color.": "0.968627453 0.921568632 0.882352948 0.2", "Sort image.": "https://i.imgur.com/uEiuf3N.png", "Similar image.": "https://i.imgur.com/3PkbAH8.png", "Take/Put all.": "https://i.imgur.com/beKBAl3.png", "Allow only containers with owners?": false, "All containers allowed?": false, "Black list if all allowed else this is white list.": [ "assets/prefabs/deployable/woodenbox/woodbox_deployed.prefab", "assets/prefabs/deployable/large wood storage/box.wooden.large.prefab", ] Plugin lang "UILootSimilar": "Same items, that you already own, were looted! (if exist)", "UILootAll": "You've looted everything you could!", "UISort": "Items were successfully sorted!", "UIPutSimilar": "You've put same items that are in a storage! (if exist)", "UIPutAll": "You've put all the items you could!", "UIBtnSort": "Sort", "UIBtnTakeSimilar": "Take Similar", "UIBtnTakeAll": "Take All", "UIBtnPutSimilar": "Put Similar", "UIBtnPutAll": "Put All" Permissions: uitemsort.use - allows to see and use sorting buttons. uitemsort.ignore - prevents from using sorting buttons if player has 'uitemsort.use' permission. Contacts: Need help or custom plugin for your server? Contact me using Discord: metangerine ---------------------------------------------------------------------- Video how plugin works:$9.99 -
Version 1.0.4
41 downloads
Adds a "quick loot" panel similar to that found in games such as Starfield and Fallout 4. This allows players to quickly view and loot items from containers without needing to open them first. Includes additional features such as item tracking and sorting. View and loot items without needing to open a container Live updating quick loot panel when looking at a container Item tracking, which allows players to track certain items which will highlight them if they appear in a container Ability to sort items in the quick loot panel Customizable hotkeys Highly configurable UI Install the plugin on your server Assign yourself (or your group) your desired permissions. For this tutorial I recommend assigning yourself all the permissions EXCEPT quickloot.ignorelocks. Once permissions are assigned, use the /ql command to open the quick loot settings menu. In the settings menu, follow the instructions for setting up key bindings, for this tutorial I recommend using the example keybindings. Each player WILL need to do this step themselves, but they will only have to do it once. Once key binding are setup, simply look at a container that you can open that has multiple items in it, the quick loot panel should appear. If you setup your keybindings according to the example, use the up and down arrow keys to page through items. You can "track" an item by paging over an item in the quick loot panel and pressing the right arrow key (if using example keybinds). Items you are tracking will appear highlighted at the top of the quick loot panel if they exist in the container. You can untrack these items by repressing the same key. You can "take" an item by paging over an item in the quick loot panel and pressing the left arrow key (if using example keybinds). This will loot the entire stack, if you want to loot a single item from the stack, hold down the sprint key (shift by default) while pressing the loot key. /ql - Displays the Quick Loot settings menu. Requires the quickloot.menu permission. These are commands that can be bound to keybindings. To do so press F1 then type "bind <key> <command>". For example if you want to bind the quick loot toggle to the "o" key, you can do "bind o ql.toggle". Rust plugins unfortunately cannot bind keys automatically. Each player will need to setup keybindings themselves, but once they do, they won't have to do it again. There are instructions for this in the /ql settings menu. ql.close - Closes the quick loot settings menu. ql.down - Selects the next item in the quick loot panel. ql.up - Selects the previous item in the quick loot panel. ql.sort - Cycles to the next item sort mode. ql.loot - Loots the selected item from the quick loot panel. Hold "sprint" to select single items instead of a stack. ql.track - Tracks the selected item. Tracked items appear at the top of the quick loot panel if they exist in the container. ql.toggle - Toggles the visibility of the quick loot panel. You can click here for a list of key identifiers to use. To try out the plugin, I recommend assigning players all the permissions EXCEPT "quickloot.ignorelocks". quickloot.storage.take - View and take items from storage containers, such as chests, furnaces, and other deployables. quickloot.storage.view - Only view items in storage containers, such as chests, furnaces, and other deployables. quickloot.barrels.take - View and take items from roadside barrels. quickloot.barrels.view - Only view items from roadside barrels. quickloot.crates.take - View and take items from naturally spawned crates. quickloot.crates.take - Only view items from naturally spawned crates. quickloot.tracking - Ability to track items, so that they will appear highlighted in the quick loot panel. quickloot.menu - Needed to use the /ql command and open the Quick Loot settings menu. quickloot.ignorelocks - Locked containers will no longer prevent you from viewing or taking items from them. Nice for admins. You can customize how the quick loot panel looks with a variety of options. To do so you will need to create a style preset. By default, this plugin auto-generates a few of them that you can use for reference. They are located within the "oxide/data/QuickLoot/styles" folder. To create a new style preset, simply copy one of them existing ones and edit the values. The load this preset, set the "StylePreset" property in the config file to the name of the preset file you created. I HIGHLY recommend creating your own preset instead of editing an existing one, because the existing ones may be overwritten if you have "GenerateDefaultStyles" set to "true" in the config. Feel free to share your created presets in the discussion forum! Q: I loaded the plugin, but the quick loot menu doesn't appear when I look at a container. A: You need to assign yourself (or your group) the permissions in order to use the quick loot features. Q: Hotkeys are not working for me. A: Rust does not allow plugins to automatically bind keys for players. Each player will need to bind hotkeys themselves. The /ql command will provide instructions for how to do this. Q: How can I loot a single item at a time instead of the entire stack? A: You can hold down the "sprint" key (shift by default) to switch to single looting mode. Q: Can I put items into the container via the quick loot panel? A: Inserting items into a container is not currently a feature of this plugin. Q: How do I change the look of the quick loot panel? A: See the customization section. Q: Some images are not loading, how do I fix this? A: The images I provided for this plugin are hosted through Imgur, which means under peak load times, sometimes may not load correctly. I recommend hosting the images yourself and setting the URL in the config to avoid this issue. Q: The quick loot panel is overlapping with the UI of another plugin. A: You can change the position of the quick loot panel in style preset. Please see the customization section for more info. Q: I have another plugin that uses the "/ql" command and it is conflicting with this one. A: You can change this command in the configuration file. Make sure to update the localization text as well if you change it.$9.99 -

Version 1.0.7
536 downloads
This plugin allows your players to list and sell custom items through their vending machines. By creating a store via the back of the vending machine, players can list any item (custom or vanilla) for sale through their machines. Players can then interact with the players vending machine to purchase their wares, just like vanilla rust. This is ideal for any server, but especially for servers with heavy role play elements, or servers that use a lot of custom items. Custom Item Vending can receive data from other plugins for both a currency and an item properties. Custom items can be added manually through the config, or sent via an API directly from another plugin. Allows players to sell items for vanilla items, custom items, economics and server rewards. Customizable limit on how many listings each vending machine can have. A map marker that will display what is currently being sold (and is in stock) in the machine. Floating text at the front of each custom item machine indicating what is being sold and its stock level. Supports almost every custom item, identifying them uniquely based on skin, name, text field, slot count and condition. Economics and Server rewards are withdrawn from the back of the machine. The only requirement to use this plugin is the permission: customitemvending.create. This is require to turn a regular vending machine into a Custom Item Vending machine. Please note that due to the nature of the plugin and the way the map's vending listings are handled via client side, it is not possible to use market drones to obtain items using this plugin.$19.99
.thumb.png.ccf8a947948c9eb1445ad21a7931247b.png)

.thumb.png.f676fcb4237b0d630285499251bcf88e.png)