Search the Community
Showing results for tags 'power'.
Found 20 results
-

Version 2.1.3
440 downloads
Supports: Wind Mills | Solar Panels | Fuel & Test Generators | Small-Medium-Large Batteries | Tesla Coils | Heaters Both Globally & with permission-based settings allowing you to create as many different levels as you wish! Written for the best performance possible! Defaults to first permission assigned in the config if you give out multiple. Wind Mill Note: Max height Needed for Max output is floor 18 Battery Options Explained MaxOutput: Maximum Power Out Put Efficiency: How Efficient Battery is When Charging ( this How Fast it Charges ) MaxCapacitySeconds: How Much Energy We Can Request From Power Sources For Charging is this value * our maxOutput Batteries will not show new Max Out-Puts Batteries will show New Power Usage! ( Pic is below, this is because its hardcoded on client side ) Fuel Generator Options Explained StackSize: Sets Inventory Stack Size for Fuel Inside The Fuel Generator OutputEnergy: Sets Power OutPut FuelPerSec: Sets How Much Fuel to Use Per Second Electrical Heater Options Explained GLOBAL SETTER ONLY > "Sets the Max Temperature Range for Electric Heaters Only (Default is 4.0)": 4.0, FadeDuration: Sets How Long Before Heat Dissipates ( when powered off ) HeatAmount: Sets Heat Amount ( when powered on ) Solar Panel Explained To get max Output you Need 1 floor up else it will only ever be half! + Panel must Face Direct Sun-light! Tesla Coil Options Explained A TeslaCoils Power consumption amount Is Calculated By ( MaxDamageOutput Divided / By PowerToDamageRatio ) A TeslaCoils DamageAmount is Calculated By Its (currentEnergy input * powerToDamageRatio) * dischargeTickRate A TeslaCoils SelfHarmAmount is Calculated By Its ( dischargeTickRate Divided / By maxDischargeSelfDamageSeconds * SetHealth ) SetHealth: Sets Item Condition Level MaxDamageOutput: Sets the Maximum Damage it Can OutPut Like Ever PowerForHeavyShorting: Sets Electrical Input Amount Needed for Strong-Zap Zap else = Weak-Zap Zap DischargeTickRate: Sets How Fast A TeslaCoil Discharges its Zap Zap MaxDischargeSelfDamageSeconds: Configuration { "Enables use of permission based settings": true, "Reset all modifications on unload (recommended true if uninstalling)": false, "Global Battery Small": { "MaxOutput": 9000, "Efficiency": 4.0, "MaxCapacitySeconds": 1, "Permissions": { "toptier": { "MaxOutput": 30, "Efficiency": 2.0, "MaxCapacitySeconds": 18000 }, "midtier": { "MaxOutput": 20, "Efficiency": 1.4, "MaxCapacitySeconds": 13500 }, "lowtier": { "MaxOutput": 14, "Efficiency": 1.0, "MaxCapacitySeconds": 11250 } } }, "Global Battery Medium": { "MaxOutput": 50, "Efficiency": 0.8, "MaxCapacitySeconds": 540000, "Permissions": { "toptier": { "MaxOutput": 100, "Efficiency": 2.0, "MaxCapacitySeconds": 1080000 }, "midtier": { "MaxOutput": 75, "Efficiency": 1.5, "MaxCapacitySeconds": 810000 }, "lowtier": { "MaxOutput": 60, "Efficiency": 1.0, "MaxCapacitySeconds": 675000 } } }, "Global Battery Large": { "MaxOutput": 100, "Efficiency": 0.8, "MaxCapacitySeconds": 1440000, "Permissions": { "toptier": { "MaxOutput": 200, "Efficiency": 3.0, "MaxCapacitySeconds": 2880000 }, "midtier": { "MaxOutput": 150, "Efficiency": 2.0, "MaxCapacitySeconds": 2160000 }, "lowtier": { "MaxOutput": 125, "Efficiency": 1.0, "MaxCapacitySeconds": 1800000 } } }, "Global Electric Generator": { "MaxOutputTestGen": 8, "Permissions": { "toptier": { "MaxOutputTestGen": 30 }, "midtier": { "MaxOutputTestGen": 20 }, "lowtier": { "MaxOutputTestGen": 12 } } }, "Global Fuel Generator": { "StackSize": 1000, "OutputEnergy": 35, "FuelPerSec": 1.0, "Permissions": { "toptier": { "StackSize": 2000, "OutputEnergy": 70, "FuelPerSec": 1.2 }, "midtier": { "StackSize": 1500, "OutputEnergy": 60, "FuelPerSec": 1.1 }, "lowtier": { "StackSize": 1250, "OutputEnergy": 45, "FuelPerSec": 1.0 } } }, "Global Solar Panel": { "MaxOutputSolar": 20, "Permissions": { "toptier": { "MaxOutputSolar": 30 }, "midtier": { "MaxOutputSolar": 20 }, "lowtier": { "MaxOutputSolar": 13 } } }, "Global Electric Wind Turbine": { "MaxOutput": 100, "TargetSpeed": 0.0, "Permissions": { "toptier": { "MaxOutput": 250, "TargetSpeed": 3.0 }, "midtier": { "MaxOutput": 200, "TargetSpeed": 2.0 }, "lowtier": { "MaxOutput": 140, "TargetSpeed": 1.0 } } }, "Global Electric Heater": { "FadeDuration": 1.0, "HeatAmount": 5.0, "HeaterTemperatureGrowableRange": 4.0, "Permissions": { "toptier": { "FadeDuration": 9.0, "HeatAmount": 16.0, "HeaterTemperatureGrowableRange": 14.0 }, "midtier": { "FadeDuration": 6.0, "HeatAmount": 12.0, "HeaterTemperatureGrowableRange": 10.0 }, "lowtier": { "FadeDuration": 3.0, "HeatAmount": 8.0, "HeaterTemperatureGrowableRange": 6.0 } } }, "Global Tesla Coil": { "SetHealth": 250.0, "PowerToDamageRatio": 2.0, "DischargeTickRate": 0.25, "MaxDischargeSelfDamageSeconds": 120.0, "MaxDamageOutput": 35.0, "PowerForHeavyShorting": 10, "Permissions": { "toptier": { "SetHealth": 350.0, "PowerToDamageRatio": 2.0, "DischargeTickRate": 0.25, "MaxDischargeSelfDamageSeconds": 120.0, "MaxDamageOutput": 50.0, "PowerForHeavyShorting": 10 }, "midtier": { "SetHealth": 325.0, "PowerToDamageRatio": 2.0, "DischargeTickRate": 0.25, "MaxDischargeSelfDamageSeconds": 120.0, "MaxDamageOutput": 45.0, "PowerForHeavyShorting": 10 }, "lowtier": { "SetHealth": 300.0, "PowerToDamageRatio": 2.0, "DischargeTickRate": 0.25, "MaxDischargeSelfDamageSeconds": 120.0, "MaxDamageOutput": 40.0, "PowerForHeavyShorting": 10 } } } }$19.99 -
Version 1.1.2
33 downloads
TurretStock makes managing your base defenses simple. Instead of opening every Auto Turret, SAM Site, Shotgun Trap, or Flame Turret individually, each building uses a single linked storage box that automatically keeps every supported defense supplied from one central location. Drop your weapons, ammunition, rockets, shells, and fuel into the linked storage, and TurretStock takes care of the rest. Built for players who want clean automation without complicated setup, while remaining lightweight enough for Vanilla, PvE, PvP, RP, and high-population servers. - Features - One linked storage box per building - Automatic weapon, ammunition, rocket, shell, and fuel distribution - Smart weapon and ammo selection with automatic fallback when preferred items are unavailable - Fair ammo distribution across multiple Auto Turrets - Automatic collection of supported weapons and ammunition back into the linked storage - Automatic support for Auto Turrets, SAM Sites, Shotgun Traps, and Flame Turrets - Optional support for turrets without electricity - Configurable refill speed (Slow, Normal, Fast) - Building isolation to prevent cross-base interference - Clean integrated control UI - UI automatically adapts to player permissions - Separate permissions for every control - Automatic linked skins for supported storage boxes and Auto Turrets - English, Russian, and Japanese language support - Lightweight with no required dependencies - Supported Defenses - Auto Turrets - SAM Sites - Shotgun Traps - Flame Turrets Take Your Rust Server to the Next Level Premium performance, lightning-fast support, and an exclusive 30% OFF using code KHALED - How It Works Link a storage box to your Tool Cupboard. Once linked, that storage box becomes the central supply hub for every supported defense inside the building. Simply store weapons, ammunition, rockets, shells, or fuel inside the box. TurretStock automatically distributes supplies where they're needed, while giving players full control over preferred weapons, ammunition types, automatic supply, and defense behavior through a clean built-in interface. Each building can only have one linked storage box, keeping every base completely independent. - Commands /ts link - Link a storage box to the current building /ts unlink - Unlink the storage box from the current building Permissions turretstock.use - Basic plugin access turretstock.admin - Full administrative access turretstock.collectammo - Use the collect ammo control turretstock.collectweapons - Use the collect weapons control turretstock.setammo - Open and change ammo selection turretstock.setweapon - Open and change weapon selection turretstock.supply - Toggle defense supply turretstock.turrets - Toggle turret-related defenses turretstock.sam - Toggle SAM site supply Example Config: { "General": { "LinkDistance": 3.0 }, "Power": { "TurretsWorkWithoutElectricity (true = ignore power)": true }, "Behavior": { "DefenseRefillMode (Slow | Normal | Fast)": "Normal" }, "Limits": { "AutoTurretAmmo": 128, "SamSiteRockets": 12, "ShotgunTrapShells": 24, "FlameTurretFuel": 200 } }$11.99 -

Version 1.0.1
16 downloads
Title Perks - Automatic Buff System for Title Selector by romzar.games - Requires Title Selector Overview TitlePerks is a companion plugin for Title Selector that brings your title system to life. Instead of titles being purely cosmetic, each title can grant configurable gameplay perks that activate instantly when equipped and deactivate when removed. Players earn titles through gameplay achievements (raids, heli kills, boss kills, etc.) and those titles now carry real mechanical weight — creating a meaningful progression loop where effort translates into tangible power. Key Features Automatic Activation & Deactivation Perks activate instantly when a title is selected in Title Selector Perks deactivate instantly when a title is removed, hidden, or cleared Full integration with Title Selector's Hide All, Show All, Clear, and Preset systems Perks auto-restore on player reconnect and server restart 15+ Perk Types Category Perk Type Description Damage damage_structure Bonus damage to building blocks (walls, floors, etc.) Damage damage_deployable Bonus damage to deployables (doors, turrets, boxes, etc.) Damage damage_heli Bonus damage to Patrol Helicopter Damage damage_bradley Bonus damage to Bradley APC Damage damage_boss Bonus damage to bosses (CH47, custom bosses) Damage damage_npc Bonus damage to all human NPCs (scientists, murderers, etc.) Damage damage_animal Bonus damage to animals Damage damage_pvp Bonus damage in PvP (against real players) Damage damage_pve Bonus damage in PvE (against everything except players) Damage damage_global Bonus damage to everything (stacks with specific types) Gather gather_ore Bonus ore yield when mining Gather gather_wood Bonus wood yield when chopping Gather gather_animal Bonus yield when harvesting animals Gather gather_plant Bonus yield when harvesting plants and growables Fishing fishing_rate Bonus fish quantity when catching fish Fishing xp_fishing Bonus fishing XP (permission group-based) Cooldown cooldown_event Reduces event cooldowns (PveMode integration) Cooldown buyable_cooldown_event Buyable event cooldown reduction (PveMode integration) Special legendary_bonus_xp Grants access to bonus XP group (permission-based) Perk Stacking Players can equip multiple titles simultaneously, and their perks stack additively. For example: Title "RaidHard" grants +15% structure damage Title "RaidExpert" grants +20% structure damage Combined: +35% structure damage Smart Entity Detection The damage system correctly identifies and categorizes all entity types: Structures: BuildingBlock (walls, foundations, floors, etc.) Deployables: Doors, storage containers, turrets, barricades, traps, sleeping bags, SAM sites, search lights, ovens NPCs: Scientists, murderers, scarecrows, tunnel dwellers, underwater dwellers, zombies, HumanNPC Vehicles: Patrol Helicopter, Bradley APC, CH47 Chinook Animals: All BaseAnimalNPC entities Players: Real Steam-authenticated players (for PvP perk) External Integrations PveMode: Automatically sets/removes player cooldown modifiers via API_SetPlayerCooldownModifier / API_RemovePlayerCooldownModifier Permission Groups: Configurable perk-to-group mapping — when a player activates a perk, they're added to a permission group; when deactivated, they're removed How It Works Player selects title in Title Selector | v TitlePerks checks config for matching perks | v Perks activated | v Game apply bonuses in real-time Lifecycle Events Event Action Player selects a title Perks activate, player notified Player removes a title Perks deactivate, player notified Player uses "Hide All" All perks deactivate Player uses "Clear" All perks deactivate Player switches preset Old perks deactivate, new perks activate Player disconnects External perks cleaned up, cache freed Player reconnects Perks restored from Title Selector's current selection Server restarts All online players' perks restored (staggered) Plugin reloads All perks recalculated from scratch Default Configuration { "TitlePerks": { "raideasy": [{ "Type": "damage_structure", "Value": 0.05 }, { "Type": "damage_deployable", "Value": 0.05 }], "raidmedium": [{ "Type": "damage_structure", "Value": 0.10 }, { "Type": "damage_deployable", "Value": 0.10 }], "raidhard": [{ "Type": "damage_structure", "Value": 0.15 }, { "Type": "damage_deployable", "Value": 0.15 }], "raidexpert": [{ "Type": "damage_structure", "Value": 0.20 }, { "Type": "damage_deployable", "Value": 0.20 }], "raidnightmare": [{ "Type": "damage_structure", "Value": 0.25 }, { "Type": "damage_deployable", "Value": 0.25 }], "helieasy": [{ "Type": "damage_heli", "Value": 0.05 }], "helimedium": [{ "Type": "damage_heli", "Value": 0.10 }], "helihard": [{ "Type": "damage_heli", "Value": 0.15 }], "heliexpert": [{ "Type": "damage_heli", "Value": 0.20 }], "helielite": [{ "Type": "damage_heli", "Value": 0.25 }], "helinightmare": [{ "Type": "damage_heli", "Value": 0.30 }], "bradleyeasy": [{ "Type": "damage_bradley", "Value": 0.05 }], "bradleymedium": [{ "Type": "damage_bradley", "Value": 0.10 }], "bradleyhard": [{ "Type": "damage_bradley", "Value": 0.15 }], "bradleyexpert": [{ "Type": "damage_bradley", "Value": 0.20 }], "bradleynightmare": [{ "Type": "damage_bradley", "Value": 0.25 }], "bosskiller": [{ "Type": "damage_boss", "Value": 0.15 }], "npcslayer": [{ "Type": "damage_npc", "Value": 0.15 }], "wildhunter": [{ "Type": "damage_animal", "Value": 0.15 }, { "Type": "gather_animal", "Value": 0.20 }], "rareminer": [{ "Type": "gather_ore", "Value": 0.20 }], "fisherman": [{ "Type": "xp_fishing", "Value": 0.25 }, { "Type": "fishing_rate", "Value": 0.15 }], "farmer": [{ "Type": "gather_plant", "Value": 0.25 }], "explorer": [{ "Type": "cooldown_event", "Value": -0.20 }, { "Type": "legendary_bonus_xp", "Value": 0.25 }], "tryhard": [{ "Type": "damage_pve", "Value": 0.10 }, { "Type": "damage_pvp", "Value": 0.05 }] }, "Show perk activation messages": true, "Show perk deactivation messages": true, "Group Perks (perk type -> permission group)": { "legendary_bonus_xp": "legendarybonus" }, "Debug mode": false } Configuration Options Setting Type Default Description TitlePerks Dictionary (see above) Maps title names (lowercase) to lists of perk definitions Show perk activation messages bool true Notify players when perks activate Show perk deactivation messages bool true Notify players when perks deactivate Group Perks Dictionary legendary_bonus_xp -> legendarybonus Maps perk types to permission groups. When a perk is active, the player is added to the group; when removed, they're taken out Debug mode bool false Verbose logging for troubleshooting Adding Custom Perks Simply add new entries to the TitlePerks dictionary. Title names must be lowercase and match the title names configured in Title Selector. "pvpchampion": [ { "Type": "damage_pvp", "Value": 0.15 }, { "Type": "damage_global", "Value": 0.05 } ], "lumberjack": [ { "Type": "gather_wood", "Value": 0.30 } ] Each title supports multiple perks — combine damage, gather, and special bonuses in a single title. Commands Command Type Permission Description /perks Chat None Shows the player's currently active perks and titles titleperks.reload Console titleperks.admin Reloads config and restores all player perks titleperks.debug Console titleperks.admin Toggles debug mode on/off /perks Output Example ======== Your Active Perks ======== Damage Bonuses: - Structure Damage: +15% - Deployable Damage: +15% - Helicopter Damage: +10% Gather Bonuses: - Ore Gather: +20% Active Titles: - raidhard - helimedium - rareminer Permissions Permission Description titleperks.admin Required for titleperks.reload and titleperks.debug console commands Title Selector Integration TitlePerks is designed as a seamless extension of Title Selector. The integration is fully automatic through Oxide/Carbon hooks: Hooks Listened Hook Fired By Action OnTitleSelected(BasePlayer, string) Title Selector Activates perks for the selected title OnTitleDeselected(BasePlayer, string) Title Selector Deactivates perks for the deselected title OnTitlesCleared(BasePlayer, List<string>) Title Selector Deactivates all perks from cleared titles Developer API TitlePerks exposes a complete API for other plugins to query perk data: // Get all active perks for a player (type -> total value) Dictionary<string, float> perks = TitlePerks.Call<Dictionary<string, float>>("API_GetActivePerks", (ulong)player.userID); // Get a specific perk value (returns 0f if not active) float heliDmg = TitlePerks.Call<float>("API_GetPerkValue", (ulong)player.userID, "damage_heli"); // Check if player has a specific perk active bool hasPerk = TitlePerks.Call<bool>("API_HasPerk", (ulong)player.userID, "damage_bradley"); // Get list of active title names for a player List<string> titles = TitlePerks.Call<List<string>>("API_GetActiveTitles", (ulong)player.userID); // Get perk definitions for a title (config lookup) var perks = TitlePerks.Call<List<Dictionary<string, object>>>("API_GetTitlePerks", "raidhard"); // Get formatted perk display string for a title (for UI integration) string display = TitlePerks.Call<string>("API_GetTitlePerksDisplay", "raidhard"); // Returns: "Struct+15% Deploy+15%" Use Cases 1. Raid Progression Rewards Players who complete raid milestones (easy through nightmare) receive scaling damage bonuses to structures and deployables, making them more effective raiders. 2. PvE Combat Specialization Titles like "BossKiller", "NPCSlayer", and "WildHunter" reward players who focus on PvE content with relevant damage bonuses, encouraging engagement with PvE systems. 3. Resource Gathering Bonuses "RareMiner", "Farmer", and "WildHunter" titles provide gathering multipliers, creating an alternative progression path for players who prefer resource-focused gameplay. 4. Event Cooldown Reduction The "Explorer" title reduces event cooldowns by 20% via PveMode integration, rewarding active event participants with faster re-entry. 5. Permission-Based Rewards Through the Group Perks system, titles can grant access to permission groups — enabling integration with any permission-based plugin. Example: "Explorer" title adds players to the "legendarybonus" group for bonus XP. 6. PvP vs PvE Balancing The "Tryhard" title demonstrates dual-category bonuses: +10% PvE damage and +5% PvP damage, allowing fine-tuned balance between gameplay modes. 7. Multi-Title Stacking Strategy Since perks stack, players must strategize which titles to equip based on their planned activities — raiding, farming, fishing, or mixed gameplay. Localization Built-in support for 3 languages out of the box: Language Code English en (default) Portuguese (Brazil) pt-br Spanish es-ES All perk names, categories, activation/deactivation messages, and UI labels are fully translatable through the standard lang system. Requirements Dependency Required Description Title Selector Yes Core dependency — provides the title selection UI and hooks PveMode No (optional) Enables cooldown_event perk type for event cooldown reduction Installation Place TitlePerks.cs in your carbon/plugins/ folder Ensure Title Selector is installed and running Restart or load the plugin Edit carbon/configs/TitlePerks.json to match your title names Run titleperks.reload in console to apply changes Data Storage Player perk data is stored in carbon/data/TitlePerks.json: { "Players": { "76561198000000000": { "active_titles": ["raidhard", "helimedium", "rareminer"], "last_update": "2026-03-03T12:00:00.0000000Z" } } } Data is used for restoration on reconnect and cleaned automatically after 30 days of inactivity.$14.99 -

Version 1.0.10
197 downloads
Windmill Upgrades adds a part based upgrade system to electrical windmills, allowing their performance to be improved. Each part type has 3 tiers. Players can open an upgrade interface while looking at a windmill and holding a hammer, then install custom parts by dragging them into specific slots. The menu input button is configurable, with support for RELOAD, USE, MIDDLE CLICK, and RIGHT CLICK. Each upgrade part affects the windmill’s stats, allowing you to tune max output, effective height, wind capture, power stability, and thunder performance through a simple interface. Parts are matched to their proper module slots, upgrades are saved per windmill, and all changes are applied directly to the entity in a lightweight, persistent system. The plugin also includes optional loot crate support, letting you control whether upgrade parts can appear in loot containers and set per-container drop chances for each tier. Alternatively, the parts can be added to any of your existing systems such as shops or crafting plugins. The upgrade parts are all configured in the config, with unique icons and stats, allowing you to quickly deploy this functionality to your server. As with most of my content, localization is possible, with a default English lang file included. The part shortnames and skins are all pre-configured but can be modified, or replaced with items from my Custom Item Manager. Permissions: windmillupgrades.use - Allows players to open and use the windmill upgrade interface. windmillupgrades.admin - Allows access to the admin part giving command. Commands: /wmpart - Admin chat command to give yourself all of the available parts for testing or adding to shops. Optionally can specify amount if you need more than one of each. Pre-Configured Parts: Blades: Shaft: Generator: Regulator: Lightning Rod: Default Config:$15.99 -
Version 1.0.5
57 downloads
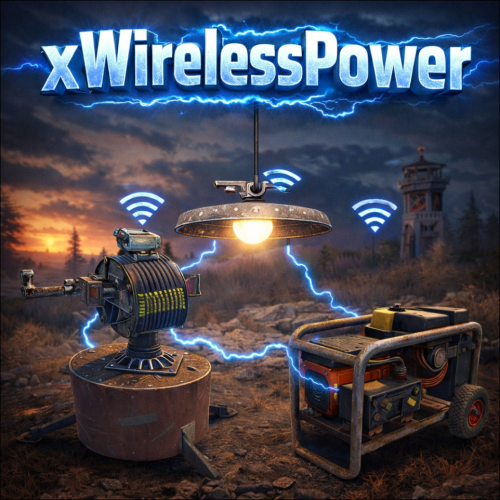
xWirelessPower xWirelessPower transforms how players interact with electrical devices (IO Entities). Instead of running back to switches, rewiring circuits, or building complex control rooms, players can directly toggle supported powered entities simply by looking at them and using a command or even with doing a clap gesture - Creating a smoother, more responsive way to manage base systems. In short: You can simply use electrical item (IO Entities) like ceiling light, sprinkler, auto turret etc. without requireing any wire or power. Features Instant Wireless Control Turn configured devices (IO Entities) ON or OFF just by looking at them with using a command or even using the clap gesture - No switches or wiring changes needed. Optional Team Access Let teammates manage shared systems for easier group gameplay. Perfect for Base Management Quickly control turrets, lights, signs, sprinklers, and more without running around your base. Faster Reaction During Raids Activate defenses or adjust systems instantly when every second counts. Fully Customizable Server owners can choose which devices are controllable and how the system behaves through config or even with chatcommadn "whoami". ShortPrefabName gets printed and saves it automatically to the confing with default value "false". Permission Support Grant access to specific groups like VIPs, admins, or trusted players. Optional Auto Power On Devices can automatically turn on when placed for smoother setup. Performance Friendly Runs efficiently with minimal impact on server performance. Plugin Preview Chat Commands /power - Toggle the IOEntity you’re looking at. /powerall - Toggles all IO entities you’re looking at. For example, when powerall is turned on and you look at an auto turret, all auto turrets will be turned off. /whoami - Prints the looked-at entity’s ShortPrefabName and adds it to your IOEntities list in config (default value = true). Permission xwirelesspower.toggle - If 'UsePermission' is true, permission is needed. Config { "ToggleCommand": "power", "PowerAllCommand": "powerall", "GetItemNameCommand": "whoami", "UsePermission": false, "PermissionName": "xwirelesspower.toggle", "AllowTeamToggle": false, "RequireToolCupboard": false, "MaxDistanceToggle": 5.0, "AutoTurnOn": true, "TurnOnOffWithClappingGesture": true, "IOEntities": { "autoturret_deployed": true, "ceilinglight.deployed": true, "neonsigntr.deployed": true, "electric.sprinkler.deployed": true }, "PermissionBasedIOEntities": { "xwirelesspower.vip": [ "fridge.deployed" ], "xwirelesspower.vip2": [ "electricfurnace.deployed", "electricfurnace.io" ] } } - You can add as many IOEntities as you want, to get the correct name of it, just spawn/place it -> Look at it -> Use ChatCommand '/whoami' and add that shortname to your IOEntities list. ToggleCommand - Chat command players use to turn IO Entity on/off. PowerAllCommand - Chat command players can toggle to turn all IO Entities from same name on/off. GetItemNameCommand - Admin command to see the IO Entity internal name (ShortPrefabName), also saves that viewed at IOEntity automatically to config with default value "false". UsePermission - If ON, only players with permission has access to this wireless power system. PermissionName - The permission name. AllowTeamToggle - Lets teammates toggle each other’s IO Entities. RequireToolCupboard - Wirless Power does only work if within a tool cupboard. MaxDistanceToggle - How close you must be to toggle (in meters). AutoTurnOn - Devices turn on automatically when placed. TurnOnOffWithClappingGesture - As the config says, use any gesture to toggle IO Entity. IOEntities - List of devices that wireless power works with (true = enabled). Localization (If you want to disable a message just use empty value "") { "NotAllowed": "You are not allowed to use this command.", "LookAtEntity": "You're not looking at an entity.", "AddedConfigEntries": "Added to config with default value true: {0}", "DetectedShortnames": "Detected shortnames: {0}", "PowerAllNoEntity": "You're not looking at a valid wireless entity, or you lack the required permission.", "PowerAllNoMatches": "No matching IOEntities could be toggled.", "PowerAllResult": "{0}: {1} entities are now {2}.", "NoEnabledEntity": "No enabled wireless IO entity was found for that deployable, or you lack the required permission.", "NotOwner": "You can only toggle your own IOEntity.", "NoEntitiesToggled": "No IOEntities could be toggled.", "ToggleAllResult": "{0}: {1} entities are now {2}.", "ToggleSingleResult": "{0} is now {1}.", "DisabledInConfig": "{0} is disabled in config.", "CupboardRequired": "A nearby tool cupboard is required to use wireless power." }$11.99 -
Version 1.1.3
114 downloads
Control the power grid stages, recycler mechanics, and powerline outputs directly from your server config. The plugin lets you easily add, edit, or remove grid stages, customize how each recycler type behaves as the grid powers up, and includes a shared Virtual Fusebox so players can contribute fuses to power the grid even on maps without a Powerplant monument. How it works Open the config file. Under "Powergrid Stages", you can add new stage blocks or edit existing ones. Under "Recyclers", you can configure powergrid-based settings for each recycler type (Green, Yellow, Red). Under "Virtual Fuse Box", you can enable/disable the virtual fuse box feature and customize its commands. Reload the plugin for the changes to take effect. The plugin will automatically sort your configured stages based on the required fuses and apply them directly to the server's power grid . You can set power to whatever you want, here I set "Powerline Available Power": 500 as an example. Recycler Powergrid Settings Configure how each recycler type behaves based on the current powergrid stage. For each recycler type (Green, Yellow, Red), you can control: Required Powergrid Stage To Operate - The minimum powergrid stage required for this recycler to function. Set to 0 to allow the recycler to work regardless of powergrid state. Required Powergrid Stage For Efficiency Override - The powergrid stage at which the custom recycling efficiency kicks in. Set to 0 to disable the efficiency override. Recycling Efficiency Override - The recycling efficiency when the efficiency stage is reached. Value from 0.0 to 1.0 where 1.0 = 100% resource return. Required Powergrid Stage For Duration Override - The powergrid stage at which the custom recycling duration kicks in. Set to 0 to disable the duration override. Recycling Duration Override - The recycling speed in seconds per cycle when the duration stage is reached. Default behavior (matching vanilla Rust): Green recyclers — Always usable. At stage 2, efficiency is overridden to 60%. At stage 4, duration is overridden to 4.5s. Yellow recyclers — Always usable. No powergrid-based overrides. Red recyclers — Requires powergrid stage 4 to operate. No efficiency/duration overrides. Chat Commands /recyclerinfo - Look at a recycler and use this command to see its type (Green/Yellow/Red), current powergrid stage, and all powergrid-related config values applied to it. Useful for verifying your configuration is working correctly. Requires permission: powergridstages.recyclerinfo /fusebox or /fb (or your custom alias) - Opens the virtual powergrid fusebox UI. Requires permission: powergridstages.fusebox /fusebox reset [1/2] - Admin command to instantly clear and reset the virtual fuseboxes. Requires Admin privileges. Useful Rust ConVars & Commands (Note: These are existing Rust convars and commands, not part of this plugin) powergrid.enabled - If disabled power grid functionality will be disabled. powergrid.status - A console command provides information about the current state of the server's power grid, including the active progression stage, the number of inserted fuses, and the total available electrical power. (This is a good place to go to verify the plugin applied changes properly) powergrid.simulatepowerplantfuses - Pretend there are this many additional heavy fuses currently plugged into the power plant. Can input negative numbers to negate the effect of any currently plugged in fuses. Default Config { "Virtual Fuse Box": { "Enabled": false, "Command": "fusebox, fb" }, "Enable Powerline Stage Mode": true, "Powergrid Stages": [ { "Required Fuses": 1, "Powerline Available Power (Only used if Powerline Stage Mode is enabled)": 15 }, { "Required Fuses": 4, "Powerline Available Power (Only used if Powerline Stage Mode is enabled)": 18 }, { "Required Fuses": 10, "Powerline Available Power (Only used if Powerline Stage Mode is enabled)": 24 }, { "Required Fuses": 18, "Powerline Available Power (Only used if Powerline Stage Mode is enabled)": 30 } ], "Recyclers": { "Green Recycler": { "Required Powergrid Stage To Operate (0 = No Powergrid Required)": 0, "Required Powergrid Stage For Efficiency Override (0 = No Override)": 2, "Recycling Efficiency Override (0.0 to 1.0, 1.0 = 100% Resource Return)": 0.6, "Required Powergrid Stage For Duration Override (0 = No Override)": 4, "Recycling Duration Override in Seconds": 4.5 }, "Yellow Recycler": { "Required Powergrid Stage To Operate (0 = No Powergrid Required)": 0, "Required Powergrid Stage For Efficiency Override (0 = No Override)": 0, "Recycling Efficiency Override (0.0 to 1.0, 1.0 = 100% Resource Return)": 0.0, "Required Powergrid Stage For Duration Override (0 = No Override)": 0, "Recycling Duration Override in Seconds": 0.0 }, "Red Recycler": { "Required Powergrid Stage To Operate (0 = No Powergrid Required)": 4, "Required Powergrid Stage For Efficiency Override (0 = No Override)": 0, "Recycling Efficiency Override (0.0 to 1.0, 1.0 = 100% Resource Return)": 0.0, "Required Powergrid Stage For Duration Override (0 = No Override)": 0, "Recycling Duration Override in Seconds": 0.0 } }, "Version": { "Major": 1, "Minor": 1, "Patch": 1 } }$9.99- 16 comments
- 2 reviews
-
- 4
-

-

-
- #powergrid
- #power
- (and 15 more)
-
Version 1.0.32
758 downloads
Grid Power rust plugin allows players to harness electricity directly from the Power Grid on any map by climbing Power line Poles to upgrade Transformers with components and protect their grid section, while also enhancing vanilla visuals with realistic, adjustable slack on hanging wires and lights. Questions? Support? Join the discord: https://discord.nikhub.dev In short Draw electricity straight from the Power Grid in Rust - on any map, be it a procedurally generated or a custom one! Ladder up the Power line Poles to upgrade their Transformers with components like Root Combiners (to replace missing/stolen/destroyed outlets that you plug into) and Tech Trash (to permanently upgrade power output level, up to a configurable point). Maintain the service with long-lasting Fuses. But most importantly, protect your precious part of the grid from vandalism, theft and sabotage that will inevitably come from those jealous players! Whatever you do, just be careful up there... high voltage happens to be highly dangerous. Always wear protective gear (like a hazmat suit) and don't touch the wires while they're live! As a bonus, this plugin also improves vanilla visuals with realistically hanging wires / hoses / Xmas lights, the slack of which (how loose they appear to be hanging) can be adjusted while placing. And this feature is completely optional, too. Goodbye, straight lines that look like steel rods - hello, actual laws of physics! But don't take my word for it - let the video speak for itself: Still not convinced? Check out this in-depth, 20+ minutes long review and tutorial by srtbull! 1.0.2 UPDATE: Introducing working Street Lights for eligible poles! The lights go on between between 20:00 and 8:00 by default. Quick start (for admins) Upload the GridPower.cs file to your oxide/plugins folder and you should be good to go, it's all plug-and-play. No need to restart your server! If you're loading it for the first time or it's a new map wipe, the plugin will automatically locate all Power Line Prefabs on your map, randomly choose some of them (according to chances set in the default config) and attach extra electrical entities to them to make them functional. Those entities should persist throughout the wipe and will be replaced if missing, on every plugin reload/server restart. Each Power line Pole will be assigned a number and its position will be stored in the data. This will work on any map that contains at least one of the following prefabs: assets/bundled/prefabs/autospawn/decor/powerline-small/powerline_pole_a.prefab assets/content/props/powerline_poles/powerline_pole_a.prefab Quick start (for players) Locating functional Transformers Not all Power Line Poles were made equally. Only a percentage of them (by default, 33% on average) will be functional. How do you recognise a functional one? Look up - if you see a Button attached to the top of the Pole, and maybe even some pre-existing Root Combiner Outlets, that's it! [insert image here, maybe a player looking at a powerline pole with binoculars] Laddering Up Now that you have located a functional pole, you need to climb it. Normally you cannot deploy Ladders on Power Line Poles and many other places (but oddly enough, you CAN deploy them on the horizontal planks at the top of a Pole!). However, Grid Power re-implements all the client-sided deployment logic to allow bypassing of that arbitrary-seeming limitation. If you try to deploy a Ladder on a Power Line Pole, don't be discouraged by the fact that the "ghost guide" is red instead of blue/amber. Click anyway and it will force it through! Ignore the message in the chat saying that the deployment failed - just like the colour of the ghost guide, it's all client-sided and as such there's nothing the plugin can do about it, visually speaking. But trust me, everything works as intended, despite what the client messages are telling you. The Ladders can then be destroyed/picked up to be reused. Maintenance A Transformer can have up to 4 Outlets (Root Combiners). That's where the players draw the electricity from. Those Root Combiners can be damaged/destroyed/repaired/picked up with a hammer (if you have Building Privilege) any time. If there's less than 4 Outlets, right-click on a Root Combiner Item in your inventory or drag it into the Fuse Box of the Transformer. You will hear a deployment effect and the Root Combiner will be deployed on the pole. In order to be able to draw power from that Transformer, you need to put a Fuse inside. Right-click a Fuse in your inventory or drag it directly to the Fuse Box. Don't worry - inside of the Transformers, those Fuses will last for much, MUCH longer than inside regular monument Fuse Boxes. By default, a brand new Fuse inside of a Transformer Fuse Box will last you for 12000 seconds (= 200 minutes, = 3.33 hours). This value can be increased or decreased in the config. You can see how much time a fuse has left in the Transformer GUI. By default, the Power Grid will produce electricity between 8 AM and 8 PM. The power output will follow a smooth curve, being the lowest in the morning/evening, and peaking at 2 PM. Exactly how much RWs will be produced on each Outlet is determined by the Transformer's Tech Trash level. By default, each Tech Trash inserted increases the peak power output by 5 RWs (up until a certain point - by default, that level is capped at 50, which translates to 250 RWs per Outlet at peak hours). Upgrade the level by right-clicking the Tech Trash item in your inventory or dragging it directly into the Fuse Box. Inserting Root Combiners/Tech Trash is still possible even if there's already a Fuse inside of the Fuse Box. The Fuse won't be replaced as the sole Item in the slot, since Root Combiners/Tech Trash are consumed immediately. Hooking Up & Hanging Out Once there's at least 1 Outlet present, you have a Fuse at hand, and the Grid is currently producing power - you're all set. Take a Wire Tool, pick your favourite wire colour with the [RELOAD] button, typically R, and connect to the outputs of the Root Combiner Outlets to your own electrical devices, usually a Battery or another Root Combiner. You will notice the text on top of your screen telling you what the current Slack of your wire tool / hose tool is. You can increase it with the [DUCK] button, typically CTRL, and decrease it with the [SPRINT] button, typically SHIFT. Larger Slack value means that the wire/hose will appear to be hanging more loosely. Smaller values will make it look tighter. Values close to zero will make it look like they look in vanilla Rust - i.e. not so good in comparison The final Slack value will be applied the moment you finalise your wire/hose connection. This hanging improvement applies to anything you do with Wire Tools/Hose Tools, not just Transformer Outlet connections! For the Advanced Xmas Lights, it's even better: you can adjust the Slack of each segment individually! After you place the Advanced Xmas Lights segment down, and you're just about to place the next segment, adjust the Slack of the segment you have just placed down with [DUCK] and [SPRINT] buttons. You will see a preview of what it will make the segment look like. Placing the next segment down confirms the Slack for the segment before it. Danger! High Voltage! If the Grid is currently producing Power (by default, during daytime) AND a Fuse is inserted in the Transformer, all Root Combiner Outlets are considered live on that Transformer. You can tell whether a Transformer is live or not: first, check your electric devices plugged in directly to the Grid. If they're not currently receiving any charge, they're not live. Similarly, you can look at the diodes on the Root Combiner Outlets. If they're not on, the Transformer is not live either. Lastly, it's pretty clear from the Transformer GUI. If a player tries to connect/disconnect a wire to/from a live Outlet, or they're trying to pick up the Root Combiner Outlet with a hammer, and they're not wearing one of the items on a pre-approved list (see the Advanced Config section below), there is a 1.0 (100%) chance they will get electrocuted to death. Another way to guarantee electrocution is trying to clear connections named INTERNAL. Leave those alone! Wearing protective clothing reduces that chance to 1 in 10 (10%, according to the default permission profile - see below). You can set that chance to 0.0 (0%) if you want to give your players a peace of mind. Another way to guarantee 0% electrocution chance is making sure the Transformer is not live: either wait for the Grid to stop producing Power or take out the Fuse before doing anything else. Permissions (Oxide.Grant user YourName [permission name starting with gridpower.]) By default, the plugin generates 3 permission profiles in the config - one for admins, one for normal players with no specific permissions (default) and one for VIP. More on permission profiles and config values they can handle can be found in the section Advanced Config. Unless you have added more permission profiles, only these two below are going to be used by your config: gridpower.admin Holders of the admin permission will also be able to run the /gp_cfg and /gp_emergency_cleanup commands gridpower.vip1 Holders of this permission will follow settings and limits associated with with that permission profile. The permissions below are also registered, but not used by default. To use them, just create some permission profiles with those permissions as the key. gridpower.vip2 gridpower.vip3 gridpower.vip4 gridpower.vip5 Automatic street lights Depending on your map design, some power line poles might have lamps on them. All those lamps will now emit light, by default between 20:00 an 8:00, which just so happens to be the time when the grid production goes back to 0. You can also set the street lights to be always on, regardless of the time of day. The time settings for the street lights are independent of your power production time settings - they can overlap, one can start before midnight and end after midnight while the other one does not, etc. Those street lights will work even on non-functional power line poles, e.g those without a button on top of them. When on, the lights will flicker from time to time. How often they will flicker and how long individual flickers are going to be depends on your config - look below. Admin F1 console/chat commands (must have ownerid/moderatorid/gridpower.admin permission) If you're typing those commands from the F1 console or the server console, drop the preceding slash in the command name. /gp_cfg Will allow the admins to change non-permission profile related config values on the fly (see below) /gp_emergency_cleanup Instantly kills all the plugin-related entities: fuseboxes, admin generators, root combiners and buttons. It won't remove the power line entries in your data, however. All the killed entities will be re-generated according to your current generation settings in the config next time your server restarts or the plugin reloads. If you want to permanently get rid of them, unload the plugin, delete your oxide/data/GridPower.json, and load it back in. /gp_pole [add/remove] This command will allow admins to add or remove functional power line poles at any time. Just look directly at the pole you want to modify and type the command with an argument (either "add" or "remove", depending on what you want to achieve). If you want to add a pole and it already is functional, or if you want to remove a pole, but it isn't functional - you will get a warning. Same if you try to add a pole, but the pole you're looking at is building blocked by a nearby monument. "Ent killing" (or using a plugin like Remover) the power line fusebox is the equivalent of permanently removing it from the data and it won't be re-generated any more on next reload. Wiping your save file also automatically removes all the extra components and replaces them with new ones tailored to your map, in accordance to your generation settings. Configuration (oxide/config/GridPower.json and /gp_cfg console/chat command) Vast majority of the settings can be configured with the /gp_cfg chat command. Typing it in the chat/console with no parameters should dump a rundown of config fields and their values. In order to run any of the config commands, you will need to have ownerid or moderatorid (or the gridpower.admin permission). /gp_cfg GridConstantPower [logical values (true or false)] If set to true, the Grid will always produce electricity at its peak (100%), 24 hours a day (DEFAULT: false) /gp_cfg GridProductionStartAtHour [fractions (like 13.37) between 0.00 and 24.00] The hour of the day when the power production starts climbing up from 0 (DEFAULT: 8.0) /gp_cfg GridProductionEndAtHour [fractions (like 0.69, nice) between 0.00 and 24.00] The hour of the day when the power production settles back at 0 (DEFAULT: 20.0) /gp_cfg StreetlightsConstantPower [logical values (true or false)] If set to true, the Streetlights will be on 24 hours a day. (DEFAULT: FALSE) /gp_cfg StreetlightsTurnOnAtHour [fractions (like 20.4) between 0.00 and 24.00] The hour of the day when the street lights turn on (DEFAULT: 20.0) /gp_cfg StreetlightsTurnOffAtHour [fractions (like 8.2) between 0.00 and 24.00] The hour of the day when the street lights turn off (DEFAULT: 8.0) /gp_cfg StreetlightsReliability [fractions (like 0.5) between 0.00 and 1.00] The reliability of the streetlight. The less it is, the more often it will flicker. At 1, which represents 100%, it never flickers. (DEFAULT: 0.95) /gp_cfg StreetlightsFlickerLengthMin [fractions (like 1.2) between 0.00 and Positive Infinity] The minimum random length of the flicker, in seconds (DEFAULT: 0.1) /gp_cfg StreetlightsFlickerLengthMax [fractions (like 2.4) between 0.00 and Positive Infinity] The maximum random length of the flicker, in seconds (DEFAULT: 0.5) /gp_cfg GeneratorChancePowerlineFunctional [fractions (like 0.5) between 0.00 and 1.00] The chance that a valid Power Line Pole will be made functional during generation. (DEFAULT: 0.33) /gp_cfg FuseRequired [logical values (true or false)] If set to false, the Transformers won't need Fuses to produce power, just the right time of the day (if power is not 24/7) (DEFAULT: TRUE) /gp_cfg BuildingBlockPreventsButtonPress [logical values (true or false)] If set to true, if there's any Tool Cupboards in the range of the Transformer, you need to be authorised on all of them to open the Transformer GUI (DEFAULT: TRUE) /gp_cfg GeneratorInitialLevelMin [integers (like 7) between 0 and 1000] The lower limit for the random Tech Trash level of valid Power Line Poles during generation (DEFAULT: 1) /gp_cfg GeneratorInitialLevelMax [integers (like 7) between 0 and 1000] The upper limit for the random Tech Trash level of valid Power Line Poles during generation (DEFAULT: 5) /gp_cfg GeneratorInitialOutletsMin [integers (like 1) between 0 and 4] The lower limit for the random number of Outlets of valid Power Line Poles during generation (DEFAULT: 0) /gp_cfg GeneratorInitialOutletsMax [integers (like 3) between 0 and 4] The upper limit for the random number of Outlets of valid Power Line Poles during generation (DEFAULT: 4) /gp_cfg PowerlinePowerPerTechTrash [integers (like 7) between 0 and 1000] How much RWs at peak hours are provided per 1 Tech Trash Level upgrade (DEFAULT: 5) /gp_cfg PowerlineMaxTechTrashLevel [integers (like 7) between 0 and 1000] The maximum level that a Transformer can be upgraded to (DEFAULT: 50) /gp_cfg PowerlineFuseDurationSeconds [fractions (like 420.69, nice) between 0.0 and Infinity] How long (in seconds) a brand new Fuse inserted in the Transformer Fusebox will last (DEFAULT: 12000.0) /gp_cfg FuseItemShortname [strings (like "fuse")] The shortname of the item that acts as the Fuse for Transformer Fuseboxes, must be a valid Rust item shortname /gp_cfg FuseItemGuiName [strings (like "Transformer Fuse")] The custom GUI display name of the item that acts as the Fuse for Transformer Fuseboxes, can be anything, or left blank for default /gp_cfg FuseItemSkinID [positive long integers (like 2783151202)] The skin ID of the Fuse item if using custom, leave at 0 to accept any items of the shortname specified by FuseItemShortname Protective clothing (only editable through oxide/config/GridPower.json) "ProtectiveClothing": { "hazmatsuit": null, "scientistsuit_heavy": null, "hazmatsuit_scientist": null, "hazmatsuit_scientist_peacekeeper": null, "hazmatsuit.spacesuit": null, "boots.frog": null, "hazmatsuit.nomadsuit": null, "pants": [ 1581896222 ], "hoodie": [ 1581890527, 1582492745 ] }, Each entry has a key (the item shortname in quotes) and a value. If the value is null, it means all possible skins for that item shortname are accepted. In the example above, we're allowing all rubbery one-pieces (value is null, so any skin) and we're also allowing pants with 1 possible skin or a hoodie with 2 possible skins to be treated as protective clothing. You will see that there's no comma after the last entry on the list. BEFORE SAVING, ALWAYS VALIDATE YOUR JSON WITH A TOOL LIKE JSON LINT! Permission profiles Using profiles you can quickly create/edit different permissions for different players, for example, if you have more than 1 VIP tier on your server - just add some new profiles. Different players can have different limits and permissions associated with using the Power Grid. To check which permission profile the player should fall under, the plugin goes through all permission profiles and checks whether the player has that permission granted. The permissions are checked in order, meaning that if the player doesn't have the first permission, it will try the next permission on the list, etc (similar to how Auto Kits checks which kit to give to a player based on their permissions in order). If the player doesn't have any permissions from the list granted, they will fall back to the "default" profile. That's the only one that you shouldn't remove! If you remove it, a new one with default values will be created. So if you don't want your default, non-VIP players to use the power grid, don't remove the default profile, just take away privileges in that profile (like upgrading/deploying ladders/pressing the button). You don't have to use the built-in VIP permissions - any REGISTERED permission from any plugin will do just fine! By default, three permission profiles are generate in the config: default, gridpower.admin and gridpower.vip1. The default permission profile will apply to any player who doesn't have any permissions listed in the profile list - let's have a look at it: "PermissionProfiles": { "default": { "PermissionRequired": "default", "GridCanDeployLadder": true, "GridCanDeployRootCombiners": true, "GridCanConnectDisconnect": true, "GridCanPressButton": true, "GridCanUpgrade": true, "GridDangerousWireElectricutionChance": 0.1, "HangingXmasLights": false, "HangingWiresAndHoses": false, "SubdivisionsPreview": 10, "SubdivisionsFinal": 50, "SlackMax": 5.0 }, PermissionRequired should contain an already existing permission registered by any plugin in the form of pluginname.permissionname GridCanDeployLadder allows players to deploy ladders on Power Line Poles GridCanDeployRootCombiners allows players to deploy Root Combiners on Power Line Pole transformers by inserting them into the Fuse Box GridCanConnectDisconnect allows players to use a Wire Tool to connect their own electrical devices to the Grid GridCanPressButton allows players to access the Transformer GUI GridCanUpgrade allows the players to upgrade the Transformer peak output by inserting Tech Trash into the Fuse Box GridDangerousWireElectricutionChance defines how likely it is that a player will die from electrical accidents, even while wearing protective clothing HangingXmasLights allows the players more control over how much the Advanced Xmas Lights will be hanging (purely visual) HangingWiresAndHoses allows the players more control over how much the Wires/Hoses will be hanging (purely visual) SubdivisionsPreview is the number of intermediary points used while showing the hanging Xmas Lights preview catenary curve of the last placed segment. The more points, the smoother it looks. (purely visual) SubdivisionsFinal is it the number of intermediary points used for the final catenary curve of the hanging wires/hoses/xmas lights. The more points, the smoother it looks (purely visual) SlackMax sets the maximum "looseness" of the wire/hose/xmas lights that the player is allowed. The more the slack, the longer the wire appears overall. API hooks (for plugin developers) All methods utilise the [HookMethod] attribute, which means you don't call them through Interface.Call, you need to first create this field in your plugin's main class... [PluginReference] private Plugin GridPower; Then, call the hooks like so. It's pretty self-explanatory what information they will provide you with. bool isPowerConstant = (bool) GridPower.Call("GridPowerIsConstant"); bool isGridProducing = (bool) GridPower.Call("GridIsProducing"); float productionHourStart = (float) GridPower.Call("GridGetProductionHourStart"); float productionHourEnd = (float) GridPower.Call("GridGetProductionHourEnd"); float currentGridEfficiency = (float) GridPower.Call("GridGetEfficiency"); bool areStreetlightsAlwaysOn = (bool) GridPower.Call("StreetlightsPowerIsConstant"); bool areStreetlightsOn = (bool) GridPower.Call("StreetlightsAreOn"); float streetlightsHourStart = (float) GridPower.Call("StreetlightsGetTurnOnHour"); float streetlightsHourEnd = (float) GridPower.Call("StreetlightsGetTurnOffHour"); Translation support (oxide/lang/en/GridPower.json) Almost every string the players see, including the text displaying in the chat and the GUI, can be edited. Just load the plugin and let it generate the file - after you edit it, reload the plugin.$24.99 -
Version 1.1.2
60 downloads
Thermal Generator Thermal Generator - Convert Fireplaces into Power Plants! This plugin adds a unique gameplay mechanic where players can generate electricity using heat and water, creating an immersive industrial experience on your Rust server. This plugin requires ImageLibrary, Zone Manager to function. • Thermal Power Generation Special skinned fireplaces become thermal generators that produce electricity when burning fuel. Power output gradually increases over time, reaching maximum efficiency after a configurable warm-up period. • Water Consumption System Generators consume water from an attached water barrel to produce steam for power generation. Water consumption scales with power output - more power means more water usage. • Real-time Status Display Two display modes available: - Mode 1: Fixed UI panel when opening the generator inventory - Mode 2: Floating 3D UI that appears when approaching the generator - Mode 3: Both display modes simultaneously (Floating 3D UI may put a load on server performance. Please choose according to the size of your server.) UI shows performance percentage, temperature, water tank level, and current power output with smooth animations. • Animated Turbine Icon Visual turbine animation that speeds up as power output increases, providing clear visual feedback of generator performance. • Multi-language Support Built-in translations for English, Japanese, Russian, and Traditional Chinese. • Fully Configurable Customize power output, warm-up time, water consumption rates, UI appearance, detection radius, and more. • Players can pick up their Thermal Generator by hitting it with a hammer. All items inside will drop on the ground, and the generator returns to inventory. 1. Give players a Thermal Generator using the console command: givegene <SteamID>, Alternatively, you can sell this item in a shop. 2. Players place the special fireplace and add fuel 3. Fill the attached water barrel with water or salt water 4. Light the fireplace to start generating power 5. Connect electrical components to the output 6. Power increases gradually as the generator warms up Shop Settings Short name: fireplace.stone Skin ID: 3667912659 Display Name (optional): Thermal Generator { "SpecialFireplace": { "SkinID": 3667912659, "Name": "Thermal Generator" }, "WaterSystem": { "TankCapacity": 500000, "MinConsumption": 1, "MaxConsumption": 30, "ConsumeInterval": 1.0 }, "PowerSystem": { "MaxOutput": 30, "RampUpTime": 1800.0, "CooldownRate": 3.0, "CurveExponent": 2.0 }, "UI": { "Enabled": true, "DisplayMode": 1, "UpdateRate": 0.03, "DetectionRadius": 7.0, "BackgroundURL": "https://i.imgur.com/TTrhDMo.png", "AnimationFrameURLs": [ ... ] }, "Limits": { "EnablePerPlayerLimit": true, "MaxPerPlayer": 3 } } SpecialFireplace • SkinID - The skin ID used to identify Thermal Generator fireplaces • Name - Display name of the Thermal Generator item WaterSystem • TankCapacity - Maximum water capacity of the attached water barrel (in ml) • MinConsumption - Minimum water consumption per interval when generator is running (in ml) • MaxConsumption - Maximum water consumption per interval at full power (in ml) • ConsumeInterval - Time interval between water consumption checks (in seconds) PowerSystem • MaxOutput - Maximum electrical power output (in rWm) • RampUpTime - Time required to reach maximum power output (in seconds, default 1800 = 30 minutes) • CooldownRate - Rate at which accumulated run time decreases when generator is off (multiplier) • CurveExponent - Power curve exponent for output calculation (higher = slower initial ramp-up) UI • Enabled - Enable or disable the status UI display • DisplayMode - UI display mode: 1 = Fixed UI panel (appears when opening generator inventory) 2 = Floating 3D UI (appears when approaching the generator) 3 = Both modes simultaneously (Floating 3D UI may put a load on server performance. Please choose according to the size of your server.) • UpdateRate - UI refresh interval in seconds (lower = smoother but more performance cost) • DetectionRadius - Distance at which floating UI becomes visible (in meters) • BackgroundURL - URL for the UI background image • AnimationFrameURLs - List of URLs for turbine animation frames (11 frames) Limits • Administrators can set the maximum number of items each player can place. givegene <SteamID> - Give a Thermal Generator to the specified player (Server Console command) Q. What settings do I need to configure in Zone Manager? A. No configuration is required. It's used for temporary UI display and performance improvements. VOID / NINJA WORKS X : @QB_WHITE MADE IN JAPAN$20.00 -

Version 1.0.1
109 downloads
Adds a Magic Panel display containing a Power Plant grid power status icon. Features: Harmony-based for performance (server calls plugin on power grid level changes). Only requests a Magic Panel HUD update on relevant state changes changes for performance. Caches Magic Panel parameters to avoid memory churn. Config file supports full image panel settings per power grid phase, allowing for per-phase icons, colors, etc. { "Panel Settings": { "Dock": "center", "Width": 0.02, "Order": 9, "BackgroundColor": "#FFFFFF08" }, "Panel Layout By Power Grid Phase": [ { "Image": { "Url": "https://i.postimg.cc/pd1PBZ1w/powerplant0.png", "Enabled": true, "Color": "#FFFFFF0F", "Order": 0, "Width": 1.0, "Padding": { "Left": 0.05, "Right": 0.05, "Top": 0.05, "Bottom": 0.05 } } }, { "Image": { "Url": "https://i.postimg.cc/xdF9PR4V/powerplant1.png", "Enabled": true, "Color": "#FFFFFF7F", "Order": 0, "Width": 1.0, "Padding": { "Left": 0.05, "Right": 0.05, "Top": 0.05, "Bottom": 0.05 } } }, { "Image": { "Url": "https://i.postimg.cc/mr6TSw5G/powerplant2.png", "Enabled": true, "Color": "#FFFFFF7F", "Order": 0, "Width": 1.0, "Padding": { "Left": 0.05, "Right": 0.05, "Top": 0.05, "Bottom": 0.05 } } }, { "Image": { "Url": "https://i.postimg.cc/QMnjqbyD/powerplant3.png", "Enabled": true, "Color": "#FFFFFF7F", "Order": 0, "Width": 1.0, "Padding": { "Left": 0.05, "Right": 0.05, "Top": 0.05, "Bottom": 0.05 } } }, { "Image": { "Url": "https://i.postimg.cc/W3FTYkQf/powerplant4.png", "Enabled": true, "Color": "#FFFFFF7F", "Order": 0, "Width": 1.0, "Padding": { "Left": 0.05, "Right": 0.05, "Top": 0.05, "Bottom": 0.05 } } } ] }Free -
Version 1.1.3
43 downloads
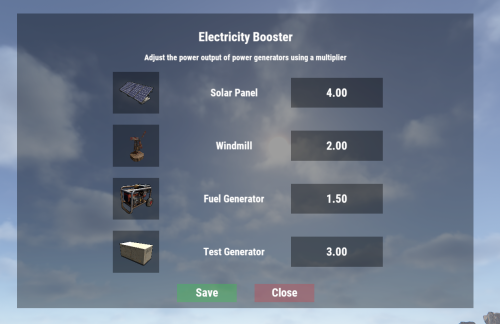
Electricity Booster Increase the output of power-generating electrical components Features Set a configurable boosted multiplier for solar panels, windmills, fuel generators, and test generators. GUI menu for easy configuration. Chat Commands /eb - Open the configuration GUI for admins. Requires permission `electricitybooster.admin`. Permissions electricitybooster.admin - Required to open configuration GUI. Configuration { "Solar Panel Power Output Multiplier (Default=1.0)": 1.0, "Windmill Power Output Multiplier (Default=1.0)": 1.0, "Fuel Generator Power Output Multiplier (Default=1.0)": 1.0, "Test Generator Power Output Multiplier (Default=1.0)": 1.0 } Support Discord Click here for Discord support Dependencies This plugin requires ImageLibrary (free)$4.99- 7 comments
-
- 1
-
-
- #electrical
- #electricity
- (and 5 more)
-
Version 1.0.2
130 downloads
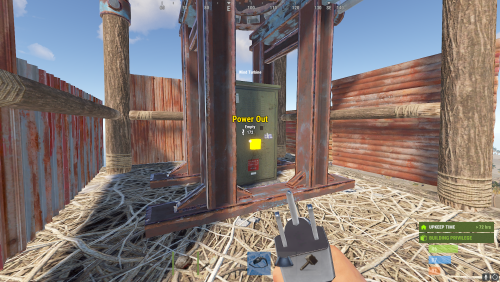
Allows adjusting of Wind Mills Globally & with different permissions based settings you can create as many different permission levels as you wish! Max height Needed for Max output is floor 18 Note Default is 100 Configuration { "Sets Global Wind Mills": { "Sets the Max Generation OutPut for Wind Mills (Default is 100)": 150, "Overrides target speed (Default is 0)": 0.0, "Reset all Wind Mills on unload (recommended true if uninstalling)": false }, "Enables use of permissions based setting": true, "Player Permissions": { "windmillmodifier.vip": { "Sets the Max Generation OutPut for Wind Mills (Default is 100)": 250, "Overrides target speed (Default is 0)": 0.0 }, "windmillmodifier.vip2": { "Sets the Max Generation OutPut for Wind Mills (Default is 100)": 300, "Overrides target speed (Default is 0)": 0.0 } } }$4.99- 2 comments
- 1 review
-
- 1
-
-
- #windmill
- #windturbine
- (and 10 more)
-

Version 1.0.2
353 downloads
Allows you to adjust the wind turbine output to be constant power regardless of height or wind. Permissions constantturbine.use - Use the plugin. Configuration { "Constant Output Power": 100, "Force Max Height Simulation": false }Free -

Version 1.0.0
176 downloads
Discord2Ptero allows you to start, kill, restart or save your Rust servers straight from a Discord channel. 1. Create a client API key @ https://your.pterodactyl.link/account/api and place it in .env file - application key will NOT work! 2. Include link to https://your.pterodactyl.link/account/api in .env file (no trailing slash) 3. Add bot token, channel IDs etc... to .env file 4. Add servers to servers.json (you can find server ID under 'UUID / Docker Container ID' in server details) 5. Enjoy! Requires a Python bot environment & full administration access on a Pterodactyl panel to functionFree- 2 comments
-
- 1
-
-
- #pterodactyl
- #tool
- (and 5 more)
-
Version 1.0.2
100 downloads
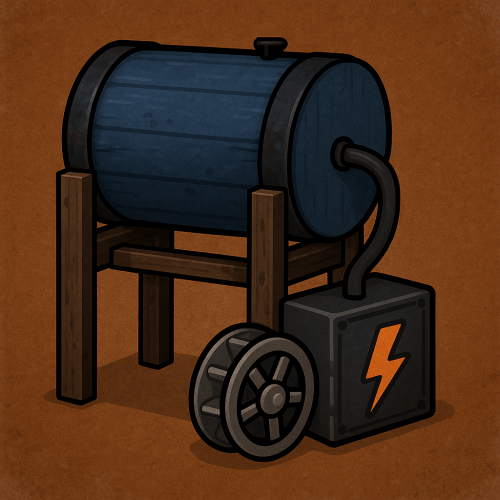
Add some hydroelectric generator's to your server for your players to have a new way to generate power using water. Commands : hydro Permisions: hydroelectricgenerator.admin See config below for all options. { "Generator Settings": { "Amount of water to consume every 10 seconds": 0, "Amount of power to splitter": 100, "Item icon name": "SpritzVolt 3000", "Item icon skinID": 3521671417, "Spawn in loot containers": true, "Container configs": { "crate_tools": { "chance": 5, "amount": 5 }, "crate_elite": { "chance": 10, "amount": 1 }, "crate_basic": { "chance": 1, "amount": 1 }, "crate_normal": { "chance": 0, "amount": 1 }, "crate_normal_2": { "chance": 0, "amount": 1 } } }, "Version": { "Major": 1, "Minor": 0, "Patch": 0 } }$15.00- 10 comments
-
- 1
-
-
- #power
- #generator
- (and 1 more)
-
Version 1.1.0
1,773 downloads
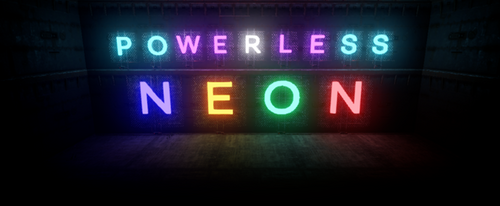
PowerlessNeon removes the power requirement for Neon signs to function. Implementation is simple, just install the file and all existing neon lights will become powered, as well as any placed after loading. There is no configuration necessary and no variables to modify.Free -

Version 1.0.0
562 downloads
Wind park is a nice replacement for Satellite Dish. It requires a Fuse and a Green Card to obtain a Blue Card. Loot 5 Crate Normal Random Spawner 1 Underwater Advanced Crate Spawner 1 Recycler 1 Scientist 1 Spawner Fuel 1 Jumpy ThingFree -

Version 1.0.0
18 downloads
Thermal Power Plant is ready to go on any map, the puzzle needs a red card to get into the full loot. We are pleased to present you the incredible monument "Thermal Power Plant" - a new place on the map that will add a huge amount of interest and opportunities to complete tasks and create unique strategies. This location is a huge abandoned Thermal Powerplant, which will become a key point on the server. Radiation and the multitude of hangars and houses, create a unique atmosphere and danger that evokes an exciting sense of adventurer. AND THAT'S NOT ALL! Thermal Power Plant hides a lot of resources that the player can use for their own purposes, improving their chances of survival in this difficult world. Everyone will find their share of action here! Features: Great detail; Simple installing; Optimized FPS; There is radiation; Huge sized monument; There are 4 oil pumps. General Info: Prefabs count: ~6500; Type: for looting; Modifiers: Height&Splat&Topology. Loot: Oil barrels: 10; Food box/crates: 10; Barrels: 126; Ordinary crates: 50; Military crates: 3; Elite crate 3; Other works: You may like to take a look at a full finished maps by myself.$18.86 -

Version 1.0.0
236 downloads
Small monument that converts fuel into electrical energy for your players with 3 possible electrical levels and admins can noclip behind the wall to change the electrical levels set for there players. ------------ French ------------ Petits monuments qui converti le fuel en énergie électrique pour vos joueurs 3 niveaux électriques possibles vous avez là possibilité de changer le niveau électrique. Extension required - Oxide.Ext.RustEdit ( https://github.com/k1lly0u/Oxide.Ext.RustEdit )Free -

Version 1.0.0
8 downloads
Power Substation is ready to go on any map, and will make a great poi on the map for your players to explore and loot (Blue card to unlock the full loot). Features: Great detail; Simple installing; Optimized FPS; Detailed inside the buildings; There is radiation. General Info: Prefabs count: 1987; Type: for looting; Modifiers: Height&Splat&Topology. Loot: Oil barrels: 5; Food box/crates: 5; Barrels: 30; Ordinary crates: 13; Military crates: 2; Elite crate: 1; and 1 red card. Other information: You may like to take a look at a full finished map by myself.$8.30 -
Version 1.0.0
15 downloads
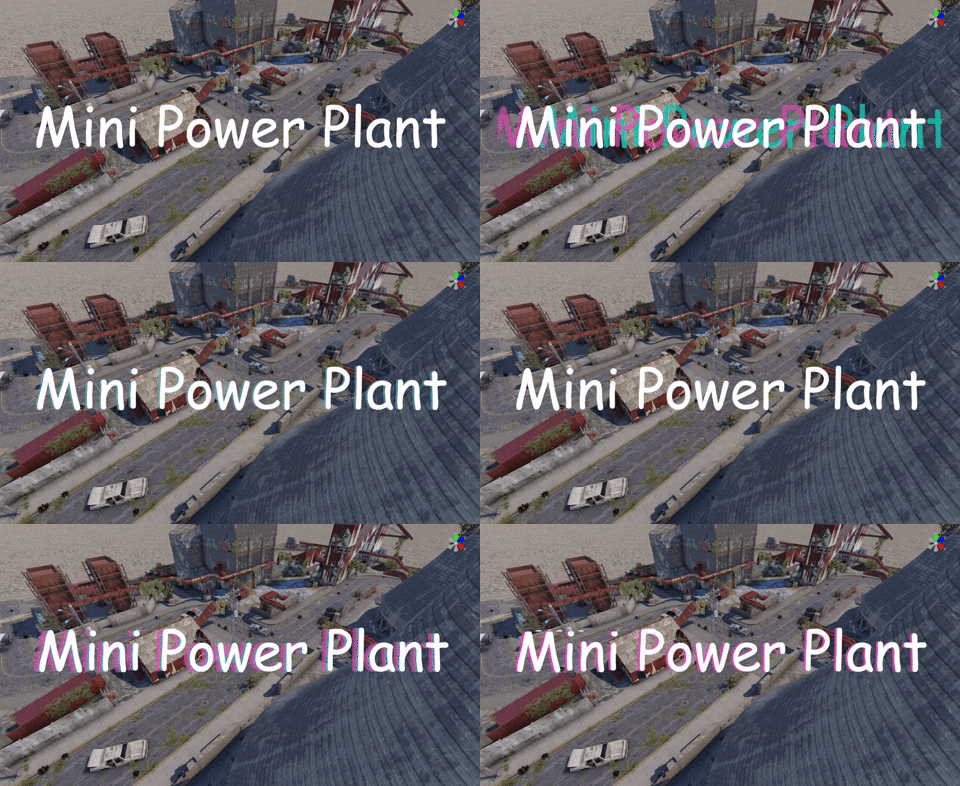
-1490 Prefabs A miniature version of the classic power plant. Same loot and same utilities, as well as a very similar puzzle. Perfect for one grid or other small map server.$11.99